If you want to understand the defense towers in The Riftbreaker in detail, this guide will show you the effective range and the actual DPS for Single Targets and Swarm DPS for Multiple Targetsfor each tower. Let’s check it out.
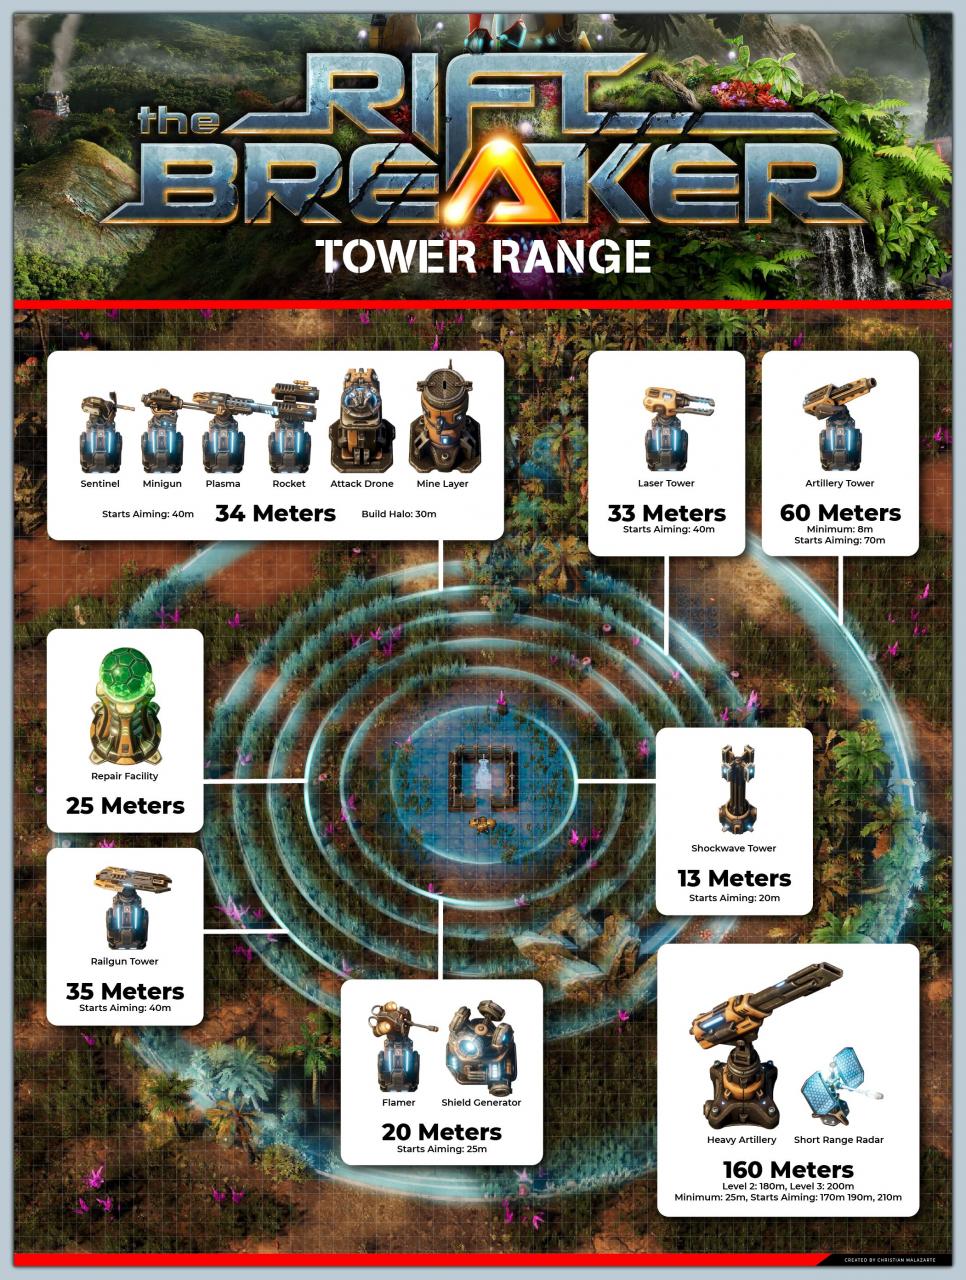
Defense Tower Range
This information was taken from data files. There are 4 parameters, and for some towers each parameter is different.
- Minimum Radius
- Maximum Radius
- Aiming Radius (when the tower starts aiming)
- Build Radius (the blue build halo)
The build halo displayed in-game is actually not accurate for some towers, but they’re close enough. Here are some examples:
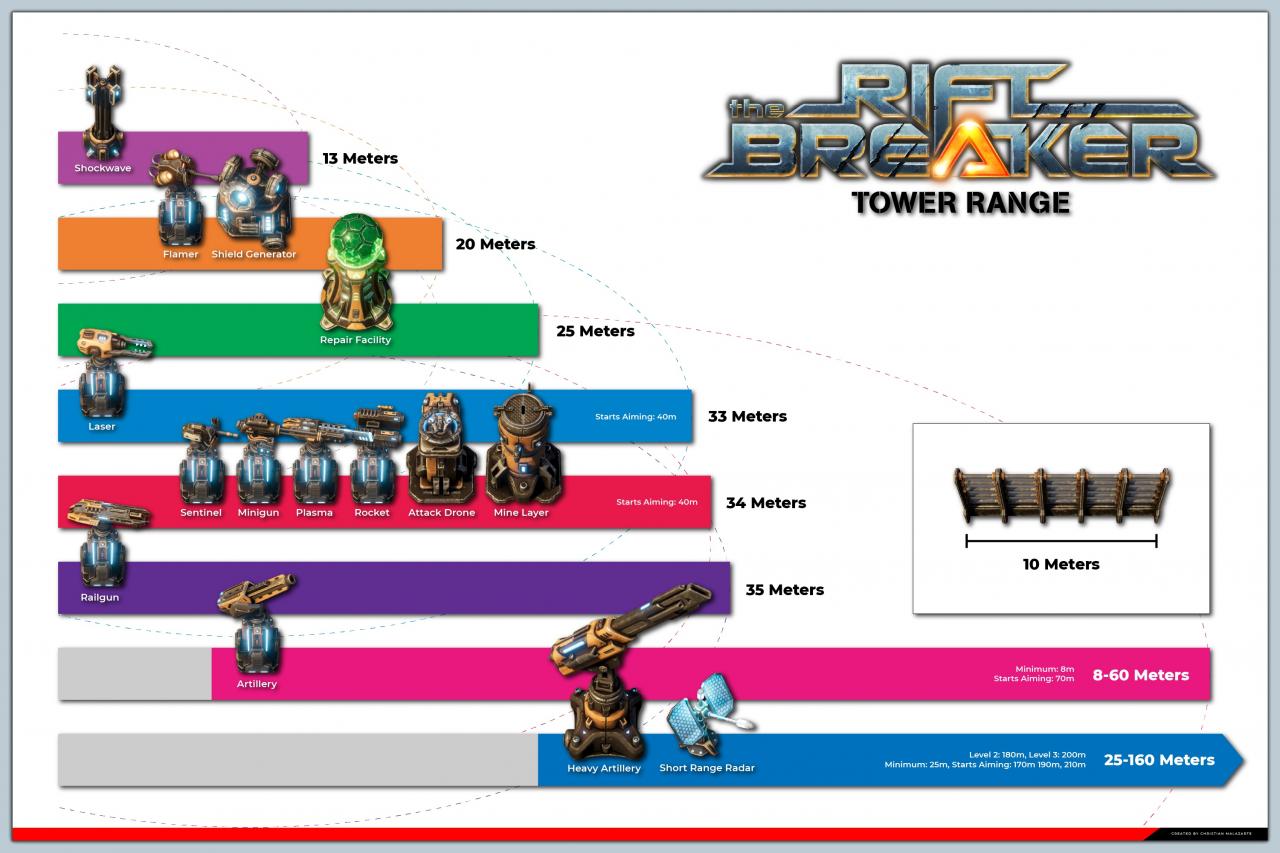
Due to this, the graphic was adjusted to display the actual firing range and not the build radius of the tower. Counting for each tile measuring 2 meters.
In-Game
Graph
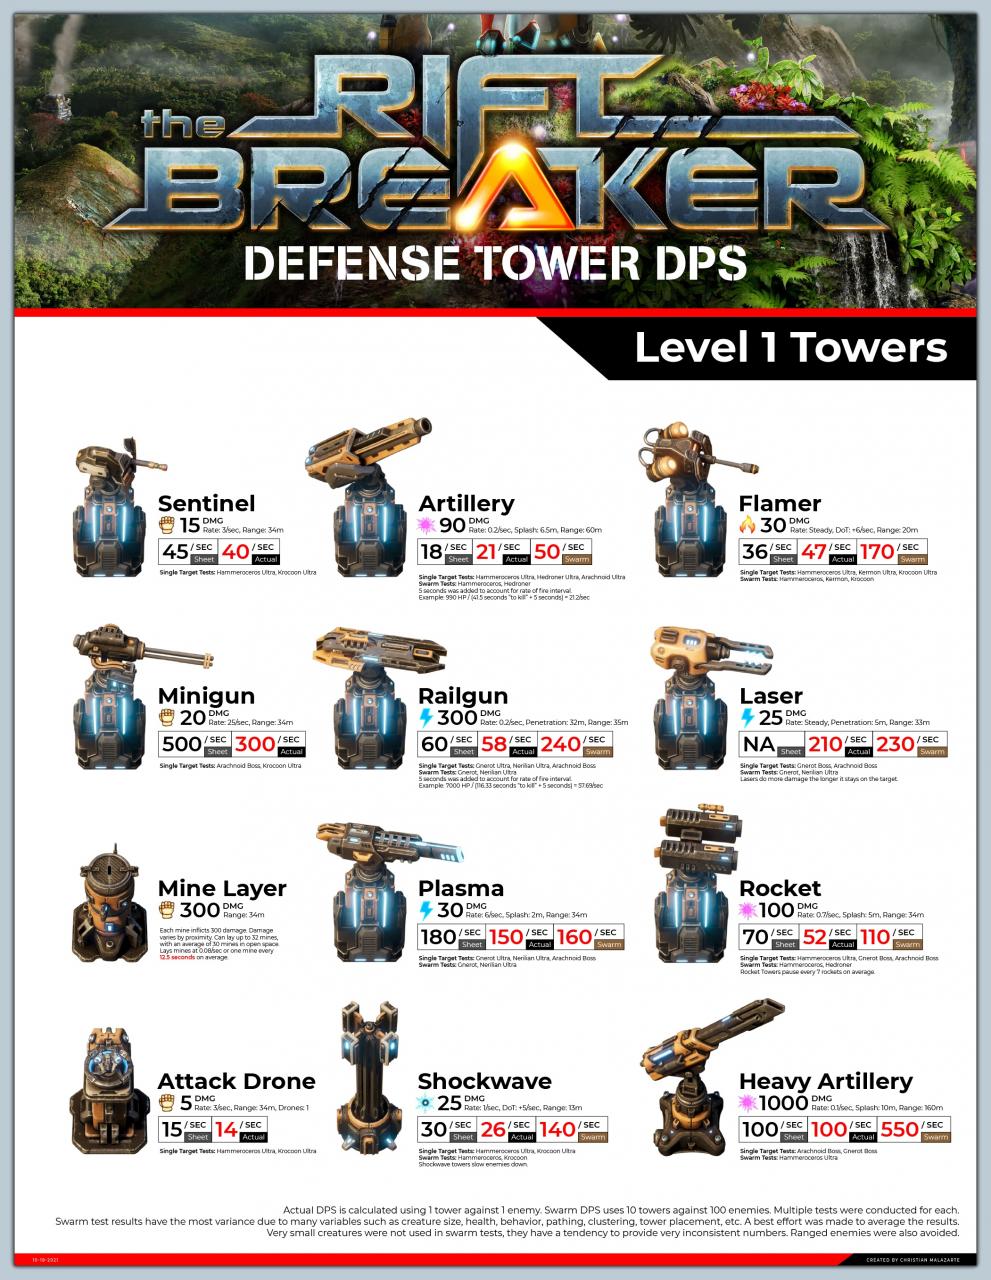
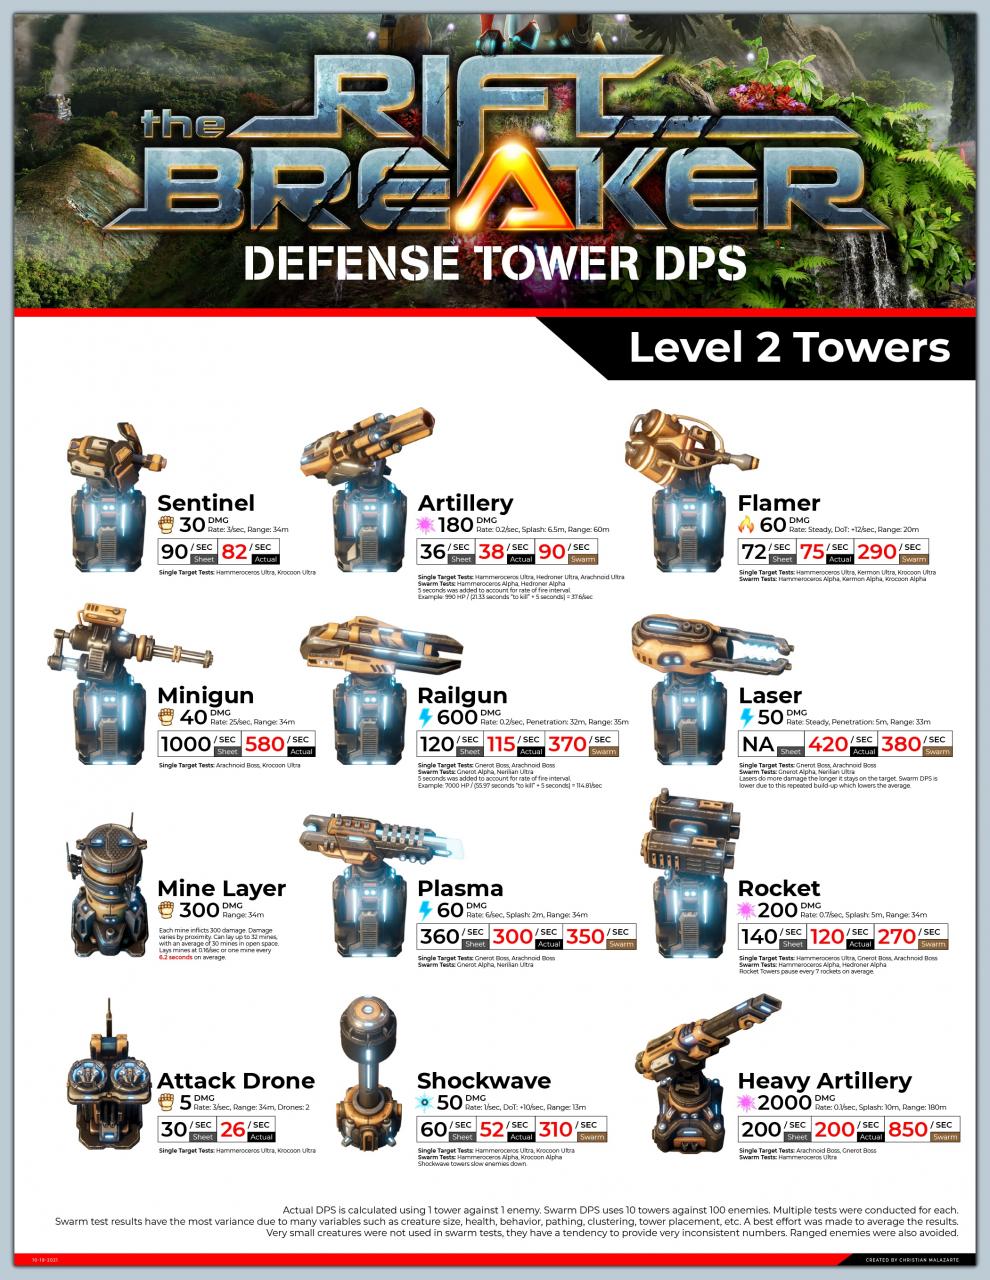
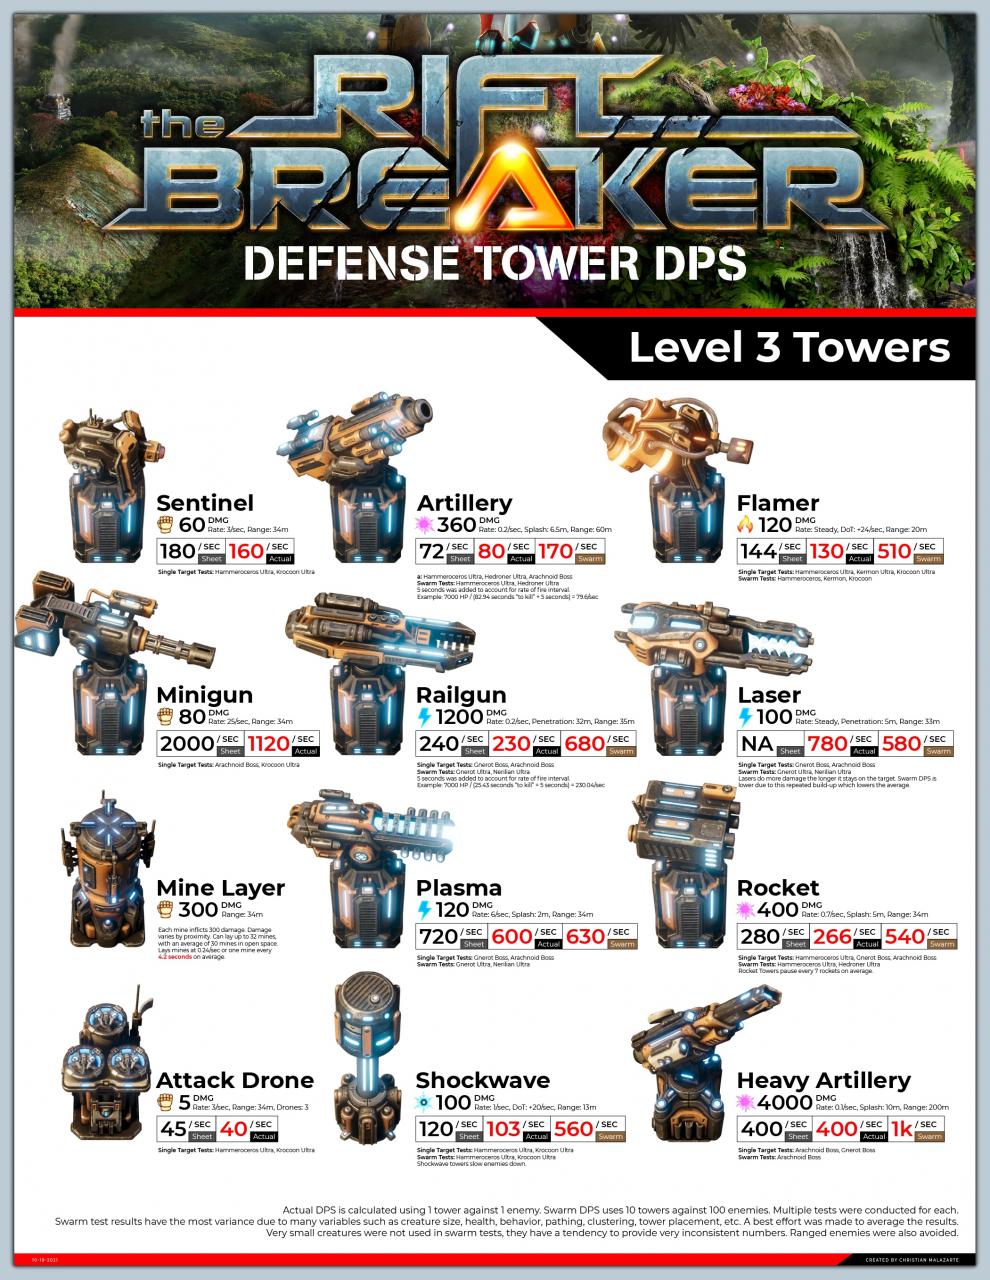
Defense Tower DPS
Swarm DPS (multiple targets) uses 10 towers against 100 enemies.Altho multiple tests were conducted for each enemy, swarm test results have the most variance due to many variables such as creature size, health, behavior, pathing, clustering, tower placement, etc. A best effort was made to average the results.
Very small creatures were not used in swarm tests, since they have a tendency to provide very inconsistent numbers. For example, a rocket that’s supposed to inflict 400 damage when hitting an enemy with 100 HP, the 300 extra damage will not register. Since the calculation is ( Enemy HP * Enemy Qty / Tower Qty / Time to Kill ). Also, the Laser Tower requires a few seconds for it to reach max damage, so creatures with low HP tend to die before the tower reaches max damage, and the tower has to start over. The more HP the enemy has the more consistent the results. Ranged enemies were also avoided, due to their nature of spreading around the tower and not clustering, and also not being near enough some towers.
Level 1 Towers
Level 2 Towers
Level 3 Towers
Related Posts:
- The Riftbreaker Solar in the Desert Guide
- The Riftbreaker Everything You Need to Know Before Playing
- The Riftbreaker Power Source Comparison Information
- The Riftbreaker Resources Drop Guide
- The Riftbreaker Useful Tips & Bug Fixes
