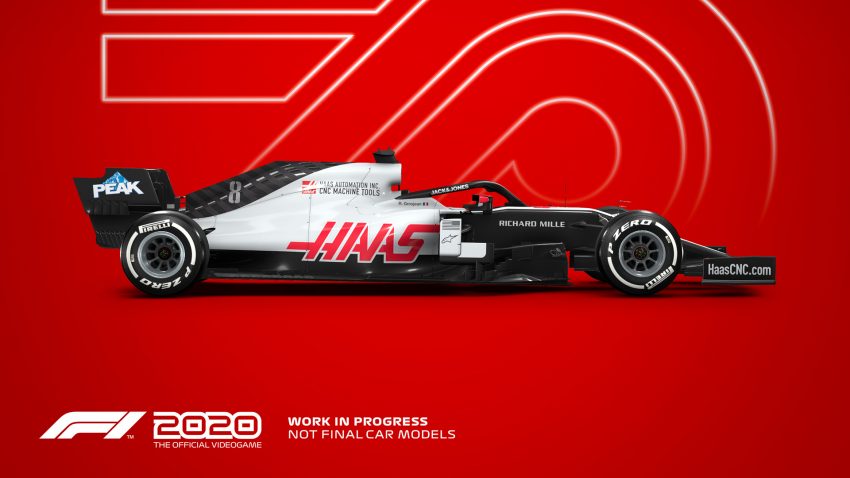
If you play F1 2020 and looking for a guide of setups, this guide provides you the fastest custom setups from the Time Trial leaderboards. Let’s check it out.
Australia

Aerodynamics
- Front Wing Aero 6
- Rear Wing Aero 7
Transmission
- Differential Adjustment On Throttle 55%
- Differential Adjustment Off Throttle 65%
Suspension Geometry
- Front Camber -2.60°
- Rear Camber -1.10°
- Front Toe 0.07°
- Rear Toe 0.26°
Suspension
- Front Suspension 3
- Rear Suspension 4
- Front Anti-Roll Bar 6
- Rear Anti-Roll Bar 5
- Front Ride Height 3
- Rear Ride Height 5
Brakes
- Brake Pressure 100%
- Front Brake Bias 54%
Tyres
- Front Right Tyre Pressure 24.2psi
- Front Left Tyre Pressure 24.2psi
- Rear Right Tyre Pressure 20.7psi
- Rear Left Tyre Pressure 20.7psi
Bahrain

Aerodynamics
- Front Wing Aero 5
- Rear Wing Aero 4
Transmission
- Differential Adjustment On Throttle 50%
- Differential Adjustment Off Throttle 60%
Suspension Geometry
- Front Camber -2.50°
- Rear Camber -1.00°
- Front Toe 0.05°
- Rear Toe 0.20°
Suspension
- Front Suspension 3
- Rear Suspension 4
- Front Anti-Roll Bar 11
- Rear Anti-Roll Bar 4
- Front Ride Height 3
- Rear Ride Height 4
Brakes
- Brake Pressure 100%
- Front Brake Bias 52%
Tyres
- Front Right Tyre Pressure 23.0psi
- Front Left Tyre Pressure 23.0psi
- Rear Right Tyre Pressure 21.5psi
- Rear Left Tyre Pressure 21.5psi
Vietnam

Aerodynamics
- Front Wing Aero 5
- Rear Wing Aero 6
Transmission
- Differential Adjustment On Throttle 50%
- Differential Adjustment Off Throttle 65%
Suspension Geometry
- Front Camber -2.70°
- Rear Camber -1.40°
- Front Toe 0.05°
- Rear Toe 0.20°
Suspension
- Front Suspension 1
- Rear Suspension 3
- Front Anti-Roll Bar 4
- Rear Anti-Roll Bar 7
- Front Ride Height 2
- Rear Ride Height 4
Brakes
- Brake Pressure 95%
- Front Brake Bias 55%
Tyres
- Front Right Tyre Pressure 23.0psi
- Front Left Tyre Pressure 23.0psi
- Rear Right Tyre Pressure 21.1psi
- Rear Left Tyre Pressure 21.1psi
China

Aerodynamics
- Front Wing Aero 3
- Rear Wing Aero 6
Transmission
- Differential Adjustment On Throttle 50%
- Differential Adjustment Off Throttle 65%
Suspension Geometry
- Front Camber -2.50°
- Rear Camber -1.00°
- Front Toe 0.05°
- Rear Toe 0.20°
Suspension
- Front Suspension 2
- Rear Suspension 3
- Front Anti-Roll Bar 8
- Rear Anti-Roll Bar 11
- Front Ride Height 3
- Rear Ride Height 5
Brakes
- Brake Pressure 100%
- Front Brake Bias 50%
Tyres
- Front Right Tyre Pressure 23.4psi
- Front Left Tyre Pressure 23.4psi
- Rear Right Tyre Pressure 20.3psi
- Rear Left Tyre Pressure 20.3psi
Netherlands

Aerodynamics
- Front Wing Aero 5
- Rear Wing Aero 6
Transmission
- Differential Adjustment On Throttle 65%
- Differential Adjustment Off Throttle 55%
Suspension Geometry
- Front Camber 2.80°
- Rear Camber -1.30°
- Front Toe 0.07°
- Rear Toe 0.26°
Suspension
- Front Suspension 3
- Rear Suspension 4
- Front Anti-Roll Bar 6
- Rear Anti-Roll Bar 8
- Front Ride Height 4
- Rear Ride Height 6
Brakes
- Brake Pressure 100%
- Front Brake Bias 50%
Tyres
- Front Right Tyre Pressure 23.0psi
- Front Left Tyre Pressure 23.0psi
- Rear Right Tyre Pressure 19.5psi
- Rear Left Tyre Pressure 19.5psi
Spain

Aerodynamics
- Front Wing Aero 4
- Rear Wing Aero 7
Transmission
- Differential Adjustment On Throttle 50%
- Differential Adjustment Off Throttle 65%
Suspension Geometry
- Front Camber -2.50°
- Rear Camber -1.00°
- Front Toe 0.05°
- Rear Toe 0.20°
Suspension
- Front Suspension 2
- Rear Suspension 3
- Front Anti-Roll Bar 4
- Rear Anti-Roll Bar 10
- Front Ride Height 2
- Rear Ride Height 4
Brakes
- Brake Pressure 100%
- Front Brake Bias 50%
Tyres
- Front Right Tyre Pressure 23.0psi
- Front Left Tyre Pressure 23.0psi
- Rear Right Tyre Pressure 21.5psi
- Rear Left Tyre Pressure 21.5psi
Monaco

Aerodynamics
- Front Wing Aero 8
- Rear Wing Aero 11
Transmission
- Differential Adjustment On Throttle 50%
- Differential Adjustment Off Throttle 65%
Suspension Geometry
- Front Camber -2.50°
- Rear Camber -1.00°
- Front Toe 0.05°
- Rear Toe 0.20°
Suspension
- Front Suspension 1
- Rear Suspension 2
- Front Anti-Roll Bar 7
- Rear Anti-Roll Bar 9
- Front Ride Height 2
- Rear Ride Height 4
Brakes
- Brake Pressure 100%
- Front Brake Bias 53%
Tyres
- Front Right Tyre Pressure 22.6psi
- Front Left Tyre Pressure 22.6psi
- Rear Right Tyre Pressure 21.1psi
- Rear Left Tyre Pressure 21.1psi
Azerbaijan

Aerodynamics
- Front Wing Aero 2
- Rear Wing Aero 4
Transmission
- Differential Adjustment On Throttle 70%
- Differential Adjustment Off Throttle 65%
Suspension Geometry
- Front Camber -2.50°
- Rear Camber -1.00°
- Front Toe 0.05°
- Rear Toe 0.20°
Suspension
- Front Suspension 2
- Rear Suspension 3
- Front Anti-Roll Bar 5
- Rear Anti-Roll Bar 9
- Front Ride Height 3
- Rear Ride Height 4
Brakes
- Brake Pressure 86%
- Front Brake Bias 54%
Tyres
- Front Right Tyre Pressure 23.4psi
- Front Left Tyre Pressure 23.4psi
- Rear Right Tyre Pressure 21.9psi
- Rear Left Tyre Pressure 21.9psi
Canada

Aerodynamics
- Front Wing Aero 3
- Rear Wing Aero 6
Transmission
- Differential Adjustment On Throttle 70%
- Differential Adjustment Off Throttle 55%
Suspension Geometry
- Front Camber -2.60°
- Rear Camber -1.10°
- Front Toe 0.06°
- Rear Toe 0.23°
Suspension
- Front Suspension 3
- Rear Suspension 4
- Front Anti-Roll Bar 4
- Rear Anti-Roll Bar 5
- Front Ride Height 3
- Rear Ride Height 4
Brakes
- Brake Pressure 100%
- Front Brake Bias 53%
Tyres
- Front Right Tyre Pressure 23.4psi
- Front Left Tyre Pressure 23.4psi
- Rear Right Tyre Pressure 21.1psi
- Rear Left Tyre Pressure 21.1psi
France

Aerodynamics
- Front Wing Aero 4
- Rear Wing Aero 6
Transmission
- Differential Adjustment On Throttle 50%
- Differential Adjustment Off Throttle 65%
Suspension Geometry
- Front Camber -3.30°
- Rear Camber -1.50°
- Front Toe 0.05°
- Rear Toe 0.20°
Suspension
- Front Suspension 3
- Rear Suspension 3
- Front Anti-Roll Bar 6
- Rear Anti-Roll Bar 3
- Front Ride Height 2
- Rear Ride Height 4
Brakes
- Brake Pressure 98%
- Front Brake Bias 50%
Tyres
- Front Right Tyre Pressure 23.4psi
- Front Left Tyre Pressure 23.4psi
- Rear Right Tyre Pressure 21.1psi
- Rear Left Tyre Pressure 21.1psi
Austria

Aerodynamics
- Front Wing Aero 2
- Rear Wing Aero 5
Transmission
- Differential Adjustment On Throttle 100%
- Differential Adjustment Off Throttle 50%
Suspension Geometry
- Front Camber -2.50°
- Rear Camber -1.00°
- Front Toe 0.05°
- Rear Toe 0.20°
Suspension
- Front Suspension 1
- Rear Suspension 7
- Front Anti-Roll Bar 1
- Rear Anti-Roll Bar 8
- Front Ride Height 3
- Rear Ride Height 3
Brakes
- Brake Pressure 100%
- Front Brake Bias 58%
Tyres
- Front Right Tyre Pressure 21.0psi
- Front Left Tyre Pressure 21.0psi
- Rear Right Tyre Pressure 19.5psi
- Rear Left Tyre Pressure 19.5psi
Britain

Aerodynamics
- Front Wing Aero 4
- Rear Wing Aero 3
Transmission
- Differential Adjustment On Throttle 50%
- Differential Adjustment Off Throttle 65%
Suspension Geometry
- Front Camber -2.60°
- Rear Camber -1.10°
- Front Toe 0.06°
- Rear Toe 0.20°
Suspension
- Front Suspension 4
- Rear Suspension 4
- Front Anti-Roll Bar 5
- Rear Anti-Roll Bar 5
- Front Ride Height 4
- Rear Ride Height 5
Brakes
- Brake Pressure 100%
- Front Brake Bias 55%
Tyres
- Front Right Tyre Pressure 21.8psi
- Front Left Tyre Pressure 21.8psi
- Rear Right Tyre Pressure 20.7psi
- Rear Left Tyre Pressure 20.7psi
Hungary

Aerodynamics
- Front Wing Aero 7
- Rear Wing Aero 9
Transmission
- Differential Adjustment On Throttle 60%
- Differential Adjustment Off Throttle 65%
Suspension Geometry
- Front Camber -2.50°
- Rear Camber -1.00°
- Front Toe 0.08°
- Rear Toe 0.41°
Suspension
- Front Suspension 1
- Rear Suspension 4
- Front Anti-Roll Bar 6
- Rear Anti-Roll Bar 11
- Front Ride Height 2
- Rear Ride Height 4
Brakes
- Brake Pressure 100%
- Front Brake Bias 58%
Tyres
- Front Right Tyre Pressure 23.0psi
- Front Left Tyre Pressure 23.0psi
- Rear Right Tyre Pressure 21.1psi
- Rear Left Tyre Pressure 21.1psi
Belgium

Aerodynamics
- Front Wing Aero 2
- Rear Wing Aero 6
Transmission
- Differential Adjustment On Throttle 50%
- Differential Adjustment Off Throttle 65%
Suspension Geometry
- Front Camber -2.50°
- Rear Camber -1.00°
- Front Toe 0.05°
- Rear Toe 0.20°
Suspension
- Front Suspension 1
- Rear Suspension 3
- Front Anti-Roll Bar 4
- Rear Anti-Roll Bar 10
- Front Ride Height 3
- Rear Ride Height 4
Brakes
- Brake Pressure 100%
- Front Brake Bias 58%
Tyres
- Front Right Tyre Pressure 24.6psi
- Front Left Tyre Pressure 24.6psi
- Rear Right Tyre Pressure 22.3psi
- Rear Left Tyre Pressure 22.3psi
Italy

Aerodynamics
- Front Wing Aero 2
- Rear Wing Aero 3
Transmission
- Differential Adjustment On Throttle 50%
- Differential Adjustment Off Throttle 65%
Suspension Geometry
- Front Camber -2.50°
- Rear Camber -1.00°
- Front Toe 0.05°
- Rear Toe 0.20°
Suspension
- Front Suspension 2
- Rear Suspension 3
- Front Anti-Roll Bar 7
- Rear Anti-Roll Bar 9
- Front Ride Height 2
- Rear Ride Height 3
Brakes
- Brake Pressure 100%
- Front Brake Bias 50%
Tyres
- Front Right Tyre Pressure 23.4psi
- Front Left Tyre Pressure 23.4psi
- Rear Right Tyre Pressure 20.7psi
- Rear Left Tyre Pressure 20.7psi
Singapore

Aerodynamics
- Front Wing Aero 8
- Rear Wing Aero 11
Transmission
- Differential Adjustment On Throttle 55%
- Differential Adjustment Off Throttle 50%
Suspension Geometry
- Front Camber -2.50°
- Rear Camber -1.00°
- Front Toe 0.05°
- Rear Toe 0.20°
Suspension
- Front Suspension 2
- Rear Suspension 3
- Front Anti-Roll Bar 4
- Rear Anti-Roll Bar 10
- Front Ride Height 2
- Rear Ride Height 3
Brakes
- Brake Pressure 82%
- Front Brake Bias 52%
Tyres
- Front Right Tyre Pressure 23.0psi
- Front Left Tyre Pressure 23.0psi
- Rear Right Tyre Pressure 19.5psi
- Rear Left Tyre Pressure 19.5psi
Russia

Aerodynamics
- Front Wing Aero 3
- Rear Wing Aero 4
Transmission
- Differential Adjustment On Throttle 82%
- Differential Adjustment Off Throttle 70%
Suspension Geometry
- Front Camber -2.50°
- Rear Camber -1.00°
- Front Toe 0.08°
- Rear Toe 0.23°
Suspension
- Front Suspension 1
- Rear Suspension 2
- Front Anti-Roll Bar 1
- Rear Anti-Roll Bar 11
- Front Ride Height 4
- Rear Ride Height 5
Brakes
- Brake Pressure 100%
- Front Brake Bias 50%
Tyres
- Front Right Tyre Pressure 21.8psi
- Front Left Tyre Pressure 21.8psi
- Rear Right Tyre Pressure 20.7psi
- Rear Left Tyre Pressure 20.7psi
Japan

Aerodynamics
- Front Wing Aero 7
- Rear Wing Aero 6
Transmission
- Differential Adjustment On Throttle 50%
- Differential Adjustment Off Throttle 50%
Suspension Geometry
- Front Camber -3.00°
- Rear Camber -1.50°
- Front Toe 0.10°
- Rear Toe 0.35°
Suspension
- Front Suspension 5
- Rear Suspension 3
- Front Anti-Roll Bar 6
- Rear Anti-Roll Bar 5
- Front Ride Height 5
- Rear Ride Height 7
Brakes
- Brake Pressure 100%
- Front Brake Bias 50%
Tyres
- Front Right Tyre Pressure 21.0psi
- Front Left Tyre Pressure 21.0psi
- Rear Right Tyre Pressure 19.5psi
- Rear Left Tyre Pressure 19.5psi
USA

Aerodynamics
- Front Wing Aero 3
- Rear Wing Aero 5
Transmission
- Differential Adjustment On Throttle 60%
- Differential Adjustment Off Throttle 65%
Suspension Geometry
- Front Camber -2.60°
- Rear Camber -1.10°
- Front Toe 0.06°
- Rear Toe 0.20°
Suspension
- Front Suspension 4
- Rear Suspension 4
- Front Anti-Roll Bar 5
- Rear Anti-Roll Bar 5
- Front Ride Height 4
- Rear Ride Height 5
Brakes
- Brake Pressure 94%
- Front Brake Bias 54%
Tyres
- Front Right Tyre Pressure 21.8psi
- Front Left Tyre Pressure 21.8psi
- Rear Right Tyre Pressure 20.7psi
- Rear Left Tyre Pressure 20.7psi
Mexico

Aerodynamics
- Front Wing Aero 2
- Rear Wing Aero 8
Transmission
- Differential Adjustment On Throttle 52%
- Differential Adjustment Off Throttle 62%
Suspension Geometry
- Front Camber -2.70°
- Rear Camber -1.30°
- Front Toe 0.06°
- Rear Toe 0.26°
Suspension
- Front Suspension 1
- Rear Suspension 2
- Front Anti-Roll Bar 4
- Rear Anti-Roll Bar 9
- Front Ride Height 2
- Rear Ride Height 3
Brakes
- Brake Pressure 100%
- Front Brake Bias 52%
Tyres
- Front Right Tyre Pressure 23.0psi
- Front Left Tyre Pressure 23.0psi
- Rear Right Tyre Pressure 21.5psi
- Rear Left Tyre Pressure 21.5psi
Brazil

Aerodynamics
- Front Wing Aero 4
- Rear Wing Aero 6
Transmission
- Differential Adjustment On Throttle 70%
- Differential Adjustment Off Throttle 65%
Suspension Geometry
- Front Camber -2.50°
- Rear Camber -1.00°
- Front Toe 0.05°
- Rear Toe 0.20°
Suspension
- Front Suspension 1
- Rear Suspension 2
- Front Anti-Roll Bar 3
- Rear Anti-Roll Bar 7
- Front Ride Height 3
- Rear Ride Height 4
Brakes
- Brake Pressure 100%
- Front Brake Bias 54%
Tyres
- Front Right Tyre Pressure 23.8psi
- Front Left Tyre Pressure 23.8psi
- Rear Right Tyre Pressure 21.5psi
- Rear Left Tyre Pressure 21.5psi
Abu Dhabi

Aerodynamics
- Front Wing Aero 3
- Rear Wing Aero 7
Transmission
- Differential Adjustment On Throttle 50%
- Differential Adjustment Off Throttle 50%
Suspension Geometry
- Front Camber -2.50°
- Rear Camber -1.00°
- Front Toe 0.05°
- Rear Toe 0.20°
Suspension
- Front Suspension 1
- Rear Suspension 2
- Front Anti-Roll Bar 4
- Rear Anti-Roll Bar 11
- Front Ride Height 3
- Rear Ride Height 4
Brakes
- Brake Pressure 100%
- Front Brake Bias 54%
Tyres
- Front Right Tyre Pressure 23.4psi
- Front Left Tyre Pressure 23.4psi
- Rear Right Tyre Pressure 21.1psi
- Rear Left Tyre Pressure 21.1psi
Notes
That’s all we are sharing today in F1 2020 Fast Custom Setups Guide (From the Time Trial Leaderboards), if there are anything you want to add please feel free to leave a comment below and we’ll see you soon.
Credit to Hudson633
Related Posts:
- F1 2020 Guide for Beginners (Tyres, Compounds, Flags, Multifunction Display, DRS)
- F1 2020 Full List of Voice Commands
- F1 2020 100% Achievement Guide
- F1 2020 Ultimate Multiplayer Guide (Defend Position & Pursuit)
- F1 2020 Realistic Camera Settings Guide
