For new players of The Outlast Trials, this guide will be focusing on the first steps in Outlast Trials as well as Rigs, Prescriptions and AMPs and general leveling.
Introduction
The Outlast Trials is an interesting addition to the Outlast series, offering a fresh twist on horror walking simulators. Building upon the legacy established by games like Amnesia: The Dark Descent, this title enhances the disturbing atmosphere while introducing unique elements such as night vision battery management, heart-pounding jump scares, and thrilling chases. Remarkably, these elements successfully transition into a multiplayer experience. In The Outlast Trials, one to four players can participate in trials featuring diverse objectives and numerous obstacles that push the limits of your fear resilience.
How much content is there?
In its current Early Access state, The Outlast Trials offers the following content:
- Three Trials featuring distinctive maps, each with three different difficulty levels that introduce Variators.
- Two MK-Challenges per map, where you explore the same map but with different starting points and objectives. These challenges are typically shorter than the Trials.
- Program X, a collection of Trials and MK-Challenges with Variators, which will receive occasional updates. Access to this program is available once you obtain grading on all other Trials and MK-Challenges.
While it may not seem like a lot to some players, especially those who prefer speedrunning or focus solely on solo play (although solo mode is more challenging), the true depth of the game lies in investing time to learn, identify mistakes, and adapt effective strategies. Moreover, there are plenty of upgrades to unlock for Rigs, Prescriptions, and Amps, which can significantly alter your gameplay. You may also find yourself adjusting your playstyle to complement your teammates. And for those seeking an extra challenge, try playing without your Rig once the game starts feeling too easy.
The matchmaking process is generally smooth, allowing you to quickly jump into a game within a minute. However, it’s worth noting that you might come across lobbies where players have significant level differences. Occasionally, group finding may be interrupted if someone declines, requiring you to restart the process. Additionally, some players may leave if they dislike the chosen Trial or MK-Challenge, even after it has started. While these are minor inconveniences, it’s expected that the developers will address these issues for the final release.
In the game, there’s a ping system that lets you communicate important messages to your teammates. It’s all you really need to have fun playing. There’s also a voice chat option available, but personally, I haven’t used it and don’t plan to.
The worst thing that I have experienced so far is a player holding the game hostage by not coming to a checkpoint. Unless there are slurs and insults being thrown left and right on the voice chat, I’d say players are pretty chill and usually cooporate pretty well.
Not at all. Leveling up happens quite fast, especially if you score A+ on Trials and MK-Challenges. You do have to wait for level-ups to earn Vouchers for upgrades, but if you genuinely enjoy the game, you won’t even notice it when you reach level 20 or higher.
Trials and MK-Challenges
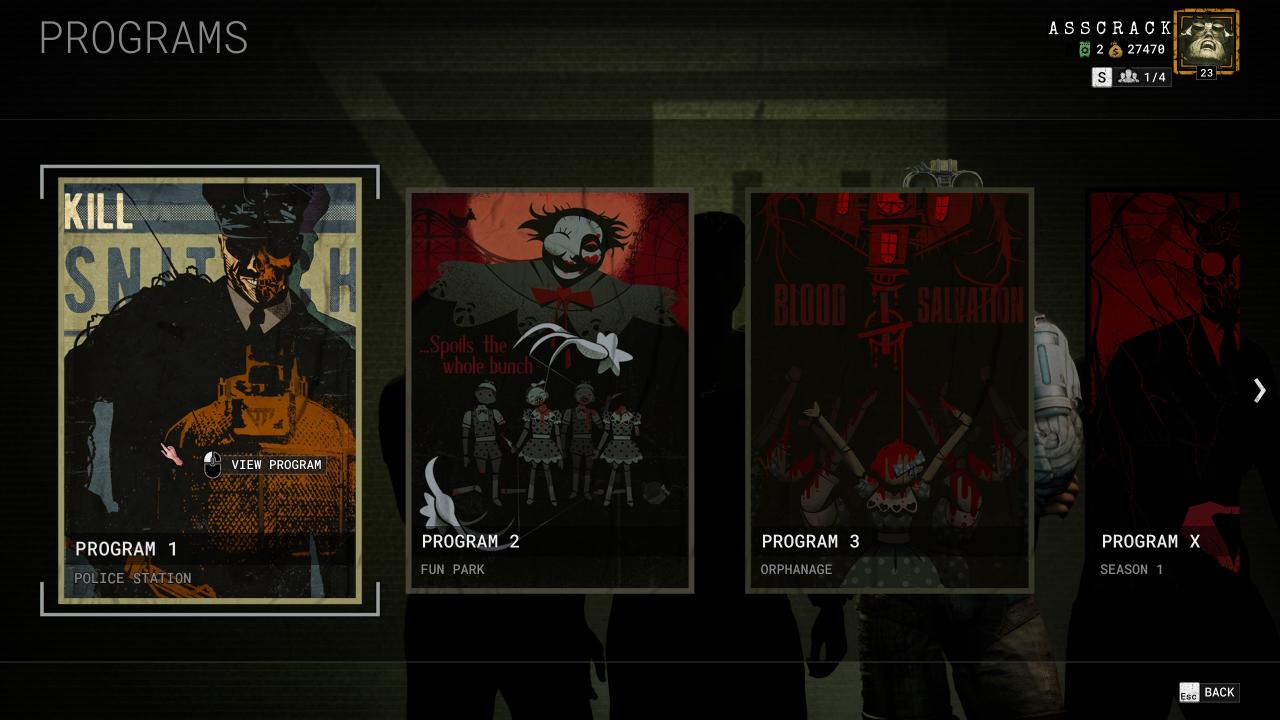
Currently there are 3 Trials in the game:
- Kill the Switch – this Trial is set in a Police Station. Your objective is to infiltrate the station, locate the snitch, and execute them,
- Grind the Bad Apples – in this Trial, you find yourself in an Amusement Park. Your task is to gain access to a ride called Root Canal and destroy a group of child mannequins,
- Cleanse the Orphans – this Trial takes place in an Orphanage. You’ll be assigned various tasks aimed at converting the children (mannequins) to the Faith..
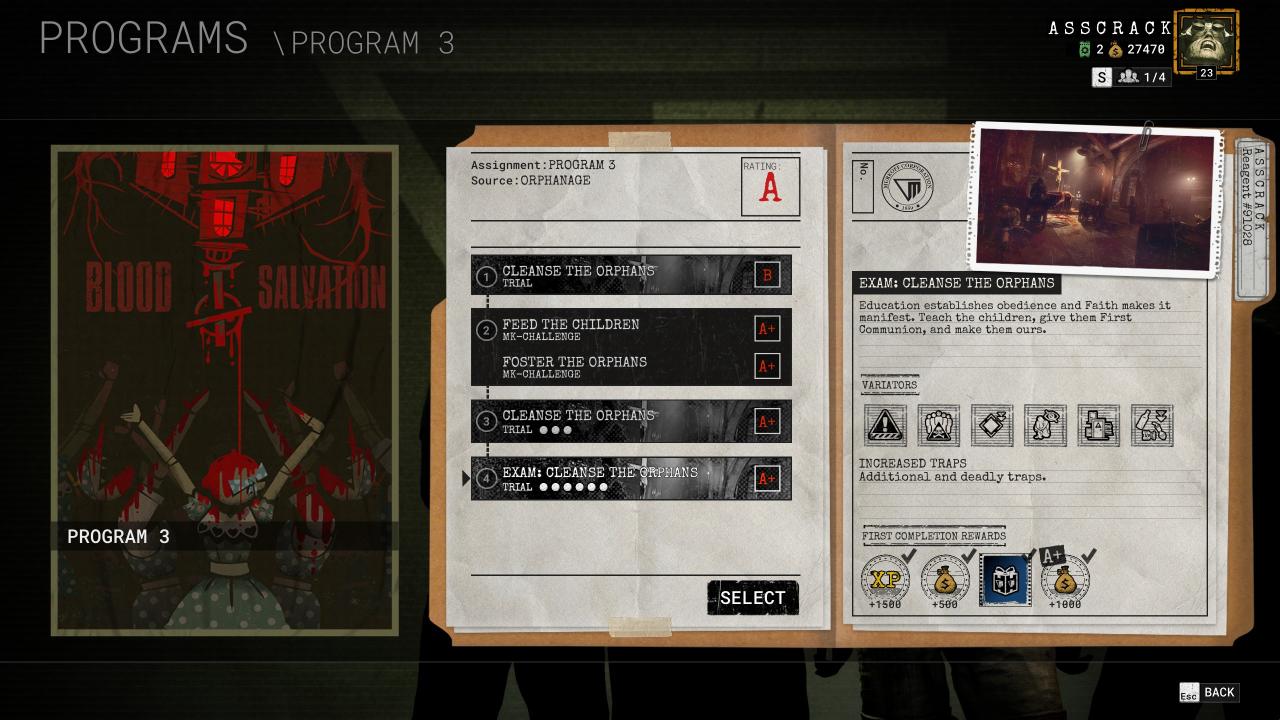
Each Trial offers a choice of three difficulties, and each difficulty level introduces different Variators to increase the challenge. Your performance in the Trial or MK-Challenge is graded, and achieving an A+ grade for the first time also grants you a bonus.
Rigs, Prescriptions and Amps
Every upgrade will cost you Vouchers, which you get after leveling up – at first you get only 1 Voucher per level, around level 10 you will start getting 2 per level and soon after that 3 per level.
As you level up your character, you’ll unlock useful upgrades that can greatly improve your gameplay:
- At Therapy Level 2, you’ll gain access to Rigs.
- At Therapy Level 3, you can unlock Prescriptions.
- Finally, at Therapy Level 10, you’ll unlock Amps.
These upgrades are crucial for achieving A+ grades on the highest difficulty levels. To acquire them, you’ll need Vouchers, which you receive when you level up. Initially, you’ll earn 1 Voucher per level. However, as you progress, around level 10, you’ll start earning 2 Vouchers per level, and soon after, you’ll receive 3 Vouchers per level.
Rigs
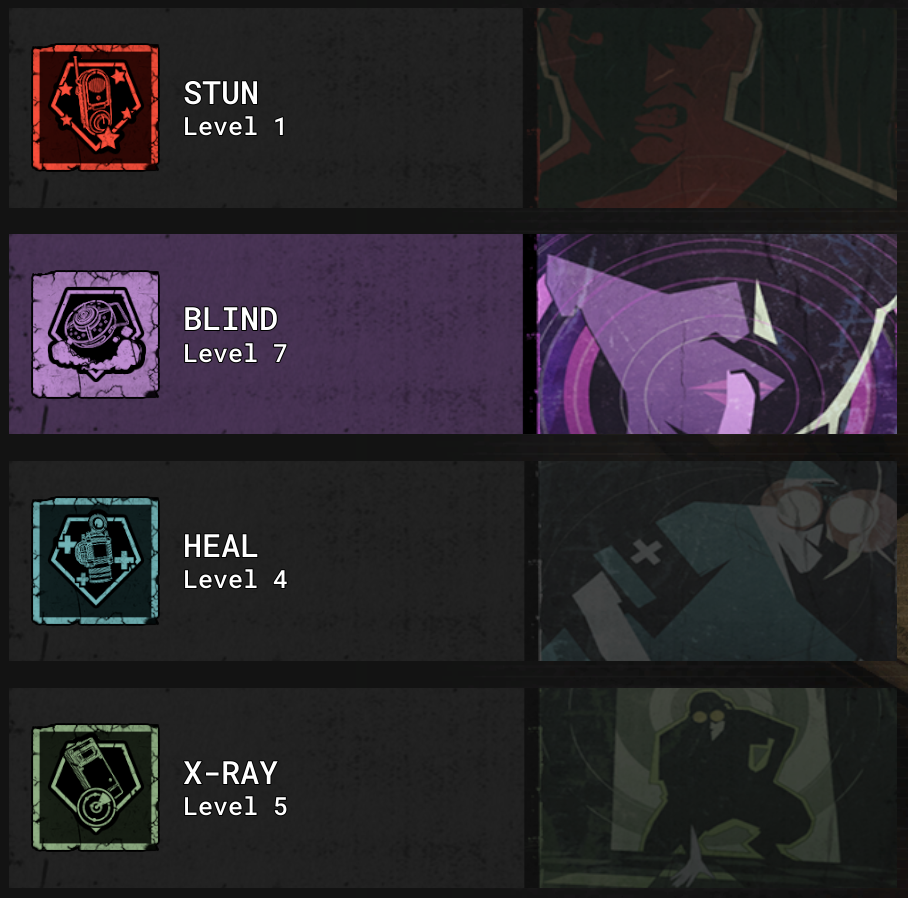
- Stun – a throwing device that stuns the enemies,
- Blind – a landmine that once triggered blinds the enemies,
- Heal – an aerosol gas that heals you and nearby players,
- X-ray – an enhancement that allows you to see enemies through walls,
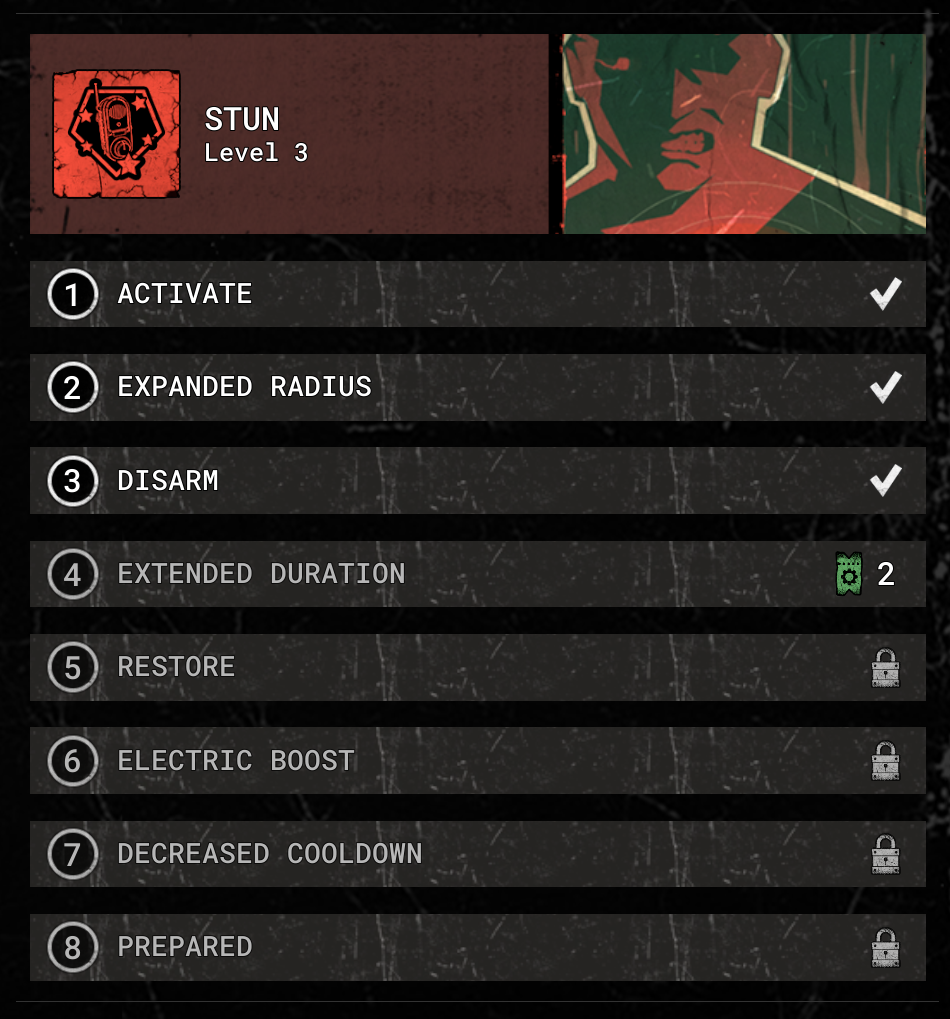 Stun is a pretty useful Rig, especially if you are caught unexpectedly by an enemy and can save you the run when in a pinch. The enemy that you hit is stunned for a moment, unable to make any action, giving you a wide enough window to run away.
The upgrades are as follows:
- ACTIVATE (1) – base upgrade, unlocks the Rig,
- EXPANDED RADIUS (1) – expands the area of the explosion, potentially making it easier to hit multiple enemies,
- DISARM (1) – the explosion destroys any traps, door traps and enemy mines,
- EXTENDED DURATION (2) – extends the duration of the stun effect,
- RESTORE (2) – reduces the cooldown if you miss the throw,
- ELECTRIC BOOST (3) – players caught in the explosion get their battery charges and stamina back,
- DECREASED COOLDOWN (3) – decreses the cooldown,
- PREPARED (3) – start with the RIg ready to be used.
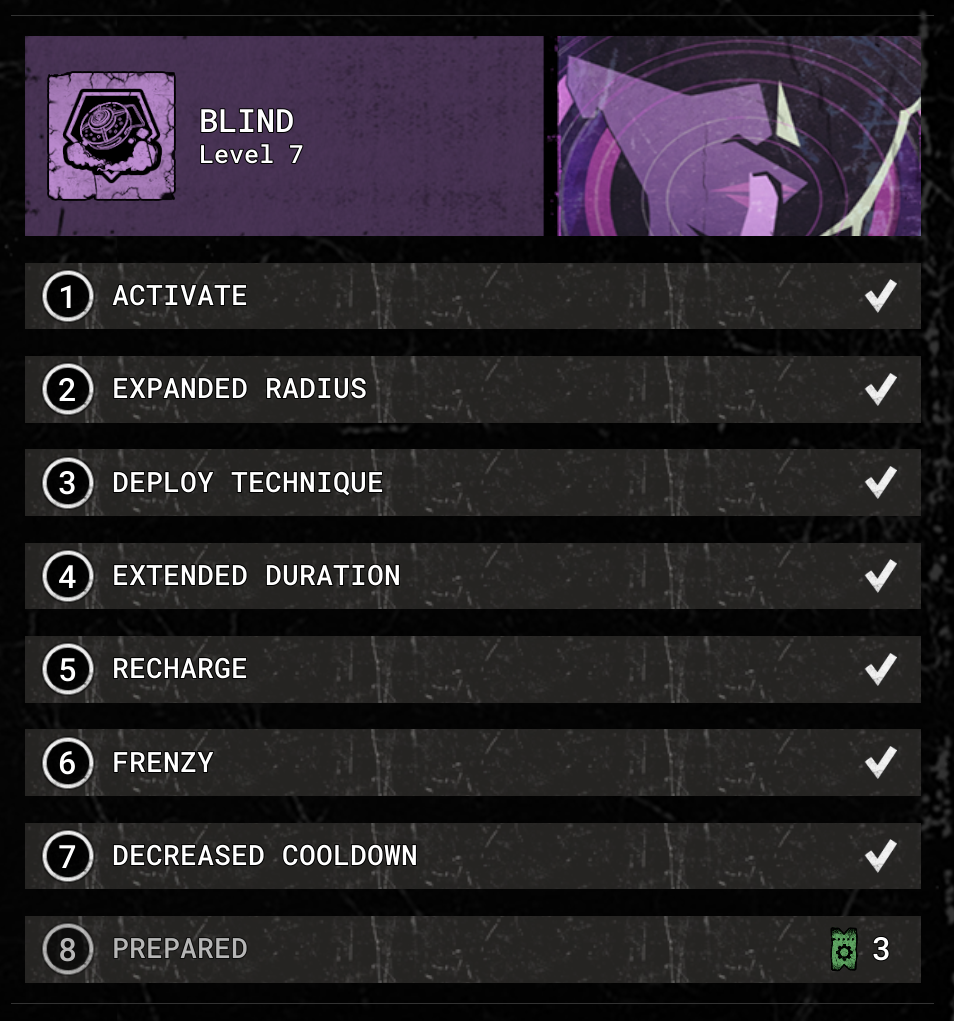 Blind is another tool that allows you to stun the enemy. Instead of being a throwable, Blind is a landmine and because of that, it has a setup time. The payoff is a way longer explosion duration that covers more area and can even blind enemies that weren’t in the radius of the initial explosion.
The upgrades are as follows:
- ACTIVATE (1) – base upgrade, unlocks the Rig,
- EXPANDED RADIUS (1) – expands the area of the explosion,
- DEPLOY TECHNIQUE (1) – the setup time is quicker,
- EXTENDED DURATION (2) – extends the duration of the blinding smoke,
- RECHARGE (2) – the mine re-arms itself once,
- FRENZY (3) – gives any player who walks through the smoke an adrenaline boost effect,
- DECREASED COOLDOWN (3) – decreses the cooldown,
- PREPARED (3) – start with the RIg ready to be used.
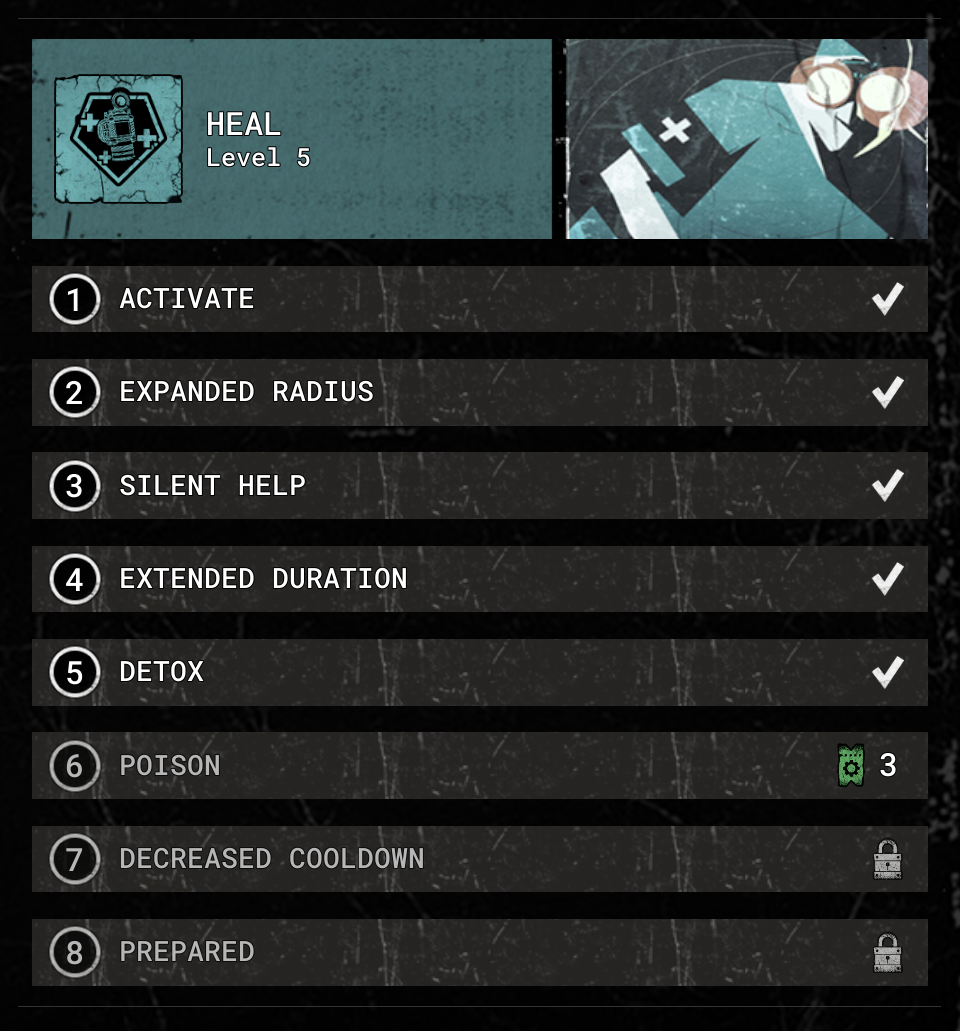 Heal is a support Rig that may come in handy if you find yourself (or your fellow Reagents) struggling with keeping yourselves alive. While it’s never safe to be running around with one health bar, you should usually focus on not getting damaged in the first place.
The upgrades are as follows:
- ACTIVATE (1) – base upgrade, unlocks the Rig,
- EXPANDED RADIUS (1) – expands the area of the healing effect,
- SILENT HELP (1) – makes the healing silent,
- EXTENDED DURATION (2) – extends the duration of the healing effect,
- DETOX (2) – healing gas will also heal Psychosis,
- POISON (3) – healing gas will also slow down enemies affected by it,
- DECREASED COOLDOWN (3) – decreses the cooldown,
- PREPARED (3) – start with the RIg ready to be used.
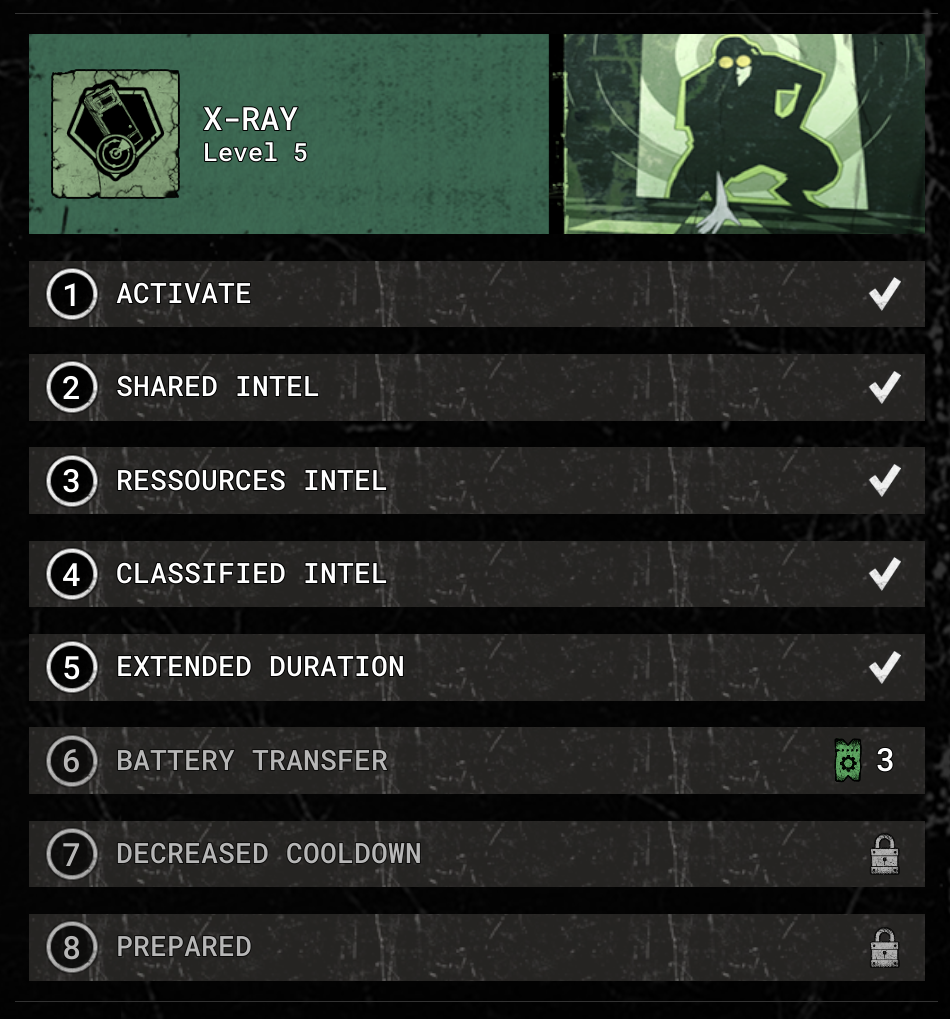 X-ray is another support Rig, giving you the ability to see the enemies through the walls and with a couple of upgrades, useful items as well. While it can be helpful when you’re having difficulty sneaking past enemies, in most cases, relying on your listening to the cues or finding alternate routes is more effective.
The upgrades are as follows:
- ACTIVATE (1) – base upgrade, unlocks the Rig,
- SHARED INTEL (1) – allies can see the locations of tagged enemies,
- RESSOURCES INTEL (1) – X-ray reveales consumables (Medicines, Batteries, Adrenaline, Bricks, Bottles, Lockpicks, Syringes, Rig Rechargers),
- CLASSIFIED INTEL (2) – X-ray reveales basically every interactable item in the game (Documents, Posters, Booster Items, Master Key, Mines, Traps),
- EXTENDED DURATION (2) – extends the X-ray duration,
- BATTERY TRANSFER (3) – using X-ray recharges your battery,
- DECREASED COOLDOWN (3) – decreses the cooldown,
- PREPARED (3) – start with the RIg ready to be used.
Prescriptions
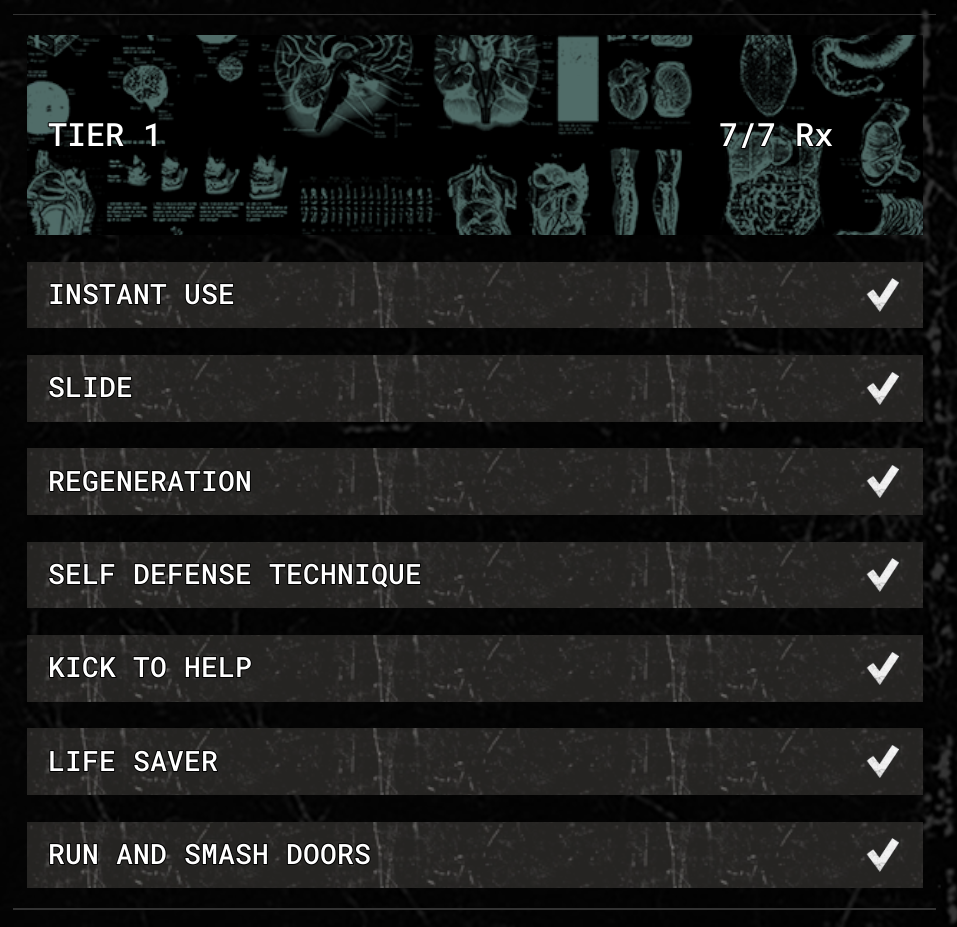
 The Tier 1 Prescriptions are:
- INSTANT USE – allows you to hold down left click when interacting with the item to use it immeadietly,
- SLIDE – pressing the crouch button when running causes your Reagent to slide,
- REGENERATION – you regenerate health to a full health bar after some time,
- SELF DEFENSE TECHNIQUE – press right click while being assaulted by a pouncer to escape their grasp,
- KICK TO HELP – allows you to kick enemies that grabbed your fellow Reagent,
- LIFE SAVER – allows you to kick enemy that attempts to execute your fellow Reagent,
- RUN AND SMASH DOORS – allows you to instantly open doors while running, unless they are locked (you will crack them though).
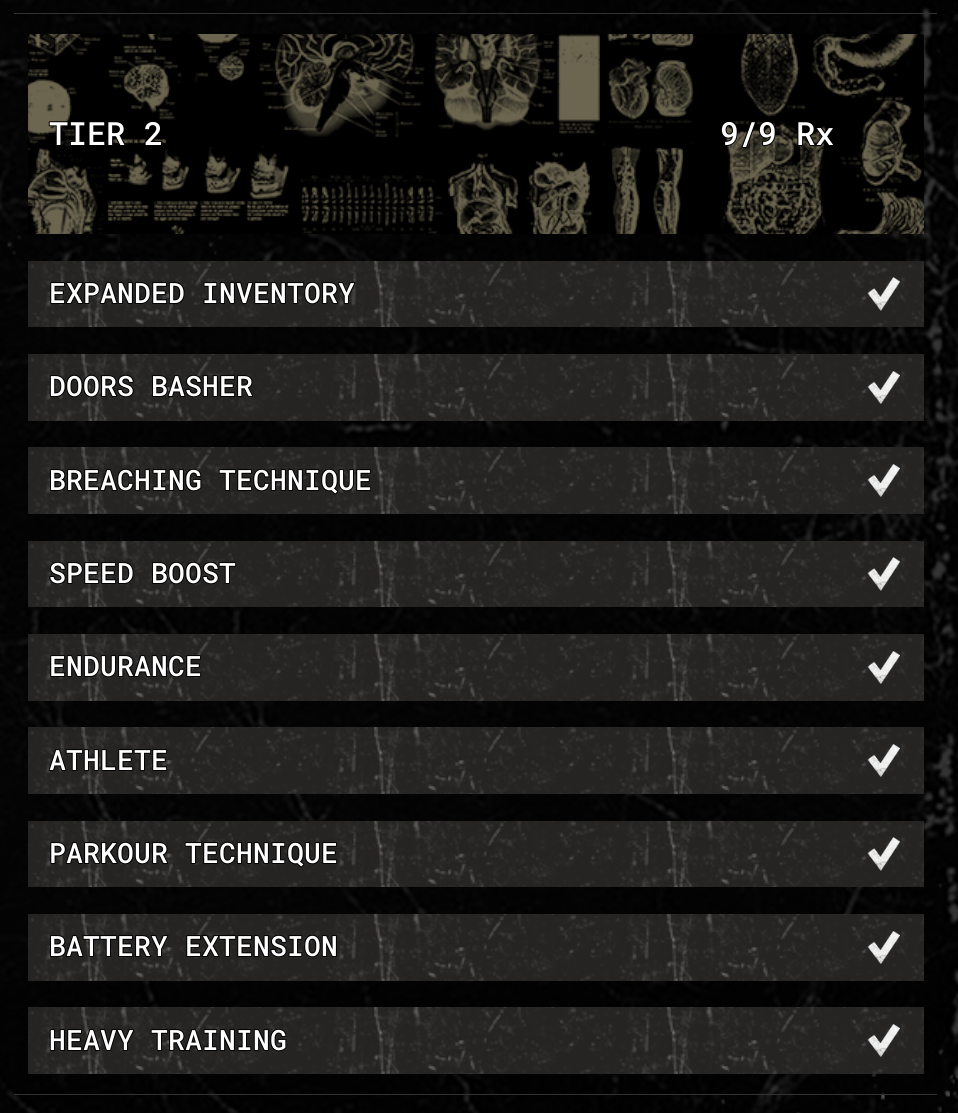
The Tier 2 Prescriptions are:
- EXPANDED INVENTORY – gives you additional inventory slot, for a total of 4 slots,
- DOORS BASHER – when trying to break through locked doors, you need only 2 hits instead of 3 to break them
- BREACHING TECHNIQUE – bashing doesn’t deplete your stamina,
- SPEED BOOST – increases running speed,
- ENDURANCE – reduces stamina consumption while running,
- ATHLETE – increases maximum stamina,
- PARKOUR TECHNIQUE – reduces stamina consumption for jumping and climbing,
- BATTERY EXTENSION – extends night vision battery life,
- HEAVY TRAINING – increases movement speed while carrying large objects.
Amps
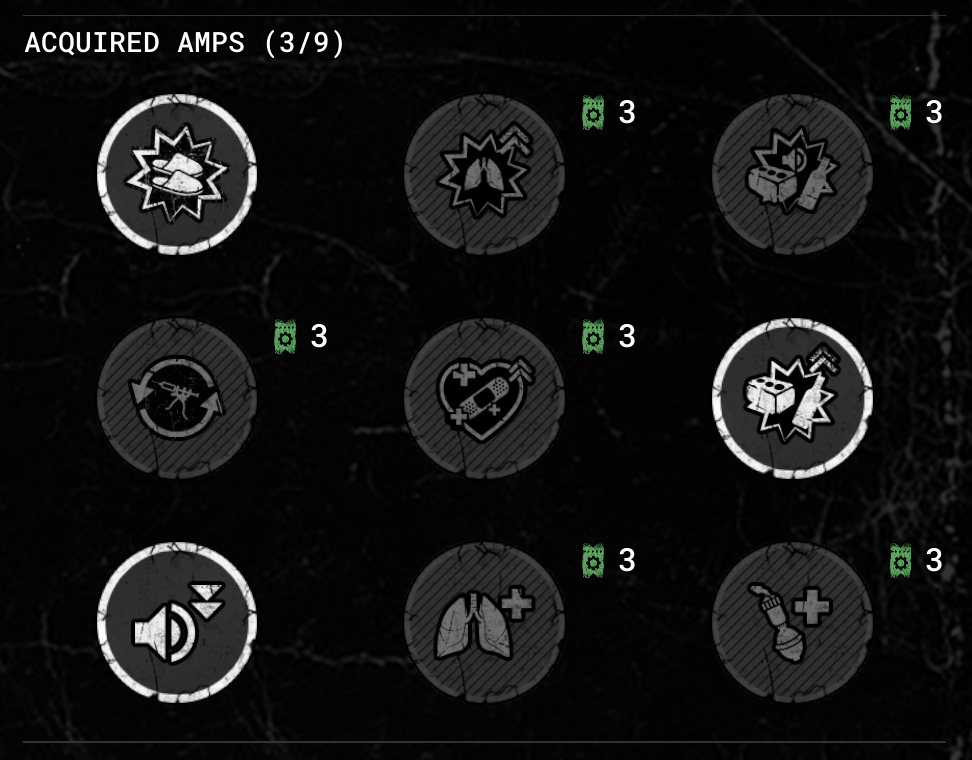
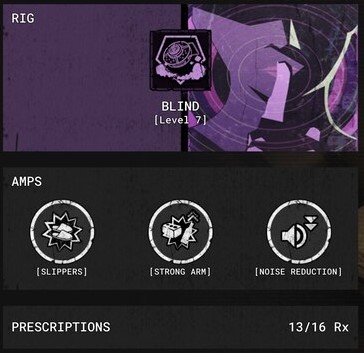
- SLIPPERS (unlocks at 10) – walking on glass is silent,
- HIDE AND BREATHE (unlocks at 12) – in a hiding spot, stamina recovery begins immediatly,
- CACOPHONY (unlocks at 14) – bricks and bottles are noisier, making them better distractions for enemies,
- DOUBLE DOSES (unlocks at 16) – syringes can be used twice,
- HIDE AND HEAL (unlocks at 18) – in a hiding spot, health recovery begins immediatly,
- STRONG ARM (unlocks at 20) – bricks and bottles pack a stronger punch when thrown at an enemy, potentially stunning them for longer,
- NOISE REDUCTION (unlocks at 22) – noise you make when running and opening doors is reduced,
- QUICK ESCAPE (unlocks at 24) – after taking damage, temporarily increases your stamina and speed,
- ANTITOXIN (unlocks at 26) – allows you to regain sanity after some time and psychosis will last half as long.
Leveling Guide
For the first 10 levels, you will basically be able to only upgrade either Rigs or Prescriptions. Starting Therapy Level 10, you will gain access to Amps and new ones will be available every 2 Therapy Levels.
What should your priorities be then?
- Buy your first Rig – I recommend picking either Stun or Blind as your first choices. They will save you in difficult situations, allowing you to manoeuvre around enemies and getting ahead of them. You can also put a couple of points into upgrading them – for both of them reaching EXTENDED DURATION is good choice.
- Focus on getting to Tier 2 Prescriptions – There are some major upgrades available in Tier 2 Prescriptions, so sooner or later you have to buy all Tier 1 Prescriptions. The most important ones in Tier 1 are REGENERATION (can mitigate a whole health bar of damage) and RUN AND SMASH DOORS (essential when running away from the enemies). You will also want to buy KICK TO HELP and LIFE SAVER as soon as possible, otherwise your co-op players will hate you. SLIDE is a nice quality of life upgrade and INSTANT USE can save you a couple of seconds. SELF DEFENSE TECHNIQUE is pretty situational and usually you should rely on your fellow Reagents to help you out rather than using Bottle or Brick.
- Get stamina Prescriptions from Tier 2 – running away from enemies is the essential skill in Outlast Trials. Unfortunately, as you will experience very fast, the base stamina of the Reagent is quite underwhelming. That’s why Prescriptions like ENDURANCE and ATHLETE are amazing upgrades you should probably get first when attributing points (no need to get them both at once, you can start with either of them and get the other upgrade later).
- Get Slippers from Dorris and forget about the Amps – honestly most of the Amps are pretty useless. SLIPPERS is a must have as it allows you to bypass one of the mechanics of the game. The next useful Amps are STRONG ARM (it can stun enemies for CRAZY amount of time) and NOISE REDUCTION (you will genuinly be shocked how often you’d have been spotted without this Amp). You could potentially consider taking QUICK ESCAPE to help you out in tricky situations, but it won’t save you if the enemy is able to one shot you (with a DEADLY PRIME ASSET variator).
That’s all we are sharing today in The Outlast Trials Beginner’s Guide, if you have anything to add, please feel free to leave a comment below, you can also read the original article here, all the credits goes to the original author A S S C R A C K
Related Posts:
- The Outlast Trials Amp Guide
- The Outlast Trials How to Remove Intro Videos
- The Outlast Trials How to Fix The Game Does Not Start
- The Outlast Trials Kill The Snitch Map
- The Outlast Trials FPS Capping Tutorial
