For Starfield players who want to have a better gaming performance, this is a guide for increase performance of low specs.
Starfield Upscaler – Replacing FSR2 with DLSS or XeSS
OVERVIEW
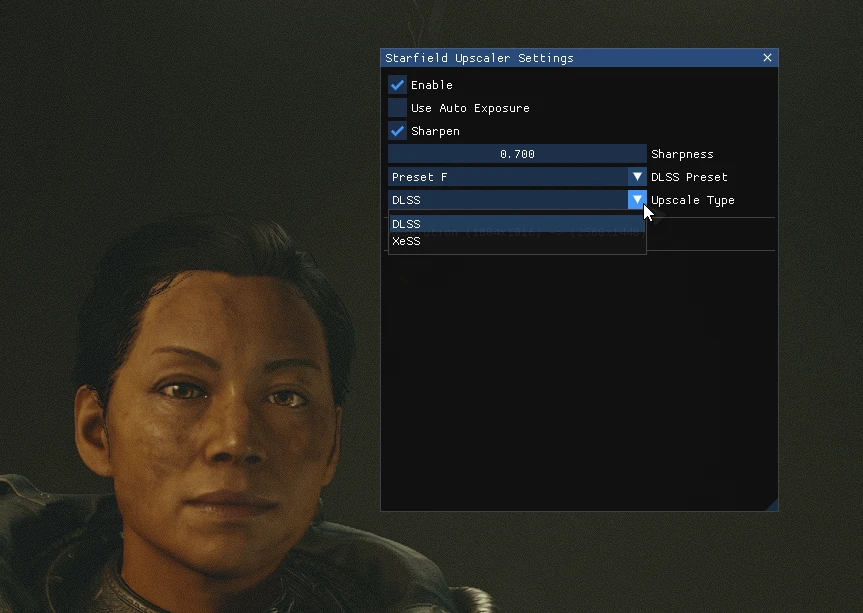
Plugin to replace FSR2 with DLSS/XeSS in Starfield. This version only support DLSS2 and not DLSS3.
REQUIREMENTS
Upscaler Base Plugin
INSTALLATION
Extract this mod to the game’s root folder.
Install Upscaler Base Plugin, place the PDPerfPlugin.dll into mods/UpscalerBasePlugin folder.
You need to download nvngx_dlss.dll or libxess.dll, and place them into mods/UpscalerBasePlugin folder. Check UpscalerBasePlugin’s description.
I have to repeat that the nvngx_dlss.dll and PDPerPlugin.dll must be both in the mods/UpscalerBasePlugin folder.
Press END in the game to open the menu for the upscaler, and you can select DLSS or XeSS.
You need to turn on FSR2 in the game’s settings, cuz this mod replaces FSR2 with DLSS/XeSS.
There’s no quality levels anymore, you simply change the render scaling ratio in the game’s settings.
Starfield Performance Optimizations

DESCRIPTION
STARFIELD GAME OPTIMISATIONS!
Has your CPU and GPU had enough?
Do you feel like fps is just too freaking low even for a bethesda game?
Well then, I’ll give you a solution… or multiple 😉
Simply exchanges the values for the original options
E.g. Ultra is now Ultra with Optimizations
REMEMBER: You must switch between your new installed options for this to take effect, e.g. go between low and ultra
Comparisons:
NO FSR2:
https://imgsli.com/MjA0OTI4
FSR2:
https://imgsli.com/MjA0OTI2
DONATIONS – KO-FI
Ko-Fi:
https://ko-fi.com/enraged
StarUI Inventory
StarUI – Inventory
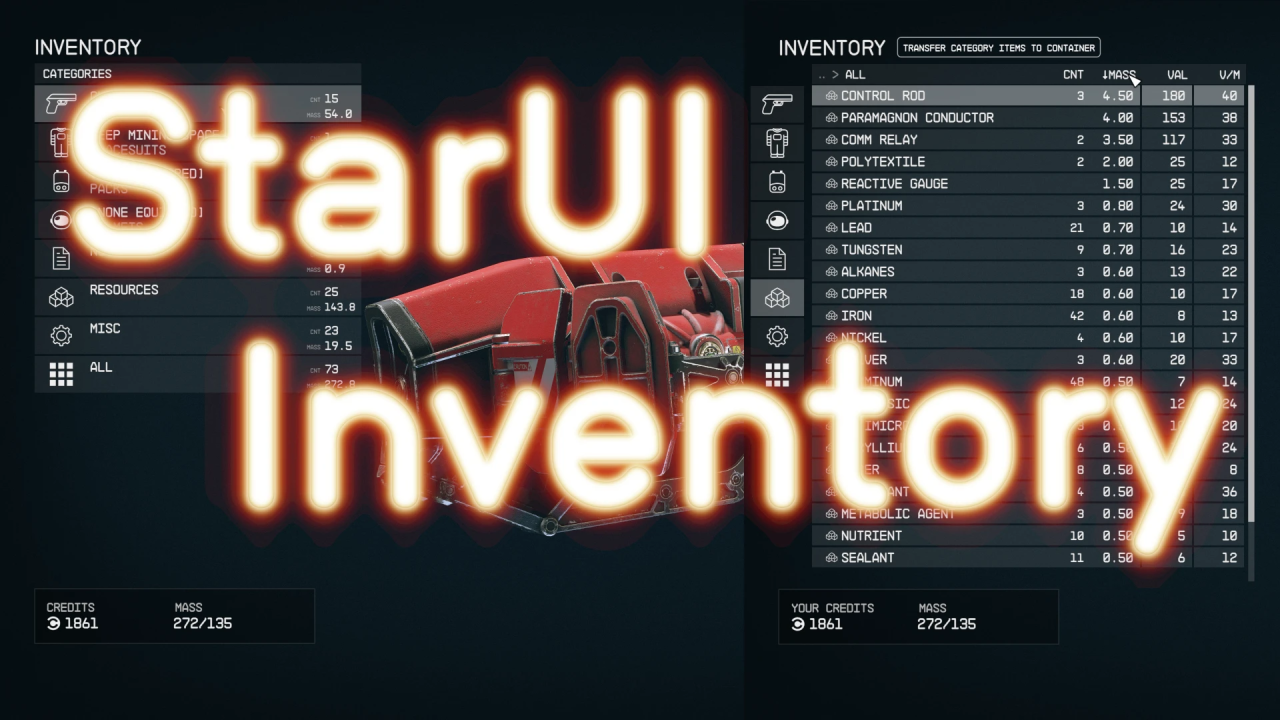
StarUI Inventory improves all inventory screens for use on a PC. Compact display style. More details in sortable columns. Item tag icons. Category and subcategories as left sidebar. Many quality of life features!
Features
Much compacter overview of category list and item list
Properties like mass, value, value/mass, mass of stack, value of stack, damage, DPS, damage resistance, ammo type, ammo rounds, weapon type, item rarity and many more are available as column. Only a few are on by default – add as much as you like via INI!
Sort the list to any of the columns by simply clicking on the column header (toggle asc/desc by another click)
New special inventory-lookup column OWNED/SHIP/CARGO – See how many items you already have in your backpack/ship when buying or transferring.
You can temporarily add inactive columns to the interface (lasts until you leave the inventory screen)
You can fold in in the additional columns to take a look at your item in 3D
Category icons before the item name, so you can directly see what a item is
Automatic tagging and sub-categorizing of most important items to further filter your item list down
Show all inventories in the bottom panel, including mass and an indicator in which direction you are currently transferring
Show category summarized mass
List navigation keys Page-Up, Page-Down, Home and End for fast navigation
Mass-transfer of a single category from/to container, from/to ship or buy/sell for trading! (Includes options to skip equipped, favorites and specific items)
Press CTRL or SHIFT key and click to directly transfer/buy/sell one item or all items – without quantity popup!
Bigger scrollbar, so it’s easier to grab it.
Change the font or font size (If you don’t like the ALL UPPERCASE style. I recommend font number 3!)
Configurable mouse wheel scroll amount of lists
Option to make <TAB> go directly back to the game instead of the character screen.
Option to disable the starting and ending animation of inventories
Multi-language ready with easy translate-able files in the standard format
Option to show the FormID of an item in the item card in inventory.
Increases the interface framerate to 60 fps. Optional files for 30fps and 120fps are available in the installer or folder Optional for manual installation.
Has no plugins and no quests – Absolutely safe to install and uninstall at any time!
Doesn’t affect the possibility to get achievement
Works with Steam and Game Pass (X-Box) version
You can configure all options in the Data\Interface\StarUI Inventory.ini. (Will move to MCM as soon as one is available 🙂 )
Installation
Enable Archive Invalidation (INI settings)
Easiest way: Use BethINI to comfortably set the value (called Load Loose Files in the GUI)
Or: See this detailed Howto: Archive Invalidation to set the INI values with Windows tools.
Install mod files
Simply install the mod via your mod manager (Vortex, Mod Organizer 2 beta, …)
Or: Alternate manual install: Copy the folder Interface\ from the zip into your Starfield\Data\ folder (where the ba2 files are) – ignore folders fomod\ and Optional\
For some people that folder won’t work, copy the files to your Documents\My Games\Starfield\Data\ folder in that case (create the Data\ folder if it doesn’t exist there yet)
To install the 30fps or 120fps version: After doing the above steps copy the files from the appropriate sub-folder in Optional\ and overwrite the existing ones.
Tip: If you are more the visual type, take a look at this installation video made by Kaykrisify:
How To Install: #Starfield StarUI Inventory Mod (UPDATED VERSION)
Configuration
Everything can be controlled in the INI file Data\Interface\StarUI Inventory.ini.
The file is completely commented, so you will find your setting pretty quick!
Spoiler: Show
Compatibility with other interface mods
Most interface mods have no conflicting files, so those should be absolutely compatible. The following mods have conflicts or are worthy to note:
Spoiler: Show
Credits
Bethesda for making another great RPG!
Collective Modding discord – for morale support, testing, ideas and more! (Check it out!)
The xEdit-Team for their great continues work (Hopefulyl there will be a SFEdit soon!)
The NexusMods community
Starfield Script Extender (SFSE)
Starfield Script Extender (SFSE) is a tool adding additional scripting capabilities and functionality to the game.
Once installed, the game must be launched via sfse_loader.exe.
Compatiblity: SFSE supports the release of Starfield on Steam. Other stores (Windows Store/Game Pass) are not supported.
[]
1. Copy the dll and exe files in to your Starfield folder. This is usually C:\Program Files\Steam\SteamApps\common\Starfield\. Do not put it in your Data folder.
2. Ignore the src folder. It is there for programmers only.
3. Make sure Steam is running, then launch the game by running sfse_loader.exe.
Cleanfield – A No-Intro Videos and Clean Menu Fix
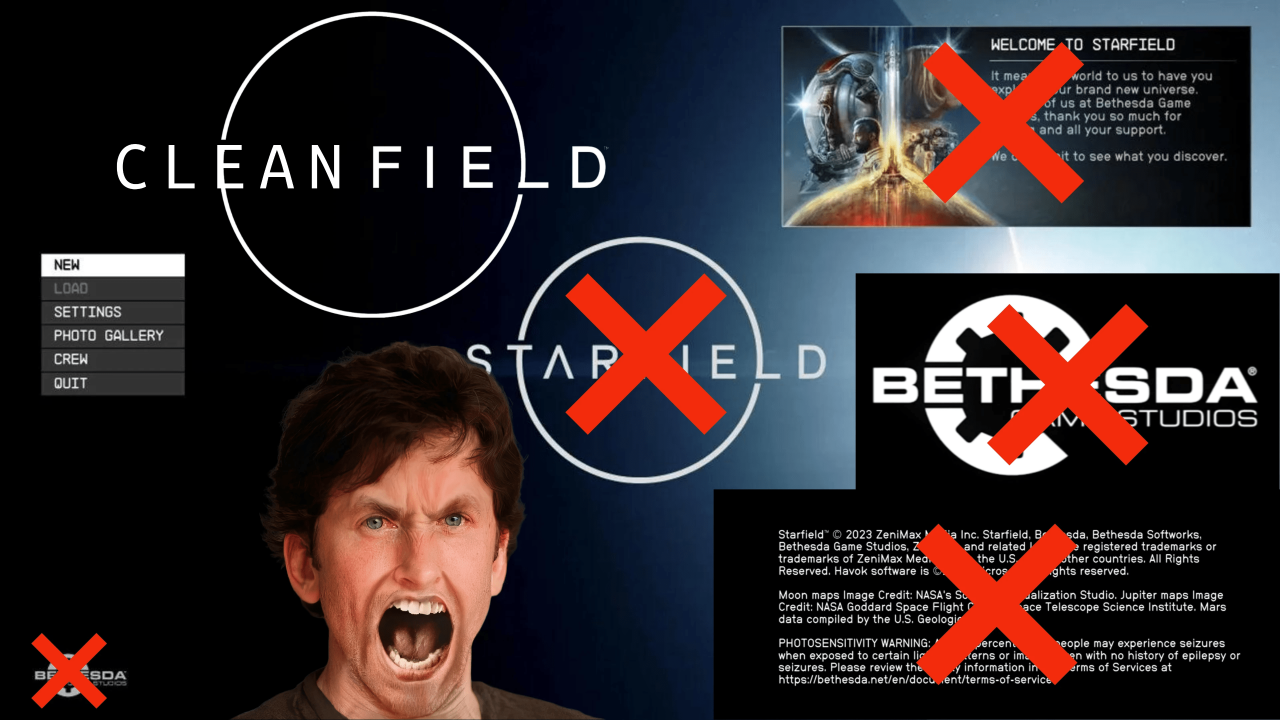
Cleanfield:
– No Epilepsy & Seizure Warning
– No Bethesda Logo Video
– No Bethesda Logo
– No Message of the Day (Optional)
– No Starfield Logo (Optional)
– 30, 60 and 120 FPS
– Vortex & MO2 Support
✦ CLEANFIELD
by Gametism
✦ DESCRIPTION
A No-Intro Videos & Clean Menu Fix
✦ INSTALLATION
1. Download and extract files (standard method):
Copy “StarfieldCustom.ini” to the “Documents\My Games\Starfield” folder
OR
Add the necessary lines to your existing “StarfieldCustom.ini”
Inside the ZIP there is a folder called Options. This folder has 4 options to choose from:
Keep MOTD
Keep MOTD and Starfield Logo
Keep Starfield Logo
Remove Everything
Inside each of these options, there are 3 folders : 30 FPS, 60 FPS and 120 FPS and inside each of these folders you’ll find an “Interface” folder.
Pick one and unpack the “Interface” folder to:
Steam-Version: X\Steam\steamapps\common\Starfield\Data
Microsoft-Store-Version: X\XboxGames\Starfield\Content\Data
For some users it also seems to help to copy the “Interface” folder to: “Documents\My Games\Starfield\Data”
There is conflicting information out there about the process Game Pass users, please see comments for discussion, there are 2 or 3 solutions floating around that seem to work for some people.
2. Configure your INI to load loose files:
In the same directory you extracted or moved files to in the previous step, you may find a file named StarfieldCustom.ini. If this file does not exist, you must create it using a text editor. Add the following lines to this file:
[Archive]
bInvalidateOlderFiles=1
sResourceDataDirsFinal=
[General]
SIntroSequence=
uMainMenuDelayBeforeAllowSkip=0
A lot of people are having trouble with this file, so something you can also try is adding bInvalidateOlderFiles=1 directly to the Starfield.ini that is present in the same folder as the EXE. Add it under [Archive]
NOTE: Make sure Windows Explorer file extensions are turned on, so you can actually rename the file to StarfieldCustom.ini instead of StarfieldCustom.ini.txt! HowTo
NOTE: Make sure there are no spaces, tabs, or other characters. It should appear exactly as above. If you are having trouble with the INI file, I’ve included an INI file in the download.
Smooth Ship Reticle (120fps Smooth UI)
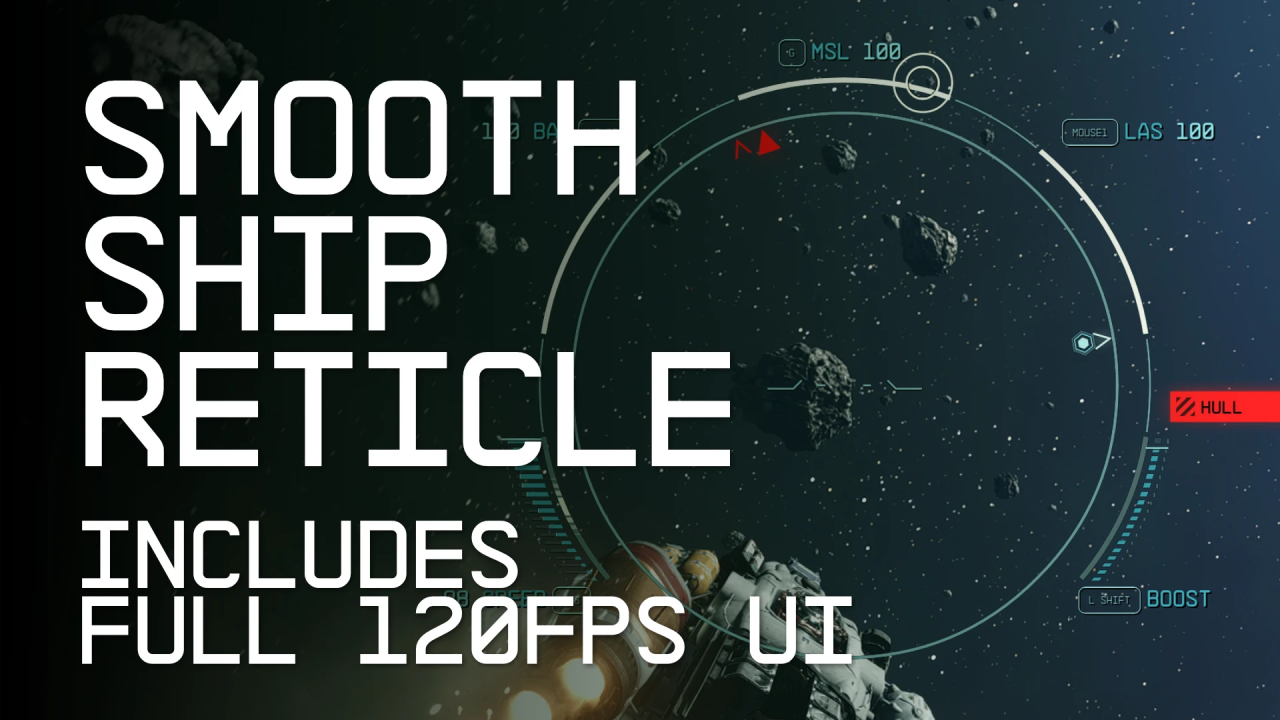
This is a super simple interface tweak that lets the spaceship HUD run at up to 120fps. By default, it’s capped to 30fps which looks pretty choppy when you’re playing at anything higher than that.
I’ve also uploaded a version of this mod that boosts all UI elements to 120fps. There may be animation oddities as some of the files appear to be specifically authored with 30fps timings in mind, but nothing that should break your game.
Installation instructions:
I highly recommend using a mod manager, like Vortex or Mod Organizer 2, to install and manage your mods.
Manual installation instructions:
1) Extract the ‘data’ folder from this mod into your Starfield directory.
2) Enable archive invalidation by adding the following lines to StarfieldCustom.ini:
[Archive]
bInvalidateOlderFiles=1
sResourceDataDirsFinal=
Note: the StarfieldCustom.ini file doesn’t exist by default. You can create it using Notepad (or any other plain text editor). It needs to be placed into:
C:\Users\<your username>\Documents\My Games\Starfield
If you’re having trouble creating this file, try downloading the example StarfieldCustom.ini in the miscellaneous files section and place it into your game folder (the same folder as Starfield.exe) instead.
Manual uninstallation instructions:
1) Delete the file(s) from the Data\Interface folder in your Starfield directory.
Compatibility:
If using the “standard” version, I’m not yet aware of any mods that will conflict.
If using the “full” version, almost any UI related mod will conflict. I recommend simply using this mod as a base and allowing others that add new features to overwrite it.
Important note about achievements:
Bethesda appear to be stricter on achievements with Starfield so using any mods may prevent you from earning them. I recommend using either Baka Achievement Enabler or Achievement Enabler to enable achievements on modded saves.
Achievement Enabler
Allows you to use console commands without worrying about your save becoming modded and achievements getting disabled.Before renaming or replacing any files please make a backup of the original file/s and store this somewhere safe so if anything does go
wrong you can restore your original files and try again.
Please also note if future updates to the game update any of the .dll files
below then these steps will need to be followed again after the update
to reinstall the mod. To be on the safe side the best thing to do would
be to reply this mod after every update to not risk missing out on
achievements.
– Setup (Credits to RennieBoy for writing the instructions)
Before renaming or replacing any files please make a backup of the original file/s and store this somewhere safe so if anything does go
wrong you can restore your original files and try again.
Please also note if future updates to the game update any of the .dll files
below then these steps will need to be followed again after the update
to reinstall the mod. To be on the safe side the best thing to do would
be to reply this mod after every update to not risk missing out on
achievements.
Steam Version Instructions:
1.) On the ASI Loader GitHub page (https://github.com/ThirteenAG/Ultimate-ASI-Loader) scroll down to the “Description” section and download “bink2w64.dll”
2.) Go to your root directory of your Starfield game (steamapp\common\Starfield) and rename the “bink2w64.dll” that is already in there to “bink2w64Hooked.dll”
3.) Now copy over the “bink2w64.dll” downloaded from GitHub (from step 1 above) and place this in the root
folder of your Starfield game (steamapp\common\Starfield)
4.) Create a new folder in the root directory of your Starfield game called “Plugins” your folder structure should look like this (steamapp\common\Starfield\Plugins)
5.) Download the mod from this page and place the “starfield-achievementenabler.asi” file from this mod inside the the “Plugins” folder
6.) That’s it enjoy! By the end of following these steps the below is what
you folder/file structure for this mod should look like:
Starfield\bink2w64.dll (downloaded from GitHub)
Starfield\bink2w64Hooked.dll (your original bink2w64.dll that is already in the folder which you have renamed to bink2w64Hooked.dll)
Starfield\Plugins/starfield-achievementenabler.asi (downloaded from this mod)
UWP Version Instructions:
*Some have advised within their root folder for the Windows version of the game they have the bink2w64.dll and the dinput8.dll, or one or the other. If you have the dinput8.dll in your root folder follow the below. If you have the bink2w64.dll follow the above. If you have both you can follow either but don’t do the this for both!
*The root location for the UWP version of the game is (XboxGames\Starfield\Content)
1.) On the ASI Loader GitHub page (https://github.com/ThirteenAG/Ultimate-ASI-Loader) scroll down to the “Description” section and download “dinput8.dll” (for most this will be x64, however if you have a x86 machine then
download that version (the different version are the blue links to the
right of dinput8.dll).
2.) Go to your root directory of your Starfield game (XboxGames\Starfield\Content) and rename the “dinput8.dll” that is already in there to “wininet.dll”
3.) Now copy over the “dinput8.dll” downloaded from GitHub (from step 1 above) and place this in the root
folder of your Starfield game (XboxGames\Starfield\Content)
4.) Create a new folder in the root directory of your Starfield game called “Plugins” your folder structure should look like this (XboxGames\Starfield\Content\Plugins)
5.) Download the mod from this page and place the “starfield-achievementenabler.asi” file from this mod inside the the “Plugins” folder
6.) That’s it enjoy! By the end of following these steps the below is what
you folder/file structure for this mod should look like:
XboxGames\Starfield\Content\dinput8.dll (downloaded from GitHub)
XboxGames\Starfield\Content\wininet.dll (your original dinput8.dll that is already in the folder which you have renamed to wininet.dll)
XboxGames\Starfield\Content\Plugins\starfield-achievementenabler.asi (downloaded from this mod)
– Credits
ThirteenAG for his ASI Loader (https://github.com/ThirteenAG/Ultimate-ASI-Loader)
Starfield FOV
https://www.nexusmods.com/starfield/mods/99
Welcome Travelers!
Change Your FOV!
in your “Documents/MyGames/Starfield” create a Text file called StarfieldCustom.ini or download the provided one and place in same folder
fFPWorldFOV is for first person 85 is the default
fTPWorldFOV is for third person 70 is the default
here is 100 for both :
[Camera]
fFPWorldFOV=100.0000
fTPWorldFOV=100.0000
To Change your Starship 3rd person FOV , download the file in the optional files section, place it next to the game’s exe (steamapps\common\Starfield) , and add the following to StarfieldCustom.ini

this will set the fov to 90, and move the camera back a tiny amount. to change it, customize the values in ShipFOV.txt
Related Posts:
- Starfield – Removing Pronouns Guide
- Starfield How to Launch SFSE via Steam
- Starfield All Ammo & Grenades Console Batch Command
- Starfield Resource Calculator Guide
- Starfield How to Fix Stuttering, Freezes, Crashes, and FPS Drops
