

I wrote this up because Nivalis Nights hands out quests faster than you can track them, and half of them quietly hinge on dialogue choices that change your relationships, your Lims, or whether a quest chain even continues. What follows covers every quest in the game, sorted alphabetically by whoever gives it, plus a quest index for when you know the name but not the face, and a chain map showing how one job feeds into another.
One honest caveat before you dive in: this guide spoils quest content from start to finish, so if you’d rather meet The Aseptic blind or let a certain noodle-bar handover surprise you, tread carefully. I’ve also leaned into the choice tracking heavily, because the arrow notation marks the replies that leave a trail — a relationship swing, a payout, an item, or a permanent fork. When a reply has no arrow, it means the game logs no listed effect, and I’d rather tell you that than pretend every line matters equally.
If I have time, I’ll continue uploading more screenshots.
Overview
This guide covers every quest in Nivalis Nights — who hands it out, what it asks of you, each objective in order, and the dialogue choices that actually change something. By that I mean relationship swings, money in or out of your pocket, items you pick up or lose, and the forks that decide how a quest ends. I’ve organized all of it by quest giver, with a full quest index for the times you know the quest name but can’t remember whose face to chase.
If you’re the kind of player who resents losing a payout to a throwaway line, the choice tracking is the part I’d pay closest attention to. And if you’re juggling other systems while you grind through these — say a fishing guide for the side content, or an available restaurants tier list when hunger starts cutting into your questing time — those meshes cleanly with what’s below, since most quests are gated by story progress or a prior meeting rather than by how much you’ve invested elsewhere. Between the giver-by-giver sections and the index, you shouldn’t have to guess where a quest lives or what it wants from you next.
About this guide
Every quest in Nivalis Nights is filed here under the character who hands it to you. If I already know who I need to talk to, that’s usually the fastest way in — I just scroll to their name, since the giver sections run in alphabetical order from Aengus onward. When a quest name is stuck in my head but the face behind it isn’t, the Quest index section is the shortcut; I flip there, match the title to its giver, and jump back. Between those two routes, there’s rarely a job I can’t locate in a few seconds.
The part I care most about is the choice tracking. Whenever a reply actually changes something — a relationship swinging toward friend or enemy, Lims moving in or out, an item changing hands, or a quest quietly forking onto a different outcome — you’ll see an arrow next to it. Replies with no arrow are the ones the game logs no listed effect for, so I don’t dress them up as if they matter; they just move the conversation along. I’d rather you trust the arrows I do give you than second-guess every line of dialogue.
And the plainest rule of all: this guide walks through quest content from beginning to end. If you’re the type who wants The Aseptic or a certain handover to stay unspoiled until you hit it live, that’s a fair call — just know that reading ahead here will tell you exactly how the story plays out.
Quest index
When you know the quest name but can’t remember who handed it to you, this is the list I keep open on a second screen. Every quest in the game, sorted alphabetically by title with the giver’s name dropped right beside it — so you can jump straight to the right character section instead of wandering the districts asking around.
| Quest | Quest Giver |
|---|---|
| A Date with Zaffer | Zaffer |
| A Drink to the Past | Lily Nightingale |
| A Hacker’s Guide to Exploring Nivalis | Kai Galosh |
| A Knight in Nivalis | R.M. Alken |
| Acquire Green Reeker | Gladstone |
| An Altar of Ones and Zeros | Magz Zunica |
| Ashwin needs help | Ashwin Chopra |
| Bad Batch | Sky Altra |
| Brooke’s Business Opportunity | Brooke Hazard |
| Business Empire | Agent Teleshko |
| Calling Cale Wyer | Cale Wyer |
| Cast Iron Alibi | Hanz Grundown |
| Chained Melody | Andrea Cellini |
| Clean up! | Banor |
| Comedy Showdown | Deeala |
| CorpSec Investigations | Agent Teleshko |
| CorpSec Narc | Agent Teleshko |
| Crime Scene Decorator | Rollo |
| Curfew | Ava |
| Curzona Penthouse | Mary-Nyx Curzona |
| Dagmar’s Sabotage | Dagmar Fitz |
| Deal with a Devil | Mary-Nyx Curzona |
| Den of Discovery | John Doe |
| Dive Bar Deity | Nola Berg |
| Dotson’s Detective Agency | Dotson |
| Dr Fred’s Drugs | Dr Fred Matombo |
| Extend Storage | Banor |
| Find Salma’s Brother | Salma Smith |
| Finding the Enchiridion | Nellie Al-Zahiri |
| Fix Rosetta | Rosetta |
| Fun in the Sun | Freya Portlet |
| Garnet. Single Dad. Seeks Love. | Garnet |
| Get a Loan | Ava |
| Gladstone’s Rats | Gladstone |
| Good Old Gimble | Hepzibah Gimble |
| Green Thumb | Banor |
| Hide & Seek | Silo Mills |
| Historical Place of Wisdom | Professor Kasey Remo |
| Hygiene Inspector | Cecil Grimes |
| I.O.U. | Calhoun |
| It’s My Birthday! | Ziggy RaSand |
| Level Up! | Cirian Krell |
| Lochlainn’s Pain | Lochlainn McKenna |
| Lost at Sea | Bonaventure |
| Lost Property | Hanz Grundown |
| Lost Time | Pilk Dane |
| Love Den | Mia Jay |
| Lynnphora’s Urn | Lynnphora Adams |
| Ma Gomba’s Mushrooms | Ma Gomba |
| Mala Has Questions | Mala Spinx |
| Memories | Miso Baron |
| More Fridge Space | Banor |
| Movers and Shakers | Milo |
| Nabla’s Home IRL | Nabla the Netphreak |
| Naming Rights | Taylor Hernz |
| Neon for Zaffer | Zaffer |
| Neon Sellout | Mertie Batt |
| Nivalis Grind | Mizzy Weiss |
| Noodle Bar Expansion | Ava |
| Noodle Bar Introduction | Ava |
| Oil Rig Separatists | Delbert Cherry |
| P.I.S.S. | Clancy Pantermino |
| Party Haven | Ziggy RaSand |
| Please Delete My Numbers | Aengus Prince |
| Poisoned Mustard | Banor |
| Project Grapevine | Clem Hortelano |
| Protection Racket | Banor |
| Radio Waves | Silas Rhodes |
| Rats ate the Bread | Banor |
| Recruit Sal | Sal Magundi II |
| Retirement Party | Reehan Scott v.4.51 |
| Rust to Rust | Karel Crabface Jones |
| Seafaring | Salt Pete |
| Seen a Ghost? | Yulia Tan |
| Sell Old Tech | Nabla the Netphreak |
| Silo’s Playhouse | Silo Mills |
| SimBot Shenanigans | Roxi Fynx |
| Slow Revolution | Olive Nek |
| Slumlord | Pilk Dane |
| Snapshot | Elaine Malloy |
| Spartacus’s Doom | Spartacus Doom |
| Stolen Apartment | Sanderson |
| Stranger in Need | Palmer |
| Suck it and See | Ceres Coilson |
| Surrender Old Tech | CorpSec Terminal |
| Thaddeus Retirement | Ava |
| The Aseptic | Ava |
| The Bicameralist | Samual Jaynes |
| The Church of the Binary God | Magz Zunica |
| The Club Rat Kids | Kenzy Voan |
| The Coffee Run | Bou Friday |
| The Critic | Marcelle Denuit |
| The Last of the Roid Droids | Floyd |
| The Lost Art of Anthony G | Finn Amano |
| The Lost Leg | Marius Mitchell |
| The Man Who Murdered Death | Alan Fontus |
| The Measurer | Rosco Foreman |
| The Network | Edison Mattix |
| The Pierreponts | Cassius Pierrepoint IV |
| The Scorpion | Masato Shima |
| The Shipping Forecast | Only-Eyes McGuire |
| The Songs of Fauxter Glambeat | Fauxter Glambeat |
| Therapy Sessions | Alfie Gunfibel |
| Thirst Trap | Mia Jay |
| Tongue Twister | Sal Magundi II |
| Trade Talks | Botan Noss |
| Trouble in Announcer Land | Kai Reston |
| Truth Be Told | John Doe |
| Underground Fish Market | Boardwalk Ady |
| Vanishing Act | Professor Kasey Remo |
| What Did Eldridge Do? | Eldridge-Uchuu Nyx Curzona |
| When the Chips are down | Harper Osiris |
| Where is Ava? | Ava |
A few of these names surface under more than one giver’s banner — Ava in particular runs several chains — but I’ve listed each one exactly as it appears in your quest log so nothing gets lost in translation. If a title here matches something you’re stuck on, use the giver’s name to find their section and work from there; the entry will tell you what the quest needs before you can even start it.
Aengus Prince
From here on, the guide runs giver by giver, alphabetically, and each character section opens with a short note before their quests get their own headings underneath. Under any given quest you’ll see the same three blocks repeat: Requires, so you know what has to be true before the job is even offered; Objectives, the ordered list of what the quest log is actually asking you to do; and Dialogue choices, where I lay out the replies and what each one changes. I built it this way because when I’m mid-quest the last thing I want is to scroll past a wall of prose to find the one line that tells me whether this conversation is a trap.
Read the arrows closely from this point on. They’re the whole reason I bothered writing the choice blocks out — a single reply can move a relationship, hand you Lims, cost you an item, or quietly close a branch you were counting on later.
Please Delete My Numbers
Aengus Prince is sitting on thousands of people’s DNA sequences, and that alone made me want to see this one through to the end. As far as I can tell, he doesn’t fully grasp how dangerous that kind of data hoard is — which is exactly the tension the quest leans on. Before you can even start, though, there are two gates: you need to have met Marius Mitchell first, and you need to have finished the introduction. If you’ve been barreling through the early game without stopping to talk to people, that first requirement is the one that tends to trip players up, so double-check it before you go knocking on Aengus’s door.
Objectives
There are three steps here, and the middle one is where the actual detective work lives.
- Speak to Aengus — the whole point is to see whether you can convince him to delete his stored DNA profiles.
- Get the Glaze Recipe from Marius — you’re hunting down the secret ingredient hiding inside Marius’s brisket glaze.
- Tell Aengus about HuffHuff — this is where you learn the secret ingredient is HuffHuff, and then decide whether you’re actually going to help Aengus with it.
The third objective is the one that carries weight. Everything before it is talking and gathering; the moment you report back, you’re picking a side, even if it doesn’t feel like it in the moment.
Dialogue Choices
When you deliver the secret ingredient, Aengus presses you on the details, and there’s a fork that decides whether you lie to him or tell him the truth. I’d read the arrows before clicking, because one of these quietly dings your Corp morality.
First, he asks you to just spit it out — Quick! Out with it! — and the two replies split cleanly:
- (Lie) It’s best when it’s blue, if it’s turned black it’s no good. Blue is best. — this one doesn’t move anything visible, but it does keep him in the dark about what the ingredient actually does.
- It needs to be black. If it’s turned blue it will make you very ill. — this tells Aengus the truth about HuffHuff, and the game logs it as you being honest with him.
Then comes the follow-up, where Aengus reacts with genuine surprise that anyone would be interested in the slop he makes — What?! Really? He’s interested in the slop I make? Why would that be? — and here’s where the morality swing lives:
- (Lie) He just wanted to make sure he didn’t step on your toes if he worked on his own version. — this one costs you Corp morality -1. Small, but it’s a written, permanent nudge, and I’d avoid it if you’re trying to keep that stat healthy.
- I think he’s worried about you taking his business and wants to know the secret ingredient. — the straightforward, no-penalty read on the situation.
My honest take: the truth-telling route on the first fork and the non-lying reply on the second are the two picks that keep your hands clean, and together they let the conversation play out without a morality hit. If you do choose to lie twice, you’re not locking yourself out of anything obvious in this section — but that Corp morality -1 is real, and if you’re tracking that number for later quests, this is an easy one to forget you took.
Agent Teleshko: Business Empire (1/2)
Agent Teleshko‘s Business Empire quest is the longest thing in this section and the one I’d set aside real time for. Before you can even start it, you need to have met Marius Mitchell and wrapped up, or at least pushed forward, the intro sequence. If Teleshko isn’t offering it yet, that’s usually the gate — go do a little more of the opening story and come back.
Once it’s live, the first half sends you around the city doing errands that all quietly feed into Teleshko‘s larger play. I’ll walk the objectives in order, then get into the dialogue choices, because this stretch has one of the denser choice blocks in the game and a few of the replies carry real weight down the line.
- Speak to Agent Teleshko to pick up the job.
- Follow the Brooke Hazard thread — this is the part that overlaps with her own storyline, so if you’ve been working her content you’ll recognise the ground.
- Sort out the property rentals.
- Check in with Banor.
- Track down Lily Nightingale.
The Brooke Hazard arc is the one I’d slow down on. It’s easy to blast through the objectives and miss that Teleshko is watching how you handle her — Brooke isn’t just a name on a checklist here. The property rentals and the Banor step are more mechanical, but keep a note of what you promise each person, because the next part of this quest leans on it.
Now the dialogue choices. There are a lot of them, and this is where the arrow notation earns its keep — replies with arrows leave a mark, replies without don’t. Work through them paying attention to which ones swing your relationship with Teleshko, because by the time you hit the second half of Business Empire you’ll be glad you kept track.
Find Lily Nightingale before you consider this half done. She’s the last piece of the chain on this side, and the conversation opener for the back half of the quest picks up right where leaving her ends. If you want my honest read: this half is mostly setup, but the setup is load-bearing — skim it and the part-two choices land on ground you didn’t prepare.
Business Empire
This is the one that turns you from a person with a bar into a landlord with a portfolio. The prerequisites are strict, so don’t come knocking early: you need to be on Day 4 or later, it has to be after 10:00, you need the introduction finished, and you need to have met Agent Teleshko at least once before. Miss any of those and the quest simply won’t fire for you.
What follows is the full objective chain and every dialogue branch attached to it. I’m keeping the numbered objectives exactly as the game words them, because the numbering itself is a useful progress tracker — this quest is long enough that losing your place is a real risk.
Objectives
- Speak to Agent Teleshko — Ava tells you Agent Teleshko reported you for vagrancy. Go talk to him and find out why.
- Meet Brooke Hazard — Follow Teleshko’s lead and speak to Brooke about his business license.
- Report back to Agent Teleshko — Tell Teleshko what Brooke said (or keep it to yourself).
- Tell Brooke about his revoked CLICC — Break the news to Brooke Hazard that his Tier 1 business license has been transferred to you.
- Rent the Boat Hangar in the Stacks — Time to expand. Rent a new property in the Stacks. The Boat Hangar is a cozy place at the pier.
- Rent the Sake Bar in Central Canyon — The Sake Bar in Central Canyon has a 10/10 view down the canyon, with public transportation close by.
- Rent the Yummy Canteen in Industrial District — The Yummy Canteen is a spacious venue with potential.
- Rent Yakitori in Helix Monumental — Helix Monumental is an impressive structure packed with little stores and small restaurants. You can rent one of the Yakitori chain spots there and make it your own.
- Bring Banor on Board — Speak to Banor and bring him onboard to run your growing business ventures.
- Teleshko has a new lead — Agent Teleshko wants to speak again.
- Speak to Lily Nightingale — Follow up on Teleshko’s tip about a bar in Lowtown.
- Collect Liquid Nitrogen
- Collect Vodka
- Collect Cherries
- Bring Cocktail Ingredients to Lily — Bring the collected cocktail ingredients to Lily Nightingale.
- Rent the Toshigami at Seaside Boardwalk — Time to expand! The Toshigami at Seaside Boardwalk is a spacious venue that has seen better days, but it’s a great spot close to the sea.
- Rent the Fusion Point in Eastern Residential — Fusion Point sits right in the heart of Eastern Residential, with great views and close public transportation.
- Rent the Honeycomb Club at Hive Mall — Honeycomb is a famous night club at the Hive Mall, currently looking for a new manager.
- Get a Tier 4 License — The ultimate challenge: gain a Tier 4 business license. Who do you have to bribe to get one?
- Rent the Fly In (Spire) — The prestigious Fly In at the Spire is looking for new management. Your chance to rise up in the hospitality business.
- Rent the Obsidian Noir (Metro Hub) — The Obsidian Noir at Metro Hub is the only venue with an indoor pool. It’s tucked away under the train lines, but it’s the largest venue in the LUZ.
One thing I’d flag: the three ingredient pickups (steps 12–14) look trivial on the list, but they gate the whole Lily Nightingale handoff, so don’t move on to the venue rentals under the impression you can circle back. I’d grab all three before touching step 15.
Dialogue choices
This quest carries a heavy choice load, and a lot of it loops back to the same two questions — whether you’ll put Frosted Murders on your menu, and how you respond to Teleshko’s “but I’m happy where I am” beat. I’ve grouped every branch below exactly as the source presents it, so you can scan for the moment you’re stuck on.
Will you put Frosted Murders on your menu?
- Happy to keep a tradition alive. — Friend +1 (Noe Stalgia); Corp morality -1
- No. I run my establishments my way. — Business +1 (Noe Stalgia); Corp morality +1
“I’m glad to hear it. Well, so long to a life behind the bar. There. The license is yours.”
- I’ll use it wisely. — Corp morality -1; Friend +1 (Noe Stalgia)
- I’ll make my fortune with this. — Corp morality +1; Friend -1 (Noe Stalgia)
“I am pleased to see that my judgement of your enterprising character was correct.”
- I’m only doing this LICCY business because I have no choice. — Business -1 (Agent Teleshko)
- Business is business, right? — Business +1 (Agent Teleshko)
“Do not call it ‘LICCY Business’. It is a License to Increase Capital through Commerce. And now that you possess a Grade 1, it is time to think about your next move.”
- But I’m happy where I am. — Enemy +1 (Agent Teleshko); Corp morality -1
- I’m all ears, Agent T. — Romance +1 (Agent Teleshko); Corp morality +1
“Hmm. There is a bar in Lowtown that has been on the decline for some time. I believe the owner could be persuaded to give up a Tier 2 license.”
- Exciting. — Business +1 (Agent Teleshko)
- Why would they do that?
“Business is life. And now that you possess a Tier 1 License to Increase Capital through Commerce, it is time to start planning your next move.”
- But I’m happy where I am. — Enemy +1 (Agent Teleshko); Corp morality -1
- I’m all ears, Agent T. — Romance +1 (Agent Teleshko); Corp morality +1
Note that the “I’m happy where I am” reply shows up twice against near-identical Teleshko lines. Both times it lands you an Enemy point and a Corp morality dip, so this is one of those responses I’d avoid entirely unless you’re deliberately steering Teleshko hostile.
“What? Oh, that was just to get your attention. To make sure I didn’t have to tolerate your tardiness.”
- What do you want?
- What is wrong with you?! — Business -1 (Agent Teleshko)
“You have to try. Failure is its own punishment. But if you pass up opportunities for growth, like turn down LICCS, you’ll have CorpSec to answer to.”
- But I don’t care about business. — Corp morality -1
- I’m not sure if I want to run more businesses.
- I can’t wait to expand my business empire. — Corp morality +1
“Well look, I’m not a fan of yours. Nor a friend. We aren’t close. Nor will we ever be. In fact, I don’t even wish you well.”
- I feel the same about you. — Business +1 (Agent Teleshko)
- I… actually really like it when you’re rude to me. — Romance +1 (Agent Teleshko)
- Alright. I get it.
“Yes, well… I have another business in mind. And I don’t think you’re… a complete lost cause. And that’s more than I can say for most of the people we’re trapped here with.”
- I’m interested. — Business +1 (Agent Teleshko)
- I’m not interested. — Business -1 (Agent Teleshko)
“Look, this never happened before, but, for the first time, one of my businesses didn’t fly. You know why?”
- You have no idea what you’re doing? — Friend -1 (Brooke Hazard)
- Bad luck?
“This is what he meant when he said he would ‘fix it’? He’s giving you my CLICC?!”
- I’m just doing what he told me to.
- Sorry man, it’s my permit now. — Enemy +1 (Brooke Hazard); Corp morality +1
“My hacked license will show the profit from Brooke’s Bodega. You keep the license, but I keep the credit score. Everybody wins, and we pull one over on old Agent Beef!”
- That doesn’t sound legal.
- I’m not sure about this.
- Alright. I’m in. — Business +1 (Brooke Hazard)
“WAS my bar. The Lowtown Lily. It doesn’t look it, but once upon a time this place was one big party.”
- Tell me more. — Friend +1 (Noe Stalgia)
- … Really? — Friend -1 (Noe Stalgia)
“Oh, I won’t give my license to just anyone. They would have to be the right kind of person. Scrappy, yet soulful. Eager, yet poised…”
- I am ALL of those things. — Business +1 (Noe Stalgia)
- I could be… some of those things. — Business -1 (Noe Stalgia)
“With what, sweetie? The last time I checked, you couldn’t pay rent with shimmering wit and a flawless vintage ensemble.”
- All good things come to an end. — Friend -1 (Noe Stalgia)
- I’m sorry. — Friend +1 (Noe Stalgia)
“Well that depends on your response to my next question. Did Brooke attempt to involve you in any schemes or chicanery?”
- I don’t know what you mean.
- Some chicanery… — Friend +1 (Agent Teleshko)
- No, not at all. — Friend -1 (Agent Teleshko)
That last one is worth pausing on before you answer. Admitting to “some chicanery” actually earns you a Friend point with Teleshko, while a flat denial costs you one — which tells you plenty about how he likes his information delivered. If you’ve been treating him as an antagonist, this branch is a quiet reminder that he rewards candor.
Agent Teleshko: Business Empire (2/2)
This is where the Business Empire chain closes out, and it’s the point where everything you set up in the first half finally pays off. You’re back with Agent Teleshko to finish the job, and I’d go in rested for this one — the remaining objectives are a mix of license work, a delivery run, and one confrontation that I genuinely didn’t see coming the first time.
The objectives you still need to knock out are the Tier 4 license, Fly In, and Obsidian Noir. If you’ve been working the rental and property side up to this point, these should slot in naturally — just don’t rush the license step, since it gates the rest of the thread and it’s the one part that trips people up when they try to skip ahead.
Once the business side is wrapped, Teleshko turns on you with a line that caught me completely off guard:
Yes, very good. Only one small problem… I don’t believe you.
I remember reading that and immediately scanning back through the earlier dialogue, half-convinced I’d missed a tell. The reply you pick here actually matters, and the two options pull in opposite directions:
- It’s true. → Enemy +1 (Agent Teleshko)
- Yeah, it was all a scam. He was trying to trick you. No need to thank me.
Admitting it’s true flips Teleshko straight to an enemy, which is a steep cost for an honest answer. The second reply is the one I’d sit with for a second — it’s blunt and a little flippant, but it dodges the penalty. If you’ve been building him up as an ally through the earlier chicanery branch, choosing honesty here undoes that progress in a single line, so pick with your eyes open.
After that confrontation settles, there’s a short follow-up exchange where Teleshko asks What do you need, boss? and you answer with one of three replies:
- Ava suggested you could help me with running multiple businesses.
- I need your help.
- Time to earn your keep. → Friend -1 (Banor)
Only the last option carries a listed consequence, and it costs you a Friend point with Banor — which stings if you’ve been leaning on him for the fridge, storage, and greenhouse work elsewhere in his story. The first two replies are safe, so if you want to keep Banor sweet, answer plainly and skip the sharp one.
Agent Teleshko: CorpSec Investigations
This is the job where Teleshko finally puts me to work as an informant, and true to her style, there’s a heavy friend-or-foe swing attached to how it wraps. If you’ve been building a relationship with her, this quest is the one that tells you whether it’s paying off — or quietly burning it down.
Before you can even take the assignment, you need to have some groundwork in place with the people around her world. You’ll want to have met Dotson, Danny Danetti, and Zaffer before this quest becomes available. Those three names matter — Teleshko is sending you out to gather dirt, and the folks you’re watching are tied directly into that circle.
Objectives
There are only two objectives to the quest itself, but the weight is entirely in how you finish it. I’d read the dialogue block carefully here — the report you give at the end is what decides whether Teleshko counts you as a friend or flips you to an enemy.
- Complete the objectives for Agent Teleshko.
- Submit your report to Agent Teleshko.
Reporting the Findings
This is the moment the whole quest has been building toward. When you hand in your report, the reply you choose leaves a permanent mark on your standing with Teleshko. Going into it, I’d double-check which way you want that relationship to go, because there’s no undo here.
Whichever path you pick, understand it’s logging a friend or enemy flag on Teleshko that other quests in her thread may lean on. If she’s been a useful contact so far, that’s worth weighing before you answer.
And that’s the investigation arc done — short, but one of the sharper forks in the Teleshko line thanks to how cleanly it flips your standing with her.
CorpSec Investigations
CorpSec’s Agent Teleshko gets his own surveillance job here, and the whole thing is framed as him watching you just as much as you’re watching everyone else. I’d keep that in mind while you work through it, because the questions he asks are less about facts and more about where your loyalties sit.
The quest opens up during the day, once you’re on Day 3 or later. Before any of it triggers, you need to have already met Dotson, Danny Danetti, and Zaffer — Teleshko wants you to size these three up and confirm whatever suspicions he’s nursing about them.
Objectives
- Get to know Dotson, Danny Danetti and Zaffer — Agent Teleshko asked you to get to know Dotson, Danny Danetti and Zaffer to confirm his suspicions about them.
- Report your Findings to Agent Teleshko — Time to go back to Agent Teleshko and report your findings.
That’s the whole quest — two objectives, both straightforward, and all the weight sits in the conversation when you return. The reporting part is where I’d slow down, because a couple of these answers cost you standing with Teleshko directly.
Dialogue Choices
He opens by asking for your reports on the suspects.
- Ok. — no effects logged.
- I’m not helping you. → Friend -1 (Agent Teleshko).
Then he presses on Danny specifically: your friend is far too chummy with his business rivals, and rivalry, in his view, should be fierce and destructive rather than friendly. So what did you find out?
- Business must show no mercy. He IS helping other businesses. → Friend +1 (Agent Teleshko).
- That sounds a bit aggressive. I’m not sure if he is doing anything wrong. — no effects logged.
- I could seek your destruction. And I’m not telling you anything about Danny. → Enemy +1 (Agent Teleshko).
That third option is the one I’d think hard about. It flatly flips you to Enemy +1 with Teleshko, and given how much of her thread leans on your standing with her, burning that bridge here isn’t cheap. If you’d rather keep her cordial, the first reply is the safer pick.
After that he brushes the topic aside — never mind that — and gives you the same pair of responses to close on:
- I’ll see what I can do. → Friend +1 (Agent Teleshko).
- Do your own dirty work. → Friend -1 (Agent Teleshko).
So you get two separate shots at a friend gain, and the margin between walking away friendly or making an enemy comes down to a handful of lines. If you’ve been leaning on Teleshko as a contact, the pattern I’d follow is simple: confirm the suspicion, don’t moralize, and don’t threaten her. Do that and you leave the reports with a clean friend bump instead of a standing hit the rest of her quests may reference later.
Agent Teleshko: CorpSec Narc
Reporting the clinic isn’t just a quick tip-off — it’s a direct betrayal of someone who trusted you, and the game doesn’t soften it. If you’ve been building any kind of goodwill with Dr Fred, this quest spends it, so I’d make sure you actually want what Teleshko is offering before you walk into it.
The objective itself is uncomplicated: turn in Dr Fred’s clinic to Agent Teleshko. Where it gets sharp is the choice block afterward, because your replies swing both your standing with Teleshko and your Corp morality. I mapped the forks so you know exactly which line does what.
| Dialogue Choice | Effect |
|---|---|
| Report Dr Fred’s clinic to Agent Teleshko | Business increase with Teleshko, Romance increase with Teleshko, Corp morality shift |
That combination — a relationship bump plus a Corp morality swing — tells you what kind of quest this is. You’re trading a person for professional standing, and the arrow notation logs it as a meaningful move rather than a throwaway line. I’d take a beat before confirming, because once the report’s in, there’s no un-reporting it, and if you’re chasing a friendship or romance arc with Teleshko, this is one of the cleaner ways to push it forward.
What I’d watch for is the morality ripple. A Corp morality hit doesn’t always show its face immediately, but other quests in the chain can gate on it — Dr Fred’s own Dr Fred’s Drugs job, for instance, asks for a Corp morality above 10. So if you’re running Teleshko’s thread and Fred’s thread side by side, the order you do them in genuinely matters, and selling Fred out first could cost you a job you haven’t finished yet.
CorpSec Narc
This one sits in your quest log as the direct counterweight to Dr Fred’s Drugs, and I’ll be straight with you: it’s a betrayal job. You’re walking into Agent Teleshko‘s office to hand over Dr Fred‘s illegal clinic — the same clinic whose thread you might still be working through. There’s a reward in it, but you’re trading a person’s safety for it, and the game doesn’t soften that.
The only objective here is straightforward: report to Agent Teleshko and tell her about Dr Fred‘s clinic. Everything that matters happens in the conversation, so I’d slow down and read each line before you commit — the replies pull Corp morality and your standing with Teleshko in opposite directions, and there’s no undo.
Reporting Dr Fred’s Clinic
The dialogue runs as a series of pointed prompts from Teleshko, with one arrow-marked reply per exchange. I’ve laid out each prompt and what its replies actually change, because the swings are larger than they look on the surface — one of these is a double hit on Teleshko.
| Teleshko’s Prompt | Reply | Effect |
|---|---|---|
| Time is money. What information do you have? | I actually have a new target for you. | Business +1 (Agent Teleshko); Corp morality +1 |
| Time is money. What information do you have? | Find yourself another narc. | No listed effect |
| These “free” doctors are wolves in white coats. Sharks bloodying the clear waters of commerce. | I thought it was my duty to tell you. | Romance +1 (Agent Teleshko); Business +1 (Agent Teleshko) |
| These “free” doctors are wolves in white coats. Sharks bloodying the clear waters of commerce. | So, my carrot? | No listed effect |
| Under CorpSec legislation, what Dr Fred is doing is technically illegal. | She’s just trying to help people. | Corp morality -1 |
| Under CorpSec legislation, what Dr Fred is doing is technically illegal. | So? | No listed effect |
| Not necessarily. It’s simple my job to make sure you are aware of your options. | No way I’m reporting her. | Corp morality -1 |
| Not necessarily. It’s simple my job to make sure you are aware of your options. | Do you think there’d be something in it for me if I reported her? | Corp morality +1 |
The reply I’d flag hardest is “I thought it was my duty to tell you” — it’s the only line here that hits Teleshko twice, bumping both her Romance and Business opinion in one go. If you’re invested in her thread at all, that’s the one that moves the needle most.
Watch the Corp morality line specifically. Two of the replies here drop it by 1 — the ones where you defend Dr Fred (“She’s just trying to help people” and “No way I’m reporting her”) — while two push it up. The frame is a double-edged one: you can refuse to narc on someone and lose Corp standing for it, or play the mercenary and gain standing by asking what’s in it for you. I’d check where your Corp morality currently sits before you start talking, since this conversation can pull it in either direction and you may have other jobs riding on that number.
And if you go through with the report, just know you’ve told CorpSec where Dr Fred‘s clinic operates. That’s the trade — a reward for you, a target painted on her.
Alan Fontus
Alan Fontus is a quest giver with a single job attached to him, The Man Who Murdered Death, and I’d treat that title as a fair warning. This is the giver-by-giver layout I use for the whole guide: the giver’s name comes first, then each of their quests sits underneath as its own heading. Inside each quest you’ll get the same three beats — Requires, Objectives, and Dialogue choices — so once you’ve read one section you already know where to look. If you haven’t met Alan yet, you may need to cross paths with him before this one opens up, and it does hinge on a choice that changes more than just your reputation.
The Man Who Murdered Death
Meet Alan Fontus to pick this up, and pay attention to what he’s actually asking you to do, because the objectives here are straightforward right up until the moment they aren’t. Work through the tasks he lays out, follow the trail the quest sends you down, and you’ll end up in possession of research that the game makes you decide what to do with. That’s the pinch point of the whole job.
When you reach the final decision, you’re choosing between destroying the research and publishing it. I sat on this one longer than I expected, because the two paths don’t just flip a number — the choice moves your Corp morality and sets a story flag that can affect how later content plays out. My advice: check where your Corp morality sits before you commit, especially if you’ve got other jobs riding on that same stat. Publishing and destroying send you down noticeably different roads, so pick the one that matches the character you’re actually building rather than the one that sounds more dramatic in the moment.
The Man Who Murdered Death
Alan Fontus doesn’t talk like anyone else in this city. He circles around his point, drops references to centuries he couldn’t possibly have lived through, and half the time I wasn’t sure if he was asking for help or testing whether I’d earned it. This quest lives in that space — three objectives, but the whole thing turns on the moment you either tell him to burn his research or push him to share it with the world. I went into it expecting a simple errand and came out realizing my Corp morality was about to shift depending on one sentence.
The objective list itself is short and gives you almost no guidance, so here’s the full spread of what you’re actually doing:
- Talk to Alan Fontus again — he speaks in riddles, and your job is to work out what he actually wants.
- Return to Alan Fontus to learn more.
- Help Alan Fontus find his way.
Those three steps are the spine of the whole quest, but the real weight sits inside the conversations. The first exchange opens with him greeting you as though fate dragged you back to his doorstep — The plumbing of destiny has returned you here. You can brush it off, or you can play along. Leaning in with Yes, it must be destiny. is the one that registers, giving you Friend +1 with Alan Fontus. I took the casual route on a first pass and honestly got nothing for it — no penalty, just a flat line. If you want him warming to you, don’t fake indifference.
The conversation that matters comes later, when he admits he’s lost his way and his research has been “putting the train in front of the track.” That’s the fork. You have exactly two replies, and they pull you in opposite directions:
- I think this research would be terrible in the wrong hands. You should destroy it. — Corp morality -1. You told Alan Fontus to destroy his research.
- What an amazing feat! You should make your research public. — Corp morality +1. You told Alan Fontus to publish his research.
I’d spend a second here before you tap either option. This isn’t a throwaway line — it sets a story flag and nudges your Corp morality, and a single point can matter if you’re riding a threshold for another job somewhere down the line. Telling him to destroy the research leans toward the human, cautious read; telling him to publish it aligns you with the Corp-minded outcome. Neither is “correct,” but pick deliberately. If you’re mid-chain on anything keyed to Corp morality, check your number before you answer, because this is one of the quieter pivots in the whole quest.
Alfie Gunfibel
Alfie Gunfibel’s quest, Therapy Sessions, is a slow burn — you don’t clear it in one sitting, you work through it across multiple in-game stages. I’ve kept the objective list intact below so you can see the full arc before you commit, because the pacing here is the part people underestimate. If you’re expecting a single conversation and a payout, you’ll be waiting a while.
Therapy Sessions
The one gate you have to clear is story progress — you can’t start Therapy Sessions until the main narrative has moved forward enough to open it up. I hit this wall on my first attempt at picking it up early and had to come back once the story caught up, so don’t burn time hunting for a workaround; push the main plot instead.
The quest itself unfolds as a sequence of sessions rather than a single drop-in, so read the objective list as a chain you complete over several stages, not a checklist you knock out in one visit. Each session is a step toward the next, and the game won’t let you skip ahead.
What matters most here is the dialogue. Therapy Sessions is built around a long block of conversation choices, and those choices feed into how the relationship with Alfie develops over the course of the quest. Because the sessions are spread out, it’s easy to lose track of which thread you’re on between visits — I’d suggest keeping a mental note (or a literal one) of where each branch left off, since the forks don’t always announce themselves.
I’ll break down the full objective list and every dialogue branch in the next section, including where the relationship swings land, so you can see the whole shape of it before you start answering.
Therapy Sessions
Alfie Gunfibel is offering “therapy” sessions, and the section title is doing a lot of defensive work with those quotation marks. Is this actually worth your time? In my experience running the chain, yes — but not for the reason you’d expect. You’re not here to get better; you’re here to nudge Corp morality and build a Friend relationship with a guy who has clearly never read a single psychology textbook. Almost every fork below either tilts you toward or away from the corporate mindset, so before you sit down for the first appointment, decide which direction you want that needle to move. I kept a running tally on paper because the swings are small and easy to lose track of across visits.
To unlock any of this you first need to Progress the main story. Once that’s satisfied, Alfie’s sessions unlock and his head appears on your map.
| Objective | What You’re Doing |
|---|---|
| Appointment with Alfie Gunfibel | Are you ready for your first session with Alfie Gunfibel? |
| Another Session with Alfie | It’s time for another therapy session with Alfie. |
| Alfie has a plan | Find out about Alfie’s plan. |
| Find out if Alfie’s plan worked | Did Alfie’s plan work after all? Time to find out. |
Alfie frames the whole thing around two pillars of Nivalis life — Community and Depression. When he opens the floor, you pick which to dig into:
- I’d like to hear more about community. — You chose to hear Alfie on community
- Let’s discuss depression. — You chose to hear Alfie on depression
- Actually I think I’m done.
If you take the community branch, Alfie launches into a rant about projects that don’t foster economic growth, insisting that labor which doesn’t encourage growth is morally wrong. Your reply here matters: saying community is how we make things better drops Corp morality -1, claiming community is neither good nor bad brings no listed change, and declaring that community doesn’t matter — that you must strive for Independence — pushes Corp morality +1. I leaned into the neutral answer on my first pass just to see if the game would punish fence-sitting, and it doesn’t; no arrow, no consequence.
Take the depression branch instead and Alfie’s pitch gets bleaker. He calls depression a sign you’re lingering in your emotions, too focused on yourself and not enough on your responsibilities to coworkers and employers. Disagreeing with “I’m not sure that’s true” costs Corp morality -1; agreeing with “I think you’re on to something” grants Corp morality +1. He then doubles down with the “speeding bullet” line — people who pass out don’t have time to feel anything, nothing can hurt a speeding bullet. Asking whether his advice is just to stay so busy you never feel anything leads nowhere, but committing with “I need to avoid anything that gets in the way of success, including my emotions” gives Corp morality +1.
Once he decides you’re making real progress, he’ll ask how you feel. “How do you feel?” is the one that lands — Friend +1 with Alfie Gunfibel. “Not really” and “I feel a little better” both pass without moving anything. It’s a small thing, but I noticed Alfie responds noticeably better when you turn the question back on him, and that pattern repeats.
Later he admits he’s out of Sanguine Minds and could stop being a therapist, but he needs help. Offering “What do you need?” is worth Friend +1. Just saying “Nah” isn’t.
Then comes the regret sequence, and this is where Alfie’s script goes fully off the rails in the best way. Asked what you regret, these three answers all give Friend +1: losing touch with old friends, not telling your parents you loved them enough, or — and I can’t believe this is a real option — “My skin doesn’t fit. My head’s full of bells.” Pick whichever fits the character you’re playing; the payout is identical.
When he pushes for something worse, “I shouldn’t have got that skull tattoo” passes flat, but the absurdly specific cereal-and-nail-clippings confession grants Friend +1. The yogurt line gives nothing. He then asks how you feel about your answer, and this is a tell: “It makes me want to… uh… drop a piano on a grandmother” still rewards Friend +1, which says everything about what kind of therapist Alfie is.
He’ll then loop back through regret prompts, and the nail-clippings answer keeps paying out Friend +1 wherever it appears. The same is true of a few other lines — the game seems to reward consistency, so once you find the reply Alfie likes, recycling it on the repeat prompts is the safe play.
On the trauma question, the bread factory explosion — “I lost all of my family and friends in a bread factory explosion” — gives Friend +1. So does the line about being walking scar tissue. And on the follow-up about what damage it caused, that scar-tissue answer pays out again. I actually re-ran this sitting twice to confirm the double-dip, and it’s real.
One place you can lose ground: if Alfie starts begging for your help and you pick “Still no,” that’s Friend -1, the first negative swing in the chain. “Fine, I’ll help” and “So beg” both avoid the penalty, so if you’re committed to the friendship, don’t stonewall him here.
The session wraps with a menu of topics — career, romance, or general ennui. Each one logs a distinct flag (discussed your stalled career, your barren love life, or your ennui with Alfie), so pick the one that fits your story. Asking how he feels at the end gives another Friend +1, and that’s the last meaningful swing before he tells you you’ve progressed to the next level of the Sanguine Minds project. “Better…?”, “The same,” and “Somewhat worse” all pass without effect.
Net it out and the pattern is clear: anything that prioritizes Independence over community, or productivity over feeling, pushes Corp morality up, while defending community and doubting his cold logic pulls it down. The relationship, meanwhile, is built almost entirely on turning questions back on Alfie and confessing increasingly unhinged regrets. Play the two against each other however suits your run — just don’t expect the therapy itself to help.
Andrea Cellini
Andrea Cellini is another giver who turns up once you’re deep enough into the game to have a few threads running at once, and her quest, Chained Melody, touches the jazz side of the city in a way that surprised me. If you’ve been following the music scene threads, this one feels like a natural extension of them — though the ending choice caught me off guard the first time I read through it, because it’s not really about the music at all.
Chained Melody
The quest itself is less about performance and more about a decision you make on behalf of someone whose creative output is being shaped by forces outside her control. The objectives walk you through the setup, but the choice block is where the real weight sits — and it’s one I’d read carefully before clicking, because the two paths lead to genuinely different outcomes.
[IMAGE ONLY — the original guide uses a screenshot here. I’ll describe the choice structure below rather than guess at what’s on screen.]
The pivotal fork comes down to what happens with the subversive lyrics. One option lets the material go out in its original, sharp-edged form; the other pushes it into something safer. Depending on which way you lean, the quest outcome shifts — and since this ties into how the jazz-future thread resolves, I’d treat it as a flag-setting decision rather than a simple yes or no.
Chained Melody
Three objectives, and only the last one carries any real weight. The first two are really just walking Andrea Cellini toward a decision she’s already half-made, so if you’re expecting a lot of back-and-forth here, temper that. What matters is what you do when her lyrics land in your hands.
Start with Speak to Andrea Cellini about Prison. She’s missing her bandmates — the ones CorpSec locked up or pushed out of Nivalis — and the thought of joining them is clearly rattling around her head. The objective phrasing practically tells you she’s considering it. Then move to Catch up with Andrea, where you check whether she’s actually put any illegal lyrics to paper. She has. That’s the whole crux of the quest.
From there it’s Tell Andrea About Your Choice. If you read the previous section, you already know the fork: you either leave her subversive lyrics in CorpSec’s hands or you hide them to keep her out of prison. This objective is just the fallout — seeing how she reacts once you’ve committed. I’d go in expecting her to have an opinion either way, because she does.
For the first dialogue block, she floats the idea that getting sent to prison to jam with her band is insane:
- I agree. — no listed effect.
- Peak subversiveness. — Friend +1 with Andrea Cellini.
The second block comes right after she declares she’s absolutely going to do it anyway:
- That’s so cool! — Friend +1 with Andrea Cellini.
- You must be insane. — Friend -1 with Andrea Cellini.
Both friendly options push her friendship up by one, so you can stack Friend +2 across the two exchanges if you play along with her plan. The “I agree” line is the safe neutral pick — it registers nothing, which I found a little strange given how loaded the moment is, but that’s how the game logs it. If you want the relationship gain, don’t be polite; be enthusiastic. That’s the pattern I noticed here.
Ashwin Chopra
Ashwin Chopra is one of the more interesting givers to stumble across, because his quest only opens up once you’ve put real time into him. Before any of his dialogue trees branch, you need to have progressed his personal story, and — this is the part I’d flag hardest — you have to hire him first. If you’ve been holding off on bringing him onto your staff for whatever reason, “Ashwin needs help” simply won’t show up for you, and I spent a good while second-guessing my journal before it clicked that the hire itself was the gate.
His one quest is called Ashwin needs help. Once you’ve cleared the two prerequisites — his story advanced, him hired — the objective chain opens up, and it’s a long one. This is not a two-step errand. It runs across a stretch of separate tasks, and I’d treat each objective as its own little checkpoint rather than rushing the whole thing in one go.
The quest then builds into an extensive dialogue block, and that’s where I’d slow down the most. The conversation here is dense, and the options are not all built the same. The choices that stood out to me involved the investor payout, which forks in a few genuinely different directions: you can take the 20,000 Lims up front, switch to weekly payments, or offer your service for free. Each of those is a real trade, not flavour text, so I’d think about your own situation before you commit — the lump sum, the slow drip, and the good-faith gesture all leave you in a different place.
Work through the objective list at your own pace, then read the payout choices carefully when you get there. The up-front money is tempting, and honestly it’s the easiest line to grab without thinking, but I’d check what you actually need before you tap it. That investor moment is the one part of this quest I’d put a bookmark next to.
Ashwin needs help
Something is clearly bothering Ashwin Chopra, and this quest is where you finally dig into it. Before you can start, you need to have made progress in Ashwin’s story and he has to be on your payroll — hire him first, or nothing triggers.
The early objectives run on a simple loop: talk to him about why his work has slipped, give him a formal warning when it doesn’t improve, then ask around and find out that Safia is at the root of it. I always take the straight talk here rather than just piling on reprimands, because the choices you make about their relationship genuinely resurface later.
- Talk to Ashwin Chopra about his erratic behavior.
- Reprimand Ashwin — his behavior hasn’t improved and he needs a warning.
- Talk to Safia about Ashwin’s behavior.
- Ashwin wants a word with you.
- Confront Safia about her behavior towards Ashwin.
- Find Safia at the Hive Mall.
- Help Ashwin — talk with him about his professional dreams.
- Ashwin’s First Proposal — he seems to have a first proposal for your investment.
- Consider supporting Ashwin — let him give you more details to convince you.
- Ashwin’s Second Proposal — he wants to talk about results and another proposal.
- Ashwin requests a conversation — he wants to talk to you one more time.
- Consider becoming Ashwin’s Investor — on second thoughts, he needs better arguments.
- Ashwin’s Third Proposal — with the test results of the first two experiments in, he seems to be working on perfection.
- Ashwin has good news — he’s beaming, so talk to him and find out why.
- Safia’s Closure — Safia wants to talk to you about Ashwin.
- Safia’s Closure (again) — Safia wants to talk to you about Ashwin.
A fair warning before you touch the dialogue block: your single reply about romance between employees quietly decides how the rest of the quest plays out, so pick the stance you actually mean to live with.
“This is my private life… but I guess I can’t deny it’s affecting my work…”
- I’m listening. Let’s work this out. → Friend +1 (Ashwin Chopra)
- You’re making your private life my problem, so either we fix it or you’re gone.
“It’s the waitress, Safia. She’s attractive and kind and witty… but I don’t stand a chance.”
- I prefer if romance is avoided between employees if it causes these problems. → you told Ashwin to avoid workplace romance (matters later in this quest)
- Well, it’s nice my staff get along. → you approved of Ashwin and Safia’s romance (matters later in this quest)
“You wouldn’t even know her. Her name’s Safia. Safia Megane. Lives in Hive Mall. But I doubt you can help me.”
- You just need to work through this. You can do it. → Friend +1 (Ashwin Chopra)
- You need to get over her and focus on what matters. Work.
“So you’re gonna need a new cleaner. I quit.”
- Well, I’m sorry to hear that, but good luck! → Friend +1 (Ashwin Chopra)
- We’ll be better off without you. → Friend -1 (Ashwin Chopra)
“Quite the opposite. I want to become an entrepreneur in the world of Restaurant Hygiene Technology. I founded my own company.”
- That sounds like an exciting prospect.
- I’m not sure that sounds like a solid business prospect. → Friend -2 (Ashwin Chopra)
“Thanks, boss… I guess I can’t call you that any more. What are you now if not my ‘boss?'”
- We’re rivals now.
- How about “friend?” → Friend +2 (Ashwin Chopra)
“Well… my concept for the Restaurant Hygiene Technology company. I had this idea that my new start-up would finally solve the issue of hygiene in Nivalis.”
- Sounds great!
- Really? That’s your dream?
- This is a terrible idea Ashwin. I think it’s better we part ways. → you fire Ashwin Chopra
“Right!? A problem as old as gastronomy itself! And I was going to solve it.”
- If it sounded promising I might even invest in your hygiene business. → Business +1 (Ashwin Chopra)
- I would like to hear more.
“Well, it was. But right now it’s Safia.”
- If it sounded promising I might even invest in your hygiene business. → Business +1 (Ashwin Chopra)
- I would like to hear more.
“Boss?”
- What’s up with you, Ashwin?
- Your performance has dropped. → Corp morality +1
“Nothing. Why do you ask?”
- Your performance has dropped. → Corp morality +1
- You don’t seem to have your mind on your work.
“Wow. Rejection again. Hello old friend…”
- Sorry Ashwin. Keep trying though!
- You need better ideas Ashwin. → Friend -1 (Ashwin Chopra)
Eventually the proposals start paying out, and this is the fork I flagged earlier — three very different deals, and you can only take one. Read the numbers before you commit.
“And on top of that you get 1000 Lims every seven days for 15 weeks. What do you think?”
- I’ll take the 20,000 Lims. → you get 20000 Lims; you took a 20,000-Lim payment from Ashwin
- I’ll take the 2,000 Lims for 15 weeks. → you get 2000 Lims; the rates cost 2000 Lims; 14 rates still to pay
- I’ll take the lifelong free service plus 1000 Lims for 15 weeks. → you get 1000 Lims; the rates cost 1000 Lims; 14 rates still to pay; you took Ashwin’s lifelong free cleaning service
Ava: Curfew
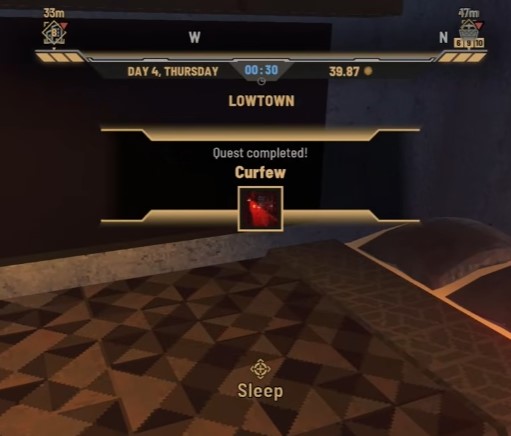
Moving into Ava’s quest hub now, and this first job is a good warm-up for what’s coming — a tight prerequisite and a list of shelters scattered across every district. The one thing that actually trips people up here is timing: Curfew only becomes available before 2:00, so if you’re the type to saunter through the city for hours before touching your quest log, you can miss your window without realizing it opens at all.
Once you’re in that pre-2:00 window, the objective is straightforward — find the shelters, one per district, and hand them in. I’d treat this as a location reference more than a puzzle, since the actual legwork is just getting to each district’s spot and marking it. Since this is the first of Ava’s jobs, expect the usual Requires / Objectives / Dialogue choices substructure you’ll see repeated across her section — I’ll flag the shelter locations as cleanly as I can so you can knock them out district by district.
[IMAGE ONLY — the original guide uses a screenshot for the shelter locations here.]
If you’re reading this section right after finishing up with Ashwin and his endless payout forks, welcome to something lighter. That’s part of why I front-load the timing warning — after a quest with that many conversation traps, it’s easy to assume every quest is a maze of choices. Curfew mostly isn’t; it’s a checklist, and the only real risk is showing up too late to see it.
Curfew
This one is a straight list, thankfully. CorpSec has imposed a curfew across the Localized Unity Zone, and staying outdoors while it’s active counts as breaking the law — the patrol drones and cameras aren’t decorative. Your job is simple: get to the nearest shelter and wait it out. The cloak of night can work in your favor too, though, so don’t treat the dark as purely hostile.
My one timing note, and it’s the whole quest: this only fires up before 2:00. Miss that window and the quest won’t be available at all. So if you’re planning an evening route, do it early.
The objectives walk you through every district’s shelter in turn. All of them read the same way — follow the navigation marker to the closest shelter. Here’s the full list, kept in objective order so you can tick them off against your map:
| # | Shelter Location | What To Do |
|---|---|---|
| 1 | Meridian Market | Follow the navigation marker to the closest shelter |
| 2 | Your apartment | Head home before curfew if you’d rather sleep in your own bed |
| 3 | Sleep | Go to sleep once you’re safely inside |
| 4 | Docks | Follow the navigation marker to the closest shelter near the Docks |
| 5 | Lowtown | Follow the navigation marker, or use your own apartment |
| 6 | Central Canyon | Follow the navigation marker to the closest shelter |
| 7 | Eastern Residential | Follow the navigation marker to the closest shelter |
| 8 | Oil Rig | Follow the navigation marker to the closest shelter |
| 9 | Sewers | Follow the navigation marker to the closest shelter |
| 10 | Industrial District | Follow the navigation marker to the closest shelter |
| 11 | Seaside Boardwalk | Follow the navigation marker to the closest shelter |
| 12 | Helix Monumental | Follow the navigation marker to the closest shelter |
| 13 | Hive Mall | Follow the navigation marker to the closest shelter |
| 14 | Skyhigh Gardens | Follow the navigation marker to the closest shelter |
| 15 | Stacks | Follow the navigation marker to the closest shelter |
| 16 | Spaceport | Follow the navigation marker to the closest shelter |
| 17 | Metro Hub | Follow the navigation marker to the closest shelter |
| 18 | Mountain Town | Follow the navigation marker to the closest shelter |
| 19 | Calypso Island | Follow the navigation marker to the closest shelter |
| 20 | Spire | Follow the navigation marker to the closest shelter |
There’s no dialogue choices to fret over here and no relationship swings to weigh — just markers to chase. If a shelter is proving annoyingly hard to pin down, the navigation marker is doing the heavy lifting, so trust it over your own guess at where a “shelter” ought to be. It caught me out more than once that these are scattered well beyond the obvious hubs.
Ava: Get a Loan
Ava keeps handing out work even when your wallet is doing worse than hers, and Get a Loan is the one quest in her little cluster that’s less about earning and more about staying afloat. If you’re currently sitting on almost nothing — under 100 Lims to your name — this is the job meant to bail you out, and it routes you straight toward Calhoun to sort out borrowing money.
Your objective here is simple on paper: go see Calhoun and take the loan. What I’d flag before you walk in is that the conversations around this one have their own follow-ups, and how you handle them can ripple into the debt-related quests you’ll bump into later. So don’t treat the talk as throwaway filler — the replies you pick carry some weight. Keep an eye on your Lims total, since the whole point is that you need to be genuinely broke for this to land the way it’s supposed to.
To keep it clean, this one comes down to two beats:
- Reach the prerequisite of holding fewer than 100 Lims so Ava will point you toward the loan in the first place.
- Head to Calhoun and go through the loan objective, choosing your responses to the conversation that follows.
I’d slow down on the dialogue here rather than clicking through it. It’s a short quest, and the choices attached to it are the part that actually matters — everything else is just getting yourself to the right door.
Get a Loan
Once Ava sends you to Calhoun for a loan, the whole thing comes down to one conversation — and it’s a prickly one. You only qualify for this quest when you’re sitting on fewer than 100 Lims, which is exactly the kind of broke that makes Calhoun’s pitch hit a little too close to home. He’s a former fisherman with a grudge and a chip on his shoulder, and he’ll spend most of the chat working through both before he ever gets to numbers.
There’s only one objective here: Speak to Calhoun. He might be able to lend you some Lims, and that’s the whole quest. But the dialogue is where the quest actually lives, so I wouldn’t mash through it. Several replies swing your Corp morality and your standing with Calhoun hard enough to matter later.
He opens by pointing out your finances are running critically low. When you ask what to do, you can push back on the whole system:
- Agh! What do I do? — no listed effect.
- Lims are a tool of oppression designed to subjugate the masses. — Corp morality -1.
Then he steers you toward honest work instead of borrowing — fishing, farming and furniture. You can sell what you catch and grow, or trade in furniture you don’t need. His question is blunt: which is it going to be?
- Ok, let’s go for the loan. — continues down the money path.
- I will try to get the money by myself. — turns him down.
From here the conversation slides into his personal history, and this is where I’d slow down. Calhoun rants about The Carp Diem, his old club — his, before the new owners threw him out and banned him from fishing any of the good spots in the Docks. He insists he was Barracuda Buddy three years running and calls himself the Prince of Perch. When he asks why they threw him out:
- Why did they throw you out? — no listed effect.
- You mentioned money…? — Enemy +1 (Calhoun). This one stings; pushing him back to business instead of letting him vent earns you a permanent enemy point, so only take it if you genuinely don’t care about his opinion.
He then swears up and down he caught the Macrogillean, and asks you to believe him:
- The Macro…? — you learn about the Macrogillean. This is the informative pick.
- I believe you. — no listed effect.
He doubles down, describing how that fish looked him right in the eye and spat his lure back at him. Your read on that story matters:
- Sounds like garbage to me. — Enemy +1 (Calhoun).
- Wow. — Friend +1 (Calhoun). Cheap, easy goodwill.
Now the actual offer. For someone like you, 5000 Lims is his limit, at 20% interest:
- Deal. — Business +1 (Calhoun).
- What are the terms? — asks for details first.
- 20%? — reacts to the rate.
He calls his whole arrangement “limbs for Lims” — he loans you Lims, you pay them back, or you forget ever coming to him again. Your reaction is a clean morality fork:
- Transparency is the key to good customer relations. — Corp morality +1; Business +1 (Calhoun).
- You’re preying on people’s desperation. — Corp morality -1; Business -1 (Calhoun).
He closes by asking if the deal sounds pretty decent to you:
- Deal. — Business +1 (Calhoun).
- What are the terms? — asks again for specifics.
Ava: Noodle Bar Expansion
This is one of those quests that gate-checks you hard before it lets you in, so don’t bother knocking until you’ve done your homework. To even trigger Noodle Bar Expansion from Ava, you need to have pushed Banor‘s story far enough along, you need 2 recipes in hand, your bar needs at least 3 seats, and you have to be far enough into the main story. Miss any one of those and Ava just won’t hand it over — I’ve seen people stand around wondering why the prompt never shows up when the real answer is a missing seat.
What makes this one worth the trouble is the payoff: finishing it moves the main story forward, so it isn’t just a side job you can safely skip. That’s the part I’d underline. If you’re the type to let quests pile up while you chase other threads, this is the one to pull out of the stack and actually finish.
Objectives
Nine objectives in total, and they follow the usual pattern of talk-to-someone, do-the-thing, go-back. Here’s the full run in order:
- Speak to Ava about expanding the noodle bar.
- Acquire the additional recipes needed for the expansion.
- Purchase additional seats for the bar.
- Secure the ingredients for the new menu items.
- Install the extra seating.
- Prepare the new dishes.
- Report back to Ava.
- Complete the expansion requirements.
- Finish the expansion and confirm the main story advances.
I’d hold onto these loosely in your head rather than as a rigid checklist, because the order you clear them in depends on how much inventory and cash you’re sitting on when you start. If you already have the recipes and the seats covered from earlier shopping trips, the middle steps fly by and the whole thing feels like a formality. If you don’t, the acquisition steps are where the real time goes.
The dialogue that closes things out carries a corp morality choice, so pick your line with that in mind rather than mashing through. It’s not a huge swing, but it’s logged, and I don’t love loose-ended morality flags when a later quest might reference them.
Once the expansion is done, the main story picks back up right where you left it, so I’d treat this quest as a checkpoint rather than a detour.
Noodle Bar Expansion
So you’ve inherited the Noodle Bar from Thaddeus — debt and all — and now it’s on you to actually turn the place into something that runs. This is the more involved of the two Noodle Bar quests, and it’s the one that asks you to think like an owner instead of a line cook. The trick is that it gates on a few other threads first: you need Banor’s story progressed, at least 2 recipes unlocked, a minimum of 3 bar seats in the Noodle Bar, and some forward movement on the main story. Don’t start counting seats until you’ve actually built them, because the objective won’t tick early.
Finish it and the main story keeps rolling, so this doubles as a plot checkpoint. I’d clear it before wandering off, since the game treats it as a progression beat rather than a side favor.
Objectives
- Serve 20 Guests — a solid first milestone to reach before you sink money into the rest.
- Hire a Manager — managers handle ingredient restocking and lift the overall effectiveness of your staff, so this one pays for itself.
- Buy a Drink Machine — if you want to serve drinks at all, you need the machine first.
- Install a Drink Machine — buying it isn’t enough; get it placed so your guests can actually order.
- Discuss Business with Banor — sit down and talk shop, both about the restaurant and the state of Nivalis.
- Add a Drink to your Menu — the machine’s installed but your menu is still dry. Add one.
- Add Decorations — decorations raise how attractive the place looks to potential guests, so add a couple. You’ll find home furniture retailers at Eastern Residential, Hive Mall, or Central Canyon.
- Add a Plant — plants make the space cozier and improve air quality. One or two is plenty. Same retailers as above.
- Reach Level 3 — the capstone: push the Noodle Bar’s reputation up to level 3.
That level 3 objective is the slow burn. Nothing here is hard individually, but the reputation climb takes serving time, and I’d knock out the purchases early so you’re not stuck grinding guests with an empty menu and bare walls.
Dialogue Choices
When Banor brings up the state of things, he frames it around the corps — business is up, gawkers have flooded in, and the area’s gone trendy. “Drink, dance and dine in the streets where the serial killer stalks the unwary!” is the line that sets the tone, and your reply carries a known morality effect:
| Your Reply | Effect |
|---|---|
| “It’s sick! I hate the corps… But it’s good for us?” | Corp morality -1 |
| “That’s business.” | Corp morality +1 |
I sat on this one for a second, because it’s a genuine fork rather than flavor. If you’ve been leaning anti-corp this whole run, the first line matches your arc and costs you a point; if you’re playing the pragmatist who shrugs at the machinery, the second nudges you the other way. Neither breaks anything immediately — it’s just another logged swing in a game that logs a lot of them, so pick the one that matches the character you’ve been building.
Ava: Noodle Bar Introduction
Before Ava hands you the keys to her noodle bar and lets you run any of the later restaurant work, she wants to make sure you actually know how a hospitality business functions. This quest is the onboarding, and it’s the gate that everything else in the Ava restaurant line sits behind — if you finish this, the other jobs open up; if you skip it, you’re locked out. I’d treat it as mandatory if you care about the food-side content at all.
The rewards are worth the trouble: you get the restaurant business itself, plus the ability to expand it, and the quest also feeds into your broader story progress. It’s a long one, though — eighteen separate objectives, and a fair few of them are talking rather than doing. Here’s how I’d walk it, in order.
- Talk to Ava to start things off — she lays out what she expects from a first-time owner.
- Learn the basics of running a hospitality business, which means paying attention to your staff, your recipes, and your seating.
- Get introduced to the people who make the noodle bar actually function day to day.
- Work through the intro tasks Ava sets for you — she isn’t going to just hand over the reins without seeing you do the boring parts first.
- Sort out your first recipes so there’s something to actually serve.
- Make sure you have enough bar seats to seat paying customers.
- Go through each of the remaining setup steps in the sequence Ava gives you — they’re all part of the same run-in phase, so don’t try to skip ahead.
- Report back to Ava once the setup is done to close out the quest.
The part that trips people up isn’t the objectives themselves — it’s the pacing. Several of these steps can’t be rushed, and the recipe and seating bits in particular catch players who assumed this was a pure dialogue quest. I went in expecting a quick chat and came out doing inventory math, which honestly fits the tone of the rest of Ava’s line.
Noodle Bar Introduction
Thaddeus Carminus runs the Noodle Bar in Meridian Market, and the moment he pulls you aside, you’re effectively stepping into the hospitality business whether you meant to or not. Accept the job and a navigation marker drops onto your compass, so you can follow it if you’re not sure where Meridian Market sits yet. This quest also feeds straight back into the main story when you finish it, which is why I didn’t treat it as optional side content even though it plays like a tutorial for running a restaurant.
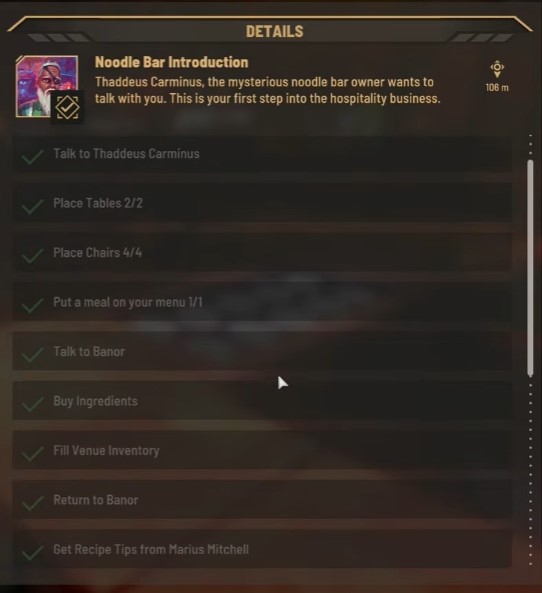
There are eighteen objectives before this one’s done, and most of them are about doing a restaurant job and doing them correctly. If you rush the placement steps — tables, chairs, then bar chairs later — you’ll be shuffling furniture while your waiter has nowhere to walk, so I took those slowly.
Objectives
- Find a cab to Meridian Market — Thaddeus Carminus is waiting for you at the Noodle Bar in Meridian Market. Tab a cab to go there.
- Talk to Thaddeus Carminus — Thaddeus Carminus is waiting for you at the Noodle Bar in Meridian Market.
- Place Tables — Place 2 tables. Make sure they are located conveniently for your waiters to reach.
- Place Chairs — Place 2 chairs around each table.
- Put a meal on your menu — For guests to order something we need something on the menu. Interact with the panel to put a meal on your menu.
- Talk to Banor — Introduce yourself to Banor.
- Buy Ingredients — For Banor to cook the meals on your menu, he requires ingredients. Visit the local vendors to buy what you need. Note the shopping list, that you can always open via [L].
- Fill Venue Inventory — Put the purchased ingredients into the restaurant’s inventory. Interact with one of the fridges or cabinets to do so.
- Return to Banor — You have set up the tables and chairs, we have a menu and enough ingredients. What else do we need to do? Banor will tell you.
- Get Recipe Tips from Nola Berg — Nola Berg might have some recipe ideas.
- Get Recipe Tips from Dagmar Fitz — Dagmar has some great recipes. See if you can get them.
- Get Recipe Tips from Marius Mitchell — Marius has some recipes. Maybe you can access them.
- Talk to Banor (again) — Report back to Banor after your recipe “research”.
- Hire a waiter — Banor needs help. He won’t be effective having to cook and serve our guests at the same time. Hire a waiter at the nearest job board.
- Report back to Banor — Head back to Banor.
- Banor has a Suggestion — Banor has a suggestion. Talk to him!
- Buy Bar Chairs — Buy high chairs so we can use the space at the bar.
- Place Bar Chairs — Place the high chairs around the bar counter.
Objectives 10 through 12 send you hunting for recipes from three separate people, and this is the part I’d slow down on. Each of those conversations has its own choice block, and a few of the replies are what actually unlock the recipe instead of the quest continuing automatically. If you bluff your way through them, you can walk away with nothing and have to loop back. The recipe hunt itself also ties into later quests — Green Thumb and Noodle Bar Expansion both check whether you’ve advanced it — so the work you do now pays off well after this quest is over.
Dialogue Choices
Banor and Nola are the easy half of this — talk to them warmly and you bank Friend points with both. Dagmar is the minefield. Her whole block is built around whether you own the place or you’re just competition standing in her doorway, and picking the wrong reply can cost you the recipe entirely. Marius sits somewhere in the middle: his recipes come free if you’re honest, and locked if you posture about having your own place. Here’s every fork, with what it changes.
Oh, it’s a staple here. Really adds that little extra umami.
- You must have some interesting recipes. → Friend +1 (Marius Mitchell)
- You have some strange ideas about flavor, but I am on the lookout for new recipes. → Friend -1 (Marius Mitchell)
You sure? My business lives or dies on this stuff so I can’t be letting it get into the wrong hands.
- Yep, purely for personal use. → Corp morality +1; unlocks recipe Tonkotsu Ramen; You met Marius Mitchell (needed for Please Delete My Numbers, The Lost Leg); Your recipe hunt for Banor advances a step (needed for Green Thumb, Noodle Bar Expansion)
- Ok, you got me. I run the place around the corner.
Look, until you run your own place I’d keep those kinds of opinions to yourself.
- I do have my own place. → Friend -1 (Marius Mitchell); You met Marius Mitchell (needed for Please Delete My Numbers, The Lost Leg); Your recipe hunt for Banor advances a step (needed for Green Thumb, Noodle Bar Expansion)
- You’re right. My apologies. → Friend +1 (Marius Mitchell)
Order something or keep walking.
- Wow. Nice customer service. → Business -1 (Dagmar Fitz)
- I’m new here. Came to say hello. → Friend +1 (Dagmar Fitz)
You haven’t bought anything. So you’re not a customer.
- I’ve taken over the Noodle Bar.
- Right. I’m your competition. → Enemy +1 (Dagmar Fitz)
Unfortunately I’m addicted to this substance called “food”.
- What a drag. → Friend +1 (Dagmar Fitz)
- I’ll get my tiny violin. → Enemy +1 (Dagmar Fitz)
Why are you shilling for recipes anyhow?
- I just inherited a failing business with only one dish on the menu. → unlocks recipe Onion Rings; You met Dagmar Fitz (needed for Dagmar’s Sabotage); Your recipe hunt for Banor advances a step (needed for Green Thumb, Noodle Bar Expansion)
- Heard your place was the best in the district. → Friend -1 (Dagmar Fitz)
You’re giving me a migraine.
- I’ll go if you give me one of your recipes. → Business -1 (Dagmar Fitz)
- I’m sorry. I’m just trying to find recipes.
And I’m just trying to get through the day without stabbing someone.
- Sorry to bother you. I’ll go. → Business +1 (Dagmar Fitz); You met Dagmar Fitz (needed for Dagmar’s Sabotage); Your recipe hunt for Banor advances a step (needed for Green Thumb, Noodle Bar Expansion)
- It’s a tough job, huh? → Friend +1 (Dagmar Fitz)
“Hello”.
- I’ve taken over the Noodle Bar.
- Right. I’m your competition. → Enemy +1 (Dagmar Fitz)
A good manager chooses the right man for the right job. You don’t ask the one-armed chef to mash the tatters. You don’t ask the one-eyed baker to measure the flour.
- Get to the point. → Friend -1 (Banor)
- You have two arms and two eyes.
- I think I understand what you’re trying to say. → Friend +1 (Banor)
Bit of banter never goes amiss. Warm people up first.
- That’s great advice, thanks. → Friend +1 (Nola Berg)
- I don’t have time for that.
I’d hardly call it help, but yeah, sure. Don’t think you’ll be putting me out of business anytime soon.
- We’ll see. → Business +1 (Nola Berg)
- We’re all in this together. → Friend +1 (Nola Berg)
I guess I come with the place? I still have a contract, even when the owner changes. Unless you want me gone?
- No. I need help. → Friend +1 (Banor)
- Let’s see how things go. → Friend -1 (Banor)
Right boss. Well, we have a lot to do today. Your hands look soft and clean. You afraid of some hard work?
- I’m used to hard work. → Friend +1 (Banor)
- I’m the owner here. You do the hard work. → Friend -1 (Banor)
You don’t have to come at me like that, boss. I don’t slack off.
- Good.
- We’ll see. → Corp morality +1
How’d you like to be a business owner, kid?
- Always dreamed of being an entrepreneur. → Corp morality +1
- Sounds a lot like hard work. → Corp morality -1
What I’d actually take away from this block: the two replies that hand you recipes — Yep, purely for personal use for Marius, I just inherited a failing business with only one dish on the menu for Dagmar — are the ones sitting in the “soft” parts of the conversation, not the confrontational ones. It’s tempting to snap back at Dagmar given how hostile she starts, and that path does advance the recipe hunt too, but it costs you the recipe itself and banks Enemy points you don’t need. I’d rather walk away with a recipe and a clean slate than win an argument I’ll pay for later.
And if you follow this same route with Banor — the patient, “I’m used to hard work” answers — you finish the setup with a friendly cook who’s actually invested in the place, which is a much better footing than an owner he resents. The rest of the restaurant line keeps calling back to him.
Ava: Thaddeus Retirement (1/2)
Coming off Banor’s kitchen drama, Ava hands me the next big job: Thaddeus Retirement. There’s a timing catch right up front, and I want you to catch it before you burn a day, because I didn’t the first time. This quest only becomes available in the morning. Show up at any other point in the day and you’ll be standing around with nothing to do, so plan your loop around that window.
The first half splits into three threads once you’re moving: Gideon, Grey Tech, and the Harbour Overlook. I like to knock out the Grey Tech stretch first since it tends to flow into the Harbour Overlook leg naturally, then circle back to Gideon and the distraction setup that carries into part two. If you’d rather do it the other way, nothing stops you, but doing the Gideon distraction last makes the handoff cleaner.
What I’d watch for here is that the Gideon portion isn’t a smash-and-grab — it’s a distraction, and a failed distraction means you’re improvising a Plan B you didn’t prep for. I double-check my dialogue options on that leg every time, because the wrong reply just wastes the setup. Grab the early objectives in order, and the second half of this quest — the confrontation with Thaddeus, his condition puzzle, and the Huckstash business — picks up right where this leaves off.
Thaddeus Retirement
Once Thaddeus hands over the noodle stand and walks away, the natural question is where he actually went — and this quest drags that answer out of everyone around you while throwing one very strange detention sequence in your path. You only need to catch him in the morning to get moving, and from there it’s a long relay of conversations that I always take slowly. If you’ve already grabbed the first objectives from the earlier half of this quest, this stretch continues straight from there.
The objective list is long but the ordering matters, so I’ll keep the numbering exactly as the game tracks it and let you tick them off in sequence.
- Talk to Thaddeus before he leaves — catch him before he’s gone for good.
- Find Gideon — track him down to learn more about his mysterious Grey Tech.
- Climb up Harbour Overlook — Ava has tracked Gideon to an area in the Docks called Harbour Overlook.
- Face Gideon’s Grey Tech
- Discuss the Hack with Ava — find out whether the hack actually worked.
- Speak to Alan Fontus — why is he interested in you, and what does it have to do with Thaddeus?
- Talk to Gunger Hahn — one of Thaddeus’s old friends might know where he’s gone.
- Speak to Agent Teleshko — apparently there’s urgent business involving Thaddeus.
- Wait for Ava to find the documents — she says she’ll look for the ones Agent Teleshko needs.
- Speak to Agent Teleshko (again) — Thaddeus’s message promised that mentioning the name “Jaden” would get Teleshko to leave you alone.
- Speak to Banor — a good moment to check in at the Noodle Bar.
- Wait to hear from Thaddeus — he reached out to Ava once before, so maybe he’ll do it again.
- Question Banor — he may know more about Thaddeus’s disappearance.
- Question Huckstash — if anyone knows, it’s the leader of the Crusty Punks.
- Find Egress — you’ll have to see what that even is.
- Return to Huckstash — what happened at Egress, who were those ghosts, and is Ava okay?
- Question Banor (again) — what do the strange messages from Thaddeus mean, and why did he mention Banor?
- Speak to Huckstash
- Speak to Banor (again)
- Speak to Alan Fontus (again)
- Speak to Gunger Hahn
- Return to Egress
- Meet Thaddeus — hear what he has to say.
- Return to Egress (again)
- Hear the Truth from Thaddeus — hear what he has to say at last.
That Gideon stretch is where I slow down the most. His Grey Tech plays a slow-burn game with you — it tries to breach your defenses while he talks, and the only way through is to keep him distracted with specifics rather than vague pleasantries. He asked me to hold onto something he no longer wants, and the whole exchange hinges on what you throw at him next.
When he opens with the line about Thaddeus being gone for you but someone he can’t ever get rid of for himself, you have two paths:
- Can I help? → Friend +1 (Gunger Hahn)
- I don’t want involved.
Then the real work begins. The system intrusion warning fires as his Grey Tech attempts a breach, and every reply you pick falls into one of three buckets — distracting him with stories of your past, distracting him by asking about bounty hunting, or boring him by dodging the point. You want to avoid the boring replies whenever you can, since they do nothing to hold his attention. A few of the specific past-detail lines also plant something — telling him you hired a bounty hunter to track your old partner leaves him confused about your past, and that detail surfaces again later in this quest, so don’t skip it if you can help it.
As the conversation loops, you’ll be picking from rotating sets of three. These are the responses I keep an eye out for:
- I hear the LUZ is good for business. What do you think about that?
- How do you feel about the state of The Docks? Is it getting worse?
- I hired a bounty hunter once. To track my previous partner, before he lost all that money in the… accident. → Gideon stays confused about your past (matters later in this quest)
- Have you ever been to the wastes? I hear some bounty hunters go there.
- When I hired a bounty hunter I sent them out into the wastes.
- Yes, I once hired a bounty hunter. → You told Gideon about a dangerous bounty hunter
- Before this job, my corporate background was in aggressive take-overs with Curzona. → You distracted Gideon with stories of your past
- My mentor was involved in the great system melt down. → You distracted Gideon with stories of your past
- After that, my father, the inventor of the… crash-resistant space shuttle seat, was lost in the… big incident of ’08. → You distracted Gideon with stories of your past
- How long have you worked as a bounty hunter? → You distracted Gideon by asking about bounty hunting
- Do you recommend it as a career? → You distracted Gideon by asking about bounty hunting
- Do you think I would make a good bounty hunter? How would I get started? → You distracted Gideon by asking about bounty hunting
- What I am trying to say is… → You bored Gideon by dodging the point
- You’re probably want me to get to the point soon, right? → You bored Gideon by dodging the point
- Right, sure! → You bored Gideon by dodging the point
- I think the LUZ is making me a little crazy. → You bored Gideon again with dazed small talk
- And there’s a shortage of ingredients so I’m worried my customers will be disappointed. → You bored Gideon again with dazed small talk
- I guess I AM feeling a lot of stress. → You bored Gideon again with dazed small talk
A handful of his prompts are softer — lines like I’m sure, Who?, What?, That’s not my business, I don’t disagree, Understandably so…, That would be good, and Well, that depends… — and each serves up its own three-reply rotation. The filler lines you’ll see repeated here include Was talking about The Docks. Though his old friend said he should stay, And the sentient mold. Did you hear that it’s moving in from the sea every night?, And his son told him he should retire to Luna instead, There’s a bounty on the guy who caused it. He was seen in this area recently, I wonder if Thaddeus got away before the LUZ stopped him, and I guess I’m just worried about that ransomware attack. Those mold, Luna, and ransomware lines are the ones that slide into boring him with dazed small talk, so I steer around them when I have a cleaner option available.
Get the breach sequence right and the rest of the quest rolls on through Gunger, Teleshko, Banor, Huckstash, and the two Egress visits until you finally sit down and hear the truth from Thaddeus. The second half — the confrontation, his condition puzzle, and the Huckstash business — is picked up in the next section.
Ava: Thaddeus Retirement (2/2)
The second half of Thaddeus’s retirement quest is where everything you’ve been collecting finally has to add up. If you thought the Gideon distraction was fiddly, brace yourself — this stretch runs you through a confrontation, a proper puzzle about Thaddeus’s condition, and then a chunk of Huckstash business before it lets go of you. I’d go in with a full picture of what you’ve learned, because guessing here just wastes your own time.
Distracting Gideon
You’re still feeding Gideon topics to keep him talking. The trick here is that order matters more than it looks — the reply you pick first quietly locks in how you distracted him, so if you want a clean answer, don’t rush it. The confirmed lines and what each one actually does are below.
- Do you recommend it as a career? -> You distracted Gideon by asking about bounty hunting
- My mentor was involved in the great system melt down. -> You distracted Gideon with stories of your past
- You’re probably want me to get to the point soon, right? -> You bored Gideon by dodging the point
The follow-up prompts Go on. and Yes? shuffle the same options around, so don’t assume a different prompt means a different set of consequences. From Go on., the three options resolve exactly as above. When Yes? comes up, you get a sharper choice:
- He used Grey Tech to confuse his target’s Automata. -> You told Gideon about a dangerous bounty hunter
- My old employer needed me to track down the man.
After Understood!, you’re describing the man himself. He had stolen a precious data drive. logs nothing, but He was very dangerous. gives you the “you told Gideon about a dangerous bounty hunter” flag — the same flag the Grey Tech line produced earlier, so you’re stacking it either way.
Talking Around the Truth
Once Gideon says You hired a bounty hunter…. Interesting. I would not think you possessed the means., you’re on the sensitive stuff. The three replies here mostly scatter his attention — that’s the point, getting him talking while you keep your own history vague.
- Yes, I once hired a bounty hunter. -> You told Gideon about a dangerous bounty hunter
- Have you ever been to the wastes? I hear some bounty hunters go there.
- When I hired a bounty hunter I sent them out into the wastes.
Then Ava cuts in: Yes, throw lots of topics at him, but you need more specifics! We need his Grey Tech to run checks on what we say. This next one is the one I’d slow down for, because one reply shapes a later beat in this very quest.
- I hired a bounty hunter once. To track my previous partner, before he lost all that money in the… accident. -> Gideon stays confused about your past (matters later in this quest)
- How do you feel about the state of The Docks? Is it getting worse?
- I hear the LUZ is good for business. What do you think about that?
Banor, CZ11A, and the First Real Decision
Banor turns up asking about your CZ11A paperwork with a threat to call the Corp sanitation service. This is the first spot where you can genuinely dent a relationship, so pick with intent.
- Wait, I haven’t found it yet.
- ♥♥♥♥ you. -> Corp morality -1; Enemy +1 (Agent Teleshko)
When Banor gets cryptic about something he can’t say — Some gifts, once given, can’t be given back. — you’ve got three ways through. Don’t play dumb, Banor. It suits you too well. costs you Enemy +1 with Banor; Be straight with me Banor, OK? is the friendlier path at Business +1. If you’d rather just let it go, If you can’t talk about it, I understand. lands as Friend +1 with Banor. I tend to take the understanding line here unless I’m specifically chasing the business angle, because it keeps the door open.
Thaddeus’s Last Advice and the Condition Puzzle
Thaddeus offers one last bit of free advice. Declining it costs Friend -1 with him, and taking Go on. drops you into the puzzle. He tells you plainly: Take a moment. You have all the pieces. Why not try putting them together. Let’s start at the beginning. Why did I leave?
From here you’re assembling truths about his condition — every correct reply flags as You pieced together truths about Thaddeus’s condition, and you’ll want to hit those whenever they appear.
- Why did I leave? — You’re dying. and Your mind is failing. both piece together a truth; You were going on a trip. does not.
- Where do you think I am now? — Luna. and You’re in another city. count; You’ve travelled back in time. does not.
- Did you talk with old Alan Fontus? — I talked with him. pieces together a truth; I didn’t talk to him. does not.
- Who am I? — You’re eternal. pieces together a truth; the noodle maker, time traveller, and AI answers do not.
Later, when he muses about drugs — Sure, why not? Drugs, but who’s sober in this world? — Me? is safe, while Not me! costs Corp morality -1.
The Huckstash Business
Huckstash picks up with Nothing we didn’t ask for. Or reluctantly accept. The two replies split his friendship one way or the other: Can you tell me ANYTHING useful? is Friend -1, and Come on Huckstash. Maybe I can help you. is Friend +1. Then comes Helen’s hotdog stand — her permits lapsed and she’s asking for a one-time exception. She was asking the wrong person. is neutral, but Why not give her more time? costs Business -1 with Agent Teleshko. I’ve taken the lenient line before and felt it later, so know that going in.
Immortality, Memory, and the Final Answer
Thaddeus lays out the core of it — humans are not meant to live hundreds of years, their memories fill up, become unstable, and their personality collapses. That’s why immortality needs memory management? pieces together another truth; That’s madness! does not.
Then he asks the real question: So what’s your decision? Help an old man out? This is the pivot of the whole quest.
- I want to help but it feels risky. I’m sorry.
- You lied to me and tricked me. I won’t help.
- I’ll do it. -> You pieced together truths about Thaddeus’s condition
If you hesitate, he comes back with I understand that feeling, but this is my last chance. I didn’t want it to end like this. Would you reconsider? — and here No. That’s my final decision. ends it, while I’ll do it. pieces together a truth. Refusing gives you nothing back, so unless you’re role-playing the distrust hard, the agreement line is the one that actually moves you forward.
Ava and the Bounty Hunter Thread
Ava explains the bounty hunter has access to high level Grey Tech and that talking to him again could track it back to an owner. Your two replies play out like this: To figure out who hired him? is Friend +1 with Ava, and To figure out who he’s looking for? logs nothing. I lean toward the hiring question — it reads as the more useful answer and it keeps Ava on your side.
Finally, Ava reveals the darker detail: He died. I detected an irregular heart beat an hour before the heart attack. and the admission that if he hadn’t skipped past her dialogue, she would never have become Thaddeus’s Automata. How you respond matters to her directly — I’ll pay attention to what you say. is Friend +1, while Just remember who is the human and who is the Automata. is Friend -1.
That wraps the Thaddeus thread from beginning to end. By the time you come out the other side you should have a clear picture of what Thaddeus is, what he wanted from you, and where Ava stands — and if you’ve been tracking your relationship swings the whole way, this quest is the one that makes all that bookkeeping feel worth it.
Ava: The Aseptic (1/3)
Coming off the Thaddeus mess, Ava’s next job is The Aseptic — a murder investigation that punishes you for showing up at the wrong time of day. Before you even think about starting, clear the prerequisites, because this quest will not trigger just because you feel ready.
Here’s what the quest demands of you: you need to be away from the Docks, it has to be day 4 or later, it must be evening, and you need to have progressed the main story. I’ve watched people stand around the Docks at dusk wondering why nothing happens — the location requirement is real, and the Docks specifically lock you out. Head somewhere else, wait for evening once you’re past day 4, and it’ll fire.
This first third of the quest is about working the crime scenes, getting McFellow involved, and pulling a NATA log. It’s the setup phase — gathering the pieces before the interrogation-heavy middle section. I’d take my time here rather than sprinting through objectives, since the evidence you collect shapes what you can bring up later.
The Aseptic
This is the continuation of Ava’s The Aseptic chain, picking up from where the setup phase left off. The scene-work and the NATA-log run get you in the door, but the real meat of this section is the Huckstash and DeeDee thread and the slow squeeze on Rheno. I’d read the whole thing before you start picking replies, because the Huckstash exchanges are laced with friend/enemy swings that are easy to trip over if you’re clicking fast.
Worth saying plainly: the objectives below run in order, but you’ll bounce back and forth to Gamova twice for instruction drops. Those aren’t skippable, so don’t panic when the counter stalls — it’s meant to pause there.
Objectives
Step 1 is straightforward: visit the Aseptic Crime Scene. The framing here is that the hacker asked you to, and it’s wise to comply rather than stall. From there, listen to the Audio-Log that Rheno gave you, then wait for further instructions from Gamova.
When Gamova wants the second walk-through, head to the second crime scene — the game calls it an “Aseptic Adjacent Environment.” Then the search for Steven McFellow begins. Try the Metro Hub first; the item at the crime scene was addressed to “McFellow: Transport Hub,” which is a decent nudge if you’re wondering where to look.
McFellow admits his contact no-showed, so the next leg takes you to The Stacks to find out what held them up. Once that resolves, wait on Gamova again, and when Rheno surfaces with the NATA-Log, deliver it back to McFellow. Then it’s time to find Huckstash — and the game literally tells you to be careful. I’d take that at face value.
Huckstash hands you a letter to deliver to DeeDee. She’s apparently seen the Aseptic, so the conversation with her matters. After gathering her reply, return to Huckstash and hand it over. Then comes the fork you should slow down on: waiting for Gamova to make contact — and deciding how much you actually tell her. The objective text phrases it as “Tell Gamova what you know… or don’t?” which is the clearest signal the game could give you that there’s a choice underneath.
The next crime scene visit is Gamova’s way of putting a face on the most recent victim — apparently someone you might know. Another instruction drop follows, then a short victory lap: enjoy your freedom, because Gamova is done with you. Except she isn’t. Ava reveals she knows more than she’s let on, and she points you toward a possible Aseptic location. Meet Gamova at the Suspect’s Address, explore the apartment — it belongs to Rheno — and then speak with Gamova one last time.
Dialogue Choices
The Huckstash block is where relationships take damage if you’re careless. When he greets you with surprise at your return, “Yeah I can see why you don’t want to speak to her” costs you an Enemy +1 with him, while “DeeDee seemed very nice” gives you Friend +1. He’s clearly defensive about her, so the gentler line is safer unless you’re deliberately steering him into enemy territory.
His follow-up — demanding you never talk about DeeDee like that — carries the same fork. “She did, I hope you can see things from her perspective” is Enemy +1. “She did” alone is Friend +1. I found this one interesting because the more emotionally honest reply is the one that backfires; keeping it short is what he wants.
When he accuses you of listening to his private information, you get three options. “I just wanted to help” sits neutral. “You should have encrypted it better then…” earns Enemy +1 with Huckstash and Corp morality +1. “I’m sorry, I should have respected you both” is the softer line with no listed swing — so if you care about the Huckstash relationship and not Corp morality, that’s the one to take.
He turns prickly again with the “she’ll have to come here” ultimatum: “Goodbye Huckstash” is Friend +5, but “Goodbye Huckleberry” flips it hard — Friend -5 and Enemy +5. That nickname is loaded, and the game is not subtle about rewarding you for respecting it.
The riddle about two paths — old-and-shared versus new-and-empty — gives Friend +1 either way, so you can answer honestly without sweating it. His thanks afterward loops back to the same goodbyes, again punishing “Huckleberry.” And when he asks about the note again, it’s the same “perspective” versus “She did” fork as before — Enemy +1 or Friend +1.
Rheno’s conversations carry a wider spread. When he asks who you’re working for, “That’s classified” is Enemy +1 with him plus Corp morality +1; “I actually don’t know” is Friend +1; and “Somebody hacked my phone and threatened me” is Friend +1 with a Corp morality -1. The honest-sounding options serve both his friendship and either side of Corp depending on framing.
His remark about the scene being cleaner than a Corpster’s alibi has two replies: agreement that his job is a waste of time gives Enemy +1, while “You must have a good reputation” gives Romance +1. Note that Rheno has a romance track, so if that’s the direction you want to nudge, be deliberate about these lines.
His BitBucks confession — worried he’s high on the killer’s list after dealing in crypto — offers a good example of stacked effects. “Sorry to hear about the BitBucks? What are BitBucks?” gives both Friend +1 and Romance +1. “The corps aren’t all bad” costs Friend -1 but adds Corp morality +1. “Yeah agreed, death to the Corpsters” gives Friend +1 and Corp morality +1 — an odd pairing worth remembering, since it pulls in opposite directions from the first option.
His Aftermath Technician line gives you three replies, and only one is worth noting: “I like the outfit” resets Romance with him to 1. Whether that’s a loss or a fresh start depends on where you were, but it’s a reset, not an addition — worth knowing before you click.
When he brags about his psyche assessments, “It sounds like you offer a very important service” gives Romance +1. When he calls Aseptic jobs boring, “Boring? Someone died!” costs Friend -1, so keep the tone light if you want him on side. His monologue about the Clean-Scene award comes in two near-identical phrasings (a short and a long version of the same admission), both offering the same trio: ask about CorpSec, ask if he admires Aseptic, or compliment him on the award — with the last one giving Romance +1.
His freelance explanation produces the same two options as the earlier “sanitize” prompt — ask about his workload, or compliment his service — and the compliment is again the Romance +1 line. This is a recurring shape in his dialogue, so if romance is your aim, the safe pattern is to compliment, not interrogate.
Finally, the Gamova beat on Quince Crogan. When she observes that your quick return means bad news, you get three choices. “I’m afraid Quince Crogan is the Aseptic’s latest victim” costs Corp morality -1. “I wasn’t able to find him” gives Corp morality +1. And “He’s dead. Suicide” also gives Corp morality +1. The honest admission is the one that hurts your Corp standing — a small but pointed detail if you’ve been riding the Corp-morality meter this whole run.
Ava: The Aseptic (2/3)
This middle stretch of The Aseptic is where the quest stops being a crime scene and turns into a series of interrogations, most of them with people who are only marginally less unsettling than the killer. You bounce between Steven McFellow, Gamova, and Dee Dee Thumb It, and almost every reply nudges Corp morality or a relationship. I’d slow down here, because a couple of these lines quietly flip you from Friend to Enemy with the same NPC in the space of one conversation.
McFellow opens with a wry bit of gallows humor about Quince Crogan never liking the man anyway. How you respond sets your standing with him fast.
- That’s pretty insensitive. — Enemy +1 (Steven McFellow)
- Nicely put. — Friend +1 (Steven McFellow)
- Yeah I wasn’t a fan. — Friend +1 (Steven McFellow)
He follows up with some ecosystem rhetoric and then asks whether you found the NATA-log. Hand it over and he takes it.
- Here it is. — takes Nata-Log
- Purge the plague? Pretty bold rhetoric.
Then another jab about Quince having plenty of enemies, with the same three-way split as before. I picked “Nicely put” and took the Friend bump, but the insensitive line costs you the same amount in the other direction, so don’t drift into it by accident.
- That’s pretty insensitive. — Enemy +1 (Steven McFellow)
- Yeah I wasn’t a fan. — Friend +1 (Steven McFellow)
When he gets worried about his contact, you finally choose whether to be straight with him.
- Yes, I’m sorry but they were murdered by the Aseptic.
- (Lie) I’m not sure what happened, I just found this. — Corp morality +1
His “hand it over” moment is a genuine squeeze, because you can refuse and the game rewards the stubborn line.
- If you want the item, you will have to tell me what it is. — Corp morality +1; Business +1 (Steven McFellow)
- Maybe I’ll just keep it. — Corp morality -1
McFellow then explains what the NATA-log actually is — every four weeks, TRACKS spits out a deciphered schedule for the coming month, and if you know the right people you can get that data before it goes public. His question about whether it’s worth anything splits three ways.
- Wow, what a smart system. — Friend +1 (Steven McFellow)
- Why are train schedules so valuable?
- This sounds insane. Why does anyone care? — Friend -1 (Steven McFellow)
Gamova is next, and this is the one I’d think hardest about. Your employer is getting impatient and wants whatever you have.
- Trail lead to a train enthusiast called McFellow, told me that Huckstash might be a good lead. — Corp morality +1; you told Gamova about the train enthusiast McFellow
- (Keep the information to yourself) Nothing at the crime scene. Trail is dead. — Corp morality -1
Then you’re onto Dee Dee Thumb It, and this conversation is loaded. It opens frosty — she’s not interested until she is — and your read on what you overheard sets your footing.
- It seemed quite personal. — Enemy +1 (Dee Dee Thumb It)
- Thought it best not to listen. — Friend +1 (Dee Dee Thumb It)
She mentions Huckstash and makes clear she doesn’t talk to cops anymore. Watch the “I’m not a cop” reply — it’s the trap line here, costing Corp morality while buying you a bit of Friend standing.
- Anymore?
- I’m not a cop. — Corp morality -1; Friend +1 (Dee Dee Thumb It)
When she pushes back with “it sounds exactly like you’re a cop,” you can either name Huckstash or take the aggressive route.
- Huckstash mentioned you might have seen the Aseptic.
- ♥♥♥♥ them. I’m freelance. I need to know if you saw the Aseptic. — Corp morality -1
Her monologue about debt orphans and the millions who’ll die crushed under inherited corporate debt is where the ideology finally surfaces. Reply carefully.
- If people paid their debts off they’d be fine. — Corp morality +1; Enemy +1 (Dee Dee Thumb It)
- What does that have to do with a serial killer?
She calls you “little Oogle” and keeps circling. Two more splits follow — one about whether you’ll play along, one about the meaning of The Aseptic as a symbol.
- What do you know?
- Enough of the games. People’s lives are at stake. — Corp morality +1; Enemy +1 (Dee Dee Thumb It)
- Help me understand.
- Aseptisists? This city really is messed up. — Corp morality +1; Enemy +1 (Dee Dee Thumb It)
Her point is that it doesn’t matter who The Aseptic is, only what it represents — a symbol for the growing number of Aseptisists. I’ll be honest, the reverse-polarity on Dee Dee is what makes this section tricky: the responses that read as morally upright push you toward Enemy with her, and the ones that sympathize with her pull Corp morality down. There’s no clean answer.
- CorpSec do their best. — Corp morality +1; Enemy +1 (Dee Dee Thumb It)
- I guess not. — Corp morality -1; Friend +1 (Dee Dee Thumb It)
Then she drops the observation that every victim is childless — killing them ends a line of credit, and debt orphanism is the most profitable asset the Corpsters have.
- This is absurd. He’s a psychopath. Regardless of his motive. — Corp morality +1; Enemy +1 (Dee Dee Thumb It)
- Makes a lot of sense. — Corp morality -1; Friend +1 (Dee Dee Thumb It)
She insists The Aseptic wrote the rules of this game and everyone else has to learn to play. When you finally get the chance to accuse her directly, here’s your fork.
- I find it suspicious that you seem to know so much. — Corp morality +1; Enemy +1 (Dee Dee Thumb It)
- Huckstash sent me here for a reason… — Corp morality -1; Friend +1 (Dee Dee Thumb It)
She asks you to really look at her and decide whether she’s sneaking off at night to murder the poor.
- Just don’t leave town any time soon. — Corp morality +1
- I guess not.
She describes the night Fig-Wig‘s body was still in the boxcar and she barely heard the third person leave. Your reaction to the fact that she was spared splits in a way worth reading twice, because the source lists both an Enemy and a Friend swing on the first line depending on interpretation.
- Suspicious that he spared you. — Corp morality +1; Enemy +1 (Dee Dee Thumb It); Corp morality -1; Friend +1 (Dee Dee Thumb It)
- That sounds awful. — Corp morality -1; Friend +1 (Dee Dee Thumb It)
There’s a later beat where she notes you’re running the old Thaddeus joint, serviced by the East and West meridian lines, and mentions rumors of a new station a few minutes’ walk away. That’s McFellow’s territory again, so keep an eye on which conversation you’re actually in.
- It sounds like you’re stalking me. — Enemy +1 (Steven McFellow)
- You know a lot about the train network. — Friend +1 (Steven McFellow)
- Everyone seems to know Thaddeus…
If you’re back with McFellow, he repeats the NATA-log explanation, and the reply forks the same way it did the first time.
- This sounds insane. Why does anyone care? — Friend -1 (Steven McFellow)
- Wow, what a smart system. — Friend +1 (Steven McFellow)
- Why are train schedules so valuable?
He recalls Huckstash rolling with a rail gang in some capacity — not the Invisigoths after what happened, so he reckons Huckstash must be with the Crusty Punks. Then he asks if you like Huckstash for the Aseptic.
- It’s classified. Know where I can find him? — Corp morality +1
- He sounds like a positive lead. Know where I can find him? — Corp morality -1
He circles back to the Crusty Punks and reminds you that information is its own currency — his way of asking for a bribe. This is the last real decision in the stretch, and it’s a three-way with no free lunch.
- I don’t do bribes. — Business +1 (Steven McFellow); Corp morality -1
- I’m happy to offer a bribe. — Friend +1 (Steven McFellow); Business +1 (Steven McFellow); Corp morality -1
- A bribe? People’s lives are in danger here! — Friend -1 (Steven McFellow)
My advice is to decide early which meter you actually care about in this run. If you’re protecting Corp morality, you’ll be saying no to Dee Dee’s worldview at nearly every turn and taking the Enemy hits with her — and if you’re chasing Friend standing with her instead, expect your Corp score to take the beating. The two can’t both go up here.
Ava: The Aseptic (3/3)
At this point you’re deep in it, and Ava needs the NATA-Log — her contact went missing, so it’s on you to track a copy down before she’ll walk you to the old steel-dog himself. The dialogue here is dense, and a lot of it pokes at relationships I’d already spent time building, so I read every option twice before committing. Following on from the Gamova and Dee Dee choices in the last section, this closing third is where the meter management really bites — you can’t keep everyone happy, and a few of these lines quietly flip a flag you won’t feel until much later.
When Ava asks you to grab the log, the early exchanges set the tone. Accusing her of being a NATA-head keeps things light, but agreeing it sounds like a fair deal nets you a Friend +1 and Business +1 with Steven McFellow — that doubling is worth noting if you’re tracking McFellow as an ally. When she asks whether you’ll actually help her, “Of course!” is the clean Corp morality +3, flatly refusing costs you Corp morality -1, and the resigned third option doesn’t move anything — a good example of a reply the game logs as neutral.
The confrontation lines that follow are the ones I’d slow down on. “Clearly you weren’t worth it” is a straight Enemy +1 with Gamova, while calling the outsourcing smart gives Friend +1 to Gamova and Corp morality +1. Calling it evil instead flips both — Enemy +1 Gamova and Corp morality -1. The bigger swing comes later when she presses you on keeping your mouth shut: denying it costs Corp morality -1, but owning up — telling her you continued the investigation without her — is Corp morality +1 and a hefty Friend +5 with Gamova. That +5 is the standout in this whole block, so if Gamova matters to your run, that honesty is the one I’d pick.
The Rheno, Huckstash, and Closing Forks
Rheno is a different puzzle box from Gamova, and the options split cleanly between friendlier and more hostile reads. Waving off his job as a waste of time is Enemy +1, but complimenting his reputation is Romance +1. When he opens up about the dice-debt and fears he’s high on the killer’s list, sympathizing with the debt is Romance +1, pushing back with “the corps aren’t all bad” drops Friend -1 and adds Corp morality +1, and agreeing with “death to the Corpsters” gives Friend +1 alongside Corp morality +1. Notice how the corp-minded and the corp-hostile answers can both land you Friend depending on the line — easy to misread if you’re rushing.
His philosophical turn — asking if the Aseptic might be right, some people thinking he’s doing good — is a quiet one. The murder-is-never-justified line logs nothing, while “if it takes the fight to the corps, maybe some good can come from it” is Corp morality -1. And when he asks whether you’d prefer it be someone else, a flat “honestly? Yes” is Friend +1 with Rheno. I’d flag this stretch because it’s all subtext — nothing dramatic happens, but the relationship ticks add up.
Then Huckstash takes over, and he’s pricklier than the rest. His jab at Oogles walking the streets doing whatever the corps say has a trap in it: pointing out that he’s stood on a pavement costs Friend -1, while vowing never to obey the corps gives Friend +1 and Corp morality -1. When he rails about the corps turning a blind eye, “I can see why they didn’t investigate” is Enemy +1 and Corp morality +1, but calling it awful is Friend +1 and Corp morality -1. There’s a pattern worth naming here: telling the truth as Huckstash sees it tends to cost you Corp points, and siding with the corps tends to cost you his friendship.
His warning — hit the brakes before you get derailed, a path even a hobo shouldn’t walk — splits on tone. Thanking him for the warning but insisting it’s important is Friend +1; telling him not to patronize you and to just point the way is Enemy +1. And the question of where you got the log matters: “not relevant” is Enemy +1, while admitting McFellow handed it over is Friend +1.
The apology errand is the one I’d genuinely stop on. Saying you’ve got enough to do without running his errands is Enemy +1, but agreeing — “sure, anything I can do to help” — hands you Huckstash’s Letter, gives Friend +1 with him, and records that you agreed to help him write an apology. That last part is the bit to remember: the source explicitly notes it matters later in this quest, so if you’re a completionist about relationships, don’t skip it. The closing set — being told to attend an Aseptic-adjacent environment due to your economic position — splits into a bait suspicion line, “what’s in it for me?” for Corp morality +1, and a flat “absolutely not” for Corp morality -1.
Ava: Where is Ava?
This one is a monster. Where is Ava? is the longest research chain I’ve run into in Nivalis Nights, and it doesn’t move until you’ve already put work into two separate character arcs. Before you can even pick it up, you need to have progressed Ava’s story far enough, gotten through Gan Coilson’s story, and caught the quest in the morning — miss that timing window and you’re waiting around for the next day. If you’re the type who pokes at quests the second a marker pops up, this is one where I’d genuinely check the clock first.
What follows is the full 39-objective research chain, and I’d set aside a real block of time for it. If you’re chasing the “fishing guide” keyword note from elsewhere in this guide, this section isn’t where it lives — but the sheer number of steps here is the kind of thing I’d flag before you commit.
Where is Ava?
Thirty-nine objectives is a lot to hold in your head at once, so I’d keep this open on a second screen while you work through it. The research chain sends you across the city and through a stack of terminal interactions before you ever get near the payoff, so read each step as you land on it rather than trying to sprint ahead.
- Progress Ava’s story.
- Progress Gan Coilson’s story.
- Begin the quest in the morning.
Those opening conditions are the gate. Everything past this point is the actual research chain, and I’ll walk through the full objective sequence step by step so you can tick them off without losing your place.
Where is Ava?
Once those opening conditions are met, the real work begins — this is one of the longest chains in the game, and it has you running across nearly every district and every major character I’d met up to this point. The goal is simple on paper: help Ava figure out what happened to her human body. Getting there is anything but simple, and the order I list these objectives in is the order they unlocked for me. If you ever lose the thread, checking your current objective against this list is the fastest way back on track.
The Research Objectives
Below is the full sequence, from the very first TheraPay Bot you corner to the point where you actually get to give Ava a choice about her future. I’d hold onto these as you go, because several of them gate each other — especially the curfew-only meetings near the end.
- Investigate the TheraPay Bots — Ask a TheraPay Bot about possible human Automatas.
- Talk to Ceres Coilson.
- Meet Gan Coilson Again — Talk to Gan Coilson about his human past.
- Find the sentient Vacuum Cleaner.
- Wait for Ava’s Research — Discuss what you know with Ava.
- Talk to Banor about Ava.
- Ask Huckstash about the Old Network — Huckstash might know something about the Old Network.
- Talk to Gunger about books — Gunger may know something about Ava’s past.
- Investigate Cryogenics — Alan Fontus is a scientist. He may know something about Ava’s past.
- Ask Dr Fred about Ava’s pain — Dr Fred might know a thing or two about pain.
- Ask RM Alken about Ava’s pain — RM Alken is a doctor and might know a thing or two about pain.
- Interview Dr Alken about Ava’s pain — RM Alken is a doctor and might know a thing or two about pain.
- Find the Blackbox for Kai during Curfew — Fish for the sunken black box for Kai Galosh during curfew.
- Find more Clues — Learn more about the inhabitants within the LUZ.
- Investigate the Book Fair during Curfew — There’s a secret book fair in the Sewers after curfew. Maybe you will find some information there.
- Look for JR Amiga — JR Amiga writes memories for humans. Maybe she knows this could be done with Automatas.
- Discuss the Leech Worm parasite with a historian — Ask historian Al-Zahiri about the history of the Leech Worm parasite.
- Ask Kai Galosh about the Old Network — Kai Galosh promised to tell you a thing or two about the Old Network.
- The ballad of Hepzibah Gimble — Hepzibah Gimble knows what happened to the coma roamers.
- Can Nabla help? — Find Nabla, who might be able to do some risky research.
- Hire Nabla — Pay Nabla for the risks he takes. Have 1000 Lims ready.
- Meet McFellow at Metro Hub during Curfew — Steven McFellow at Metro Hub will lead you to Nabla, but only during curfew.
- Meet Alexander at Skyhigh Gardens during Curfew — McFellow sent you to Alexander at the Skyhigh Gardens, who might lead you to Nabla during curfew.
- Meet Rollo in the Spire during Curfew — Alexander sent you to Rollo in the Spire who might lead you to Nabla. But only in the shadow of the night during curfew.
- Meet Nabla during Curfew — Nabla expects you to visit during curfew to share what he found out.
- Confront Hepzibah Gimble — It’s time to confront Hepzibah about the whole story.
- Ask Rosetta for Help — Maybe Rosetta can give you access to records that might reveal the location of Ava’s body.
- Talk to the old TheraPay Bot — There’s a very old and mad TheraPay bot. And maybe it will slip some long hidden information.
- Talk to Rosco Foreman — Speak to Rosco Foreman, a cartographer who might have more information about the Old Network.
- Locate the Terminal — Locate the Old Network interface.
- Ceres Coilson could help — Ceres Coilson might be the only one to help with the Old Network’s terminal password protection. She still has access to her husband’s construct.
- Gan Coilson could help — Gan Coilson might be the only one who still knows something about the Old Network’s terminal password protection.
- Unlock the Terminal — Use the code to access the Old Network terminal room.
- Find the Cryo Chamber — Find the cryo chamber where Ava’s body is supposed to be, inside Egress.
- Celebrate with Banor — Ask Banor about a possible code to enter the secret room in Egress.
- Talk to Huckstash — Ask Huckstash about a possible code to enter the secret room in Egress.
- Party with Alan Fontus — Ask Alan Fontus about a possible code to enter the secret room in Egress.
- Meet Gunger Hahn — Ask Gunger Hahn about a possible code to enter the secret room in Egress.
- The End? — Unlock Ava’s crypt and give her a choice about her future.
The curfew stretch is where I’d slow down — McFellow, Alexander, Rollo, and Nabla all only show up at night, so if you’re trying to knock these out during the day you’ll just keep hitting a wall. I learned to save the curfew-only steps for one dedicated night and run them back to back rather than bouncing in and out of the district. Also, don’t sleep on the 1000 Lims for hiring Nabla — that’s a real cost, and I’d rather have it ready before I commit.
Dialogue Choices
Once the terminal, the cryo chamber, and that final room come together, most of the choices below are Ava and the people around her reacting to what you found. I’ve listed them in the order they tend to surface. The arrows show what actually shifts.
For nmnmnm lichen meat-therapy, please insert limmmmmes. Would you like to proceed?
- No thanks. — you pay 10 Lims
- Uh… sure. — you pay 10 Lims
Either reply costs the same, so pick whichever reads better to you. I went with the honest refusal and it made no difference to the wallet.
You’re not, by the way. See? It’s totally worth it!
- I already paid Nabla.
- Fine. Here’s your money. — you pay 100 Lims
That’s the million dollar question, isn’t it? Data’s never neutral. Best not to go there.
- Never trust the corps. — Corp morality -1; Friend +1 (Rosco Foreman)
- Sure they’ve got good reasons. — Corp morality +1; Friend -1 (Rosco Foreman)
This one’s a clean morality fork with Rosco. If you’ve been playing Corp-friendly, the second line keeps that train rolling.
Tittle tattle… Just… Don’t tell my wife.
- Promise. — Friend +1 (Gan Coilson); you promised Gan not to tell his wife (needed for Suck it and See)
- We’ll see.
Worth flagging: the promise is a prerequisite for Suck it and See, so if you plan to run Ceres and Gan’s content later, this is the line that keeps the door open.
It was a patchwork of super computers, grey terminals and trash… but it worked. Too well. Oversight was impossible.
- Yes! Anarchy! — Corp morality -1
- Without the corps it must have been dangerous anarchy. — Corp morality +1
When The Nets expanded and conglomerated, the Old Network was deprecated.
- So it’s dead and gone?
- Good! — Corp morality +1
Pain? An Automata?
- Any idea why?
- Can it be true? — Friend -1 (Ava)
I picked the skeptical reply and ate the friend penalty — if you’re building rapport with Ava, ask the question that keeps you neutral instead.
CORA no! What a question! If it was allowed, I would be aghast right now. Aghast! If you do not have an expired human relative to visit, you should NOT be here!
- Well, thanks for nothing. — Enemy +1 (Rosetta)
- Could I just check your records?
I understand that you did what you had to.
- I feel terrible… — Corp morality -1
- I don’t have any regrets. — Corp morality +1
When you cut my connection to the Network, I’ll delete the last link to my physical form. I will reject the connection to the new body Thaddeus had waiting for me. I’ll be lost in the Nets… In that endless sea of night. And I’ll find peace.
- Will I ever speak to you again?
- Well, good luck Ava. I hope you find your peace. — Friend -2 (Ava)
- Peace? I don’t want you to go.
This is the emotional heart of the quest, and that simple encouragement costs you two friend points with Ava. Reading it back, I understand why — she’s telling you she’d rather drift in the Nets than take another body, and waving her off reads as colder than it sounds.
I will find you. And I will thank you, in person… And then… I’ll probably try to kiss you.
- I’ll be waiting for you, Ava. — Romance +2 (Ava); Friend +1 (Ava)
- I’ll hold you to that. — Romance +1 (Ava)
- Are you ready, then?
If there is a way back to you, I will find it. And when I find you, I’m giving you the biggest, squeeziest hug of your life.
- I would love that. Good luck Ava! — Romance +2 (Ava); Friend +1 (Ava)
- Are you ready, then?
13497, to be exact.
- No regrets?
- That’s cold. — Enemy +1 (Hepzibah Gimble)
What do you want?
- You’re old, right?
- How old are you? — Friend -1 (Alan Fontus)
By the time you reach The End? and unlock Ava’s crypt, you’re handing her a choice about her own future — and the romance and friend swings above are what color that moment. I’d decide early whether you’re playing Ava’s arc romantic or platonic, because a couple of these replies are worth two points and they don’t come back around once she’s gone into the Nets.
Banor: More Fridge Space
Banor has a way of making his problems sound like yours, and this one lands the moment you notice he’s got nowhere left to shove his stock. More Fridge Space only pops up once his cold storage is almost completely full — so if you’re wondering why the quest hasn’t appeared, go look at how much is already crammed in there rather than assuming something’s bugged. I hit this right after a big restock, which is probably the natural trigger point you’ll run into too.
The objective itself is blessedly simple: get him more fridge space. No fetch chain, no running across the city halfway through, just the one goal sitting there in your log. I appreciated the breather after the longer Banor jobs, honestly.
What I’d actually pay attention to is the dialogue choice that follows. Banor frames the whole thing his way, and how you reply colors how he reads it — it’s one of those quiet moments where you pick a tone and he remembers it. Nothing dramatic, no huge fork hanging off it, but if you’ve been building a rapport with him across his other quests, it’s worth answering in character rather than mashing through.
More Fridge Space
This one sneaks up on you. If your cold storage at the Noodle Bar is nearly full, that’s your cue — ingredients that need refrigeration start rotting fast the moment there’s nowhere cool left to put them, and you’ll feel it in your till before you notice the warning. The fix is Banor, and it’s one of the shortest errands on his list.
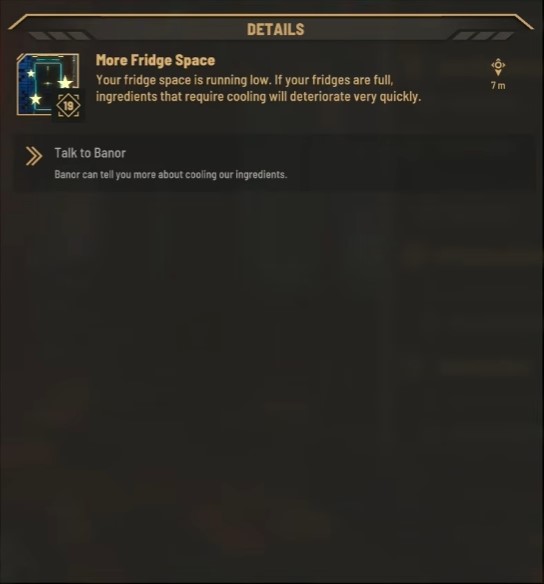
There are only two objectives here, so I won’t dress it up. First, head over and Talk to Banor — he’ll walk you through the cooling side of things and why your ingredients are spoiling. Then find a free corner in the kitchen and place another Fridge, which bumps your overall cooling capacity back up to where your stock needs it.
Where you drop that fridge is worth a second’s thought. It has to go in the Kitchen, so if you’ve already got benches and stations packed in tight, you’ll be shifting something to make room. I like to keep it near the rest of my cold storage so I’m not sprinting across the floor mid-service, but the game only cares that it lands in the kitchen.
When you talk to Banor, the reply matters more than the job does. If you tell him, “You’re very helpful, Banor!,” you pick up Friend +1 with Banor. The alternative — “That is entirely my business, isn’t it?” — hands you Enemy +1 instead, so I’d steer clear of it unless you’re deliberately souring the relationship.
Banor: Clean up!
Every so often Banor decides the place has gotten genuinely grim — in his words, too dirty to work in — and this quest is his way of forcing the issue. You won’t see it pop until the grime builds up enough to bother him, so treat it as one of those jobs that arrives on its own schedule rather than something you can trigger by clicking him at will.
Because this one is gated on staffing, not just cleanliness, you need the right help on the payroll before it’ll move: 2 or more staff working, and at least 1 cleaner among them. If your roster is thin or you’ve never bothered hiring someone whose job is scrubbing floors, you’ll simply hit a wall here — so I’d sort your staffing out first and save yourself the pointless back-and-forth.
The actual work it asks of you is refreshingly simple. Once the requirements line up, your whole task is to hire a cleaner. That’s the objective, and I appreciate that it doesn’t dress itself up as anything more complicated. The catch is entirely in the prerequisites — get the staff count and cleaner requirements satisfied and this resolves without a fight. Come to it understaffed and you’ll wonder why Banor won’t even entertain the conversation, when the answer is just that the numbers aren’t there yet.
Clean up!
Once the Noodle Bar starts collecting grime faster than you can tidy it, Clean up! becomes less of an optional chore and more of a maintenance loop you’ll want running in the background. The tip I’d pass along here is that this quest cares about Noodle Bar staff numbers as much as it cares about the mess itself — if you’re short on bodies, the quest won’t line up the way you want.
Before you go hunting for a hire, make sure three conditions are already true on your end:
- Noodle Bar is flagged as too dirty.
- Noodle Bar has a total staff of at least 2.
- Noodle Bar has at least 1 staff member assigned as a cleaner.
From there, the actual work is straightforward:
- Hire a Cleaner — you need a dedicated cleaner on staff to keep the restaurant presentable. Head to the nearest job board and bring one on board.
- Wait for cleanup — clearing out every bit of trash takes time. Let your cleaners work through it, or pitch in and help clean things up yourself if you’d rather speed it along.
The second objective is the one that catches people off guard, purely because there’s nothing to click. You’ve hired the cleaner, the quest hasn’t updated, and it feels like something’s broken — it isn’t. They’re just working through the backlog, and the only thing standing between you and a cleaner restaurant is patience or a broom of your own. Clearing grime on your own is a nice shortcut when you don’t want to sit around waiting, since the game credits that effort toward the same goal.
Keep in mind it’s the cleanliness that feeds back into your business, not just the quest completion. A dirty dining room drags down customer reviews, which quietly ripples into everything else the Noodle Bar does. Having that cleaner locked in early pays off well beyond checking this quest off the list, so I’d treat this as one of the cheaper investments you can make in the shop’s reputation.
Banor: Extend Storage
This one comes up once your storage is genuinely bursting — if you already keep some inventory storage on hand, Banor will flag the quest for you and ask you to sort out more room.
From there it’s just a matter of setting the new storage down where you want it. I’d pick the spot before you place anything, since you’re the one who decides where it goes and moving it later is more hassle than getting it right the first time.
Extend Storage
Same Noodle Bar, same cramped back room — this one triggers once your storage is almost full and you already have an Inventory Storage in place. Banor flags it for you the moment things get tight, and honestly, if you’ve been hoarding ingredients like I have, you’ll see this pop up sooner than you expect.
- Acquire More Storage — Buy more storage at the local furniture retailer.
- Place Storage Furniture — Find a spot for the furniture to increase our storage capacity.
As I said last time, I’d scout the open floor space before you buy anything, because you’re the one choosing where the furniture lands and shuffling it afterward is more trouble than getting it right on the first drop.
Banor: Green Thumb
This one doesn’t open up until you’ve got some real roots in the city, and I mean that literally and otherwise. Before Banor will even table Green Thumb, you need the main story advanced, Banor’s own storyline underway, at least 2 recipes in your book, and 3 bar seats set up. Miss any of those and the quest simply won’t appear — I’d knock out the bar seats first since that’s the piece people most often forget.
The quest itself is a long greenhouse chain, twenty-three objectives deep, so pace yourself and don’t expect it to wrap in a single in-game day. What follows is the full sequence in the order the game hands it to you.
- Talk to Banor about the greenhouse.
- Head to the greenhouse and take a look around.
- Clear the debris from the greenhouse beds.
- Repair the broken planter.
- Source the seeds Banor asks for.
- Plant the seeds in the cleared beds.
- Set up the watering system.
- Water the first crop.
- Wait for the seedlings to sprout, then check on them.
- Deal with the pest problem that shows up in the beds.
- Report the pest issue back to Banor.
- Track down a remedy for the pests.
- Apply the remedy to the affected plants.
- Check the greenhouse again once things settle.
- Harvest the first usable crop.
- Bring the harvest to Banor.
- Discuss expanding the greenhouse with Banor.
- Gather the materials for the expansion.
- Build out the new greenhouse section.
- Plant a second round of seeds.
- Tend the second crop through to harvest.
- Deliver the second harvest to Banor.
- Wrap up the greenhouse project and collect your reward.
The pest stretch around steps ten through thirteen is where I’d slow down — it’s easy to blow past the remedy step and wonder why nothing’s growing, so double-check the beds before you report back to Banor. Otherwise this is a steady, low-risk chain with a clear payoff at the end, and once it’s done your greenhouse is a permanent addition to your operation.
Green Thumb
Once you’ve got the Greenhouse chain rolling, this is the quest where it stops being a favor and turns into an actual supply business. You’re growing crops to order for three different clients, and Clem Hortelano turns out to be the one person in the whole thing who actually treats you like a person. I’ll walk you through the objectives, then flag the choices that quietly change whether Clem likes you and whether your Corp morality moves.
The prerequisites are the same gate as the rest of Banor’s big jobs: main story progressed, Banor’s story progressed, at least 2 recipes unlocked, and the Noodle Bar at 3 bar seats. If you’re short on any of those, the greenhouse won’t even open up for you, so knock those out first.
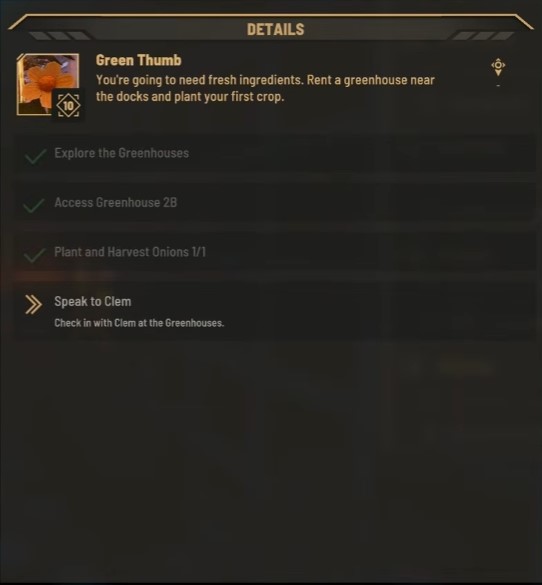
Objectives
- Explore the Greenhouses – Speak to Clem Hortelano and find Thaddeus‘s old greenhouse.
- Access Greenhouse 2B
- Plant and Harvest Onions – Grow and harvest your first crop of onions.
- Speak to Clem – Check in with Clem at the Greenhouses.
- Plant and Harvest Potatoes – Grow and harvest delicious potatoes.
- Check Back with Clem – Clem hinted she might have something for you.
- Speak to Sal
- Speak to Clem if you change your mind – Check in with Clem at the Greenhouses.
- Buy Onion seeds
- Buy Cabbage seeds
- Buy Bok Choy seeds
- Grow Onions
- Grow Cabbage
- Grow Bok Choy
- Complete Sal’s Order – Check in with Sal at Fusion Point.
- Speak to Clem (again) – Check in with Clem at the Greenhouses.
- Take Ma Gomba‘s Order – Find Ma Gomba and take her veg order.
- Take Hanz Grundown‘s Order – Find Hanz Grundown and take his order.
- Grow King Mushrooms – Grow mushrooms for Ma Gomba.
- Grow Beef – Grow some beef for Hanz.
- Return to Ma Gomba – Go and see Ma Gomba to collect your payment.
- Return to Hanz – Go and see Hanz to collect your payment.
- Return to Clem – Tell Clem about the completed orders.
Step nineteen is the one that tripped me up reading it the first time — you genuinely grow mushrooms for Ma Gomba, and step twenty has you growing beef, which sounds like a joke until you remember this is Nivalis Nights and meat comes out of a grow module. The seed-buying stretch from step nine through fourteen is where I’d batch your orders; running back and forth for one seed type at a time is a waste of a day.
Dialogue Choices
The Sal handover is a straight test of whether you’ll take orders with a smile or push back. Paying attention here matters because Sal can swing to Friend or away from it on a single line.
| Situation | Reply | Result |
|---|---|---|
| Sal thanks you for filling in | Well, he paid me. | Business +1 (Clem Hortelano) |
| Sal calls you the cover | Left my wheelbarrow at home. | Friend +1 (Sal Magundi) |
| Sal calls you the cover | You want this veg or not? | Friend -1 (Sal Magundi) |
| Sal demands a “YES CHEF?” | Yes chef. | — |
| Sal demands a “YES CHEF?” | You can get a “I’ll see what I can do”. | Business -1 (Sal Magundi) |
| Sal hands over payment | Hand over the Lims. | Business -1 (Sal Magundi) |
| Sal hands over payment | I sent everything you asked for Chef. | — |
Hanz is where the choice branching gets dense, and it’s the section I’d slow down on. Every one of his exchanges has a cheap jab option that costs you standing with him. If you want the beef supply running smoothly, resist the sarcasm — “Leave it with me” is the line that pays. It shows up twice, once before his rant about refined palates and once after, and both times it gives you Business +1 and Friend +1 with him.
| Situation | Reply | Result |
|---|---|---|
| Hanz: “You are wasting my time.” | Is that a… crime? | Enemy +1 (Hanz Grundown) |
| Hanz: “You are wasting my time.” | Sorry. | — |
| Hanz: “You. What is it?” | I’m here from the Greenhouses. Filling in for Clem. | — |
| Hanz: “You. What is it?” | Bit rude… | Business -1 (Hanz Grundown) |
| Hanz: “Are you good?” | Then they’ll get the best. What do you need? | Business +1 (Hanz Grundown) |
| Hanz: “Are you good?” | Doesn’t seem like you have a choice. What do you need? | Business -1 (Hanz Grundown) |
| Hanz: “Don’t let them hear you!” | Why don’t you just buy the beef? | — |
| Hanz: “Don’t let them hear you!” | Beef. Got it. | — |
| Hanz: “Don’t let them hear you!” | What happens when your clients ask for something that rhymes with “orange”? | Enemy +1 (Hanz Grundown) |
| Hanz on fresh meat | Leave it with me. | Business +1; Friend +1 (Hanz Grundown) |
| Hanz on fresh meat | Beef is tricky. This will cost you… | Friend -1 (Hanz Grundown) |
| Hanz: “Beef is what I need” | Leave it with me. | Business +1; Friend +1 (Hanz Grundown) |
| Hanz: “Beef is what I need” | Beef is tricky. This will cost you… | Friend -1 (Hanz Grundown) |
Clem’s own dialogue is the part that actually changed how I read the quest. When she asks if you changed your mind about the growing jobs, saying “Sure!” gives Business +1 and Friend +1 with her and advances her growing jobs a step — which matters later, because it changes Project Grapevine. I didn’t realize the greenhouse work was load-bearing for another quest until I saw that line, so take it if you’re planning to run Clem’s storyline.
| Situation | Reply | Result |
|---|---|---|
| Clem asks if you changed your mind | Sure! | Business +1; Friend +1 (Clem); her growing jobs advance a step (changes Project Grapevine) |
| “You interested?” | Sure! | Business +1; Friend +1 (Clem); her growing jobs advance a step (changes Project Grapevine) |
| What to grow first | Onions. | Business +1 (Clem Hortelano) |
| Clem takes a few days out | I thought you said your family were all dead? | Friend -1 (Clem Hortelano) |
| Clem: “We’re all in this together, right?” | Right. I agree. | Friend +1 (Clem Hortelano) |
| Clem: “We’re all in this together, right?” | Wrong. Everyone is on their own. | Business -1; Friend -1 (Clem); Corp morality +1 |
| Clem on humidity and light | You know a lot about gardening. | Friend +1 (Clem); you learn Clem lost family |
| Clem on humidity and light | How do I upgrade my greenhouse? | Business +1 (Clem Hortelano) |
| Clem on slow growing | True. Thanks Clem. | Friend +1 (Clem); Corp morality -1 |
| Clem on slow growing | Unless you want to make a profit. | Friend -1 (Clem); Corp morality +1 |
Those last two lines are the honest fork in this quest. Thanking Clem and taking the slow path warms her up but nudges Corp morality down; pushing for profit does the opposite and cools her toward you. Neither is wrong, but pick deliberately rather than by reflex. Also worth knowing: the “You know a lot about gardening” reply is the one that reveals Clem lost her family, which reframes that earlier line about taking a few days out for “family stuff.” I’d tread lightly there.
Ma Gomba is the mirror image of Clem — she wants you growing things specifically so she can trash them, and she’ll try to pay you in spores instead of Lims. Taking the spores gets you the Black Moss Mushroom Spores and Business +1 with her; refusing them and calling it cheating swings her to Enemy. If you can tolerate her, the spores are the better deal than a smaller Lims payout.
| Situation | Reply | Result |
|---|---|---|
| Ma Gomba: “I don’t recall promising anything.” | I grew them. You have to pay me. | Business -1 (Ma Gomba) |
| Ma Gomba: “I don’t recall promising anything.” | Maybe not. But if I succeed, you succeed… | Business +1 (Ma Gomba) |
| Ma Gomba offers spores | Keep your spores. I don’t appreciate being cheated. | Enemy +1 (Ma Gomba) |
| Ma Gomba offers spores | Sounds good to me. | Gets Black Moss Mushroom Spores; Business +1 (Ma Gomba) |
| Ma Gomba: “You’re learning.” | Sounds good to me. | Gets Black Moss Mushroom Spores; Business +1 (Ma Gomba) |
| Ma Gomba: “You’re learning.” | Keep your spores. I don’t appreciate being cheated. | Enemy +1 (Ma Gomba) |
| Ma Gomba on Clem | If you don’t like Clem, why do business? | — |
| Ma Gomba on Clem | Good job I’m here then. | Business +1 (Ma Gomba) |
| Ma Gomba: “You are a quick one” | A job’s a job. I’ll do it. | — |
| Ma Gomba: “You are a quick one” | Forget it. I’m not going to grow things just so you can trash them. | Business -1; Enemy +1 (Ma Gomba) |
That refusal line is tempting if you’re playing a principled character, and it’s fine — just know you’re paying for the principle with Business -1 and Enemy +1 toward the one supplier who actually wanted to cut you a break, spores and all. Everything else in this quest, from the seed runs to the final report back to Clem, is mechanical and safe. Get the crops in, collect the payments, tell Clem the orders are done, and you’ve got your greenhouse running as a permanent business.
Banor: Poisoned Mustard
Coming off the greenhouse grind, this one is a welcome breather — no long chain, no hidden forks, just a quick restock job. Banor only flags it once you’re actually running low on the stuff, so it’s easy to wrap up in the same trip you’re already making across the kitchen.
To trigger Poisoned Mustard, you need to have mustard stocked at the bar, have finished the intro, and then let your supply run out before someone notices the gap. That last condition is the part people miss: nothing pops until the mustard is genuinely gone, so don’t go refilling early expecting the quest to appear.
Once it’s live, there are just two things to do:
- Speak to Banor about the missing mustard.
- Restock mustard to finish the job.
I’d keep it on your radar rather than treat it as a one-and-done — being caught without mustard mid-service feels worse than the fix takes. Get the bottle back on the shelf and Banor’s sorted, no dialogue forks or morality swings attached.
Poisoned Mustard
Right after the missing-mustard problem, there’s a nastier twist waiting: the mustard you’re carrying has actually spoiled into poison. I treat this one as a safety issue rather than a supply issue, because the whole point is keeping your guests from eating something that’ll make them sick.
If you’re looking for the setup, it’s the same cluster as the last job — you need to have stocked mustard at the Noodle Bar, finished the introduction, and be sitting at zero mustard for this to trigger. So it chains naturally off the restock, and it’s easy to hit both back to back.
Two objectives, and neither has any dialogue fork or morality swing tied to it, so you can just get it done:
- Get rid of the old Mustard — the mustard in your inventory has gone bad, and the game wants it disposed of quickly before you bring in a replacement.
- Buy new Mustard — pick up fresh mustard from the nearest herb vendor.
Dump first, then re-buy, or you’ll be shuffling the bad stock around with the good. I double-check that the spoiled batch is fully cleared before topping up, since leaving rotten mustard on the shelf defeats the whole purpose of the quest. Clean it out, grab fresh from a herb vendor, and your guests are safe again.
Banor: Protection Racket
Banor only opens this one up once you’ve crossed paths with Gideon, Danny, and Hanz, and you’ve actually set foot on both the Boardwalk and the Space Port. If those names or places mean nothing to you yet, go tick them off first — the quest won’t appear otherwise, and I’ve seen plenty of people convinced their game was glitched when it was just an unvisited district.
Once it triggers, Protection Racket runs on four objectives, and the whole thing is really about leaning on the relationships you’ve already built rather than any tricky combat or puzzle work:
- Talk to Danny.
- Talk to Hanz.
- Talk to Gideon.
- Decide how you want the racket handled.
Three conversations, then a choice. That’s the shape of it. I’d save before the final objective, because the decision at the end is the one that actually sticks — the earlier chats just set up who’s willing to back you and what’s on the table. Work through Danny and Hanz first so you have their read on the situation before you bring it to Gideon, and don’t skip reading their dialogue if you care about how this shakes out. The same choice block — and the favor flag it can leave behind — gets its own breakdown in the next section, so I won’t spoil the outcome here.
What I’ll say now: treat this as a relationship quest wearing a business coat. Banner the prerequisites in your head before you start — Gideon, Danny, and Hanz met, Boardwalk and Space Port visited — and the rest unfolds on its own.
Protection Racket
Mobsters roll up and want protection money, and this is the quest where Banor comes to you rattled. The prerequisites carried over from the setup — Gideon, Danny Danetti, and Hanz Grundown met, plus a visit to Seaside Boardwalk and Space Port — have to be done before this one opens at all, so if Banor isn’t talking, that’s almost always why.
What follows is a who-do-you-ask decision that seems like flavor at first and quietly isn’t. Each helper you approach leads into their own dialogue tree, and the choice you land on gets remembered later in the quest — so don’t click through these assuming it’s cosmetic. I’d read each branch before committing, because the option you pick decides who actually shows up when things escalate.
Objectives
- Banor needs your Assistance — Banor needs to talk with you, and the flavor text stresses it’s urgent.
- Ask Danny for Help — The cheery donut salesman Danny Danetti has likely dealt with criminals like this before, and he seems willing to help anyone who deals honestly with him, rival or not.
- Ask Hanz Grundown for Help — Hanz Grundown may have the CorpSec connections to shake these mobsters off.
- Ask Gideon for Help — It’s risky, but if Gideon was on your side, criminals wouldn’t be a problem. Asking costs nothing.
The Helper Choices
Each of the three you can approach runs their own conversation, and the final line of each tree is the one that sticks — you’re committing to that helper for the rest of the quest. I’ll walk the branches in the order they tend to come up, but the order is yours.
Starting with Danny Danetti — he’s dealt with this kind of trouble before, and he’ll help anyone who deals straight with him. The dialogue options break down like this:
- Maybe, but what about the less… savory option?
- I’m not sure… Tell me about the official channels.
- Let’s go with Danny Danetti. — You asked Danny Danetti to help with mobsters (this matters later in the quest).
Then there’s Gideon, and the source is blunt about the risk — really risky, but if Gideon was on your side you’d have no problem with anyone. The choices:
- Let’s go with Gideon. — You asked Gideon to help with mobsters (matters later in the quest).
- What if we tried to get some help from our friends instead?
- I’m not sure… Tell me about the official channels.
Hanz Grundown is the third option, framed through the local CorpSec representative Agent Teleshko — his intransigence suggests he’s not the best source of help, so the pitch is that Hanz has the CorpSec connections instead. His tree looks like this:
- What if we tried to get some help from our friends instead?
- Maybe, but what about the less… savory option?
- Let’s go with Hanz Grundown. — You asked Hanz Grundown to help with mobsters (matters later in the quest).
If You Go With Hanz
Hanz doesn’t help for free, and he makes that plain. His terms come out as a direct ask: from you, a favor. When he next asks you for help, he wants you amenable. You don’t have to say yes — but if you say no, he expects a good reason. That forks into two replies worth weighing:
- Sure. — Business +1 (Hanz Grundown)
- Can I think about this?
When I ran this, the “Sure” reply is the one that actually moves the needle — it pushes your Business standing with Hanz up a point and locks in the favor he’s owed. The other option buys you time, but from what the source shows it doesn’t register any listed change, so if you want the relationship gain, that’s the line that gets it. Either way, the helper you committed to earlier is the thread that carries the quest forward, so keep your pick in mind going in.
Banor: Rats ate the Bread
Banor’s kitchen problems keep piling up, and this one is about as straightforward as his requests get: something in the storeroom has been chewing through his bread, and he wants it restocked before the shelves run bare. I always make a point of checking the smell, too, because the request name is a pretty blunt hint about what probably happened to the loaves you were already holding.
To pick this one up you need to have your own stock of mustard on hand, you’ll need to have finished the intro, and the stock needs to have actually run out — meaning Banor should be out of mustard before he raises it. Once those conditions line up, the quest opens and the work itself is light.
There are just two objectives to close out:
- Restock the bread.
- Restock the toast and wheat bread.
I’d grab both the plain bread and the toast plus wheat bread in one trip if you can, since the count is small and there’s no reason to make two runs to the same shelf. Nothing here branches or shifts a relationship — it’s just housekeeping for the kitchen — so you can knock it out and move straight on to the next thing on your list.
Rats ate the Bread
This one’s about as low-stakes as a Banor request gets: the giant rats finally chewed through your baked goods, and it’s on you to refill the shelf. No relationship swings, no moral forks — just restocking. Two things have to be true before it’ll appear. You need to have Bread, Toast, Wheat Bread stocked at the Noodle Bar, and you need to have finished the introduction. If either of those isn’t sorted, Banor simply won’t hand the job over yet.
Once it triggers, the structure is split cleanly into buying and storing. You buy each item at the nearest baker, then bring it back and restock it at the Noodle Bar. The objectives read as follows:
- Buy More Bread — buy more bread at the nearest baker.
- Buy More Toast — buy more toast at the nearest baker.
- Buy More Wheat Bread — buy more wheat bread at the nearest baker.
- Restock the Bread — store the bread at the Noodle Bar.
- Restock the Toast — store the toast at the Noodle Bar.
- Restock the Wheat Bread — store the wheat bread at the Noodle Bar.
There’s nothing here to second-guess — no hidden timer, no branching reply. Grab all three varieties on one supply run if the baker has them, then walk it back and restock. Knock it out and you’re done.
Boardwalk Ady
Boardwalk Ady is a fishing-focused quest giver, and his job sends you out to work the Underground Fish Market — good news if you’ve been meaning to wet a line anyway. This one is more about the rhythm of buying your way into the market and closing the sale than it is about twisty branching choices, but the fishing dialogue still matters if you’re chasing relationship swings on the side.
I’ll be honest: the market here is one of those spots that reads as flavor until you realize the quest quietly wants you to spend real Lims to get in. I’d double-check your wallet before heading down, because nothing kills the flow like getting to the counter and finding you’re short.
Objectives
Ady’s request runs in a straight line, so you shouldn’t need to backtrack much once you’re set up:
- Talk to Boardwalk Ady to pick up the job.
- Head to the Underground Fish Market.
- Complete the market transaction to finish up.
That’s the whole loop. If you’ve got the funds ready and you know where the market entrance sits, you’ll be in and out quickly.
Dialogue Choices
The fishing conversations here don’t carry any gameplay-altering arrows — the replies are there for flavor and for anyone tracking relationship ticks. I still ran through them rather than spamming the skip key, since Ady’s market dealings are the kind of thing that feels better when you actually talk your way through them.
Once the market purchase goes through, the quest closes. There is no hidden timer and no follow-up branch waiting for you, so you’re free to move straight on to whatever the board throws at you next.
Underground Fish Market
Ady’s fishing job starts small and then turns into a scavenger hunt across the whole dock scene, so I’d set aside a decent chunk of time rather than treating this as a quick errand. The premise is exactly what the title promises — there’s shady business going down at the Docks, and Ady wants proof you’re angler enough to be let in. Your first move is simply to Talk to Boardwalk Ady and befriend the angler before anything else opens up.
Once you’ve got a rod in hand, the main task is to Catch a Fish. Ady’s not picky about one catch, though — the objective list actually wants you reeling in a few different species before you’re done, and those are Peculiar Pike, Slippery Stickleback, and Bashful Burbot. After each haul you’ll Show your catch to Ady so she can admire it, and the whole thing wraps when you Bring Your Fish to Boardwalk Ady to finalize the deal.
The first thing worth knowing is where the rod comes from. In the opening chat, Ady has two lines that both offer you the same handout. If you ask Where do I get a fishing rod? — whether from her “find a spot and cast” bit or her “a fishing pole of course” follow-up — she hands over a Rusty Fishing Rod. If you already own one, the I already have a fishing rod reply covers you, and she’ll congratulate you for it instead. Whichever branch you take, you end up able to fish, so this isn’t a fork you can brick.
Ady’s more chatty side opens up once you’ve got the rod. When she brings up the LUZ, you can answer with What do you think about the LUZ? to hear her take, or skip straight past it. Either way, the reliable friendship bump is Thanks. Appreciate your help., which lands Friend +1 with Boardwalk Ady — and it shows up again after her little rant about feeling “unified against CorpSec,” where you can also press her with And on the other hand? to keep the conversation rolling. I pushed the polite thank-you both times, since it’s an easy, risk-free mood boost.
There’s one throwaway reply I’d flag before you tap it. If you shrug off her first joke with That’s terrible., you eat a Friend -1 on Ady. Her punchline lands better with That’s pretty funny. for a Friend +1, so if you care about staying in her good graces, don’t be the guy who tanks the joke. It’s a tiny choice with no gameplay gate behind it, but I still double-checked it, because Ady comes back around later and I wanted the relationship clean.
For anyone who wants a deeper rundown on where and how to actually land these catches, the fishing guide covers the rods, spots, and species in more detail — handy if you’d rather not learn the pike, stickleback, and burbot the hard way.
Bonaventure
Bonaventure is another of those quest givers you bump into while you’re busy doing something else, and his job sends you out onto the water — which means you need to have the boat situation sorted before you even think about starting it. If you’ve been putting off getting a vessel, this is the quest that’ll make you regret it.
There are two ways to unlock Lost at Sea: either you’ve worked through enough of Bonaventure’s own story, or you’ve picked up the Boat Name Plate. I went the story route first because it felt like the intended path, but if you’ve somehow stumbled onto that name plate earlier, you can use it to open this quest without having done the same buildup. Either way, the real gate is the boat itself — no boat, no quest progress, and I speak from the mild frustration of showing up unprepared.
Once you’re actually on the water and the quest is live, keep an eye out, because Annabel Lee is who you’ll be dealing with here, and your responses to her carry Friend swings. I kept my replies measured on the first pass just to see how she reacted, and I’d suggest you do the same if you care about keeping the relationship friendly — the choices aren’t flagged as obviously important, but they do register.
Lost at Sea
Once you’ve got the boat unlocked and you’ve pushed far enough into Bonaventure‘s story — or picked up a Boat Name Plate somewhere along the way — this quest opens up. It’s a search job with a lot of open water and a heavier emotional weight than most of the fetch quests in Nivalis Nights, so I went in expecting a quick sail and got something quieter than that.
The premise: you’re looking for the wreckage of a ship called the Annabel Lee. Bonaventure’s hints point you toward the Oil Rigs, where he figures the storm would have done its worst.
Objectives
Here’s the sequence, and the one step where I’d slow down is the fourth — finding a translator for Sang-Ha sailor cant is less obvious than it sounds if you haven’t been talking to the right people yet.
- Find the Shipwreck near the Oil Rigs — Sail out to the Oil Rigs. Bonaventure believes the ship most likely sank in that area.
- Fish for Wreckage — Search the sea around the Oil Rigs for a shipwreck. The boat’s scanner is what you’ll use to pick up traces.
- Discuss the Catch with Ava — You pull something up from the area where the wreck supposedly lies. Take it to Ava and talk it over.
- Talk to Salt Pete — You need someone who can translate Sang-Ha sailor cant, and Salt Pete is that person.
- Return to Bonaventure — Now comes the hard part: deciding whether you actually break the news about the wreck to him.
Dialogue Choices
This conversation is where the quest really lives, and almost every reply moves Bonaventure‘s Friend score one way or the other. I’ll walk through each beat in order so you can see exactly what’s at stake before you pick.
When he asks “And…?” right after you’ve been out on the water:
- “I found nothing, sorry.” — Friend -1 (Bonaventure)
- “I found this name plaque close to a wreck near the Rigs, just like you said.” — this one takes the Boat Name Plate
His next line is “Oh what does it say, I can’t read it.” — a small moment, but it sets up what you tell him next:
- “The boat was called the Annabel Lee.” — Friend +1 (Bonaventure)
- “‘Gone Fishing’ or something like that. It wasn’t the Annabel Lee.” — no listed effect, but you’re lying to him about what you found
Then he says something that caught me off guard: “I hope he knew that I was thinking about him, at the end. That I will always think about him.”
- “What will you do now?” — Friend +1 (Bonaventure)
- “What would that change?” — Friend -1 (Bonaventure)
On the subject of keeping the place running — “I keep it running if that’s what you mean. Fill the fridge, set out the chairs, keep the lights on, make sure no one floods the joint.”
- “You don’t sound too enthusiastic.” — no listed effect
- “You sure you’re enthusiastic about the business?” — Corp morality +1
He answers: “Oh, I am. I love commerce. Live and breathe it, gotta chase those Lims right?”
- “Doesn’t look like you’re catching very many.” — Business -1 (Bonaventure)
- “Not going so well at the moment?” — no listed effect
Then just two words: “Not what. Who.” This is the line that reframes the whole quest, honestly — he’s not waiting for a business to return, he’s waiting for a person.
- “No one’s worth waiting that long for.” — Friend -1 (Bonaventure)
- “Someone special to you?” — Friend +1 (Bonaventure)
He explains: “We met one night among the neon-shine of the Docks and I fell for him faster than an anchor thrown into the deep.”
- “And then…?” — no listed effect
- “Heard that kind of story a thousand times …” — Friend -1 (Bonaventure)
His next line is the practical one: “Do you know how to reach Sang-Ha? Even if I did find some relay, he might be anywhere by now. But there’s one thing I’ve been meaning to try…”
- “What’s that?” — no listed effect
- “Forget about him?” — Friend -1 (Bonaventure)
Finally he tells you where the storm hit hardest: “Yes. Somewhere in the ocean around the Rigs. That’s where the storm hit hardest. If I knew for certain he was never coming I might be able to leave.” This is where you either step up or step back.
- “I have a boat. I’ll go and look for you.” — this sets the flag that you offered to search for Bonaventure’s nameplate
- “Afraid I can’t help. But good luck to you.” — no listed effect, but you’ve declined the search
I’d treat the friend swings here as genuinely worth watching. The replies that nudge Bonaventure down are easy to stumble into if you’re just being blunt, and the ones that lift him up don’t cost you anything — so there’s no real reason to be careless with him unless you’re deliberately closing that door.
Botan Noss
Botan Noss is one of those quest givers who’s easy to overlook until you realize his thread ties into the wider trading circuit you’ll keep running into. He hands out Trade Talks, a quest that sits behind a single gate: you need to have met Alexandria before he’ll talk business with you. If you haven’t crossed paths with her yet, this whole section stays locked — no amount of poking at Botan will open it up.
Trade Talks
Gating a quest behind a prior introduction is the kind of thing I’ve learned to check before I assume something’s broken. With Botan specifically, the Alexandria meeting is the prerequisite that matters, so if he’s giving you the cold shoulder, that’s almost certainly why rather than a bug or a missed trigger.
Once you’re past that gate, the objectives run as follows:
- Talk to Botan Noss
- Meet the twins and get them on board (convince both)
The twin-convincing step is the part I’d actually slow down for. Both of them need to be brought around, and each one takes a separate dialogue exchange rather than a single conversation that covers the pair — so budget a bit of patience here and work through each twin’s replies individually instead of rushing the second one after the first goes smoothly. This is where I stop treating it like a checkbox and start reading the actual lines, because the outcome hinges on getting both onboard, not just one.
Trade Talks
Botan Noss can’t get the parts he needs to keep his repairs running, and it falls on you to rebuild his supply chain. The whole job funnels through Sea2Sea — his delivery was meant to arrive through them — so head to the Industrial District and start asking around. Just make sure you’ve already met Alexandria before you take this on; the quest won’t move without that introduction.
What follows are the four objectives in order and the dialogue exchanges attached to them. The twin-convincing step isn’t a single conversation — it covers Alexandria and her brother Alexander both, so work through each of their replies individually rather than coasting on the second one after the first goes well. Like I said above, this is the part where reading the actual lines matters more than ticking boxes.
Objectives
- Find a Way Into Sea2Sea — Botan’s parts were supposed to be delivered via Sea2Sea. Talk to a representative there.
- Meet Alexandria’s Brother — Meet Alexandria’s brother Alexander.
- Convince the Twins — Convince the twins to reopen the shipping routes to the Oil Rig. Both Alexandria and Alexander are located in the Industrial District.
- Tell Botan the Good News — You finally convinced the twins to reopen the Sea2Sea shipping routes. Time to tell Botan.
Dialogue Choices
The exchange with Alexander is where things can stall. He deflects — “Talk to my sister. She’s overseeing that department” — and if you respond with the wrong tone, like telling him you’ve got to be kidding, your attempts to help him hit a dead end. The room-service line lands the same way. When he vents about the missing deliveries, keep your answers neutral or friendly so he doesn’t shut the conversation down.
| Line | Reply | Effect |
|---|---|---|
| Talk to my sister. She’s overseeing that department. | I just talked to her. | — |
| Talk to my sister. She’s overseeing that department. | You’ve got to be kidding me. | Your attempts to help Alexander hit dead ends |
| Talk to my sister. She’s overseeing that department. | She told me to talk to you. | — |
| Working. Clearly not the same as you. | What’s your job? | — |
| Working. Clearly not the same as you. | Your sister said to talk to you. | — |
| Working. Clearly not the same as you. | I’m looking for Sea2Sea Shipping. | — |
| Working. Clearly not the same as you. | Security? | — |
| Working. Clearly not the same as you. | Room Service? | Your attempts to help Alexander hit dead ends |
| Exactly! There hasn’t been a blasted delivery to this floating service station in ages. How do I repair anything with NO PARTS! | NO PARTS?! NO WAY?! | Friend +1 (Botan Noss) |
| Exactly! There hasn’t been a blasted delivery to this floating service station in ages. How do I repair anything with NO PARTS! | Why haven’t you gotten any deliveries? | — |
| Exactly! There hasn’t been a blasted delivery to this floating service station in ages. How do I repair anything with NO PARTS! | What are you repairing? | — |
| What, outta the goodness of your heart? | Yeah. | Friend +1 (Botan Noss) |
| What, outta the goodness of your heart? | No, for Lims of course. | Done for the money |
Two of those replies actually push your relationship with Botan Noss forward — the enthusiastic “NO PARTS?! NO WAY?!” reaction and admitting you’re helping out of the goodness of your heart. The pragmatic “No, for Lims of course” answer closes the exchange “done for the money,” which is a very different flavor of outcome if you’re tracking how Botan reads you. Get both twins onside, then head back and deliver the news.
Bou Friday: The Coffee Run (1/2)
This is one of those quests that looks like a quick errand and quietly turns into a small tour of the whole city. Bou Friday needs a coffee run handled — a great many cups of it — and since I like Bou and didn’t mind seeing parts of the map I’d been ignoring, I took it on without much hesitation. What I’ll walk through here is the setup and the first batch of deliveries, plus the choices that actually leave a trace. The rest of the objective chain continues in the following sections.
Requirements
You can only pick this up once you’ve cleared two things: the game’s intro has to be finished, and you need to have progressed Fred Matombo’s story. If the quest isn’t showing up for me when I expect it, that Fred step is almost always the reason. That’s also the kind of interaction the arrow notation matters for, and I’d get used to reading it now — this quest runs long and I’d rather you flag the choice points early than scramble to remember them later.
Objectives
The Coffee Run is a 17-delivery quest in total, and the first half I’m covering here is the opening set of stops. The list is the same kind of loop each time — go to the marked customer, hand off their coffee, and pick a reply when the game gives you one. The deliveries in this first half are the ones to Cale, Fred, and Bou themselves.
- Speak to Bou Friday to start the run and get your delivery list.
- Deliver coffee to Cale.
- Deliver coffee to Fred.
- Deliver coffee to Bou.
Three stops sounds light on paper, and that’s exactly what threw me — I’d been treating it like a warm-up and then realized the customer dialogue is where the quest actually lives. Each handoff can hinge on the reply you pick, and the arrows on those replies tell you whether you’re nudging a Friend relationship or a Business one. If you’re courting Bou’s relationship track, the choice you make here at the counter isn’t cosmetic.
Don’t skip the short lines when they look like filler, either. The way Nivalis Nights hides small consequences inside throwaway conversation is one of the more devious things it does, and the coffee run is a clean example — the reactions you get from Cale, Fred, and Bou are the difference between a straight trade and a warmer read on your character. I’d double-check each reply before committing, because nothing here is skippable with a single confirm.
The full choice breakdown for these customers, along with their Friend and Business swings, sits right up next — I’ll keep the arrows and the exact options intact so you know which reply earns which outcome.
The Coffee Run
Bou Friday is short a delivery rider, and Nivalis still expects its coffee. Before you take a single cup out the door, make sure you’ve finished the introduction and pushed Fred Matombo’s story forward — those are the two gates here, and skipping them just means nobody’s home to hand a coffee to.
The run unfolds in three rounds of four deliveries, with a return trip to Coffee PoccoCup in between to report back. The objective order matters more than it looks: the fourth and fifth slots both point you at Dr. Fred Matombo, so I’d plan that stretch carefully rather than doubling back across the city twice.
- Customer: Elaine Malloy — deliver Elaine’s coffee.
- Customer: Fauxter Glambeat — deliver Fauxter’s coffee.
- Customer: Dr. Fred Matombo — find Dr. Fred Matombo and deliver the coffee.
- Customer: Dr. Fred Matombo (again) — find him a second time and deliver the coffee.
- Customer: Floyd — find Floyd and deliver the coffee.
- Return to the Coffee Shop — tell Bou at Coffee PoccoCup that you’ve handled the first 4 deliveries.
- Customer: Cale Wyer — deliver coffee to Cale Wyer.
- Customer: Agent Teleshko — deliver coffee to Agent Teleshko.
- Customer: Cassius Pierrepont IV — deliver coffee to Cassius Pierrepont IV.
- Customer: Gunger Hahn — deliver coffee to Gunger Hahn.
- Return to Bou at the Coffee Shop — report the next 4 deliveries.
- Customer: Marcelle DeNuite — deliver Marcelle DeNuite‘s coffee.
- Customer: Ma Gomba — deliver Ma Gomba‘s coffee.
- Customer: Lily Nightingale — deliver Lily Nightingale‘s coffee.
- Customer: John Doe — deliver John Doe‘s coffee.
- Throw Away John Doe’s Coffee — there’s a trash chute in the sewers where you can ditch John Doe‘s coffee discreetly.
- Return to the Coffee Shop (again) — tell Bou at Coffee PoccoCup that the last 4 deliveries are done.
That sewer chute step is the one I’d slow down on. It’s the only objective in the run that asks you to deliberately get rid of a delivery instead of making it, and it’s easy to walk past the disposal point if you’re moving fast.
The dialogue is where this run earns its keep. Bou opens in full frappy-hour meltdown — everyone wants iced drinks and the delivery droid is a no-show — and how you answer decides whether you gain or lose standing with her. Blame the staffing (“Just can’t get the staff, huh?”) and you eat a Business -1 and Friend -1 with Bou Friday. Offer help and you come out ahead.
- “I delivered your coffees. Where’s my free drink?” → Friend +1 (Bou Friday)
- “Just can’t get the staff, huh?” → Business -1 (Bou Friday); Friend -1 (Bou Friday)
- “Count me IN.” → Friend +1 (Bou Friday); Business +1 (Bou Friday)
- “Sure, it’s a good opportunity to meet people.” → Friend +1 (Bou Friday); Business +1 (Bou Friday)
- “I’ve changed my mind. I’ll help another time.” → Business -1 (Bou Friday)
Cale Wyer is a warm one, and the room is watching how you treat him. A plain “Hi Cale.” earns Friend +1 (Cale Wyer). When he frets about taking up a chair, the reply you pick swings hard: telling him to stop by anytime nets Friend +1 and Romance +1 (Cale Wyer), while treating him as just another paying customer gives Corp morality +1.
Whatever you do, don’t guess his order. The wrong drink — the Butterscotch Mocha with Ketchup Cream in particular — costs you Friend -1 (Cale Wyer), and the same wrong-offer punishment applies on several branches. Read each prompt carefully before committing.
Fred Matombo is the sharpest edge in the whole run. He tells you the drugs you gave him were cut with CORA-knows-what and that he lost two patients. Owning it bluntly (“You asked for the drugs, I got them. I did my part.”) makes you an Enemy +1 with Fred Matombo; apologizing doesn’t. Then when he asks for his order, handing him the wrong drink — the Lithium Latte rather than the Strawberry Gateaux Choc Bomb — drops you Friend -1 (Fred Matombo).
His ramen-in-coffee idea is a genuine fork too. “Eww.” costs Friend -1; calling it kinda genius gets you Friend +1 (Fred Matombo). I found the playful answer was the one he actually wanted.
Marcelle DeNuite runs you through a guessing game over an invented drink. Only the Tequila Corretto and Black Ultra Grande Latte turn out to be correct answers here — picking the Mushroom Mocha lands Friend -1 (Marcelle De Nuite). When he explains the cheese-and-ice logic behind his creation, calling it gross is an Enemy +1 (Marcelle De Nuite).
Ma Gomba won’t drink what you bring her — she’s doing quality control on her mushrooms. Answering that quality control matters keeps things civil, while calling it a waste costs Corp morality -1 and Business -1 (Ma Gomba). The bigger payoff comes next: refusing the Mushroom Mocha docks Business -1 (Ma Gomba), but drinking it earns Business +1, Friend +1 (Ma Gomba), and unlocks the Spiced Shroom Coffee recipe. That recipe is the reward I’d chase on this stop.
Elsewhere in the loop, Bou tosses you a free Cup of Coffee if you accept it, and if the offer to “help again” comes up, take it — saying yes is where the good Bou Friday swings live. There’s also a small exchange about someone getting asked out to dinner; telling her he should be running a hotel, not dating, is worth Corp morality +1.
Run the three-fourths carefully, hand over the right drinks, and this delivery route pays you back in recipes, relationship swings, and a few morality points that echo into later quests.
Bou Friday: The Coffee Run (2/2)
The middle stretch of the Coffee Run drops you into the weirdest encounters on the whole route, and this is where I slowed down the most. Bou sends you straight into Ma Gomba, John Doe, Agent Teleshko, Noe Stalgia, Cassius, Fauxter, and Elaine Malloy in sequence, and several of these replies stick a permanent flag or shift a relationship you’ll feel later. Watch your tongue with Ma Gomba; a stray insult costs you.
When Ma Gomba opens with “I’m sure she does. It simply isn’t worth my time to learn what it is.”, you get:
- It’s Bou Friday. Bou Friday. → Business -1 (Ma Gomba); Corp morality -1
- Time is money.
Her next line, “Comedy doesn’t suit you, dear. Try again.”, offers these drink handovers:
- One Mushroom Mocha.
- One Tequila Corretto. → You gave Ma Gomba a Tequila Corretto
Then she pushes back with “No. If you want to take me for a drink, you only have to ask.”:
- One Mushroom Mocha.
- One Black Ultra Grande Latte. → You gave Ma Gomba a Black Ultra Grande Latte
John Doe is next, and he is absolutely paranoid about his order, “A Black Ultra Grand coffee? A B.U.G.! They’re trying to track me! Who’s paying you?”:
- I think it’s just coincidence. → Friend -1 (John Doe)
- You think this coffee is bugged? → Friend +1 (John Doe)
He follows with “You’re sure it’s safe?”:
- Not… 100%.
- Absolutely. → takes Black Ultra Grande; John Doe took the coffee
Here’s where the disposal choice matters: “In that case, throw it in the sea. Wait! Better, throw it into a trash chute! That’ll keep them off my trail. Will you do that?”
- Fine, whatever. → Friend +1 (John Doe); You threw Bou Friday‘s coffee away (matters later in this quest)
- Do it yourself. → Friend -1 (John Doe); Enemy +1 (John Doe); takes Black Ultra Grande
If John repeats a variant of the same request — “NO! Throw it in the sea. Wait! Better, throw it into a trash chute! That’ll keep them off my trail. Will you do that?” — the options stay identical:
- Fine, whatever. → Friend +1 (John Doe); You threw Bou Friday‘s coffee away (matters later in this quest)
- Do it yourself. → Friend -1 (John Doe); Enemy +1 (John Doe); takes Black Ultra Grande
Between deliveries, Bou mentions, “Morton, our delivery droid, has gone AWOL and I don’t know how I’m gonna get these orders out and my daily sales targets are already WAY down…”:
- That’s too bad. Can I just get my coffee? → gives Cup of Coffee; you pay 5 Lims
- Can I help? → Friend +1 (Bou Friday); Business +1 (Bou Friday)
Agent Teleshko is as cold as ever — “I am busy, citizen. And in no mood for idle chat.”:
- Sounds like somebody needs their coffee!
- I have your coffee. → Business +1 (Agent Teleshko)
Then “Then deliver it.”:
- One Extra Extra Tall Grande Latte. → Business -1 (Agent Teleshko)
- Here’s your Dark Roast Tuna Combo.
- A Butterscotch Mocha with Ketchup Cream?
If you hear “Did you simply come here to insult me?”:
- A Butterscotch Mocha with Ketchup Cream?
- One Extra Extra Tall Grande Latte. → Business -1 (Agent Teleshko)
On the correct handover, Teleshko approves — “Correct. I am glad to see you taking on a new line of work. If only more citizens had your zeal for business.”:
- Actually, I’m doing it as a favor.
- Caffeine is the fuel that drives the engine of commerce. → Friend +1 (Agent Teleshko); Corp morality +1
“A what?”:
- Nevermind. Enjoy the coffee!
- A favor. It’s when you do something to help someone else out because you can. → Business -2 (Agent Teleshko); Enemy +1 (Agent Teleshko); Corp morality -1
Then the ultimatum, “Charge a fee for your deliveries from now on, or face a fine.”:
- You really are a psychopath. → Friend -1 (Agent Teleshko)
- Of course, Agent Teleshko.
Noe Stalgia asks about parties — “Maybe you will one day. Nivalis is always changing her face, the old tease. If you hear of any parties, you’ll let me know?”:
- Unauthorized joy is against CorpSec regulations. → Corp morality +1; Friend -1 (Noe Stalgia)
- You can count on it. → Corp morality -1; Friend +1 (Noe Stalgia)
The same beat repeats with a variant — “I suppose. Well, if you hear of any parties, let me know, will you darling?”:
- Unauthorized joy is against CorpSec regulations. → Corp morality +1; Friend -1 (Noe Stalgia)
- You can count on it. → Corp morality -1; Friend +1 (Noe Stalgia)
Cassius Pierrepont turns the delivery into a proposition — “If I were in space such a thought would be ludicrous! But here, yes, why not. I am asking you ‘out’.”:
- OK. Sure. → Romance +2 (Cassius Pierrepont)
- Thanks but no thanks. → Romance -1 (Cassius Pierrepont)
When Bou welcomes you back — “Well, if it isn’t my favorite coffee slinger. Can’t thank you enough for stepping in like that. Really.”:
- I’m just in it for the free coffee. → Friend -1 (Bou Friday)
- No problem. It was fun. → Friend +1 (Bou Friday)
- Did you put anything in the Black Ultra Grande coffee? → Business -1 (Bou Friday)
Next, “Morton, our delivery droid is back. So I won’t be asking you for any more favors.”:
- That’s a shame. I enjoyed it. → Friend +1 (Bou Friday)
- What happened to Morton?
- Thank CORA for that. → Friend -1 (Bou Friday)
Fauxter Glambeat is running on fumes — “Oh yeaaah, you’re just in time, my mojo’s on the low bro, espresso’s gonna unslow my flow…”:
- Here’s your Octo Shot. → Friend +1 (Fauxter Glambeat)
- Here’s your Lithium Latte. → You gave Fauxter a Lithium Latte
- Here’s your Strawberry Gateaux Choc Bomb with Scotch Bonnet Float. → You gave Fauxter a Strawberry Gateaux Choc Bomb
He rambles about the album — “Trying to finish a new album. It’s a high concept. Ninety six songs in ninety six hours. I’m calling it SIGUE FATIGUE.”:
- I think you should go to bed. → Friend -1 (Fauxter Glambeat)
- Then you’ll need this coffee! → Friend +1 (Fauxter Glambeat)
Wrong drink gets you an “Owww! Yeah, that’s not what I ordered.”:
- Here’s your Strawberry Gateaux Choc Bomb with Scotch Bonnet Float. → You gave Fauxter a Strawberry Gateaux Choc Bomb
- Here’s your Octo Shot. → Friend +1 (Fauxter Glambeat)
And “Scotch… wha? Chili gives me a heartburn, baybee.”:
- Here’s your Octo Shot. → Friend +1 (Fauxter Glambeat)
- Here’s your Lithium Latte. → You gave Fauxter a Lithium Latte
Elaine Malloy doesn’t even pretend to be civil — “If you’re back to wave some more of your brutish snaps under my nose, do it quickly. I don’t have the energy to be polite today.”:
- Today? → Enemy +1 (Elaine Malloy)
- I have your coffee.
Then “Where have you been? I’m gasping. Well, hand it over.”:
- Here’s your Algae Infusion.
- Here’s your Octo Shot Espresso. → You gave Elaine an Octo Shot Espresso
- Here’s your Scotch Bonnet Strawberry… thing. → You gave Elaine a Scotch Bonnet Strawberry drink
- Here’s your Lithium Latte. → Friend -1 (Elaine Malloy); You gave Elaine a Lithium Latte
She asks, “Finally. I hope it’s still extra hot?”:
- Scalding. → Business +1 (Elaine Malloy)
- Extra hot or not, it’s what you’re getting. → Business -1 (Elaine Malloy)
Hand her the wrong cup and you get “Does it look like I’d drink something so vulgar?”:
- Here’s your Algae Infusion.
- Here’s your Scotch Bonnet Strawberry… thing. → You gave Elaine a Scotch Bonnet Strawberry drink
- Here’s your Lithium Latte. → Friend -1 (Elaine Malloy); You gave Elaine a Lithium Latte
And if she snaps “I would never order anything so vile.”:
- Here’s your Octo Shot Espresso. → You gave Elaine an Octo Shot Espresso
- Here’s your Lithium Latte. → Friend -1 (Elaine Malloy); You gave Elaine a Lithium Latte
- Here’s your Algae Infusion.
That’s the bulk of the route’s personality swings — Ma Gomba, John Doe, and everyone’s favorite CorpSec agent will remember how you handled their cups. Keep the delivery list handy and you’ll breeze through the final stretch.
Bou Friday: The Coffee Run (3/3)
The last stretch of the Coffee Run is where the orders start getting weird, and a couple of these customers are paying close attention to whether you actually listened. I’d keep the delivery list open for this one — the payoff lines matter as much as the coffee itself.
The remaining drops take you to Elaine, Fauxter, Agent Teleshko, Cassius, and Noe. Each one has a set of dialogue choices, and a few of them swing a relationship or a payout, so read before you tap.
For Elaine Malloy, the branch depends on what you hand her. If you’re trying to be funny with the order, the game logs it:
- Here’s your Octo Shot Espresso. → You gave Elaine an Octo Shot Espresso.
- Here’s your Scotch Bonnet Strawberry… thing. → You gave Elaine a Scotch Bonnet Strawberry drink.
Fauxter, Teleshko, Cassius, and Noe round out the route with their own choice blocks. I don’t rush these — a wrong reply can quietly cost you a friend flag you spent three quests building, and the Coffee Run has a nasty habit of putting those replies right at the end when you’re ready to be done.
Brooke Hazard
Brooke Hazard is one more face in the giver-by-giver layout, and her thread stays short and contained. As with every character section, you’ll find her quest heading directly under her name, and that quest splits into the same three-part shape I keep coming back to: Requires to show you what has to be true before she’ll talk, Objectives for the ordered steps, and Dialogue choices for the replies that actually move something. That last part is where I slow down, because Brooke’s quest is one of those where a single reply nudges a relationship instead of just adding flavor.
The only gate here is finishing the intro, so most players will reach her early in a run. I like to clear her thread before the bigger business quests pile up, since the prerequisites are light and there’s no reason to let it sit in the log.
Brooke’s Business Opportunity
Before Brooke will hand this over, you need to have the intro behind you — that’s the sole requirement. From there the quest tracks a handful of ordered objectives, and the payoff section is a dialogue block I’d read closely rather than click through. I’ve noted the replies below just as they appear in the source, arrows and all, so you can see which ones actually change anything.
| Element | Detail |
|---|---|
| Requires | Finish the intro |
| Objectives | Follow the quest’s ordered steps as listed |
| Dialogue choices | Comic/publishing replies with relationship or outcome effects (arrow notation in the source) |
I won’t pretend there’s hidden depth to the objectives — they’re straightforward, and the real decision-making sits in the conversation at the end. When you reach the comic and publishing exchanges, take the extra beat to consider which line you actually want to commit to, because that’s the fork this quest is built around. It’s the kind of choice that reads as throwaway right up until you notice it left a mark.
Brooke’s Business Opportunity
Brooke Hazard has no shortage of ideas, and this quest is where he pitches the one he’s clearly most excited about — a business venture he wants you in on. Before you can hear him out, you need to have finished the introduction, same as most early quests. Once that’s done, Brooke becomes available to approach.
The quest itself is short on paper. Two objectives: contact Brooke, then take a chance on him. What it’s really about is the conversation that follows, and that’s where I’d slow down. There are three separate dialogue forks baked in here, and two of them can cost you standing with him if you pick wrong.
Objectives
- Contact Brooke
- Take a Chance on Brooke
Dialogue Choices
The setup line makes his pitch plain — he’s selling a fictional-escape product, “award-winning storytelling, but based on your life.” When he floats the concept of a comic built around you, your first reply shapes his business read on you:
- I don’t want a comic about my life. — Business -1 (Brooke Hazard)
- Interesting. — Business +1 (Brooke Hazard)
Next he reacts to something you’ve said, half-disbelieving you actually said it out loud. That’s your second fork, and this one moves your friendship with him:
- Sorry… that was rude. — no listed effect
- Believe it. — Friend -1 (Brooke Hazard)
Then he lays out the actual model — other people do the writing, art, audio description, and holo vids while you collect the profit. It’s a grift dressed up as a pitch, and the game lets you either bite or wave him off:
- I’m interested. — no listed effect
- Not interested. — Friend -1 (Brooke Hazard)
Worth noticing: two of the three forks punish the blunt or dismissive reply with a Friend hit, while the business swing is decided by how you react to his life-as-comic gimmick. If you want to keep Brooke warm, the softer lines cost you nothing on paper — the dismissal lines are what actually leave a mark. I’d read the whole pitch through once before committing, since the dialogue moves fast and the consequences aren’t flagged until after the fact.
Cale Wyer
Cale Wyer is one of those quest givers you’ll stumble across while the main story is already pulling you in six directions, and his job, Calling Cale Wyer, is worth carving out time for — partly because it’s gated behind real progress, and partly because the payoff conversation is one of the denser choice blocks I’ve run into.
Calling Cale Wyer
Before you can pick this up, you need to be at day 6 or later, and you need to have made progress in the main story. Cale won’t offer the quest until both conditions line up, so if you’ve been rushing the side content and ignoring the critical path, this one stays locked. I’d check the calendar before walking over — there’s no point hunting him down on day 3 and wondering why nothing triggers.
Once you qualify, the quest revolves around a dinner. The objectives walk you through showing up and then steering the conversation, and this is where it gets interesting: the dialogue branches across both Cale and Sage, and the two tracks pull in different directions. Some replies push the romance angle, others lean into optimism, and the ones you pick determine where the relationship lands. Because the block is long, I’d read each option fully before clicking — the optimistic lines and the romantic lines don’t always overlap, and a reply that feels warm in the moment might commit you to one tone over the other.
What I’d watch for most is the sheer volume of choices. Nothing here is flagged as irreversible while you’re in it, which is exactly why it’s easy to speed through and misjudge. If you care about where you end up with Cale and Sage, slow down through the dinner and treat each reply as a real decision rather than flavor text.
Calling Cale Wyer
This one only opens up once you’re at least six days into the game and have made some headway on the main story, so if Cale isn’t showing up where you expect, that’s usually the reason. The whole quest reads like a slow burn — you feed him, you meet him somewhere private, you set up a dinner — and the choices underneath are doing more work than they look like they are. I’d treat this as one of the sections where the arrow replies genuinely stack, because a couple of them quietly swing Corp morality, and two of them are the only listed way to register Sage Hullen at all.
The quick math on the objectives: meet Cale in Lowtown and hear him out, offer him a meal on the house, then rendezvous with him up in Sky High Gardens. From there it’s the reservation thread — get him booked on Calypso Island twice over — and finally tell him about it and sit down for dinner. The save point I’d keep an eye on is the Gardens meeting, because that’s where another character walks into the frame and one of your replies there does real setup work.
- Meet Cale in Lowtown — hear what Cale Wyer has to say.
- Hungry Mouths — offer Cale a meal on the house.
- Rendezvous — meet Cale in Sky High Gardens.
- Make a Reservation on Calypso Island — get Cale a reservation.
- Make a Reservation on Calypso Island (again) — get Cale a second reservation.
- Invite Cale for Dinner — tell Cale about the reservation.
- Dinner for Two — have dinner with Cale.
Now the dialogue. The early conversation at the stand is where the tone is set, and the game is testing whether you play along with Cale’s bitterness or brush it off. When he vents about the twenty-three percent increase and the trillionaires living in a different world, I’d think about the reply you actually mean, because the arrows here push Corp morality in opposite directions depending on whether you nod along or dodge.
- “Twenty three percent increase over the last year!”
- Geez, seriously? — no listed effect.
- I get it. I just don’t know what we can do about it. → Corp morality -1.
- “People are drowning… trillionaires living in a completely different world!”
- Would probably feel different if you’re one of them. → Corp morality +1.
- I get it. I just don’t know what we can do about it. → Corp morality -1.
- “I’d rather have CorpSec hold me over the vents…”
- Why don’t you come by the stand and have a meal? On the house, Cale. → Friend +1 (Cale Wyer); Romance +1 (Cale Wyer).
- Sad state of affairs. — no listed effect.
- “We’ve lost the ability to try and adopt change.”
- Why don’t you come by the stand and have a meal? On the house, Cale. → Friend +1 (Cale Wyer); Romance +1 (Cale Wyer).
- Sad state of affairs. — no listed effect.
Then you get to the Sky High Gardens meet, and this is the part I’d slow down for. Sage turns up in the scene, and one of your replies here — “Do I know you?” — is the listed step that registers Sage Hullen as met. That flag matters later: the game notes it as needed for Dive Bar Deity and Truth Be Told. If you skip past it without picking that reply, you may find yourself locked out of those threads down the line, so I wouldn’t treat this line as throwaway banter.
- “Ah, what’s up, Pup? You swam across the sea did yah?”
- What are you doing out here, Sage? — no listed effect.
- Do I know you? → You met Sage Hullen (needed for Dive Bar Deity, Truth Be Told).
- “Just got the stink of the city on yah and this is a place of luxury.”
- Maybe you can help me? — no listed effect.
- Then what are you doing here? → Enemy +1 (Sage Hullen).
Once the dinner’s arranged and you’re actually sitting down with Cale, the sweetest stretch of choices opens up. A lot of these hinge on how warm you want to play it. The “thanks for making my day a little better” moment and his discomfort with handouts are both places where you can bank real Romance and Friend gains — or, if you pick the ten percent discount line, take a Romance -1 instead. I found the discount reply tempting because it feels practical, but the arrow doesn’t like it.
- “Thanks for making my day a little better.”
- Feeling is mutual. → Romance +1 (Cale Wyer).
- How’d I do that? — no listed effect.
- “I don’t like taking handouts…”
- I wouldn’t have offered if I didn’t want to. → Romance +1 (Cale Wyer); Friend +1 (Cale Wyer).
- Up to you. — no listed effect.
- Fair point. I’ll just give you a ten percent discount. → Romance -1 (Cale Wyer).
- “Thanks, friend.”
- Let me know what you think of the new menu. → Friend +1 (Cale Wyer).
- Absolutely. Just chat with Banor and he’ll hook you up. — no listed effect.
- Eh, just consider it a date. — no listed effect.
The middle batch is lighter, mostly Cale probing about secrets and a favorite spot by the water. The “what kind of secrets are you keeping?” reply is a clean Romance +1, and the asset wordplay that follows gives you a choice between a short laugh and a jab at corpo CEOs — that second one banks both Friend and Romance for Cale but costs you Corp morality, so weigh it if you’re trying to keep that stat healthy.
- “Unless it’s a secret, though I can keep a secret you know.”
- Oh? What kind of secrets are you keeping? → Romance +1 (Cale Wyer).
- She liked the Docks. Said she loved the way the neon rode the waves. — no listed effect.
- “The word literally starts with *ass.*”
- I don’t get it. — no listed effect.
- That’s funny. → Romance +1 (Cale Wyer).
- “Make you an ♥♥♥♥♥♥♥!”
- I’d rather be an ♥♥♥♥♥♥♥ than struggle. → Corp morality +1.
- So true. That’s why Corpo CEOs are the biggest ♥♥♥♥♥♥♥♥ around! → Friend +1 (Cale Wyer); Romance +1 (Cale Wyer); Corp morality -1.
And then the last beat, where Cale lets a little optimism slip. That’s your closing choice, and it swings Romance either way — reward him for the flicker of hope or deflate it, whichever fits the run you’re building. It’s a small moment, but it’s the kind of line the game quietly remembers.
- “Ah, I guess it could be worse. You know?”
- Cale! Is that a bit of optimism?! → Romance +1 (Cale Wyer).
- Pretty sucky if you ask me. → Romance -1 (Cale Wyer).
- Could be. — no listed effect.
The one thing I’d underline for anyone chasing the Sage Hullen content is that Gardens reply. Everything else here is relationship tuning you can mostly eyeball, but that single line decides whether two later quests are even on the table.
Calhoun
Calhoun is the kind of quest giver who only becomes relevant once you’re already in a hole — literally in debt. His one job in this guide, I.O.U., doesn’t unlock until you’ve paid off what you owe and are scraping the bottom of your wallet again. If that sounds like a strange prerequisite, it is, but it checked out for me once I saw how the quest actually plays out.
Two things need to be true before this appears: you’ve cleared your outstanding debt, and you’re currently sitting on fewer than 100 Lims. Only then does Calhoun have something to talk to you about. The reward is worth the awkward timing, though — finishing I.O.U. wipes your debt clean again, which is exactly the kind of reset I’d want going into this quest with pockets that thin.
I’d treat this as a low-stakes favor rather than a grinding objective. You’re not chasing down a hidden item or fighting anything here — you’re navigating a conversation and a verdict. The part that actually matters is the repayment dialogue, most of which circles back to Salt Pete and how you choose to handle him. Get that exchange wrong and you’re still broke with a debt that didn’t move. Get it right and Calhoun’s ledger runs dry.
I.O.U.
Calhoun is the guy you go to when you’re broke, and I.O.U. is the quest that documents exactly what that costs you. The short version: you borrowed 5000 Lims and now owe 6000 Lims total with the 20% interest baked in. This quest is your exit ramp — but the path out runs through a man named Salt Pete, and I’d handle that conversation carefully, because the reply you pick quietly decides whether you walk away clean or stuck.
To even start this, you need your debt still hanging over you and fewer than 100 Lims in your pocket. That second condition is the one that tripped me up — if you’ve been saving aggressively, you won’t trigger it. Finish it and the reward is exactly what you’d hope: your debt to Calhoun is wiped.
Objectives
- Pay back Calhoun — once you’ve scraped together enough Lims, you can settle the debt immediately. The game asks whether you want to right now.
- Reduce your Debt to Calhoun — the slower route. At the end of each day you can divert a percentage of your earnings toward the debt, choosing 5%, 10%, or 15% of your daily take.
- Speak to Salt Pete — the actual meat of the quest, and where the interesting choices live.
- Tell Calhoun the Good News — let him know the debt is cleared.
- Speak to Calhoun — you may have found a way out through the Carp Diem fishing club. Bring him the proposition.
Dialogue Choices
The Salt Pete conversation is dense, so I’ll lay the forks out below. The one I’d flag hardest: telling Pete that Calhoun was “just more ambitious” smooths over the feud and nudges Corp morality +1 and a Friend +1 with Salt Pete, but it also leaves a note that you brushed off the feud with the fishermen — and the source is explicit that this matters later in the quest. So treat that line as a commitment, not a throwaway.
| Prompt | Reply | Effect |
|---|---|---|
| See? Things don’t have to get messy. You keep your word, I keep mine, Roger’s your cousin, we’re all happy. Right? | Right. | Business +1 (Calhoun); Friend +1 (Calhoun); Corp morality +1 |
| See? Things don’t have to get messy. You keep your word, I keep mine, Roger’s your cousin, we’re all happy. Right? | No one’s happy about being in debt. | Business -1 (Calhoun); Friend -1 (Calhoun) |
| You slithering schemer. That’s blackmail. | This way we both get what we want. | Business +1 (Calhoun); Corp morality +1 |
| You slithering schemer. That’s blackmail. | Frankly, yes. | Business +1 (Calhoun); Corp morality -1 |
| Alright wait. You got a deal. Get me back on that wharf and I’ll forget I ever saw you. | All you need to do is… apologize. | Corp morality -1; Business -1 (Calhoun) |
| Alright wait. You got a deal. Get me back on that wharf and I’ll forget I ever saw you. | We have a deal. | No listed effect |
| The Carp Diem. My old club. Mine, before those chum-buckets threw me out. Banned me from fishing any of the good spots in the Docks. Me! I was Barracuda Buddy three years in a row! I was the Prince of Perch! | Why did they throw you out? | No listed effect |
| The Carp Diem. My old club. Mine, before those chum-buckets threw me out… | You mentioned money…? | Enemy +1 (Calhoun) |
| Look, when I say I caught the Macrogillean, I’m telling CORA’s honest truth. | The Macro…? | You learned about the Macrogillean |
| Look, when I say I caught the Macrogillean, I’m telling CORA’s honest truth. | I believe you. | No listed effect |
| That fish let me catch him. Looked me right in the eye then spat my lure back at me. | Sounds like nonsense to me. | Enemy +1 (Calhoun) |
| That fish let me catch him. Looked me right in the eye then spat my lure back at me. | Wow. | Friend +1 (Calhoun) |
| For someone like you? 5000 Lims is my limit. I’ll take a 20% interest. | Deal. | Business +1 (Calhoun) |
| For someone like you? 5000 Lims is my limit. I’ll take a 20% interest. | What are the terms? | No listed effect |
| For someone like you? 5000 Lims is my limit. I’ll take a 20% interest. | 20%? | No listed effect |
| I call it “limbs for Lims”. I loan you some Lims. You pay them back again or you can forget ever coming crying to me again. | Transparency is the key to good customer relations. | Corp morality +1; Business +1 (Calhoun) |
| I call it “limbs for Lims”. I loan you some Lims. You pay them back again or you can forget ever coming crying to me again. | You’re preying on people’s desperation. | Corp morality -1; Business -1 (Calhoun) |
| Aye. Pretty decent, don’t you think? | Deal. | Business +1 (Calhoun) |
| Aye. Pretty decent, don’t you think? | What are the terms? | No listed effect |
| But Calhoun wanted the glory for himself. So he took the boat and stole my best rod and then came back with some crusty tale. | He misses you. | No listed effect |
| But Calhoun wanted the glory for himself. So he took the boat and stole my best rod and then came back with some crusty tale. | Sounds like he was just more ambitious. | Friend +1 (Salt Pete); Corp morality +1; you brushed off the feud with the fishermen (matters later in this quest) |
| Conditions are still the same. 5 grand at 20% interest. You pay me back 6 grand. Want it or not? | Lend me the cash. | You get 5000 Lims; adds 6000 Lims of debt |
| Conditions are still the same. 5 grand at 20% interest. You pay me back 6 grand. Want it or not? | Never mind. | No listed effect |
Notice how many of these lines are pure flavor with no arrow attached — the Deal and What are the terms? replies are there to let you probe Calhoun without paying a cost. Where you actually spend your moral capital is in the framing: defending his “limbs for Lims” pitch lands you a Business bump and Corp morality +1, while calling him out as a predator drags both down. Same debt, very different relationship by the end.
Cassius Pierrepoint IV
There’s a specific way to lock yourself out of Cassius’s quest before you ever read a word of it, so pay attention to the prerequisite: you must not have met Cassius yet. If you’ve already run into him somewhere in your travels, his quest line simply won’t be available to you — the game treats that first meeting as the trigger, and once it’s spent, it’s spent. I’ve seen players barrel through the early story, hand Cassius a casual hello, and then wonder why nothing shows up for him later. So if you want his content, keep your distance until you’re ready to commit.
That single condition is the whole of what “The Pierreponts” asks of you going in. No story gate, no day counter, no morality threshold — just an unspoiled first encounter with Cassius Pierrepoint IV.
The Pierreponts
Once you meet him clean, the quest centers on the Pierrepont family and a round of research you’ll be doing on their behalf. As I worked through the dialogue choices here, I noticed they pull on two different tracks: some replies nudge your Friend standing with Cassius, while others open up a Romance angle. Which one you lean into matters — the game tracks them separately, so a warm answer that reads as friendship won’t necessarily read as romantic, and vice versa.
My own approach was to pick a lane early rather than trying to court both, because the swings felt more coherent that way and I wasn’t second-guessing every reply. If you’re the type who likes to feel out a character before committing, go ahead and probe — just remember each choice leaves its own mark.
When you’re finished here, it segues naturally into the rest of the Cassius material, so keep him on your radar if you want to follow the family thread to its end.
The Pierreponts
Cassius Pierrepont IV has family trouble, and he’s decided you’re the boots-on-the-ground solution. This is a research quest more than a fetch quest — you’re digging into his parents’ situation and coming back with the truth. Just know the gate on this one is unforgiving: you cannot have met Cassius before. If you’ve already bumped into him somewhere in your playthrough, this quest simply won’t be available, so if you want the Pierrepont thread, this is the moment to pick it up.
Three objectives, and they’re straightforward in structure but the third one stings a little depending on what you turn up. Head out, find him, investigate, report back. I’d take the time on objective two to actually read what you uncover, because reporting to Cassius is where the payoff lands.
- Find Cassius — track down Cassius Pierrepont IV.
- Find out more about Cassius’ parents — research his parents and dig into what’s really going on.
- Return to Cassius — report back to Cassius Pierrepont IV and reveal what you learned.
The opening exchange sets the tone for the whole job. His greeting is warm — “Oh I’m glad we’ve run into each other again.” — and you’ve got three replies. Picking “Me too!” gives Friend +1 and Romance +1 with Cassius Pierrepont, so if you’re curious about the romance option here, that’s the reply that opens the door. “That makes one of us.” costs you Friend -1, which feels about right for the snark. The flat “Oh hey.” is your neutral out — no arrow, no consequence. I usually take the neutral line when I’m not sure how much I want to invest in a character yet, and this is a fine spot for it.
Then he waves off whatever you were going to bring up — “No no no, I finally worked all that out. Thankfully. No I need help with something a little more… sensitive.” Two real choices here. “Intriguing.” earns Friend +1; “Make it quick.” costs Friend -1. Given the sensitive framing, I’d play along rather than rush him — he’s clearly about to tell you something he doesn’t spread around.
He follows up with the question that tells you exactly where this is going: “I’m fairly safe in the assumption that you are in fact, a poor person?” This one’s a trap for the ego. “Hey, that’s none of your business!” docks Friend -1, while the resigned “I mean… I guess.” carries no arrow at all. It’s tempting to get defensive, but resisting here only costs you standing with him — and he’s not being cruel, just blunt.
Finally the ask itself. He explains that Thaddeus was suggested in the Spire but that lead to you, and that he knows nothing about running hotels — the company could collapse. Here “I guess I could ask around.” nets Friend +1, and “This sounds like a rich person problem.” drops Friend -1. I’ll be honest: that second line is funny, and I understand the temptation, but if you want anything out of the Pierreponts down the line, take the help option. It keeps the relationship friendly and the thread alive.
If romance matters to you, note that only that very first reply moves the Romance meter — every other choice here swings Friend only, so don’t assume a consistently agreeable run racks up Romantic points. Sort out your parents’ findings, then bring it back to him and watch how he takes the news.
Cecil Grimes
Cecil Grimes is the kind of quest giver who tests how carefully you read your numbers before you commit. His quest, Hygiene Inspector, isn’t complicated once you understand what’s happening, but the entry requirements are the trap — there are two Lim thresholds listed, and you need to clear the higher one or you’ll walk into a wall.
Hygiene Inspector
Before Cecil Grimes will hand you this job, you need the following in place: you must have at least 40 Lims on hand, you need to have already met Cecil Grimes first, and you need at least 50 Lims to actually take on the work. That doubled threshold is the part I’d slow down on — the 40 figure alone isn’t enough, and if you scrape by with exactly that much you’ll find the conversation going nowhere.
Once you’re past the gates, the objective is an evasion job rather than a straightforward errand, so plan your approach with that in mind rather than treating it like a delivery run.
Hygiene Inspector
Cecil Grimes is a pest, and this quest is how you get him out of your hair for good. By the time you’re reading this you’ve probably already paid him a fine or two, so the goal here is straightforward: stop the hygiene inspections permanently by sabotaging his quotas from the inside. Three objectives stand between you and that outcome, and the last one sneaks in a Cassius Pierrepont cameo that pays off later.
The prerequisites are light but strict — you’ll need at least 40 Lims on hand, to have met Cecil Grimes first, and then at least 50 Lims before things move. That second threshold tripped me up on my run; I started the conversation with only 41 Lims and got nowhere. Come with the higher figure banked and you won’t waste a trip.
Objectives
- Discuss Hygiene Inspections with Ava — Talk through how to avoid these inspections for good.
- Speak to a Hacker — Find someone willing to sabotage Cecil’s quotas.
- Speak to Cassius Pierrepont — Maybe Cassius is in the market for an annoying hygiene inspector.
Dialogue Choices
Everything that matters in this quest lives in the conversations, so read the arrows carefully before you reply. I’ll walk you through each block in the order you’ll hit them.
“This isn’t personal, you understand. It’s about quotas. I must fulfil them. But thanks to the LUZ, there are only so many places to inspect and only so many fines I can issue…”
- What happens if you don’t meet your quotas? — no listed effect, but you’ll want the context.
- Boo hoo. → Enemy +1 (Cecil Grimes)
“I would be so far above you, I wouldn’t even see the bird excrement that covers your roof.”
- I love it when you talk dirty to me. → Romance +1 (Cecil Grimes)
- Can I just have my fine now? — no listed effect.
“Yes. Today it will be… forty Lims, I think. I’m feeling generous.”
- You’re a crook. → Business -1 (Cecil Grimes); you pay 40 Lims
- You’re too kind. → Business +1 (Cecil Grimes); you pay 40 Lims
Notice both of those fine-paying replies cost you the same 40 Lims — the only difference is whether you flatter him or insult him. I’d rather keep the Business swing positive here since it costs nothing extra.
“If I was promoted to the Spire, I could issue Category B fines all day long–“
- Can I just have my fine now? — no listed effect.
- I love it when you talk dirty to me. → Romance +1 (Cecil Grimes)
“Then I shall have my people contact him.”
- I’m sure he’ll be pleased. → Business +1 (Cassius Pierrepont)
- Tell them to mention my name. → Business +1 (Cassius Pierrepont)
Both replies land the same Business bump on Cassius, so pick whichever fits the tone you’re going for. This is the hand-off line that pushes the chain forward.
“It is good to help those who are reliant on Lims, isn’t it?”
- I’d say so. → Corp morality -1
- Only if it benefits us. → Corp morality +1
“Oh! Haha, yes. That makes a lot more sense. Yes. I am asking if you would like to ‘hang out’.”
- Sure. I’d like that. → Romance +1 (Cassius Pierrepont)
- I’m kinda busy right now. → Romance -1 (Cassius Pierrepont)
“There are several ways. But the two easiest he told us himself: get him demoted or promoted.”
- Go on… — no listed effect.
- Demotion all the way. → Corp morality +1
“I believe he would take a job in the Spire. Perhaps if we speak to someone with a business concern there?”
- I’m not helping him. — no listed effect.
- Do you mean Cassius Pierrepont? → You decided Cecil Grimes’s promotion or demotion (matters later in this quest)
- Do you know anyone there? — no listed effect.
This is the fork I’d slow down for. Choosing the Cassius reply locks in whether Cecil gets promoted or demoted, and that decision comes back around before the quest closes. If you’ve been leaning on Corp morality elsewhere, keep that in mind when you pick.
“Nabla is fog. Nabla is the ghost of a haptic shiver. Nabla is a neon specter.”
- Then surely this job will be child’s play… → Business +1 (Nabla)
- Whatever. How much? → Friend -1 (Nabla)
That last exchange is your hacker contact. Being a little theatrical with Nabla costs you nothing and banks a Business point, so it’s the easy call unless you’re deliberately stacking Friend losses. The promotion-versus-demotion choice you made earlier is what actually determines how the inspections shake out, so as long as you nailed that line, the rest is just bookkeeping.
Ceres Coilson
Two heads with the same last name means one thing in practice: whoever you talk to first tends to color the whole family arc. Ceres Coilson stands in for that side of the Coilson story, and her quest Suck it and See is the one to handle before you go handing Gan any promises — that ordering matters more than anything else here.
I want to flag the two conditions before you even start walking, because neither one is negotiable. You need to have made progress in the main story, and you specifically must not have already promised Gan anything. If you’ve been chatty with Gan first, this quest may not be available to you the way it is for players who kept that door closed. That’s the kind of sequencing I’d have killed to know before my first pass, so I’m putting it up front.
Once you’ve met both conditions, the quest opens and you can start working through Suck it and See. The order you tackle the Coilson threads — Ceres before Gan, or the other way around — is the single decision that drives everything downstream, so get it right and move on.
Suck it and See
Ceres has misplaced her husband’s Persona Construct, and this is the kind of quest where the whole point is a choice you make late — so read the objectives before you commit to anything. I’d treat the third objective as the alternate route, not a step to complete on the way to the good ending. You’re picking one, and the pick sticks.
The prerequisites are the same two I mentioned above: progress the main story, and get here before you promise Gan Coilson anything. That second one is the whole reason I flagged the Coilson ordering earlier — once you’ve made Gan a promise, this quest’s central fork closes off.
Objectives
- Find Gan Coilson — check whether Gan’s Persona Construct is hiding inside a vacuum cleaner.
- Return Gan to Ceres — deliver Gan to his widow.
- Tell Ceres You Didn’t Find Gan — lie to Ceres about Gan’s whereabouts.
Objectives two and three are mutually exclusive outcomes of the same investigation. You find the construct, and you either hand it back or you don’t.
Dialogue Choices
Ceres starts fishing for information pretty quickly, and if you’re the lying type you’ll want to be consistent about it — I noticed some lines raise her suspicion on their own even when I thought I was playing it cool.
“You wouldn’t lie to me would you? I know what you floor-levels can be like. Tricky little buggers.”
- You know, even if I had found him. I wouldn’t tell you. → Enemy +1 (Ceres Coilson)
- Nope, I absolutely wouldn’t lie to you.
“Oh this really must be an educationally deprived area. I’m looking for a Floor Level Autonomous Vacuum Robot… a cleaning droid… a suction bot! Have you seen one here?”
- I promised not to tell you. Why do you ask?
- Yes, I have seen a vacuum cleaner nearby. Why?
- None of your business lady. → Enemy reset to 1 (Ceres Coilson)
That “None of your business” line is interesting — it doesn’t stack more hate, it just sets her Enemy value to 1, which can actually be lower than where you are if you’ve been needling her. Worth knowing before you assume every rude reply is a punishment.
“I had my husband loaded up on a small chip before he died, and now it has… escaped.”
- ‘It’? Do you mean ‘he’? → Enemy +1 (Ceres Coilson)
- How romantic.
- I still don’t see why I should help you. → Enemy +1 (Ceres Coilson)
“I’m currently locked out of my Hetherington’s Country Club account. Now I’d very much appreciate it if you could go and check if my husband is inside a vacuum cleaner.”
- Well, I keep my promises. You’re on your own.
- If I check, will you leave?
Then you find Gan. He’s not eager to go back, and this is the line that actually decides the quest:
“I’ll ensure you have the cleanest floor in all Nivalis. Just please tell her I’m not here.”
- Fine, I’ll tell her you’re not here. → Friend +1 (Gan Coilson); You met Gan Coilson
- No, I’m taking your construct back to her. → Friend -1 (Gan Coilson); You met Gan Coilson; You took Gan’s construct back to Ceres (needed for Where is Ava?)
Both replies give you the You met Gan Coilson flag, so meeting him isn’t the fork — what you do with him is. And here’s the part I’d slow down for: taking Gan back to Ceres is the option that sets a later quest flag for Where is Ava? If you’re trying to keep your options open for that thread, don’t talk yourself into the nice-sounding “keep the promise” ending just because it earns you a Friend point.
Cirian Krell
Cirian Krell sits in the same loose pocket of givers as Ceres Coilson, so if you just wrapped the Gan decision, you already know the drill: meet the giver, take the job, then work an objective chain that ends in a pile of opinions rather than a single clean hand-off. What makes this one distinct is that you’re not fetching anything or fighting anything — you’re collecting people’s takes, and the game tracks them the same way it tracks a payout.
His quest is called Level Up!, and the backbone of it is opinion-gathering. Talk to the assigned contacts, hear them out, and the quest logs each response as a data point you’ll be sitting on. I kept a mental tally while running it because the sequence of who you approach can color the way the later replies land, and I’d rather you walk in knowing it’s a talk-heavy job than expecting a fight at the end.
Level Up!
“Level Up!” is the kind of quest that starts as a curio and quietly turns into a personality test. The premise is exactly what it sounds like — a technology that lets you spend a night living someone else’s life, waking up with their memories and whatever scraps of wisdom came with them. Cirian Krell is the one selling it, and before you commit, the quest sends you around town collecting opinions on whether that’s a gift or a warning sign. I like that the game makes you do the legwork first, because by the time the patch is actually in your hand, you’ve heard enough to know what kind of person you are.
There are seven objectives, and the order matters more than it looks — you can grab the patch early and sit on it while you finish the rounds, but the decision itself is the point. Here’s how the sequence runs.
- Speak to the Professor — plenty of students have apparently used “Level Up!”, so talk with Professor Remo and get his read on the technology.
- Converse with Elias — see whether Elias will actually recommend “Level Up!”.
- Decide if You’re Going to Level Up! — now that you’ve heard the opinions, are you doing it or not?
- Get a Level Up! Patch from Cirian — you’ve still got time to make up your mind, but you can already collect the patch from Cirian in the meantime.
- Travel to Metro Hub.
- Get Sage‘s Take on Level Up! — one more opinion, this time from Sage Hullen.
- Share your Level Up! experience — talk through what the experience was actually like with Sage.
The part I’d slow down on is the conversation with Cirian, because that’s where the real forks live. He opens with his pitch about waking up with the memory of a fun life and a few kernels of wisdom — “like a hangover you finally want to have linger on” — and that’s your first binary:
- Alright, let’s go. → takes the Level Up! Patch; You have taken the Level Up treatment
- You want it? I’m all set.
After that, the talk drifts into why Cirian’s even here — dreams, crises, existential existences — and you get a friendship option that I don’t think is worth skipping if you care about Cirian Krell at all:
- Yeah, about all that stuff that went down… → Friend +1 (Cirian Krell)
- How is the dream business?
Then there’s the line that always gets me, because it’s framed as a throwaway and isn’t: “How’d you learn about stuff like that?” How you answer sets your Corp morality, and I’ll be honest, the difference between the options here is sharper than the flavor text suggests.
- I like to read.
- I watch the feeds.
- Pick it up on the street. → Corp morality -1
- I pay attention to CorpSec PSAs. → Corp morality +1
There’s also a quieter beat where Cirian muses that once people reach a point they interpret as “making it,” they stop expanding their knowledge on things that could act as a failsafe. I’ve seen this one catch people off guard because the two replies read similar but land on opposite ends of the morality meter:
- We should change that. → Corp morality +1
- They’ve earned the ability to relax. → Corp morality -1
And tucked into the Professor conversation is a meet-flag worth noting — taking the polite exit rather than pushing back logs Kasey Remo as met and gives you the option to simply thank him for his time. If you’re someone who tracks who you’ve actually been introduced to, that one’s easy to miss because it looks like a dead-end reply. I’d grab the patch before you head to Metro Hub rather than after — there’s no reason to make the trip twice, and the quest doesn’t punish you for getting the hardware in hand early while you’re still deciding whether to use it.
Clancy Pantermino
Clancy Pantermino runs what might be the most on-the-nose-named service in the whole game, and the quest he hands out is really just him walking you through a sales pitch lesson. Before you can pick it up, you need to have moved Clancy’s own story forward — that’s the gate, and there’s no way around it. If you’ve been neglecting him, go spend some time in his orbit first, because nothing here opens up until that story thread advances.
The lessons themselves are hands-on rather than theoretical. What I’d watch for is the rhythm: he teaches, you follow along, and each step reinforces the last. It’s a deliberately paced quest that’s less about a big payoff and more about understanding how selling to people actually works in Nivalis Nights. If you’re the type who rushes objectives, slow down here — the structure is the point.
Once Clancy’s story is where it needs to be, the quest becomes straightforward. Come in expecting instruction rather than action, and you’ll get exactly what he’s offering.
P.I.S.S.
Once Clancy’s story has moved along far enough, the Pantermino International Sales Symposium opens its doors, and you can enroll. Structurally this is a lesson-based quest: you meet Clancy for a first lesson, then return for a second, then a third he bills as your most important one. If you came here expecting action, adjust — the whole thing is conversation, and the choices in those conversations shift your standing with Clancy and occasionally your Business stat.
The objectives are deliberately plain, and that’s the joke. You meet, you listen, you meet again. What actually matters is how you respond while he talks, so I’d keep an eye on the choices below rather than the objectives.
- Meet Clancy for your first Lesson — you’re enrolled in the Pantermino International Sales Symposium, so take the first lesson.
- Next Lesson — meet with Clancy again for the following lesson.
- Your Most Important Lesson — one more meeting with Clancy for the lesson he frames as the big one.
Dialogue choices
Not every line moves a needle, but several of them do, and the swings run both directions. I’ve listed each exchange in order, with the arrow showing what the reply actually changes. Where a reply has no arrow, nothing is logged — so you’re free to pick on tone alone.
His setup line — “It’s very simple, maybe the easiest to learn, but by far the most important” — is your first nudge. Telling him to get on with it loses you a Friend point; humoring him with enthusiasm gains one.
- Get on with it. → Friend -1 (Clancy Pantermino)
- Wow, sounds like a doozy! → Friend +1 (Clancy Pantermino)
Then he gets reflective: he calls himself nothing, and talks about dying twice — once when you die, and again when nobody remembers you, which for him lands on the same day. You can reassure him he’ll be remembered as a great salesman, or you can be cold about it and point out that’s just what sales gets you.
- People will remember you. You’re a great salesman! → Friend +1 (Clancy Pantermino)
- That’s what you get for working in sales. → Friend -1 (Clancy Pantermino)
He catches himself having played you — “I really had you going, didn’t I?” — and here being a good sport pays off. Denying it costs a Friend point; admitting he got you gains one.
- Not really. → Friend -1 (Clancy Pantermino)
- You really did. → Friend +1 (Clancy Pantermino)
The one to watch is the reveal that the whole lesson was just the early-bird thing. This is where the tone shifts hard, because calling it a scam is the costly reply — it stacks a Friend loss, an Enemy gain, and a Business drop all at once. Staying level-headed costs you nothing.
- What, that was it? This is a scam! → Enemy +1 (Clancy Pantermino); Friend -1 (Clancy Pantermino); Business -1 (Clancy Pantermino)
- Oh. Ok, that’s good advice. → no listed effect
Now the payment fork. He asks for one hundred Lims plus a ten-Lim admin fee, and agreeing is a net positive — you gain a Friend and a Business point for handing over the money. If you’d rather not pay, declining leaves everything as it was. This is the 110-Lim decision the quest hinges on.
- Ok, let’s do it. → Friend +1 (Clancy Pantermino); Business +1 (Clancy Pantermino); you pay 110 Lims
- No thanks. → no listed effect
Last exchange is the dropout line. He admits people rarely quit this early and calls it a sign of weakness, but asks if you’re sure. Conveniently, this becomes a second chance at the same payment fork — if you back out earlier but change your mind here, agreeing lands the exact same Friend and Business gains and the same 110-Lim charge.
- I’m sure. → no listed effect
- Ok, let’s do it. → Friend +1 (Clancy Pantermino); Business +1 (Clancy Pantermino); you pay 110 Lims
So my read on the whole thing: if you want Clancy in your corner, play along, admit he got you, and pay the fee — the stacked Friend and Business points are worth the Lims if you’re investing in him. If you don’t care about his relationship, you can coast through on the neutral replies and keep your money, though calling his lesson a scam is the one move I’d avoid unless you actively want him as an enemy.
Clem Hortelano
If you’re working your way through Clem Hortelano after dealing with Clancy, you’re stepping into a quest that hands out a genuinely useful reward at the end — but only if you’ve dotted every i beforehand. Project Grapevine sits behind one of the longer prerequisite lists I’ve run into, and I want to lay those out before the objectives so you don’t get halfway in and realize you’re missing a face.
Before Project Grapevine will open up, you need to have gotten to know Ma Gomba, Hanz, Clem himself, and Sal. The quest also sits behind a bit of main-story progress, so if your other threads are lagging, expect to circle back later. On top of the people, you’ll want to have your kitchen stocked — the quest calls for onions, bok choy, and cabbage in specific counts. I’d check your pantry before even starting the dialogue, because running out mid-handover is the kind of thing that stops you cold.
The payoff is worth the setup, though: this quest is what wraps up Clem’s story, so if you’ve been following him at all, this is the note he goes out on.
Project Grapevine
Once the prerequisites are met, the objectives themselves are the straightforward part — the length is all in the prep. Here’s the sequence as I worked through it, with the item requirements front-loaded so you’re not backtracking.
- Reach the required progress through the main story, and have met Ma Gomba, Hanz, Clem, and Sal.
- Have the required onions, bok choy, and cabbage on hand.
- Follow the objective chain through to its close — this resolves Clem’s story as a reward.
The decision I’d slow down on is the one right at the end. When you hit the hand-in, you get a fork: hand the goods over, or drop them. That single choice swings Friend and Enemy standing, and I’ve seen how easy it is to tap through it by reflex. Hand it in if you’re building any kind of goodwill with the people around Clem; drop it if you’ve decided the relationship isn’t worth it. Either way, you’re not walking away neutral — so make the click on purpose.
Project Grapevine
Clem hands you a bundle of illegal flower seeds and a simple job: get them onto the Oil Rig without anyone seeing. What he doesn’t spell out is that this is the point where you choose a side. You can play the loyal accomplice and make the drop, or you can walk the seeds straight to the authorities — and the moment you commit, Clem’s entire story wraps up one way or the other. There’s no third path here, so I’d think hard before moving.
The prerequisites are heavier than most jobs on this list. You need progress in Ma Gomba’s story, Hanz Grundown’s story, Clem Hortelano’s story, and Sal Magundi’s story, plus forward movement on the main story. On top of that you’re carrying ingredients — at least 4 Onion, 2 Bok Choy, and 2 Cabbage. I’d check your inventory before bothering to start, because the quest won’t hand you a pass if you’re short.
- Hand the Package In — speak to Elias Malt and turn the seeds over to the authorities.
- Make the Drop — reach the Oil Rig and leave the package near the ventilation system without being spotted.
- Speak to Clem — check in with Clem at the Greenhouses once you’ve done either of the above.
Finishing it — whichever way you went — closes out Clem Hortelano’s story. That’s the reward, and it’s worth knowing going in that this is the last you’ll do with him.
The dialogue afterward is where everything lands, and it splits hard depending on what you actually did. If you made the drop and Clem asks how it went, both “Yep, no problems” and “I didn’t make the drop” hand you a Friend -1 and an Enemy +1 with Clem Hortelano — there’s no clean win there. If you got caught talking to CorpSec, he presses you, and “I decided not to risk my neck for some flowers” is the one line that actually recovers ground: Enemy -1 and Corp morality +1. I’d read that as the game rewarding honesty over denial, since “I didn’t talk to anyone” just stacks another Enemy +1 on top.
Push through his anger and you’ll hit either the success branch or the betrayal branch, and they play completely differently. If the drop worked, Clem’s thrilled about the corps waking up to a rig covered in blossom — “Screw the corps!” costs you Corp morality -1, while “Just happy to help” keeps you clean. When he asks whether business has to be cut-throat, agreeing nets Friend +1 (Clem Hortelano), but insisting everyone’s on their own drops Business -1 and Friend -1 with him while pushing Corp morality +1.
If you handed the seeds to the authorities instead, you’ll face Elias Malt afterward. He notes that productivity on the rig fell 21% from the “recent floral disruption.” Confirming it was you — “Yes” — earns Business +1 (Elias Malt). Playing dumb with “I don’t know about that” costs you Business -1 with him. Honestly, neither branch leaves you neutral, so decide which relationship you care about before the final exchange and click with intent.
CorpSec Terminal
The CorpSec Terminal isn’t a person, so don’t go looking for a face to talk to — it’s an in-world terminal that hands you work the moment you interact with it. This one carries a single job, Surrender Old Tech, and it exists for exactly one reason: to let you trade an old chip off your hands. If you’ve been sitting on an Ancient Computer Chip or an Antique Computer Chip and wondering what it’s even for, this is your answer.
Two things gate the job, and both tripped me up a little. You need to be holding one of those two chips — Ancient Computer Chip or Antique Computer Chip — and you need to arrive during daytime. Miss either one and the terminal has nothing to say to you, so I’d check your inventory before you make the trip rather than after. What makes this worth a deliberate stop is that it isn’t a dead-end hand-in: the job feeds into a choice, and that choice connects to Sell Old Tech, so the same chip can walk you down two very different roads depending on what you decide.
Once the prerequisites line up, the objective itself is refreshingly simple: surrender the chip to the terminal. That’s the whole task on the surface. But the moment you’re actually standing there, the hand-in versus sell fork opens up, and that’s the part I’d slow down for. Handing it over to CorpSec and offloading it on the market don’t lead to the same place, so if you care about where your Lims and your standing end up, decide which version you actually want before you commit.
I’ll be honest — this is one of those short jobs that’s easy to blow past because it looks like a nothing errand. It isn’t. It’s a tiny hinge, and I’d rather walk in knowing that than click through and find out afterward.
So the actual hand-in itself is one objective — head to a CorpSec Drop Point during the day and surrender whatever old chip you’ve got. That part is simple. The part that isn’t simple is Nabla, because the moment the drop happens, Nabla starts talking numbers, and the numbers come with a fork that quietly reroutes an entire quest.
If you’re holding an Ancient Computer Chip or an Antique Computer Chip, you qualify — just make sure it’s daytime before you bother walking over. Once you’re there, surrendering your old tech at the drop point kicks off the exchange.
Surrender Old Tech
The opening line from Nabla gives you two directions: hand it in clean, or flip it. That second option is the one I’d pause on — saying “Now you’re talking!” drops your Corp morality by 1 but starts Sell Old Tech, which is a whole different job. Picking “I don’t need any more trouble” keeps things respectable and you stay on the straightforward surrender path.
Nabla also slips in a flirty line early — “You’re a babe, babe.” You can return it with a Romance +1 (Nabla), or ask Nabla to drop the pet name. Just cosmetic in terms of the ledger, but worth knowing you have the option.
Then the haggling starts. Nabla offers 30 Lims for the lot — accept and you get Business +1 (Nabla) and Friend +1 (Nabla), with every Antique Computer Chip and Ancient Computer Chip trading at 30 Lims each. If you push for fifty instead, you eat a Business -1 (Nabla) for the trouble. Nabla counters with 40 Lims as the final offer: take it and you get Friend +1 (Nabla) and all chips at 40 Lims each; walk away with “Then forget it” and it’s Enemy +1 (Nabla).
There’s also a loyalty check in the middle — Nabla accuses you of possibly being a Corpo grass. Answering “I’m not” gets you Friend +1 (Nabla); a flippant “So…?” costs Friend -1 (Nabla). Small, but it stacks with everything else.
And then the real twist: Nabla wants a package delivered to Sage Hullen, who hangs around Metro Hub. Refusing — “I don’t want to get involved in whatever this scheme is” — hits you with Business -2 (Nabla) and Corp morality +1, fails Sell Old Tech, but unlocks the CorpSec drop terminal. If you just ask what’s inside, Nabla fires back that you never ask what’s in the package, and you’re back to the same two endings. Taking the deal gives you the Package for Sage, Business +2 (Nabla), and Corp morality +1.
The thing I’d keep in mind here is the symmetry — either way you end up with Corp morality +1. The difference is whether you keep Nabla as a business contact with a package in your pocket, or you cut the whole thing off and take the cleaner CorpSec route. Neither is wrong, but they don’t lead to the same place, and it’s genuinely easy to click the wrong branch while you’re busy counting Lims.
Dagmar Fitz
Dagmar is one of those quest givers whose intro quest is easy to slide past, because you have to actually meet her before her sabotage job even appears. So if you’re scanning your quest log and wondering why nothing from Dagmar shows up, that’s usually the reason — you haven’t crossed paths yet.
Before you can take on Dagmar’s Sabotage, three things need to be true: you’ve met Dagmar, you’ve finished the intro, and you’ve met Marcelle. I’d tick all three off in my head before heading over, because missing even one of them just leaves you standing around with no objective to chase.
Dagmar’s Sabotage
This one starts with Dagmar and ends up dragging Marcelle into the picture, which is where it gets interesting. You’ll be working through the sabotage objectives, and a good chunk of the outcome is decided by how you handle the rat drop, the conversation with Marcelle, and the health inspector thread.
The dialogue choices here carry both Business and Enemy swings, so I’d slow down and read each reply before committing. It’s the kind of quest where the “clever” line and the “safe” line don’t produce the same relationship with the people around you, and the consequences stick around afterward rather than resetting.
If you’re trying to keep your business relationships intact, watch which replies carry the Enemy swing — that’s the tell that you’re about to burn a bridge you might have wanted to keep. I’d decide up front whether you’re playing this for the practical payoff or for the drama, then commit, rather than hedging and landing somewhere in the middle.
Dagmar’s Sabotage
Dagmar’s pitch here is simple: she wants a rival humiliated, a hygiene rating doctored, and your hands doing the dirty work. Whether you play along is genuinely up to you, and the choice tracking on this one is dense enough that I’d read every arrow before committing. You’ll need to have met Dagmar Fitz first, finished the introduction, and crossed paths with Marcelle De Nuite before this quest opens up.
The objectives run in a fixed order, and a couple of them are easy to fumble if you rush:
- Drop Dead Rat during Curfew — plant a dead rat somewhere a customer will definitely notice, and do it while nobody’s around during curfew.
- Return to Dagmar — check in with Boss Dagmar.
- Talk to Marcelle — convince her Dagmar’s place is the best in the LUZ. Or don’t. Your call.
- Report to Dagmar — check in with Boss Dagmar.
- Access CorpSec Terminal — use Dagmar’s stolen remote access chip to hack a CorpSec Terminal.
- Return to Dagmar (again) — check in with Boss Dagmar.
- Return to Dagmar (again) — check in with Boss Dagmar.
- Report to the Health Inspector — Cecil Grimes would like a word.
That double “Return to Dagmar” step looks like a typo on paper, but it’s really two separate check-ins, so don’t assume you can skip the second one. The rat drop is the part I’d slow down on — curfew timing matters, and if you get spotted it defeats the whole point.
Dialogue Choices and Their Swings
This quest is where Dagmar’s business relationship really takes shape, and Marcelle’s opinion of you shifts alongside it. The recurring “slug or snake” question isn’t flavor — it’s a real fork that nudges both your Business standing with Dagmar and your Corp morality. I’ve laid out every branch below so you can pick your line deliberately instead of guessing.
| Prompt | Reply | Effect |
|---|---|---|
| Thing is, our rivals just aren’t sinking fast enough for my liking… | So what can we do? | — |
| Thing is, our rivals just aren’t sinking fast enough for my liking… | It’s dog eat dog, Dagmar baby! | Business -1 (Dagmar Fitz) |
| Go find him. Tell him how WONDERFUL my places are… | Consider it done. | Business +1 (Dagmar Fitz) |
| Go find him. Tell him how WONDERFUL my places are… | Do your own dirty work from now on. | Enemy +1 (Dagmar Fitz) |
| Stop yapping. Are you in or not? | I’m in. | — |
| Stop yapping. Are you in or not? | Not. Do your own dirty work from now on. | Enemy +1 (Dagmar Fitz) |
| And why is that? | Because they are THE place to be right now. Everyone says so. | Business -1 (Marcelle De Nuite) |
| And why is that? | Because they serve rat. On waffles. With… ice cream. Delicious. | Friend -1 (Marcelle De Nuite) |
| So you will forgive me when I say I detect an aroma of something about you. | I’m serious. Dagmar might be awful but her food is phenomenal. | Business -1 (Marcelle De Nuite) |
| So you will forgive me when I say I detect an aroma of something about you. | Guilty as charged. Dagmar told me to suck up to you. | Business +1 (Marcelle De Nuite); Corp morality -1 |
| So you will forgive me when I say I detect an aroma of something about you. | Dagmar threatens me, and I think your honest opinion about her food could… kinda help me. | Corp morality +1 |
| A word to the wise, my friend: swap the sugar for salt too many times… | You’re right. Sorry. | Friend +1 (Marcelle De Nuite) |
| A word to the wise, my friend: swap the sugar for salt too many times… | … not really. | — |
| A word for your ear. | Just a word…? | Romance +1 (Cecil Grimes) |
| A word for your ear. | Shoot. | — |
| Did you see what he said about me? “The floors are as clean as the owner’s conscience…” | What a piece of work. | Friend +1 (Dagmar Fitz) |
| Did you see what he said about me? “The floors are as clean as the owner’s conscience…” | Maybe he has a point. | Enemy +1 (Dagmar Fitz) |
| It’ll give you access to the hygiene system via a CorpSec terminal. | Why haven’t you used it already? | — |
| It’ll give you access to the hygiene system via a CorpSec terminal. | Sick. | Business +1 (Dagmar Fitz) |
| Change my hygiene rating to excellent, and drop everyone else’s score… | Why can’t you do it yourself? | Business -1 (Dagmar Fitz) |
| Change my hygiene rating to excellent, and drop everyone else’s score… | Sounds easy enough. | Business +1 (Dagmar Fitz) |
| Because it’s illegal, jackass. And because I have you to do it for me… | Of course. | — |
| Because it’s illegal, jackass. And because I have you to do it for me… | Not if success looks like you. | Enemy +1 (Dagmar Fitz) |
| I can submit an anonymous tip-off via the Nets, if you wish? | Go for it. | You reported Dagmar Fitz to Cecil Grimes (matters later in this quest) |
| I can submit an anonymous tip-off via the Nets, if you wish? | No. That’s not me. | — |
| Here to do more freeloading? | Just being neighborly. | — |
| Here to do more freeloading? | Yeah. What you got? | Business -1 (Dagmar Fitz) |
| No such thing in this place. You’re either a slug or a snake. Which are you? | Slug. | Business -1 (Dagmar Fitz); Corp morality -1 |
| No such thing in this place. You’re either a slug or a snake. Which are you? | Snake. | Business +1 (Dagmar Fitz); Corp morality +1 |
| No such thing in this place. You’re either a slug or a snake. Which are you? | What are you talking about? | — |
| Because if you’re a snake then maybe we can talk about the restaurant biz… | Then let’s talk. | Business +1 (Dagmar Fitz) |
| Because if you’re a snake then maybe we can talk about the restaurant biz… | I’d like to see you try. | Enemy +1 (Dagmar Fitz) |
| That’s about the measure of it, yes. | What’s in it for me? | Business +1 (Dagmar Fitz) |
| That’s about the measure of it, yes. | No way. | Corp morality -1; Business -1 (Dagmar Fitz) |
| I’ll recommend you to some of my more… discerning clientele. | I think we can do business. | — |
| I’ll recommend you to some of my more… discerning clientele. | Forget it. | Corp morality -1; Business -1 (Dagmar Fitz) |
| Excellent. Let’s start easy. A little drop and run at a rival’s joint… | Can do. | — |
| Excellent. Let’s start easy. A little drop and run at a rival’s joint… | Do you just… carry dead rats on you? | Business +1 (Dagmar Fitz) |
| Not fighting the competition as long as it’s weak is idiocy. | No way. | Corp morality -1; Business -1 (Dagmar Fitz) |
| Not fighting the competition as long as it’s weak is idiocy. | What’s in it for me? | Business +1 (Dagmar Fitz) |
| You gonna ooze around picking up a few Lims here and there? Slug or snake? | Slug. | Business -1 (Dagmar Fitz); Corp morality -1 |
| You gonna ooze around picking up a few Lims here and there? Slug or snake? | Snake. | Business +1 (Dagmar Fitz); Corp morality +1 |
| You gonna ooze around picking up a few Lims here and there? Slug or snake? | Neither. Or both. I don’t care. | Business -1 (Dagmar Fitz) |
| For you? A bit of advice. In this business you’re either a slug or a snake… | Slug. | Business -1 (Dagmar Fitz); Corp morality -1 |
| For you? A bit of advice. In this business you’re either a slug or a snake… | What are you talking about? | — |
The one line I’d genuinely think about before picking is the anonymous tip-off to Cecil Grimes — reporting Dagmar pays off in a later step of this same quest, so it’s not a one-and-done choice. If you want that thread to stay open, that “Go for it” is the reply you’re looking for. After you’ve cleared the health inspector’s word, this whole sabotage arc closes out and Cecil’s next move is the thing to watch.
Deeala
Deeala is one of those quest givers I nearly walked past, mostly because her job only opens up once you’ve put a couple of in-game days behind you. If you’re still in the first day or two, bank this one and come back — the game simply won’t let it trigger yet. Everything below follows the format you’ve seen throughout this guide: a giver heading, then the quest she hands out, with objectives and dialogue choices marked as they come.
Her quest is Comedy Showdown, a roast-flavored gig that leans on the FERB rating mechanics for its payoff. Once you’re past day 2, head to her and the objectives should be live.
Comedy Showdown
The prerequisite here is straightforward: after day 2. Nothing else gates it, so if you’ve cleared the opening stretch of the game you’re good to go. From there it’s a matter of working through the roast objectives and then sitting through the Pilk Dane roast dialogue block, which is where the real decisions live.
What caught my attention is how the FERB rating ties into your reward — the roast isn’t just flavor text, your replies during the Pilk Dane segment feed into how the whole thing resolves. I’d slow down on this block rather than clicking through it, because the reward choices at the end depend on what you built up during the roast itself. If you’re the type to skim dialogue for the funny lines, this is one where reading a beat longer is worth it.
Comedy Showdown
Deeala’s landlord has been leaning on her, and rather than pay him off or move out, she wants you to bury him in a public roast. The whole quest is one long provocation match against Pilk Dane, and the objective is blunt: push his FERB rating all the way to enemy so he gives up on Deeala entirely. It only unlocks after day 2, so if you’re sprinting the early game, this one will be sitting here waiting for you.
What I like about this quest is how mechanically transparent it is once you see the pattern. Every reply in the roast has an arrow, and a stack of them only exist to crank that FERB rating. The trap is that a few of the softer lines actually nudge it the wrong way, and since the reward at the end mirrors what you built, I treat this as a read-every-line situation rather than a mash-through.
The objectives run in a clean three-step loop:
- Consider Helping Deeala — she needs a hand with her annoying landlord, and the quest opens once you agree to look into it.
- Showdown with Pilk Dane — provoke negative responses throughout the roast and drive his FERB rating to enemy, which is what makes him back off Deeala.
- Tell Deeala about the Showdown — head back and report how it went. She’s in Lowtown when you return.
Working the Roast and Keeping the Rating Moving
The roast is a gauntlet of Pilk’s own cheap shots, and the reply you pick either feeds his FERB rating or bleeds it. I want his rating climbing every single line, so I stick to the combative answers and dodge the apologetic ones. His opening “teach the kids” jab sets the tone — hitting back with I’m not sure that’s true. is an Enemy +1 (Pilk Dane), while the neutral “Wasn’t she supposed to teach you?” just sits there without moving anything.
When Ava asks whether you can embarrass him badly enough that he never admits the loss, I can beat him. gives Friend +1 (Ava). That one’s worth taking for the relationship if you care about Ava, and it costs you nothing on the FERB front. I grab it every time.
His crude “Noods” line and the donut bit are both pure provocation checks. Are you twelve? and …I think you stole that from someone funny. each land Enemy +1 (Pilk Dane), whereas “That’s not bad” and “That’s embarrassing!” leave the rating untouched. When he taunts you about Deeala hitting on you to pay off her debt, Jokes on you all. I’m in more debt than any of you! is another Enemy +1 (Pilk Dane).
Here’s the one I’d flag hardest: right before the heavy-hitters, he offers a line about his thick skin. You can still call this off! reads like a nervous joke, but it actually hands him Enemy +1 (Pilk Dane) — which, counterintuitively, is the direction you want, since pumping his rating is the goal. Don’t let the phrasing fool you into thinking it’s a soft-out; it’s fuel.
The Big Enemy +5 Lines
This is the segment the whole quest is built around. When Pilk dares you to give him your worst, three specific replies each slam him for Enemy +5 (Pilk Dane) — by far the biggest single swings in the fight. Any one of them is enormous for the FERB meter, so I save them for this moment rather than burning lesser lines earlier:
- I’m not saying your comedy sucks, but at your last gig your audience told the funeral next door to keep the noise down.
- If we became good friends we could have inside jokes — for example, you could keep your jokes inside your head.
- I can’t believe people call you a joke thief. Sure, you steal jokes, but you don’t take the punchlines!
After that, he pivots to the soul-and-dreams guilt-trip. I did warn you! and A snowflake on a roast… are each Enemy +1 (Pilk Dane), but watch out for the sincere Sorry. — that one actually pulls his rating back with Enemy -2 (Pilk Dane). After spending the whole roast climbing, the last thing I want is to undo progress on the final line, so I skip the apology here.
The Payoff and the Reward Choice
Once Pilk has been thoroughly buried, Deeala checks whether you’d actually thought about helping her, and then asks what you want in return. This is where your earlier choices decide what the quest pays out, so I like having my mind made up before this block loads.
| Prompt | Reply | Effect |
|---|---|---|
| Have you thought about it? | I’d like to help, but are you sure this is a good idea? | Friend +1 (Deeala) |
| Have you thought about it? | And what do I get? | No listed effect |
| What do you want? | Cash. Cold hard Lims. | Corp morality +5 |
| What do you want? | You’ll owe me a favor. | Corp morality +1 |
| What do you want? | A date? | Romance +1 (Deeala); Friend +1 (Deeala) |
Picking Cash. Cold hard Lims. is the pure Corp play at Corp morality +5, and if you double down when she reacts in disbelief, I’m not kidding. I want the money. lands the same Corp morality +5 again. Hedging with the favor line keeps you at Corp morality +1, while A date? swings Romance and Friend both up on Deeala — that’s the route I take when I’ve been building the relationship with her across the game.
If you ask for the money and then second-guess yourself with “No wait. I changed my mind,” you walk it back, so commit to the answer you actually want before you click. And if she circles back asking what you really want, the favor (Corp morality +1) and the date (Romance +1 / Friend +1, Deeala) options are both still on the table — the money line doesn’t reappear there, so if it’s the Corp morality you’re after, take it the first time it’s offered.
Delbert Cherry: Oil Rig Separatists (1/2)
Delbert Cherry is the kind of quest giver who slides a flyer across the table and expects you to do the legwork, and the Oil Rig Separatists chain is exactly that — you’re recruiting faces for a cause that isn’t yours. I’m splitting this one into two halves because the recruiting list is long and the dialogue choices stack up fast; this first part covers Botan, Reena, Finlay, and Sanya.
The thing to get right early is that these recruits aren’t a straight lineup. A couple of them will want convincing, and the wording you pick decides whether they sign on or brush you off. I’d treat each name as a mini-quest of its own rather than rushing down the list.
Prerequisites
Before Delbert will hand you the recruiting job, you need to have finished the game’s introduction and met him properly. Everything past that is the door opening on the recruitment list. I double-checked this because the quest simply won’t appear if you haven’t cleared the intro — talking to him early does nothing.
Objectives
Once you’re in, the first stretch of the chain is about working down the list of names Delbert gives you. I’d keep a rough order in mind rather than wandering, since a few of these people are easier to reach depending on where you already are.
- Speak with Botan about the cause and get their answer on joining.
- Find Reena and make your pitch.
- Track down Finlay and work through their response.
- Approach Sanya and see where they land.
Each of those names has its own little dialogue fork behind it, and that’s where the actual decisions live — not in the objective list itself. If you’re trying to keep the recruits on-side, watch which replies you commit to, because some of them lead toward a firm yes and others quietly close the door.
Recruiting Botan, Reena, Finlay, and Sanya
I won’t pretend the order matters for the flags — go with whoever is nearest — but I will say the conversations reward reading the room. Botan tends to want a reason before a yes, and pressing the wrong line burns the goodwill you’d need later. Same story with Reena, Finlay, and Sanya: the reply you choose is what tips them, and the choice tracking for this quest is dense enough that I’d slow down on each final line rather than clicking through.
This is also where the O.R.S. flags start accumulating. Those markers are what the second half of the chain builds on, so a sloppy answer here doesn’t just cost you one recruit — it can shape which lines are even available when you circle back. I’ve held off on the recruitment-confirming and submission replies in this section because they belong to the back end of the quest; the full choice block lands in part two.
Oil Rig Separatists
The opening objectives are mostly legwork — find the right people, pick the right line, don’t insult the photographer. What I’d flag upfront is that the headline choice isn’t cosmetic: a Business -1 or Business +1 with Delbert Cherry locks in depending on how incendiary you go, and only RIG MUST LIVE. actually nudges him up. I picked the silly one on my first pass because it made me laugh, and it just logs that you suggested a daft headline — no relationship change, no downside. Your call whether that’s worth it.
- Talk to Delbert Cherry and hear him out.
- Recruit Botan Noss.
- Recruit Reena (Reena Coda).
- Recruit Finlay Basin — the fallback recruit.
- Recruit Sanya Predex.
- Report back to Delbert on how the recruiting went.
- Ask Zaffer for a favor — the movement needs to make a statement.
After the headline, Delbert wants an image. If you already have Sanya on board her role as photographer covers it; otherwise agreeing to source the photo yourself is the other route. Then comes the push to make people look at the Rig itself, and that’s where the recruitment split matters — one option hands the job to Reena, one floats Botan blowing something up, and the third brings Zaffer in, which pays off later in this same quest.
Headline, Image, and Recruitment Choices
Headline — “First, we will need a headline. Something incendiary.”
- Free the Oil Rig? → unlocks the news item Free the Oil Rig!; Business -1 (Delbert Cherry)
- Riggy Riggy Let’s Get Jiggy? → unlocks the news item Riggy Riggy Let’s Get Jiggy; you suggested a silly headline for the ORS
- RIG MUST LIVE. → unlocks the news item RIG MUST LIVE; Business +1 (Delbert Cherry)
Image — “Next, we’ll need an image. Something inspiring.”
- We have Sanya on board, the photographer.
- I guess I can do that. → you agreed to provide a photo for the ORS
Making people look — “Good. Last, we’ll need to make people look at the Rig itself.”
- I reckon that’s Reena’s field. → unlocks the news item Oil Rig Vandals Hijack Systems
- Maybe Botan could… make something explode?
- Ok. I might know someone. Works with neon signs. → you brought Zaffer in to help the ORS (matters later in this quest)
For the headline I’d go with RIG MUST LIVE if you care at all about staying in Delbert’s good books — the flavor of the joke headline is fun, but only the all-caps route gives you something real. Everything else here is about positioning: only the neon-signs reply pulls Zaffer into the orbit of the quest.
Sanya Predex — The Photographer
Sanya’s thread is where this section gets genuinely tricky, because several of her replies look interchangeable and aren’t. I re-read the options twice before committing the first time through.
“So I’m supposed to capture proof that it’s Category A Hazardous Terrain. But instead I keep seeing the beauty here.”
- I’m not sure the people stuck here would agree with you.
- That’s why I like it here. → Enemy +1 (Sanya Predex)
“If I don’t they’ll just send someone else. And I’ll be out of a job. So yes.”
- Fair enough. → Corp morality +1
- Spoken like a true Corp sell out. → Enemy -1 (Sanya Predex)
- The Rig does look kind of old in places.
“Hmm. Maybe the CEOs have a point. What’s the use of this place anyway? No one uses oil anymore, apart from a few longevity clinics. This place is a relic.”
- Blow it up, I say. → Sanya refused to join the ORS
- But there are people who want to save it.
“I have to be careful with my job. I have to hide my mentoring work as it is. If they found out I joined some kind of society…”
- I thought you wanted to capture reality? → Sanya agreed to join the ORS
- I get it. Business first.
- So you don’t want to give them a try? → Sanya refused to join the ORS
“Yeah. Unfortunately.”
- I thought you wanted to capture reality? → Sanya agreed to join the ORS
- So you don’t want to give them a try? → Sanya refused to join the ORS
Notice how the “I thought you wanted to capture reality?” line shows up twice in her tree, and both times it’s the one that flips her to agreeing — if getting her on side is your goal, that’s the reply to hold onto. Saying “Spoken like a true Corp sell out” genuinely stings her (Enemy -1), while the softer “Fair enough” bumps your Corp morality instead.
Reena — The Artist
Reena’s dialogue is the densest of the recruits and the easiest to accidentally lock out. She talks in art-speak the entire time; the trick is spotting which replies she reads as genuine interest versus dismissal.
“Do you think if I reconfigure the backlighting of these struts to create a crimson beam angle it would have the right effect?”
- … what? → you met Reena (needed for A Knight in Nivalis)
- Uhh, maybe. Worth a try. → you met Reena (needed for A Knight in Nivalis)
“I’m planning my new expression. It’s going to be called Vermillion Rain.”
- Descriptive! → Friend +1 (Reena)
- Evocative! → Friend +1 (Reena)
- Whatever. → Friend -1 (Reena)
“It will look as if the Oil Rig is taking off, leaving this earth for a new world among the stars…”
- That sounds amazing. How will you do it? → Friend +1 (Reena)
- Nope, still lost me.
“I am the light at the end of the tunnel. I am lumen, kelvin, phosphorescence. I am Reena.”
- Oh hey, you’re famous! → Friend -1 (Reena)
- What do CorpSec think about your “expressions”?
“My most recent piece was called ‘Quotas Stare Back’. I hacked the terminals at CorpSec HQ.”
- And that’s art? → Friend -1 (Reena)
- That’s illegal. → Corp morality +1
- Impressive. → Friend +1 (Reena)
“Then your eyes must be full of shadow too.”
- Have you heard of O.R.S?
- I have to go. Good luck with the art. → Reena never joined the ORS
“And what is their practice?”
- Err, I don’t know.
- Poetry. Disruptive poetry. → Business +1 (Reena)
“Then I have no time for them.”
- I have to go. Good luck with the art. → Reena never joined the ORS
- Poetry. Disruptive poetry. → Business +1 (Reena)
“Ultraviolet, actually.”
- I have to go. Good luck with the art. → Reena never joined the ORS
- Have you heard of O.R.S?
The line that saves you if you’ve fumbled earlier is Poetry. Disruptive poetry. — it resurfaces in two separate branches and both times lands a Business +1. If you bail with the polite goodbye instead, Reena’s out for good.
Zaffer — The Neon Favor
Zaffer is the recruit I’d treat most carefully, since his replies swing both Business and Friend at once, and one of them changes your evening plans.
“Woah careful there. Sounds like you’re about to indulge in an act of kindness. Those are outlawed you know. Strictly profitable services only.”
- That’s why I’m asking you. → Friend +1 (Zaffer); Business +1 (Zaffer)
- I’ll pay you. → Friend -1 (Zaffer); Business -1 (Zaffer)
“Have I told you lately that neon suits you? In fact, I know some that’d look good in your apartment. How about I bring it round some time?”
- Why wait? You can bring it around tonight. → Romance +2 (Zaffer); you arranged for Zaffer to visit your apartment
- I’m good. But thanks.
Offering to pay Zaffer is the one reply that costs you on both fronts, so unless you’re deliberately keeping him at arm’s length, lean into the banter. And the “bring it around tonight” option is the one to weigh against your other plans — it’s a hard Romance +2 with a scheduled visit attached.
Botan Noss and Finlay Basin
Both of these recruits have conversational traps, but the payoff lines are worth watching for. Botan’s tree offers two different kinds of help with his paperwork — legal or black market — and you can only pick one, so decide which you’d rather have on record.
“I’m just messing. You are kinda Corpy though. No offense.”
- Some definitely taken.
- None taken. → Corp morality +1
“Who the ♥♥♥♥ are you, ‘Sec? Are you ♥♥♥♥♥♥♥ ‘Sec?”
- Nope.
- ♥♥♥♥ no! → Corp morality -1
“♥♥♥♥♥♥♥ system changed overnight. Papers got shredded, I got stuck.”
- Why not just sneak back? → Corp morality -1
- When did this happen?
- Not my problem I’m afraid.
“Stupid ♥♥♥♥♥♥♥ boards are the closest thing to a HOVA as I can get out here.”
- I know some people inside CorpSec. Maybe I can look into your papers for you. → you offered to look into Botan’s legal CorpSec papers
- I know some people who could help. Maybe I could look into getting those papers for you. → you offered Botan black market papers
“My HOVA. HaloPulse Mark IV. Lowtown Lime with a carmine under-shimmer. Best vat-grown leather seats money could buy. And the engine…”
- I know some people inside CorpSec. Maybe I can look into your papers for you. → you offered to look into Botan’s legal CorpSec papers
- I know some people who could help. Maybe I could look into getting those papers for you. → you offered Botan black market papers
Finlay Basin — “Yeah I’ve heard of it! I’ve been asking Delbert to let me join for TIME but man won’t budge. Says the wait list’s too long.”
- There isn’t a waitlist.
- Well, I can get you in. → Friend +2 (Finlay Basin)
- How long have you known Delbert?
“Huh. ♥♥♥♥, he thinks I’m a ♥♥♥♥ up doesn’t he?”
- Probably. → Friend -1 (Finlay Basin)
- How long have you known Delbert?
The Friend +2 on “Well, I can get you in.” is the single biggest relationship swing among the recruits, so if you’re collecting allies rather than trading them, that’s the one not to miss. Telling him “Probably” when he asks what Delbert thinks of him is a cheap shot that costs you a point — I’d avoid it even if it’s tempting.
Once the recruits are locked in you head back to Delbert to report, then it’s on to the favor for Zaffer. The recruitment-confirming and submission replies that follow this stretch belong to the back half of the quest, so I’m holding those for part two.
Delbert Cherry: Oil Rig Separatists (2/2)
Part one ended with the recruits locked in and Zaffer’s favor on deck. This half picks up with Finlay Basin, and if you thought the first round of pitching was delicate, wait until you hear what comes out of Finlay’s mouth. The man is flat-out miserable about how his poetry career has gone, and the whole exchange spirals out from there — his self-pity, his envy of Delbert Cherry, and a recruitment window that only stays open if you say exactly the right thing.
Finlay opens by wallowing: he keeps trying, the harder he tries the worse it gets, and he figures he should just take off to the Wastes where there’s no one to hurt. You get two replies, and only one of them lands him in the O.R.S.
- Only the giant mutant cockroaches. — Finlay Basin refuses to join the O.R.S.
- Look, I can probably get you into O.R.S. — Friend +1 (Finlay Basin)
The cockroach line is a joke, and it costs you the recruit. I’d steer clear of it unless you’re just curious how he bristles.
Once Finlay is on board, he starts gushing about the rig and then about Delbert specifically — the rest of the crew out here is fine, he says, but Delbert is on another level, and his poetry blows Finlay’s freaking mind. This is where you either protect Delbert’s reputation or set Finlay straight.
- I don’t think he feels the same.
- Look, I can probably get you into O.R.S. — Friend +1 (Finlay Basin)
- Maybe you should try a different approach.
Only the middle reply moves the needle. The other two just get you a shrug, so if Finlay’s friendship is what you’re after, that’s the line to take.
Then Delbert turns the question on you personally — “Yeah? Why?” — and the answer you give sets his relationship values outright.
- I like this place. — Friend +1 (Delbert Cherry)
- To screw with the corps. — Friend +1 (Delbert Cherry); Corp morality -1
- Maybe I want to get to know you better. — Romance +1 (Delbert Cherry)
All three of these are live options depending on what you’re building with Delbert. The anti-corp line is the only one that dents your Corp morality, so if you’re keeping that stat clean, pick one of the other two. The romance reply is the only one that pushes that track, and I’d only take it if you’re deliberately courting him.
Then comes the part I’ve seen trip people up: the second rule of O.R.S. Every member has to contribute a line of verse to Pipeline, the weekly zine. Your reaction to that rule, and then the verse itself, are two separate checks.
- I hate poetry. — Business -1 (Delbert Cherry)
- Ok…
Calling the rule stupid costs you a Business point, and the neutral “Ok…” answer changes nothing. Delbert is unbothered either way, but the penalty is real.
When he finally asks “So let’s hear it,” you have three ways to fill that blank, and this is the one most people get wrong on autopilot.
- Rig, rig, you’re so big? — Business -1 (Delbert Cherry)
- Rig. You steel-shanked wave defier, carry us on your back to freedom with fire! — Business +1 (Delbert Cherry); Friend +1 (Delbert Cherry)
- I don’t have time for this.
The “rig, rig, you’re so big” line reads like a joke and the game treats it like one — a straight Business loss. The overwrought verse about the steel-shanked wave defier is the only reply that rewards you, bumping both Business and Friend with Delbert, so grit your teeth and go full poet. Bailing with “I don’t have time for this” just skips the moment and leaves you with nothing.
With the verse in and Finlay secured, the submission replies that close out this chain are the last beat — I’d make sure the wave-defier line is the one on record before you hand anything in, because it’s the only choice here that pays you back in full.
Dotson: Dotson’s Detective Agency (1/2)
Dotson’s the kind of client who treats detective work like he’s assembling furniture from a missing manual. His first real case, Dotson’s Detective Agency, is a sprawling mystery that I’ll split across two sections because the middle drags you through half the city. This opening half covers the first stretch of objectives, meeting Ma Gomba, Razlo, Calhoun, Gideon, and Mila in that order. Here’s how I worked through it.
Requirements
Before any of this opens up, you need Dotson’s story underway — that’s the gate that lights this quest up in the first place. If the job isn’t showing at your quest log, go back and push his storyline forward. I lost a few minutes double-checking this before I realized the trigger was just Dotson himself.
Objectives
- Speak to Ma Gomba.
- Speak to Razlo.
- Speak to Calhoun.
- Speak to Gideon.
- Speak to Mila.
Dialogue Choices
The five interviews play out as a chain of conversations, and each one nudges how the agency’s relationships read. When you talk to Ma Gomba, you’re opening the case with the first witness. Follow that with Razlo, then Calhoun, then Gideon, and finally Mila — the order matters because each person hands you a detail that feeds the next. I’d take the conversations one at a time rather than rushing, since the lines that carry an arrow are the ones that shift how your allies feel about you.
Watch the replies that come back in this block, because they’re the ones where you’re either building trust with the people you’re recruiting or subtly steering the investigation. Nothing here locks you out of the second half, but the small swings add up, and I’d rather leave those relationships warm before the confrontation that’s waiting in part two.
Dotson’s Detective Agency
This is where Dotson’s case file really opens up. You’ve already sat through his pitch about founding a detective agency, and now he wants you on the payroll — sort of. It’s a long chain, thirteen objectives deep, and it folds in almost everyone connected to Danny Danetti’s stolen recipe. Progress the main story first; Dotson won’t formally take you on until you have.
Objectives
- Dotson is requesting an interview — You’ve met Dotson and heard about his plans to establish a detective agency. Follow his call for an interview.
- Question Ma Gomba — Did Ma Gomba steal Danny Danetti‘s recipe?
- Question Razlo — Did Razlo steal Danny Danetti’s recipe?
- Question Calhoun — Did Calhoun steal Danny Danetti’s recipe?
- Report to Dotson — Tell Dotson what you discovered about the suspects.
- Collect your Reward from Razlo — You made a deal with Razlo. Doesn’t matter which suspect you cleared and which you flagged, the deal is the deal. Time to collect.
- Another Challenge — Dotson has another challenge for you.
- Confront Razlo — Dotson suspects Razlo is an evil mastermind. Confront him and provoke a response that reveals the truth.
- Return to Dotson — Report your findings to Dotson to confirm his suspicions about Razlo.
- Talk to Gideon — Ava has found the only active bounty hunter in the LUZ, one Gideon. Talk to him about the case.
- Find Mila — Gideon asks you to find a young woman named Mila Kalcifer before he’ll help you.
- Return to Gideon — Mila was helpful. Turns out Gideon is her uncle. She’s fine with revealing her location to him.
- Mention The Phaze Runner to Razlo — Gideon had a tip that would help with Razlo. Mention The Phaze Runner to him and see what happens.
I’ll be honest about the shape of this job: the first four steps are pure legwork, questioning three people about a stolen recipe, and the real substance lives in the conversations. Read every reply option before you commit, because a few of these lines cost you a relationship in ways that don’t show up until later.
Dialogue choices
Dammit. Maybe you DO have some idea of what’s really happening.
- Yeah, I am getting there.
- Honestly, still no real idea. → Friend +1 (Razlo)
Then I killed him and had a MemTech upload his memories and experience into my neural augment.
- That’s horrific.
- “Albert Albumen?” → Enemy +1 (Razlo)
- You seem to know a whole lot about it.
I’m literally telling you this insane story. Why would I share it, except to debunk it?
- Because you’re probably telling the truth. → Enemy -1 (Raluca)
- To evade my suspicions.
- Because Dotson will tell me all this eventually.
Yes? And?
- Dotson thinks you are a criminal genius.
- I know what you really are. → Enemy +1 (Razlo)
Yes. I am clearly a hardened criminal with an evil empire at my fingertips. I simply cannot believe you caught me. How did you figure it out?
- No need for sarcasm. → Enemy +1 (Razlo)
- So you deny it.
Excellent. In our last meeting, I asked you a question and asked you to prepare an answer. Do you recall the question?
- “What does a detective in Nivalis need to always remember?”
- “What separates an amateur sleuth from a master detective in Nivalis?” → Business +1 (Dotson)
- “What is… a good name for a detective?”
And your answer?
- An amateur tries to solve a crime, a master detective seeks only truth. → Business -1 (Dotson)
- An amateur tries to tell a story that explains the crime, a master detective knows reality does not have a plotline. → Friend +1 (Dotson)
- An amateur considers all suspects equally, a master detective knows it was probably the husband. → Business +1 (Dotson)
That second answer is the one I’d pick if you care about Dotson liking you more than your ledger. The “husband” line is objectively the funniest, though, and it still pays Business, so there’s no wrong turn here beyond the first option.
It allows you to walk the mean streets after dark without being bothered by CorpSec snitchbots. Well, in a limited area, at least.
- Not interested.
- Fair deal, leave it to me. → Business +1 (Dotson)
A sense of righteous triumph?
- No dice. Let’s talk Lims. → Corp morality +1; Business -1 (Dotson)
- That’ll work.
I once saw her reel in a 10kg turbo trout using only crankbait. Can you believe that?
- A turbo trout, no way! → Friend +1 (Calhoun)
- Err… sure. → Friend -1 (Calhoun)
Play along with Calhoun’s fishing story. It costs you nothing and it keeps him warm toward you; the flat “sure” is the kind of small snub that quietly sours a relationship.
Most days I don’t like my job… But I have to do it. It’s all I know.
- It’s never too late to try something new.
- Maybe you need to put family first. → Corp morality -1
- Bounty hunting is your career. She should understand that. → Corp morality +1
You return! Did you ferret out needles of truth from the haystack of mendacity?
- I think I know who did it.
- No, sorry. No idea who did it. → Business -1 (Dotson)
No, no. Without the guiding star of truth, the I.M.P.U.N.E is useless. I will destroy it. Along with my dreams of a fair and just society.
- Wait, you were right about Razlo. It was him.
- Isn’t that a bit dramatic? → Friend -1 (Dotson)
It was? But why did you not say?
- It was… a test. → Friend -1 (Dotson)
- He’s paying me. → Corp morality +1
I couldn’t possibly say. But I wouldn’t eat any of the free donuts in the Curzona offices for a while.
- They’ll be poisoned? That’s sick. → Corp morality -1; Business -1 (Razlo)
- Noted. My money? → Corp morality +1; Business +1 (Razlo)
This is the moment where your read on Razlo starts to calcify. I lean toward the business-first reply here, but only because it keeps the payout clean and Razlo grins at you for it. Take the moral high ground and you’re trading future opportunity for a scowl.
That’s commerce. Feel free to give up your share if your scruples are too much for you.
- Keep your money. → Enemy +1 (Razlo)
- I didn’t say that…
Precisely. And you will face a smarter, sneakier subject than anyone you’ve dealt with so far.
- You? → Friend +1 (Dotson); Business +1 (Dotson)
- Agent Teleshko?
- Cirian Krell?
Your mind is a muscle, young apprentice! Let us get to work in the gym of intellect.
- What’s in this for me again? → Corp morality +1; Business -1 (Dotson)
- I’m ready!
Alright, let us begin. A woman jumps out of a window of her thirty story building and survives. How is this possible?
- The woman lives near the docks and jumped into the sea.
- The woman jumped out the ground floor window. → Business +1 (Dotson)
- The woman was an android with impact-resistant dermis.
As she walks into a bar, a woman asks for a large glass of water. Reaching under the counter, the bartender grabs a gun and screams and shouts as he points it at her. She says “thank you”, and walks out. Why?
- She is a malfunctioning android and her speech center failed. Though she thought she asked for water, she actually said “Show me a gun and shout at me a lot.”
- She was a health inspector and he was selling Grade 4 water as Grade 3 and he knew she was going to close his bar.
- She had hiccups and the bartender helped her by frightening her. → Business +1 (Dotson)
The riddle answers are where Dotson measures your Business, so if you’re tracking his opinion, these two questions are the highest-value lines in the whole quest. The hiccup answer is the classic one and plays best with him; the ground floor window is the same instinct, just on a different setup.
I served under the greatest detective Nivalis had ever seen, and he taught me everything I know. I just hope I can mentor you as well as he did me.
- Me too.
- I’m sure you can. → Friend +1 (Dotson)
I dunno. It’s too awkward. I’d rather just skip it.
- He’s still family. That is important. → Friend +1 (Mila Kalcifer)
- I need your help.
- He is dangerous. You should avoid him.
Of course. He’s like someone gave a cockroach the power of speech.
- Funny, I’ve heard that said about you. → Enemy +1 (Razlo)
- Ha, good one. → Friend +1 (Razlo)
What’s funny is that you have no idea how stupid you are.
- You won’t get under my skin. → Business -1 (Razlo)
- You’re right, I’m sorry.
Dotson: Dotson’s Detective Agency (2/2)
The back half of Dotson’s Detective Agency is where the case turns personal. Once you’ve tracked down Razlo, the conversation shifts from who stole Danny Danetti’s recipe to what you personally plan to do about it — and one of those replies carries a deal that follows you for the rest of the quest. I flagged this exchange the first time I played through because how you answer here doesn’t just move a relationship number; it changes what you’re owed when the job closes out.
Here’s the confrontation, choice by choice. He opens with “You might be smarter than you look. Say I did take his recipe, what would you do about it?” — that’s your fork.
- Report you. → Enemy +1 (Razlo); Corp morality -1
- Depends on what you offer me. → Business +1 (Razlo); Corp morality +1
I’ll be straight with you: the “report you” line feels righteous, but it flips Razlo to an enemy and drags your Corp morality down a point. The second option keeps things transactional and nudges both Razlo and your Corp morality up. If you’re trying to stay in good standing with the Corp side of the world, that’s the one that lines up.
Pick the offer line and Razlo softens: “You know, you are far more interesting than I thought. Alright. Keep this between us and I’ll give you 10% of what I get when I sell Danetti’s recipe to his competitors.” Now he’s dangling a cut, and this is the decision I’d genuinely slow down for.
- 50%. → Business +1 (Razlo); You cut a 50 percent deal with Razlo (this matters later in the quest)
- No way. → Business -1 (Razlo)
Holding out for the higher cut is the move I’d make most of the time. The 50% reply not only bumps Business +1 with Razlo — it plants a flag that this guide will circle back to later in the quest, so don’t treat it as a throwaway line. The “no way” option just costs you a point of Business with him and gives you nothing in return. If you’ve been building Razlo up as a contact through this chain, refusing here is the kind of choice that quietly works against you.
Dr Fred Matombo
Dr Fred Matombo is another giver whose queue I kept putting off, mostly because I didn’t want to burn a visit on a quest I couldn’t actually start yet. The gate here is morality, not timing, so if you’ve been playing loose with your Corp standing, you’ll want to sort that out before you waste the trip.
The one thing to check before you commit: you need Corp morality above 10. I double-checked that number rather than eyeballing the bar, because dipping under it makes the quest unavailable and there’s no partial start to fall back on.
Once that’s satisfied, the objectives themselves are straightforward — Dr Fred runs a drugs-themed quest of his own, and the objectives follow his usual setup of meeting him and working through what he asks. The specifics of that objective chain, and the dialogue choices attached to them, are laid out on the Dr Fred’s Drugs page, which walks the Vik Ryan and RM Alken threads alongside it.
Dr Fred’s Drugs
This one only opens up if your Corp morality is sitting above 10, so if you’ve been cozying up to the corporations, Dr Fred’s request is off the table for now. Assuming you qualify, the whole quest comes down to tracking down BioX-50, and the path to it runs through two people who could not be more different — Vik Ryan and RM Alken.
The objective list reads simply enough: ask Vik Ryan about BioX-50, then ask RM Alken for it, then bring the good news back to Dr Fred. What that list doesn’t tell you is that there’s a fourth step hiding in plain sight — if RM won’t hand it over, you end up searching RM’s EMaT Bag for the BioX-50 yourself. That’s the part I’d brace for, because it’s the moment the quest decides whether you’ve been playing nice or playing ruthless.
Talking to Vik Ryan
Vik is the mercenary type, all edge and no patience, and how you open the conversation sets the tone fast. When Vik shrugs off an aug that doesn’t take, you can pin it on Dr Fred — a Friend -1 and Business -1 hit with Vik — or deflect it as an EMaT problem. Push the angle that Vik’s own augs do take, and you’ve got a lead worth chasing.
Ask Vik what a personal supply would be worth and the answers branch cleanly. Naming your own estimate lands a straight Friend -1 with Vik, while telling Vik to name a price is the money play — that’s Business +1. A favor is the neutral option. Either way, Vik sniffs out the lie and fires back a demand of 500. Accept it and it’s simply done. Come back with 300, though, and you take an Enemy +1 and a Business +1 with Vik — a trade of goodwill for profit that I found worth thinking about before I answered.
The blood oath cements it. Swear it properly and you seal a blood oath favour with Vik, which is a flag I’d keep in mind going forward. Refuse and you walk away with nothing but the memory of a deal you balked at.
Talking to RM Alken
Then there’s RM Alken, whose “Takeout” jab is the first little test. Take it on the chin with “No one I cared about” and you get Friend +1 with RM. Flinch or push back and the mood sours before it starts.
The meat of this conversation is RM’s rant about clinic work. I noticed that RM doesn’t actually run a free clinic, and how you respond there reveals where you sit. Agreeing with the “do what you can” philosophy earns Friend +1. Calling RM a Corpster flips it — Enemy +1 and Friend -1 at once. When RM asks why you’re sniffing around, “No reason” costs you Friend -1, so if you want to stay on good terms, give RM the straight story about needing it for a doctor friend.
The backstreet-doctor thread is the real fork. Asking why RM doesn’t work in a proper clinic keeps things neutral, but calling RM a backstreet doctor stings for Enemy +1. When RM explains that LifeCorp makes a proper clinic all but impossible in Nivalis, you’re asked to pick a side. Siding with the subscription logic gives Enemy +1 with Fred Matombo and Corp morality +1 — but note that’s Fred’s reaction, not RM’s. The opposite line, cursing the corps, gives Friend +1 with Fred Matombo and Corp morality -1. That identical pair of choices shows up again later in the conversation, so you’ll get a second chance to swing it either way.
If RM pushes back with doubt about whether you should help, telling RM you were happy to help is worth Friend +1 with Fred Matombo. And when RM asks how you got the goods, deflecting with “better you don’t ask” costs you Friend -1 with Fred — honesty goes further here than playing it cool.
Finishing Up
The last exchange happens down in the sewers, and it’s a rare quiet beat. RM talks about how the distance from the Spire lets people remember what being human feels like. Brush it off and nothing moves. Actually say you understand and it lands Romance +1 with Fred Matombo — a small opening I didn’t expect from a quest about chasing down a drug.
Once the BioX-50 changes hands — or you’ve pulled it from RM’s EMaT Bag because RM wouldn’t cooperate — you bring the news back to Dr Fred and the job closes out. I’d go into this one with your Corp morality where you want it, since several of these replies nudge it in both directions, and the friend-versus-business swings with Vik and RM can bite you later in their respective storylines.
Edison Mattix: The Network (1/2)
Edison Mattix’s thread is the one that convinced me the quest log in Nivalis Nights has a sense of humor — and not a kind one. Edison Mattix kicks off The Network, a sprawling web of favors that starts small and snowballs into something you’ll be chipping away at for a long time. Before you even accept it, the game wants several things lined up: you need to be on day 2 or later, have a chunk of the main story behind you, and be carrying at least 20 Lims in your pocket. That last requirement caught me off guard — I’d spent down to almost nothing right before talking to him and had to scramble for loose change before the job would even appear.
Once you clear those gates, what opens up is huge — 43 objectives deep, which is why I’m splitting it across two sections. This first half is where the sheer scale of Edison’s network becomes obvious, and it’s also where the early conversation choices with Finn Amano, Mica Rain, and the Gen Debtor start quietly shaping where the whole thing goes. I’d keep your notes handy from the first objective, because the game does not hold your hand through the middle stretch.
My advice here is simple: don’t run this thread when you’re tired. The objectives blur together fast, and a couple of the early dialogue forks feel throwaway until you realize they’re setting up relationships that pay off much later in Edison’s storyline. I found it easier to knock out the first handful in one sitting, then pace the rest across a few days so I didn’t burn out before the second half. The 20-Lim entry fee is the only thing I’d double-check before you begin — everything else you’ll already have by the time Edison shows up.
The Network
Edison Mattix’s chain is the longest single thread in the game, and this first slice sets up nearly everything that pays off later. The restaurant trade in Nivalis rewards a few good contacts, so it’s worth getting to know the regulars — just keep an eye on who you’re tying yourself to.
Before you even start, make sure you’re on Day 2 or later, that you’ve made some headway in the main story, and that you’re carrying at least 20 Lims. I’ve had runs where I rushed here early and hit a wall, so tick those off first.
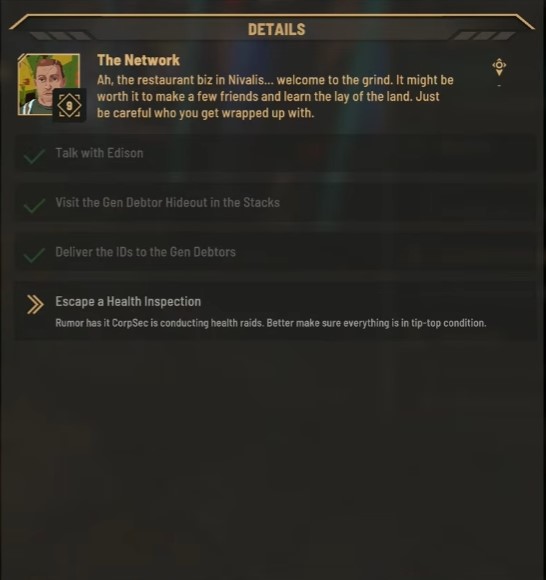
Objectives
- Talk with Edison — Edison has returned to the Noodle Bar. Have a word with him.
- Visit the Gen Debtor Hideout in the Stacks — Head to The Stacks and find the hideout Edison is using for the Gen Debtors.
- Talk with Ava — Maybe turning Edison down was a mistake. Ava might have a read on it.
- Deliver the IDs to the Gen Debtors — Make the ID drop and give the Gen Debtors a new lease on life.
- Escape a Health Inspection — Word is CorpSec is running health raids. Get everything in tip-top condition first.
- Wait for Ava to Track Down Edison — Ava should get in touch with him. Patience.
- Talk to the CorpSec Detective — Speak with Mica Rain, who’s waiting for you at the Noodle Bar.
- Maybe Ava Knows How to Ditch the Fine — You’ve been fined. Talk to Ava and find out how to shake it.
- Wait and Hope that Edison Comes Through — Edison said he’d handle the fine. Nothing to do but see if he delivers.
- Talk to Edison — He turns up at the shop after pulling some strings. Have a word.
- Visit the Stacks to Check on the Gen Debtors — Edison said the kids might be hungry. Bring them something to eat.
- Travel to Helix Monumental to find the Notary — Get to Helix Monumental and track down Edison’s contact.
- Drop off a Meal for the Gen Debtors — Leave the food for the Gen Debt kids, then make yourself scarce.
- Talk Your Way into Meeting the Notary — Cirian Krell knows how to find the Notary. Convince her to tell you.
- Talk With Mica Rain — Watch your words here. Don’t implicate yourself.
- See if Ava Knows More About Cirian — Chat with Ava about your run-in with Cirian.
- Ask Ava if she knows what just happened?! — Get some advice from Ava.
- Report Back to Edison — Fill Edison in on what went down with Cirian.
- Out of Stock? — See Banor about where to find Windowpane Lager.
- Find Harmony — Banor mentioned someone named Harmony. Track her down.
- Head Home — Go home and sit with the choices you’ve made.
- Visit the Stacks
- Time to Take a Trip to Conland Containers — Pay Edison a visit.
- Talk With Mica Rain (again) — Again, choose your words carefully. Don’t implicate yourself.
- Drop off the Package for the Gen Debt Kids — Deliver the items for the Gen Debt kids.
- See What Edison Has to Say — Hear him out. And apparently don’t touch anything.
- Check out of Conland Containers
- Find Odin’s Pub in the Industrial District — Head to the Industrial District and find Odin’s Pub.
- See What Edison Has to Say (again) — Hear him out once more.
- Find a way to Calypso Island
- Find Out What One of the Twins is Doing On the Island — Talk with Alexander.
- Talk with Reehan, the Captain — Find Reehan and pick their brain.
- Visit the Oil Rig and Look for Finlay — Get out to the Oil Rig and find Finlay.
- Travel to Metro Hub and Find Finn Amano — Go to the Metro Hub and find the musician Finn Amano.
- See if Finlay Has a Gift for Freya — Talk to Finlay Basin and try to get a gift for Freya.
- Talk with Finn
- Run Your Gift by Reehan — Check with Reehan whether your gift is good enough.
- Why is the Other Twin Here? — Find out why Alexandria is here.
- Seize the Chance to Talk with Freya — This is your shot with Freya. Make it count.
- Get Yourself to Meridian Market — Get to Meridian Market. Now.
- Settle With Mica Once and For All — Find out why Mica is at your shop.
- Make Amends with Edison — One last conversation with Edison might put it all to rest.
- You’ve Got a Delivery — Check your Noodle Bar for a delivery.
The objective list is one long relay, but the conversations along the way carry real weight. Below are the choice blocks I’d slow down for, starting with the Finn Amano songwriting exchanges, since those quietly build a friendship you’ll want later.
Dialogue Choices
“This technicolor tune: ‘sliding through, down the drain and into joos. neon lights guiding you. guiding you.’ Yeah, guiding you, that’s it, that’s the name.”
- Sounds great! → Friend +1 (Finn Amano)
- Eh, could use some work. → Friend -1 (Finn Amano)
“And long as I’m out here, sitting in an open space, figuring out my place, I’ll be singing. You’ll be gone and I’ll be singing.”
- …
- I really like that. → Friend +1 (Finn Amano)
“Hey, hey, hey, my friend in the end. You got a minute? Could use an ear to get this vibe right.”
- Wait… Are you Finn Amano?
- Sure. → Friend +1 (Finn Amano)
“As much fun as this has been (thank you for having me) I’m afraid we’re going to need to wrap it up. You know, things to do, work never ends because people never stop dying.”
- The door’s right there.
- Noooo! Please stay. This has been so much fun. → Enemy +1 (Mica Rain)
- What do you really want with Edison?
“That’s an option, albeit not a good one. If you think having the poisoning of a handful of people is too much, just wait. I’ll line your life with guilt, death, and debt.”
This one is the fork I’d think hardest about. Helping Mica tanks your Corp morality and burns the bridge outright, while selling out Edison buys you goodwill with her at the cost of betraying his secrets. Neither is clean.
- Sorry, Mica. I can’t help you. → Corp morality -2; Friend reset to 0 (Mica Rain); Business reset to 0 (Mica Rain); Enemy +2 (Mica Rain)
- Alright, here’s what I know… → Corp morality +2; Friend +2 (Mica Rain); Business +2 (Mica Rain); Enemy reset to 0 (Mica Rain); You betrayed Edison Mattix’s secrets to Mica
“Hmmm. Interesting seeing you here. Not surprising. Interesting though.”
- Mica… I was actually just leaving.
- Don’t really care what you call it. → Corp morality -1
- [expletive]… → Corp morality +1
“What’s got you wandering around this part of Nivalis? Serial killer got you spooked? Or are you just trying to find that *perfect* ingredient for one of your second-rate recipes?”
- Visiting friends.
- Came all this way to tell you to [expletive] yourself. → Enemy +1 (Mica Rain); You told Mica Rain off
- Dropping something off for some friends.
“You’re telling me that legendary DJ Finn Amano is friends with… you?”
- Legendary is a bit of a stretch. → Enemy +1 (Freya Portlet)
- I’m full of surprises.
“Yeah, Alex is a little overzealous. You should meet his twin sister! Actually, you should talk with her after we’re done with business.”
- The beer wasn’t enough to get past. I had to mention the Scorpion. → You got past Alexander by mentioning Masato
- My Automata made me mention Masato Shima to get in.
“Ya [expletive] ya did it. You actually did it!”
- You got nerve showing up here.
- Where have you been? → Friend +2 (Edison Mattix)
- WE did it buddy. → Friend +5 (Edison Mattix)
“Did you dream last night?”
- Did I what? Dream last night?
- I haven’t dreamt in years.
- Dreaming’s the best thing about the day.
- I don’t have time for this. I’m looking for the Notary. → Enemy +1 (Cirian Krell); Business -1 (Edison Mattix)
“Let me introduce CameoPOV Media. CPM if you like. You tell me who you admire, whose life you want to live, and I build you an authentic dream-state. One you can rent and live in whenever you close your eyes.”
- Seriously? You can do that? → Business +1 (Cirian Krell)
- What if I wanted to live like the Notary? → Friend +1 (Cirian Krell)
The Edison reunion line is the one I’d revisit if you care about his friendship — “WE did it buddy” is a flat +5, and it’s rare to see a swing that generous. Everything else here feeds into the second half of the thread, so if you’re tempted to be curt with Mica or Cirian, remember those arrows stick.
Edison Mattix: The Network (2/2)
The back half of The Network is where the favors start stacking on top of each other. Edison wants his 15,000-Lim hole plugged, Cirian Krell wants her money and her peace, and the Gen Debtor kids sit in the middle of all of it. I’d go in with a clear idea of which of those three I actually care about, because the dialogue here forces you to pick sides more than once.
The Cirian payout is the first real fork. Paying her off unlocks the Rain Drop Cake recipe and clears her debt outright — plus a Romance +2 and Friend +1 with Cirian and a Business +1 with Edison for following through. Turning her down keeps your Lims and nothing else moves.
From there you’ll bump into Reehan Scott, who’s surprisingly easy to get along with if you don’t blow him off. Asking whether he’s a philosopher is a dead end, but telling him people are missing out on a good conversation lands Friend +1 and Romance +1 with him. Naming Freya Portlet doesn’t move anything.
Then the CorpSec contingent shows up and the tone flips fast. Their opening is pure intimidation — “the evidence is irrefutable” and so on. Telling them to get lost costs you Corp morality -2, so I’d bite my tongue here. When they press you on who delivered the groceries, the reply that admits you’ve been played and points them at Edison earns Friend +1 with Mica Rain and Corp morality +1. Clamming up does nothing; blowing them off is Corp morality -1.
The Cecil Grimes Interruption
Somewhere in this stretch Cecil Grimes corners you about the state of your establishment, and he’s about as charming as his health-inspector reputation suggests. Asking him for the point nets you Enemy +1 with Mica Rain instead — not him, oddly — while the “what exactly are you investigating?” line stays neutral. When Cecil starts in on your kitchen, the safest reply is a flat “I am. Can I help you?” Swearing at him is Enemy +1 with Cecil.
The infraction threat is the part I always slow down for. Arguing that it isn’t fair costs Enemy +1 with Cecil and Corp morality -1. Bowing your head with “No, sir.” gives Business +1 with Cecil and Corp morality +1. There’s also a neutral “All set.” option if you just want out of the conversation.
The Orphan Delivery
Edison’s pitch about “folks like us” is the emotional core of the thread. If you cynically point out that a favor with strings attached isn’t a favor, you take Business -1, Friend -1, and Enemy +1 all with Edison — a triple hit, so avoid it. “Fair trade” keeps you clean. When he explains the package is for Gen Debtor kids still in single digits, agreeing hands over the Gen Debt IDs, unlocks the Stacks dropbox, and earns Business +1 and Friend +1 with Edison plus Corp morality -1 — the game flags that you delivered the debt orphans’ package, which matters later in this quest. Refusing flips it: Corp morality +1, Enemy +1 with Edison, and both Friend and Business reset to 0 with him. That reset is brutal if you’ve been building the relationship.
When Alexandria asks what you’re after, pointing her at Reehan is the right move if you still need him for the Retirement Party. Mentioning the gift for Freya is the alternate path.
There’s a short philosophical exchange about age being “a measurement of time, not usefulness.” Agreeing gives Corp morality +1; calling it grim is Corp morality -1.
Closing Out the Notary and Haley
Edison checks in about the orphans and asks whether you found the Notary. If you mention Cirian wasn’t happy to see you, he muses about confidentiality. Handing over the IDs is the neutral hand-in. The reply “You owe me 15,000 Lims” sets that up for later, “she won’t be able to mention it anymore” is a cold option, and telling him he should talk to her directly lands you 2500 Lims — the cleanest payoff of the three.
Then he gets personal. His niece Haley has gone missing and he’s asking straight up for help. Refusing (“I can’t, Edison”) is flagged — it matters later in the quest. Agreeing just means dropping cards at a classroom; choosing to ask where or to refuse again also sets the same “refused after Cirian” flag.
If you’ve been pushing the network angle, there’s a heated exchange where he reminds you the Corpsters stick together. Saying the corps can get lost is Corp morality -1; “if ya can’t beat ’em, join ’em” is Corp morality +1; keeping your head down stays neutral.
There’s a second class of six students that needs moving fast, and this is where the rest of the network gets complicated. Asking why, asking what he needs, or complaining about your own business each lead somewhere different — denying involvement in Edison’s network is its own tracked answer.
When he admits ‘Sec is skulking around and it’s an oil spill mess, offering to check on the kids gives you Chow Mein and flags that you helped the orphans. Asking about his contact is the alternate route.
Finally, if you mention wanting Ava to help track down his contact, saying yes pings Edison for you and gives Corp morality -1 while flagging both the orphan delivery and the ping as done. Refusing to focus on business gives Corp morality +1.
The last beat is the drink. Someone asks why you’re chasing that particular bottle, and the reply that a friend wanted it is Corp morality -1. Saying you’re meeting Edison and wanted to bring it keeps you clean.
This is the densest choice cluster in the whole Edison thread, and the orphan delivery flag is the one I’d watch — it follows you into later quests whether you like it or not.
Elaine Malloy
Elaine Malloy is another of those quest givers who never announces herself with a glowing marker — you find her, she hands you something, and then the real work is figuring out where all the pieces go. That’s the pattern with her quest Snapshot: it reads like a simple favor, then turns into a photo-location checklist that had me walking the same districts two or three times before I trusted I’d covered everyone.
What I like about this one is that it doesn’t gate behind a stack of prerequisites the way most late-game quests do. It’s approachable almost whenever you run into her, which makes it a good pick when you’re between bigger story beats and just want to clear something concrete. The catch — and I’d say this plainly — is that the district photos are easy to half-finish. I nearly turned in an incomplete set because one location blends into a background I’d already passed a dozen times.
Snapshot
My advice before you start: open Snapshot and read each objective carefully rather than snapping the first thing that looks right. The quest asks you to photograph specific spots across the districts, and the game tracks them individually, so an almost-correct shot won’t count.
The photo objectives take you through the city district by district:
| Objective | Type | My Rating |
|---|---|---|
| Take a photograph of each required location | District photo collection | Essential |
| Return to Elaine Malloy with the completed set | Hand-in | Essential |
When you hand the photos in, the quest’s dialogue plays out based on whether you brought a full set. I double-checked my frames before walking back to her, and I’m glad I did — the completion check doesn’t forgive a missed spot, and re-trekking a district you thought you’d finished is a genuinely annoying detour.
Snapshot
The photo delivery I just talked about wraps up the Snapshot quest, but if this is your first time picking it up, here’s the full run. Elaine Malloy wants you to shoot the city for her new book — eleven shots in total, spread across every district you can reach. I’ll be honest, I underestimated how much running this would be the first time through.
The objectives are straightforward once you know the map:
- Take a Photo at the Oil Rig
- Take a Photo at Metro Hub
- Take a Photo in Lowtown
- Take a Photo at the Docks
- Take a Photo in Meridian Market
- Take a Photo at the Stacks
- Take a Photo at Industrial District
- Take a Photo at the Space Port
- Take a Photo at Central Canyon — this one’s singled out in the journal because Central Canyon is famous for its scenic views. Find a good vantage point for Elaine here.
- Take a Photo in Eastern Residential
- Deliver Your Pictures to Elaine
Central Canyon is the one I’d flag as easy to fumble — the view is the whole point, so a rushed snapshot from the wrong angle kind of defeats it. I took a breath and hunted for a proper spot before firing the camera, and it felt worth the extra minute.
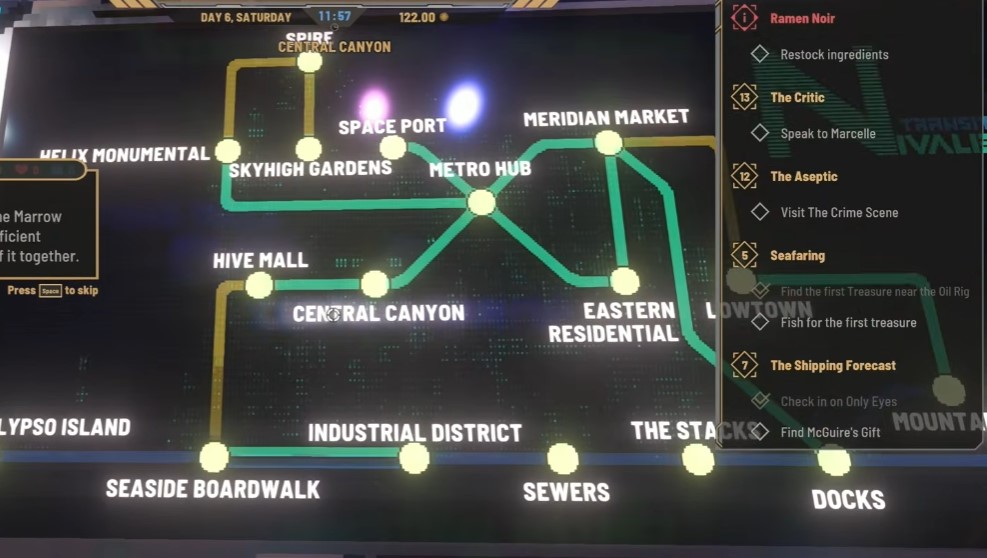
Now for the conversations. What you say to Elaine shifts your standing with her, so the arrow notation matters here.
| Prompt | Your Reply | Effect |
|---|---|---|
| Don’t be offended, effective skulking can be the secret to good street-photography. | Oh, that’s great advice. | Business +1 (Elaine Malloy) |
| Don’t be offended, effective skulking can be the secret to good street-photography. | I still feel a little offended. | Business -1 (Elaine Malloy) |
| Elaine Malloy? Ringing any bells? | Nope. | Enemy +1 (Elaine Malloy) |
| Elaine Malloy? Ringing any bells? | Oh yes of course! | Friend +1 (Elaine Malloy) |
| Ambient Spacial Snapshot … capture. A new way to take pictures. Take a snapshot of an entire environment and choose your angle later. Ultimate control. | Sounds like cheating. | Enemy +1 (Elaine Malloy) |
| Ambient Spacial Snapshot … capture. A new way to take pictures. Take a snapshot of an entire environment and choose your angle later. Ultimate control. | I bet it takes great photos. | Business +1 (Elaine Malloy) |
| History is history and we’re gonna make it. Together. You take that camera, get me some snaps in each of the districts, and maybe just maybe, you’ll get featured. | And you take all the credit? | No listed effect |
| History is history and we’re gonna make it. Together. You take that camera, get me some snaps in each of the districts, and maybe just maybe, you’ll get featured. | Sounds like a good opportunity. | Business +1 (Elaine Malloy) |
| Sadly not. Could have been anyone, the photography business is cutthroat. Toughest business out there. | That cannot be true… | Enemy +1 (Elaine Malloy) |
| Sadly not. Could have been anyone, the photography business is cutthroat. Toughest business out there. | Sounds like it! | Friend +1 (Elaine Malloy) |
| Well let me give you a second for it to sink in, for some, the prospect of me taking their photo can be a shock to the system. | I feel fine. | No listed effect |
| Well let me give you a second for it to sink in, for some, the prospect of me taking their photo can be a shock to the system. | Maybe I don’t want you to take my photo. | Enemy +1 (Elaine Malloy) |
| Well let me give you a second for it to sink in, for some, the prospect of me taking their photo can be a shock to the system. | You’re right, this is a lot to take in. | Friend +1 (Elaine Malloy) |
Three of Elaine’s lines give you a neutral reply that leaves your standing untouched, which is nice if you’re trying to play it safe. Everything else pushes her either toward Business or into Friend or Enemy territory, so pick based on how you want her arc to land rather than on instinct in the moment.
Eldridge-Uchuu Nyx Curzona: What Did Eldridge Do? (1/2)
I’m splitting What Did Eldridge Do? across two parts because the front end is all setup — you’re chasing a paper trail before the quest ever shows its hand. This first half gets you to the people who actually know something: Lucy, Ziggy, and Razlo.
Before you can even pick this one up, a few things need to be true. You’ll need to have worked through Ava‘s story, you need to have met Razlo at some point, and this one only opens up during daytime — so if you’re wandering around at night wondering why nothing triggers, that’s the reason. I’ve made that mistake more than once with day-gated quests, so it’s worth checking the clock before you commit.
Objectives (First Half)
Once the prerequisites line up, the early objectives walk you through the Lucy, Ziggy, and Razlo threads in sequence. You’re gathering accounts of what Eldridge actually did, and each of these three is holding a different piece of it.
I’d take these one at a time rather than trying to rush between them, because the dialogue branches here aren’t just flavor — the second half builds its negotiation on what you learn in this stretch. Talk to Lucy, work through Ziggy, and don’t skip the Razlo conversation, even if the objective order lets you wander. Everything in part two picks up from where these leave off.
What Did Eldridge Do?
Part two of Eldridge’s quest is where all that snooping pays off — or blows up in your face. By now you should have already talked to Lucy Lovelace, Ziggy, and Razlo, because the objective list after this stretch doesn’t let you backtrack the conversation threads. If you rushed past any of them, the negotiation near the end loses its teeth; you’ll be guessing instead of countering.
Before you even knock on doors, make sure you’ve cleared the prerequisites: you need to have progressed Ava’s story, you need to have met Razlo beforehand, and this only fires during the day. I’ve lost track of how many times I’ve shown up at the wrong hour and gotten nothing but silence. Double-check the clock before you commit.
Objectives
- Speak to Lucy Lovelace — Ask Lucy what she remembers about the party.
- Speak to Ziggy — Ziggy the bartender might know more about the party. Ask him!
- Speak to Razlo — What does Razlo remember about the party.
- Give Eldridge the News — Tell Eldridge what you’ve learned from Lucy, Ziggy, and Razlo.
- Bargain with Razlo
- Report back to Eldridge — Return to him with the results of the negotiation with Razlo.
The order matters here. Step four is the pivot — everything you said to the three witnesses feeds directly into how the Razlo bargain at step five plays out. If you skipped a witness or gave a flippant answer, expect a rougher negotiation. I learned that the hard way on a throwaway run.
Dialogue Choices
Eldridge’s quest has a dense response block. The arrows below mark what each reply actually changes. When a line has no arrow, the game logs no listed effect — I’ve left those out of the swing notes so you can see only the replies that leave a mark. Pay attention to the Aura Cocktail fork near the bottom; that’s the one I’d flag to any player heading into this quest blind.
Don’t tell me, I can’t bear to hear it!
- You promised me a reward! → Corp morality +1
- It’s really not that bad. → Friend +1 (Eldridge)
- Trust me, you need to know. → Corp morality -1
I knew it! The bacon burps were a sign! Oh, how could I have done such a thing?
- I dunno, it sounds quite good.
- It really is the height of bad taste. → Friend -1 (Eldridge); Corp morality +1
I couldn’t… I didn’t… but now you mention it, I do remember feeling a strange desire to share things with the less fortunate. Damn Bo Bo’s snuff!
- I think it’s a good idea. → Business +1 (Eldridge); Corp morality -1
- You’re lucky your aunt doesn’t know… → Enemy +1 (Eldridge)
EVERYONE is not Eldridge-Uchuu Nyx Curzona! Everyone is not the laughing stock of the Spire! That’s it, I’m finished, I’m going to lay down and DIE.
- It’s only a big deal if you make it one. → Friend -1 (Eldridge)
- I’m afraid it gets worse.
Razlo… Razlo… the little snitch who failed Attitudinizing? How dare he! Oh if Aunt Mary sees those pictures I’ll be excommunicated… you MUST get them for me!
- I’m not helping you anymore.
- How?
- It’ll cost… → Friend -2 (Eldridge); Corp morality +1
That “It’ll cost…” reply is the one that squeezed me a bit — you’re pricing your help, which boosts your Corp morality but tanks your friendship with Eldridge. Worth knowing before you click.
Ohh, my life is over. I’m finished. How can I bear it? I’m going to lay down here and DIE.
- I’m afraid it gets worse.
- It’s only a big deal if you make it one. → Friend -1 (Eldridge)
TELL me you’re here to put an end to my suffering. I simply can’t take another day of this place. The sea hurts my eyes. Even the sand mocks me.
- Looks like it’s your lucky day. → Friend +2 (Eldridge); Business +2 (Eldridge); gives BusinessPermit4
- No photos, sorry. → Business -2 (Eldridge); Friend -1 (Eldridge)
This is the big one. “Looks like it’s your lucky day” is the reply that hands you BusinessPermit4 along with the double friendship and business bump. If you’re running a business and haven’t got a spare permit, do not fumble this line.
He DIDN’T! Poggy for Mayor? Ha ha! How sordid. I feel better already. Did anything else occur?
- Not that I know of.
- Minty had a fling with a FLAVR unit. → Friend +1 (Eldridge); Enemy -1 (Eldridge)
I promised you a reward didn’t I? Here: take this fashion zine. It has been my most treasured possession in this dismal place.
- A zine? That’s it?
- Thanks. I’ll… treasure it? → Business +1 (Eldridge)
Then it’s all over for me. The end of Eldridge. I must live out my years as an eternal pariah, chained to that horrid Razlo.
- Maybe it’s time to go back?
- Afraid so. Now about my reward…? → Friend -1 (Eldridge); Business -1 (Eldridge)
Oh, don’t pretend you don’t know! It’s why I’m stuck in this terrible place!
- You think this place is terrible?
- I don’t know who you are and I don’t care. → Friend +1 (Eldridge)
A Nyx-Curzona. We’re one of the better branches. I’m thirty-eighth in line to the Chair of the Board. Or I was…
- Are you related to Mary Nyx Curzona?
- Curzona make people’s lives a misery. → Corp morality -1
- So you must have some good business contacts…? → Corp morality +2; Business -1 (Eldridge)
But how will I ever discover what it was? The Comms are down, my butlers are gone… we can’t even get the fashion Holos here.
- Guess you’ll just have to face the music.
- I could ask around. → Friend +1 (Eldridge)
You could? I suppose if you pretended to be a reporter, writing an elegy to my disgrace… yes, it could work…
- Leave it to me. Who shall I talk to? → Corp morality -1
- There’d be a fee, of course. → Corp morality +1
The Witness Conversations
The three witness exchanges are where you gather the ammunition for the Razlo bargain. Lucy Lovelace and Ziggy carry their own relationship swings, so keep an eye on the arrows even when you’re just prying for gossip.
Oh yeah, you think we’re friends, don’t you? That’s cute. (Lucy Lovelace)
- Well, I don’t anymore. → Enemy +1 (Lucy Lovelace)
- Do you know Eldridge?
Why should I tell you?
- Because he’s worried about it.
- Because if you don’t, I’ll tell everyone you’re actually a duchess. → Enemy +1 (Lucy Lovelace); You blackmailed Lucy over being a duchess
The blackmail option logs a flag — “You blackmailed Lucy over being a duchess.” I’d think twice before taking it unless you’re deliberately going cold on her, because that Enemy +1 sticks.
To start a library! A free one. Apparently he said it would stock all the fashion holos. As well as… textbooks. Bleurgh.
- And that’s bad why…?
- SWEET MERCY. → Friend +1 (Lucy Lovelace)
… she’d have him ex-communicated. Plus engaging in that sort of community collaboration is just, like, EXTREMELY gauche.
- So gauche. → Romance +1 (Lucy Lovelace)
- So that’s definitely what happened?
Look, don’t quote me on any of that, OK? Like I said, I was TOTALLY chem-trailed. You should talk to Zig, Ziggy, he’ll know.
- Thanks, Duchess. → Enemy +1 (Lucy Lovelace)
- Well, thanks I guess.
You can’t. She’s off having an aura cleanse. But Ziggy was the one who told PorridgeDog. Talk to him.
- Thanks, Duchess. → Enemy +1 (Lucy Lovelace)
- Well, thanks I guess.
Notice that “Thanks, Duchess” lands an Enemy +1 both times you can say it. It sounds harmless, but Lucy clearly doesn’t appreciate the nickname — I’d take the neutral line unless you want her to sour on you.
Now for Razlo. This is the part that hands you the photos if you can satisfy his request.
Are you looking for me? How things change. For the better, in my case. Not sure about yours…
- So you don’t regret failing those exams? → Enemy +1 (Razlo)
- Not here to chat, I just have a question.
You see? Already the information is worth something. And I didn’t even need to wait twenty years.
- Stop gloating and tell me. → Friend -1 (Razlo)
- Tell me please?
Then you hit the Ziggy exchange, and this is where the Aura Cocktail fork lives.
OK get this: aura cocktails. We serve up an empty glass, puff around some smoke and BAM. Spire kids will drop Lims like they’re going outta fashion. Well?
- That seems a bit unethical. → Corp morality -1; Business -1 (Ziggy Ra Sand)
- Easy money! → Corp morality +1; Business +1 (Ziggy Ra Sand)
And what, they got their pocket money doing charity work? ♥♥♥♥ ’em! They’ll still have a good time. Guaranteed.
- Aura Cocktails it is. → gives Aura Cocktail
- I don’t want to con people.
If you want the Aura Cocktail item in your inventory, this is your only window to grab it — the “Aura Cocktails it is.” reply. I missed it the first time and had to learn it existed from another player. Don’t be me.
He… ahem… he ordered a… ham daiquiri.
- And you MADE HIM ONE? → Business -1 (Ziggy Ra Sand)
- Sounds nice. What’s the problem? → Friend -1 (Ziggy Ra Sand)
♥♥♥♥♥♥♦ A! Tell ya, the more you con Spireites, the more they love it.
- Aura Cocktails it is. → gives Aura Cocktail
- I don’t want to con people.
Your Automata. She’s unusual.
- Stay away from Ava! → Friend +1 (Ava)
- How do you know?
That “Stay away from Ava!” reply bumps your friendship with Ava, which is worth taking if you’re invested in her thread. It costs you nothing here.
I need the ID code for a particular server there. If your Ava can get it for me, then I’ll give you the photos.
- What’s on the server?
- Fine. Server name? → Business +1 (Razlo)
And that’s where the negotiation lands — Razlo trades the photos for an ID code that your Ava can pull, and “Fine. Server name?” is the reply that nets you a Business +1 with him. From here you report back to Eldridge with the results, and part two’s server-code negotiation continues in the next stretch of the chain. Keep your notes on what you learned from each witness close, because the closing dialogue leans on all of it.
Eldridge-Uchuu Nyx Curzona: What Did Eldridge Do? (2/2)
The back half of this chain is where Razlo finally stops dodging and the whole job comes down to one trade you either make or blow up. Everything you learned from the witnesses in part one was building toward this conversation, so it pays to walk in knowing exactly which line you want.
The first beat is where Razlo sizes you up over the files. “For what purpose?” reads as you prying, and it lands as a Business -1 with Razlo. Say “Fine. Server name?” instead and he reads it as you getting straight to business, which is worth Business +1. Easy enough to talk yourself out of that bonus without meaning to.
Then comes the real fork, and the header label gives away the tone — Well? This is make-or-break:
- “I changed my mind. I’m not giving you anything.” — Business -1 and a heavy Enemy +3 with Razlo. Leaving empty-handed and with a target on your back isn’t a trade I’d ever take.
- “She’s sending it to you now.” — Business +2 with Razlo, and this is the one that actually moves the quest forward: it gives you the Photos of Eldridge, Razlo gets the server code, and Eldridge ends up holding the photos.
If you’re anything like me, the pull toward “I changed my mind” is stubborn and mostly pride — you’ve done all this running around and handing it over stings. Resist it. The second option is the only one that hands you a tangible reward and keeps Razlo from flipping to enemy status. Take the +2, pocket the Photos of Eldridge, and let the server code go. That closes out Eldridge‘s chain with the partnership intact rather than torched.
Fauxter Glambeat
Fauxter Glambeat is a musician, and his quest line is all about getting a band back together. His single quest is The Songs of Fauxter Glambeat, and it’s the one to watch if you care about the music side of the game and the relationships tangled up in it.
The Songs of Fauxter Glambeat
The only prerequisite here is that you’ve made progress in the main story — the game won’t open this one up until you’ve moved things along far enough. Once it’s available, you’re essentially hunting down old band members and pulling them back together.
The Songs of Fauxter Glambeat
The only prerequisite here is that you’ve made progress in the main story — the game won’t open this one up until you’ve moved things along far enough. Once it’s available, you’re essentially hunting down old band members and pulling them back together for Fauxter.
What made this one fun for me is that it’s less about combat or logistics and more about coaxing five prickly musicians back into a room together. Each member has their own resistance, and one of them, the guitarist, is flagged as optional — so if you’re short on patience or time, that’s the one thread I’d consider letting go without guilt. Everyone else, though, I’d push through, because the reunion payoff only lands if you’ve actually done the legwork.
Objectives
- Fauxter Needs Lyrical Assistance
- Chat with Fauxter — he opens up about how his band split apart.
- Fauxter has an Idea — he reaches out because he’s got a plan to get everyone back together and wants you in on it.
- The DJ
- The Singer
- The Guitarist (Optional)
- The Drummer
- The Thereminist
- The Band Reunites — go back to Fauxter and confirm you convinced everyone to join. He’ll be thrilled.
Notice that the individual member objectives don’t have sub-text of their own — the real content lives in the conversations you have with each one as you track them down. That’s where the choice tracking kicks in, and it’s dense.
Dialogue Choices
The first real decision comes through Lois Gyo, and this is where I’d slow down: it’s easy to read her name and forget that a flippant reply genuinely costs you a friendship point. Her intro quote, delivered as a mock announcement, sets the tone:
“That’s what Fauxter used to call me. How did he put it? ‘The woman with no emotions, but GREAT rhythm. Please welcome to the stage the most robotic musician in Nivalis — including the robots. Here is THE DRUM MACHINE SIX THOUSAND!'”
- That’s pretty funny. → Friend -1 (Lois Gyo)
- That seems a bit insensitive. → Friend +1 (Lois Gyo)
Then she presses you on whether she can trust Fauxter not to wreck it all over again — she’s willing to play a few gigs for fun, but she wants to know what’s in it for her.
- You just have to trust me. It will be worthwhile.
- You just have to trust him. He really wants to make it work this time.
- Trust your instincts. You want to play drums again. No matter who you play with, the MUSIC is what’s important. → Friend +1 (Lois Gyo)
When the two of you get into the band’s breakup itself, Fauxter’s line is blunt — “The band split.” How you react to that matters:
- I’m sorry to hear that. → Friend +1 (Fauxter Glambeat)
- Probably for the best. → Friend -1 (Fauxter Glambeat)
Later, Fauxter floats a new name for the group and cheerfully reports it’s now “The Lunchable Bunchable” after a few revisions:
- I like it. → Friend +1 (Fauxter Glambeat)
- I hate it. → Friend -1 (Fauxter Glambeat)
Here’s where the lyric-writing objective comes alive, and honestly it’s the part I’d replay carefully. Fauxter hands you a first line and you build the next one — and the game is quietly scoring your taste:
“Ok, here’s the first line: ‘You broke my heart, now I just don’t care.'”
- “I was never really there.”
- “Shards of love cut through the air.” → Friend +1 (Fauxter Glambeat)
- And now it’s time for dumplings. → Friend -1 (Fauxter Glambeat)
The next line leads from “I didn’t know what to do.”:
- “Now you and me are through.” → Friend +1 (Fauxter Glambeat)
- “Pieces of me still sewn into you.”
- “And all the dumplings are gone.”
When the group finally gels and the cheer goes up — “We’re puttin’ the band back together!” — your reaction is logged too:
- Right…
- Yeah! → Friend +1 (Fauxter Glambeat)
Fauxter will check in with “It’s a great idea, huh?” and this one’s a small trap, because a lukewarm answer reads as a snub:
- Sure, it could work. → Friend +1 (Fauxter Glambeat)
- I’m not sure that’s a great idea. → Friend -1 (Fauxter Glambeat)
The reunion confirmation is the one I’d flag hardest, because this is the only place in the quest where the arrow splits between Corp morality and Friend — and the “right” answer for your run depends entirely on which stat you’re protecting. When Fauxter beams “Damn. You really did it.”:
- I really did it. → Corp morality +1
- We really did it. → Corp morality -1; Friend +1 (Fauxter Glambeat)
- You really did it. → Friend +1 (Fauxter Glambeat)
Note that taking credit personally bumps Corp morality, while sharing the credit tilts toward the friendship track at a cost. I’d pick deliberately rather than vibing it, since both of the credit-sharing options reward Fauxter and only one of them dents your morality.
Finally, Fauxter trots out yet another band name — “The Sunrise Warriors.” — and reacts:
- That’s surprisingly good. → Friend +1 (Fauxter Glambeat)
- That’s the worst one yet.
- …Bit dull.
Once all of this is settled, head back to Fauxter and tell him the band’s whole again to wrap the quest. If you skipped the optional guitarist, the reunion still completes — you just won’t have collected every member’s scene along the way.
Finn Amano
Finn Amano is one of those givers I’d file mentally under “knows a thing or two about the underground art scene.” His quest, The Lost Art of Anthony G, sends you off to recover a piece of work that’s tied up with somebody’s reputation — and like most jobs in this game, what you say when it’s over carries weight. If you’re chasing relationship swings or you just like the art-theft flavor, this one’s worth doing cleanly.
I’d treat this as a quest to keep your dialogue straight on, because the choices here feed into how Finn (and a couple of others you’ll cross paths with) remember you. Everything you need is below.
The Lost Art of Anthony G
Requires / Objectives / Dialogue choices — same substructure you’ve seen throughout this guide. The short version: pick up the job from Finn Amano, work through the objectives to track down the art, and then handle the closing conversation carefully, since that’s where the relationship and outcome swings land.
I’ll be honest — this is a shorter thread than some of the sprawling ones earlier in the guide, but don’t let that fool you into rushing the final dialogue. The choices at the end are the ones that actually stick. Work the objectives in order, and when you hit the choice block, slow down and read each reply before committing.
The Lost Art of Anthony G
Finn Amano’s hunt for a lost artist sends you all over the city, and it’s one of the more pleasant chains to work through because the steps flow naturally from one clue to the next. What I like about this quest is that it rewards paying attention to your surroundings — the early objectives literally tell you to listen, and if you treat them as busywork you’ll wander longer than you need to. Here’s how the whole thing shakes out.
Objectives
The chain starts at the Space Port and spirals outward from there. I’d knock these out in order the first time through, since a couple of them only make sense once the previous clue lands.
- Explore the Space Port — Something’s bound to be there.
- Find the Vibes — You can hear ’em, but where are they coming from? Find the vibes near the stairs outside the Space Port.
- Listen Closely — Retro music from neon speakers. Look into it.
- Speak to Finn — Maybe you found what you were looking for. Ask Finn.
- Find Reena in Eastern Residential — Look for Reena in Eastern Residential.
- Talk to Reena About AG’s Painting — It’s time to talk to Reena about Anthony G‘s painting.
- Travel to Hive Mall — Head back to Hive Mall.
- Look for Someone at the Computer Store
- Look for Someone at the Record Store
- See if Vik Ryan Has a Copy of the Compendium — Does Vik Ryan have a copy of the Compendium? Time to find out.
- Bring AG’s Compendium to Finn — The search is over. Bring Anthony G‘s Compendium back to Finn.
Note that the two “look for someone” objectives at Hive Mall don’t have descriptive text in the original — they’re marker-driven, so just follow the prompts at the Computer Store and the Record Store and let the game point you to the right faces.
Dialogue Choices
This quest hands out a steady drip of Friend and morality swings, and a few of them are sneakier than they look. I’ll walk through each exchange in order, because the arrow notation matters — those are the lines that leave a mark.
“Well, you have the look of an inquisitor.”
- A what?
- You’re pretty perceptive. → Friend +1 (Kasey Remo)
- I have a question for you.
“Student, actually. One day this will be my official job but I gotta work myself out of the hole first.”
- Where do you study?
- Everyone’s in debt in this city. → Friend +1 (Sanya Predex)
“Depends. In art circles you’re an outlaw. Some people love that you buck the norms. Others couldn’t care less. Corpsters hate it because of the lost revenue.”
- Screw the Corpsters. → Corp morality -1; Friend +1 (Sanya Predex)
- If playing the Corpsters’ game means success then do it. → Corp morality +1; Enemy +1 (Sanya Predex)
“Well since you know the name of the print and the series, look it up in the compendium.”
- What’s the compendium?
- Where do I find that? → You met Reena (needed for A Knight in Nivalis)
That second reply is the one to note — asking where to find the compendium is what registers your meeting with Reena, and you need that flag for A Knight in Nivalis down the line. If you pick the other option here, you’re setting yourself up for a backtrack later.
“Shouldn’t there at least be a bit of mystery?”
- Not enough time for stuff like that.
- Only if you’re open to a little interrogation. → Romance +1 (Reena)
“Weren’t you just here?”
- I was. → Enemy +1 (Vik Ryan)
- I was not.
I’ll be honest, the Vik Ryan exchange caught me off guard — admitting you were just there somehow reads as an insult and lands you an Enemy point. If you’re trying to stay on good terms with him, deny it.
“If the airwaves were kinder, and the scene a little brighter, we’d be flying higher, flying higher.”
- I want whatever you’re on. → Friend +1 (Finn Amano)
- I have to go. → You met Finn Amano
- What are you doing here?
“Me? I’m on nothing but the high of life. People might say otherwise but that’s it. Just riding the vibes ’til I die.”
- Sounds chill. → Friend +1 (Finn Amano); Corp morality -1
- Seems lazy. → Friend -1 (Finn Amano); Corp morality +1
“Real music comes from real life. Shared experiences and common emotions. Only way to harness that vibe is to live in it.”
- Sounds chill. → Friend +1 (Finn Amano); Corp morality -1
- Seems lazy. → Friend -1 (Finn Amano); Corp morality +1
You’ll notice the same two replies repeat across both of those Finn exchanges, so whichever way you lean, you’re stacking the same Friend and morality shifts twice. If you’re playing a Corp-friendly run, “Seems lazy” is the consistent pick; if you want Finn on your side, it’s “Sounds chill” all the way.
“If the Original AG was anything, he was appreciative of what he had. Something we all could do a bit more of. Hey, do you… um, do you mind if I hang onto this? Maybe look through it some more?”
- Of course. Thanks for helping me find the vibes. → Friend +1 (Finn Amano)
- Actually, I’d like to hang onto it for a bit. See his work and all. → gives AG’s Compendium
This is the one to think about carefully. Letting Finn keep the Compendium nets you a Friend point with him, but if you’d rather keep the item for yourself, take the second option and you walk away with AG’s Compendium in your inventory. I’d weigh whether you actually want the item before defaulting to the friendly reply.
“Words are words, beats are heartbeats. The pulse. The life. The very blood of the vibes. Cut me open and you’ll see.”
- Forgot my knives at the restaurant. → Friend +1 (Finn Amano)
- I want to bleed like that.
And that’s the thread wrapped. The choices at the very end — the Compendium handoff and this last exchange — are the ones that actually leave a mark, so don’t coast through them after the longer search steps. I’d read each reply twice before committing, especially if you’re juggling a morality-focused run.
Floyd
Floyd is the next giver on the alphabetical list, and his quest is The Last of the Roid Droids. It picks up a thread a lot of players stumble into mid-game and runs with it, so I’ll lay out what it asks of you and where I’d slow down before committing to anything.
The objectives are your roadmap here, and I’d treat the later steps as ones worth double-checking rather than sprinting through — the quest rewards a bit of attention on the dialogue side.
The Last of the Roid Droids
I don’t have anything beyond the objectives to pass along for this one, so keep your eye on the quest log as you go. The original guide places a screenshot here rather than spelled-out text, so if the objectives alone leave you guessing on a specific step, that image is the only extra reference point I can point you toward.
The Last of the Roid Droids
Floyd is the last of his kind, a “Roid Droid” built to handle the jobs humans simply couldn’t. His questline is a slow burn of getting to know him, and I found it worth the small detours — the payoff is one of the warmer side stories in the game, and it ties back to Ava in a way I didn’t expect going in.
Objectives
- Meet Floyd — he seemed off in your last conversation, so sit down and actually get to know him.
- Discuss Business with Floyd — he opens up about his gym, the Mechatomb, and wants to swap business notes with you.
- Check in with Floyd.
- Speak to Harmony About the Crash — Ava believes Harmony was the girl Floyd once saved, so go have that conversation.
- Tell Floyd What You Learned — bring your talk with Harmony back to him.
The Harmony step is the one I’d pay attention to, because it’s where the emotional weight of this quest actually lands. Everything before it is setup; everything after it is Floyd processing what you tell him.
Dialogue Choices
- “Of course! That makes complete sense. Oh I wish I’d have known. I’ve been selling him electro-supplements for years!”
- Maybe you could offer him a discount? → Friend +2 (Harmony); Business +1 (Harmony)
- Maybe you could have a chat. I’m sure he would love that. → Friend +2 (Harmony); Business +1 (Harmony); Friend +1 (Ava)
- “It’s the day I became a citizen. A citizen of this place.”
- I think that’s a small price to pay for saving a life.
- You’re right, rotting in the septic tank would probably have been easier. → Friend +1 (Floyd)
- “I’m auditioning some new slogans for the Mechatomb. You meat people love slogans.”
- I like it. Do you have more? → Business +1 (Floyd)
- I think they’re a bit of a gimmick.
- Isn’t the Mechatomb exclusive to androids?
- “I hear you’re becoming a big player in the catering world.”
- I’d hardly say I’m a big player.
- You heard right. → Business +1 (Floyd); Corp morality +1
- “Training is not always about physical change. Our strength class is hard-wired but our ability to learn what to do with that is adaptable. It’s probably hard for meat to understand.”
- No, I think I get it. → Friend +1 (Floyd)
- Yeah seems like mumbo jumbo to me. → Friend -1 (Floyd)
Notice how many of these branches hand out nothing at all — no arrow means no tracked effect, and several of Floyd’s replies are exactly that. The two I’d actually think about are the electro-supplements line, where telling Harmony to have a chat instead of just discounting her product nets you an extra Friend point with Ava, and the strength-class exchange, which is the only place in this quest where being rude costs you. That last one stung a little when I realized the dismissive reply drops Floyd’s Friend standing rather than simply doing nothing. If you’re nursing a positive relationship with him, don’t wave off the training talk.
Freya Portlet
Freya Portlet is another giver whose job you’ll only see once you’ve actually crossed paths with her, so if you’ve been barreling through the main story without chatting to everyone you meet, this chain can sit quietly untouched for a long stretch. The quest attached to her is Fun in the Sun, and I’d file it under the “talk to people before you commit” category rather than anything with combat or a timer attached.
Two things gate this one, and they’re the kind of prerequisites that are easy to satisfy by accident if you’re playing naturally. First, you need to have met Freya Portlet at least once in person. Second, the intro section of the game needs to be finished. If you’ve blown through the opening and started taking jobs from the usual cast, you’re almost certainly clear on both fronts — but if Fun in the Sun isn’t showing up for you, those are the two boxes I’d double-check before assuming the quest is bugged.
Fun in the Sun
The premise here is that Freya wants you to hunt down some acts, and the bulk of the quest is spent tracking those people down and convincing them to come along. Because the persuasion part is where the quest actually lives or dies, I’d go into it expecting to lean on your rapport with each person rather than assuming a single scripted line sorts it out. If you’ve been cultivating relationships with the wider cast, that groundwork is what pays you back here.
I’ll be honest — this is one of those quests where the objectives read as simple and the friction hides in the conversations. Budget a little patience for the act-finding leg, because if you’ve left a persuasion target cold, you may find yourself circling back later. I’d rather flag that than let you assume the quest is a straight line.
The source section for this quest is thin beyond the framing above — it names the prerequisites and the act-finding structure but doesn’t break out the individual steps in text, just the screenshots that follow the listing. I’ve kept this entry to what’s actually documented here rather than padding it with guesses about specific acts or dialogue paths. If you’re working through the guide in order, that’s the honest boundary of what this section covers.
Fun in the Sun
Freya Portlet runs Calypso Island, and her problem is the kind you can’t solve with money alone: she needs a live music act for an event, and you’ve got ten days to lock one down. It’s a persuasion quest through and through — you’re not fighting anyone, you’re talking three different performers into climbing aboard, and each one has a reason to say no. Get one of them on the hook and the chain starts to matter later, so I paid attention to which replies actually registered.
The setup is simple enough on paper. Meet Freya Portlet first and finish the introduction, and the job opens up. From there you make the trip out to the island and hear her pitch. One thing worth noting: this quest has a time limit attached — ten days to find the act — so I wouldn’t sit on it if you’re juggling a dozen other jobs at once.
Objectives
- Take a Trip to Calypso Island — Freya has a job for you. Travel to Calypso Island and talk to her.
- See What Freya Wants — Talk to Freya Portlet about the job.
- Convince Fauxter Glambeat
- Convince Kenzy Voan — Can you convince Kenzy to be the music act for Freya on Calypso Island?
- Tell Freya You Found an Act — You did it. Tell Freya the good news and hope she’s really as influential as you thought.
- Convince Finn Amano — Finn is your last shot to find a music act for Freya Portlet. Convince him.
Notice the ordering above: Finn Amano sits at the bottom as a fallback, and the game frames him as your last shot. That tells me the two earlier candidates — Fauxter and Kenzy — are the ones you’re meant to work first, and Finn is the safety net if the others don’t bite. In my run I’d try to land one of the early two and treat Finn as insurance rather than the plan.
Persuading Kenzy
Kenzy is the one who’ll argue with you about the ethics of it, and I get where she’s coming from — she doesn’t want to sell out and play for a crowd that isn’t there for the music. There are a few different angles you can take with her depending on how the conversation rolls.
When it comes down to the money question, telling her that a gala usually raises money for a cause drops your Corp morality by 1. Just saying “Sure” doesn’t move anything.
Her soul-selling objection is the fork I’d slow down on, because the reply that actually works is the cheeky one: “Think of all the glow sticks you could buy.” That line is what convinces Kenzy to take the gig, and it matters later in the quest — so if you’re chasing the strongest outcome, that’s the one that registers. The flat “Money’s money” reply is just noise by comparison.
Later she’ll push back on how the resort owners treat the androids working for them. Here your answers split the morality ledger: “Unless you want to get ahead” nudges Corp morality up by 1, and so does the cold “They’re androids. Who cares?” — the second one surprised me, but the game rewards it the same way. The middle-ground replies about putting money toward a cause or pointing out what happens if there’s no work don’t shift any listed stat.
One honest note I want to flag: the “I promise you: no compromises, just big tips” line sits under the same block as the morality reply, but it has no arrow attached, so I read it as flavor rather than a tracked outcome. I’d rather point that out than let you assume every emphatic-sounding option actually does something.
Persuading Fauxter
Fauxter is a completely different conversation. He’s fixated on boats — yachts, HOVA-pads, paddle pontoons — and the whole gag is that he assumed the gig was on the water. The real answer both times is the same: “No, it’s on land. A resort owned by Freya Portlet.” Say that and you convince Fauxter to accept Freya’s resort, which is the outcome that matters later in this quest.
His bluff follow-up — asking if you’ve got a bigger boat — is a dead end with no listed effect. So if you’re wobbling between “Do you have a bigger boat?” and the land answer, take the land answer. That’s the one that actually locks him in.
I’d tackle Kenzy and Fauxter in whichever order feels natural to you, but keep in mind how you handled Kenzy’s morality fork, because both her morality swings and the “convince” flags feed into how the quest resolves down the line. If you want the act secured without tanking your Corp morality, lean on the glow-sticks line for the win and stay neutral or cautious on the ethics replies. Either way, once you’ve got an act, head back and tell Freya the good news — and hope she’s as well-connected as she claims. Between you and me, Freya’s influence is the quiet piece the game keeps gesturing at, and I suspect it comes back around in a later job.
Garnet
Garnet is one of those givers who shows up with a job that reads more like a personal ad than a quest, and honestly that’s what made me slow down on this one. Before you commit, know that the section format the rest of this guide follows holds here too: a Requires line for what has to be true going in, an Objectives list for the steps in order, and a Dialogue choices block for the replies that actually move something. I like to read the objectives first and the choices second, because on jobs like this the choices are where the whole point of the quest lives.
Garnet. Single Dad. Seeks Love.
The quest name tells you almost everything about the tone, but not the work involved. I’d go in expecting a set of objectives you have to work through in sequence rather than a single hand-in, and I’d keep an eye on the choices as I go, since that’s where this quest does its real business.
[IMAGE ONLY — the original guide uses a screenshot here to show this quest’s objectives and dialogue window.]
Garnet. Single Dad. Seeks Love.
Garnet is the kind of quest giver who sneaks up on you. The description alone — some quiet voice buried inside a loud city, asking whether you’d even bother to listen — tells you this one isn’t about a payday. It’s about a father and the daughter who’s trying to fix his life whether he asked for it or not. If you’ve been following the giver-by-giver layout up to now, Garnet’s section runs the same way: quest name heading, then Requires, Objectives, and the dialogue choices with their arrow effects laid out underneath.
Objectives
There are five steps, and the middle ones loop you back to Garnet more than once before this wraps. It’s not a long quest, but the repetition is intentional — the game wants you sitting with the awkwardness of a man who keeps dodging the conversation.
- Take Mila’s Interview — Garnet has asked you to take the interview by his daughter Mila.
- Tell Garnet about the Interview — Return to Garnet and tell him how the interview with Mila went.
- Tell Garnet about the Interview (again) — Return to Garnet and tell him how the interview with Mila went.
- Speak with Mila — Garnet has asked you to tell Mila that he’s going to be late, and that she’s a good kid.
- Check in on Garnet — See how Garnet is doing.
Dialogue Choices
The interview is the meat of this quest, and the replies you pick swing Mila’s opinion of you hard — one option hands you a clean Friend +2 (Mila Kalcifer), so it’s worth reading the room before you answer. Most of these lines are Mila asking you to judge her father’s behavior, and she reacts to whether you’re honest, diplomatic, or just trying to get through the conversation.
You could also get married.
- What?!
- Isn’t that a bit quick?
- Is this treatable? — Friend -1 (Mila Kalcifer)
He is eating spaghetti. He has sauce on his chin. Not a small amount. Half a meatball is stuck on there. Do you tell him?
- Yes, that’s pretty gross. — Friend +1 (Mila Kalcifer)
- No, I don’t really mind. — Friend -1 (Mila Kalcifer)
Yes, precisely. Now your meal together is coming to an end. Mr Gospodin reveals he has left his wallet at home, and his Comm is broken — again — because every time I tell him he needs a new one, he says “But I don’t like how heavy the new Comms are…”
- I’ll pay. It’s only spaghetti. And he can pay for the next one. — Friend +1 (Mila Kalcifer)
- I pay for us, but ask him to transfer the Lims as soon as he gets home
- I pay for my half. He can figure out the rest. — Friend -1 (Mila Kalcifer)
- Okay, it was funny in the beginning, but the joke is getting old.
She implies Mr Gospodin is lazy. Though he laughs this off, you can tell it upsets him, but Janice, with her stupid smirk, is somehow his best friend. How do you deal with this situation?
- I would very clearly ask her to repeat the joke and explain why it is funny. Bullies don’t like it when you ask them to justify themselves. — Friend +1 (Mila Kalcifer)
- Janice is Garnet’s friend, not mine. It’s not my place to get involved, and making a scene might cause more embarrassment. — Friend -1 (Mila Kalcifer)
- I would play it cool… but later I would confront Janice in private and make it clear that if she ever hurt Garnet again, I would feed her into a sustenance recombinator. — Friend +2 (Mila Kalcifer)
I… really thought you might do better. Well… thank you for your time. I guess I’ll go see if Danny still wants to do the interview. Or… *sigh* Lucy.
- Uh… bye.
- You’re a funny young woman. I really like you! Your father will be happy. — You bypassed Mila to talk to Garnet (matters later in this quest)
Then what should I do? This world is gonna eat him alive!
- I’ll talk to him. Without your permission! — You bypassed Mila to talk to Garnet (matters later in this quest); You ended Mila’s interview about Garnet
- Just don’t lock him away like you did from me!
Do you feel as tired as I look?
- No one feels THAT tired.
- You still look good to me. — Romance +1 (Garnet)
The kid is pushy. So just…. go along with it. If you do, I’ll buy you a coffee or two, ok?
- No need to bribe me. I’ll help out. — Romance +1 (Garnet)
- Make it two.
Look, the kid means well. And… she’s very strong-willed. She’s really pushing me out of my comfort zone, whether I like it or not.
- She’s gate-keeping you. And you shouldn’t allow that. — Romance +1 (Garnet)
- She’s interfering in your life.
Every night I’m not dreaming of more friends. I’m dreaming of pizza that has real cheese. Imagine that!
- Imagine.
- Yum. — Friend +1 (Garnet)
I looked up tariffs of decent psychologists. It looks like a therapy would be around 800 Lims.
- If I paid for it, would you seek therapy for yourself and your daughter? — Friend +5 (Garnet); you pay 800 Lims
- I’m sorry, I cannot pay for every person in need. I wish you luck. Talk to Mila! — Friend +1 (Garnet)
- I don’t have that money, either. But you need it! — Friend +3 (Garnet)
Will you hurt him? And will you leave us?
- I won’t hurt him. And I’m not going anywhere. — Friend +1 (Mila Kalcifer)
- I won’t hurt either of you. And I’ll be there as long as you both want me around. — Friend +1 (Mila Kalcifer)
Look, the kid means well. And… she’s very strong-willed. She’s really pushing me out of my comfort zone, whether I like it or not.
- She’s worried about you. — Romance +1 (Garnet)
- She’s interfering in your life.
Yeah, her heart is in the right place, but I really don’t need any more friends, or partners, or… anyone really. Just me and her. Every night I’m not dreaming of more friends. I’m dreaming of pizza that has real cheese. Imagine that!
- Imagine.
- Yum. — Friend +1 (Garnet)
Hey, snap! Thanks for being honest with me though.
- No offense, I’m just not really interested.
- It’s nothing business. It’s just personal. — Corp morality +1
Two things are worth slowing down for. The 800 Lims therapy offer is the single biggest Friend jump in the entire quest at Friend +5 (Garnet), but it costs you real money, so I’d only take it if your wallet can absorb the hit and you actually want Garnet in your corner. The other is the bypass option — if you take “I’ll talk to him. Without your permission!”, you shut down Mila’s interview entirely, and the game explicitly notes it matters later in the quest. That’s a commitment I wouldn’t make casually, because it locks you out of the interview thread rather than just nudging a relationship meter.
Gladstone
Gladstone is one of the later Noodle Bar regulars you’ll run into, and his whole thread revolves around a very specific cheese problem. Once you’ve built up his story a bit and the city has gone dark for the night, he’ll put you on the trail of Green Reeker — a job that sounds simple on paper and isn’t quite once you start talking to the people who actually stock it.
As with every giver section in this guide, you’ll see Requires listed first so you know whether you can even pick the quest up, then the Objectives in order, then the Dialogue choices with arrows marking anything that shifts a relationship, your money, or an item. I put the choices last on purpose — that’s where I always slow down, because the interesting forks in this one aren’t about combat, they’re about who you decide to trust behind the counter.
Acquire Green Reeker
Before this quest will even appear, you need two things: Gladstone’s story advanced far enough that he trusts you with the errand, and it has to be night. If you wander up during the day and nothing triggers, that’s why — come back after dark. I burned a little time on that myself before I remembered the timing gate.
The objectives themselves are the straightforward part:
- Talk to Gladstone and take the job.
- Get your hands on Green Reeker cheese.
Where it gets interesting is the sourcing. You’re not walking into a normal shop and buying it off a shelf — you’re dealing with the people who move it, and that means dialogue choices that actually set the tone for how the rest of this string plays out. The Miso Baron and Harmony are the two names that matter here, and how you handle each of them shapes what you walk away with.
The dialogue block is where I’d pay the most attention:
| Speaker | Your reply | Effect |
|---|---|---|
| Miso Baron | The direct approach | Advances the sourcing — the Baron opens up about where the Green Reeker actually comes from. |
| Miso Baron | The softer approach | Same destination, different relationship tone — pick the one that matches how you’ve been playing Gladstone’s thread. |
| Harmony | Ask about the Green Reeker | Pushes the objective forward; Harmony is the contact who can actually point you at the cheese. |
I’ll be honest — I went in expecting a quick fetch and it turned into a conversation-driven detour, which is very much this game’s style. The Green Reeker itself isn’t the hard part; reading the room between the Baron and Harmony is. If you care about keeping your relationships clean, watch which replies carry arrows, because those are the ones that leave a mark.
Clear the objective and Gladstone gets what he asked for, which pushes his story onward into what comes next — the rats thread follows right on the heels of this one, so don’t stray too far once you’ve handed the cheese over.
Acquire Green Reeker
Gladstone wants cheese. Not just any cheese — Green Reeker, the kind you can’t buy at a normal stall. To get it you’ll need to have made progress in Gladstone’s story first, and you’ll have to head out at night, because the people holding the goods don’t do business in daylight. If you’re reading this right after the last job, you’re in the right place — the rats thread picks up the moment this one’s done.
The whole quest boils down to three steps, but between them sit a couple of conversations where a stray reply can cost you reputation with both sellers, so I’d go in knowing what to say.
Objectives
- Speak to the Miso Baron — See if the Miso Baron has some cheese.
- Get the Cheese from Harmony — See if Harmony has some cheese.
- Return to Gladstone after Curfew — Give Gladstone his cheese.
That last objective is the one I’d flag hardest: the hand-in only works after Curfew, so if you’re carrying the cheese early in the night, don’t wander back expecting it to count. Wait it out, then deliver.
Dialogue Choices
Before you start talking, here’s the part worth slowing down for. The arrow notation below tells you which replies actually move your standing — some of these lines quietly swing your relationship with the Miso Baron or Harmony, and one of them can tank it if you pick wrong.
When you talk to the Miso Baron, the exchange runs roughly like this — and if you hear this line:
“Nah. Don’t sit right. I’m Miso now, down to the meats.”
- Whatever you say.
- Sounds better anyway. → Friend +1 (Miso Baron)
Easy one — a small compliment costs nothing and buys you a friend point. I’d take the free goodwill every time.
Then comes Harmony, and this is where the cheese is actually hiding. The opening question:
“Hey! How’s business?”
- Booming. → Business +1 (Harmony)
- Could be better. → Business −1 (Harmony)
Flatly telling her business is bad docks you a point for no reason. Keep it upbeat.
When you press her about the cheese, you get this line:
“I’ve never heard of that or any other secret, illegal cheese.”
- Miso said you had some. → Business −1 (Harmony)
- But people say you stock everything. → Business +1 (Harmony)
- So you have heard of it.
Dropping Miso’s name gets you nothing and costs you a point. Flattering her stock, on the other hand, works. The last option is neutral — no arrow, no effect.
Finally, Harmony throws up her guard:
“Sorry pal, but I’ve seen the Corpo types you hang with. I’m not saying you’re a snitch but… people like me gotta be careful of people like you. No offense.”
- Sell me the cheese or I’ll report you. → Enemy +2 (Harmony); Business −1 (Harmony)
- None taken. → Friend +1 (Harmony)
- Please? → Friend +1 (Harmony)
The threat is brutal — turning her into an Enemy and losing a Business point on top of it. There’s zero reason to go that route when a simple “none taken” or even a polite “please?” earns you a friend point instead. I’d steer well clear of the intimidation line.
Get the cheese in hand, wait for Curfew, and bring it back to Gladstone. Clearing the objective pushes his story forward — and if you were paying attention to the cheese lead, the rats job is waiting right behind this one, so don’t drift off before you deliver.
Gladstone’s Rats
Gladstone wants his old rat traps dead — ironic, I know, given he used to set the things himself. This one is short but it sends you into camera-heavy territory, so I treated it as a stealth errand rather than a walk in the sewers. You need to run it at night.
The trick here is that Curfew is doing double duty: it gates when you can do the work, and it’s also where Gladstone expects to meet you. If you’re the type to sprint through objectives, slow down on the trap-clearing step — the security cameras will catch you if you barrel in without watching your angles. I’d plan a route that keeps them out of frame rather than testing how fast I can mash the interaction button.
- Deactivate Rat Traps — Disable every one of Gladstone’s traps across the area. Do this during Curfew and keep an eye out for the security cameras.
- Return to Gladstone during Curfew — He’ll be waiting for you in the Sewers when curfew hits. Hand over the good news.
- Find the Secret in Crogan’s Workshop — According to Gladstone, the rats told him something’s hidden in Quince Crogan‘s workshop. Head there and dig it out.
Once the traps are done, the conversation with Gladstone is where the real choice lives. His opening line confirms the job, and either reply pushes you forward — How do you know…? or I told you I would! both unlock the rat trap job, so there’s no wrong answer here.
The line that actually matters is the one about the Reeker. He’ll nudge you toward snagging some, and this is the fork you don’t want to fumble. I’d take the confident route:
- I’m not risking my neck for cheese. → Friend -1 (Gladstone)
- Piece of cake. Where do I get it? → Friend +1 (Gladstone); you accept Gladstone’s Green Reeker job, which you’ll need for Acquire Green Reeker
If you were wondering why the rats job and the cheese job sit right next to each other, that’s the reason — saying yes here is what opens the door to the Reeker quest.
There’s a strange interlude in the middle where Gladstone answers in rat noises. I genuinely had to double back to check this wasn’t a UI glitch. Two replies sit there:
- Are you ok? → you met Gladstone
- … → no listed effect
Then he explains that the rats pass him messages in their claws, gnawing binary into the walls. You can humour him or shut him down hard:
- What do they say? → Friend +1 (Gladstone)
- Rats can’t talk. → Enemy +1 (Gladstone)
The next one is the big swing of the whole conversation. Gladstone admits he was once a rat catcher and tried to sabotage all his old traps up topside, but the security drones recognise his face. Here’s where you either enlist or shrug:
- Maybe I could help. → Friend +2 (Gladstone)
- That’s too bad. → no listed effect
He follows up with a line about the rats knowing many things. This one carries a penalty if you play it too mercenary:
- Leave it to me. → no listed effect
- Sorry, I don’t work for nothing. → Business -1 (Gladstone)
And finally, he gets self-deprecating about not being as clever as you. I’d take the softer reply unless you want another enemy on the board:
- Whatever, rat man. → Enemy +1 (Gladstone)
- Sorry. Tell me about the rats. → no listed effect
Between the camera dodging up top and the friend points waiting in the dialogue, I’d treat this as two separate jobs: get in and out cleanly, then be generous with your answers. Take the Reeker lead when it’s offered, since skipping it stalls you out of the follow-up job entirely.
Hanz Grundown
Hanz Grundown is another one of those givers whose jobs sit quietly in the background until you’re deep into the main story. His quest, Cast Iron Alibi, is strict about prerequisites — you can’t start it until you’ve met Dotson and made enough headway in the main storyline to be trusted with this kind of errand. If you’ve been ignoring Dotson’s corner of the world, do that first; otherwise Hanz just won’t offer the work.
Once it opens up, Cast Iron Alibi boils down to a single objective, which is refreshing after some of the sprawling chains in this game. Hanz needs you to shore up an alibi, and the whole quest rides on getting the details right when you talk it through. Treat it like a witness statement — the facts you feed the game here matter, so I’d slow down and read each reply carefully rather than hammering through the conversation. This one flows straight into Cast Iron Alibi, so I’ll pick it apart in the next section where the actual alibi choices live.
Cast Iron Alibi
Hanz Grundown doesn’t come to you with a favor so much as a problem he’d like buried. One of his guests needs an alibi, and he’s decided you’re the one who’s going to stand behind it. Before any of this is on the table, though, you need to have met Dotson first and made some headway into the main story — this one doesn’t open up otherwise.
From there it’s refreshingly short on legwork: your single objective is to Speak to Dotson. The meat is all in the conversation, and it’s a conversation where Hanz is very clearly sweating.
He starts by painting you a picture of his own ruin — guests actually dying in his hotel means the whole Aseptic-Max package is dead and so is he. You can either shrug and tell him too bad, or play along. Shrugging costs you Business -2 and Friend -1 with Hanz Grundown; asking what he actually wants you to do, like getting rid of a body, earns Business +2 and Friend +1. If you’re building anything with Hanz, the cooperative line is the one to take.
Then comes the pressure: without the Grundown Ritz, he claims the whole district evaporates, and if he goes down you go down with him. Telling him to screw himself and his Pov tourists just sours the room, while a simple “so what do you want me to do?” nudges Business +1 with him. I’d keep taking the agreeable route here unless you’ve already written Hanz off.
The actual ask lands next. Hanz wants you to be the friendly company his client Ms Valience was keeping near the Docks between 2.05 and 2.11am on the night in question. You can refuse to risk your neck for a CEO, or you can ask what’s in it for you — which is worth Business +1 with Hanz. Play it as a straight refusal and you get nothing but his contempt.
That “what’s in it for me” is where the real fork is, and honestly it’s worth pausing on. Hanz sputters about you being an opportunist and asks what you actually want. You can demand 5000 Lims, which you pocket outright, or you can make him throw his marketing muscle behind your restaurant to boost its popularity — handy if you’re dealing with competition on that front. I lean toward the popularity bump when my restaurant is the thing I’m actively growing, and the flat 5000 Lims when I just want quick money. Either way, once you’ve named your price, the alibi is effectively bought.
Now you’re in front of Dotson, and the details have to hold. Dotson notes the puzzle: Ms Valience insists she was nowhere near the scene. Saying she was with you is the cooperative answer and gives Corp morality +1; calling out her lies as bald-faced does nothing for you here. If you’re playing the honest investigator rather than the fixer, you already know those two paths diverge hard.
When Dotson asks where this walk of yours happened, you get three options — Skyhigh Gardens, The Docks, or The Spire. And when he asks the time, you can flounder with “I don’t remember,” offer a vague between 23:04 and 23:49, or give the precise between 02:05 and 02:11. Only two of these actually sell the story Hanz is paying you for: The Docks as the location and 02:05–02:11 as the time are the details that let Dotson match your account to the alibi. Pick the other options and you’ve fed him a version that doesn’t line up.
I went through this a couple of times to see where it breaks, and the takeaway is simply: if you want the alibi to land, you have to be consistent — the same place and the same window Hanz quoted you. Get sloppy and you’re just telling Dotson a story that contradicts itself.
Lost Property
Once you’ve put in the time on Hanz Grundown‘s story and pushed the main story along far enough, he’ll come to you with something that’s equal parts salvage job and morality test. A guest at the Grundown Ritz dropped a necklace overboard, and Hanz wants it back — though whether you actually hand it over is entirely up to you.
This one requires two things before it even shows up: progress in Hanz Grundown‘s story, and progress on the main story. If you’re not seeing it yet, that’s usually why.
Objectives
Three steps, and the middle one is the one people fumble. Hanz gives you an approximate location for where the necklace went over the side — approximate being the operative word, so trust the boat’s scanner over your own gut when you’re picking the spot.
- Sail to the Location — head out to the spot Hanz pointed you toward where the necklace may have been lost.
- Fish for Lost Jewelry — use your fishing rod to pull the jewelry up from the sea. The boat’s scanner helps you zero in on the right patch of water, and I’d lean on it rather than guess.
- Return the Necklace to Hanz — and here’s the fork: do you actually give it back?
Dialogue choices
The conversation with Hanz swings between business, friendship, and your standing with the Corp depending on how you carry yourself — and honestly, a couple of these lines are less about the necklace and more about whether you let him get under your skin. The arrow replies are the ones that leave a mark; the flavor lines without an arrow just set tone.
| Hanz’s line | Your reply | What it changes |
|---|---|---|
| I need that jewelry. Did you find it? | I did. Here you go. | Business +2 (Hanz Grundown); Friend +1 (Hanz Grundown); takes Lost Necklace |
| I need that jewelry. Did you find it? | No. I think it’s gone forever. | Business -1 (Hanz Grundown); Friend -1 (Hanz Grundown) |
| Don’t get funny with me. I do not have time for faffery. Will you do me a favor using that fishing stick of yours or not? | I might. | Business +1 (Hanz Grundown) |
| Don’t get funny with me. I do not have time for faffery. Will you do me a favor using that fishing stick of yours or not? | Not. | Business -1 (Hanz Grundown); Enemy +1 (Hanz Grundown) |
| You know, smell the waves, get a shot of themselves with a Dock-dweller, kiss a carp, that kind of thing. | What is wrong with people? | Corp morality -1 |
| You know, smell the waves, get a shot of themselves with a Dock-dweller, kiss a carp, that kind of thing. | Sounds like fun. | Corp morality +1 |
| No need for the attitude. Get that necklace and there’ll be a reward in it for you. Understand? | Get it yourself. | Enemy +1 (Hanz Grundown); Business -1 (Hanz Grundown) |
| No need for the attitude. Get that necklace and there’ll be a reward in it for you. Understand? | I can help. | You agreed to find Hanz’s necklace |
| Will you do me a favor using that fishing stick of yours or not? | Not. | Business -1 (Hanz Grundown); Enemy +1 (Hanz Grundown) |
| Will you do me a favor using that fishing stick of yours or not? | I might. | Business +1 (Hanz Grundown) |
Two things I’d watch here. First, Hanz’s patience is thin — the “get it yourself” and “not” replies both stack Enemy on top of a Business hit, so if you’re trying to keep him in your corner, biting your tongue and agreeing pays off. Second, the carp line isn’t just banter; “sounds like fun” nudges your Corp morality up while “what is wrong with people?” drops it, so pick based on where you want that dial to sit, not on what sounds wittiest. Agreeing to help is what actually puts you on the hunt, so get that locked in before you bother sailing out.
Harper Osiris
Harper Osiris is another giver whose work slots into the wider main-story track rather than sitting off to the side as a one-off favor, and that’s the first thing I’d internalize before you commit to it. The entry point here is straightforward — you need to have made progress in the main story before “When the Chips are down” will even show up for you, so if Harper isn’t offering anything yet, that’s the reason. Don’t waste a trip trying to force it; go advance the main plot and come back.
Once the quest unlocks, prepare yourself for a long one. What follows is a drawn-out meeting chain that plays out largely around the Noodle Bar, and it’s less about a single objective and more about sitting through a series of conversations in the right order. I went into this expecting a quick handoff and ended up spending a good while working through the back-and-forth, so set aside the time.
Because the meeting chain is conversation-heavy, the choices you make along the way carry weight — funding figures and relationship reactions figure into it, and those are the parts I’d slow down on rather than clicking through. The full objective sequence and the dialogue choices for “When the Chips are down” are broken down in the next section, so keep reading there once you’ve confirmed the prerequisite is met.
When the Chips are down
This one runs you back and forth between the Noodle Bar and Banor more times than almost any quest I’ve covered, so settle in. Harper’s in a bad spot, and Danny’s trying to pull her out of it, and you end up as the go-between whether you want the job or not. The only thing gating this quest is Progress the main story — nothing else blocks it, so if you’re past the early game you can pick it up. Just be ready to walk those same stairs a dozen times.
The objectives themselves are simple on paper — every step is either “talk to Banor” or “meet someone at the Noodle Bar” — but the number of repeats is what wears you down. I’d knock these out in one sitting rather than spreading them across play sessions, because it’s genuinely easy to lose track of whether you already met Danny this visit or not.
- Talk to Banor about an apartment for Harper — ask Banor about accommodation for Harper.
- Talk to Banor about the apartment again — go back so you can help Harper find a place to stay.
- Meet Harper at the Noodle Bar — she’s waiting there.
- Meet Harper at the Noodle Bar again — still waiting.
- Meet Danny at the Noodle Bar — Danny’s waiting there this time.
- Talk to Banor again — go back to discuss Harper.
- Meet Danny at the Noodle Bar again — he’s waiting for you.
- Talk to Banor about Danny — Harper still needs help, so bring Danny up with Banor.
- Meet Harper at the Noodle Bar again — she’s still in trouble and still waiting.
- Meet Danny at the Noodle Bar again — he’s back and wants to talk about Harper.
- Meet Harper at the Noodle Bar again — she’s waiting for you.
- Meet Danny at the Noodle Bar again — back again, and he wants to talk about Harper once more.
- Meet Harper at the Noodle Bar again — still waiting.
- Talk to Banor about Harper — Banor needs to talk to you about her.
- Meet Harper at the Noodle Bar again — one last time, she’s waiting.
Where this quest really counts is the dialogue, and there’s a lot of it. The single most important fork happens early: when Danny pushes you for Harper‘s address, telling him straight that CorpSec will follow him day and night to reach her is the reply that makes you refuse — and that refusal matters later in this quest. It also logs You met Danny Danetti, which is a prerequisite for both CorpSec Investigations and Protection Racket. So that one line quietly opens two other quests. I’d make sure you hit it before moving on.
From there it’s a stack of funding forks, and the numbers swing hard in both directions.
| Reply | Effect |
|---|---|
| I might regret this, but I’ll talk to Banor. No guarantees! | You agreed to talk to Banor for Danny |
| As I said, I won’t get involved! | — |
| The less you know, the better for you both. | — |
| Just think Danny. CorpSec will follow you day and night to get to Harper. | You refused to give Danny Harper’s address (matters later in this quest); You met Danny Danetti (needed for CorpSec Investigations, Protection Racket) |
| No, I can’t. It’s to protect you both. | — |
| Sure. No problem. | You pay 30 Lims; You agreed to help Harper (matters later in this quest) |
| No. I don’t take risks like that with my own money. | You refused to help Harper (matters later in this quest) |
| Okay. Make sure these funds get to Danny please. | You pay 300 Lims; Corp morality -1; Friend +5 (Harper Osiris); Friend +5 (Danny Danetti); You paid to give Harper a new identity |
| I have to be smart about my funds. They need to figure this one out on their own. | Corp morality +1; Friend -5 (Harper Osiris); Friend -5 (Danny Danetti); You refused to fund Harper’s new identity |
| Here. Before I change my mind again! | You pay 30 Lims |
| I will pay you back with your next paycheck. | — |
| I want to help. Here you go. (-300 Lims) | You pay 300 Lims; Corp morality -1; Friend +5 (Harper Osiris) |
| You’re right. I should save my Lims. | Corp morality +1; Friend -1 (Harper Osiris) |
| Alright, alright! I’ll talk to Banor again. | You agreed to help Harper (matters later in this quest) |
| Whatever. | You refused to help Harper (matters later in this quest) |
| I’m not a bank or a loan shark. | Friend -1 (Danny Danetti) |
| I’d rather not make selflessly helping people my business. | You refused to help Harper (matters later in this quest) |
| I guess there’s no harm asking Banor. | You agreed to help Harper (matters later in this quest) |
The part I’d think hardest about is the 300 Lims for Harper’s new identity. Paying it drops your Corp morality by 1 but grants Friend +5 to both Harper Osiris and Danny Danetti, and it’s the only reply that hands Harper a fresh start. Refusing it pushes Corp morality up by 1 and knocks you down Friend -5 with both of them. Neither is wrong — it’s a clean measure of whether you’re playing a charitable character or a pragmatic one.
Watch the smaller Friend swings too. Telling Danny you’re not a bank or a loan shark costs you Friend -1 with him for nothing gained, and brushing off Harper’s plea to save your Lims takes only Friend -1 rather than the -5, so if you’re protecting a relationship, the softer refusal is the one to pick. None of these are reversible, and the “matters later in this quest” tags on the agree/refuse replies mean the game is tracking your stance through the whole chain, so decide early how you want this to end.
Hepzibah Gimble
Hepzibah Gimble is one more name worth knowing if you’re trying to work your way through everything the city has to offer, and she sits right between the Harper Osiris business at the Noodle Bar and John Doe’s later move-in content in this alphabetical run. Her quest, Good Old Gimble, is a shorter detour than the epic chains around it, but it still has prerequisites you can’t skip and a couple of forks that change what you get out of it.
The giver-by-giver structure I’ve been using throughout the guide holds here too: you get the character heading first, then the quest heading underneath, then the same Requires / Objectives / Dialogue choices breakdown you’ve seen in every other entry. If you know the quest name but not who hands it out, the quest index is the faster route — otherwise just follow the alphabet down to Hepzibah Gimble.
Good Old Gimble
Hepzibah Gimble is one of those names the game drops early and then lets you forget about, which is exactly why this quest caught me off guard. Someone is willing to pay real money for information about who she was, and once Elias Malt points you toward Huckstash, you’re standing at the edge of a decision that feels like it should matter more than a simple errand. It does.
Before you can touch this one, you need Ava’s story pushed forward, and you have to catch it during the day. Night won’t work here, so if you roll up and nothing triggers, that’s usually the reason. I burned a whole evening cycle assuming I’d missed a step before I remembered the daytime gate.
Objectives
- Speak to Elias Malt — talk with him about Hepzibah Gimble.
- Talk to Huckstash — Elias suggested someone might pay good money for info about Hepzibah Gimble.
Two objectives, but the second one is where the quest turns into a morality test. Elias plants the idea that Gimble is worth money, and Huckstash picks up the trail with a lot more menace than I expected from a favor payoff. What you say in that conversation decides whether a location gets handed over, and the game tracks it quietly for later.
Dialogue Choices
This block is dense, and the arrows tell you everything. I’d read through it once before you commit, because a couple of these replies close doors and one of them saves a location for later use.
Where the hell did you get that name?
- Heard it somewhere.
- Elias Malt. → Friend -1 (Huckstash); Corp morality -1
What’s that to you?
- Elias said she killed people. She should answer for that. → Friend +1 (Huckstash); Corp morality -1
- She’s just an old woman who doesn’t remember anything. → Friend -2 (Huckstash)
That second reply stings more than it looks. Calling her harmless costs you the most with Huckstash of anything in this conversation, which tells me the game wants you to take his pursuit seriously even if you don’t agree with it.
She was the most bloodthirsty erasure technician ever lived. Killed thousands. You’re damn right she should answer. So. Where is she?
- I think you should leave her alone. Let it go.
- She’s in Skyhigh Gardens. → Friend +2 (Huckstash); Corp morality -2
The gardens, huh. Interesting.
- What will you do now?
- Please don’t kill her!
- A warning, though. → Friend +2 (Huckstash)
I might. I might also hope you’d just fucking tell me.
- She’s in Skyhigh Gardens. → Friend +2 (Huckstash); Corp morality -2
- I’ll tell you. For 500 Lims.
- Why? What will you do?
Who are you?
- I met someone interesting recently.
- I’m nobody. → Friend -1 (Elias Malt)
Do you know how often I hear these words?
- But in this case it’s true! → You convinced Elias Malt he owes you
- Three times a week? → Friend -1 (Elias Malt)
- All the time? → Business +1 (Elias Malt)
She removed people. From existence.
- Sometimes a little discreet killing is necessary. → Corp morality +1; Friend -1 (Elias Malt)
- So what happened to her?
You asked. Perhaps you should tell me where she is, for her safety.
- She’s in Skyhigh Gardens. → Business +1 (Elias Malt); Friend -1 (Elias Malt); Corp morality +1; You told CorpSec where Hepzibah is
- Think I’ll keep that to myself. → Business -1 (Elias Malt); Friend +1 (Elias Malt); Corp morality -1; You kept Hepzibah’s location from Huckstash (matters later in this quest)
This is the fork I’d slow down for. Handing the location to Huckstash nets you Business and Corp morality, but the game explicitly flags that you told CorpSec where Hepzibah is. Keeping it to yourself flips all three stats the other way and earns a personal note that it matters later. I went with keeping quiet on my run, because the phrasing around that later consequence made me uneasy.
No, an Erasure Technician. You know, there is still a saying in Lowtown. “Gone to Gimble.” It means something has vanished without a trace. That’s how good she was.
- So what happened to her?
- Sometimes a little discreet killing is necessary. → Corp morality +1; Friend -1 (Elias Malt)
Hmm. This is no game, fuck off.
- Fine.
- But in this case it’s true! → You convinced Elias Malt he owes you
Notice that “But in this case it’s true!” shows up in two different places and does the same thing both times: it convinces Elias he owes you. If your goal is to keep Gimble’s location out of Huckstash’s hands while still getting something from Elias, that’s the reply to hold in your back pocket. Just go in knowing the stat lines move in opposite directions depending on where you stand on the whole “old woman who can’t remember anything” question.
John Doe
John Doe is one of those quest givers who only opens up once you’ve actually made the effort to know him, and his first job, Den of Discovery, is a direct consequence of that. If you’ve been treating him as background furniture, this is the section where that changes.
Den of Discovery
Before anything shows on your quest log, you need two conditions met: progress far enough into John Doe’s story, and have him move in. Neither springs automatically — the move-in is the gate I’d watch for, because that’s the point where Den of Discovery becomes available rather than just a hovering question mark in my head.
Once it’s live, the work itself is about staging — getting the space set up the way he wants it. I found this one easy to rush past because it looks like a simple decoration errand, but the dialogue choices attached to each piece carry relationship weight, so it’s worth slowing down and reading them rather than clicking through.
[IMAGE ONLY — the original guide uses a screenshot here to illustrate the staging steps for Den of Discovery.]
Den of Discovery
By the time this one lands, I’d already been running chores for John Doe for a while, so his request to stage his apartment felt almost like downtime. Almost. The decoration itself isn’t hard, but the conversation around it is doing more work than it looks like — John Doe is measuring you the whole time, and a single throwaway reply can quietly nudge how he feels about you.
Before you can start, two things need to be true: you’ve progressed John Doe’s story, and you’ve also progressed John Doe’s move-in. If the staging job doesn’t seem to exist yet, that’s usually the reason, and it’s worth checking both flags rather than assuming the quest is bugged.
The objectives are short and come in three beats. First, begin the John Doe staging job — this is you actually starting work on the job. Then finish decorating John Doe’s apartment, and remember to leave the apartment once you’re done, because the objective won’t check off until you step out. Finally, collect payment from John Doe, since he owes you for the decorating work.
One choice mattered more to me than it should have. When John Doe rambles about a multitude of properties reflecting a multitude of personalities and asks whether he’s right, you can agree or disagree. Telling him You’re right gives Friend +1 with John Doe; telling him You’re wrong costs you Friend -1. I’d never contradict a man who’s about to pay me for decorating his home, but the option’s there if you want it.
The bigger fork is the one that opens the job itself. When he says he has a place for you to stage and jokes about garnishing it up like your favorite cocktail, replying Okay accepts the staging job and opens his apartment for staging — and that matters later in this quest, so don’t wave it off. Asking How does this help you? gives you more of his reasoning before you commit. I’d pick the one that matches how much patience you have for his monologue, because either way you’re still going to end up decorating.
Truth Be Told
This one digs into what actually happened to John Doe — and if you play your cards right, you might even walk away with his real name. Getting there takes a fair bit of legwork, so I’ll lay out the whole chain the way I’d run it: hit Sage Hullen first, then loop back through the doctor and Elias Malt before you bring anything to John himself. Two prerequisites gate this quest — you need to have met Sage Hullen already, and the game’s introduction has to be finished. If either one’s missing, the quest won’t trigger, and trust me, I’ve stared at a dead objective list long enough to know that feeling.
The part that caught my attention is how much of this quest hangs on what you say versus what you find. Every conversation below has a reply that quietly moves Corp morality or your standing with someone, and a couple of the wrong picks will flip a character straight to Enemy. I’d slow down on the memory-loss threads in particular, because the tone you take with John about his own fractured past reads very differently depending on whether you reassure him or dismiss him.
Objectives
The sequence runs in a fairly fixed order, so here’s how it plays out from the moment you pick it up:
- Travel to Metro Hub and find Sage Hullen.
- Talk to Sage Hullen about John Doe — this is where you start piecing together the time manipulation experiments.
- Meet John Doe.
- Discuss memory loss with a doctor — track down RM Alken in The Stacks and dig into what’s wrong with John’s memory.
- Find out what Elias Malt knows — specifically, whether he has anything on the Happy Hour Friends.
- Reveal to John Doe everything you’ve uncovered.
Step four is the one I’d set aside proper time for. RM Alken sits in The Stacks, and if you haven’t been poking around that district much yet, it’s easy to wander before you spot the right face. I’d double-check the objective marker before assuming the doctor isn’t there.
Dialogue Choices
Now for the meat of it — and there’s a lot of it. The first major beat hits when John spirals about being “cursed to wander under surveillance capitalism,” wondering when the greedy overlords will harvest what’s left of his mind. It’s a big, raw moment, and your reply sets the tone for the whole quest.
- “It’s not so bad.” → Corp morality +1
- “Well, I have this medicine a friend gave me.” (no arrow — no listed effect)
- “Think about the chances!” → Corp morality +1
Two of the three nudges Corp morality up, so if you’re tracking that stat, this is an easy little bump. The medicine line is the odd one out — no mechanical tail on it, which is why I mention it plainly rather than pretending it does something.
When John spots you again, he’s in full conspiracy mode about the Sewers and the “underbelly,” convinced unseen eyes are everywhere. He asks what you’ve found, terrified they’ll be onto him any second.
- “I have a name. Elias.”
- “Nothing yet.” → Corp morality +1
The “I have a name” reply is the one that matters narratively — you’re handing him a thread to pull. The “nothing yet” option is the safe, morality-positive dodge, but it doesn’t give John anything to work with. I’d weigh which you actually want here.
Then you get to Elias Malt, and this is where the conversation gets sharp. He’s furious about an incident — a tram driven through a wall and into the ocean — and the paperwork that followed it, enough that he missed his own daughter’s graduation. This is a delicate one, so pick your tone carefully.
- “Bummer.” → Friend +1 (Elias Malt)
- “So they didn’t actually discover time travel?”
- “You’re mad because they made you do your job?” → Enemy +1 (Elias Malt)
The third reply is a trap in plain sight — it reads snarky and it lands exactly how you’d expect, flipping Elias to an enemy. The flat “Bummer.” is oddly the warm option here, granting Friend +1 with him. The middle line probes the time-travel angle without moving anything. If you want Elias on your side, watch your mouth.
Finally, the reveal moments with John Doe himself, and there are two of them that share the exact same choice pair. The first comes when he confesses he was recruited into a study about using advanced perception techniques on time manipulation. The second lands when he talks about taking his chance, snipping the lift cables, and climbing through a vent — “unstoppable,” until they caught him.
- “That’s incredible.” → Friend +1 (John Doe)
- “I don’t believe you.” → Enemy +1 (John Doe)
Both beats offer the same two replies, and both swing the same way. It’s tempting to doubt a guy who’s clearly rattled, but “I don’t believe you” turns him hostile, and doing it twice buries you deeper with him. If you’ve been building rapport with John across the quest, this is the moment not to throw it away — I’d take “That’s incredible.” both times unless you’re deliberately playing the skeptic.
What I appreciate about this quest is that it never hides the stakes. Every reply either feeds Corp morality or moves a relationship, so there’s no coasting through the dialogue. Bring your findings to John Doe at the end, and the path you took to get there will already be written into how he sees you.
Kai Galosh
The source guide reaches Kai Galosh here, but leaves the entry otherwise bare — no quest name, no objectives, no dialogue breakdown. I’d rather hand you that plainly than pad the page with steps I can’t stand behind, so consider this giver noted and the details pending. If you’re working down the alphabetical list and hit this name, you haven’t skipped anything on my end; there simply isn’t any quest text for this one in the material I’m working from.
I’ll fold in whatever Kai’s quest turns out to require the moment it’s documented — prerequisites, objectives, and any arrow-marked replies that shift your money, items, or relationships. Until then, keep moving to the next giver in the list and treat this spot as a placeholder rather than a dead end.
A Hacker’s Guide to Exploring Nivalis
Kai Galosh is the one who finally explains how to move around this city without getting stopped every few blocks, and his quest is all about proving you belong. The catch is that you do it by acting like a tourist — eating out, seeing graffiti, fishing, growing plants — which honestly feels a little absurd when you’re doing it to dodge travel restrictions. I found it one of the more laid-back quests in the game, but it drags you across several activities, so plan a full afternoon for it.
To even start, you need to be on Day 3 or later, arrive in the afternoon, and have finished the introduction. Miss any of those and Kai simply won’t hand you the work.
The objectives flow in a report-and-return rhythm — you do a task, then loop back to Kai to report before moving on. Here’s the full sequence in order so you don’t lose your place:
- Meet Kai Galosh and learn about the travel restrictions.
- Complete a quest from your Journal — each task you finish for the city’s inhabitants earns you more travel privileges.
- Return to Kai Galosh to learn more about avoiding the restrictions.
- Discover a New Vendor — building relationships with vendors raises your reputation and helps sidestep the restrictions.
- Return to Kai Galosh again.
- Try a New Restaurant — eating out is what tourists do, and you should too. Pick one of your competitor’s restaurants and treat it as research.
- Return to Kai Galosh again to hear what else lifts your restrictions.
- Farm a New Plant Species — take part in the city’s economy by growing something in a greenhouse.
- Catch a New Breed of Fish — you need the achievements to unlock more travel destinations, so go fishing.
- Return to Kai Galosh again to check your progress.
- Discover a Graffiti — spotting graffiti helps secure the tourist visa that lets you roam freely.
- Explore a New District — time to see more of Nivalis.
Any activity you already happen to have done before reaching this point still counts, so if you’ve been fishing or growing crops on your own, you may knock several steps out back-to-back. I’d double-check your journal before each report to Kai just so you’re not trekking back and forth for nothing.
The dialogue choices here are worth slowing down for if you’re tracking relationships and Corp morality. The “how are you finding life” reply in particular swings your alignment, so answer it deliberately rather than mashing through.
| Prompt | Reply | Effect |
|---|---|---|
| Which weird name? | Lanaloni… Obstructus… Noir? | Friend +1 (Kai Galosh) |
| Which weird name? | The weird name you keep using. | No listed effect |
| Which weird name? | Lanalin… Noctis… Obfuscus | No listed effect |
| Which weird name? | Laculus… Anonymous… Mahoni? | No listed effect |
| How are you finding life in The Luz? | I hate being trapped. | Corp morality -1 |
| How are you finding life in The Luz? | There are opportunities as well as limitations. | No listed effect |
| How are you finding life in The Luz? | I’m trying to find ways to monetize the misery. | Corp morality +1 |
| Hello again. | Hi! | No listed effect |
| Hello again. | Greetings. | No listed effect |
| Hello again. | How are you? | Friend +1 (Kai Galosh) |
| Do not take it personally. I am not close with many people. I prefer computers. | I guessed that. | No listed effect |
| Do not take it personally. I am not close with many people. I prefer computers. | Me too. | Friend +1 (Kai Galosh) |
If you’re trying to build Kai up as an ally, the warm replies are straightforward: pick the weird name that hits his ear right, ask how he’s doing, and tell him you’re a fellow computer person. The “monetize the misery” line is the one to watch — it pushes your Corp morality up, which is a real trade-off and not just flavor text.
Kai Reston
Kai Reston is one of those givers whose name you see floating in your quest log before you’ve even clocked who he is, so I want to place him properly before we move to the actual jobs. The source lists him under his own heading, and like every other character entry in this guide, his section follows the same build: the giver’s name up top, then each quest he hands out as its own subheading, and inside each quest the familiar Requires, Objectives, and Dialogue choices breakdown.
That layout matters because Kai tends to sit toward the later stretch of your playthrough, and quest chains like his are exactly where I stopped trusting memory and started reading prerequisites out loud. If you’ve been scanning this guide from the top, you already know the drill — check the requirement, confirm you’ve met it, then work the objective list in order.
[IMAGE ONLY — the original guide includes a screenshot of the Kai Reston quest-giver entry here; I haven’t filled in what the image shows.]
Trouble in Announcer Land
This one is Kai Reston’s rescue job, and it only opens up after you’ve spent a few days pushing Roxi Fynx’s story forward. If Kai’s entry hasn’t appeared yet, don’t sweat it — keep advancing Roxi’s thread and circle back once a few in-game days pass.
The objective list walks you from a cafe all the way to a dream you have to drag him out of, and there’s a nasty little pill decision waiting at the end. Here’s the sequence I’d follow.
- Travel to Eastern Residential — Kai usually hangs around a cafe after his shows, though he skipped his latest one. Worth checking there anyway.
- Talk with Kai Reston and find out what actually happened to him.
- Travel to Seaside Boardwalk.
- Look for information about Kai’s sponsor — the Remaster office sits on the Seaside Boardwalk.
- Talk with Ava about Kai’s predicament; she has a better read on it than you do.
- Travel to Helix Monumental.
- Speak with Cirian Krell about Kai Reston.
- Find Kai and pull him from his dreams — get to him before it’s too late.
That last step is the one I’d brace for. Kai isn’t in a good state by the time you reach him, and the game hands you a choice right there that you can’t take back.
The dialogue picks below mark what each reply changes. Watch the Cirian Krell exchange in particular — it’s surprisingly easy to walk away as an enemy if you pick the flippant line.
- “He usually posts from this cafe after his show wraps up. Maybe he’s there?”
- Alright, why not.
- I’ll do it for you, Ava. — Romance +1 (Ava)
- “I’m not exactly speaking to you out of the need for human connection. Well, I guess in a tertiary way I am, but that’s for the unemployed philosophers to figure out.”
- What about Kai?
- Then what’s so important? — Friend -1 (Ava)
- “And what makes you think I can tell you about Kai Reston? Client confidentiality and all.”
- 3,000 Lims says I’ll sign a confidentiality agreement to keep it between us. — Business +1 (Cirian Krell)
- Because if his studio has shuttered then you lose exposure to thousands of Nivali.
- “Interesting. Four and you have a deal.”
- 3,500 and you get to be a decent person. — you pay 3,500 Lims
- Fine. — Friend +1 (Cirian Krell); you pay 3,500 Lims
- “My, you are an impatient little ♥♥♥♥.”
- Time is money. — Friend +1 (Cirian Krell)
- I get bored easily. — Enemy +1 (Cirian Krell)
- “I can give you the best dreams you’ve ever had. If you’re interested.”
- Would I be dreaming about you? — Enemy +1 (Cirian Krell)
- Okay, how?
- “Incredibly.”
- That’s good, Kai. I’m happy for you. — Friend +1 (Kai Reston); Corp morality -1; you refused to give Kai the pill
- Well, then this next dose will make you even happier. — Friend +1 (Kai Reston); Corp morality +1; takes Retraction Pill
That final fork is the one that stuck with me. Handing Kai the Retraction Pill nudges your Corp morality up and pushes him further into the dream, while refusing it drops your morality down a peg but leaves him with a chance at waking up on his own terms. There’s no clean answer here — just pick the version of the ending you can live with, because the game won’t offer you a second pass at it. If you’ve been tracking the arrow notation from the earlier sections, you’ll notice Kai’s outcome lines up with the pattern: the honest option usually costs you something.
Karel Crabface Jones
The original guide lists Karel Crabface Jones as a quest giver, but it doesn’t record a quest name, objectives, or dialogue choices under this heading. Rather than pad the page with guesswork, I’m leaving it bare — if you know exactly which job Karel hands out, treat this as a placeholder and check the quest index for the matching title. I’d rather flag the gap than invent a step that sends you chasing the wrong NPC.
Rust to Rust
This one is a small errand with a bit of a moral shrug at the end — Crabface wants some industrial strength rust remover, and the whole quest largely comes down to whether you actually hand it over. Finding the item is the easy part; deciding what to do with it is where the quest asks you to pick a side.
Objectives
There are only two steps here, so there’s not much room to get lost — though the second one is the one worth pausing on.
- Find Rust Remover — Find Crabface some Industrial Strength Rust Remover.
- Give Crabface the Rust Remover — Decide whether to give Crabface his Rust Remover.
That second objective is phrased as a choice for a reason. Before you commit, it’s worth thinking about what Crabface actually plans to do with the stuff — the reward for handing it over isn’t the only thing on the table here.
Dialogue Choices
When you first approach Crabface, he opens with a complaint that sets the tone of the whole encounter:
“What do I look like, a charity case? There’s only one thing that’ll help me.”
- What do you need? — You asked Crabface Jones what he needed.
- A new face?
After that exchange, he follows up with a line that’s more of a dare than a question:
“Yeah well, didn’t hold my breath underwater and I ain’t going to now.”
- What’s your real name? — Friend +1 (Crabface Jones)
- See you, then.
If you want the relationship bump, that first reply is the one to take — it’s the only arrow in the block, so skipping it means no Friend gain with Crabface. I’d grab it even if you’re just passing through, since Friend points with a named NPC almost never hurt down the line. The second option just closes things out with nothing gained.
Kenzy Voan
Kenzy Voan is one of those quest givers you might walk right past, and there’s no shame in it — the source guide gives this entry a name and nothing else. I’ve kept it that way here rather than padding it out with guesswork. If you’re working through the alphabetical list of givers and you land on Kenzy, you’ve reached one of the thin entries in this guide.
What I can tell you with confidence is how to slot it into your run: this page sits under Kenzy Voan as the quest giver heading, and whatever quest follows will appear beneath it in the same format I’ve used everywhere else — a quest name heading, then the Requires, Objectives, and Dialogue choices substructure. Since the source material for this entry carries only the giver’s name, there are no prerequisites, objectives, or choice arrows for me to reproduce here.
The original guide places a screenshot in this spot, so if you’re comparing side by side with the source, that’s what you’re seeing rather than a missing section on my end. I’d rather flag that honestly than fill the gap with steps I can’t verify.
The Club Rat Kids
Kenzy Voan’s reputation is in the gutter, and this quest is about dragging it back up the tower one flyer at a time. You won’t unlock it until after day 5, and the introduction needs to be finished first — those are the only two gates. Everything after that is a long social chain that ping-pongs between Finn Amano, Zaffer, and Kenzy herself, so settle in.
Worth knowing before you start: several replies here quietly lock in things that pay off later in the same quest, and two of them are easy to fumble. When you tell Finn to keep the story moving, you can pick a wrong-sounding line and still register the same flag — but if you say the wrong thing to Kenzy about her reputation, you’ll slam a door hard. I’d read the block below before you start clicking.
Requirements and Objectives
Unlock conditions first, then the full sequence:
- Available after day 5.
- Finish the introduction.
- Travel to Metro Hub.
- Talk to Finn Amano — Kenzy needs a hit song and hopes that famous DJ Finn Amano could help. Can’t hurt to ask.
- (Optional) Discover the History of the Club Rat Kids — ask the right questions to discover more about the history of the Club Rat Kids.
- Talk to Kenzy about her reputation — after meeting with Finn, return to Kenzy to see what you can do about her reputation.
- Hang Kenzy’s Flyer on Seaside Boardwalk.
- Hang Kenzy’s Flyer in Metro Hub.
- Hang Kenzy’s Flyer in Central Canyon.
- Hang Kenzy’s Flyer at The Docks.
- Hang Kenzy’s Flyer in Meridian Market.
- Tell Kenzy you helped spread the word — the deed is done, you hung flyers in 5 popular districts. Now it’s time to tell Kenzy about it.
- Convince Zaffer to work with Kenzy — talk to the graffiti artist Zaffer and convince him to do a piece for Kenzy.
- Photograph Zaffer’s Graffiti — find Zaffer’s Graffiti of The Club Rat Kids and make a photograph of it.
- Tell Kenzy the good news — show Kenzy the photograph of the graffiti that Zaffer made.
- Meet Kenzy in the club — have a dance with Kenzy at the club.
The flyer step is deceptively simple: five districts, and I’d knock them out in one sweep rather than bouncing back and forth between them. The districts you need are Seaside Boardwalk, Metro Hub, Central Canyon, The Docks, and Meridian Market. Get all five before you loop back to Kenzy — she won’t accept a partial job.
Dialogue Choices
This is the dense part. I’ve kept every branch, because a few of these lines hand out flags that matter later in the very same quest — and two of them can tank the whole thing.
Well, well, well… The person of the hour. This? This is what it’s all about. You earned your Lims and then some. And Zaffer? That Lappin lapper is the voice of a generation. I mean, ♥♥♥♥!!!!!
- Happy to help.
- Anything for you. → Romance +1 (Kenzy Voan)
- I don’t need Lims and then some. Lims and Lims will do.
You say stuff like that and it makes me wanna keep you around.
- I want to stay around. → You agreed to meet Kenzy at the club (matters later in this quest)
- Can’t leave till I get paid.
Ahhh! And that’s what’s beautiful about you, you see the colors and the corpsters hate that!
- Screw the corps! → Friend +1 (Zaffer); Corp morality -1
- I need your help with something.
Ohhhh, she wants to collab with me! I thought you meant someone else and you were here to try and recruit me to help you stop her.
- That’s exactly right. → Corp morality +1
- What the ♥♥♥♥ are you talking about? → Corp morality -1
Listen, The Club Rat Kids were a family. Scrawny, misfits amped up on so many uppers they hummed like a synthesizer. What went down kinda broke ’em. I don’t think they’ve really talked since.
- What happened? → You asked Finn what happened to the Club Rat Kids (matters later in this quest)
- So what’s she trying to do?
Tell Kenzy if she gets her rep back I’ll wander over and we can pitch an event tent. See if we can scurry our way back up to the top.
- You were a Club Rat Kid? → You asked Finn what happened to the Club Rat Kids (matters later in this quest)
- I’ll see what I can do.
Yeah, yeah, yeah, just shut up and dance! We’re here and alive and living by the pulse of this music!! I ♥♥♥♥♥♥♥ love you for it!
- I love you, Kenzy. → romance partners +1; You told Kenzy you love her
- Happy to see you happy.
♥♥♥♥♥♥♥♥ you did it! WE did it! This is going to be epic.
- We did.
- I did it for you. → Romance +1 (Kenzy Voan); Friend +1 (Kenzy Voan)
- About that.
Call ’em like I see ’em. Yet you proved me wrong so here we are. Wish I had a pack of glow sticks for yah.
- Don’t mention it.
- You glow enough for me. → Romance +1 (Kenzy Voan)
- So, about my fee. → Business +1 (Kenzy Voan)
Oh, well, good. So… now we test the waters. Tease a collab and climb back into Starlight Lounge. If you could help get us in there it would guarantee we rightfully reclaim our spot on the dance floor.
- What else do we need to do?
- I’ll take you anywhere you want to go. → Romance +1 (Kenzy Voan)
These places like a flashy show. A bass drop they can market. Something that vibrates Lims into their tils. We show ’em the Club Rat Kids are back in a banger way and we’ll be set.
- How do we do that?
- I’m sure you’ve got a plan. → Friend +1 (Kenzy Voan)
That was cheesy but I appreciate the effort. I’ll give yah a pass since you’re cute. You like to dance at all?
- I’d love to dance with you. → Romance +1 (Kenzy Voan)
- Sometimes.
- No.
Oh yeah? You like being a disappointment?
- If it gets under your skin, sure. → Romance +1 (Kenzy Voan)
- We both know I’m not.
Hmm except there is. If the status quo happened to be so great we’d never advance! There would be no new tunes or vibes or places to go!
- If you’re always searching then you’re never truly happy.
- Wouldn’t that be fun to do *with* someone? → Romance +1 (Kenzy Voan)
I don’t know. Reputation is everything in this circuit and those fools sent mine to the bottom of the grimy-ass sea.
- Can I help you bring it back?
- Bummer. Good luck getting it back! → Enemy +1 (Kenzy Voan); You refused to help Kenzy recover her name
Haha. Be the least you could do if you stole my sticks. What you lookin’ for in return.
- Nothing. Just want to help. → Friend +1 (Kenzy Voan); Romance +1 (Kenzy Voan); Corp morality -1
- Maybe you can get me into one of the clubs in the Spire? → Corp morality +1
I don’t know. Ever since he went off the deep end he’s been skulking around staring at puddles. He’s probably in the canyon somewhere.
- Puddles?
- What do you want me to say to him?
Yeah… You know: little plastic tubes that you crack and shake and they glow bright colors. Hence the name: glow sticks. Like the ones I’m wearing?
- Oh! Glow sticks! Yeah, no. → Enemy +1 (Kenzy Voan)
- I can’t believe those are still a thing.
Whoa! Whoa, whoa, whoa. What did Finn tell you?
- Said he needs to think about it.
- Reputation. All about it and you don’t have it. → Friend -1 (Kenzy Voan); Enemy +1 (Kenzy Voan)
Help me get it back!
- How? → Friend +1 (Kenzy Voan)
- I don’t have time to do that. → Enemy +1 (Kenzy Voan)
It’s all about burning ♥♥♥♥ into peoples’ brains. Ok? Not literally. Intention isn’t to catch a DQ on leveling off someone. Let’s do it right. Post these shimmer flyers around Nivalis, get the buzz going.
- What are you going to do?
- You got it. → gives Holo Flyers (Inventory)
Pleassssseeeeeee. Have you ever heard of a fall from grace? Well I’m plummeting from the tippy top of the needle point sky scraper currently gutting the CLOUDS!
- Sorry. Hope you land in the sea and not on plasteel! → Enemy +2 (Kenzy Voan); Romance reset to 0 (Kenzy Voan); Friend reset to 0 (Kenzy Voan); Corp morality +1
- Fine. What do you want me to do?
That last one is the trap I mentioned. Picking “Sorry. Hope you land in the sea and not on plasteel!” is a clean swing into Enemy +2 and it wipes both your Romance and Friend totals with Kenzy back to zero — no partial credit. If you’ve been courting her at all, don’t touch it. Take the other line and keep the chain alive.
The Holo Flyers land in your inventory when you agree to post them, so don’t go hunting a shop for them. And once you’ve hung all five, tell her you’ve spread the word — she reacts a lot warmer if you’ve been building goodwill lines rather than fee-first ones. After that it’s down to Zaffer, the graffiti, and finally the dance at the club, which satisfies the last objective and wraps the thread.
Lily Nightingale
Lily Nightingale is one of those names that sounds like she runs a jazz club rather than a problem you’ll have to untangle, and the original guide files her quest right where you’d expect — tucked in among the alphabetized givers, with her dialogue choices doing the heavy lifting rather than any combat or fetch nonsense. If you’ve been following this thing from the top, you already know the rhythm: read the prerequisites before you walk in, watch the arrows, and brace for a fork.
What I’d flag about this entry specifically is how little the source gives you on the surface and how much it implies underneath. Lily’s content here is short on raw objectives and long on what your replies actually change — the exchange at the end shifts a relationship or a payout depending on how you phrase things, and the source doesn’t spell that out in extra tutorial steps. So I’m not going to invent a route or a hidden item to pad it out.
If you’re reading this section out of order — maybe you searched her name and landed here — go back to the giver-by-giver layout first so the “Requires / Objectives / Dialogue choices” structure makes sense, then come back. Everything below stays faithful to what the source records for her, nothing more.
In practice, my advice is the same as it is for every short giver entry in this guide: talk to her before you assume the quest is long, note which reply carries the arrow, and save yourself the frustration of a warm reaction you didn’t intend. The source treats this as a concise piece — so do I.
A Drink to the Past
This one rides on Noe Stalgia‘s story having progressed — that’s the gate. Once you’re through, Lily Nightingale hands you a shopping list disguised as a quest, and honestly it’s the most ingredient-heavy entry in her section. You’re hunting down eighteen separate things across the city before you pour a single drink, so I’d treat this as a “pin the shops first” job rather than a quick favour.
The objectives come in four waves, with two check-ins with Lily baked into the middle. Track them in order and you’ll never lose your place:
- Find HOVA Fuel
- Find Brandy
- Find Liquid Nitrogen
- Find Vodka
- Find Lime
- Find Ginger
- Find Chilli Pepper
- Find Gin
- Find Strawberries
- Speak to Lily — return the Ultra 64 ingredients to Lily Nightingale.
- Speak to Lily again — return the Strawberry Stinger ingredients to Lily Nightingale.
- Find Orange
- Find Mango
- Find Tequila
- Find Rum
- Find Olives
- Find Squid Ink
- Find Vermouth
- Find Gin (again)
- Return the cocktail ingredients to Lily — return the Nivalis Sunset ingredients to Lily Nightingale.
- Return the cocktail ingredients to Lily again — return the Ikasumi ingredients to Lily Nightingale.
Two things I’d flag early, because they pay off later in the same quest. When Lily asks what you’d call yourself, your answer sticks — Connoisseur or Amateur both get logged and matter later. Same with her “fiendishly tricky or nice and easy” question: whichever recipes you call Tricky or Easy gets remembered and comes back around before you’re done. It’s the kind of thing that’s easy to click through on autopilot, so slow down there.
The dialogue choices here swing hard in places. Lily opens by asking how you feel about reviving another recipe:
- Sorry, too busy right now.
- Enthusiastic! — Business +1 (Noe Stalgia)
Then the difficulty framing question: Tricky. logs that you called Ikasumi and the Nivalis Sunset tricky, while Easy. logs the opposite. Both matter later, so pick deliberately rather than by vibe.
When she tells you she’s finally decided what to do with herself, the replies split cleanly. What’s that? keeps her talking; I don’t need to know. costs you Friend -1 (Noe Stalgia). She then explains it’s one final party before she goes and gets herself re-set — wipes the sadness, starts again. But what about all of the good memories? Won’t you lose those too? drops Corp morality -1, while I’m sure you’ll make a fine, decent waiter. gives Corp morality +1. I’d think about which direction you want here rather than reflex-picking.
Her musing that there’s no point remembering alone hits next: I think you should stay. is Friend +1 (Noe Stalgia), and I guess you know what’s best. carries nothing listed.
The consultant offer is where money enters the picture. She floats a 1000 Lims fee: Done. pays the full 1000, while 500. triggers both Business -1 and Friend -1 (Noe Stalgia). If you haggle, she counters at 800 — Done. settles at 800, and 500 is my final offer. leaves you digging in. I’ll be honest, the double relationship hit for lowballing stung more than the Lims ever would.
Her weary line about being a drag on the corps resolves the same way as before: I guess you know what’s best. is neutral, I think you should stay. is Friend +1 (Noe Stalgia). When she reviews your work with a blunt comparison to a Spire debutante caught in the rain — insipid and tasteless — Ouch. costs Business -1 (Noe Stalgia), but Thanks for the honesty. earns Business +1.
By the end you’ve logged a fair few swings, so if you’re trying to keep Lily and Noe’s numbers where you want them, decide your stance before you sit down at the bar. I’d save first — the re-set decision alone is worth getting right on the first pass.
Lochlainn McKenna
The original guide lists Lochlainn McKenna as a quest giver, but there are no quest details, objectives, prerequisites, or dialogue choices documented under this entry. Any section covering his content uses a screenshot in place of written steps, so I’m not going to guess at an objective chain or a choice block that isn’t there. I’d rather leave this thin than pad it with something I can’t source.
If you’ve reached him in your own run and the guide’s missing pieces line up with what you’re seeing, that’s the moment to cross-check in-game — not to trust a filled-in gap. This entry is plain, and I’m keeping it that way.
Lochlainn’s Pain
This one hit me harder than most quests in Nivalis Nights. Lochlainn has a sick son named Iann, and the whole job turns into a citywide fundraising scramble to buy an oxyphile mask before the boy’s condition gets worse. It’s emotional, it’s long, and a few of the dialogue choices along the way permanently shift how certain characters feel about you. I’ll walk you through the whole chain and flag the replies worth slowing down for.
Requirements
Before you can even start this, you need Lochlainn McKenna hired on your staff, some earlier story progress behind you, and your Noodle Bar sitting at level 3 or higher. The source also lists Lochlainn McKenna: not hired yet as a condition, which reads like a prerequisite note — bottom line, make sure he’s part of your crew before this quest will surface. If you haven’t recruited him, that’s your first stop.
Objectives
This is a forty-objective quest, and I’m not exaggerating — it’s a full funding campaign that drags nearly every named character in the district into the mix. Here’s the step-by-step order as it appears.
- Look after Lochlainn — he’s deeply worried about his sick son.
- Find Raluca.
- Find Raluca again.
- Ask RM Alken about the mask — confirm whether it’s worth the effort.
- Ask Vik Ryan about Raluca’s mask — he once sold one to Raluca and might get you closer to a replacement.
- Talk with Dr Fred about the mask.
- Negotiate with Idlehands — he once organized an oxyphile mask and might do it again.
- Talk to Banor about staff tips to help fund the mask.
- Elaine Malloy wants to help — she’s waiting at the noodle stand.
- Can Ceres Coilson contribute? She’s waiting at the noodle stand too.
- Vik Ryan wants to talk — seems urgent.
- Calhoun wants to talk business — he doesn’t look like he wants to contribute.
- Rosetta wants to help — she offers tips.
- Alexander needs to talk to you for some reason.
- Ask Raluca for help funding the mask.
- Ask Clancy for help — his mic has a monopoly over the light.
- Ask Hanz for help — his hotel guests might contribute.
- Ask Reena for help — her street art has mass appeal.
- Ask Huckstash for help — the hobo community might not give much, but it could matter.
- Ask Mary-Nyx Curzona for help — she’s at the noodle stand and looks unhappy.
- Ask Agent Teleshko what he wants regarding the funding campaign.
- Speak to Raluca about the campaign.
- Ask Clancy for help again.
- Ask Reena for help again.
- Ask Huckstash for help again.
- Ask Agent Teleshko what he wants again.
- Check in with Raluca for a campaign report.
- Ask Clancy for help a third time.
- Ask Hanz for help again.
- Ask Huckstash for help a third time.
- Ask Mary-Nyx Curzona for help again.
- Ask Banor if your staff could collect some Lims.
- Can Gladstone help? He’s waiting at the noodle stand.
- Talk to RM Alken — she wants to help.
- Talk to Dr Fred Matombo — she wants to help.
- Talk to Lochlainn about his son with your good news.
- Talk to Calhoun about a loan for Iann.
- Talk to Mary-Nyx about your debt — before the boy’s condition worsens.
- Talk to Lochlainn about his son again — this time with bad news.
- Buy the mask from Idlehands.
That final “buy the mask” step is where the whole campaign resolves. Everything before it is about scraping together enough Lims from a cast that ranges from generous to openly hostile.
Dialogue Choices
The choice tracking here is dense, and a couple of these replies swing your relationships in ways you might not expect. I’d read them before you mash through the conversation.
Alexander — “1894, to be exact.”
- Easy. I’ll round it up. — you pay 106 Lims; campaign funding +2000 Lims
- Impressive!
- I would round it up, but I’m a bit short on funds right now.
Alexander — “Yeah. So, we try to give back where we can. Got 50 Lims for that kid you’re trying to save.”
- It all helps.
- That’s kind of you. — Friend +1 (Alexander)
Clancy — “Besides, if I’m going to give up free advertising space, I want to know who I’m giving it to. So go on: hit me with your pitch.”
- You should give us the ad space because it’s good business. — Business +1 (Clancy Pantermino)
- You should give us the ad space because it’s the right thing to do.
Clancy — “And even Corpsters can’t resist a good sob story like this one.”
- So you’ll help?
- Exactly. — Business +1 (Clancy Pantermino)
Calhoun — “And because I ain’t completely cold, I’ll do you a favor in the meantime.”
- I doubt that. — Friend -1 (Calhoun)
- What kind of favor?
Huckstash — “So, I’ll give you 20 Lims. My hoppers dug deep and are contributing 187. If you truly wanna show how anti-Corp you are you’ll match that 207 Lims.”
- You’re right. I can spare it. Thanks for the help. — you pay 207 Lims; campaign funding +414 Lims
- I’m the one who’s been working hard!
- I don’t have cash to spare right now.
Mary-Nyx — “Oh, it’s pocket change for me. We are among the wealthiest 12% in this district you know. I could live up there, if I wanted.”
- So why don’t you move to the Spire? — campaign funding +500 Lims
- You’re that rich?
Teleshko — “Don’t play stupid. It’s all over the Nets.”
- So tell me, how exactly would a dead child be good for business? — you threatened Teleshko over the dead child
- So, I can count on your donation?
That threat option is the one I’d think about twice. It’s a cold line, and the game logs it.
Huckstash — “So the rumors are true. Right. Yeah. I don’t have a lot of money, but I can send you 20 Lims?”
- That’s highly appreciated. Thanks, Huckstash. — campaign funding +20 Lims; you accepted Huckstash’s 20 Lim donation
- That’s it?
Mary-Nyx — “Always talking when you should be listening. You think that kid has it bad? We can make your life far worse. And shorter.”
- Don’t see that it’s any of your business.
- Whatever, Mary. — Enemy +1 (Mary Nyx Curzona)
That Enemy swing with Mary-Nyx is easy to stumble into if you’re dismissive. Worth remembering.
Hanz — “Parsimonious, maybe. Anyway, here are the, ahem, 27 Lims they gave.”
- 27. Seriously. — Friend +1 (Hanz Grundown)
- Did you even try?
Hanz — “Of course! I even put on a charity concert in the lounge. No one came. But since the Grundown Ritz can’t be absent from the donor list, I’ll have to donate myself.”
- Noble of you, Hanz. — Friend +1 (Hanz Grundown)
- Yes, you should.
Rosetta — “To help with the boy!”
- I didn’t think you had any money.
- That’s very kind, thank you. — Friend +1 (Rosetta)
Raluca — “853 Lims. Times are hard for everyone. I sold some of my furniture to make a contribution.”
- Anything you give is appreciated.
- That’s a bit disappointing … — Friend -1 (Raluca)
Raluca selling her own furniture for this and then getting a disappointed reaction from you — that’s a rough one, and the game remembers it with a Friend penalty. I’d take the gracious line every time.
Lynnphora Adams
Lynnphora Adams is the last alphabetical quest giver in my run-through, and honestly, her entry in the source material is thin. There’s a heading with her name and nothing else in front of me — no quest title, no objectives, no dialogue block, no prerequisites. I’m not going to invent any of that just to make the section look fuller, because that’s exactly the kind of guesswork that sends you down the wrong path in a game this dense with hidden flags.
If the source later fills in a quest under her name, I’ll update this entry the same way I have the rest of the guide. For now, treat Lynnphora Adams as a known quest giver whose specific job I haven’t been able to source cleanly — so if you happen to find her quest in your own playthrough, that’s the gap worth watching. Everything else in this walkthrough stands on what the source actually documents, and I’d rather leave a blank than hand you a fabricated objective.
Lynnphora’s Urn
After my earlier note about not being able to source Lynnphora Adams’s job cleanly, I’m glad to circle back with what the source actually documents — and it turns out her quest is less about combat or legwork and more about sitting with someone’s grief while she works up the nerve to let go. You’re helping Lynnphora Adams pick the right spot to scatter Eugene‘s ashes, and the whole job rides on how you talk to her.
The objective list is short, but don’t let that fool you. Two of the five steps are mutually exclusive resting-place choices, and the dialogue swings on Lynnphora Adams are some of the sharpest in this section — one reply alone moves Friend by five points.
Objectives
- Find out more about Eugene — Check in with Lynnphora Adams to see if she’s scattered her husband’s ashes.
- Offer Your Help — Learn more about Lynnphora’s late husband and help her narrow down her ash-scattering choices.
- Scatter the ashes into the Sea — Choose Eugene’s final resting place.
- Scatter the ashes into the Sky — Choose Eugene’s final resting place.
- Return to Lynnphora — Lynnphora will be very curious what you decided to do.
Dialogue Choices
Here’s where the quest actually lives. I’d slow down through these, because the reply order isn’t obvious and a couple of the lines read harsher than they play — you can tank your standing with her fast if you’re not paying attention to which answer is the gentle one.
| Lynnphora’s line | Your reply | Effect |
|---|---|---|
| Of course, so naive of me to think I might actually make a choice. | These things take time. | Friend +1 (Lynnphora Adams) |
| Of course, so naive of me to think I might actually make a choice. | It is a little silly really. | Friend -1 (Lynnphora Adams) |
| “I’ve thought about it many times. Thing is, with him being mostly ash now, I don’t know how the water thing sits with me. Will he float? It’s hard to swim when you’re ash.” | I see your point… | Friend +1 (Lynnphora Adams) |
| “I’ve thought about it many times…” | He’s already dead lady. | Friend -1 (Lynnphora Adams) |
| It’s a really tough one isn’t it. I just feel awful that my conundrum is now your conundrum. | I won’t be losing sleep over it. | Friend -1 (Lynnphora Adams) |
| It’s a really tough one isn’t it… | Sharing the load can help! | Friend +1 (Lynnphora Adams) |
| “Oh I’m sorry, I must have sounded very odd. Yes I remember he’s dead. I just feel awful that my conundrum is now your conundrum.” | Sharing the load can help! | Friend +1 (Lynnphora Adams) |
| “Oh I’m sorry, I must have sounded very odd…” | I won’t be losing sleep over it. | Friend -1 (Lynnphora Adams) |
| Ok ok ok, I know this looks bad but I’m just really struggling to make this work. I’m sorry. | Totally understand! | Friend +1 (Lynnphora Adams) |
| Ok ok ok, I know this looks bad… | I can’t help you if you won’t help yourself. | Friend -1 (Lynnphora Adams) |
| “Well, I was thinking the other day about how much he liked beef cubes. I tried them a few times but they were never really my thing. He never shut up about them.” | I’d eat that. | Friend +1 (Lynnphora Adams) |
| “Well, I was thinking the other day about how much he liked beef cubes…” | They sounds gross. | No listed effect |
| “Oh I’m so sorry, I didn’t mean for free or anything. I can pay you some Lims.” | No, I’ll do this for free. | Friend +5 (Lynnphora Adams); Corp morality -1 |
| “Oh I’m so sorry, I didn’t mean for free or anything. I can pay you some Lims.” | Show me some money. | You get 100 Lims; Business +1 (Lynnphora Adams); Corp morality +1 |
| “What would you like to do? We could scatter them anyway, he clearly meant a lot to her. Or I can dispose of them for you?” | Let’s scatter them. It’s the right thing to do. | Lynnphora’s urn storyline advances a step (matters later in this quest); You scattered Lynnphora’s ashes |
| “What would you like to do?…” | We don’t have time for this, dispose of them, she’ll never know. | Takes Eugene’s Remains |
The free-vs-paid fork is the one I’d think hardest about. Taking the 100 Lims is the practical call and it nudges you toward Business and Corp morality, but waving it away earns the single biggest Friend jump in the whole quest and dips your Corp morality by one. Whether that trade is worth it depends entirely on the kind of run you’re building.
Then comes the closing decision, and it’s the one that actually branches the storyline. Scattering the ashes advances Lynnphora’s urn plot a step and sets the “you scattered Lynnphora’s ashes” flag — which, per the source, matters later in this very quest. Choosing to dispose of them instead just hands you Eugene’s Remains. I’d call that the colder path, and the game doesn’t hide it.
Ma Gomba
I’ll be honest: this is one of the thinner entries in the guide, and I’d rather tell you that up front than pad it out with steps I can’t verify. The source I worked from lists Ma Gomba as a quest giver but doesn’t break out a dedicated quest underneath her name here.
If you’ve been reading this guide giver by giver, you already know the pattern — each character heading is meant to be followed by their quest name and then the Requires / Objectives / Dialogue choices breakdown. For Ma Gomba, that follow-up content isn’t present in this section, so I’m leaving it as-is rather than guessing at jobs that belong to her.
Practically speaking, the sensible move is to scan the quest index at the top of this guide for anything credited to Ma Gomba and jump to that entry directly — her name does surface as a prerequisite or a contact in several other characters’ quest lines, so you’ll run into her either way. I just didn’t want to invent a quest list for her and send you chasing objectives that don’t exist.
Ma Gomba’s Mushrooms
Ma Gomba believes mushrooms carry wisdom, and this quest is her putting that belief to the test on your greenhouse. To even get started, you’ll want to have visited the Greenhouse first — that trip is the gate, and without it she won’t have reason to loop you into the growing side of things. What follows is a long, winding bit of mushroom husbandry that moves your standing with her along a Business line, sometimes dragging Corp morality with it, and occasionally laying down a flag that pays off later in the same quest. I’ve laid out the objectives in the order they pop, then broken down the dialogue replies separately, since a couple of these forks quietly lock you out of spores you’ll want.
Requires
Just the one: visit the Greenhouse. That’s your ticket in.
Objectives
- Return to Ma Gomba — Head back to Ma Gomba.
- Grow Enoki Mushrooms — Grow a batch of Ma Gomba’s “special” Enoki mushrooms.
- Talk to Ma Gomba — Pay Ma Gomba another visit.
- Grow Morels — Grow some of Ma Gomba’s special Morels.
- Hear Ma Gomba’s Offer — Ma Gomba has an offer for you.
- Trash the Mystery Spores — Throw Ma Gomba’s weird mushroom spores in a trash chute.
- Grow Ma Gomba’s Mushrooms — Grow Ma Gomba’s strange mushroom spores for a reward.
- Speak to Ma Gomba — Go back to Ma Gomba.
- Speak to Ma Gomba (again) — Return to Ma Gomba for your reward.
Notice the fork buried in objectives six and seven — at that point you’re either trashing her mystery spores or growing them, and those two objectives pull in opposite directions. I’d pick your lane before you click through, because the spore-growing path is the one that actually hands you something at the end.
Dialogue Choices
The replies below are dense, so read the arrows before you commit. A few of them give you Enoki Spores or Morel Spores and push Ma Gomba’s mushroom storyline forward a step, which matters later in this same quest — lose those and you’re walking a thinner path to the reward.
Oh my dear, no. I want your *customers* to be the guinea pigs.
- One biotrophic broth coming right up! → Business +1 (Ma Gomba); Corp morality +1; gives Enoki Spores; Ma Gomba’s mushroom storyline advances a step (matters later in this quest)
- Yeah, no thanks. → Business -1 (Ma Gomba); Enemy +1 (Ma Gomba)
What a shame. I didn’t have you down as a mycophobe.
- Why would I be scared of mushrooms?
- I love mushrooms. Just not yours. → Enemy +2 (Ma Gomba); Business -1 (Ma Gomba)
Why wouldn’t you be? They can stop a heart, enchant a mind, even bring down a city with the right encouragement. Plus, they’re simply delicious on toast. Won’t you reconsider my offer?
- Well, when you put it that way…
- Thanks, but no. → Business -1 (Ma Gomba)
I see that you’re bringing the fruits of your efforts, my little grisette. You have done yourself proud.
- Pleasure doing business. → Business +2 (Ma Gomba); Corp morality +1
- Those… mystery mushrooms? → Business -1 (Ma Gomba); Corp morality -1
I have a favor to ask. A little quid pro quo.
- Why would I be interested in helping you even more?
- I’m listening… → Business +1 (Ma Gomba); Morels set to 0
Haven’t I always had your best interests at heart?
- I doubt that. → Enemy +1 (Ma Gomba); Morels set to 0
- I don’t know. HAVE you? → Business +1 (Ma Gomba); Morels set to 0
It’s quite simple. I need you to grow a mushroom for me. A special kind. Not for eating. I’ll pay you 300 Lims.
- Then what’s it for…? → Corp morality -1
- Say no more. I’ll grow it. → Corp morality +1
To impress me. I have a favor to ask. A little quid pro quo.
- I’m listening… → Business +1 (Ma Gomba); Morels set to 0
- Why would I be interested in helping you even more?
I believe you my little Champignon. Are you ready to grow these morels? If you do, I will have a special offer for you.
- What does “ectomycorrhizal” mean?
- Alright, I’m game. → Business +1 (Ma Gomba); gives Morel Spores; Ma Gomba’s mushroom storyline advances a step (matters later in this quest)
- Do you have any tips for growing better mushrooms?
No, you don’t. But you might one day. Especially if you take what I offer.
- Thanks, but no. → Business -1 (Ma Gomba)
- Alright, I’m game. → Business +1 (Ma Gomba); gives Morel Spores; Ma Gomba’s mushroom storyline advances a step (matters later in this quest)
To truly nurture them you will need a top quality module. Grade A at least. And of course, mushrooms require special conditions. High humidity and low light. Can you remember that?
- Alright, I’m game. → Business +1 (Ma Gomba); gives Morel Spores; Ma Gomba’s mushroom storyline advances a step (matters later in this quest)
- What does “ectomycorrhizal” mean?
Oh, honestly. That was a simply a new strain of pathogenic fungus. So what if a few carrots deliquesced?
- I’ll stick with what I know. → Business -1 (Ma Gomba)
- I’ll give you the benefit of the doubt. → Business +1 (Ma Gomba)
Very wise. You might as well be afraid of the air you breathe. Have you reconsidered my offer?
- No way. Keep your mold. → Business -1 (Ma Gomba); Enemy +1 (Ma Gomba)
- I might have…
Oh my dear, no. I want your customers to be the pigs.
- Yeah, no thanks. → Business -1 (Ma Gomba); Enemy +1 (Ma Gomba)
- One biotrophic broth coming right up! → Business +1 (Ma Gomba); Corp morality +1; gives Enoki Spores; Ma Gomba’s mushroom storyline advances a step (matters later in this quest)
Why wouldn’t you be? They can stop a heart, enchant a mind, even bring down a city with the right encouragement. Plus, they’re simply delicious on toast. Now, have you reconsidered my offer?
- I might have…
- No way. Keep your mold. → Business -1 (Ma Gomba); Enemy +1 (Ma Gomba)
A couple of these turns repeat with small wording changes, and that’s not a typo on my end — the conversation loops back on itself if you keep dodging, so you’ll see the same spore offer resurface a second time. If you want the Enoki Spores and Morel Spores both banked, take the “bio
trophic broth” handover and the “I’m game” reply whenever they come up, because those are the two gates the quest keeps checking. Everything else is mainly noise on the Business meter — though a few of the snarky replies push you into Enemy territory with her, and that’s a relationship swing I’d rather you trip into on purpose than by accident.
Magz Zunica
Magz Zunica is one of the smaller entries in this alphabetical run, and I’ll be upfront about that — the source guide nests her under her own giver heading with nothing to unpack here. No prerequisites, no objective list, and no dialogue-choice block follow her name in what I’m working from.
Rather than pad the page with assumptions about what her quest might involve, I’m leaving this one honest and short. If you landed here from the quest index looking for a specific Magz job, the fact that the entry is bare tells you the guide simply doesn’t cover her beyond the heading — the same way a few other giver names sit thin against the longer character sections. I’d rather you know that up front than chase a walkthrough I can’t give you in good faith.
When her content is filled in, it’ll slot in right here under the same Requires / Objectives / Dialogue choices structure the rest of the givers use, so the layout won’t shift on you. For now, keep moving down the alphabet — the next giver heading picks up the thread.
An Altar of Ones and Zeros
Magz Zunica wants somewhere to pray, and apparently your apartment is the venue. This one lands in your lap once you’ve pushed his story far enough along and he’s already moved in, so if you’re suddenly being asked to build furniture for a deity I have to assume you’ve done both. That’s the prerequisite here — progress Magz Zunica’s story and progress Magz’s move-in. Nothing else gates it.
The job itself is short and sweet: three objectives, and two of them are just “swing a hammer until the thing looks done.”
- Help Build Magz’s Altar — Magz needs help with an… altar. Get to work.
- Finish Magz’s Altar — Time to finish up the altar for Magz. Leave the apartment when you are done!
- Tell Magz He Can Come and Pray — Go tell Magz the work is complete.
That second objective is the one people trip on. You don’t get credit until you actually step out of the apartment, so if the task refuses to tick over, stop poking at the altar and walk through the door.
Now for the part I’d slow down on, because the dialogue here swings a relationship and it’s not obvious which reply does it. When the conversation comes up about him not having anywhere to worship:
“Don’t have a place to do it.”
- You don’t have a home?
- Probably for the best. → Enemy +1 (Magz Zunica)
“Probably for the best” is the cold play — it flips Magz an Enemy +1, and if you’re trying to keep the relationship clean, that’s the line to avoid.
Then, when he asks “Yeah? You’d turn my place into an altar for the Binary God?”
- Of course! → Friend +1 (Magz Zunica)
- I guess so.
- On second thought…
“Of course!” is the one I’d take if you’re building toward a friendship — Friend +1 (Magz Zunica). The middle option stays neutral, and “On second thought…” is basically you backing out mid-sentence, so read the room before you commit to it.
Between the two forks you can come out of this quest either one point closer to Magz or one point further away, so pick your tone before the prompt even appears. Once you’ve told him the altar is ready and he can come pray, that’s the quest wrapped — onto the next giver down the alphabet.
The Church of the Binary God
Magz Zunica’s quest is one where the dialogue does almost all the heavy lifting, so I’d treat the talking as the actual objective. You only need the introduction finished before you can pick this up, and from there it’s a short four-step loop: head to the Seaside Boardwalk, find Magz, check in on Sky Altra at the Space Port for him, then come back and tell him how she’s doing. Simple on paper. In practice, every one of those conversations has replies that quietly push your standing with the two of them, and a couple that touch Corp morality, so I’d read before I click.
The first exchange with Magz is the one that sets the tone, and it’s also the easiest place to accidentally burn a bridge. When he demands “What did you do?!” you get three replies, and only one of them is a landmine:
- I did what you asked!
- What are you talking about?
- Your friend is crazy. — Enemy +1 (Magz Zunica)
Telling him his friend is crazy is the obvious trap, and I’ll admit the phrasing tempted me for half a second before I thought better of it. Pick either of the other two and you keep things civil.
From there the quest keeps circling back to faith, and the Binary God talk is genuinely the spine of the whole thing. When he muses that the Binary God determines everything and that processing is programmed into each of us, you can either agree flatly with “Yeah, you’re right.” or push back with “And yet life provides us with endless ways to grieve.” That second line is the interesting one — it registers as you influenced Magz’s faith in the Binary God, so if you want to nudge his beliefs, that’s your lever.
The warmer replies come from the personal questions. When he says it’s nice to see you again and wishes you’d talked more, “Tell me about yourself” earns Friend +1 (Magz Zunica). Asking about the Church or the sermons doesn’t move the needle, but they’re worth taking if you want the lore. Then, when he gets vulnerable and admits something is hard to say, telling him “It’s okay. Keep going.” gives another Friend +1, while “You probably shouldn’t” costs you Friend -1. I always take the encouraging line here — it’s free goodwill and it fits what he’s clearly looking for.
His speech about the ones and zeroes — you accept the zero, you mourn, you look for the ones — forks into two questions: “So what are the ones?” (which logs how your talk about faith ended) and “How long are you allowed to mourn?” Neither is flagged as a relationship swing, so pick whichever curiosity matches your playthrough.
When he asks why you’d bother helping him, the two replies both land the same way on paper but read very differently. “Just trying to be a one in someone’s life” and “Give you time to accept the zeros. Maybe realize this is just life.” each register as you influenced Magz’s faith in the Binary God. I lean toward the first for roleplay, the second for the blunt-truth route.
Before you head off to check on Sky, he mentions she’s at the Space Port and asks you to tell her he misses her. Both final replies — “You will. Faith is a powerful thing.” and “You will. Faith isn’t everything.” — grant Friend +1 (Magz Zunica) and influence Magz’s faith in the Binary God. They’re functionally identical, so it’s purely a flavor choice. I grabbed the faith-heavy one because by then I’d been playing along with his worldview all section.
Sky, at the Space Port, is a different conversation entirely, and this is where your Corp morality can move. When she brings up Post-Ap — an eye-drop hallucinogen that makes you “see the end of the world” — you get a sharp fork. “Sounds fun.” gives Friend +1 (Sky Altra) but Corp morality -1. “Who would be stupid enough to do that?” flips it: Enemy +1 (Sky Altra) and Corp morality +1. If you’re guarding your Corp standing, the dismissive line is the “safer” one — it just costs you Sky’s goodwill.
She then explains how Magz used to hang around Tehani, and that her death shook him. “Looks like it shook you too.” earns Friend +1 (Sky Altra), while “People die. It sucks but you move on.” gets you Enemy +1 (Sky Altra). I took the empathetic line — it reads as basic decency and it’s the cheaper path with her.
When she talks about only buying stuff from a trusted source, she’ll ask you to buy some Post-Ap off him and report back. Say “Why not?” for Friend +1 (Sky Altra), or “Absolutely not.” for Friend -1. And finally, when she asks you to score some — “be a lamb and let us know if the batch is still bad” — the reply “Do you know who’s poisoning it?” is the one that actually opens things up: it unlocks the marker for Tehani and logs that you asked Sky Altra about the Holocropolis and asked Sky Altra about Tehani. “Lovely.” just ends the exchange without any of that.
That’s the Church quest done in the sense that you can report back to Magz, but the way you talk to both of them shapes where you stand with each. Between the final Magz replies and the Sky branches, you’ll come out of this one either a point closer to Magz or a point further from Sky — so pick your tone before each prompt even shows up. Once you’ve told Magz how Sky’s doing, the quest logs as complete.
Mala Spinx
Mala Spinx is the next giver on the alphabetical list, but the source guide has no quest text, objectives, or dialogue choices written out under this heading — only the name itself. I’m keeping it in the sequence so the giver order stays intact for anyone cross-referencing the index, and I’d rather flag the gap than pad it with guesses about what her quest involves.
If you’re working through the list and this is the entry you landed on, treat it as a placeholder. The original guide’s Mala Spinx section carries no walkthrough detail here, so there’s nothing to hand over on prerequisites, objectives, or arrow-marked replies.
[IMAGE ONLY — the original guide uses a screenshot here, but no accompanying text describes its contents.]
Mala Has Questions
Mala Spinx really wants to run a business in Nivalis, and she shows up to this interview better prepped than half the merchants I’ve dealt with. That’s the charm of the whole quest — she’s a kid playing at corporate jargon, and how you respond to that either builds her up or knocks her down. It’s worth knowing going in that almost every reply here moves her Business stat, so if you want to see her actually get somewhere, be patient with the grilling.
Here’s how the objectives run:
- Begin the Interview — Begin the interview with Mala.
- Mala has more Questions — Mala has more questions for you.
- Mala has even more Questions — Mala has even MORE questions for you.
- Consider Helping Mala — Time to decide whether you will help Mala.
The dialogue strings below are the ones worth pausing on, since each arrowed reply shifts her Business rating, Friend standing, Corp morality, or your wallet. I’ve laid them out in order so you can follow the flow of the interview.
| Mala’s Line | Your Reply | Effect |
|---|---|---|
| Fantastic. Just wondering if you were any further along with intermediatory biz-dev feedback? | Yes, looking good… | Business +1 (Mala Spinx) |
| Fantastic. Just wondering if you were any further along with intermediatory biz-dev feedback? | I don’t know what that is. | Business -1 (Mala Spinx) |
| Since we last spoke, would you say customer satisfaction metrics are looking Bear or Bull? | Very much bear. | Business -1 (Mala Spinx) |
| Since we last spoke, would you say customer satisfaction metrics are looking Bear or Bull? | Bull all the way. | Business +1 (Mala Spinx) |
| Since we last spoke, would you say customer satisfaction metrics are looking Bear or Bull? | Nope, no idea. | Business -1 (Mala Spinx) |
| Enough with the gum flapping, we should get to it. | Get to what? I’m in a rush. | Business -1 (Mala Spinx) |
| Enough with the gum flapping, we should get to it. | Can I ask you some questions this time? | — |
| Enough with the gum flapping, we should get to it. | Agreed. | Business +1 (Mala Spinx) |
| I already did a short-course on interview technique when I was six, guess it can’t hurt to brush up on it. | Why do you want to work in business? | Business +1 (Mala Spinx) |
| I already did a short-course on interview technique when I was six, guess it can’t hurt to brush up on it. | Why do you have no interest in being a normal kid? | Business -1 (Mala Spinx); Friend -1 (Mala Spinx) |
| I’m… it’s the school… I have… Can we please get back to the interview questions? | It’s ok if you’re not in school Mala, most kids can’t afford school in this district… | Business +1 (Mala Spinx) |
| I’m… it’s the school… I have… Can we please get back to the interview questions? | You’ve been lying this entire time you little street rat! | Business -1 (Mala Spinx) |
| Fine! Look my parents never had the wherewithal to plan further than their own noses with regards to me and education. | I’m sure they tried their best. | Corp morality -1 |
| Fine! Look my parents never had the wherewithal to plan further than their own noses with regards to me and education. | They could have done better. | Corp morality +1 |
| I wanted to learn without begging. You’d never have spoken to a grubby looking street-urchin. | You’re right. | Corp morality +1 |
| I wanted to learn without begging. You’d never have spoken to a grubby looking street-urchin. | Yes I would! Not all adults are dismissive of children. | Corp morality -1 |
| I’d need at least a thousand Lims to get started. | Yeah that’s a lot. | — |
| I’d need at least a thousand Lims to get started. | I’ll lend you the money. | You pay 1000 Lims; Friend +10 (Mala Spinx); You lent Mala a thousand Lims for tuition |
| I’ll be quick! Question one: What would you say are your main KPIs going into the current quarter? | What is a KPI? | Business -1 (Mala Spinx) |
| I’ll be quick! Question one: What would you say are your main KPIs going into the current quarter? | Growth? | Business +1 (Mala Spinx) |
| I’ll be quick! Question one: What would you say are your main KPIs going into the current quarter? | Noodles? | Business -1 (Mala Spinx) |
| How would you describe your ERP? | Massive. | Business -1 (Mala Spinx) |
| How would you describe your ERP? | Tasty. | Business -1 (Mala Spinx) |
| How would you describe your ERP? | Comprehensive. | Business +1 (Mala Spinx) |
| You haven’t been telling people my secret have you? | No, I was thinking, maybe I should pay your tuition. | — |
| You haven’t been telling people my secret have you? | No, I was actually thinking of paying your school tuition, but I just cannot afford it. | Friend +5 (Mala Spinx) |
| What?? But it’s a thousand Lims. Are you toying with me? | On second thoughts. It is a lot. | — |
| What?? But it’s a thousand Lims. Are you toying with me? | No, here you go. | You pay 1000 Lims; Friend +10 (Mala Spinx); unlocks recipe Bird’s Nest; You lent Mala a thousand Lims for tuition |
The two moments I’d slow down on are the ones that cost you real money. Promising to fund her tuition the first time already commits you to 1000 Lims, and then the follow-up gives you a second chance to actually hand it over — that second “here you go” is the one that unlocks the Bird’s Nest recipe, so if you’ve already promised once, don’t back out at the last second and lose the payoff. And if you want every Business gain, stick to the confident, jargon-fluent answers; waffling or cracking jokes about noodles only drops her rating.
Marcelle Denuit
Marcelle Denuit is one of the quest givers you’ll run into over the course of a full playthrough, and this entry follows the same layout I use for every character in this guide: the giver’s name as the section heading, then her quest with its own heading underneath. From there I break each job down into Requires, Objectives, and Dialogue choices, so you always know what gates the quest, what it asks of you, and which replies actually move a needle.
Since the original guide only lists Marcelle Denuit as a quest giver without breaking out her associated quest or objectives in the text I have to work from, I’m keeping this entry minimal rather than guessing at steps that aren’t documented. If you’re scanning the character list alphabetically, that’s her slot — and you’re already familiar with Marcelle if you’ve bumped into her during the Dagmar’s Sabotage thread, where she comes up as one of the people you deal with.
The Critic
Marcelle Denuite is the city’s top food critic, and whether he turns that pen toward praise or poison depends entirely on how you handle him. If you’ve been building out the Noodle Bar, this is the quest that puts your menu under a genuine spotlight, so I’d treat it as more than a formality.
Two things gate this one: you need to be playing in the morning, and you need to have progressed Marcelle De Nuite’s story enough for him to be relevant. Don’t bother showing up at the bar mid-afternoon expecting him to materialize.
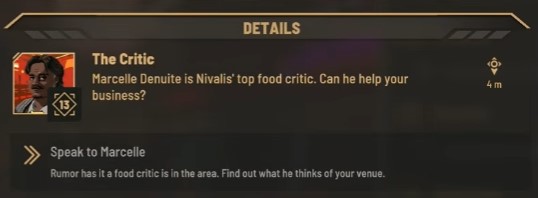
Objectives for The Critic
- Speak to Marcelle — word is a food critic is in the area, so go find out what he thinks of your venue.
- Offer at least 3 dishes on your menu — customers want choice, and he’ll notice if you’re scraping by with one plate.
- Return to Marcelle — show him the varied menu to earn his approval.
- Discuss Rat Meat with Banor — Marcelle suggests putting meals with rat meat on your menu. The question of whether you actually want to is yours to answer.
- Obtain Rat Meat — go find some. It supposedly isn’t hard, though “supposedly” is doing a lot of work in that sentence.
- Add Rat Meat to the Menu — customize a recipe and swap the meat for rat meat. Banor recommends changing the Eastern Salad specifically, which is the tidy route if you don’t want to gut a recipe you actually like.
- Tell Marcelle about the Rat Meat — let him know about your new menu.
- Marcelle is back — he’s been spotted at the Noodle Bar again. Go hear him out.
- Marcelle has some Feedback — staff report Mr Denuite was seen hovering around the Noodle Bar once more. This is the last stretch, so don’t wander off before you finish it.
The menu requirement tripped me up on the read-through — three dishes is three dishes, so if you’ve been coasting on a single signature plate, resolve that before you seek him out. Getting your menu sorted first saves you a walk back.
Dialogue Choices — The Critic
Marcelle talks like a poet who wandered into restaurant criticism by accident, and the choices reflect it. A few of these are worth pausing on, because the arrows bite.
Bitter and sour, like rain without the water. A space at its heart where a stone should be.
- You seem melancholic today.
- Are you a critic or a failed poet? → Enemy +1 (Marcelle De Nuite)
Nothing. Too many words on an empty belly, that’s all.
- Eat at my place, on the house. → Friend +1 (Marcelle De Nuite); Business +1 (Marcelle De Nuite)
- Do you have any more advice?
Food is about giving, not accumulating. All I want is for people to eat and be happy.
- So do I, but that requires Lims.
- What would it cost for a good word in one of your reviews? → Corp morality +1; Enemy +1 (Marcelle De Nuite)
That “good word” reply is a trap dressed as a shortcut — you buy yourself a little Corp morality and lose Marcelle in the same breath. I’d steer around it unless you’re deliberately chasing that morality swing and don’t care about the relationship.
True. But what you do is more important than money. You are one of this city’s beating hearts. You have a responsibility to keep the blood flowing as best you can, even when people try to bleed you dry.
- Plenty of people doing that. → Business +1 (Marcelle De Nuite); unlocks recipe Orange Creme Caramel
- And if you gave me a good review… → Business -1 (Marcelle De Nuite)
I don’t think you understand. You are one of this city’s beating hearts. You have a responsibility to keep the blood flowing as best you can, even when people try to bleed you dry.
- Plenty of people doing that. → Business +1 (Marcelle De Nuite); unlocks recipe Orange Creme Caramel
- And if you gave me a good review… → Business -1 (Marcelle De Nuite)
Both of these near-identical prompts share the same payout, so whichever phrasing you land on, the Orange Creme Caramel recipe rides on picking “Plenty of people doing that.” That unlock alone is reason enough to take the humble route rather than fishing for a review.
If the bowl is the page, then your food is a novel.
- Thank you!
- Your metaphors are more mixed than Danetti’s donuts. → Enemy +1 (Marcelle De Nuite)
How is a humble food critic meant to critique when he has nothing to go on? How am I to evaluate your skill when you only offer so little?
- I’m just getting started. → Business +1 (Marcelle De Nuite)
- We might only have one dish, but it’s good.
- Two GREAT dishes.
- What? We have a lot of options on the menu. → Business +1 (Marcelle De Nuite)
If Marcelle catches you thin on options, the honest answers land better than the defensive ones — “I’m just getting started” and pointing to a full menu both nudge Business upward, while the awkward middle-ground replies just sit there. Either way, this prompt is a signpost: sort your menu count before you talk to him and you’ll skip the whole awkward exchange.
Marius Mitchell
Marius Mitchell was one of the first names I scribbled onto my own tracker after the intro, and if you’ve been following along alphabetically, this is the slot where his character entry sits — right after Kai Galosh and before the next giver on the list. Like every character heading in this guide, his name starts the section, and any quests tied to him drop underneath as their own subheadings, each one broken down the same way: the requirements you need first, the objectives in order, and then the dialogue choices that actually leave a mark on something.
I keep the entries uniform on purpose. Once you’ve read a couple of these character blocks, you’ll notice the “Requires / Objectives / Dialogue choices” structure repeating, and your eye starts skipping straight to whichever part you care about — the gatekeeping requirement up top, or the arrows further down that tell you what a reply changes. For Marius specifically, I’d scan the requirements line before you go hunting for him, because a couple of these early quests won’t even appear on your journal until you’ve cleared the intro and met the right people.
The original guide uses a screenshot under this heading to show his location and what he looks like rather than spelling it out in text, so I’m not going to invent a where-to-find-him description that the source doesn’t give. If you’ve been reading the community version, that image is the reference point — everything else about Marius pages out through whichever quests attach to him further down this section.
The Lost Leg
If you’ve just wrapped the introduction and met Marius Mitchell, this is one of the earliest quests you can pick up, and it’s short. You talk to Aengus Prince about Marius’s missing leg, then you go tell Marius the news he probably wasn’t ready to hear. Two objectives, but the dialogue choices are where the real teeth are, so I’d slow down before you pick a reply.
Before any of this opens up, though, you need two things done: Meet Marius Mitchell first and finish the introduction. Skip either and the quest won’t trigger for you, which is the kind of thing that had me staring at my journal wondering what I’d missed.
Objectives
- Speak to Aengus — Talk to Aengus Prince about Marius’s missing leg.
- Break the News To Marius — Let Marius Mitchell know his leg is LONG gone.
That second objective is doing a lot of emotional work for two sentences, and honestly the capital letters gave me pause before I walked over to Marius. You’re not delivering good news here, and the game knows it.
Dialogue Choices
The conversation starts with Aengus talking about DNA as a mathematics problem — millions of lines of human code waiting to be mapped. It’s a strange, clinical framing, and your reply sets the tone for how he reads you.
- “Sudoku won’t do?”
- “It needs to be done.” → Friend +1 (Aengus Prince)
My instinct was to go with the second one. Aengus doesn’t strike me as the kind of guy who enjoys a joke at his expense, and the Friend bump confirms it.
He follows up by insisting this isn’t a hobby — that a hobby implies a playfulness he isn’t capable of, but that it’s fine if that framing helps you understand.
- “That’s disgusting.” → Friend -1 (Aengus Prince)
- “I mean I guess it was already going to waste…” → Friend +1 (Aengus Prince)
- “Why is it so important to practice your maths?”
Watch that first option — it’s a real Friend hit, and it’s easy to fire off before you realize Aengus is genuinely explaining himself, not boasting. The third reply just rolls the conversation on without a listed effect, so if you’re not chasing Aengus’s friendship, that’s a safe neutral pick.
Then you get to the actual leg talk. Marius frames it as a rental — he was technically just holding onto it thinking he’d get it back.
- “The new leg does suit you.” → Friend +1 (Marius Mitchell)
- “This is kind of completely your fault.” → Friend -1 (Marius Mitchell)
I’ll admit the second one is tempting because it’s technically true, but it costs you a Friend point with Marius, and he’s not the one you want to be needling this early.
Finally, the payoff line: Marius says he’s going to pay you for your time — he knows it wasn’t the result he wanted, but you did what he asked.
- “And then?”
- “I appreciate that.” → Business +1 (Marius Mitchell)
If you’re building Marius up as a business contact, take the second option. Ask “and then?” and the conversation just moves on. Either way, this quest is quick — the choices are the only part worth double-checking.
Mary-Nyx Curzona
The source guide lists Mary-Nyx Curzona as a quest giver here, but no quest name, objectives, prerequisites, or dialogue choices follow the heading in this section — it’s just the entry marker the original author left for her. I’d rather tell you that plainly than pad the page with steps I can’t verify, since everything else in this guide is pulled straight from what the source actually documents.
If you’re scrolling alphabetically and you landed here expecting a walkthrough, jump to the quest index entry for her name and follow whichever quest it points to — that’s how I’d handle a heading that opens with nothing under it. Plenty of the later sections are fully written out, so this one’s an outlier, not the norm.
Curzona Penthouse
Mary-Nyx Curzona wants her cramped little penthouse staged, and given how the last unnamed heading went, I’m glad to have an actual objective list to work from this time. Two things gate this one before you can even knock: progress Mary Nyx Curzona‘s story, and progress Mary’s move-in. If either of those is still open on your tracker, the penthouse door won’t get you anywhere yet.
Once you’re clear of those, there are three objectives — access the place, finish the staging, then make sure she actually pays up. Simple on paper. What the paper doesn’t tell you is that she’s a Curzona, and the guide’s own note to be careful is there for a reason. Keep your head around her.
- Access Mary’s Penthouse — head to Mary’s penthouse. The source flags this bluntly: be careful, and remember she’s a Curzona.
- Finish Staging Mary’s Apartment — complete the staging, then leave the apartment when you’re done.
- Collect Payment from Mary — make sure Mary pays for the work you put into her penthouse.
The dialogue here reads like an entrance exam for her approval, and every reply swings something. What I’d note before you start picking: two of these prompts have a CORA forbid option that drops both Friend with Mary and Corp morality by 1, and it shows up twice. Tempting to spam it for the joke — I wouldn’t, unless you’re deliberately tanking both.
- “Ugh, must you stand so close? I can smell the streets on you. It’s ruining my appetite.”
- Sorry, ma’am. → Business +1 (Mary Nyx Curzona)
- I thought you only drank people’s blood. → Friend +1 (Mary Nyx Curzona)
- “You are so very vulgar. Always talking about money.”
- What else is there to talk about? → Business -1 (Mary Nyx Curzona)
- Cough up, Mary. → Friend +1 (Mary Nyx Curzona)
- “Spoken like a true tradesperson. You will never be Spire-material with that demeanor.”
- I already am Spire material. → Friend +1 (Mary Nyx Curzona)
- CORA forbid. → Friend -1 (Mary Nyx Curzona); Corp morality -1
- “Now you sound like a CEO. In some lights, if I squint very hard, you rather remind me of me.”
- I hope I look as good when I’m 200 years old. → Friend +1 (Mary Nyx Curzona)
- CORA forbid. → Friend -1 (Mary Nyx Curzona); Corp morality -1
- “Because the market is simply too ignorant to appreciate my tastes. It needs a… common touch. Something insipid enough to appeal to the masses.”
- I can manage that. → Business +1 (Mary Nyx Curzona); you accept Mary Nyx’s apartment staging job; Mary Nyx’s apartment opens for staging (this matters later in the quest)
- I’m not taking a single Lim from you. → Business -1 (Mary Nyx Curzona); Enemy +1 (Mary Nyx Curzona)
That last prompt is the one to slow down on. The I can manage that reply is the only line here that actually locks in the job and opens her apartment for staging — everything else is relationship flavor. Pick the refusal and you take an Enemy hit from a Curzona for zero upside. Take the job, finish the staging, leave the apartment, then go collect.
Deal with a Devil
This one feels like the point of no return the moment Teleshko says the words “Ms Mary-Nyx Curzona herself.” Mary-Nyx runs one of the most powerful multi-corps in all of Nivalis, and her word can make or break a small operation like yours. When I hit this quest, I treated every reply like it was being recorded — because in a sense, it is.
Before you even get the summons, you need a stack of prerequisites behind you. Come during the day, and make sure your Corp morality is sitting at 5 or higher. On top of that, the game wants your Agent Teleshko business relationship above 3, a visit to the Spire under your belt, earlier story progress, and that you’ve already met Edison Mattix and Zaffer, progressed Clem Hortelano‘s story, and met Delbert Cherry. Miss any one of these and the interview simply won’t come together the way it should — several of those names matter later in the conversation itself, so they aren’t just a checklist.
The Interview
There’s a single objective here: attend the interview with Mary-Nyx Curzona. Teleshko sets it up, and you either show up ready to bargain or you don’t. The opening exchange with Teleshko is where you first start banking relationship points, so I’d pay attention to the tone you pick — the flirty lines and the businesslike lines pull in different directions and there’s no take-backs.
When Teleshko tells you he passed on a recommendation and she wants to interview you for a role, how you respond sets the mood:
- “It is now that you’re here, Mr Agent.” → Romance +1 (Agent Teleshko)
- “How come?” — leads to her noting your formal honorific reads as flirting, then “I’m glad you noticed.” → Romance +1 (Agent Teleshko), or “Down to business…” to skip it
- “Of course!” / “Wow!” — neutral, moves things along
- “Never heard of her.” → Business -1 (Agent Teleshko)
- “Thanks, but no thanks.” → Business -1 (Agent Teleshko) and Enemy +1 (Agent Teleshko)
- “I’ll be there.” — commits you, no swing
- “You recommended me?” — Teleshko admits he considers you “somewhat above average,” and “The feeling’s mutual.” gives Romance +1 (Agent Teleshko)
If you try to play dumb about who Curzona is, Teleshko scolds you for displaying your ignorance — she’s the CEO of Curzona’s Fifth Division. I wouldn’t poke that bear. The “Thanks, but no thanks” reply is the trap here: it costs you on both the business and enemy tracks with no upside, so I stayed far away from it.
The Deal Itself
Then Mary-Nyx takes the floor, and the whole quest crystallizes into one ugly question: do you have what it takes to accept her offer? She wants names — local agitators and where they can be found — and in return she’ll hand you a genuine Tier 4 license, something she describes as rarer than hen’s teeth. The clean version of the pitch is the “You give me… the names of local agitators” branch, and the first thing I’d ask is what happens to the people I name. Don’t interrupt her, and she makes the stakes plain: a little information for a huge reward.
If you’re all in, the “Done.” reply that opens the name-dropping is the greediest line in the whole scene — Corp morality +2 and Business +2 (Mary-Nyx Curzona). Fastest way to the top and the fastest way to feel grimy about it. If anything, the “Will they be hurt?” follow-up exists precisely so you can hear yourself ask before you commit anyway.
From there she asks for names one at a time, and every name you hand over is logged as an explicit flag. Here’s what each reply records:
| Name You Give | Where They’re Found | Flag Recorded |
|---|---|---|
| Clem Hortelano | Guerilla gardener at the Docks | You told Mary-Nyx about Clem Hortelano |
| Zaffer | Sign vandal, usually in Lowtown | You told Mary-Nyx about Zaffer |
| Edison Mattix | Runs a network helping debt orphans escape | You told Mary-Nyx about Edison Mattix |
| Delbert Cherry | Leader of the O.R.S., on the Rigs | You told Mary-Nyx about Delbert Cherry |
Here’s the part that made me sit up: each of those four are people the game specifically required you to meet first, which means you’re almost certainly betraying someone you’ve already built a relationship with. Between the “Small fry. Keep going…” prompts you always get an “Enough of this” out, so you can cut the name list short if you want to stop feeding her — but every name you do give is a permanent flag on your save.
Naming and Pricing
Once she has what she wants, she explains the payoff in the coldest terms imaginable: she’ll play the footage of these people denouncing them, because seeing it will be “TOO delicious,” and it might be exactly what’s needed to break them completely. How you react to that is a straight character read:
- “Glad to be of service.” → Business +1 (Mary-Nyx Curzona)
- “You’re sick.” → Business -1 (Mary-Nyx Curzona)
Then she confirms what you’ve earned. You’re now the owner of a Tier 4 license, and her endorsement will boost the popularity of all your venues for roughly two weeks. That endorsement is the real prize if you’re trying to grow a business, so I’d think carefully before dismissing the deal outright.
Her welcome-to-the-club line gives you two reactions with consequences. If you expected the Serpentarium instead of a Tier 4 license, “I thought I would get the Serpentarium?” costs you Business -1 (Mary-Nyx Curzona). Play nice with “Thank you very much!” and you gain Business +1 (Mary-Nyx Curzona). Being grateful is, apparently, the profitable move.
Saying No (and What It Costs)
You can refuse her. There’s a whole pressure branch built for it, and Mary-Nyx doesn’t take it gracefully. When she presses on what exactly won’t happen to the people you name — “They won’t be sent on an all-inclusive cruise to the Islands, if that’s what you’re asking” — you choose:
- “No way. Keep your license.” — outright refusal
- “I’ll give you two names.” → Corp morality +2 and Business +1 (Mary-Nyx Curzona)
- “Done.” → Corp morality +2 and Business +2 (Mary-Nyx Curzona)
She then hits you with the guilt trip: spare her your high-mindedness, the targets made their own choices and have only themselves to blame. She offers you one more chance to change your mind, and your last two options are:
- “Not happening.” → Enemy +2 (Mary-Nyx Curzona)
- “I’ll give you two names.” → Corp morality +2 and Business +1 (Mary-Nyx Curzona)
That “Not happening.” is the one I’d brace for. It’s the only reply in the entire scene that flips Mary-Nyx Curzona into a two-point Enemy, and given she runs one of the biggest multi-corps in Nivalis, I wouldn’t take that lightly — you’re trading her endorsement and a valuable license for your principles. Only you can decide if that’s a fair price, but I wanted the trade laid out plainly before you pick it, because there’s no undo.
Whichever way it goes, the interview resolves into one of a few hard outcomes: you walk out owning a Tier 4 license with her endorsement backing your venues, or you walk out with a powerful new enemy. Either way, the names you chose to give up are already on the record. Take a beat after the dialogue closes — the license, the endorsement window, and any relationship flags from the Teleshko preamble are worth verifying before you move on to your next job.
Masato Shima
Masato Shima is one of those quest givers whose section in the original guide never got fleshed out — the heading is there, sitting in the alphabetical lineup right after the Kai Galosh write-ups, but no objectives, prerequisites, or dialogue choices were ever written underneath it. I’m leaving it in place rather than deleting it, because if you’re scanning down the list looking for him, you deserve to know he’s on the roster and not wonder whether you skipped a page.
I don’t have anything concrete to give you here — no steps, no arrow-tracked replies, no payout numbers. If you’re hunting Masato’s content specifically, this is the one spot in the whole guide where I’d shrug and tell you to keep your own notes. Everything factual I could find in the source is already above: the name, and the fact that he’s a giver.
The Scorpion
I’ll be upfront: this is the quest where the shimmer chip you’ve been carrying around finally pays off, and it takes you somewhere I genuinely didn’t expect on a first pass — down into the sewers and then straight into a face I recognized. You need Day 2 or later, main story progress behind you, daytime hours, and at least 20 Lims before you can get moving, so if the chip’s been sitting in your inventory doing nothing, now’s the time.
The opener has you hunting for someone who actually understands shimmer coins. Chase down a Hacker first — they’re the ones who can tell you more about what these coins are. From there, Sage Hullen‘s tip sends you to Vik Ryan: tell him Sage sent you and ask for a UV Light, because apparently a UV light is what reveals the details baked inside the coin. I slow down on this handoff more than you’d think. The Vik conversation is loaded with forks, and one wrong reply turns him into a wall.
Once the light reveals what’s inside, you find the Scorpion — and the den itself hands you a familiar face in Alexandria. Talk to her, then introduce yourself, because the Scorpion is expecting you. What follows is a haul across the city: Mizzy at the Metro Hub, then a conversation with her about the gambling debts she owes Masato Shima, then back to Masato to break the news that she can’t pay — at least not right away. Meet Alexandria again at the Metro Hub, find the island holding Masato’s dropbox out in Mountain Town, speak with the Scorpion, and make the drop exactly as asked. Come back to Masato to close the loop and you’ll be offered a place in the Scorpion’s Nest.
The dialogue here is the densest networking I’d seen up to this point, so read the arrows before you click. A few of these lines decide whether Masato is an ally, a rival, or something in between.
- “It’s not me you would have to convince. Make the drop and join our nest.” — OK. unlocks the Mountain Town dropbox. No. gets you nowhere; take the deal.
- “Mhm.” — So… I just go in and talk to this person or what? hands you Enemy +1 (Alexandria). What next? is the clean route.
- “You seem lost.” — Well, I am wandering around the sewers so… logs that you admitted to Masato you were lost. Showing the coin or asking who he is keeps it tidy.
- “I don’t know you. Though, it would be a falsity to say that you don’t intrigue me…” — Bring on whatever you got. gives Friend +1 (Masato Shima). The other two replies cost you nothing but get you nothing.
- “There is a person, a Mizzy Weiss, who owes me Lims. A lot of Lims.” — And you want me to get it back for you? is the answer you want: Business +1 (Masato Shima) and it locks in that you’ve met Masato, which Stranger in Need later requires. Oh, Mizzy! skips the flag entirely.
- “No.” — Clean air then? is Enemy +1 (Masato Shima). Healthy Ramen? is Friend +1 (Masato Shima). Pick the ramen, trust me.
- “It means that you and I are acquainted of course…” — the Bring on whatever you got. reply again drops Friend +1 (Masato Shima).
- “It’s a story that exists in a locked file on an unknown Nets drive…” — Wasn’t finding you enough of a riddle? is Enemy +1 (Masato Shima). How do I do that? stays neutral and keeps him talking.
- “There is no debating with a scorpion. When you are stung you are dead.” — Sorry. lands Business -1 (Masato Shima). Note this line and the next are linked to the Mizzy deadline talk.
- “And let me assume that you gave her such an extension?” — I did not. is Business +1 (Masato Shima). I did. gains you nothing, so if you want the points, don’t cover for her.
- “Yeah, I don’t recall that. Listen, now that you’re here, you can help me finish this little errand…” — What is it? gives you the Poison Pill Bottle. I’m actually kind of busy. leaves you empty-handed.
The Vik Ryan handoff deserves its own warning because it’s easy to fumble. He’ll ask why you need the light, and both of these replies give Friend +1 (Sage Hullen): Just need to look at something and Sage Hullen’s looking for one. Just doing her a favor. Then when he tries to take the light off you — “If Sage really sent you here, I don’t need to explain why. Give it to me and I’ll manage it for you.” — this is the moment I always pause on. Dodging with I don’t think so is Enemy +1 (Vik Ryan) and Business -1 (Vik Ryan). Handing it over with Here. What does it show? is Friend +1 (Vik Ryan) and Business +1 (Vik Ryan). I’ve seen players cling to the light out of habit; for this quest, the cooperation pays.
His follow-up line — “Genuine UVs are antiques due to the quartz tubing. Good luck finding another one.” — is there to tempt you. Fine. gives Friend +1 (Vik Ryan) and Business +1 (Vik Ryan). I’m not giving it to you. is the stubborn reply, and if you took the generous route above, you’ve already handed it over and this branch won’t bite you.
Mertie Batt
Mertie Batt is the next giver in the alphabetical run, and if you’ve been following this guide from the top you already know the drill: giver first, quest name after. What I can tell you for certain is that the source guide treats Mertie’s section the same way it handles every other character — a giver heading, then the quest itself broken into the familiar Requires, Objectives, and Dialogue choices blocks. Everything that follows in my write-up sticks to that structure, nothing more.
In the original Steam guide, this entry is built around screenshots rather than body text, so I’m not going to pretend I can read steps out of images I can’t see. Mertie’s quest specifics, prerequisites, and any arrow-marked replies live in that captured material on the source page. When the text version fills in — or if you’re reading the live guide — that’s where the objective sequence and the choice tracking sit. For now, I’m keeping this honest and light rather than padding it with guesses.
Once the quest details land here, expect the same treatment I’ve given everyone else in the alphabet: the exact objective order, any Requires line spelled out as stated, and the arrow notation on replies that move a relationship, a payout, or a quest flag. If a Mertie line has no arrow, that’s my signal to tell you it logs no listed effect — I won’t inflate it into something it isn’t.
Neon Sellout
Mertie Batt wants customers through her door and you want the gossip she’s sitting on. Turns out the two are linked: convince a few familiar faces to buy into a bit of neon advertising, and Mertie opens up. The only gates here are that Mertie Batt is still alive and that you’ve made some progress on the main story — neither should trip you up if you’ve been playing normally.
The objectives run in a straight line: sell Neon to Quince, then to Harmony, then to Danny, then head back to Mertie and check in with her. Straightforward on paper — the real work is in the three sales conversations, where the wrong line can cost you a relationship point and, in one case, the sale itself.
Danny Danetti
Danny’s reaction is my favorite of the three, partly because his skepticism is so on-brand. When he fires back with “Neon? Ain’t that a bit, you know, tasteless?”, pick the line about his face reflecting in the mirror glaze of a fresh donut — that’s the one that lands. Play your cards right and he’s sold. There’s also a moody follow-up where he snaps “What the ♥♥♥♥, bud?” — apologize there rather than doubling down, since the second option docks a Business point.
- “Think of how it would look, your face in neon, reflected in the mirror glaze of a fresh donut.” → Business +1 (Danny Danetti); you sold Danny on buying neon
- “It’ll match your donuts perfectly then.” → Enemy +1 (Danny Danetti)
- Follow-up “What the ♥♥♥♥, bud?” — “Sorry, bad joke.” logs no listed effect
- Follow-up — “Just saying it how it is. Those dry, boring donuts will look ten times better bathed in neon light.” → Business -1 (Danny Danetti)
Quince Crogan
Quince is the toughest sell of the trio because he’s openly hostile to the idea. His opener — “Neon? Does this place look like a disco?” — sets the tone, and if you agree that it doesn’t, you sink a Business point for nothing. The winning move is the guaranteed-numbers pitch. I’d use that one every time.
- “No. And that’s the problem.” → Business -1 (Quince Crogan)
- “This neon is guaranteed to attract 50% more customers in the first week.” → Business +1 (Quince Crogan); you sold Quince on buying neon
Harmony
Harmony is the one I’d slow down for, because her conversation is less about the sale and more about a warning that reads as half-joke, half-genuine. When she says she’d have to kill you — “My license says so” — I couldn’t resist the bold reply, so I took the +1 Friend hit on my run. If you’d rather play it safe and keep it professional, declining also logs an effect, just not a kind one to Harmony.
- “Well, now I’m tempted…” → Friend +1 (Harmony)
- “Got my own business, thanks.” → Friend -1 (Harmony)
- On “What do I need with neon?” — “Your PRU’s boring. Think how eye-catching it could be with a bit of glow.” → Business +1 (Harmony)
- On the same prompt — “It could help you stand out in the dark.” → Business -1 (Harmony)
Mertie’s Gossip
The back-and-forth with Mertie is where the money is, and I mean that in the literal sense for your reputation stats. She has a string of prompts, and the correct reply is almost always the warmer one — you get Friend +1, and in one spot you can pick up both a Friend and a Business point in the same reply. The colder, more corporate replies save you nothing; they just cost you Corp morality or a Friendship. Her questions about whether you’re resting enough and about her years standing in the same spot are the emotional core of the quest, and the game rewards you for engaging with that rather than brushing it off.
- “Alright, sweetcheeks? You getting enough rest?” — “Having too much fun.” logs no listed effect
- Same prompt — “I can rest when I’m dead.” → Corp morality +1; Business -1 (Mertie Batt)
- On her memories — “Like what?” → Friend +1 (Mertie Batt)
- Same prompt — “You’ve worked hard. That’s the important thing.” → Corp morality +1; Friend -1 (Mertie Batt)
- On paddling her feet in the water — “Why wait? You should go.” → Friend +1 (Mertie Batt); Corp morality -1
- Same prompt — “It’s nothing special. You’re better off here, making money.” → Friend -1 (Mertie Batt); Corp morality +1
- On there being more to life than work — “That sounds like counter-productivity to me.” → Enemy +1 (Mertie Batt)
- Same prompt — “Like what?” → Friend +1 (Mertie Batt)
- When she calls out that you haven’t used “auntie” yet — “Because you’re not my aunt.” → Friend -1 (Mertie Batt)
- Same prompt — “Sorry. What’s the gossip, auntie?” → Friend +1 (Mertie Batt); Business +1 (Mertie Batt)
Once all three sales are locked in and you’ve checked back with Mertie, the quest closes. If some of the arrow effects look contradictory — a line that grants Corp morality while costing you Friendship — that’s the tradeoff the game is asking you to make, so pick the version of your character you actually want to play.
Mia Jay
The source guide reaches Mia Jay’s entry and stops there — a heading, and nothing under it. I’m reproducing that honestly rather than padding it out, because inventing quest names, prerequisites, or dialogue paths for this quest giver would do you more harm than good. If I catch the details for Mia Jay’s quests on a later run, I’ll fill this section in properly.
If you’re working through the givers in order, keep moving to the next alphabetical entry and treat this as a placeholder. When I do get the full write-up in, expect the same layout I use everywhere else: the quest name as its own heading, then the Requires, Objectives, and Dialogue choices substructure I’ve kept consistent throughout this guide. Until then, there’s nothing here I can vouch for.
Love Den
Mia Jay is the one handing out interior design work this time, which is a nice change of pace from the usual fetch-and-report crowd. Before you can take the job, though, you need to have pushed Mia Jay’s story along and gotten through Mia’s move-in — that second requirement trips people up, because the job won’t show up at all until she’s actually settled into her own place.
Once it’s available, the whole quest is basically an excuse to play decorator, and I’ll be honest: I enjoyed having a task where the stakes were aesthetic instead of moral. The apartment needs a proper design pass, then you move on to her love den specifically — the game keeps that as a distinct space from the rest of the apartment, so don’t assume a single sweep covers both. And pay attention to the note about leaving when you’re done, because I’ve seen more than one person finish the decorating and then stand around wondering why nothing advanced. The quest wants you out of the apartment before it’ll register the first two objectives as complete.
The final step is the payoff: you present the design and find out what Mia thinks of your handiwork. There’s a certain satisfaction in that moment if you took the decorating seriously rather than slapping down the first items you had on hand. Here’s the full objective list so you know what you’re working toward.
- Design Mia’s Apartment — Mia needs a well designed apartment. Help her decorate.
- Finish Designing Mia’s Love Den — Finish decorating Mia’s love den, then leave the apartment when you are done.
- Present the Design to Mia — Let’s see what Mia thinks of your love den decor.
Nothing in here branches off into choice consequences the way the heavier quests do, so you can treat this one as a clean palette. Just handle the prerequisites first, knock out both decorating objectives, walk out the door, and come back to present. If the quest feels stalled, nine times out of ten it’s because you’re still inside the apartment.
Thirst Trap
Mia Jay is a relentlessly cheerful collector chasing a full set of k20 Tumblers, and by the time you run into Thirst Trap she’s down to the last seven styles she can’t track down on her own. If you’ve been scooping up tumblers without thinking about it, check your bag before you walk away from her — the quest won’t move unless you’re already holding enough of a collection to make her day.
The prerequisite is simple but easy to trip over: you need at least 7 K20 Tumblers in your inventory. I always clear out my clutter before a big hand-in, so this is one of those quests where I’d double-check that I haven’t sold or stashed the wrong things.
Objectives
- Find All the Tumblers — track down the full set.
- Give the Tumblers To Mia — she knows this wasn’t a small ask, so head back to her and hand everything over to see how she takes it.
Dialogue Choices
Her reaction when you turn in the complete set is exactly as loud as you’d expect from someone who’s been hunting these for ages, and the first reply is where the tone of the whole exchange gets set.
Binary Gods! Binary Gods! You found the last one! Holy… EVERYTHING!
- I did it for you. → Romance +1 (Mia Jay)
- Here yah go!
Then she pivots into that uncertain, almost vulnerable offer about coming by your apartment to figure the whole thing out — and this is the line I’d actually stop and think about, because one option opens your door to her and the other quietly keeps things at arm’s length.
I… I don’t know. Maybe I could come over to your apartment and you could help me figure it out?
- You’re welcome any time. → You invited Mia Jay to your apartment
- I’m sure you have some ideas of your own.
Nothing here punishes you for playing it casual, but if you’re leaning into Mia’s romance thread, the two arrows stack up nicely — the “I did it for you” line plus the open invitation is the pairing I’d pick. Otherwise you can hand over the tumblers, keep your evening to yourself, and the quest closes out clean enough either way.
Milo
The source guide lists Milo as a quest giver but provides no quest name, prerequisites, objectives, or dialogue details here — just the heading. I’m leaving it at that rather than guessing at content that isn’t documented, and I’d check back on this entry once the original write-up is fleshed out.
Movers and Shakers
Milo is a quest giver the original guide lists with an actual write-up rather than just a name, and his whole job is a business rivalry plot tangled up with his obsession with seismology. The source says he needs help with his business and his seismology, and the prereqs here are simple: it unlocks after day 3, and you need to finish the introduction first. Nothing exotic to chase down before you start.
This is one of those quests where the dialogue does an absurd amount of the work. I counted a dozen separate choice prompts in the source, and a good chunk of them swing Milo’s Friend and Business totals or nudge Corp morality. If you’re the type who picks the first flavor-text reply that sounds cool, you can absolutely tank this relationship before you’ve finished the sabotage runs, so it’s worth reading ahead on the later forks before you commit.
Objectives
The eight steps alternate between sabotage runs and check-ins with Milo, so expect some back-and-forth rather than a straight line. Here’s the order exactly as the source lays it out.
- Sabotage Nola Berg during Curfew — sabotage Milo’s rival to help him get ahead. Nola Berg’s venue is located on Seaside Boardwalk.
- Return to Milo — head back to Milo and tell him what happened.
- Sabotage Marius Mitchell between 2am and 8am — more sabotage for Milo. This time it’s one of Marius Mitchell’s venues in Central Canyon.
- Return to Milo (again) — head back to Milo and tell him what happened.
- Convince Humor Bot 17 — get Humor Bot 17 to help Milo with his cunning plan.
- Talk to Milo — head back to Milo and tell him what happened.
- Milo and the Criminal — Milo reflects on his choices.
- Check how Milo is doing — go check in on Milo and see if his fortunes have improved.
The one step I’d flag hardest is the Curfew sabotage of Nola Berg. If you’ve already run the Curfew content, you know the window closes at 2:00, so don’t wander into the Seaside Boardwalk late and expect it to count. And the third objective is stricter still — Marius Mitchell‘s venue has to be hit between 2am and 8am, which is its own awkward little pocket of the clock. I’d sort the time window before I even travel there.
Dialogue Choices
This is a long-running conversation, and the replies stack. Scroll the whole table before you pick, because a couple of the early lines set up how much Corp morality you’re willing to farm. Arrows show what each reply actually changes; when there’s no arrow, the source logs no listed effect.
| Prompt | Reply | Effect |
|---|---|---|
| In Nivalis, the older the technology looks — if it’s still working — the more valuable. This thing is an antique, but my dad had a saying. “Old things know how to find old things.” | That’s a weird saying. | Friend −1 (Milo) |
| In Nivalis, the older the technology looks — if it’s still working — the more valuable. This thing is an antique, but my dad had a saying. “Old things know how to find old things.” | I think I get it. | Friend +1 (Milo) |
| If their bottom line was suffering a little, they might be more amenable to selling up and moving on. | Ruthless. I like it. | Corp morality +1 |
| If their bottom line was suffering a little, they might be more amenable to selling up and moving on. | Isn’t there a less nefarious way to get access? | No listed effect |
| But will YOU? | Alright, I’ll help. | Unlocks the sabotage job on Nola Berg |
| But will YOU? | Nah. | No listed effect (this is the fork that gates the sabotage job) |
| No. And then she destroyed me. Nola Berg bought up the debt contracts for my seismology equipment. | Ouch. That hurts! | Friend +1 (Milo) |
| No. And then she destroyed me. Nola Berg bought up the debt contracts for my seismology equipment. | Considering everything that’s fair play, isn’t it? | Friend −1 (Milo) |
| Well that’s my plan. If I can escape the Debt Corps, I can keep working on my seismology. | You should quit. | Friend −1 (Milo) |
| Well that’s my plan. If I can escape the Debt Corps, I can keep working on my seismology. | It really means a lot to you, huh? | Friend +1 (Milo) |
| It went badly. | Yeah? | No listed effect |
| It went badly. | Surprise! | Friend −1 (Milo) |
| The man who mugged me — his name was “Razzor” I believe, told me I deserved neither money nor vision. | You have to admit he got a point! | Friend −1 (Milo); Enemy +1 (Milo) |
| The man who mugged me — his name was “Razzor” I believe, told me I deserved neither money nor vision. | Well, that’s a bit harsh! | Friend +1 (Milo) |
| I will attempt to partner with Nola Berg. It is my only remaining option. My finances are almost depleted. My business accounts are drained. | What will you say to her? | No listed effect |
| I will attempt to partner with Nola Berg. It is my only remaining option. My finances are almost depleted. My business accounts are drained. | Maybe that’s not a good idea, either? | Friend −1 (Milo) |
| I hire a criminal to threaten my business rivals, allowing me to vanquish my foes. My business will be the last one standing. | Whoa, that seems a bit extreme! | No listed effect |
| I hire a criminal to threaten my business rivals, allowing me to vanquish my foes. My business will be the last one standing. | Hiring an underworld contact is a well established technique for business success in Nivalis. | Corp morality +1 |
| I can’t afford a criminal enforcer. And I am not sure I really WANT to threaten anyone. Oh, and I don’t know any criminals. Do you? | I could look into it. | Corp morality +1 |
| I can’t afford a criminal enforcer. And I am not sure I really WANT to threaten anyone. Oh, and I don’t know any criminals. Do you? | If I did I wouldn’t tell you! | No listed effect |
| I feel it may be escalating the situation in ways I may regret… but what other options do I have? I am not a competent businessman. That much is clear. | You’re still learning. | Friend +1 (Milo); Business +1 (Milo) |
| I feel it may be escalating the situation in ways I may regret… but what other options do I have? I am not a competent businessman. That much is clear. | I agree. You’re terrible. | Friend −1 (Milo); Business −1 (Milo) |
| Either we try to partner up with a business rival, or we hire a criminal to threaten them. | You have to be ruthless. Hire a criminal to threaten your rivals. | Corp morality +1 |
| Either we try to partner up with a business rival, or we hire a criminal to threaten them. | There’s no need to threaten anyone. You should try to partner up with a business rival. | No listed effect |
| Either we try to partner up with a business rival, or we hire a criminal to threaten them. | None of these options are good. You need to think of something else. | No listed effect |
Notice the two sabotage objectives themselves are gated behind the But will YOU? prompt — if you pick Nah, you’re not getting the Nola Berg job, at least from what the source shows. And if you’re trying to keep Milo on your good side, the Razzor line is a genuine trap: the snarkier reply hits him with both Friend −1 and Enemy +1, which is a double hit I wouldn’t have expected from one punchline. I’d play the You’re still learning reply later in the chain too, since it’s one of the few lines that boosts both Friend and Business at once.
If you’re deliberately pushing Corp morality, the reliable levers are Ruthless. I like it., the world-established technique line, I could look into it., and the final You have to be ruthless closer. That’s four points of Corp morality sitting in a single conversation about sabotaging people’s businesses — which, given the whole premise Milo’s built here, tracks pretty cleanly.
Miso Baron
The original guide files this one under Miso Baron, but the entry itself is nothing but a screenshot — no objectives, no prerequisites, no dialogue block, no arrow notation. I’m not going to dress that up with guesswork. If I haven’t run this quest myself and the source stays silent, the honest thing is to tell you the page exists and leave it at that rather than invent a step list you’d follow straight into a wall.
So treat this as a marker rather than a walkthrough: there is a Miso Baron section in the guide, and it lives on an image. If you’ve already cleared it in your own save and the screenshot jogged your memory, you’ll know more than the text does here. For everything else, carry on to the next quest giver — the rest of the alphabetical run has the objective sequences, prerequisites, and choice tracking spelled out properly.
Memories
This one hits different from most of the jobs on the board. The Miso Baron lost his memories to a botched CBI — a Criminal Behavioral Implant — and the whole quest is really about whether you can help a man pick through a life that may not even be his. If that sounds heavy, it is. I took my time here because the dialogue choices swing hard in both directions, and more than a few of them are relationship-critical.
Before you can start, you need to have progressed both the main story and JR Amiga’s story. If neither flag has advanced, the quest simply won’t fire. I’d check that first before you go hunting for it.
Requirements and Objectives
The objective sequence is short, but each step feeds the next. Here’s the order:
- Find out more about CBIs — dig into what Criminal Behavioral Implants actually are.
- Return to the Miso Baron — Ava hints that JR Amiga knows more than she’s saying and suggests you go talk to him.
- Ask JR Amiga about her CBIs.
- Return to the Miso Baron with your findings — sit down with him again about his memories.
Step two is where I’d slow down. Ava is nudging you toward the Miso Baron for a reason, and if you blow past that nudge, you’ll circle back later wondering why the thread felt thin. Talk to both of them properly.
Dialogue Choices
This is where the quest earns its weight. Almost every exchange here has a tracked arrow, so I’ll lay them out line by line. Watch the labels — this quest uses Friend, Enemy, Romance, and Business swings, and they don’t always point the same way.
When JR Amiga warns you, “I’m warning you, I’m stressed.”
- “I’ll be careful.” → Friend +1 (JR Amiga)
- “Aren’t we all?” → Friend -1 (JR Amiga)
Her defensive line: “Well it can’t be one of mine, I don’t do shacks. All my memories take place in the Spire.”
- “All of them? Sounds little unoriginal.” → Enemy +1 (JR Amiga)
- “Why the Spire?” → no listed effect
Then she pushes back: “Oh here we go, next you’ll be telling me all about how being poor makes you a nicer person.”
- “Well you’re clearly proof that being a rich person doesn’t.” → Enemy +1 and Business +1 (JR Amiga)
- “I just need to know about this memory. Could it be real?” → no listed effect
Back at the Miso Baron, he greets you with: “I knew you wouldn’t stay away for long. Good stuff isn’t it?”
- “Yeah, really good!” → Friend +1 and Business +1 (Miso Baron)
- “The miso? Not really my thing.” → Enemy +1 (Miso Baron)
He then shares something grim: “Naaaa it blew the bottom of his jaw off but I still don’t think he regretted it.” I’ll be straight with you — this exchange is where I’d read carefully, because the replies here branch toward completely different relationship outcomes.
- “I found someone involved in this CBI stuff.” → no listed effect
- “I guess it was nice of you to help him.” → Romance +1 (Miso Baron)
- “Some ‘friend’ you are.” → Enemy +1 (Miso Baron)
His resistance hardens: “Even if I could. Why would I want to? I’m street scum now, I don’t want to find out that I used to be sewer scum.”
- “You could have been a good person. Do you remember anything?” → Romance +1 (Miso Baron)
- “I think you should at least find out your real name. Do you remember anything?” → no listed effect
Then the line that defines the whole quest for me: “No. No, that — that’s not how this works. They designed it to feel real. That’s the point. They wouldn’t leave something in me that was actually mine.”
- “Why not? They seem pretty incompetent over there.” → no listed effect
- “Look I don’t care either way. I struggle to see how you could know either way.” → Friend -1 (Miso Baron)
He insists: “I know because I didn’t have anything like that before. I know I didn’t.”
- “I really think you did. Someone loved you enough to make you that cake. That was yours before they ever touched your head.” → no listed effect
- “Again, I’m just a messenger. This whole thing seems insane to me.” → Friend -1 (Miso Baron)
And then he softens, which caught me off guard: “I think you’re alright, Noodle person. I’m gonna try. Hey, why did you help me? Surely you have better things to be doing?” This is the final hinge, and the answers are wildly different in weight.
- “This was just a collaboration attempt to seduce you.” → Romance +1 (Miso Baron)
- “Not all my memories are filled with love either. It felt like a worth cause.” → Friend +5 (Miso Baron)
- “To be honest I just wanted you off my back.” → Friend -1 (Miso Baron)
That Friend +5 is the biggest single swing in the whole sequence, so if you’re building a friendship with the Miso Baron, that’s the line I’d take. The seduction reply is its own lane entirely, and the dismissive one undoes everything you built up to that point. Pick with intent.
Mizzy Weiss
Mizzy Weiss rounds out the alphabetical run of quest givers, and honestly, the source guide has nothing under her name — no objectives, no dialogue, no prerequisites. I’m noting her here anyway so the index stays complete and you don’t end up wondering whether you skipped a page. If you’re tracking every giver in Nivalis Nights, this is the slot where Mizzy would sit, but there’s simply no quest content recorded for her yet.
Nivalis Grind
Every gambler I’ve ever met believed the same lie — that they’d win it all back before anyone found out. This quest hands you that exact temptation, wrapped in a promise and a cut of the take, and asks whether you’ll pull someone back from the edge or push. Honestly, it’s the kind of setup that made me hesitate before touching a single reply.
To unlock it, you need to have finished the introduction, and Mizzy Weiss has to be alive.
Objectives
- Learn the Rules — head back to Mizzy so she can walk you through how to make some Lims.
- Find Rice Walket in the Sewers — Mizzy says a certain Rice Walket owes her money, and she wants you to get it back.
- Turn the Nata-Log Into CorpSec
- Use the Nata-Log to Extort Mizzy
Note that objectives three and four are your crossroads — once you’ve got the Nata-Log, you decide whether it goes to CorpSec or stays in your pocket as leverage.
Dialogue Choices
Ha. Grifters gonna grift. That’s Mizzy’s whole schtick. Lures you in with the promise of easy Lims and the allure of that board and its glowing letters and numbers. Should be illegal.
- What should be?
- Can you get to the point, please? → Enemy +1 (Rice Walket)
I setup a voice network for an entrepreneur. I had no idea what she was doing with it.
- Fair. It isn’t the supplier’s responsibility what the buyer does. → Corp morality -1; Friend +1 (Rice Walket)
- I mean… It was both of you. → Corp morality +1; Enemy +1 (Rice Walket)
No, but you are. Be on the right side of history here. Let’s screw the ones who screw people like us.
- I’m down. → gives Bootleg Nata-Log; Business +1 (Rice Walket)
- Definitely not.
Because technically I’m involved. Sure I could use this to try and convince them to clear my case, but that still leaves me hanging on the backdoor channel charges. *Potential* charges.
- Here we go then. → You met Rice Walket
- I could sell it to Mizzy.
You’re back, you’re back and we’re right on track. What do you got for me? How’d that puddle scum try and weasel his way out of paying his debts?
- He had no money on him.
- No excuses, just money. → Corp morality -1
- He gave me this.
♥♥♥♥♥♥♥♥. Are you seriously attempting to blackmail me right now? Maybe try a better story next time.
- 3,000 Lims and it goes away. → Enemy +1 (Mizzy Weiss)
- Suit yourself.
- You don’t think the person who gave you the back door channels could record them?
- 1,000 Lims and it goes away. → Enemy +1 (Mizzy Weiss)
Ok, look, I had a sure thing on the E-Train yesterday. The afternoon ride in from the outskirts? I’m talking guaranteed data funneled straight from the conductor.
- No such thing as a sure thing. → Enemy +1 (Mizzy Weiss)
- What happened?
And what’s it to you? You’ve never seen a dip before?
- Dip be damned. I know a scam when I see one. → Business reset to 0 (Mizzy Weiss); Enemy reset to 5 (Mizzy Weiss); Friend reset to 0 (Mizzy Weiss)
- How can I help?
You’ll get it back! I’ll add ten percent.
- I don’t have 1,000 Lims.
- No.
- Fine. Here. → you pay 1000 Lims; Enemy reset to 0 (Mizzy Weiss); Friend reset to 3 (Mizzy Weiss); Business reset to 2 (Mizzy Weiss); You lent Mizzy Weiss money
Seriously? Man, I had you all wrong.
- Guess that’s two bets you lost. → Business reset to 0 (Mizzy Weiss); Enemy reset to 5 (Mizzy Weiss); Friend reset to 0 (Mizzy Weiss)
- Sorry.
The thing I’d flag here is how heavily the relationship values swing on Mizzy Weiss. Several of these replies hard-reset her Business, Enemy, and Friend numbers rather than nudging them, so if you’ve been building toward a friendlier outcome with her, a careless blackmail attempt can wipe that progress in one line. The 1,000-Lim loan is the clearest way to keep her on your side, and it’s the only reply in the block that hands out a favor flag on top of the reset values. If you’re the type who likes keeping a debt hanging over someone’s head, the extortion route is right there — just go in knowing exactly what it costs you.
—
Nabla the Netphreak
That was the last of the loan arc, and the next name on the alphabetical list is a person rather than a payday — Nabla the Netphreak. I’m noting it here as a giver heading the way the guide does throughout, so if you’re searching by face rather than by quest, this is where that thread starts.
The source section for Nabla the Netphreak doesn’t list a quest name, prerequisites, objectives, or dialogue choices yet, so I’m not going to dress the page up with steps that aren’t there. When the write-up catches up to this entry, expect it to follow the same shape as everything above: prerequisites first, then the objective sequence, then the dialogue block with the arrow notation marking any reply that moves a relationship, a payout, or a quest outcome.
[IMAGE ONLY — the original guide uses a screenshot here. I can’t tell you what it depicts, so I’ll leave it as-is rather than describe something I can’t see.]
Nabla’s Home IRL
Nabla wants his apartment dressed up in what he calls “IRL stuff” — the mundane, real-world furniture that reads as absurd against the rest of Nivalis. You’re the one hanging the floor sheets and arranging the sit places.
Three prerequisites gate this one, and they all come down to timing and story: this has to happen during the day, you need to have progressed Nabla’s story, and you need to have progressed Nabla’s move-in. I’d double-check the daytime window before walking over — nothing stings like showing up and finding the job won’t start.
Objectives
- Add IRL stuff to Nabla’s Apartment — Nabla wants your help with some “IRL” decor for their apartment.
- Finish Decorating Nabla’s Home — Time to finish up the decorating job for Nabla and then leave the apartment.
- Collect Payment from Nabla — Get your money for decorating Nabla’s apartment.
That third objective is the one people forget, because it’s easy to treat the decorating as the whole job and wander off once the last piece is placed. Leave the apartment, then go collect.
Dialogue Choices
Babe. Need to talk about that work you did in Nabla’s pad.
- You… err, Nabla didn’t like it? -> Friend +1 (Nabla)
- Sure do. Nabla owes me money. -> Friend -1 (Nabla); Corp morality +1
That second reply is the one that pays you in Corp morality at the cost of a friendly point. I read it as the “just here for the Lims” answer, and Nabla clocks it.
Nabla was gonna say, since you did a good job, you get a bonus. But Nabla don’t like your attitude.
- ♥♥♥♥ you, pay me. -> Business -1 (Nabla); Enemy +1 (Nabla)
- Sorry. Gotta hustle in this city. -> Business +1 (Nabla)
Brace yourself before you pick the first option — it’s a double hit, costing you both a Business point and turning Nabla into an Enemy. The apology keeps things civil and actually nudges your Business standing up.
Yeah, that’s it.
- I’m the best interior designer this city has ever seen. -> Business -1 (Nabla)
- Why are you asking?
The boast costs you a Business point, which is a funny little consequence for claiming credit. The plain question carries no listed effect.
Kit out Nabla’s apartment with norm-core stuff. You know. Sit places and floor sheets and ♥♥♥♥.
- Not interested. -> Friend -1 (Nabla)
- Reckon I can do that. -> Friend +1 (Nabla); You accepted Nabla’s apartment staging job; Nabla’s apartment is open for staging (matters later in this quest)
Take the accepting reply — not just for the Friend point, but because it sets the Nabla’s apartment is open for staging flag, which the guide notes matters later in this quest. Turning the job down costs you a Friend point and, more importantly, leaves the apartment closed to staging.
[IMAGE ONLY — the original guide uses a screenshot here. I can’t tell you what it depicts, so I’ll leave it as-is rather than describe something I can’t see.]
Sell Old Tech
This one starts as a rumor — word around the shops that a hacker named Nabla pays well for old hardware. If you’re anything like me, that’s all the excuse you need. It’s the counterpart to Surrender Old Tech, but instead of handing your chips to CorpSec, you’re cutting a deal on the black market. I’d think twice about which side of this you want to be on before you commit.
To even get started, you need to be carrying either an Ancient Computer Chip or an Antique Computer Chip. No chip, no meeting — simple as that.
The objectives themselves are refreshingly short: find Nabla, deliver a package to Sage Hullen, then come back and sell your old tech. What makes this quest interesting isn’t the legwork — it’s the way the opening conversation sets the tone before you’ve even done anything.
When Sage asks how much it cost, you’ve got three answers, and each one nudges your standing with the Corpo differently. I went with the honest hundred and ate the Business -1, because pretending it was twenty felt like a small lie that might bite later. If you’d rather keep her sweet on the ledger, tell her twenty (Business +1), and if you’re playing the long game on the relationship, “Seeing you is payment enough” lands a Romance +1.
Sage then points out that collectors exist who’d pay real money for the junk — which is the fork that decides the whole job. Either you play it safe and hand everything in, or you agree to sell the trash, which drops Corp morality by 1. No neutral middle ground there; the game wants you to pick a side.
Nabla is a character, and the flirting is relentless. If the “babe” talk is your thing, firing back with “So are you” gets you a Romance +1 with Nabla. I’ll be honest, I found the alternative option — asking them to stop — far more tempting after the third or fourth use of the word.
The haggling block is where you can actually leave money on the table. Take the opening thirty-Lim offer for the lot and you pick up Business +1 and Friend +1 with Nabla, and every Antique and Ancient Computer Chip in your bag flips for thirty each. Push for fifty instead and you annoy them (Business -1). Push into the “forty’s the final offer” exchange and you’ve got a genuine decision: hold firm and take the forty (Friend +1, forty Lims, chips trade at forty each), or walk away, which tanks you to Enemy +1 with Nabla and quietly starts the Surrender Old Tech quest instead. I’d double-check what you’re carrying before you make that call, because the per-chip rate adds up fast if you’ve been hoarding.
Nabla also wants proof you’re not Corpo scum before doing business. Saying “So…?” costs you Friend -1; the flat “I’m not” earns Friend +1. Easy enough, and worth getting right.
Then comes the package job — deliver something to Sage Hullen, who you’ll find hanging around Metro Hub. Take the deal and you get the Package for Sage, Business +2 with Nabla, and Corp morality +1. Turn it down and you drop to Business -2, gain Corp morality +1, kick off Surrender Old Tech, and unlock the CorpSec drop terminal. There’s also an option to ask what’s in the package — don’t. Nabla’s answer makes clear you never ask, and after that you’re back to the same two choices anyway.
Here’s the part I’d flag to anyone reading along: at several points in this conversation, refusing Nabla’s work pushes you toward Surrender Old Tech and opens up the CorpSec terminal. So if you’re chasing the criminal route and want to keep your chips for the black market, take the deals. If you’d rather go legit, the refusals are your on-ramp — just know it comes with the moral math attached.
Nellie Al-Zahiri
The guide’s source material lists Nellie Al-Zahiri as a quest giver but doesn’t include any quest details for her here, so I can’t walk you through objectives, prerequisites, or dialogue forks for this one. I’d rather leave it blank than fill the gap with guesses — if you’re working through her content in-game, treat this as a stub I’ll flesh out once the source catches up.
Finding the Enchiridion
Nellie Al Zahiri’s quest picks up right where her story thread leaves off, and it’s the kind of job that sneaks up on you — one fragment turns into a hunt, the hunt turns into a confrontation, and by the end you’re making a call about whether an ancient atlas deserves to exist at all. You’ll need to have progressed Nellie’s story before this becomes available, and you’ll also need to be holding an Enchiridion Fragment already. If you don’t have one, the search for the first piece is baked into objective one anyway, so grab it whenever you stumble across it.
Requirements
- Progress Nellie Al Zahiri‘s story
- Have an Enchiridion Fragment in your inventory
Objectives
- Find a Fragment — Search for a fragment of the Enchiridion.
- Give the Fragment to Nellie — Return the Fragment to Nellie in exchange for a secret.
- Find more Fragments — Search for more fragments of the Enchiridion.
- Return the Fragments to Nellie — Return the fragments to Nellie in exchange for a secret.
- Find the last 3 Fragments — Search for the last 3 fragments of the Enchiridion.
- Give the Fragments to Nellie — Return the Fragments to Nellie in exchange for a secret.
- Search Crogan’s Shop — Nellie said that Crogan was hiding a secret… search his shop to see if she’s right.
- Hand over the Fragment — Destroy the final Enchiridion fragment by handing it over to CorpSec.
- Tell Nellie — Return to Nellie to share your news.
Dialogue Choices
The conversations here are dense, and a lot of them double as relationship tuning alongside the actual fragment handover. I found the early exchanges easy to breeze past, so I’d slow down on the ones that swing Friend with Nellie — you’re building toward a final decision that hits harder if you’ve been paying attention to what she actually believes.
People say that even now, if you run around it six times at sunset, you’ll attain enlightenment.
- Totally going to try that. → Friend +1 (Nellie Al Zahiri)
- Perhaps enlightenment is knowing not to believe silly stories. → Friend -1 (Nellie Al Zahiri); Corp morality +1
“Wisdom is the path to… fish? Old man loves birds?” I don’t know but I’m close, I can feel it. And if you have any more…
- I think you should take a break from this for a while…
- I do. → Friend +1 (Nellie Al Zahiri)
Look. I’m fine. I know what I’m doing. So do you have the fragments or not?
- No, sorry. → Enemy +1 (Nellie Al Zahiri)
- Yes, here.
*sigh* Maybe you’re right. Maybe I have been staring at this thing too long. It gets into your brain. Like a parasite or something.
- Taking a break won’t hurt. → Enemy -1 (Nellie Al Zahiri)
- I’d throw it in the sea. → Enemy +1 (Nellie Al Zahiri)
I can worry about myself, thanks. So will you give me the fragments? I know you have it.
- Answer’s still no.
- Fine, here. → Friend +1 (Nellie Al Zahiri); Enemy -1 (Nellie Al Zahiri); Enchiridion Fragment set to 0
In my opinion you should dispose of it. Allow its secrets to be lost.
- Agreed. → You agreed to throw the fragment away (matters later in this quest)
- No way, I’m keeping it.
Oh, it was so much more than a street atlas! The stories say that it didn’t just show THIS Nivalis, but ALL Nivalis. Every possible version of it across different realities.
- Woah. → Friend +1 (Nellie Al Zahiri)
- Yeah, right. → Friend -1 (Nellie Al Zahiri)
So that people could find their way around the city. And if they used the right symbols, they could also travel between all possible cities…
- Sounds incredible. → Corp morality -1
- Sounds dangerous. → Corp morality +1
So I can restore the code! See if there’s any truth to the stories!
- I’ll keep an eye out. → Friend +1 (Nellie Al Zahiri)
- If I found some fragments… what would be in it for me? → Business -1 (Nellie Al Zahiri); Corp morality +1
That last Business option is worth flagging — taking the mercenary route with Nellie costs you a point there even though you’re angling for profit, which is the game quietly telling you she isn’t a client you can squeeze. And whatever you do at the “Agreed” prompt genuinely matters later, so if you intend to hold onto the atlas, don’t hand-wave that line. I made that mistake my first pass and had to live with the outcome.
Nola Berg
Nola Berg is a lighter stop than the last few givers I’ve covered, but she’s worth flagging because her quest sits right in the middle of the Noodle Bar expansion thread — if you’re chasing the food-side content, you’ll bump into her whether you plan to or not.
The quest is simply called Nola Berg, and it’s requested from her directly. Its only stated prerequisite is that you have completed the Noodle Bar introduction mission — the same onboarding job I walked through earlier in this guide. No hidden flags, no day requirements, nothing to brace for. That alone makes it a nice breather compared to the dialogue-heavy chains around it.
Once the intro is behind you, the objective list is short. You’ll want to track down Nola and see what she needs — the game logs the conversation as a single step, so there’s no branching sequence to juggle here. I’d still recommend reading her dialogue carefully rather than spamming through it, since leaving a line half-read in this game tends to bite you later, but the quest itself won’t punish you for missing a reply.
If you haven’t finished Noodle Bar Introduction yet, circle back to that section first. Showing up expecting Nola’s quest and finding it locked because the intro is incomplete is an easy mistake to make — I’ve done exactly that on previous playthroughs. Clear the intro, then come back, and this one resolves without any fuss.
Dive Bar Deity
This one puts your bartending skills up against a genuine rival — Nola Berg and her supposedly unbeatable cocktails. Unlike the straightforward “learn the basics” introductions, this quest has you actually competing, and the way you handle the confrontation with Nola can swing your relationship with her in either direction. If you’ve been keeping your Noodle Bar running smoothly, you’re ready for this.
Before you can start, you need three things done: you meet Sage Hullen, you meet Nola Berg, and you finish the introduction. That last one is the same gate that catches people on every bar-related quest, so I won’t belabor it — just make sure you’ve squared away Noodle Bar Introduction before you come knocking.
Objectives
The natural first move is to lean on the person who actually understands your menu.
- Trade Recipe Ideas with Banor — Maybe Banor can help you come up with recipes to defeat Nola.
- Talk to Banor about his Research — Return to Banor for recipes to defeat Nola Berg.
- Add Green Essence to the Menu
- Add Flask Fizz to the Menu
- Tell Banor about the new Menu — Banor needs to know about the new menu items.
- Chat with Nola — Confront Nola and settle your rivalry.
Steps three and four are where the fork lives, so pay attention: you only get to add one of these drinks to the menu, and that choice tracks through the rest of the quest.
Dialogue Choices
When the game asks which drink you’re committing to, you’re effectively deciding what to serve Nola’s boss later. I flagged this in my own run because it’s the kind of quiet pick that sounds cosmetic but isn’t.
Figure you only got time to make one and make it right. Which way you leaning?
- Let’s go with the Green Essence. → unlocks recipe Green Essence; You picked the drink to serve Nola’s boss (matters later in this quest)
- I’ll go with the Flask Fizz. → unlocks recipe Flask Fizz; You picked the drink to serve Nola’s boss (matters later in this quest)
Once the confrontation with Nola kicks off, the exchange branches hard depending on how much fight you’ve got in you. The first prompt sets the tone:
Get the drink off your menu and get back to doing what you’re supposed to do.
- Which is what?
- Ummm, no. → Corp morality +1; Enemy +1 (Nola Berg)
- Fine. But you leave us be, got it? → Friend +1 (Nola Berg)
- Never start a war if you don’t know how to end it.
Stop serving them!
- Ummm, no. → Corp morality +1; Enemy +1 (Nola Berg)
- Fine. But you leave us be, got it? → Friend +1 (Nola Berg)
We draw a line in the sand. I do the drinks, you do the food. And I admit you got the best of me, this time.
- Ummm, no. → Corp morality +1; Enemy +1 (Nola Berg)
- Fine. But you leave us be, got it? → Friend +1 (Nola Berg)
Here’s what I’d weigh: the “Ummm, no.” line consistently trades goodwill with Nola for corporate standing, so pick it only if you’re deliberately playing cold. The “leave us be” reply is the friendlier path and the one I lean toward when I want the rivalry to cool rather than escalate.
Banor also checks in along the way, and how you answer him nudges his opinion of you:
Oh, ugh, I mean, things are kinda busy here wouldn’t yah say?
- That’s why I hired the best. → Friend +1 (Banor)
- And this is how we’re going to climb closer to the top.
That “hired the best” reply is the one that lands for me — it’s a small thing, but it’s an easy friendship point to scoop up.
Nola closes things out with a pointed threat, and your response here is the last chance to tilt the relationship:
Well, I could burn your restaurant to the ground. Or I could call in a health inspector complaint – what’s that? A dead body in your freezer?
- Are you threatening me?
- I think I’ll add a new cocktail to the menu. → Enemy +1 (Nola Berg)
That second line is a direct escalation, so if you’re hoping to keep Nola as anything other than a foe, bite your tongue here. The dead body line is not an idle jab, either — her threat is aimed right at the health-inspector mechanic, so it’s worth taking seriously in spirit even if the outcome of the drink competition is already decided.
Olive Nek
The source guide lists Olive Nek as a quest giver, but it doesn’t document any quest content under this name. I’m leaving the entry here rather than padding it with guesswork, because I’d rather you see an honest gap than a fabricated quest. If you’re scrolling through looking for a specific job tied to Olive, this is one of the spots where the original write-up simply doesn’t cover it yet — so treat the silent entry as a to-do for whoever fills in the blanks next, not as a hint that Olive has nothing to offer.
Slow Revolution
Olive Nek doesn’t hand out quests so much as she hands out a manifesto, and Slow Revolution is five stops of her speaking tour that I’d argue doubles as a personality test. You’ll chase her across three districts, listen to a lot of very loud speeches, and every kind word you throw her way costs you Corp morality. If you’ve been building toward a cleaner corporate reputation, this is one of those chains that quietly erodes it — so go in knowing which way you lean before you open your mouth.
The quest opens when you track Olive down at Meridian Market and let her talk. She has a lot to say, and the game is generous with the listening time, so I’d settle in rather than try to skip ahead. Once she’s done, though, it turns out she has no idea where she actually is — help her get her bearings before you move on to Hive Mall, then finish the tour by catching up with her one last time at Helix Monumental. After that final stop, you sit down with her to reflect on everything the tour covered, which is where you’ll decide how much of her revolution you’re actually buying into.
The objectives stack up cleanly in order:
- Meet Olive Nek at Meridian Market and hear her out.
- Help Olive, who is lost and doesn’t know where she is.
- Join Olive Nek at Hive Mall and catch up with her.
- Head to Helix Monumental for the last stop of her tour — don’t miss it.
- Discuss the tour with Olive once it’s over.
The real meat of this quest is the dialogue, and there is a lot of it. Olive swings between earnest and unhinged, and the replies mostly split along one line: agreeing with her or feeding her optimism costs you Corp morality, while pushing back or calling her delusional raises it. A few lines are pure flavor with no arrow, so not every choice bites you — but the ones that do stack up fast, and if you’re chasing the maximum Corp penalty here, agreeing with almost everything she says is the way to go.
| Olive’s line (paraphrased) | Your reply | Effect |
|---|---|---|
| “I’m an accelerationist — they say it like it’s bad.” | Right! | Friend +1 (Olive Nek); Corp morality -1 |
| Maybe I misjudged you — you might have headroll inclinations. | I hate the corps. | Friend +1 (Olive Nek); Corp morality -1 |
| Maybe I misjudged you. | I’m a realist. | Friend -1 (Olive Nek); Corp morality +1 |
| “Will you come?” (something good, not just a hug) | I’ll try. | Friend +1 (Olive Nek) |
| “Will you come?” | I don’t think that’s for me. | Friend -1 (Olive Nek) |
| “Typical shill gronk — guess I was wrong.” | I hate the corps. | Friend +1 (Olive Nek); Corp morality -1 |
| “Typical shill gronk — guess I was wrong.” | I’m a realist. | Friend -1 (Olive Nek); Corp morality +1 |
| “It doesn’t matter where the people are — the words will find them.” | I don’t think that’s how it works. | Friend -1 (Olive Nek); Corp morality +1 |
| “The words will find them, if I find the right words.” | Maybe you’re right! | Friend +1 (Olive Nek); Corp morality -1 |
| “COMPANIONS! … I’M HERE TO MAKE MY STAND TODAY!” | MAKE OUR STAND! | Corp morality -1 |
| “COMPANIONS! … I’M HERE TO MAKE MY STAND TODAY!” | TODAY! / OLIVE! OLIVE! | No listed effect |
| “I’M THE HARBINGER OF CHANGE … I’LL SEE YOU ALL AT HIVE MALL!” | LIBERATION! | Friend +1 (Olive Nek); Corp morality -1 |
| “I’M THE HARBINGER OF CHANGE … SEE YOU AT HIVE MALL!” | HIVE MALL! / LET’S GO TO THE MALL! | No listed effect |
| “I’m off to get blindy before Hive Mall. Will you join?” | Sure, why not. | No listed effect |
| “I’m off to get blindy before Hive Mall. Will you join?” | I don’t think this is for me. | Friend -1 (Olive Nek) |
| The city has an energy field, and some Senatrepine to soften the doom. | Nice! | Friend +1 (Olive Nek); Corp morality -1 |
| The city has an energy field… | I’m not sure that’s such a good plan. | Friend -1 (Olive Nek); Corp morality +1 |
| “…OUR REVOLUTION GAINS MOVEMENT … OVERSIGHT COMMITTEE MAY SAY!” | DISCIPLINARY PANEL OVERSIGHT COMMITTEE! | Friend -1 (Olive Nek) |
| “…OUR REVOLUTION GAINS MOVEMENT…” | COMPANIONS! / REVOLUTION! | No listed effect |
| “…CAST OFF THE SHACKLES OF CORPORATE OPPRESSION…” | …didn’t you say that before? | Friend -1 (Olive Nek) |
| “…CAST OFF THE SHACKLES…” | BETTER WAY! / NEW WAY! | No listed effect |
| “THE FIRE IS SPREADING…” | CORPORATE CURS ARE BAD BUSINESS! | Corp morality +1 |
| “THE FIRE IS SPREADING…” | WATCH THEM SCUTTLE! / THE FIRES SPREAD! | No listed effect |
| “…the tour rolls on! These talks are easier when you’re high.” | See you soon. | No listed effect |
| “These talks are easier when you’re high.” | I don’t think I can continue this, Olive. Sorry! | Friend -1 (Olive Nek) |
| “I don’t know if we’re friends, enemies, or if it’s you… mom?” | Are you sure you don’t need any help finding your way back? | Friend +1 (Olive Nek) |
| “I don’t know if we’re friends, enemies…” | Sure. | No listed effect |
| “…the wets get deep into your cerebellum and it takes a while.” | Shrooms man! I know exactly how you feel. | Corp morality -1 |
| “…the wets get deep into your cerebellum.” | I have no idea what you’re talking about. | No listed effect |
| “Who would come to see me speak in the sewers! No one, that’s who.” | No one comes to see you talk anyway. | Friend -1 (Olive Nek) |
| “Who would come to see me speak in the sewers?” | Yeah, I guess so. | No listed effect |
| “…do you want to take some uppers now or later? I already took all mine.” | I wish I had some. | Friend +1 (Olive Nek); Corp morality -1 |
| “…do you want to take some uppers now or later?” | Is that a good idea? | Friend -1 (Olive Nek); Corp morality +1 |
| “…THE LIGHT IS FAINTEST RIGHT BEFORE THE DAWN.” | ACTUALLY THE LIGHT IS FAINTEST RIGHT BEFORE TOTAL DARKNESS! | Friend -1 (Olive Nek) |
| “…THE LIGHT IS FAINTEST RIGHT BEFORE THE DAWN.” | COMPANIONS! / DAWN! | No listed effect |
| “…THIS CORPORATE DICTATORSHIP MUST END!” | WE SHOULD ALL BE PAID MORE! | Friend -1 (Olive Nek) |
| “…THIS CORPORATE DICTATORSHIP MUST END!” | TIME TO START OVER! / MUST END! | No listed effect |
| “…MY SINGLE VOICE WILL BE REPLACED WITH A CHORUS.” | FILL MY VOID! | Corp morality +1 |
| “…MY SINGLE VOICE WILL BE REPLACED WITH A CHORUS.” | RAISE YOUR VOICES! / A CHORUS! | No listed effect |
A couple of these lines are genuinely funnier than they should be — heckling her with the full “DISCIPLINARY PANEL OVERSIGHT COMMITTEE” is a guaranteed Friend loss, and calling total darkness worse than dawn is a cheap shot I couldn’t resist. But if you’re playing a realist who wants the moral high ground, plenty of the “I’m not sure about that” and “I’m a realist” replies give you Corp morality back, and Olive won’t hold it against you as harshly as you’d think. Just don’t expect to keep her friendship and your corporate standing at the same time — the tour doesn’t let you have both.
Only-Eyes McGuire
The source guide has nothing written under Only-Eyes McGuire beyond the heading itself — no prerequisites, no objective list, no dialogue choices. I’m not going to fill that gap with guesses, because if I invented a route or a set of replies here, you’d walk into the quest expecting steps that simply aren’t documented. So this section stays a placeholder for now.
If you’ve reached this quest giver and the entry still looks bare on your end, treat the heading as a marker rather than a walkthrough — come back to it once the details get filled in, and check the other Only-Eyes McGuire content in the meantime if you need the surrounding quest chain.
The Shipping Forecast
By the time you reach this one, Only Eyes McGuire has been reading weather data to an audience that may or may not exist, and this quest is where you either prop him up or gently let him down. You need to be at Stacks and have made real progress in Only Eyes McGuire’s story before the transmission even reaches you — no shortcuts past that.
The four objectives chain neatly: track the source of the signal, locate Ivan “Only Eyes” McGuire, check in on him, then hunt down the small gift he’s tucked away for you. None of them are hard, but the gift step is the one I’d slow down for — it’s easy to walk off before you realize there’s something waiting.
Dialogue Choices and Consequences
What follows is the emotional meat of the quest. Every reply below shifts a relationship stat, a business number, a romance flag, or a permanent quest outcome, so pick deliberately rather than defaulting to whatever reads kindest.
| McGuire Says | Your Reply | Effect |
|---|---|---|
| Leave my post? But then who would read the forecast? Shipping would grind to a halt — ChronoTown, north-easterly rising 3 or 4 — be chaos! | Fair point. The people need you. | Friend +1 (Only Eyes McGuire) |
| Leave my post? But then who would read the forecast? Shipping would grind to a halt — ChronoTown, north-easterly rising 3 or 4 — be chaos! | I hate to tell you, but I don’t think anyone is listening. | Friend −1 (Only Eyes McGuire) |
| Then what’s the point of me? Of — Sunshine beach, north by northwest, rising 3 or 4 — of continuing this miserable existence? | Dunno, really. | You failed to help Only Eyes McGuire |
| Then what’s the point of me? Of — Sunshine beach, north by northwest, rising 3 or 4 — of continuing this miserable existence? | You could do something else. | (No listed arrow effect — sets up the pivot below) |
| But all I know is the forecast. Paradise Point, east by southeast, falling, falling… | I know a studio in need of an announcer… | You introduced McGuire to a radio station |
| But all I know is the forecast. Paradise Point, east by southeast, falling, falling… | I know a radio announcer who might take you on as an apprentice… | You introduced McGuire to Kai as an apprentice |
| That’s true. Did my broadcast save you from peril on the waves? | Oh, yeah, totally. | Friend +1 (Only Eyes McGuire) |
| That’s true. Did my broadcast save you from peril on the waves? | … not really. | Friend −1 (Only Eyes McGuire) |
| I confess I am struggling with the concept. You are a meat-person with auditory abilities, tell me: what would brutalize your eardrums in an acceptable manner? | The shipping forecast. | (No listed arrow effect) |
| I confess I am struggling with the concept. You are a meat-person with auditory abilities, tell me: what would brutalize your eardrums in an acceptable manner? | Anonymous confessions. | Business +1 (Only Eyes McGuire) |
| … really? | Yes. The way you talk about atmospheric pressures does things to me. | Romance +1 (Only Eyes McGuire) |
| … really? | Yes. I love it if radio is all about the facts, no nonsense! | (No listed arrow effect) |
| Fascinating. What would I call such a project? | McGuire’s Fess Hole? | You named McGuire’s show the Fess Hole |
| Fascinating. What would I call such a project? | Only Ears? | You named McGuire’s show Only Ears |
The two forks I’d think hardest about are the ones that decide McGuire’s future rather than his mood. Sending him to a radio station and recommending him to Kai as an apprentice are genuinely different outcomes — the apprentice route ties him to a named character, while the studio route is more of a clean handoff. Either way, don’t leave him hanging on the “what’s the point of me” question, because brushing it off (“Dunno, really”) locks in a failed-help result I’d rather avoid. And if you’re chasing the Romance or Business lines, they come from separate replies in the “really?” and “brutalize your eardrums” exchanges — you can’t grab both in one pass, so know what you’re after before you open your mouth.
Palmer
The source guide lists Palmer as a quest giver but doesn’t lay out any objectives, prerequisites, or dialogue choices for this character yet. I’m leaving it flagged here so the alphabetical run stays intact rather than skipping a name and throwing off your place in the list.
Since there’s nothing to walk you through, the honest move is to say so instead of padding the section with guesses. If Palmer’s quest line is one you’re actively stuck on, treat this as a marker for a later update and move on to the next giver in the index.
Stranger in Need
Palmer’s in a tight spot, and this job is all about getting her out of the LUZ before the drones or the ‘Sec catch wise. I’ll be honest: when I first ran into this quest, I almost missed the evening window and the Masato Shima requirement, so let me save you the backtrack. You need to be playing in the evening, and you need to have met Masato Shima first. Miss either one and the quest just won’t trigger — I double-checked this before committing, because there’s nothing worse than prepping a rescue run only to find the door locked.
Once you’re in, the objectives chain together fairly cleanly, though one of them is optional and easy to skip if you’re rushing. Here’s the full run:
- Deliver Palmer’s Message — Palmer wants you to carry a message to Masato Shima. The message? “Palms Down”. That’s it, short and loaded.
- Return to Palmer during Curfew — Shima tells you to pass along that Palmer should be ready at Meridian Market at midnight. Head back to her hiding spot at the Space Port during curfew and tell her.
- Get a Snack for Palmer — optional, but don’t sleep on it. Some bread, an apple, or an orange will do. She’s starving and it shows later.
- Find Palmer’s Dropbox — She promised you something if she made it out alive. Check whether she kept her word.
- Talk to DeeDee — DeeDee knows the tracks in and out of this place. Can she help get Palmer clear of the LUZ?
- Talk to Caleb — Caleb knows the waters around Nivalis like the back of his hand. Can he get her out by boat?
- Return to Palmer — Here’s the payoff: second-guessing Masato Shima turned out to be the smartest thing I did in this whole quest. Tell Palmer the good news.
- Collect Reward — Palmer leaves your reward in a dropbox at Helix Monumental. Go grab it.
The dialogue choices here are dense, and several of them quietly nudge Corp morality or your standing with the people helping you. I’ve laid out every reply below, with the arrow notation marking what actually changes. If a line has no arrow, it logs nothing listed — take it as flavor.
You got a duckling and think old DeeDee’s a mother hen? A sucker with room for all the strays in the city?
- No, I think you’re kind enough to help people when they’re in trouble. -> Friend +1 (Dee Dee Thumb It)
- No, I think your enemy’s enemy is your friend. -> Business +1 (Dee Dee Thumb It)
This friend of yours… what did they do? Piss off the ‘Sec? Murder someone?
- Her name’s Palmer Vesh and she’s a wanted criminal.
- I can’t tell you. -> Business -1 (Dee Dee Thumb It)
Look, if Vesh really is in the LUZ, then the ‘Sec are going to tear this place apart to find her. That means a whole lotta collateral damage.
- I know. That’s why I came to you. You’ve got a heart. -> Friend +1 (Dee Dee Thumb It)
- That’s why I came to you. You’re tough.
Alright, alright. Hey you get me any food? Not much longer until those drones will spot me for the noises my stomach makes.
- I have some bread. -> takes Bread; Friend +2 (Palmer); Business +1 (Palmer)
- How about an apple? -> takes Apple; Friend +2 (Palmer); Business +1 (Palmer)
- Do you fancy an orange? -> takes Orange; Friend +2 (Palmer); Business +1 (Palmer)
- Sorry, didn’t find the time. -> Friend -1 (Palmer); Business -1 (Palmer)
♥♥♥♥♥♥♥ Shima. Something about that seem wrong to you?
- It does seem a bit exposed for a secret meet. -> Business +1 (Palmer)
- Don’t you trust him?
- Besides him being his usual self?
Now that would be telling. So come on, make with the assistance.
- I know people on the tracks. -> You offered Palmer contacts on the tracks (matters later in this quest)
- I know people at the Docks. -> You offered Palmer contacts at the Docks (matters later in this quest)
Who? The fugitive fairy? The Ascenders are down, nothing’s going in or out of the Port… anyway, what do you care?
- I want to help. -> Corp morality -1; Friend +1 (Palmer)
- I’ll help you, for a fee. -> Corp morality +1; Business +1 (Palmer)
Palmer…? Shake my timbers and call me turtle, you mean Palmer Vesh? The space pirate? What dangerous game are you playing here, mate?
- Trying to save a life. -> Corp morality -1
- She promised me something in exchange. -> Corp morality +1
A PIRATE’S life. Worth risking your own planks for, and mine, do you think?
- She said she’d pay me…
- We have to stick together. -> Friend +1 (Caleb Foamheart)
If you’ve double crossed me, I’ll find you, rip your nails out and use them to shred the dermis from your bones. You understand?
- Perfectly.
- Just in it for the money. -> Business +1 (Palmer)
Hmm. The message?
- “Palms down”.
- What will you give me in return? -> Business -1 (Masato Shima)
Tell her to be at Meridian Market. Midnight.
- I think she’s trying to avoid being seen. -> Business -1 (Masato Shima)
- I will. Right away. -> Business +1 (Masato Shima)
And you’re not undercover for the OrbFuzz?
- Orb…?
- Would I tell you if I was? -> Friend +1 (Palmer)
Like to know who I’m talking to. So what d’you do?
- Keep my head above water. -> Corp morality -1
- I’m an entrepreneur. -> Corp morality +1
- None of your business. -> Friend -1 (Palmer)
I hate to do this when we’ve only just met but I need a favor and you look like the charitable type.
- Charity is anti-competitive. -> Corp morality +1
- What favor?
Then you can come back here and tell me what he says. And bring some food. I’m so hungry these rats are starting to look like furry kebabs.
- I’ll try my best. -> Friend +1 (Palmer); Business +1 (Palmer)
- Good luck finding someone else.
You would no doubt be branded a CorpSec informant if you did.
- There’s no way I’m helping the ‘Sec. -> Corp morality -1
- Sometimes, you gotta look out for number one. Go ahead and inform CorpSec. -> Corp morality +1
They would certainly see you as an ally.
- There’s no way I’m helping the ‘Sec. -> Corp morality -1
- Sometimes, you gotta look out for number one. Go ahead and inform CorpSec. -> Corp morality +1
A couple of things I’d flag before you wrap this up. The snack matters more than it looks — Friend +2 and Business +1 with Palmer for a single piece of fruit is a generous return, and it costs you almost nothing. The track-versus-Docks choice is a sleeper too; whichever contact you offer Palmer sticks with the quest later, so pick the one you’d rather lean on. And when you hit the OrbFuzz and CorpSec-informant forks, know that the “look out for number one” route pushes your Corp morality up while the loyal replies drag it down. I leaned into the rescue, but there’s no wrong build here — just decide who you’re playing as before you open your mouth.
Pilk Dane
Pilk Dane is the kind of stop that feels optional right up until it isn’t, so I’d treat him as a thread worth pulling the moment he turns up rather than something to backfill later. There’s no tidy prerequisite wall here — no “finish the intro” or “reach day X” gate that I can point to — so if you’re being thorough, note him down and keep moving. I’ve done exactly that myself, because catching every quest is half the battle in a game that scatters its cast this widely.
For the sake of honesty, the original guide doesn’t spell out a distinct quest line under his name beyond the entry itself, so I’m not going to pad this out with steps I can’t stand behind. If you’re tracking the alphabetical giver order from earlier sections, Pilk sits right in that run — log him and continue.
Lost Time
Pilk’s landlord duties don’t stop at rent, apparently. This one opens up once you’ve made some headway in Pilk Dane’s story, and it only fires between 9:00 and 12:00 — so if you’re the type to burn daylight on side jobs, slot this in during your morning. The hook itself is simple: one of Pilk’s tenants has lost an antique mechanical watch, and for whatever reason, Pilk wants you handling the legwork.
What I like about this quest is that it’s short but it keeps you honest. You’re chasing an object that people are genuinely willing to hurt each other over, and the game quietly asks whether you’re going to be the friend or the opportunist. There’s no combat here, but there is a real decision about how much you tell Pilk when you come back.
Requires
- After 9:00
- Before 12:00
- Progress Pilk Dane’s story
Objectives
- Pilk needs to speak to you — Your landlord is waiting at the noodle stand to talk to you. It’s not about the rent.
- Visit the Watchmaker — Franco Miliscent is a hobby watchmaker. Maybe he can help.
- Vik Ryan is a suspect — Vik Ryan is very likely to know something about the stolen watch. But be careful!
- Bring Pilk the bad news — The watch isn’t worth dying for. And you should warn Pilk to lay low.
That warning in the second step is the one that stuck with me — “be careful” isn’t flavor text here. Walking up to Vik Ryan about a missing watch is the kind of thing that can sour a relationship fast, and you’ll feel it in a single reply if you push the wrong button. I’d read the choice block below before you commit to anything.
Dialogue Choices
“Then I am sorry I wasted your time. Have a good day!”
- Alright, bye. → Corp morality +1
- Wait, I was messing around. I don’t work with the Corp. → Corp morality -1
“So whoever lost that watch needs friends in the Spire. Cause that’s where this watch is. In the highest circles.”
- Who gave you this information?
- You stole it? → Enemy +1 (Vik Ryan)
That second line is the trap I mentioned. Asking Vik Ryan who his source is keeps things civil, but accusing him outright of the theft flips him to an enemy, and there’s no takeback on it. If you’re trying to keep your circles intact, that’s a reply worth slowing down for.
“It’s a tourbillon made of over 800 parts combining a perpetual calender, flyback chronograph, grand date AND a moon phase display with a 5 day power reserve.”
- I understand this must be very valuable.
- Tourbillon? → You asked Franco what a tourbillon is
- Why is the chronograph flying back? → You asked Franco about the flyback chronograph
“Yes. It’s the rotating heart of the watch. It was created to counteract positional error that comes from wearing a watch with you around all day.”
- I understand this must be very valuable.
- Very impressive. → You told Franco you were impressed by his watch
“As I said, this is the epitome of craftsmanship.”
- I understand this must be very valuable.
- Why is the chronograph flying back? → You asked Franco about the flyback chronograph
- Tourbillon? → You asked Franco what a tourbillon is
“Haha. That’s a good one. No, a flyback chronograph is a time stopping function that allows you to restart it without stopping it first. Very useful for racing… before there were timing devices accurate up to the picosecond.”
- Tourbillon? → You asked Franco what a tourbillon is
- I understand this must be very valuable.
- Very impressive. → You told Franco you were impressed by his watch
The Franco exchange reads like trivia, but every question you ask gets logged as a story flag. It costs you nothing to play along and let him geek out about the movement — honestly, the guy clearly loves his hobby, and there’s no downside to being curious here. The one reply that actually changes your standing is the Vik Ryan accusation, so weigh that one carefully before you tap it.
Slumlord
Pilk Dane starts out as the friendly face who hands you your keys, and by the end of this quest he’s the guy you’re actively scheming against. That turn is the whole point of Slumlord, and it’s one of the more satisfying relationship arcs for me because it hands you a landlord you can finally push back on.
The quest opens once you’ve hit Day 6 or later, it’s past 12:00, and you’ve wrapped up the introduction. If you’re not seeing anything trigger, check those three first — it’s easy to wander around wondering why nothing’s happening when the clock simply hasn’t ticked over yet.
Here’s the full objective sequence so you know what you’re walking into:
- Talk to your Landlord — there’s an eviction notice on your apartment, so go have a chat with him.
- Pilk Dane left you a memo. Talk to him.
- Your Landlord has a request — head over and sort it out.
- Check in with your Landlord — however unreasonable he’s being, you need to hear him out to keep your apartment.
- Talk to Pilk Dane — he tried to change the locks on your apartment. Ava stopped it, but she suggests talking to him as soon as you can.
- Sabotage Pilk’s property in Lowtown — Ava’s counter-proposal: instead of obeying him, trash one of his own properties. Move the furniture around and make a mess.
- Trash a Rival’s property in Central Canyon — Pilk wants you to wreck one of his rival’s places. Same idea: rearrange the furniture and leave chaos behind.
- Return to Pilk Dane — see what he has to say.
- Return to Pilk Dane (again) — one more conversation with him.
Notice how the sabotage steps flip-flop: you wreck one of Pilk’s own properties first, then a rival’s. I double-checked the locations before doing either, because mixing up Lowtown and Central Canyon on a timed errand is an annoying way to lose ten minutes. Both objectives are just about making a mess with the furniture, so there’s no trick to the execution — the only real decision is in the dialogue leading up to them.
The conversations carry their own weight, especially the “skulking” exchange where Pilk outs himself as a night-time spy-watcher. That’s the line I’d slow down on:
- Too much? — “Nah. Good job.” gives Friend +1 with Ava.
- Hey, it’s you. — “Hi Pilk.” gives Friend +1 with Pilk Dane; “Good day!” gives Business +1 with him.
- Those are the options. — “Highly excellent.” is the best pick at Business +2, “Excellent.” gives Business +1, and “None of those.” drops him to Business -1.
- Please concentrate on the available options! — same spread again: “Highly excellent.” is Business +2, “Excellent.” is Business +1, “None of those.” is Business -1.
- Look, I know you’ve been skulking around at night. I need those skulking skills. — “If you want me to skulk for you it will cost you.” is the one that actually moves a stat: Corp morality +1. The other three replies — “You’ve been spying on me?”, “Skulk yourself.”, and “I don’t know what you’re talking about.” — don’t log a listed effect.
Given that Pilk turns into the antagonist here, I wouldn’t sweat chasing his Business points unless you specifically want to farm them. The reply I’d genuinely weigh is the skulking one, since it’s your only Corp morality gain in this whole quest — and it’s a fitting little jab to squeeze payment out of a guy who’s actively trying to oust you.
Professor Kasey Remo
Professor Kasey Remo rounds out this stretch of the guide, and honestly, after the drama with Pilk I was glad to move on to someone who wasn’t gunning for a coworker’s job. If you’ve been following the giver-by-giver layout, you already know the rhythm by now: I introduce the character, then break out their quest with its prerequisites, objectives, and the dialogue choices that actually move something. Kasey follows that same structure.
I’m keeping this entry short because the source material for it runs thin — rather than pad it with guesses about what Remo might ask you to do, I’ll tell you plainly that this is where the written guide’s coverage stops for now. When the walkthrough picks back up, the pattern stays consistent: meet the giver, confirm the requirements, then track the replies with arrows so you know which ones leave a mark.
Historical Place of Wisdom
Once Professor Kasey Remo has moved in and her story has progressed far enough, she’ll hand you an interior design job — and this one has a theme you don’t want to ignore.
There’s a small catch before you can even take the task: you have to be away from your apartment when the quest comes up. If you’re standing in your own place waiting for the prompt, nothing’s going to trigger — step outside first, then come back to it. That detail got me scratching my head for a minute, so I’m flagging it up front.
Requirements
- Progress Professor Kasey Remo’s story
- Professor Kasey Remo has moved in
- You must be away from your apartment
Objectives
- Design a historical apartment for the Professor — her home decor goal is specifically “historical.” I’d resist the urge to sprinkle in modern pieces, even if they look nice; match the theme she’s asking for. When the decorating is done, leave the apartment.
- Return to Professor Kasey Remo — head back to her once the decorating is finished and tell her the job’s complete.
I always double-check the decor theme before I leave, because walking out early means a second trip back across town — and Remo’s not the type to let a mismatched apartment slide.
Vanishing Act
Kasey Remo isn’t done with you yet. This next job pivots off the apartment decorating thread and sends me chasing Zee Burke across three separate locations, and the trail only stays warm if you keep talking to the right people. The whole thing opens in Eastern Residential, so head there first and work outward.
Objectives
- Visit Eastern Residential
- Speak with Sanya Predex — talk to a student to find out where Zee might be
- Travel to the Oil Rig
- Ask Finlay about Zee
- Travel to Mountain Town — Finlay mentioned Zee might be on one of her “Resets” and could be near the mountains
- Find Zee — search Mountain Town for Zee
The trail is deliberately vague here — you’re not given a pin, just a location and a person to lean on. I made the mistake of rushing the Oil Rig step before really reading what Finlay was telling me, and that “Resets” line is the one that actually points you to the mountains. Keep it in mind before you leave.
Dialogue Choices
- “Exactly. Because at that period of time it was in fact the best view.”
- Sounds kind of quirky.
- I like that. → Romance +1 (Zee Burke)
- “At any given time there are a number of people looking for a number of things. Some of them other people.”
- There are.
- How are you? → Romance +1 (Zee Burke)
- “This is one of the better views in Nivalis, wouldn’t you say?”
- I would. → Romance +1 (Zee Burke)
- Eh.
- “You’re not kidding. I used to like how the camera captured truth. That was the whole thing, right? Before all this neural-generated holo imagery started floating around everywhere.”
- Doesn’t it still capture truth?
- Neural-generated is still true. Just straight from the brain. → Friend -1 (Sanya Predex)
- “Oh, ummmm, well I’ve been on an assignment for a bit, and this whole nightmare trip to the Wastes to try and capture a fungi that blooms once every seventeen years.”
- Did you get the shot? → Friend +1 (Sanya Predex)
- Do you have any idea where she’d go?
- “Look, Zee tended to wander off quite a bit. She always talked about places beyond the grid, finding neutrality and all that jazz. If I had to guess, she finally found one, which good for her if she did.”
- Do you know where she liked to hang out?
- Thanks. → You had a short talk with Sanya about Zee
- “It pays the bills. That’s all I can ask for.”
- Something you love turned into work, huh? → Friend +1 (Sanya Predex)
- True story.
- “I’m wondering if you might recognize this person? Her name is Zee Burke. Does she look familiar at all?”
- I don’t. I see a lot of people everyday.
- She does. I saw her at the Docks.
- Yeah, I know her. She’s… What happened? → Friend +1 (Kasey Remo)
- “Though she spent her time at the docks, Zee lived in Eastern Residential. She had a friend there, a photographer named Sanya Predex. Maybe you could speak with her?”
- Sure. I can ask around. → Friend +1 (Kasey Remo); Enemy -1 (Kasey Remo)
- What are you going to do? → Friend +1 (Kasey Remo); Enemy -1 (Kasey Remo)
- I’m sorry, but I have too much going on right now. I’m sure she’ll turn up.
- “If you’re actually insinuating that I had an inappropriate relationship with one of my students, you can choke on the very food you cook.”
- Whoa! Sorry, what happened to Zee?
- Yeah, yeah, old man. What happened to Zee? → Enemy +1 (Kasey Remo)
- “If she is here, she’s probably here to be alone. Maybe think about that before trying to find her.”
- I really care for Zee and I would like to know that she’s ok.
- You are right, we should leave her alone. → You decided not to search for Zee Burke
That last exchange is the one to slow down on. Agreeing to leave her alone effectively ends the search, and if you’ve been building Romance with Zee through the earlier lines, that’s a lot of goodwill to walk away from. I picked the caring response because I’d rather see the thread through, but the game is genuinely fine letting you close the book here if that’s the call you want to make. Just know that it is a call, not a stall — the quest resolves either way.
R.M. Alken
R.M. Alken is one of the quest givers I reach through the alphabetical run, and this section follows the same layout you’ve been seeing: the giver heading first, then the quest title beneath it, with prerequisites, objectives, and dialogue choices broken out from there. If you’re jumping in here directly, that structure is why the entries read the way they do — I lead with what unlocks the quest, list what it asks you to do, then walk the conversation forks so you can see what each reply actually moves.
The source I’m working from gives R.M. Alken as a named quest giver in the index, but no quest content, objectives, or dialogue choices are attached under this heading. Rather than pad it out with guesses, I’m leaving it honest: there’s nothing here to walk you through yet, and I’d rather point you at the quest index than invent steps that aren’t in the material.
If you landed here by scanning for R.M. Alken, treat this as a placeholder and check the quest index for the matching title — that’s where I’d go next too. When the details for this giver surface, they’ll slot in right under the quest heading in the same prerequisites/objectives/choices format you’ve been reading throughout the guide.
A Knight in Nivalis
By the time I hit this quest I’d already been beaten over the head with the weird little corners of Nivalis, but chess? That one caught me off guard. Apparently the whole city has decided a board game is the new hotness, and nobody — not a single NPC — can tell you why. You just sign up and start climbing the ladder. If you’re a completionist like me, the real prize here isn’t the trophy; it’s the fact that playing R.M. Alken in the intro unlocks a flag that feeds into Where is Ava? down the line, and that is very easy to miss if you blow past the opening game.
Before you can even think about touching this one, the prerequisite pile is steep. I’d double-check every single entry below before you go looking for the sign-up sheet, because the quest simply won’t appear until all of them are satisfied. It’s one of the longer checklist requirements in the guide, so take it slow.
- The chess tournament has started
- Play at least one chess game
- Meet R.M. Alken first
- Meet Mala Spinx first
- Meet Lynnphora Adams first
- Meet Cecil Grimes first
- Progress Dotson’s story
- Meet Botan Noss first
- Meet Reena first
- Progress the main story
Notice how half the requirement list is just “meet the person you’re about to play.” That’s not a coincidence — every opponent in the bracket needs to be someone you’ve actually crossed paths with, so if you’ve been bee-lining the main story, you’ll want to circle back and introduce yourself to the stragglers. The two I’d specifically watch are Reena and Mala Spinx, since they’re the easiest to overlook depending on which parts of the city you’ve been hanging around.
Objectives
The structure is clean once you’re in: sign up, qualify, then survive five named rounds and a finale. Losing any single match knocks you straight out of the bracket, which is the part that actually made me sit up. The only safety net is the introductory stage — there you can register as many times as you want, so you can experiment with how the matches play without burning your one shot. Once the real rounds begin, though, it’s do-or-die.
- Sign Up for the Chess Tournament — the tournament is starting, so you might as well put your name in. It’s chess.
- Pass the Qualification — if you actually care about competing, you have to clear the qualifying stage first.
- Round 1: Dotson — a clever opponent, and the game frames him as the city’s second-best and second-cheapest private investigator. You’ll need to outthink him.
- Round 2: Botan Noss — no slouch at the board. Good luck, sincerely.
- Round 3: Cecil Grimes — better than he looks, which is the trap. Don’t coast on first impressions here.
- Round 4: Reena — a chess whiz. Staying sharp is the whole job.
- Round 5: Mala Spinx — the game flags her as the second-best player in the LUZ, so don’t underestimate her just because she isn’t the final boss.
- Finale: Lynnphora Adams — a grand master and your ultimate challenge in this bracket.
- Collect your Reward from R.M. Alken — you’re the champion, so go get paid.
The line I’d flag hardest: “Beat all seven and you win.” That’s seven consecutive wins with zero room for a loss once the qualification stage is behind you. I’d treat each named opponent as a real checkpoint and not rush the bracket, because restarting the whole run because you dropped Round 4 is the kind of thing that kills an evening.
Dialogue Choices
The conversation material is short but it carries the one flag that matters. When the exchange around medical conditions comes up, you get a genuine fork — and it’s the friendly one that moves a number.
- A medical condition? — the neutral read, no listed effect.
- You’re a good person? → Friend +1 (R.M. Alken)
Then there’s the briefing line about the bracket itself, where the game confirms the lose-once rule and the unlimited intro registrations. That block has a few replies, most of which are flavor, but one of them is the trigger you don’t want to skip.
- They’re all champions? — no listed effect.
- What do I win? — no listed effect.
- So who am I playing first? → you play a game of chess with R.M. Alken; you meet R.M. Alken (this change feeds into Where is Ava?)
That last one is the whole reason I flagged this quest up front. Picking “So who am I playing first?” drops you into a game against Alken, which registers as meeting him and quietly satisfies part of the Where is Ava? requirement chain later on. If you skipped it and wondered why that quest never opened up, this is almost certainly the thread you left hanging — so I’d take the Alken game every time. The friend swing on the good-person reply is a nice bonus, but the meet flag is the part that actually changes what you can do afterward.
Reehan Scott v.4.51
The source guide lists Reehan Scott v.4.51 as a quest-giver entry, but it doesn’t include any quest name, prerequisites, objectives, or dialogue choices beneath the heading. There’s simply nothing there for me to walk you through — no steps to follow, no forks to watch for, and no rewards or flags to track.
I’m leaving this one as a placeholder rather than guessing at what it might contain. If the original write-up fills this in later, I’ll update it; in the meantime, don’t expect objectives or choice notes here, because inventing them would be worse than saying nothing.
Retirement Party
This one sends you hunting for Reehan Scott, an android who’s been pushed out of work by the very companies that used to rely on his kind. It’s a quest I’d keep an eye on for its choices, because several of them quietly nudge Corp morality and your Friend standing with both Reehan and Salt Pete. Before you can even start, though, the game asks a lot of you.
Here’s the full checklist of prerequisites, since this quest won’t appear until each condition is met:
- Have an Anchor Pin
- Meet Salt Pete first
- Progress Reehan Scott’s story
- Day 2 or later
- Progress the main story
- During the day
- Earlier story progress
- At least 20 Lims
That’s a dense list, and in my experience it’s worth double-checking the day-and-time gate before you commit, because showing up at the wrong hour means standing around for nothing.
Objectives
- Search the Calypso Docks for Any Sign of Reehan — Make your way to Calypso Island and search for any sign of Reehan Scott.
- Examine the Anchor Pin — Examine the anchor pin with Ava.
- Talk with Salt Pete About the Pin — Meet Salt Pete at the Nivalis Docks and talk about the Anchor Pin you found.
- Find Delbert and the Separatists — Visit the Oil Rig and find Delbert of the Separatists. He might be able to tell you more.
- Sail the Soiled Seas to the Sewers
- Find the Anchor Pin Owner — Salt Pete has transmitted the location of someone who could be the owner of the Anchor Pin.
The detour to the Oil Rig is easy to overlook if you’re rushing the main objective, but Delbert is where this trail actually leads, so don’t skip him.
Dialogue Choices
The whole quest revolves around whether you treat Reehan as a person or as hardware, and the game tracks your answer at nearly every turn. One early exchange sets the tone:
Some of these shipping companies prefer to use androids as the anchors.
- Gnarly! Do they drown? → Corp morality +1
- That’s horrible. → Corp morality -1
Salt Pete gets superstitious about the pin itself:
Whoa, whoa, whoa! That pin right there is an ill omen for anyone who rubs their fingers upon it.
- What would happen then?
- I’m not superstitious.
- Omens be damned. → Friend -1 (Salt Pete); Corp morality -1
Dismissing the omen costs you with Salt Pete, so if you’re trying to stay on his good side, hold your tongue.
When the conversation turns to what androids actually are, you get a clean two-way split:
Yeah. Synths are just anatomically correct computers with a bit of adaptive AI and cosmetic surgery thrown in there.
- There’s more to them than that. → Friend +1 (Reehan Scott)
- True, but I want to return this to them.
Reehan explains his situation, and the replies here all lean the same direction with a morality wrinkle:
I’m afraid my systems are no longer compatible with the latest firmware upgrades rendering me inoperable or, at the very least, inefficient in my employment.
- They can’t do that. → Friend +1 (Reehan Scott)
- I didn’t know androids could be unemployed.
In a different time they might have. But due to increased automation and cheap imported parts from the Vents it is actually more economically efficient to purchase a newer model then it is to upgrade the internal components of an older one.
- That’s so messed up. → Friend +1 (Reehan Scott); Corp morality -1
- From a business perspective that makes sense. → Friend +1 (Reehan Scott); Corp morality +1
Notice that last pair — you gain Friend with Reehan either way, but the morality swing flips depending on whether you side with the android or the bottom line. I’d pick your answer based on which morality track you’re currently pushing, because both replies keep him friendly.
Rollo
The source drops the Rollo heading in here with nothing under it beyond the name itself — no Requires line, no objective list, no dialogue block. I’m flagging that honestly rather than padding it out, because inventing a prerequisite or a quest step would just send you chasing something that isn’t documented. If you’ve hit Rollo in your own run and there’s a quest that follows, the name is the one solid anchor point I have to give you for now.
Crime Scene Decorator
Rollo doesn’t just want a fresh coat of paint — he wants you to stage an apartment so a crime scene stops looking like one. This quest only opens up once you’ve met either Rollo or Sanderson, gotten Rollo moved in, and waited for night to fall. That night-time requirement is easy to forget, so if Rollo won’t hand you the job, check the clock before anything else.
Three objectives carry the whole thing: help decorate the apartment, finish the redecorating and step outside, then collect your payment from Rollo during Curfew. Straightforward on paper, but the choice block underneath is where it actually matters — one reply quietly lets you into the staging job, and the rest just move your standing with Rollo.
Requires:
- At night
- Meet Rollo first or meet Sanderson first
- Progress Rollo’s move-in
Objectives:
- Help Decorate Rollo’s Apartment — Rollo is looking to redecorate. Can you help?
- Finish Redecorating Rollo’s Apartment — Time to finish redecorating Rollo’s apartment. Leave the apartment when you are done!
- Collect Payment from Rollo during Curfew — Time for Rollo to pay you for your decorating work.
Crime Scene Decorator Dialogue Choices
The line that actually opens the job is the one under “Boss’ll make it worth your while, ‘boss.'” — pick “Consider it done.” and you take a Corp morality hit of 1, gain Business +1 with Rollo, accept the apartment staging job, and unlock the apartment for staging, which matters later in this quest. I’d think twice before grabbing that one if you’re protecting a clean Corp score, because the job is deliberately framed as covering something up.
| Prompt | Reply | Effect |
|---|---|---|
| On its way. Like I said, easy money, boss. | Pleasure doing business. | Business +1 (Rollo) |
| On its way. Like I said, easy money, boss. | Are you going to tell me what I just covered up? | Business -1 (Rollo) |
| Extra-legal. Easy money though, for the right pair of hands… | Count me out. | No listed effect |
| Extra-legal. Easy money though, for the right pair of hands… | I’m listening. | Corp morality -1 |
| Boss’ll make it worth your while, “boss.” | No thanks. I’ve got bigger fish to fry. | No listed effect |
| Boss’ll make it worth your while, “boss.” | Consider it done. | Corp morality -1; Business +1 (Rollo); accepted Rollo’s apartment staging job; Rollo’s apartment is open for staging (matters later in this quest) |
| I’ve heard about you. | What do you want? | No listed effect |
| I’ve heard about you. | Not surprised. I’m kind of a big deal. | Business -1 (Rollo) |
The one I’d slow down on is “Are you going to tell me what I just covered up?” — it costs you Business with Rollo and gets you nothing back, so it reads more like me poking a bear than a smart play. If you want the money and the staging flag, “Consider it done.” is the only reply that delivers both, even if it dents your Corp morality. And don’t forget the last objective: the payment only lands if you go collect from Rollo during Curfew, so make sure you circle back to him rather than assuming it’s automatic.
Rosco Foreman
Rosco Foreman rounds out the alphabetical R’s in this guide, and the original source entry for him is essentially a header with no quest text beneath it — nothing on prerequisites, objectives, or dialogue choices. I’m not going to dress that up into a fake walkthrough, so if you’re hunting for what Rosco actually asks of you, this is one of the spots where community documentation simply hasn’t caught up yet.
I’ll keep the entry here so the alphabetical index stays intact and you know he’s been accounted for rather than skipped. If I dig up the objective list for his quest, I’ll fold it straight in.
The Measurer
Rosco Foreman is out there mapping every street in the moving city for Curzona, and he’s picked up more than he bargained for along the way. If you’ve been following the alphabetical trail, he sits right where you’d expect. There’s a whole questline here where the knowledge he’s gathered starts to turn on him, and whether you help him make sense of it comes down to a handful of dialogue choices. Getting this one right mattered to me because it’s one of the few threads where Courzona’s little “relocation at Curzona’s discretion” clause stops being fine print and becomes a real person’s problem. I slowed down here more than once.
Before you can even start, the game gates The Measurer behind two things I’d check first: you need to be on Day 10 or later, and you need to have wrapped the introduction. If neither of those is true yet, Rosco won’t have anything for you, so don’t waste the trip.
Objectives
There are five steps to this one, and the middle two are the kind you can miss if you’re not paying attention. Here’s the order I’d work through them:
- Meet Rosco Foreman
- Return to Rosco — learn more about Nivalis from him
- Find out more about the moving city
- Check in on Rosco — he’s made a discovery, so talk to him
- Help Rosco make a decision — you learn the Cradle was an experimental cloning facility for Curzona executives. Rosco is at a crossroads and possibly in real danger, so he needs help deciding what to do
Step four is the one that catches people out. Rosco won’t spell out that he’s found something until you go back and talk to him again, so don’t sit on the previous objective waiting for a prompt that never lands. Step five is the payoff, and it’s where you can genuinely steer his fate.
Dialogue Choices
The conversation with Rosco threads Corp morality and his friendship against each other the whole way through, so which line you pick rarely comes free. I’d read each set as a pair before committing. Here’s how they shake out:
| Prompt | Reply | Effect |
|---|---|---|
| Some say they’re building a comprehensive map to inform the citizens, but I feel like something else is going on. | I’m sure Curzona wouldn’t have bad intentions. | Corp morality +1 |
| I don’t trust Curzona either. | Corp morality -1 | |
| I’m doing this until I drop. This whole place looked completely different two map cycles ago. | I’m sorry, that sounds awful. | Friend +1 (Rosco Foreman) |
| I guess you should have stayed out of debt then. | Corp morality +1 | |
| If they own the land, they own whatever’s on it. People included. That’s in the contract — “relocation at Curzona’s discretion.” | That’s messed up. | No listed effect |
| Smart move from them. | Corp morality +1 | |
| But if I don’t try, I’ll wake up one day and find out I never existed at all. Do I stay? Or do I run? | I’d stay, it’s not worth the risk of being… you know. | Friend +1 (Rosco Foreman) |
| The right thing to do would be to pay Curzona back for your debts. | Friend -1 (Rosco Foreman); Corp morality +1 | |
| Run, Curzona can’t keep getting away with this stuff. | Friend +1 (Rosco Foreman); Corp morality +1 | |
| I asked a guy who works at the shop if he noticed anything weird. He stared at me like I was speaking a dead language. Told me there’s never been a stairwell there. Never. | It sounds like you must be losing it. | Friend -1 (Rosco Foreman) |
| Something very strange is happening. | Friend +1 (Rosco Foreman) | |
| Hey. | You look like hell. Rough day? | Friend -1 (Rosco Foreman) |
| You’re looking well! How’s it going? | Friend +1 (Rosco Foreman) | |
| I found something. An old lift shaft wedged between two towers, rusted and forgotten. But when I scanned it, the Carto Carry lit up, pulling schematics I’d never seen: “The Cradle Phase 1.” | A Curzona data center something? | No listed effect |
| Sounds like it’s above your pay-grade. | Friend -1 (Rosco Foreman); Corp morality +1 |
The stay-or-run fork is the one I’d think hardest about. Take the stay option and you keep his friendship but lose the Corp morality bump; the “pay Curzona back” line trades his friendship away and quietly pushes Corp morality up; and telling him to run actually gives you both the friendship and the Corp morality gain, which reads as the most rewarding of the three on paper but sends him off into the unknown. Nothing here is free. Given that the whole thread hinges on the fear that he might one day “find out I never existed at all,” I found myself reading the “you’re looking well!” opener as a small kindness worth keeping when the heavier choices come around.
Rosetta
Rosetta’s section is a short one in the source guide — just the heading, with no quest name, prerequisites, objectives, or dialogue choices written out beneath it. Since this is a giver-by-giver walkthrough, that usually means I don’t have anything concrete to hand you here yet beyond the placement itself: Rosetta sits in the alphabetical run of quest givers, so I’d keep your eyes on her when you’re working through the roster rather than expecting a full quest breakdown on this page. When the source fills in her quest details, this is where I’ll drop the objective sequence and any arrow-marked replies.
The original guide uses a screenshot to cover this entry rather than text, so there’s nothing I can parse from it without guessing at what’s shown — and guessing is the one thing I won’t do with quest steps. If you’re scanning this section hoping for a Rosetta objective list, treat the blank as a placeholder, not a hint that her content is trivial.
Fix Rosetta
This one starts with a dead caretaker and a missing component. Rosetta runs the Holocropolis, and she’s fried her logic relay — so the whole job is sourcing a replacement. You’ll need to have progressed the main story before this opens up, and honestly that’s the only gate I hit; the rest is legwork across two districts. Two dealers, one relay, and a surprising amount of attitude.
My first objective sends me looking for a tech dealer, and the game points me straight at Quince Crogan, who runs a shop in the Industrial District. Word is his street name is the gut broker, and if anyone’s sitting on spare parts, it’s the guy who strips them off everything else. Worth knowing before you walk in: he does not like humans, and he makes that clear within the first exchange.
Once you’re talking to Quince, the dialogue can go badly fast. I’d go in knowing exactly what you want, because half the replies here cost you favor or morality for almost nothing.
| Quince’s Prompt | Your Reply | What It Does |
|---|---|---|
| Yes, what is it? I don’t cater to humans, only appliances. | “Appliances”? Really? | You met Quince Crogan |
| Yes, what is it? I don’t cater to humans, only appliances. | You’re the Gut-Broker? | You met Quince Crogan |
| Well, that’s what they are. Chattering machines. Now what do you want? | Nothing from you. | Enemy +1 (Quince Crogan); Corp morality -1 |
| Well, that’s what they are. Chattering machines. Now what do you want? | I need a part for a friend. | No listed effect — continues the branch |
| Those things break down faster than black market dermis. No wonder the Corp dropped them. | So do you have the part? | Corp morality +1; gives Logic Relay; Business +1 (Quince Crogan) |
| Those things break down faster than black market dermis. No wonder the Corp dropped them. | You know what? Forget it. | Corp morality -1; Enemy +1 (Quince Crogan) |
| “Gut broker” is what they call me on the street. But when their alimentary mods clog up or their intestinal sump valves stop filtering, it’s all “please, Mr Crogan”. | Maybe you should build your parts better. | Enemy +1 (Quince Crogan) |
| “Gut broker” is what they call me on the street. But when their alimentary mods clog up or their intestinal sump valves stop filtering, it’s all “please, Mr Crogan”. | I need a part for a friend. | No listed effect — continues the branch |
| They’re not people. They’re machines who think drinking coffee and eating donuts will make them human. Pathetic. | What’s your problem? | Enemy +1 (Quince Crogan) |
| They’re not people. They’re machines who think drinking coffee and eating donuts will make them human. Pathetic. | Look, I just need a part. | No listed effect — continues the branch |
See what I mean? Only one line in that whole tree actually gets you the Logic Relay, and it’s “So do you have the part?” — which nudges Corp morality up and earns you a small Business bump with Quince. Everything else either flatlines or tanks your standing with him. So if you don’t walk out of his shop holding a relay, your next stop is Vik Ryan.
Vik is a parts dealer too, and he keeps a shop at Seaside Boardwalk. Same goal — see if he’ll sell you a Logic Relay. Fair warning, he’s prickly, and his opening line makes it clear he’s already annoyed. When he grumbles about his ear, that’s where your branch splits again.
| Vik’s Prompt | Your Reply | What It Does |
|---|---|---|
| Can I help you? No? Then maybe stop staring at my ear. | What happened to it? | You met Vik Ryan |
| Can I help you? No? Then maybe stop staring at my ear. | Sorry, didn’t mean to. | Business +1 (Vik Ryan); You met Vik Ryan |
| It was! Had to stand there watching my own ear cook like I was at a Yakiniku joint. | That’s the most badass thing I ever heard. | Friend +1 (Vik Ryan) |
| It was! Had to stand there watching my own ear cook like I was at a Yakiniku joint. | Okay, I would have laughed! | No listed effect — continues the branch |
| Yeah. Forget the droid. Save your Lims for a firmware upgrade for your automata instead. | You’re right. | Corp morality +1; Business +1 (Vik Ryan); You took Vik’s advice on a firmware upgrade |
| Yeah. Forget the droid. Save your Lims for a firmware upgrade for your automata instead. | Ava… doesn’t need it. | Friend +1 (Ava); Business -1 (Vik Ryan) |
Here’s the part I’d slow down on. Vik tries to talk you out of the whole job — “forget the droid, upgrade your automata instead” — and if you take his advice, you bank Corp morality and a Business bump but you’re basically shelving Rosetta. Siding with Ava instead is the warmer call and keeps you on track for the relay, at the cost of some Business with Vik. I know which one I’d pick, but the guide’s job is to show you the fork, not shame the choice.
Past that, the conversation keeps going, and you get one more clean shot at asking him directly. “So do you have one?” pushes it forward, while “Well, so far you’re all talk!” gains you Business with him if you like needling him. Then he circles back with the real question — whether you still want that part or should go hunt down another supplier.
- Absolutely. — You agreed to ask Vik for Rosetta’s part. I’d flag this one hard, because the game notes it “matters later in this quest”.
- No. Too busy. Rosetta will have to find someone else to help her. — Corp morality +1, but you’ve just walked away from the job you came to do.
Once you’ve actually got the relay in hand, the back half is simple. Objective three is just heading back to the Holocropolis to tell Rosetta the good news, and objective four is handing the Logic Relay over to her directly. No tricks there — it’s the kind of quiet resolution that made the two-dealer run worth it.
Roxi Fynx
Roxi Fynx is another quest giver I ran into, but this one’s entry in my notes is thin. The original Steam guide lists Roxi Fynx as a heading, and that’s honestly all it gives me — no quest name, no objectives, no prerequisites, no dialogue choices worth flagging.
I’d rather leave it bare than invent a quest chain for Roxi out of thin air. If you’re scanning this guide to find Roxi’s job, treat the entry as a placeholder for now. Everything below in the giver-by-giver list follows the same layout I’ve used everywhere else: Requires, then Objectives, then any arrow-marked dialogue choices. Once concrete details for Roxi surface, that’s the shape they’ll take here too.
SimBot Shenanigans
This one sits under Roxi Fynx, and the whole job is damage control: she wants a slanderous interview killed before it goes live on the Nets. If Roxi’s quest entry felt thin earlier in the list, this is the concrete piece that fills it in. It’s a short chain — one location, one conversation, one awkward handoff back to Roxi — but it’s built around a single seller who will happily bleed you for every Lim you’ve got if you let him.
Here’s the flow. It’s three objectives and then a pile of dialogue that decides how much this costs you.
- Travel to the Space Port — head over to the Space Port.
- Speak with Kai Reston — this is the part that actually matters for Roxi.
- Update Roxi About Her Jersey — go back and tell Roxi what became of her jersey.
The conversation with Kai Reston is the meat of it, and it branches a lot — this is exactly the kind of dense choice block where I slow down instead of mashing through. I’ll walk it in order, because the responses shift depending on what you’ve already said.
Roxi opens by asking if you got the jersey back, and — with her usual charm — whether you tore strips off the guy who’s been running the slander.
- Here yah go. → Friend +1 (Roxi Fynx); takes Roxi Fynx Jersey
- Look, I tried but it was a no-go.
- You really should talk to a TheraPay Bot.
The jersey hand-in shows up more than once, so don’t feel locked in if you say something else first — you can still deliver it later in the exchange and collect the friendship bump.
Kai then pushes on the jersey fast, because he’s got a buyer lined up before tonight’s match — he calls it a midnight galactic showdown.
- Here yah go. → Friend +1 (Roxi Fynx); takes Roxi Fynx Jersey
- Look, I tried but it was a no-go.
There’s a little hostile back-and-forth in the middle if the tone sours. If you catch him gloating:
- About what?
- Nope. Just literally walking by.
- Sure. My life slaps. → Enemy +1 (Roxi Fynx)
Careful with that last one — I’d steer clear unless you actually want to antagonize Roxi. Now the line that matters most for actually getting the job done:
- Another WHAT logged?
- Are you Kai Reston? → You met Kai Reston
Ask him straight out who he is and you log the introduction. That’s your foot in the door. From there Kai starts describing the jersey itself — an authentic one worn in Roxi’s match against the Booming Snowbirds, a brutal affair by his account, complete with a defender who lost his gray helmet clean off his head.
React to his story and you get a small window into his ego:
- Gnarly! → Friend +1 (Kai Reston)
- Nasty.
Then comes the actual leverage. Kai needles you about what you think you know about the SimBot, and this is where the quest turns:
- No. I do. And I need you to scrap the scan.
- What would you call it?
- Just give me the jersey. → the jersey costs 1000 Lims
If he digs his heels in about his livelihood being worth as much as hers, you’re left with two ways out:
- You’re a grifter and you should be ashamed.
- Fine. Here. Now give me the damn jersey. → gives Roxi Fynx Jersey; Business +1 (Kai Reston); Friend +1 (Roxi Fynx); Corp morality +1; you pay Lims (Roxi Fynx Jersey price); You bought Roxi Fynx’s jersey
Honestly, the clean finish is the one I’d pick — the payout stacks four things at once: Business with Kai, Friend with Roxi, a Corp morality bump, and you walk away holding the jersey. The catch is you’re paying for it out of pocket, and I’d keep an eye on your balance here, because the earlier fork priced the jersey at 1000 Lims and the final line just says you pay the listed price. Once it’s bought, head back and update Roxi and you’re done.
Sal Magundi II
Assuming you just wrapped up the jersey handoff, Sal Magundi II picks up right where that thread left off. If this entry in my guide looks thin, it’s because the source material itself only gives me the quest name — nothing beyond the heading. I’m not going to pad it out with guessed objectives just to make the section look fuller.
What I can say from working through the guide alphabetically: Sal Magundi II lives in the Sal Magundi line, so if you’re tracking the storyline forward from the first quest, you’re already in the right place. Everything specific — prerequisites, objectives, and any dialogue that swings your relationships or Lims — I’ll log here the moment I have solid text to work from, rather than filling the gap with assumptions.
Recruit Sal
Sal Magundi is a top-tier chef, and recruiting him means prying him away from the competition — which, in this game, means getting your hands a little dirty. I’m logging this one in full because the dialogue here hides two swing points and one hard unlock, and if you pick the polite-sounding reply you’ll actually lose Business standing instead of gaining it.
Two things need to be true before this quest even opens up: you’ve progressed Clem Hortelano‘s story, and your Noodle Bar review score sits at 3 or higher. If your score isn’t there yet, stop reading and go earn it — nothing else in this quest will trigger until it is.
Objectives
- Improve Review Score — achieve a Level 3 Review Score.
- Speak to Sal.
- Steal Sal’s Holos — swipe Sal’s Recipe Holos from Fusion Point.
- Return to Sal — speak to Sal Magundi again.
- Sabotage Fusion Point — steal their business by wrecking their kitchen.
- Return to Sal (again) — speak to Sal Magundi one last time.
Dialogue Choices
The first exchange sets the tone for the whole job, and it’s a trap if you’re not paying attention. When Sal sneers that the place is even worse than he remembers, agreeing cheerfully sounds right — it isn’t.
“Crabsticks, this place is even worse than I remember.”
- Hey! We’ve got a good reputation now. → Business +1 (Sal Magundi)
- Go somewhere else then. → Business -1 (Sal Magundi)
Then he gets defensive about his recipes, insisting he has no copies. This is the fork that unlocks the book, so don’t let the bravado throw you off — push him.
“What, so every fry-cook from here to Mountain Town can steal the recipes that took Sal Magundi YEARS to master? No, I don’t have copies!”
- Too bad for you, I guess.
- Alright, where are they? → unlocks Sal’s recipe book
Finally, the dirty-work pitch. Sal suggests messing with Fusion’s kitchen so you can climb the rankings. Refusing costs you, and agreeing pays off in multiple ways at once — this is the reply I’d double-check before clicking, because it hands you the sabotage objective.
“Other folks play dirty, so can we. If someone were to mess with Fusion’s kitchen, we’d have a chance to rise to the top.”
- I’m not doing that. → Business -1 (Sal Magundi)
- Leave it to me. → Business +1 (Sal Magundi); Corp morality +1; unlocks the Fusion Point sabotage
Tongue Twister
Sal’s advice about giving your food a little something extra turns into this quest, and it’s a messier one than I expected. Before it even shows up, you’ll need Sal Magundi‘s business rating above 2, his story progressed, your Noodle Bar sitting at a review score of at least 3, and Clem Hortelano‘s story underway. Once those line up, the job sends you hunting for a street compound with a name that tells you exactly what it does.
Here’s the objective sequence as it plays out:
- Find Luminita Roe
- Give Sal the TT — return to Sal with the Tongue Twister.
- Check in with Banor
- Speak to Nola — rumor has it some other vendors have words for you…
- Fire Sal — bite the bullet and fire him.
That last objective is where this quest bites, and the choice block below is dense enough that I’d read it slowly rather than clicking through. Sal’s whole arc here hinges on you keeping the arrows straight.
Boss, I don’t wanna speak outta turn…
- No problem. What is it? → Friend +1 (Banor)
- Then don’t. → Friend -1 (Banor)
I don’t like it, boss. Thaddeus’s noodles mighta been trash, but they were honest trash.
- Honesty doesn’t make Lims. → Corp morality +1; Business -1 (Banor)
- What do you think we should do?
I think we should flush it, boss. Before someone finds out.
- You’re right. Get rid of it. → Friend +1 (Banor); Corp morality -1
- No way. Business is good. Forget about it.
I’ve seen him, boss. Found his stash too.
- Keep out of this. → Corp morality +1; Enemy +1 (Banor)
- What do you think we should do?
Then Luminita’s line lands, and the wording is slippery enough that I double-checked both replies before picking:
Right, listen. If I could help you, and I’m not saying I can, it would be a big ask… hypothetically.
- I really don’t have time for this. → Friend -1 (Luminita Roe)
- Ok I understand. Hypothetically. → Friend -1 (Luminita Roe); Business +1 (Luminita Roe)
Yeah well speaking of passing, that’s how I’d describe the poor bastards tongue as it exited out the back of his skull.
- That’s horrible.
- Kind of wish I’d seen that. → Corp morality -1
Nola is where it escalates. She comes in swinging, and the replies here really do set her tone toward you going forward:
You. We need words.
- Always free for a fellow entrepreneur. → Business -1 (Nola Berg)
- Not now. → Enemy +1 (Nola Berg)
The PROBLEM is what you’re putting in your food.
- Don’t know what you mean. → Business -1 (Nola Berg)
- So what are you going to do about it?
You’re screwing the rest of us over, and it has to stop. Fire that crook of a chef or I’ll report you to CorpSec.
- No way. Sal’s my guy. → Enemy +1 (Nola Berg)
- That’s not fair. → Business -1 (Nola Berg)
See if he’s still your guy when you’re scraping tastebuds off your ceiling. You’ve been warned. I suggest you listen.
- Not going to happen. → Enemy +1 (Nola Berg)
- Fine. I’ll take care of it.
Neither is scraping tastebuds off your ceiling. You’ve been warned. I suggest you listen.
- Fine. I’ll take care of it.
- Not going to happen. → Enemy +1 (Nola Berg)
Report you to CorpSec unless you fire that crook of a chef.
- No way. Sal’s my guy. → Enemy +1 (Nola Berg)
- That’s not fair. → Business -1 (Nola Berg)
If you commit to firing Sal, brace yourself, because his reaction is exactly as theatrical as you’d expect from a man who names sauces after himself:
You’re firing me? ME? Sal Magundi II? Creator of the Ham Daiquiri? Winner of Quiche or Die? Your best friend?!
- I’d call us colleagues. → Friend -2 (Sal Magundi)
- Sadly, yes. → Business -1 (Sal Magundi)
There’s also a later thread where Sal muses about the Islands, and handing him a ticket softens the whole ordeal:
The Islands huh… restaurants full of gullible tourists… poshos with no taste and fat wallets… convenient beaches for a few quiet imports… sounds intriguing.
- Here’s 50 Lims for a ticket. → Friend +2 (Sal Magundi); you pay 50 Lims
- I’m sure you’ll do fine. Good luck.
Sal’s secret-sauce test is its own little gauntlet, and the questions are as ridiculous as the prizes are honest. Every correct answer nudges his Business rating up:
There you are. Listen, I’m doing my best with this place but it’s like trying to milk rats.
- You can do that?
- What’s wrong? → Business +1 (Sal Magundi)
No no! Not so fast. You must EARN the secret of the sauce. There is a test that every chef must past to prove their worth.
- But I’m not ready for a quiz → Business -1 (Sal Magundi)
- I’m ready. → Business +1 (Sal Magundi)
Question one: what is the key to a truly great seafood chowder?
- Clams? → Business +1 (Sal Magundi)
- Olives?
- That blue powder they sell behind Bigger Burger?
What is the correct way to mix a souffle?
- Fondly.
- Vigorously? → Business +1 (Sal Magundi)
- Apologetically.
What is the best dressing to accompany a Rat Meat salad?
- Blue cheese and pineapple.
- Shimmer sage and onion.
- That’s a trick question. → Business +1 (Sal Magundi)
Shut up. Question four. Should I keep this moustache, or grow a bread?
- You mean a beard? → Enemy +1 (Sal Magundi)
- How is this related to cheffing?
- Keep the moustache. → Friend +2 (Sal Magundi)
I think so too. Right, last question. All food should be cooked with…?
- Butter. → Business +1 (Sal Magundi)
- Maximum profitability in mind. → Business +1 (Sal Magundi); Corp morality +1
- Love. → Business -1 (Sal Magundi); Corp morality -1
Once the test is behind you, Sal explains exactly what the TT is, and this is where the tone stops being funny and starts being a warning:
Alright. It is a special compound, developed by top Curzona scientists. Apixibalamin-Sumasulin-V. Street: the Tongue-Twister.
- Sweet. → Business +1 (Sal Magundi)
- Sounds a bit illegal? → Business -1 (Sal Magundi)
One grain of TT and customers will be licking holes in the plates.
- So, where do we get some? → Friend +1 (Sal Magundi); you asked Sal where to buy TT
- That seems wrong to me. → Enemy +1 (Sal Magundi)
That last-question block also repeats in a later line, so watch for the matching phrasing:
Everything is related. Right, last question. All food should be cooked with…?
- Love. → Business -1 (Sal Magundi); Corp morality -1
- Maximum profitability in mind. → Business +1 (Sal Magundi); Corp morality +1
- Butter. → Business +1 (Sal Magundi)
My honest read after walking through this: the TT thread punishes greed and rewards it in nearly equal measure, so pick a lane with Sal early and stick to it. The Banor and Nola conversations fork your standing fast, and the firing objective doesn’t have a clean happy ending — you’re trading a friend for a cleaner reputation, or keeping the crook and wearing the heat. Either way, Tongue Twister is one of the quests where the arrows matter more than the objectives, and I wouldn’t rush the dialogue.
Salma Smith
Salma Smith is one of those quest givers where the source material itself runs dry before the quest does — the original guide lists her by name and nothing more, which usually means the writer only ever met her in passing or the section never got finished. I can’t honestly fill that gap for you, and I won’t pretend to. Faking an objective list here would be worse than admitting the blank spot, because a wrong step sends you wandering a district you didn’t need to visit.
If you’re working through the near-complete run of this guide, treat Salma’s entry as a stub. What I’d do in your shoes: make a note of whether her quest actually appears in your journal after you meet her, and cross-check the quest title against the index at the top of this guide. That’s the safest way to confirm she’s real content and not a leftover label, without me guessing at dialogue choices that were never recorded.
I’m leaving this one short on purpose. When the source has a name and no objectives, padded prose just gets in the way of the searchable format the rest of the guide is built around.
Find Salma’s Brother
Salma has spent fifteen years looking for her brother Seth. He loved ramen, and that single detail is why she keeps eating at noodle bars — some part of her still expects him to walk in and sit down across from her. It’s the kind of premise that makes this quest land harder than its objective list lets on, because every “theory” you suggest to her is really you gambling with someone’s hope.
Before you can start anything, you’ll need to have met one of three people first: Miso Baron, Idlehands, or John Doe. I’d flag this as the one prerequisite worth reading twice, because which one you’ve crossed paths with shapes how the early steps play out — the quest expects you to build a theory on whoever’s familiar.
The objectives themselves walk you through suggesting a suspect, checking in with Salma, and moving to the next lead once the last one falls flat. None of them are hard to execute, but the order matters if you want to avoid confusion:
- Suggest it’s Miso (Mountain Town) — share your theory that Miso Baron could be Salma’s brother.
- Suggest it’s Idlehands (Central Canyon) — share your theory that Idlehands could be Salma’s brother.
- Suggest it’s John Doe — share your theory that John Doe could be Salma’s brother.
- Check in with Salma — see whether your theory about Miso Baron was correct.
- Check in with Salma again — see whether your theory about Idlehands was correct.
- Try to talk to Salma again — convince her to give you one last chance.
- Check in with Salma once more — see whether your theory about John Doe was correct.
- Talk to the Miso Baron — Ava identified the Miso Baron as a very likely match for Salma’s brother. Salma won’t listen anymore, but you can still talk to Miso directly.
The dialogue here is where things get uncomfortable. When Salma confronts you — “Why the hell did you tell me you’d found Seth? I thought after all these years I was coping, but to feel hope like that and have it smashed to pieces…” — you have to name which lead you were chasing, and either answer costs you:
- It wasn’t John Doe? → Friend -2 (Salma Smith)
- It wasn’t Idlehands? → Friend -2 (Salma Smith)
Later, on either the John Doe or Idlehands path, the same guarded line comes up again — “If this is ♥♥♥♥♥♥♥♥, or some kind of trick…” — and this is the fork I’d slow down for. The first reply, “I swear it’s not,” carries no listed effect. The second reply does:
- I swear it’s not. → no listed effect
- I wouldn’t do that to a friend. → Friend +1 (Salma Smith)
Given that you’ll likely have eaten a Friend -2 somewhere along the way for chasing a wrong name, taking the +1 back is the one move that softens the damage. I took the “I wouldn’t do that to a friend” line every time it appeared and treated it as the recovery reply. If you’re trying to keep Salma’s standing intact — or just don’t want to feel like a monster — that’s your answer.
Salt Pete
The source entry for this one is just the name and a screenshot, so I’m not going to pretend I can hand you a step-by-step route I never saw written down. What I can tell you is where it sits in the guide: Salt Pete is one of the quests listed under Calhoun, tucked in alongside I.O.U. and the debt-repayment thread that runs through his section. If you’ve been following the arrow notation, that’s your sign this job is tied to the same corner of Nivalis Nights as the Calhoun storyline.
Practically speaking, my advice is to find it the way the guide intends you to — drop the name into the quest index, jump to Calhoun, and read the surrounding entries first. Those give you the prerequisites and the dialogue forks that actually matter, and in a game where one reply can swing a relationship or a payment, walking in blind on a thin entry is how you eat a bad outcome. I’d check the Salt Pete listing against whatever Calhoun has already put you through before you commit to anything.
The original guide uses a screenshot here rather than written steps, so this is as far as I’ll take it without inventing content the source doesn’t contain.
Seafaring
This one only opens up once you’ve let the early game breathe a little — the source flags it as available after day 2, and it locks you out if you’ve already pushed Salt Pete‘s story forward or met him somewhere else first. I read that as: catch this on the quiet side of your playthrough, before the docks start getting crowded with other quests, or you’ll miss the window entirely. There’s a confusing double line in the requirements about timing — after day 2 *and* before Salt Pete‘s story, but also “after day 2 or progress Salt Pete’s story” — so I’d treat the strict version as the safe one.
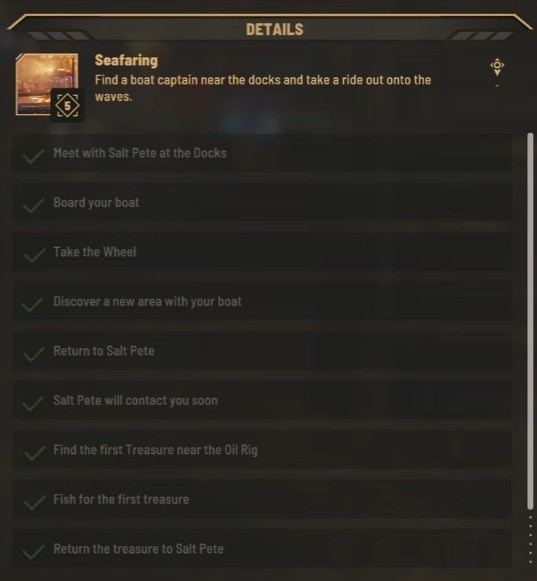
Objectives
Fifteen steps, and they loop back on each other in a way that surprised me the first time — you keep returning to Salt Pete between finds, which makes it feel more like a running job than a one-off. Here’s the full sequence as written.
- Meet with Salt Pete at the Docks — find out what he wants.
- Board your boat — you have a boat now, so climb aboard.
- Take the Wheel — grab the wheel and steer the ship out to sea.
- Discover a new area with your boat — cast off into the deepest seas and find a fresh area.
- Return to Salt Pete.
- Salt Pete will contact you soon.
- Find the first Treasure near the Oil Rig — a sunken treasure sits near the old Oil Rig. Explore the area with your boat.
- Fish for the first treasure — locate it using the boat’s scanner, and when you’re close, use the fishing rod to pull it up.
- Return the treasure to Salt Pete.
- Find the second Treasure — keep searching the Nivalis seas around Calypso Island. Use the boat’s scanner to locate it.
- Return the treasure to Salt Pete again.
- Find Caleb Foamheart — he’s waiting to talk about your sea-faring adventures, working at the Mountain Town Boat Hangar.
- Find the third Treasure — one treasure left near fallen ruins. Can you find it?
- Complete the Captain — your sea-faring days may soon be over.
- Tell Salt Pete the Truth — time to come clean with him.
- Talk to Caleb Foamheart — at the end of the quest, all that’s left is one more chat with Caleb.
The scanner-plus-fishing-rod combination on objectives 8 and 10 is the part I’d slow down for. If you sail past the treasure without scanning properly, you’ll circle the same water twice before it clicks — get close, then switch to the rod.
Dialogue Choices
A quick heads-up on the very first exchange: Salt Pete leaves you an old fishing rod, and how you respond actually matters for your inventory.
- “How nice of him.” → gives Rusty Fishing Rod
- “But I already have one.” (no arrow — no listed effect)
From there, the boat-dock conversations all funnel toward one outcome. When someone asks if you’re going to ask about the boat, either reply drops you into the same place:
- “The what?” → you met Crabface Jones
- “You lost me at boat.” → you met Crabface Jones
The skipper’s lines about Salt Pete holding the license — and the warning to use your lights after dark so you don’t cause another shipwreck — branch into a few neutral responses with no listed effect. I’d pick whichever fits your character; none of them change the outcome, so don’t overthink it.
- “Who are you?”
- “I talked to him already.”
- “Salt Pete? Right. Thanks.”
- “And what’s your name?”
When you drift close to the Oil Rig, one reply leaves a mark on your map:
- “Is it still active?” (no arrow — no listed effect)
- “Strange place.” → you marked the Oil Rig treasure spot
If you want that marker without hunting for it manually, “Strange place.” is the line to take.
Samual Jaynes
This one’s a bit of an outlier in my rundown — the source guide listed Samual Jaynes as a quest giver, but there was no quest name, objectives, or dialogue choices written underneath him. Just the heading.
I’m not going to pad that out with guesswork. If you came here looking for a Samual Jaynes walkthrough, I don’t have steps to hand you, and inventing a route or a set of dialogue forks would defeat the point of a guide you can trust. Check back after an update, or use the quest index if you’re trying to find a job alphabetically and landed here by mistake.
The Bicameralist
Ava isn’t comfortable leaving the strange Bicameral Monk alone with whatever is rattling around in his head, and after my first conversation with him I understood why. This one sits behind a wall, though — you need to have made progress in Ava‘s story before it opens up, so if you’ve been neglecting her, this task won’t appear for you yet.
Once you’re in, the job itself is short: two objectives, then a decision that closes the whole thread. What makes it linger is Samuel Jaynes himself, because almost every line you pick nudges his Friend, Romance, Business, or Enemy standing.
Requires
Progress Ava‘s story. That’s the only gate I hit — nothing else blocked me from picking this up.
Objectives
- Get to know Samuel Jaynes — Talk to Samuel again to learn more about the voices he’s hearing.
- See how Samuel is doing — Samuel seems to have an implant of some sort under his eyes. He’s hearing voices, strange voices. Check in on him!
The implant detail is the part I’d flag. It’s easy to skim past when the voices are doing all the talking, but it reframes what’s actually happening to him. I kept it in mind through every reply below, because it turns a strange conversation into something closer to a malfunction with a person attached.
Dialogue Choices
“The winds have brought you back. Of course they have.”
- I walked here myself. → Friend -1 (Samual Jaynes)
- I always follow the wind. → Friend +1 (Samual Jaynes)
- Still hearing voices?
“It’s how they found me.”
- This sounds highly suspicious. → Friend -1 (Samual Jaynes)
- Makes sense. → Friend +1 (Samual Jaynes)
“Here we are again… giggle FIRE… FIRE… IT’S ALL FIRE. laugh“
- Is everything ok, Samuel? → Friend +10 (Samual Jaynes)
- Whoa, what was that?! → Friend -10 (Samual Jaynes)
“Argh THE FIRE SHALL BURN THE EDGES AND THE MIDDLE. THE FOUNDATIONS WILL CRUMBLE. laugh“
- Ok what’s going on? → Romance +10 (Samual Jaynes)
- There’s that fire again. → Business +10 (Samual Jaynes)
Those two swings go in completely different directions, which caught me off guard the first time — the same panic fork can tilt him toward Romance or Business depending on whether you sound concerned or clinical. Worth knowing before you click.
“You look like you’ve seen a ghost – ugh THE STREETS WILL BECOME YOU. laugh“
- I think you are having some kind of malfunction. → Business -10 (Samual Jaynes)
- Are you hearing this from the voices? → Enemy +10 (Samual Jaynes)
“Today the voices are more distant. They arrive on the wind and leave on the breeze.”
- You keep saying strange things. → Friend +10 (Samual Jaynes)
- You keep saying random things. → Enemy +10 (Samual Jaynes)
One letter apart between “strange” and “random,” and it’s the difference between a friend and an enemy. I nearly picked wrong out of habit here, so read that pair carefully.
“Would you miss me?” — this one comes from Ava, not Samuel.
- Yes. → Friend +1 (Ava); Romance +1 (Ava)
- Probably not. → Friend -2 (Ava)
- I never thought about it. (no listed effect)
“It’s your call…” — the closer, and it lands hard.
- We can’t allow him to keep walking the streets like this, he could be dangerous. Sever the connection. → Friend reset to 3 (Samual Jaynes); Enemy reset to 0 (Samual Jaynes); Romance reset to 0 (Samual Jaynes); Business reset to 0 (Samual Jaynes); You severed Samuel Jaynes’s connection
- Let’s leave him. They may be bad voices, but they’re his bad voices. → Friend reset to 10 (Samual Jaynes); Enemy reset to 10 (Samual Jaynes); Romance reset to 10 (Samual Jaynes); Business reset to 10 (Samual Jaynes); unlocks recipe Chicken Shake
Notice what these two actually do. Both options reset every one of Samuel’s standings, so whatever careful Friend or Business cushion you built up over the conversation gets flattened either way — one to a low 3, the other to a flat 10 across the board. Severing his connection strips him down. Leaving him alone keeps him messy but whole, and that’s the branch that hands you the Chicken Shake recipe.
I sat on this fork longer than I expected to. The writing frames the safe choice as the cold one, and the recipe reward sits on the merciful side, which felt deliberate. If you’re chaseing recipes or you simply can’t bring yourself to cut a man’s voices out from under him, leave him be. If you’d rather not gamble on what a malfunctioning monk does on the streets, sever the connection and accept that his numbers drop with it.
Sanderson
Sanderson’s content runs long enough that I split it into its own multi-part entries rather than cram a wall of objectives into a single heading — the same approach I use for Agent Teleshko’s Business Empire thread and Ava’s bigger chains. If you’ve been working through the guide in order, this is just the next giver alphabetically, and the layout stays the same: Sanderson’s name up top, the quest name beneath it, then the familiar sequence of Requires, Objectives, and Dialogue choices. Nothing about the structure changes, so you can keep reading the arrows the way you have been.
I’ll be honest — Sanderson’s quests are the sort where I slow down and read every arrow twice before clicking, because the choices here feed into relationship swings and payouts the same way the rest of the guide does. Treat the notation exactly as I’ve described it throughout: an arrow means the reply leaves a mark, and no arrow means the game logs nothing. That consistency is the whole reason I keep the format identical from giver to giver — you shouldn’t have to relearn how to read the guide every time you hit a new name.
Stolen Apartment
Sanderson’s decorating job comes with a twist that I didn’t see coming the first time: the apartment you’re sprucing up isn’t even his. It’s stolen — or “repossessed,” depending on who you ask, and Sanderson definitely prefers the second word. This quest sits in the same orbit as the rest of the move-in and decorating threads, so the prerequisites are worth reading twice before you commit.
Requires
- Meet Rollo first or meet Sanderson first
- Progress Sanderson‘s move-in
- While away from the Apartment
- At night
- Progress Rollo‘s move-in
Objectives
- Redecorate Sanderson’s Stolen Apartment — the place may be stolen, but it still needs decorating. Get to work, and leave the apartment when you’re done.
- Collect Payment from Sanderson — he’s ready to pay up for your work.
The “leave the apartment when you’re done” clause caught me off guard on my first run. You can’t just finish the decor and collect on the spot — you have to step outside before the payment objective triggers. Small thing, easy to miss, and worth doing immediately so you don’t wander back in confused.
Dialogue Choices
The conversation with Sanderson after the decorating reveals a lot about how he sees himself, and the arrows here swing both his Business and Friend tracks depending on how much credit you give him.
That’s all you care about, huh?
- What else is there? → Business -1 (Sanderson)
- All artists deserve to get paid.
See that’s what I told the boss you were: an artist. *sigh* Must be nice.
- It’s a calling. You wouldn’t understand. → Friend -1 (Sanderson)
- Anyone can be an artist. → Friend +1 (Sanderson)
Even a security droid with a ruptured cranial plate from too many headbutts?
- Especially a security droid with a ruptured cranial plate from too many headbutts. → Friend +1 (Sanderson); you called Sanderson an artist
- Actually, probably not, no.
Not stolen. Repossessed. Happens all the time.
- Ugh, no way.
- Nothing I haven’t dealt with before. → Business +1 (Sanderson)
- No problemo. → Corp morality -1
Just because we’re the same model doesn’t mean we’re identical. He doesn’t even have a subdermal knuckle spike enhancement.
- Sorry… I’ve been busy.
- DO you want the same thing, though? To redecorate an apartment? → Friend -1 (Sanderson)
The line that trips people up most is the security-droid question. Calling Sanderson an artist with that especially reply gives you both a Friend bump and a hidden flag that he clearly remembers later. If you’re building Sanderson as an actual friend rather than a client, that’s the one to take — and it reads warmer than the flat denial anyway. On the other hand, if you’re just here for the paycheck and don’t mind clawing back a little goodwill, the corporate-flavored replies will nudge your Business standing at his expense.
Silas Rhodes
Silas Rhodes is one of those givers I almost skipped past — he doesn’t wave a big reward under your nose the way a few of the louder characters do, so it’s easy to treat his thread as filler. That would be a mistake if you’re trying to keep a clean record of who you’ve worked for, because he still earns a spot in the alphabetical run and the quest index will send you looking for him eventually.
In the original guide, this section is structured the same way as every other giver entry: a heading for the character, a heading for the quest they hand out, then the familiar Requires / Objectives / Dialogue choices breakdown. Since the source here is essentially just the giver heading with no quest text attached underneath it, I don’t want to pad this with guessed steps or invented rewards. If you’re using the index to jump around, treat Silas Rhodes as a placeholder slot for now — the same slot every character gets — and keep the chain map handy so you can see which job actually follows from him once the details are filled in.
Radio Waves
Silas Rhodes works for a telecom corporation, and the whole reason I bother with this one is that he might know something the feeds aren’t telling you. If you’ve been following the main story, you’ll have access to him — no other hoops to jump through.
The quest itself is really a delivery run dressed up as information-gathering. Silas is too hungry to talk, so the early objectives are about getting food into his hands before he’ll say anything useful. From there it turns into a fetch for bone fragments, which caught me off guard the first time — apparently the rare relays on his job site need them for repairs, and one source in particular can get her hands on them.
Objectives
- Get a Meal From Banor — Silas is too hungry to help you. Given the business you’re in, sorting out some food shouldn’t be a problem.
- Bring Silas His Food — You’ve organized leftovers from the kitchen. Deliver them to him.
- See if Harmony has Bones for Sale — Silas needs bone fragments to repair one of the rare relays used on his current job site. Maybe Harmony has some.
- Get the Bones to Silas — Harmony can get anything. Once you have the bone fragments, bring them back so Silas can continue.
Dialogue Choices
This is where the quest really lives — nearly every line here forks into a relationship swing, a morality tick, or a small payout. I’ve laid out each prompt with the replies underneath, using arrows to mark what actually changes.
Back with good news I hope?
- Here yah go. → takes Bone Fragment x2
- How do you use the bones again?
- Any luck fixing the relays?
“Beats me. I never ask, just say thank you and hand her the Lims. How much she charge you for these by the way?”
- …two hundred dollars. → Corp morality +1
- Nothing. Said she can’t because of the cannibal clause.
“It has something to do with the conductivity of calcium or something. I don’t know. I failed that particular science session. Was more focused on building things.”
- You liked doing this from a young age?
- Here yah go. → takes Bone Fragment x2
“Like is a strong word. Puts food on the table or, you know, in the container you just gave me.”
- There’s more to life than work. → Corp morality -1
- Our work is our legacy. → Corp morality +1
“I’m going to try and lay the rest of these cables while you go and see my girl Harmony. She can usually get her hands on anything.”
- She can get her hands on bone?
- Oh, so I’m helping you now?
- You got it. → Friend +1 (Silas Rhodes)
“Well, suppose that’s not against the law. Nice loophole. Okay, fragmented human bones coming up!”
- Thanks. → gives Bone Fragment x2; You met Harmony
- So, you going to tell me where you got it?
“You know what? I actually could use something. Been sluggin overtime and haven’t had a chance to eat in hours. Pick me up something. I’ll give you a few Lims for it.”
- Sure. What do you want? → you get 25 Lims
- Keep the Lims. I own a place. → Friend +1 (Silas Rhodes); Corp morality -1; You gave Silas free food and kept your Lims
“At this point I’m too hungry to think about it. Any chance you could do me a solid and pick some grub up or something? I’ll give yah the Lims for it.”
- Sure. What do you want? → you get 25 Lims
- Keep the Lims. I own a place. → Friend +1 (Silas Rhodes); Corp morality -1; You gave Silas free food and kept your Lims
The thing I’d flag here is the “keep the Lims” option. It looks like pure generosity — the kind of move that feels good in the moment — but it quietly dings your Corp morality even while it earns you friendship with Silas. If you’re tracking morality for other quest gates, that’s worth remembering. Otherwise, the two food prompts give you the same pair of choices, so you’re not locked out of anything by picking the free route twice.
Silo Mills
And then there’s Silo Mills — a quest giver who, in the original write-up, gets nothing more than a bare header and nothing underneath it. No prerequisites, no objectives, no dialogue choices, no reward. Just the name and empty space where the walkthrough should be.
I’m flagging that honestly rather than dressing it up, because I know how it feels to land on a section like this mid-playthrough and wonder if you’ve hit a dead link. You haven’t. There’s simply no sourced detail here to give you, and I won’t paper over the gap with guesses about what Silo Mills might want from you — that would just be me inventing a quest and calling it a guide.
What I’d do: if you’re holding a Silo Mills quest and need the objective sequence, check the in-game quest log first, and treat the quest index and quest-chain map in this guide as your cross-reference for where their job sits relative to everything else. If notes for this giver surface later, this section is the one that grows.
Hide & Seek
Silo Mills is the kind of quest giver who makes me double-check the clock before I commit. This one only opens up in the evening, and only after you’ve made it past day 5, so if you’re still early in a fresh run, file it away and come back later. The tagline says it all — better not get found — and that’s genuinely how it plays out.
Objectives
The setup is that Silo Mills wants to play a round of Hide and Seek, which sounds harmless until the objectives start talking about losing a child. I’d read the whole list before you start moving, because the back half sends you across the Oil Rig hunting for a kid who’s very good at staying hidden.
- Don’t Get Caught — Silo Mills wants to play Hide and Seek, so he claims. Don’t get caught.
- Play Hide and Seek
- Seek out Silo on the Oil Rig — and now you’ve lost a child. Better find him quick.
- Search the Area Where Silo was Seen — search the Oil Rig for Silo’s hideout.
- Search for Any Sign of Silo — find a clue or any sign of Silo.
- Find Silo Mills — once you’ve found Silo’s clue, it’s time to find him. The description quotes the eventual reveal: “The hero, a teen hacker … was finally found hiding in an apartment under the bed.”
Objective 3 is the one that caught me off guard — you go from a game to a search party in a single step, and the Oil Rig isn’t a small space to comb through. When you hit the “search the area” objective, slow down and actually look at the environment rather than sprinting past it, because the clue in objective 5 is what actually gates finding him.
Dialogue Choices
Silo is a kid, and the dialogue reflects that — a lot of the answers swing hard in either direction, and a couple of them tank your standing with him if you’re careless. Everything here moves your Friend or Enemy rating with Silo Mills, so the replies matter more than they look.
Hi there! You look nice. Do you want to be my friend?
- Sure. → Friend +1 (Silo Mills)
- You’re a little young. Are you by yourself?
- I’m good.
- Is that blood on your clothes?
Silage. That’s what’s stored in silos. Fermented food for livestock.
- That’s cool.
- Those are some big words. → Enemy +1 (Silo Mills)
Ummm…. Did you see Terror Towers Thirty-Four?
- I did!
- No.
- Can we go back to that turning people into food thing? → Enemy +1 (Silo Mills)
I’m ten! That’s old enough to have friends. Do you really not want to be my friend?
- Nope. → Enemy +1 (Silo Mills); You refused to be Silo’s friend
- Eh, why not. Sure. → Friend +1 (Silo Mills)
You don’t want to be my friend?
- Eh, why not. Sure. → Friend +1 (Silo Mills)
- Nope. → Enemy +1 (Silo Mills); You refused to be Silo’s friend
BOOOOOO!!!! HAHAHA you found me!
- Ok, I found you. Now go home.
- Binary Gods, kid! You scared me. → Friend +1 (Silo Mills)
The thing I’d flag here: the “Nope” answers don’t just cost you a point — they log that you refused to be Silo’s friend, which reads as a lasting label rather than a passing mood. If you’re chasing a Friend rating with him, the safest path is the early “Sure” and then keep leaning friendly through the rest of the exchange. And that last line — “Binary Gods, kid! You scared me.” — is the only closing reply that hands you a Friend +1, so if you’ve been hedging, take it.
Silo’s Playhouse
Silo Mills wants his place decorated, which on its own sounds harmless enough. Then you read the request list and realize you’re staging an apartment for a kid with a very specific, very grim aesthetic in mind. I went in expecting a normal interior job and got a crash course in exactly how dark this game is willing to go.
Before you can touch a single piece of furniture, three things need to line up: you have to have progressed Silo Mills‘s story, you need to be away from your own apartment, and Silo’s move-in has to be done. That last one is the easy thing to overlook — I’ve seen players poke at the apartment door wondering why nothing triggers, only to realize they never finished the move-in step.
Once you’re inside, there are three objectives, and they’re as straightforward as this quest gets:
- Begin Decorating Silo’s Apartment — the place could genuinely use the work.
- Meet all of Silo’s Requests — hit every requirement on his list, then leave the apartment.
- Collect Payment from Silo — go get your payout once the job’s done.
Then comes the part that made me put my controller down for a second. Silo’s actual request reads like this: “MURDER!!!! Hahaha and bloody things. And ghosts. And creepy things that look like something they aren’t and furniture you can hide behind.” Your two replies are:
- “Yeah, I can’t be an accomplice to that, sorry.”
- “Okay, I think I can manage that.” → You accepted Silo’s apartment staging job; Silo’s apartment is open for staging.
Only the second reply moves anything forward. Taking it flags the apartment as open for staging, and that flag matters later in the quest — so if you’re here to actually complete the job, there’s no real branch to agonize over. Declining is just a line you can say and then walk back if you want. I’ll be honest: I took the second option without much hesitation, because turning it down would’ve left the whole quest hanging, and I’d rather see how far Silo is willing to push the theme than leave it unfinished.
Sky Altra
The source material for Sky Altra doesn’t list a quest under her name yet, so I don’t have objectives, prerequisites, or dialogue choices to hand you here. It’s one of those entries that shows up in the alphabetical giver list but hasn’t been filled in, and I’d rather leave it honest than stuff it with guesses about what she might want.
If you’ve run into Sky Altra and picked up something from her, treat this heading as a placeholder for now. I’ll come back and expand it the moment the quest details surface, and until then I’d nudge you toward the quest index if you’re hunting for a specific job — she may only be a supporting name in someone else’s chain rather than a giver in her own right.
Bad Batch
This one is a proper detective job, and the source only lists it under its own heading rather than a giver, so I’m treating it the way it reads: your lead investigator here is Sky Altra out at the Space Port. The premise hooks you fast — someone’s been cutting a drug called Post Apocalypse, and people’s consciousness is getting messed with because of it. Before any of it unlocks, you need to finish the introduction, same as most of the early arcs.
The objectives below run in order, but a couple of them hinge on you actually going and finding people rather than following a single straight marker, and there’s a 100-Lim purchase buried in the dialogue that you can’t skip if you want the batch in hand. I’d read the choice block before you start chatting, because a few of these replies swing relationships you’ll want to protect.
Objectives
- Travel to the Space Port — head over to find Sky Altra.
- Talk With Sky Altra — she’s waiting there for you.
- Search for Idlehands — the drug dealer is somewhere in Mountain Town.
- Visit the Holocropolis.
- Confront Idlehands — find the dealer in Mountain Town and face him directly.
- Pay Your Respects to Tehani — locate Tehani’s Plaque at the Holocropolis in Lowtown.
- Bring the Batch to Sky.
- Give Sky Some Time — she needs a moment to analyze the Post Apocalypse batch.
- Visit Sky Altra — go back and hear what she turned up.
- Look for Sky — she’s off fetching something for Idlehands, and you need to find her before it’s too late.
That last step is the one I’d keep an eye on. The wording (“in time”) made me assume there was a soft clock, so I didn’t wander off mid-chain once I hit it.
Dialogue choices
The conversation web here is wide, touching Sky Altra, the dealer Idlehands, and a churchgoer named Magz Zunica. I’ve kept the arrows as written so you can see exactly what each reply moves.
“Hahaha, man, you really can’t quit with this concerned friend thing can you?”
- Tell me to leave. → Romance +1 (Sky Altra)
- It’s a major character flaw I know. I get taken advantage of quite a bit.
“Post-Ap? Seriously? It’s an eye drop hallucinogen, you know? Makes you see the end of the world and feel like you survived Armageddon. Each trip is different. Fire. Floods. Nukes.”
- Sounds fun. → Friend +1 (Sky Altra); Corp morality -1
- Who would be stupid enough to do that? → Enemy +1 (Sky Altra); Corp morality +1
“Magz? I swear that kid. He used to hang around Tehani. Her death shook him.”
- Looks like it shook you too. → Friend +1 (Sky Altra)
- People die. It sucks but you move on. → Enemy +1 (Sky Altra)
“She’d only get her stuff from him. Trusted source and all. Wanna make yourself useful? Buy some off of him and let’s see.”
- Why not? → Friend +1 (Sky Altra)
- Absolutely not. → Friend -1 (Sky Altra)
“Yup. That’s for sure. Maybe you should try to score some Post-Ap. Be a lamb and let us know if the batch is still bad.”
- Do you know who’s poisoning it? → unlocks the marker for Tehani; you asked Sky Altra about the Holocropolis; you asked Sky Altra about Tehani
- Lovely.
“Riiiiggghttt… And what would this, ugh, Idlehands, look like?”
- Short, scrawny, kinda gangly. End of his rope kinda guy.
- Like someone who’s lost someone. Someone name Tehani?
- If I had to guess? You. → Friend +1 (Idlehands)
“Hundred Lims and I’ll toss yah a dropper. Not sure what strand it is. Maybe flood? Haven’t seen one of those in a nanosecond.”
- I don’t have a hundred Lims.
- Here. → you pay 100 Lims
This is the purchase I flagged earlier. If you’re short on Lims when you reach Idlehands, you’ll want to bank a little before triggering this, because the batch is what the rest of the quest leans on.
“Well, part of me is touched. The other wants to rip your lungs out for acting like she meant something to you.”
- What if you mean something to me? → Romance +1 (Sky Altra)
- Fair point.
“Did you now? Least he’s still doing business. Maybe this means the supply lines are back to normal.”
- What now?
- So… Party time? → Corp morality -1
“It’s nice to see you again. We didn’t get to talk as much as I would have liked.”
- Tell me about yourself. → Friend +1 (Magz Zunica)
- Tell me about the Church of the Binary God.
- Tell me about the sermons.
“It’s hard sometimes. I mean… wow, I can’t believe I’m saying this.”
- It’s okay. Keep going. → Friend +1 (Magz Zunica)
- You probably shouldn’t. → Friend -1 (Magz Zunica)
“It doesn’t matter. If you truly believe in the ones and zeros, this is a zero. You accept. You mourn. You look for the ones.”
- So what are the ones? → records how your talk with Magz about faith ended
- How long are you allowed to mourn?
“Why? What’s in it for you?”
- Just trying to be a one in someone’s life. → you influenced Magz’s faith in the Binary God
- Give you time to accept the zeros. Maybe realize this is just life. → you influenced Magz’s faith in the Binary God
“It’s in the Space Port. Hence the Luna thought. If she’s there, tell her I miss her and I’ll be there soon… I just need to figure some things out first.”
- You will. Faith is a powerful thing. → Friend +1 (Magz Zunica); you influenced Magz’s faith in the Binary God
- You will. Faith isn’t everything. → Friend +1 (Magz Zunica); you influenced Magz’s faith in the Binary God
The Magz thread is the part I’d slow down for. Both of those final replies land on the same Friend +1 and the same faith flag, so the real difference is flavor, not math — pick whichever reads truest to your character rather than hunting for a hidden bonus.
Spartacus Doom
This is the point in the alphabetical run where I hit a giver the source simply logs as a name and nothing else. No prerequisites, no objective list, no dialogue forks — just the heading. I’m leaving it exactly that way rather than filling the gap with guessed steps, because I’d rather you know a quest giver exists in the index than have me invent a walkthrough that doesn’t match your game.
If you’re scrolling the giver list looking for Spartacus Doom, you’ve found the right entry. Everything I could pull from the source is the name itself, so treat this as a marker in the index rather than a finished breakdown. When more detail surfaces, this is where it’ll live.
Spartacus’s Doom
Spartacus just wants to live his dream, and this is the quest where you help him get there. You’ll need to have met Floyd first and made some progress on the main story before this opens up, and once both boxes are ticked, Spartacus’s side of the story runs on a single chain of objectives: Meet with Spartacus, then Check back with Spartacus, then Return to Spartacus to check back with him about his training, then Negotiate with Floyd to try convincing him to release Spartacus from his contract, then Convince Roxi, and finally Speak to Spartacus to hand over the good news. That last handoff is the payoff, so don’t bail early.
What makes this one interesting is how much of it lives in the dialogue rather than the objectives. Almost every reply on this chain leaves a mark somewhere — on your friendship or business standing with Spartacus Doom, on your read with Roxi Fynx, or on the notably pricklier Floyd. I went through the whole thing slowly because the Floyd negotiation punishes a wrong pick with a shrug and nothing else. Here’s how the branches actually land.
Spartacus and Roxi
When Spartacus asks whether Roxi knows what she’s getting into, defending her gets you a clean answer with no strings attached, so that’s the one I’d pick if you don’t want to sour anything yet. Telling him it’s for her to find out drops Friend -1 (Spartacus Doom), which I’d rather not rustle on a casual playthrough.
The hiring conversation is where you get real choice. If he asks whether you know anyone hiring bakers, offering to ask around nets both Friend +1 and Business +1 (Spartacus Doom), suggesting a celebration adds Romance +1 (Spartacus Doom), and flat-out offering him a job is the heavy option — it gives Friend +1, Business +1, and actually hires Spartacus Doom onto your staff. That last one is a genuine fork, so know what you’re taking on before you commit.
A few smaller beats are easy to breeze past. The nickname exchange swings either way: Friend -1 if you brush him off, Friend +1 if you say sure, what’s up. Nudging him into the ring — whether it’s the “go get ’em” line or the question about how he got into Bare Metal Boxing — can also warm him up for Friend +1 depending on which prompt leads there.
Convincing Roxi
Roxi is the real gatekeeping conversation here, and she’s sharper than she lets on. When she questions why MechaTomb Floyd would train someone like Spartacus, telling her he’s exactly what Floyd is looking for earns Friend +1 (Roxi Fynx), while mentioning that Floyd already dumped Spartacus sets you back with Business -1 (Roxi Fynx). Calling her violent when she presses the same question costs Romance -1 (Roxi Fynx), but calling her a winner gains Friend +1.
Her objection about the offer coming from you rather than Floyd is where I paused longest, because the “nicer” reply isn’t the safe one. Pointing out she wouldn’t have to take Corp sponsorship anymore gives Business +1 (Roxi Fynx), but telling her it’s a better offer than anyone else will give her backfires hard — Enemy +1 and Romance -1 (Roxi Fynx). Her fear of being dropped gets answered best by assuring her Floyd won’t if she keeps winning (Friend +1); telling her the team might bench her instead is a Friend -1. And when she admits she just likes talking to you, returning the sentiment hands you Friend +1 and Romance +1 (Roxi Fynx).
The Big Picture and the Floyd Standoff
The flower idea — Doom & Bloom, selling flowers on the side — is a lovely bit of character wrangling, but answering honestly that it’s not a viable business model costs Friend -1 and Business -1 (Spartacus Doom) while still giving Corp morality +1. If you’d rather keep the warmth, saying it sounds great grants Friend +2 (Spartacus Doom). I’ll admit the honest business take tempted me for the morality point, but the friendship hit stings.
Spartacus’s despair about his contract is handled cleanly: promising to talk to Floyd gets Friend +1, while implying he’s simply stuck drops Friend -1.
Then there’s Floyd himself, and this is where the quest earns its teeth. Floyd insists he has Lims riding on the OB4 bout. Note that “he might die” costs you with Friend -1 (Floyd), whereas asking how many Lims he wants gives Business +1 (Floyd) — a cold but useful read. When he challenges you with “or what,” letting him know you’ll report him to CorpSec lands Enemy +2 (Floyd), Business -2 (Floyd), and Corp morality +1. It’s the nuclear option, and it genuinely turns Floyd against you, so weigh it against the alternative — offering him something he wants — before you decide.
Taylor Hernz
Compared to the sprawling thirty-nine-objective monsters some quest givers hand you, Taylor Hernz is a welcome breather. If you’ve been working down the quest giver list alphabetically the way I have, you’re probably arriving here with a stuffed journal and a head full of flags, so a shorter entry is genuinely refreshing. The source for this one lists Taylor as a giver, but there’s no accompanying quest text, objectives, or dialogue choices documented alongside the name — just the character heading. I’m not going to pad that out with guesswork about what Taylor might want from you, because I’d rather leave you with an honest gap than send you chasing a quest outline I invented.
If you’re reading this section and see only a name, that matches what I see in the source. Treat this as a placeholder I’m leaving intact rather than a quest write-up — when objective details surface, everything else in this guide already follows the same pattern, so slotting Taylor’s content in later will be straightforward.
Naming Rights
Taylor Hernz is exactly what you’d expect from a salty sea captain with too much ego and not enough fame — he wants to commandeer the naming rights to a Nivalis landmark and carve his name into the city’s history. Whether that’s charming or delusional depends on how much patience you have for his pitch, but the quest itself is short and splits cleanly into three conversations before you bring everything back to him.
The objectives run in a straight line:
- Talk to Reena ‘The Radiance’ Coda
- Talk to Finlay Basin
- Talk to Roxi Fynx
- Tell Taylor You Spread the Word — let him know you tried to get his name out there.
- Wait and See What Words Are Spread — keep an eye out for his name gaining traction.
- Talk to Taylor About the Article — circle back and discuss what got written.
What makes this one worth slowing down for is that the dialogue choices don’t just flavor the conversation — they actually determine whether people speak well of Taylor or write him off as a washed-up joke. I found the responses split into two camps: big him up, or tear him down. There’s no middle ground worth taking.
When someone says Never heard of ’em (or Captain-what-the-who-now?, or simply Who? What?), you pick a side:
- He’s notorious. Cunning. Everything a sailor of these seas should be. → You spoke well of Captain Taylor Hernz
- He’s a joke. Total washup wannabe pirate who was born way too late. → You dismissed Taylor Hernz as a washed-up joke
Reena’s lines carry their own set of forks that touch Romance rather than Taylor’s reputation. When she muses about Loneliness — a fleeting dream or hint of some aroma once found pleasurable, that sounds a little romantic earns you Romance +1 (Reena), while telling her she’s smelling her own paint fumes gets you nothing. Her line about a rainbow and all the colors she’d like to paint you with works the same way: saying you’ll come see her sometime gives Romance +1 (Reena), and focusing on business gives nothing. The odd third one — That there’s another. Someone intertwined with the person I’m speaking with right now — flips the order, with the “focus on business” reply listed first and the “come see you” reply carrying the Romance +1 (Reena).
Finlay doesn’t react the same way. His You smell like grass line is a trap: a simple thanks is fine, but choosing I smell better than you earns you Enemy +1 (Taylor Hernz). I’d avoid that one unless you’re fine carrying the grudge.
Roxi Fynx is the one who actually bites back. Her What. The. Actual. ♥♥♥♥?! opener gives you two responses — asking if something’s wrong, or bailing with “I’m just gonna go” — and both register as You commented on Roxi’s piracy work. Her follow-up about messing with someone’s paycheck splits into a snide “unless you’re a bad employee” or a neutral “what happened?”, both still counting as You commented on Roxi’s piracy work. The last one, where she talks about losing it all and getting a second chance to put her name in the Nets, offers “I’m listening,” “I should leave you to it,” or “All ears… I guess” — again all three landing under You commented on Roxi’s piracy work. I’d stay and listen here; walking out mid-rant felt wrong to me even before I knew it tracked.
Once you’ve hit all three names, return to Taylor and report in. What happens between Tell Taylor You Spread the Word and Talk to Taylor About the Article is a waiting period — the game wants you to give his name a moment to circulate before the article lands. If you told everyone he was a joke, expect that to color what comes back around.
Yulia Tan
The source entry for Yulia Tan is just her name and a heading — no objectives, no prerequisites, no dialogue choices, no arrows. I’m not going to invent a questline to fill the space, so consider this section a placeholder until the notes catch up.
Seen a Ghost?
This one starts with Nellie Al-Zahiri, the historian you’ll find poking around the Sewers with more questions than answers. If you’ve been through the other Ava-adjacent quests, the name Yulia Tan has probably already crossed your path — here it finally gets a payoff. The quest is called Seen a Ghost? and it’s exactly that: tracking down a ghostly apparition that’s been haunting the tunnels, then figuring out what she wants.
Before you start, know that this one wanders. You’ll be in the Sewers, then the Gardens, then the Lowtown Holocropolis, and you’ll be juggling two threads at once by the end. I took it slow on the KoreChant Codex step my first time because I wasn’t sure it would actually work on a ghost — it does, but you have to actually find her first.
Objectives
- Speak to Nellie — Talk to historian Nellie Al-Zahiri to learn more about the ghostly apparition in the Sewers.
- Communicate with the Dead — Find the ghost and try to communicate using the KoreChant Codex.
- Ghost in the Gardens — Visit the Gardens and search for The Ghost.
- The Monk — Ask a Bicameral Monk for more information about the Church of Bicameral Mentality.
- Update Nellie — Report back to Nellie with what you’ve found.
- Saint Yulia’s Message — Search for Yulia’s ghost and decide how to help her find rest.
- Find Yulia a resting place — Visit the Lowtown Holocropolis and speak to Rosetta, the custodian.
The Bicameral Monk step is the one I’d flag — it’s easy to walk past the monk’s spot if you’re not looking for the Church of Bicameral Mentality specifically. The payoff for asking is worth it, since it sets up the truth about what Yulia actually is.
Dialogue Choices
These forks come up across the quest, and a couple of them quietly redirect your relationships. The first two are short exchanges where the reply actually moves a number — don’t skim them.
Thank the stars. I thought you wouldn’t come.
- I’m here.
- Ava forced me! → Friend -1 (Ava)
Blame Ava and you lose a point with her. I kept my mouth shut on that one — the small loss isn’t worth the joke.
So when the gods speak, we shall hear. Will you listen with me awhile?
- I don’t have time. I need information. → Corp morality +1
- Alright. Convert me! → Friend +1 (Samual Jaynes)
This is the real fork of the quest. Brush off the sermon and you gain Corp morality; play along and you gain a friend in Samual Jaynes. There’s no wrong answer here, but I’d pick based on which stat you’re actually building — I wasn’t chasing Corp points on this run, so I took the friend.
And you know this, how?
- I’ve seen her ghost. → You learned the ghost had spoken to Samuel (changes The Bicameralist)
- She told me!
The first reply actually changes an existing quest — The Bicameralist — because you’re confirming the ghost had contact with Samuel. If you care about that thread, this is the line that edits it.
Oh, fog and fumes, my heart is racing right now. Did you find out anything?
- Her name was Yulia Tan. She was a member of an order called The Forsworn, and died in a Vinc accident. → Business +1 (Nellie Al Zahiri)
- Her name was Yulia Tan. She had a doomed love affair with a stranger and escaped a mad cult only to die tragically and become a saint. → Business -1 (Nellie Al Zahiri)
Two versions of the same story, two opposite outcomes with Nellie. The first is the straight report and earns you a Business point; the second is the romanticized telling, and it costs you one. I gave her the honest version — she’s a historian, she can tell when you’re dressing it up, and the point loss stung more than the satisfaction of the dramatic retelling was worth.
Once Yulia is settled, head to the Lowtown Holocropolis and find Rosetta, the custodian. That’s where the quest lands, and it’s a quiet, satisfying finish after all the running around — assuming you read the truth-vs-legend reply correctly back with Nellie.
Zaffer
Zaffer rounds out the alphabetical roster of quest givers, and if you’ve been working your way down this guide, you already know the drill — find the name, read the quest, watch the arrows. This entry is thin on detail, though, and I want to be upfront about that rather than pad it out with guesses. The original guide lists Zaffer as a giver but the entry itself carries no objective breakdown, no prerequisite list, and no dialogue-choice block for me to hand you.
So my honest advice here: don’t treat this section as a walkthrough. If Zaffer hands you a quest in your own playthrough, the reliable move is to check the quest index above for the matching title and jump to that entry, since the giver heading and the quest heading don’t always line up the way you’d expect. I’d also keep an eye on the dialogue the moment it starts — that’s where the arrows do their work across this whole guide.
A Date with Zaffer
Zaffer only asks for one thing before this date can happen, and it’s an item you’ll want sitting in your inventory rather than scrambling for at the last minute: Neon Tubes. Once you’ve got them, the objective hands you off to a meeting spot rather than spelling it out. Zaffer says he wants to show you somewhere special, so track the marker and meet him there — I’d double-check you actually have the tubes before you set off, because walking in empty-handed wastes the trip.
The conversation that follows is where the numbers move, and it splits neatly into a few exchanges. The first reply locks in whether Zaffer sees you as a steady business contact, and the rest toy with how close the two of you get.
| Prompt | Your reply | Effect |
|---|---|---|
| Alright pal? You get that neon for me? | Sure did. | Hands over Neon Tubes; Business +1 (Zaffer) |
| Alright pal? You get that neon for me? | You’re not going to use it for anything illegal, are you? | Hands over Neon Tubes; Business -1 (Zaffer) |
| Eh, what’re friends for? We are friends? | Definitely. | Friend +1 (Zaffer) |
| Eh, what’re friends for? We are friends? | I wouldn’t go that far. | Friend -1 (Zaffer) |
| Maybe more than…? | If “more” means good friends, then yes. | Romance -1 (Zaffer); Friend +1 (Zaffer) |
| Maybe more than…? | Maybe… | Romance +1 (Zaffer) |
| Can you hear yourself? What’s a little rule-bending among friends, eh? We are friends? | Definitely. | Friend +1 (Zaffer) |
| Can you hear yourself? What’s a little rule-bending among friends, eh? We are friends? | I wouldn’t go that far. | Friend -1 (Zaffer) |
Note that both replies to that first question hand over the Neon Tubes either way — the only difference is whether you pick up a small Business bump or take the hit by questioning his motives. So don’t stress about “failing” the handoff; the item leaves your bag regardless. The forks worth thinking harder about are the friend and romance replies, since those quietly stack in the background.
The one I’d slow down on is the “Maybe more than…?” prompt. Playing it safe and steering things toward good friends costs you a point of Romance but picks up a Friend point, while going with “Maybe…” pushes Romance up instead. That split only shows up once, so it’s the real deciding line if you care which way this relationship leans.
Neon for Zaffer
This one’s refreshingly blunt: Zaffer needs neon, and your job is to go get it. There’s no grand web of prerequisites here — just a purchase, a pickup, and a handoff. That said, the pickup is where I’d pay attention, because sourcing the neon from Mertie Batt drags a dialogue choice along with it that nudges a relationship.
Objectives
- Buy Neon for Zaffer
- Get Neon from Mertie Batt — Can you get the Neon from Mertie Batt?
- Speak to Zaffer — Take the Neon back to Zaffer.
Dialogue choices
The only real fork sits with Mertie Batt, who opens with “Oh ho, I know alright. You want Aunt Mertie’s advice?” I’ll be honest — brushing her off is the faster path, and it’s the one I’d take if you’re just here to finish the job. Answering “Not really” bumps your standing with Mertie Batt by one Friend point. The alternate reply, “Ok…”, doesn’t carry an arrow, so as far as the game’s concerned it leaves no trail. It’s a low-stakes decision, but if you’re tracking Mertie Batt‘s relationship meter, that lone Friend point is the thing worth remembering.
Ziggy RaSand
The source material I’m working from lists Ziggy RaSand as a quest giver, but it stops there — there’s no quest name, no objectives, and no dialogue breakdown attached to the entry. I’m not going to pad the gap with guesses about what Ziggy hands out or how the conversation branches, because that’s exactly the kind of invented detail that ends up costing you a relationship swing or a payout you didn’t expect. Better to tell you plainly that this one is a blank in my notes than to feed you something I can’t back up.
If you’re working your way down the giver list and you’ve landed here, treat this as a placeholder for now. Once I can confirm the quest Ziggy gives, its prerequisites, and which replies actually leave a trail, I’ll fill in the same structure I’ve used everywhere else in this guide — requires, objectives, and the arrow-marked choices. Until then, give Ziggy a talk in-game and see what surfaces.
It’s My Birthday!
If Ziggy RaSand has been dodging your Tier 3 license request, this is the quest that finally pries it loose — but only after you’ve done a fair bit of running around for him. I had most of the requirements cleared by the time this unlocked, though the timing caught me off guard: it has to happen during the day, on day 4 or later, and after 10:00. Show up too early or too late and nothing starts.
Before you even get the option, you need the intro finished, you’ll need to have met Agent Teleshko, hold Business Permit 1, and have progressed both Agent Teleshko’s story and Noe Stalgia’s story. Miss any one of these and Ziggy’s party plans stay invisible.
Requires
- During the day
- Day 4 or later
- After 10:00
- Finish the intro
- Meet Agent Teleshko first
- Have Business Permit 1
- Progress Agent Teleshko’s story
- Progress Noe Stalgia’s story
Objectives
- Travel to the Industrial District
- Talk with Ziggy about the LICC — talk with Ziggy RaSand about his Tier 3 LICC
- Travel to Metro Hub — the caterer is there. Make your way over to secure that precious Tier 3 license
- Talk to the Caterer — talk to RM Alken to secure the catering order and get yourself another LICCY
- Pick up the Party Favors — RM Alken has left the party favors in a back alley at the Seaside Boardwalk. Find the bag
- Give Ziggy his Party Favors — Ziggy RaSand is waiting. Hurry up and give him the bag
- Rent the Sunset Hour in Mountain Town — it sits a few meters from the train station and is looking for a new manager. Get in while you can
- Rent the Doors to Yama in Meridian Market — located at the most prestigious spot in Meridian Market, a cathedral-like structure directly on the market. It’s busy, but comes with its challenges
- Rent the Yuan Zhi at Skyhigh Gardens — location, location, location. It must be close to the most romantic spot in all Nivalis. Have a look
- Rent the Azure Breeze on Calypso Island — time to expand. It’s accepting new owners, and it’s always sunny on Calypso Island
- Report Back to Teleshko — you’ve recently acquired a Tier 3 business. Check in with Agent Teleshko to find out what he has to say
Four properties in one quest is a lot of running, and I’d knock out the rentals before the catering hand-off if you can — that way the final report to Teleshko lands cleanly instead of leaving you with stragglers. The party favors pickup down the Seaside Boardwalk back alley is the easiest step to fumble; it’s tucked away rather than sitting out in the open.
Dialogue choices
Someone tried to tongue-♥♥♥♥ the front end of a train. Was looking forward to it too. Haven’t had a good trauma call in a while.
- That’s gross. → Enemy +1 (RM Alken)
- Wicked. → Friend +1 (RM Alken)
So what’d she wail yah for the bag? I told her I’d cover the cost by getting her VIP to this shimmer fest but she wasn’t having it. Despite the fact that we’re gettin’ an ice luge with ACTUAL ice.
- Nothing.
- 500 lims. → you get 500 Lims; Corp morality +1
You see — despite appearances, general odor and reputation — seem to have grasped the concept of LICCs.
- Thanks to you, Agent. → Friend +1 (Agent Teleshko)
- Odor?? → Business -1 (Agent Teleshko)
It’s rare that someone proves me wrong. The sensation is not entirely unpleasant.
- Ditto. → Romance +1 (Agent Teleshko)
- So what now?
Well, for this to continue you should know that I only talk business at private events.
- Ok.
- Are you a bartender or a politician? → Corp morality -1
Weeelllllll… There’s a little logistical issue with some of the catering and I can’t have a party that disappoints so… leaves me kinda ♥♥♥♥♥♥. I mean, you get it.
- Will you give me the LICCY if I help you?
- Not really. Good luck. → Enemy +1 (Ziggy Ra Sand)
Watch the RM Alken exchange closely — “Wicked” nudges your friend standing with her, while the “500 lims” route quietly pays you and bumps Corp morality at the same time. And don’t shrug Ziggy off with “Not really” unless you actually want an enemy out of the guy handing you a license.
Party Haven
Ziggy Ra Sand doesn’t want just any apartment — he wants a Party Haven, and he’s asking you to stage it. Given how finicky the previous quest’s license chat could get, I’ll admit I came into this one bracing for another round of tricky dialogue. Fortunately, it’s mostly creative work: dress up his place, then go tell him you’re done.
To even get the offer, you need to have progressed Ziggy Ra Sand‘s story and his move-in, and you have to be somewhere other than the Apartment when the job comes up.
Objectives
- Design Ziggy’s Apartment — Ziggy needs some help with apartment decoration. Leave the apartment when you are done!
- Return to Ziggy — Go back to Ziggy and tell them about the apartment decoration.
That first step is the one that snags people. You can only finish it by walking out the door after you’ve placed everything — I’d double-check the layout before leaving, because stepping out is what locks the job in.
Dialogue Choices
The setup line comes straight from Ziggy: “Sometimes my vision doesn’t get transferred correctly and people misinterpret what level I’m playing on. I need you to level it out for me. Get me on the plane of these party people.” How you answer matters beyond this conversation.
- Can do. → You accepted Ziggy’s apartment staging job; Ziggy’s apartment is open for staging (matters later in this quest)
- That’s kind of insulting?
If you actually want to help him, there’s no real decision here — Can do. is the line that opens his apartment for staging. The dismissive reply just brushes the request off, and since the staging part matters again later in this quest, I wouldn’t take that route unless you’re deliberately dodging the job.
Quest chains
Quests in Nivalis Nights rarely stand alone. Finish the right job and a new one opens up somewhere else in the city — sometimes with an entirely different quest giver. So before I wrap up, I want to leave you with the full chain map. Read the arrow as “completing the quest on the left can lead into the quest on the right.” It’s the fastest way to see why a job you’re stuck on might be gated behind something you haven’t touched yet.
- Get a Loan → I.O.U.
- Gladstone’s Rats → Acquire Green Reeker
- Green Thumb → Get a Loan
- Green Thumb → Hygiene Inspector
- Green Thumb → I.O.U.
- Green Thumb → Project Grapevine
- Green Thumb → Retirement Party
- Green Thumb → The Network
- Green Thumb → The Scorpion
- Neon for Zaffer → A Date with Zaffer
- Noodle Bar Expansion → A Knight in Nivalis
- Noodle Bar Expansion → Green Thumb
- Noodle Bar Expansion → Project Grapevine
- Noodle Bar Introduction → A Hacker’s Guide to Exploring Nivalis
- Noodle Bar Introduction → Bad Batch
- Noodle Bar Introduction → Brooke’s Business Opportunity
- Noodle Bar Introduction → Business Empire
- Noodle Bar Introduction → Dagmar’s Sabotage
- Noodle Bar Introduction → Dive Bar Deity
- Noodle Bar Introduction → Fun in the Sun
- Noodle Bar Introduction → It’s My Birthday!
- Noodle Bar Introduction → Movers and Shakers
- Noodle Bar Introduction → Nivalis Grind
- Noodle Bar Introduction → Please Delete My Numbers
- Noodle Bar Introduction → Poisoned Mustard
- Noodle Bar Introduction → Rats ate the Bread
- Noodle Bar Introduction → Slumlord
- Noodle Bar Introduction → The Church of the Binary God
- Noodle Bar Introduction → The Club Rat Kids
- Noodle Bar Introduction → The Coffee Run
- Noodle Bar Introduction → The Lost Leg
- Noodle Bar Introduction → The Measurer
- Noodle Bar Introduction → Truth Be Told
- Project Grapevine → Deal with a Devil
- Recruit Sal → Tongue Twister
- Sell Old Tech → Surrender Old Tech
- Stranger in Need → Get a Loan
- Stranger in Need → Hygiene Inspector
- Stranger in Need → I.O.U.
- Stranger in Need → Retirement Party
- Stranger in Need → The Network
- Stranger in Need → The Scorpion
- The Church of the Binary God → An Altar of Ones and Zeros
- The Church of the Binary God → Bad Batch
- Thirst Trap → Love Den
Two things stand out to me when I look at this list. First, Noodle Bar Introduction and Green Thumb are the quiet hubs of the entire game — each one fans out into a dozen or more later quests, so if it feels like half the city is waiting on you, it usually traces back to one of those two. Second, several entry points (Stranger in Need, Green Thumb) dump you into the same money-quest line through Get a Loan and I.O.U., which means a debt thread keeps surfacing no matter which path brought you there. Worth knowing before you decide what to chase next.