In Deep Rock Galactic, the Experimental Plasma Charger (AKA the EPC) is one of the best weapons in DRG’s arsenal. In this guide I’ll show you how to master it in order to bend the caves of Hoxxes IV to your will with one of the most underappreciated, yet overpowered tools in the game.
Foreword
Welcome to your ‘one-stop-shop’ for learning to use R&D’s best invention yet!
Whether you’re a freshly employed greenbeard, or a greybeard with facial hair to rival that of Karl I hope you find something useful here to increase your proficiency with this ever elusive piece of equipment.
Management have become increasingly concerned with the dropping levels of ability in R&D’s most expensive theoretical physics science magic thingy – after all some return on investment is needed to maintain DRG’s profit margins!
Alas this is where I enter the scene, a dusty driller main to guide you through the twists and turns of this rollercoaster weapon for the low, low price of 2 Error Cubes (Not that I know what they’re used for or anythi-ERR://23¤Y%/).
On another note, management has advised me to advise you to be advised that this guide is a work in progress and will focus mainly on the Thin Containment Field side of the EPC, while other builds are still viable, they’re much more straight forward and you probably don’t need a guide on that… right? Nevertheless if there’s the demand then this guide may be updated in the future to include other builds.
So without further adieu lets take a deep dive into the Experimental Plasma Charger!
What is it and why is it special?
The Experimental Plasma Charger, or EPC as it’s endearingly known is one of Deep Rock’s most alluring weapons. It is unlocked after attaining its respective license following the assignment License Upgrade: Experimental Plasma Charger which becomes available after obtaining driller rank 15, and occupies the drillers secondary slot as an alternative to the Subata 120.
Sporting a futuristic plasma pistol design that gives old Halo players like myself some sizeable nostalgia with its single & charged shot dynamic, it is perhaps one of the most promising weapons to grace our dwarven hands (As you’ll come to learn shortly). On the surface however, it is not uncommon for new users of the weapon to be left markedly disappointed. Compared to its competitor, the Subata feels more reliable, punchy and familiar to the unenlightened; indeed it appears on the surface that the Subata in fact has greater utility than the EPC, supplementing the driller’s lacking single target damage capabilities with its Hollow-Point and Volatile Bullets in tiers 4 and 5 respectively. Whats more is that the “anti-matter-powered supercharged plasma bolts” spewed out by the EPC are prone to a considerable bullet time, server lag, and on their own feel rather underwhelming.
Yet this isn’t unlike most of the unlockable weapons in the game, which serve a more niche role and arguable different utility than their default counterparts. In this respect the EPC is no different, it vastly rewards you for playing to the drillers main strength – crowd control and get this… drilling – while punishing you for deviating from the class’ preconceived role in the team.
By taking the EPC, the driller is sacrificing most of it’s single target damage potential for even more crowd control capability – something it already excels at. In doing so it vastly reduces it’s all round combat versatility, HOWEVER this isn’t the end of the EPC’s story…
Because then comes along this beast
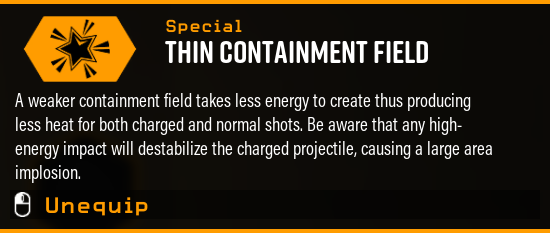
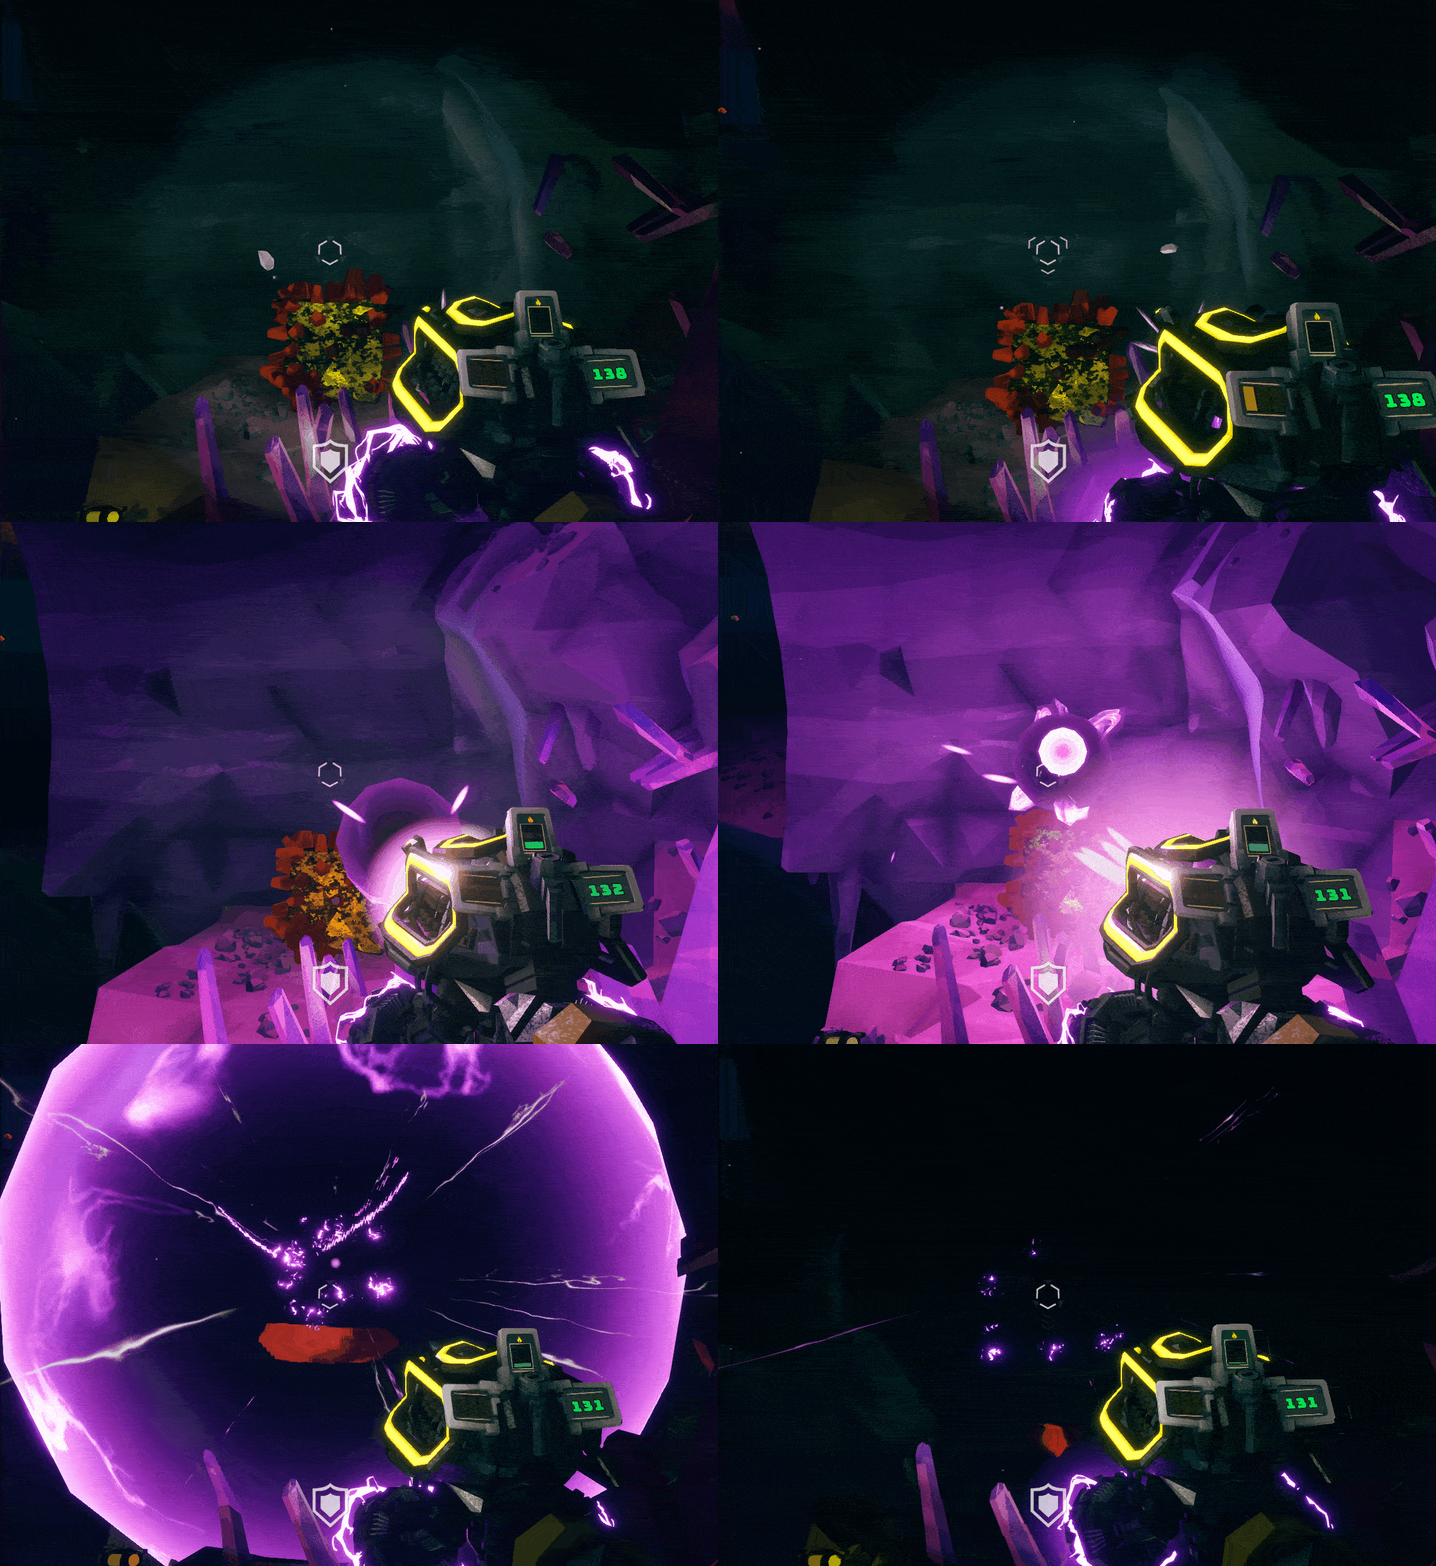
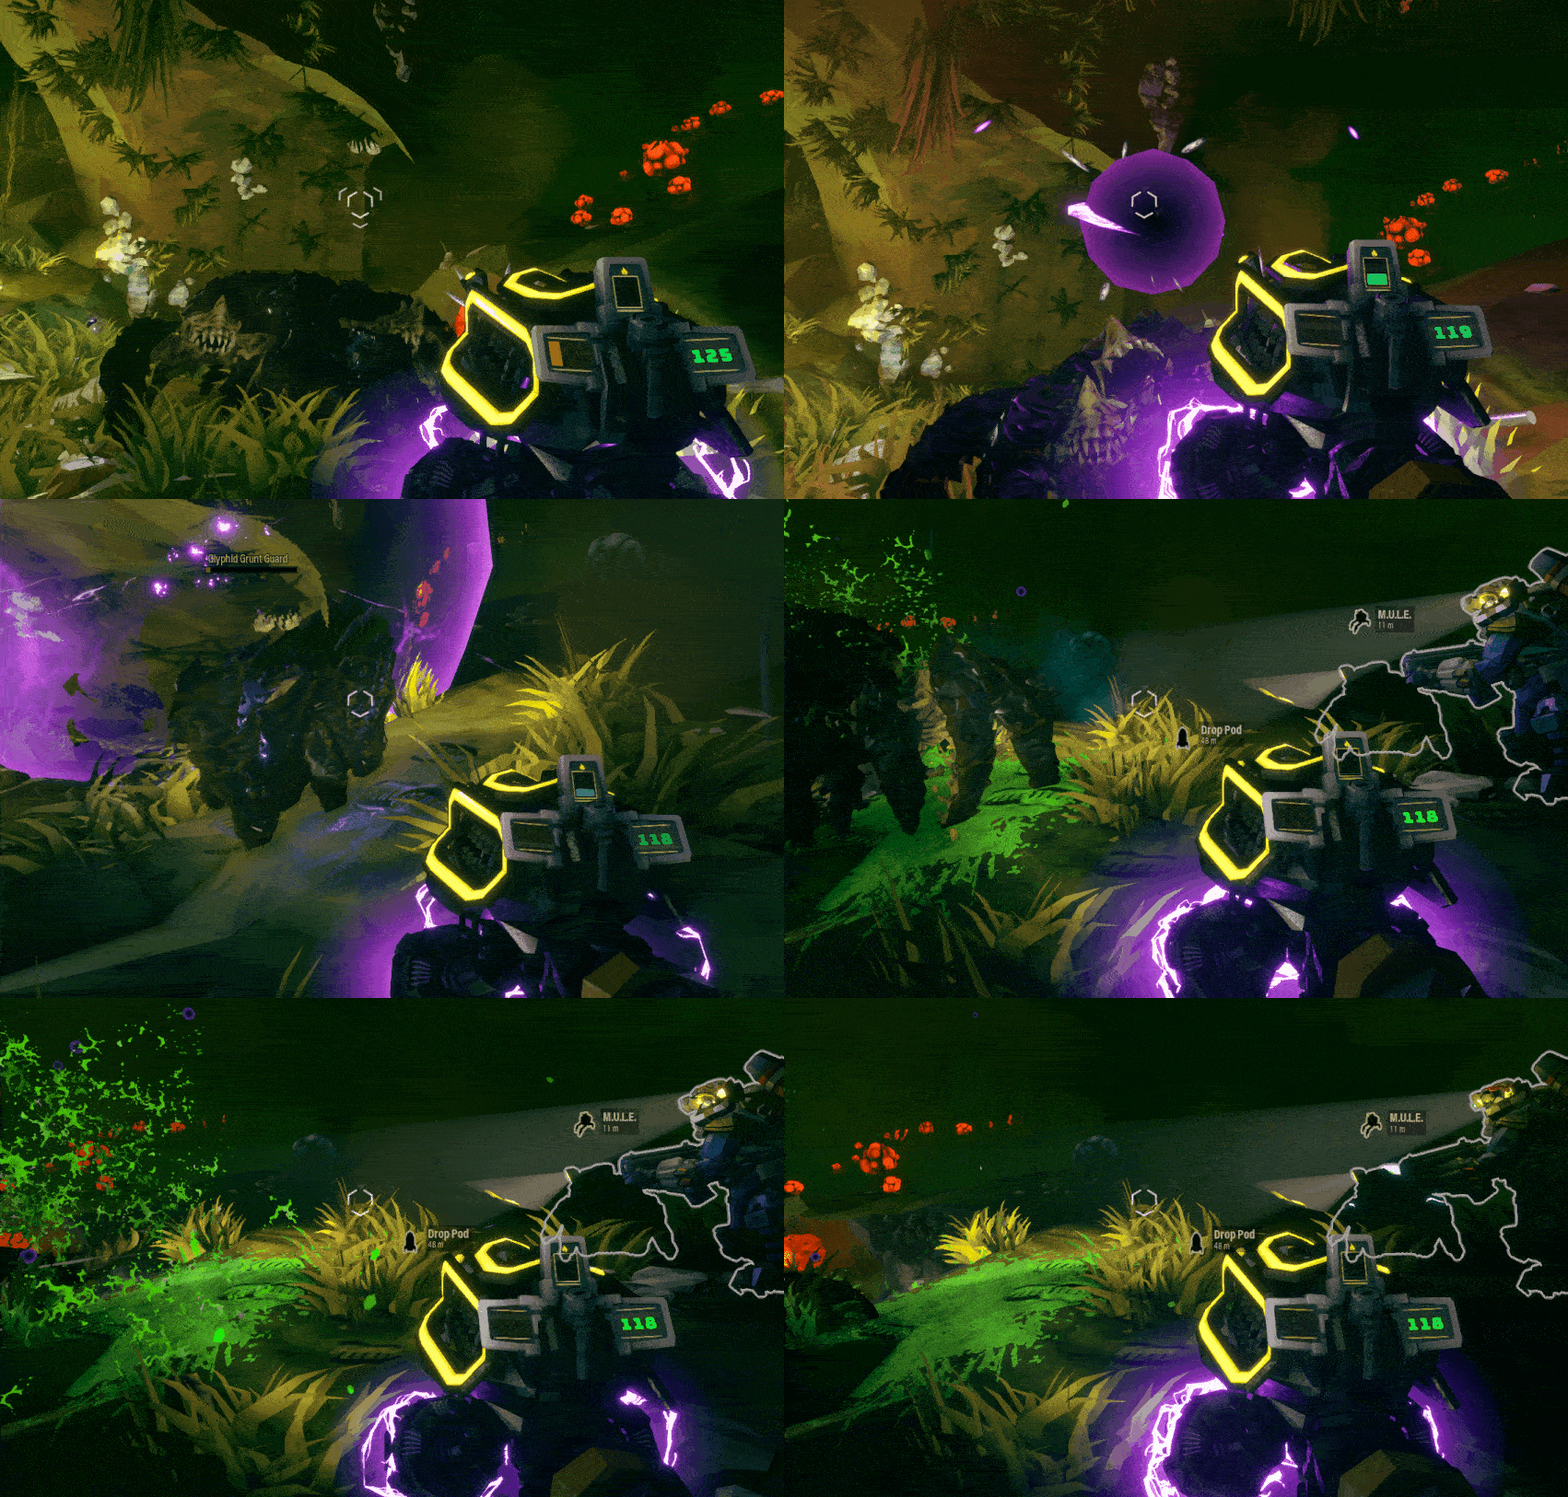
Implosions… to put it simply this is the crux of what I believe makes up of this weapon, nay tool; what puts the driller so far up on a pedestal that none of the other classes even come close to reaching the ceiling of what this monster can achieve. Still don’t believe me? It’s this one mod that allows drillers all across the company to do this:
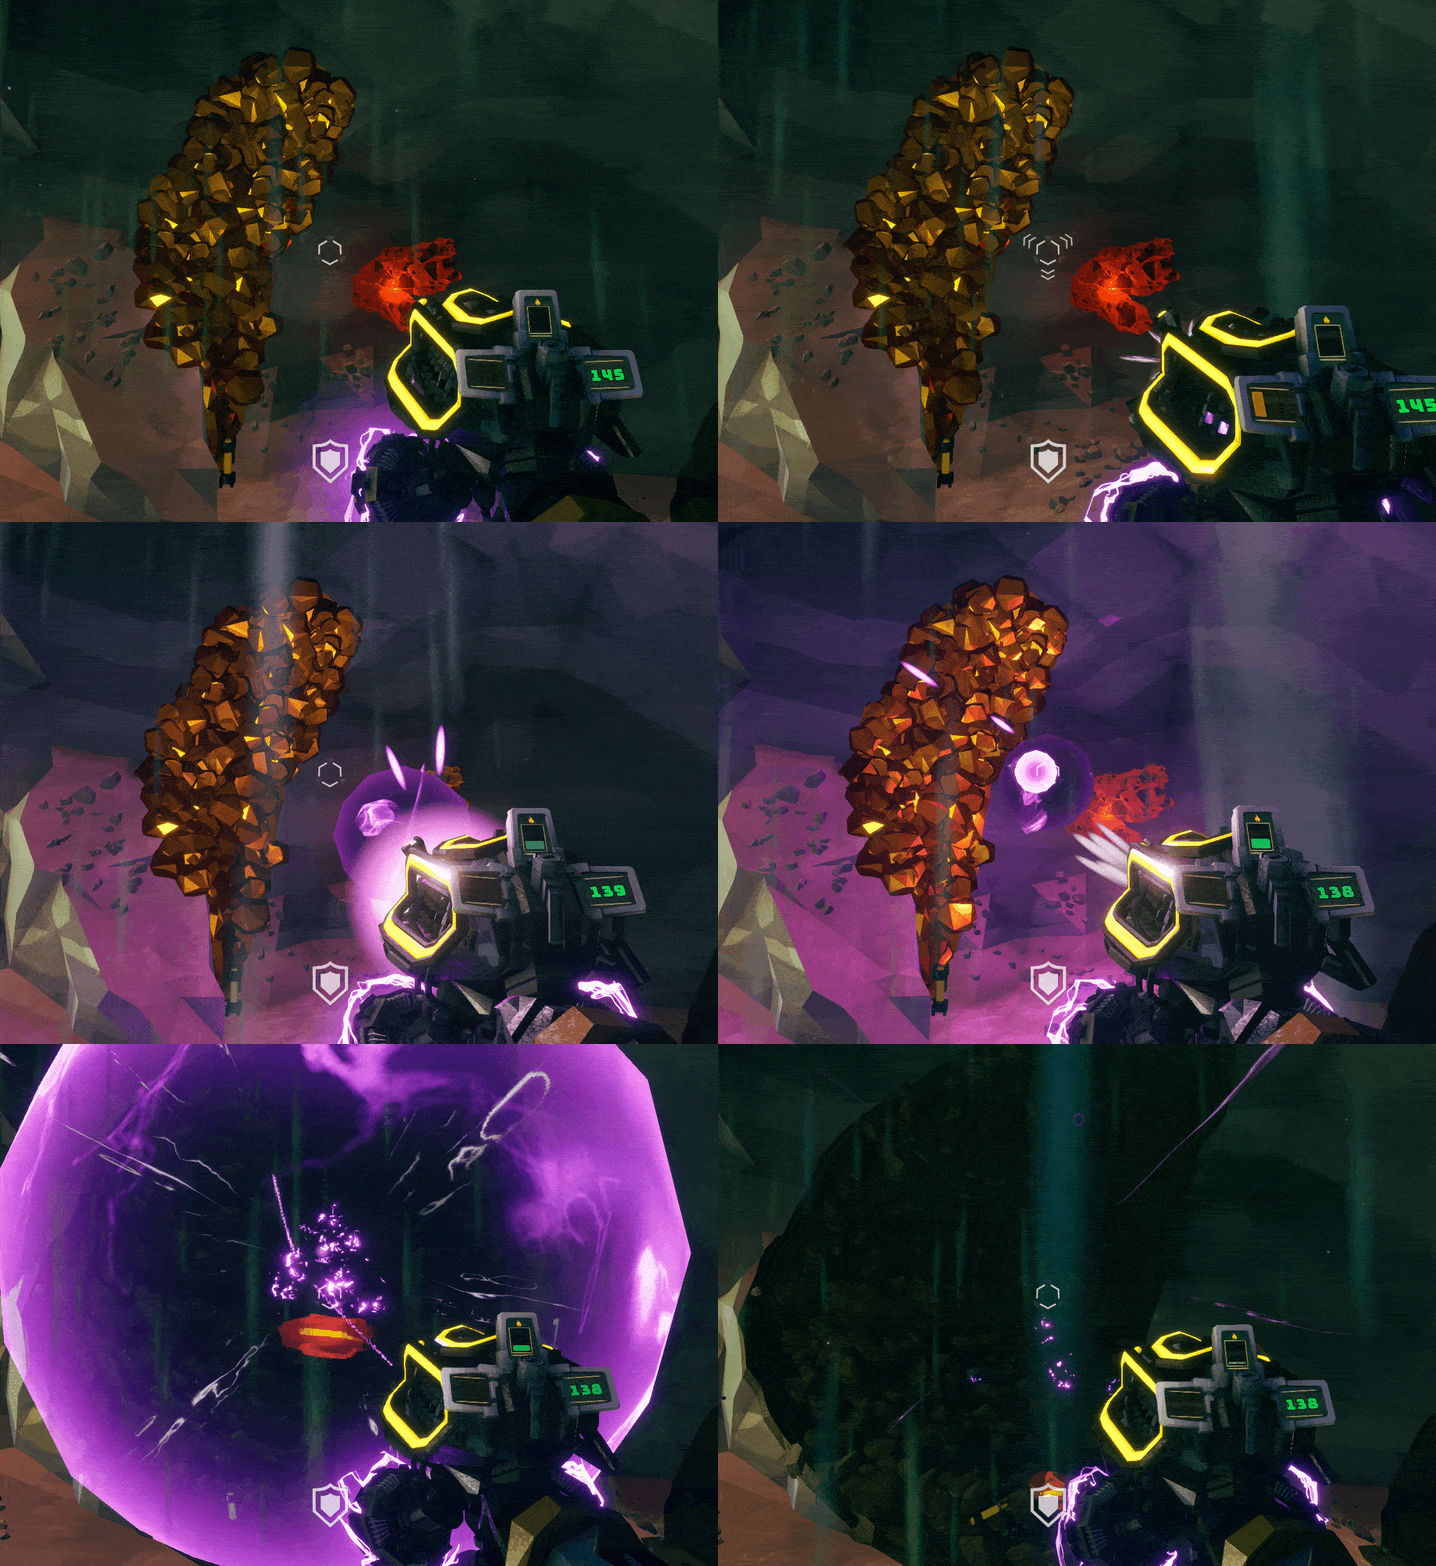
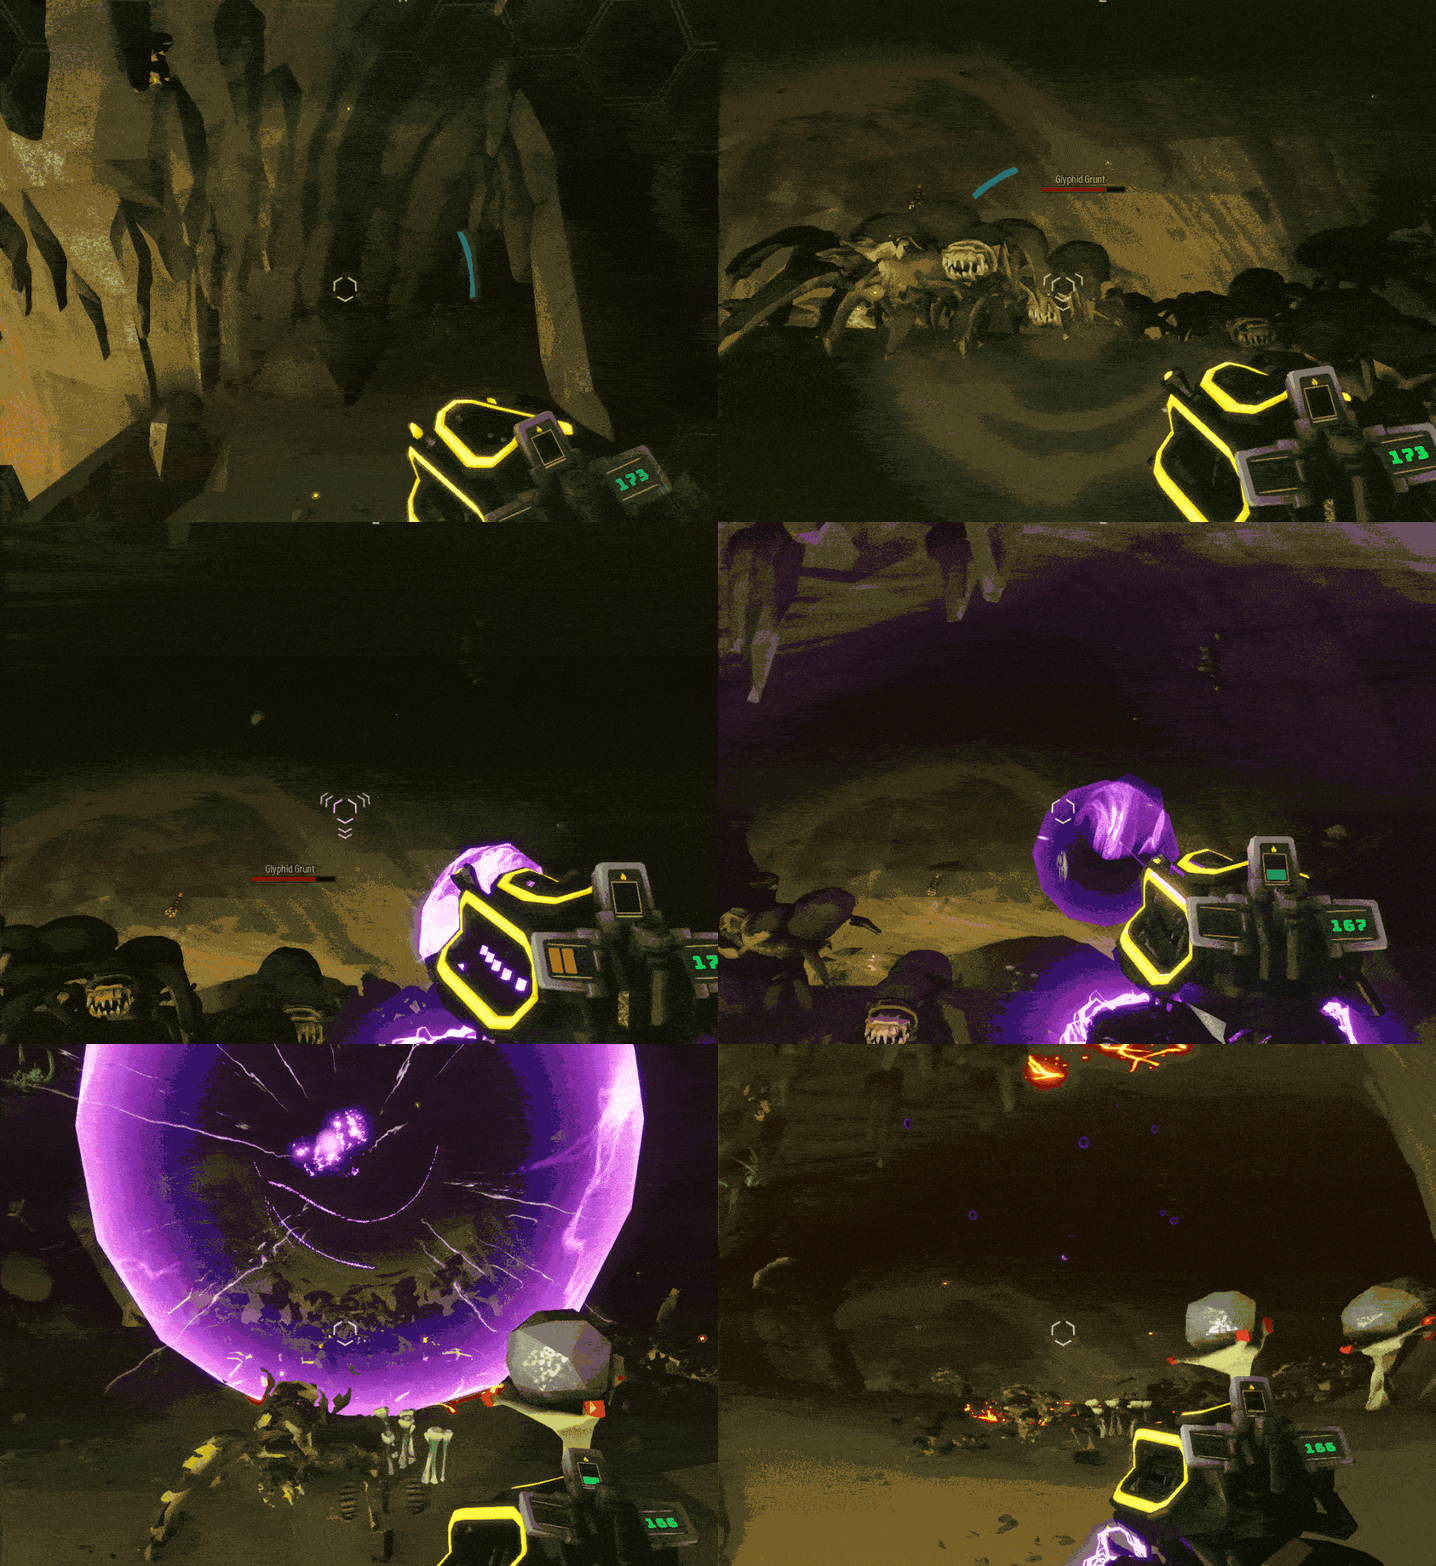
Indeed it’s this one tier 5 mod, unlocked as early as the driller’s 18th level that propels the class into the territory of the gods. What makes the EPC special in this regard is that it’s the only secondary in the game (besides maybe the Engineer’s grenade launcher) that has both practical utility as a tool, and combat utility as a weapon. To put it simply, most of the time, your experience with this weapon will be comprised of shooting at walls, geysers and those god awful cactus plants just as much as it will be by shooting at Glyphids. And the best bit? The only thing holding you back from achieving this is the time you’ve spent learning its ins and outs – Which is where the guide comes in! 🙂
(Leaf Lovers do not attempt)
Basic Tutorial
So right about now is when you might be asking yourself, But how do I use it?!?! I have no idea! You probably weren’t but I need the transition so you’re going to have to deal with it. Anyway, here’s the zero to hero on the EPC, focusing of course on a Thin Containment Field Build.
So to start, here are some basic controls;
Left Mouse Button
NB: I call these ‘single shots’ because they use a single unit of ammo, as compared to the following charged shots. They are also known as ‘Normal Shots’ by the community.
I just want to be different 😛
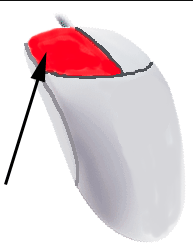
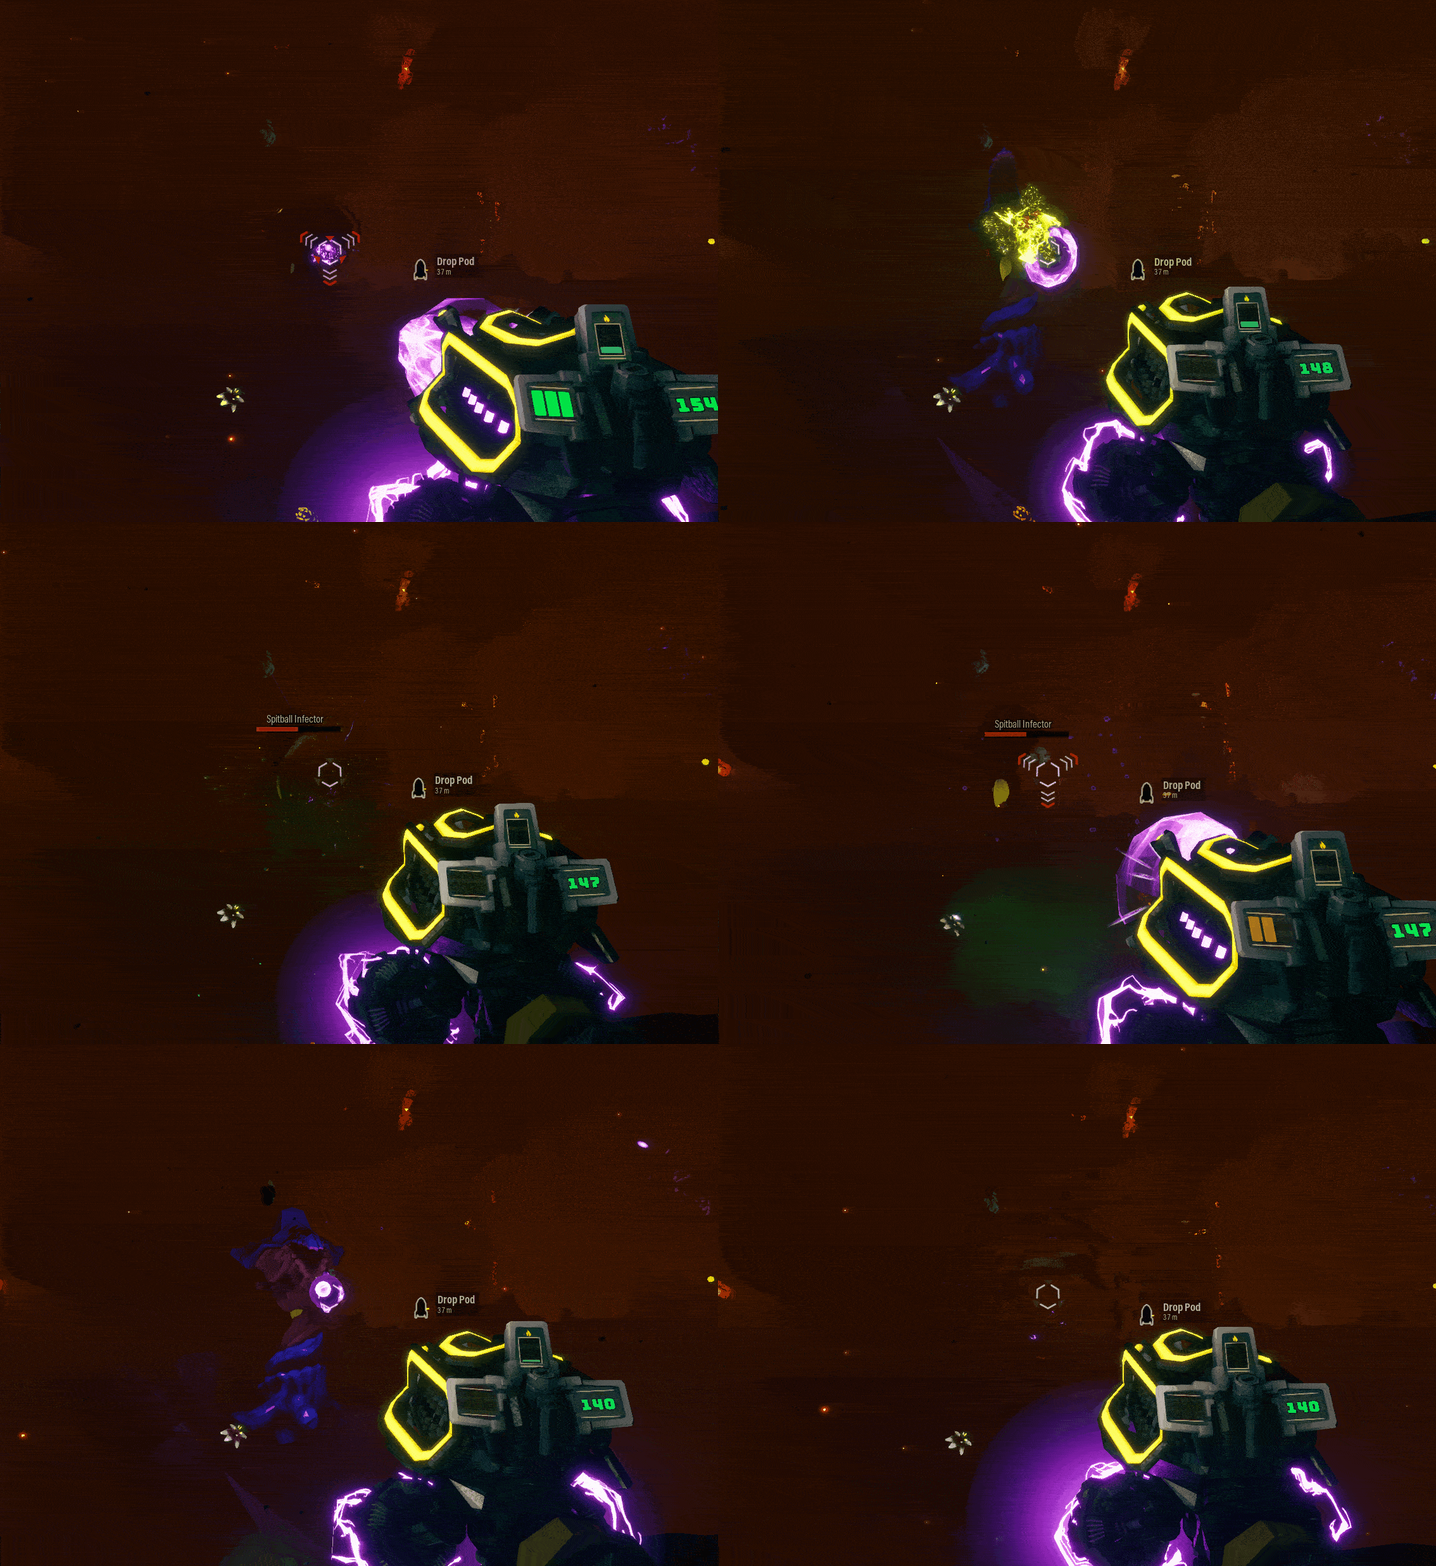
Hold Left Mouse Button until the indicator (3 bars) change from orange to green and then release LMB to fire. This is also denoted by the red chevrons on your aiming reticle.
NB; without the thin containment field mod, this will cause the weapon to overheat instantly

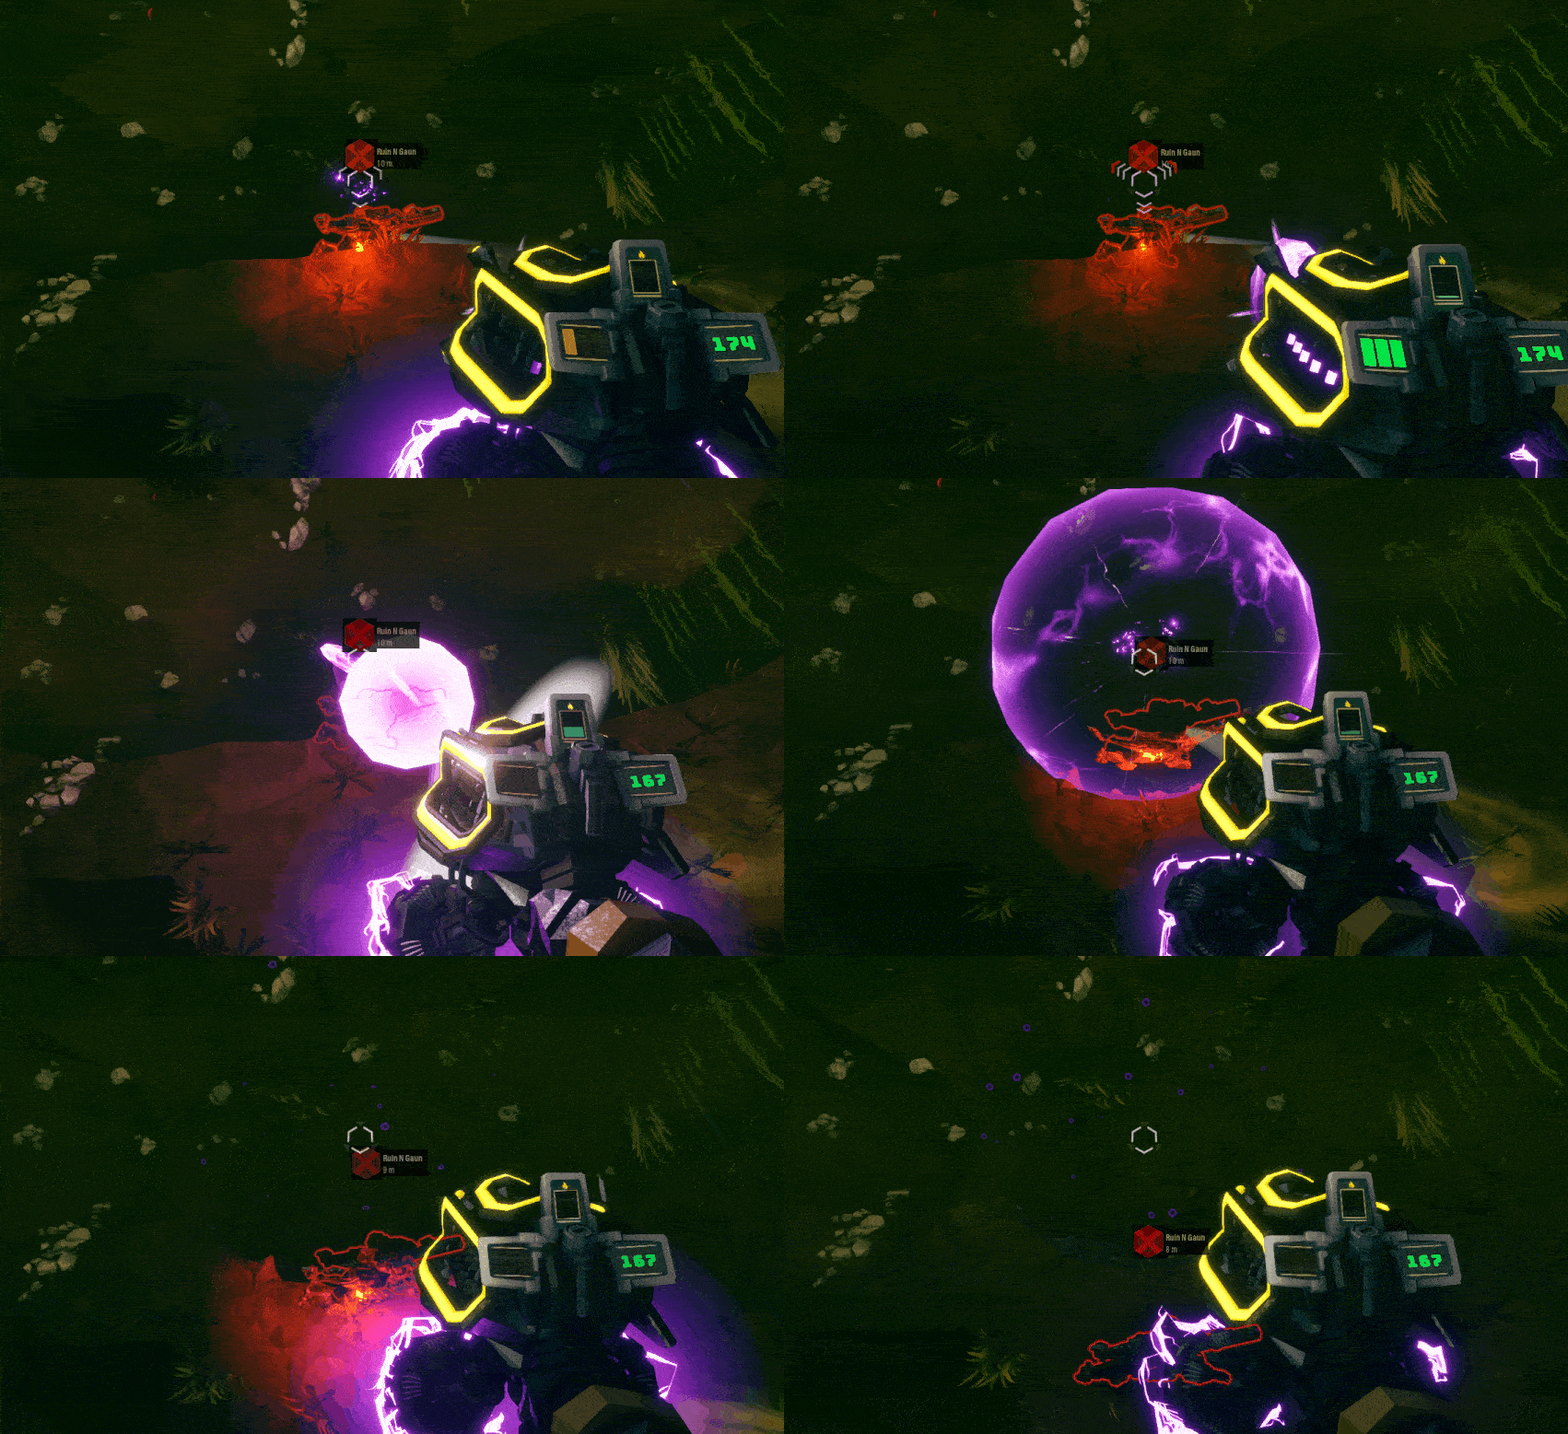
Using the Thin Containment Field mod, fire a charged shot, and then shoot it again with a single shot to detonate it.
NB: this second, single shot is called the detonating shot from here on out.

And that’s all there is to it! Simple eh? Well not exactly, it takes a fair bit of practice putting it all together to be able to use the EPC reliably. And that really is the main thing here, practice, it certainly is one of those easy to use, hard to master sort of things, but the payoff is almost immeasurable.
So, now it’s time to actually give it a crack, you know how to shoot it, but how do you really use it to the point where you can be effective? Well like all things, this depends on the situational context of what you’re trying to do. Broadly, this can be split into three categories, general tips, combat utility, and mining utility.
General Tips
The first thing to know is that in order to be successful with a Thin Containment Field EPC build is you’re going to be wanting to be causing implosions a lot. Who knew that your unique feature is what you should focus on right? To effectively achieve this it’s important to keep in mind that charged EPC shots will implode when they take damage from a projectile of some sort, that means that they can be triggered by you, your team mates, or even Glyphids (more on this later).
While you’re starting out it’s best to try and stay as still as possible while getting the timing, angles, and speeds of your shots down to muscle memory. It becomes exponentially difficult to actively trigger an explosion when moving due to the weapons bullet time (plasma bolt time?), as now you need to account for the trajectory, speed, and intersection points of not one, but two shots. In time though you’ll learn to throw some back and forward movement into the equation for some handy manoeuvring while running away from bugs, but jumping, falling, strafing and ziplining are all not ideal for accurately getting EPC shots off.
Moreover, the hitbox of the charged shot is much, much larger than it appears to be, and it loves to crash into surfaces earlier than you intend, keep this in mind when your implosion zone (or where you intend to create the big plasma crater) is just in front of another solid object, or when shooting past/nearby dwarfs, Glyphids or terrain. We’ll cover techniques on how to mitigate the difficulties encountered by this later on.
Another crucial piece of information is that if any part of the EPC’s implosion hits a target, be it bugs or a terrain entity (such as an environmental element like a geyser, cactus plant, whatever), it will deal FULL DAMAGE! So what does this mean for you? Well fortunately it means that we dont need to be super precise with our aiming, and we only need the tip of an implosion to merely graze an object for it to be turned to dust in front of your shiny dwarven eyes.
Combat Utility
When in combat, the EPC opens up a few choices depending on the situation, rendering it a bit more nuanced than the ‘point-and-click‘ nature of most of the other weapons. Firstly, lets go over our options and their implications:
So with this in mind, it should be fairly obvious that each option is better at different things.
Single shots are most useful for finishing of weakened enemies, or quickly panic spamming low health grunts. They’re particularly practical when the target is frozen and lends itself to the cryo-cannon + EPC meta. In conjunction with combat axes these serve to increase the single-target damage capabilities of the driller. There isn’t too much to say about them, and will feel fairly familiar to most dwarfs, just remember to lead your targets!!
Charged shots are in my opinion a bit underwhelming when it comes to their potential capabilities. To put it bluntly, they’re a bigger, heavier version of a single shot, which a thin containment field build isn’t spec’d to focus on; if you’re a fan of charged shots that are slow and deal decent damage, then a Flying Nightmare or Plasma Burn build will be more suited to you. That being said they have value in close range engagements where a single enemy needs to be taken care of, such as an annoying Mactera or dangerously close slasher. In these instances it may not be practical to detonate an explosion due to your own low health, lack of time, or needing to manoeuvre sharply while the slow speed of the charged shot is mitigated by short range.
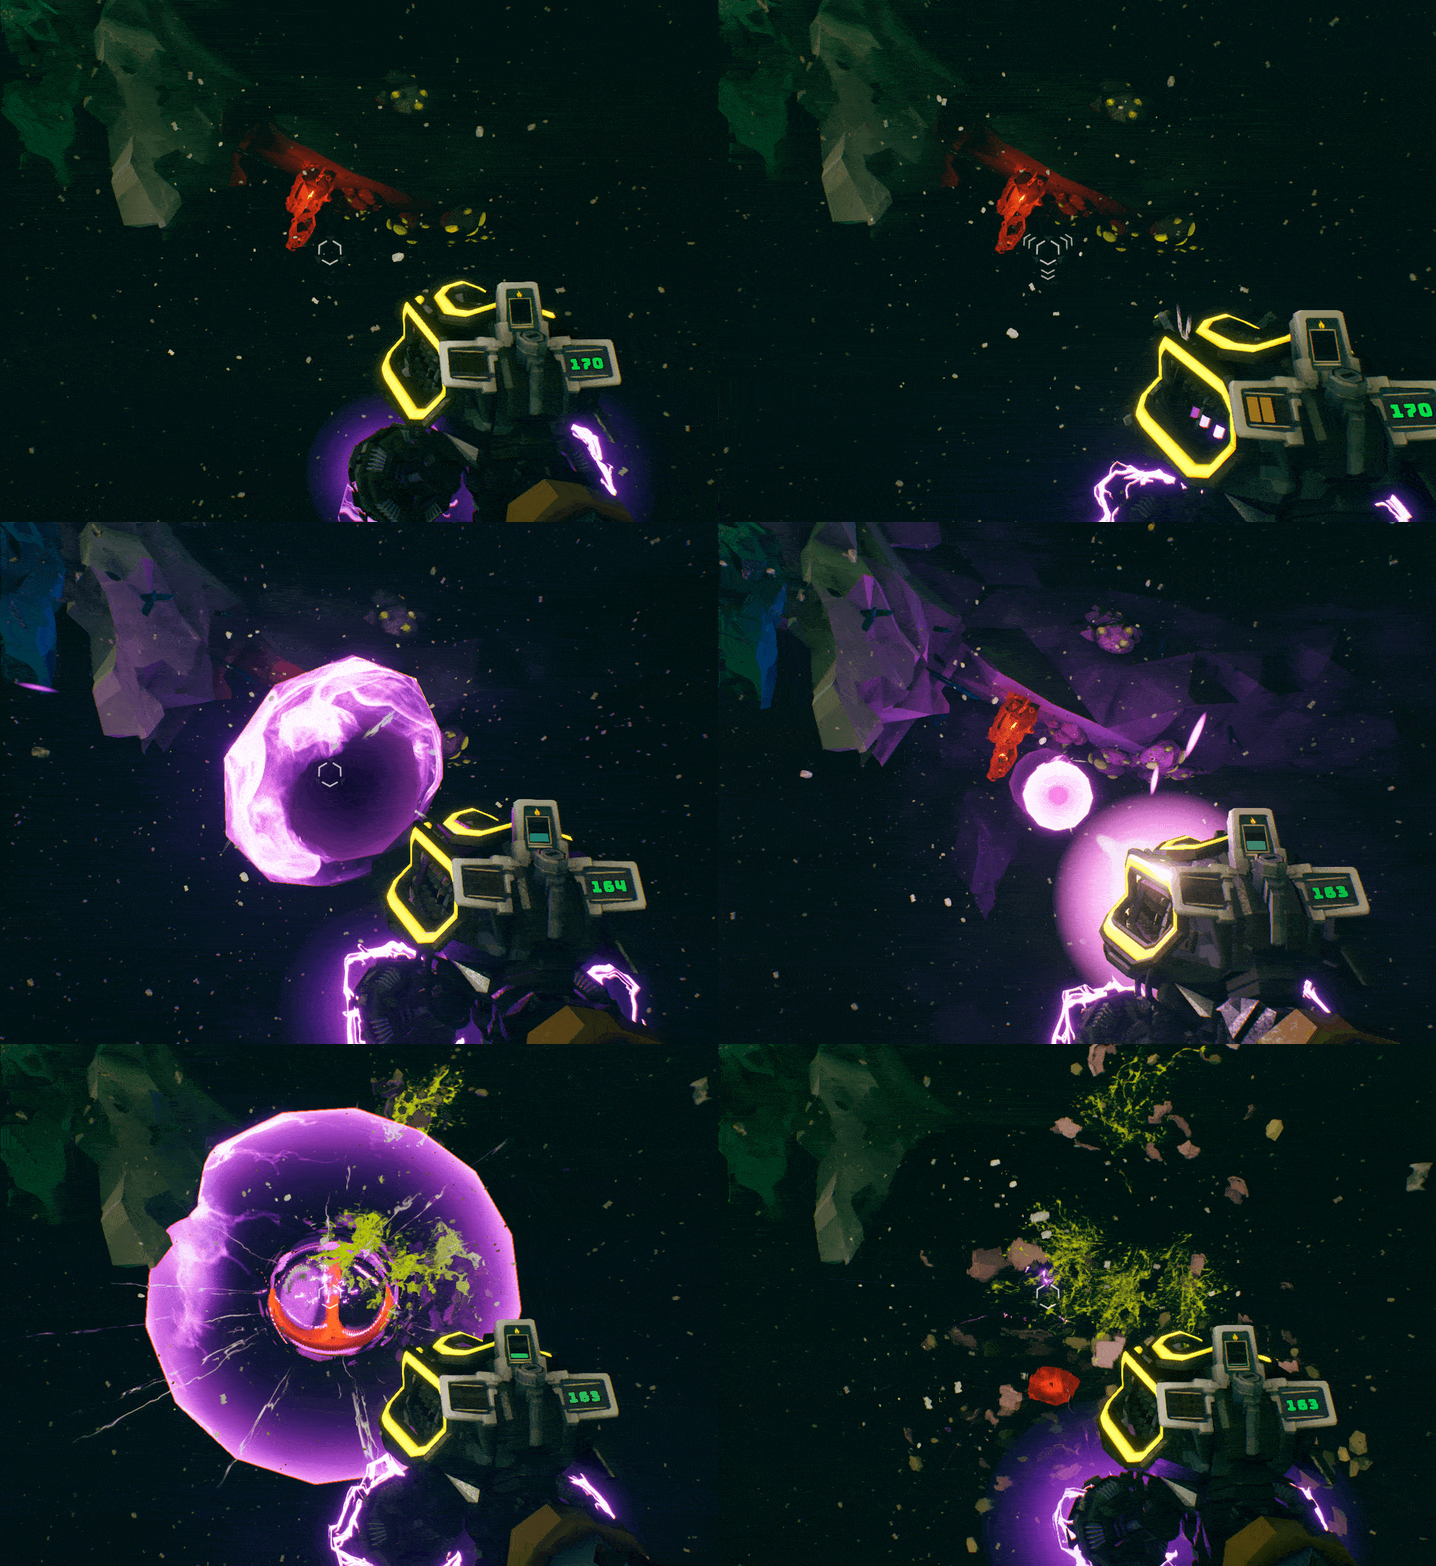
Implosions are the crème de la crème of EPC combat. They offer an instant kill to any swarmer, grunt, slasher, mactera, acid or web spitter, and boasting an impressive 2 shot to guards, shellbacks, spitballers and most other medium sized enemies. They strip enemies of their armour provided they’re caught within the implosion field making team play synergies possible, and there mere touch of one can simply delete a significant proportion of a hazard 5 stage. They’re the best bang for your buck in my opinion, yet take the most amount of practice to use effectively. Implosions are best employed against enemies at short-medium range, where you have enough time to charge, aim and get your shots off at a comfortable distance.
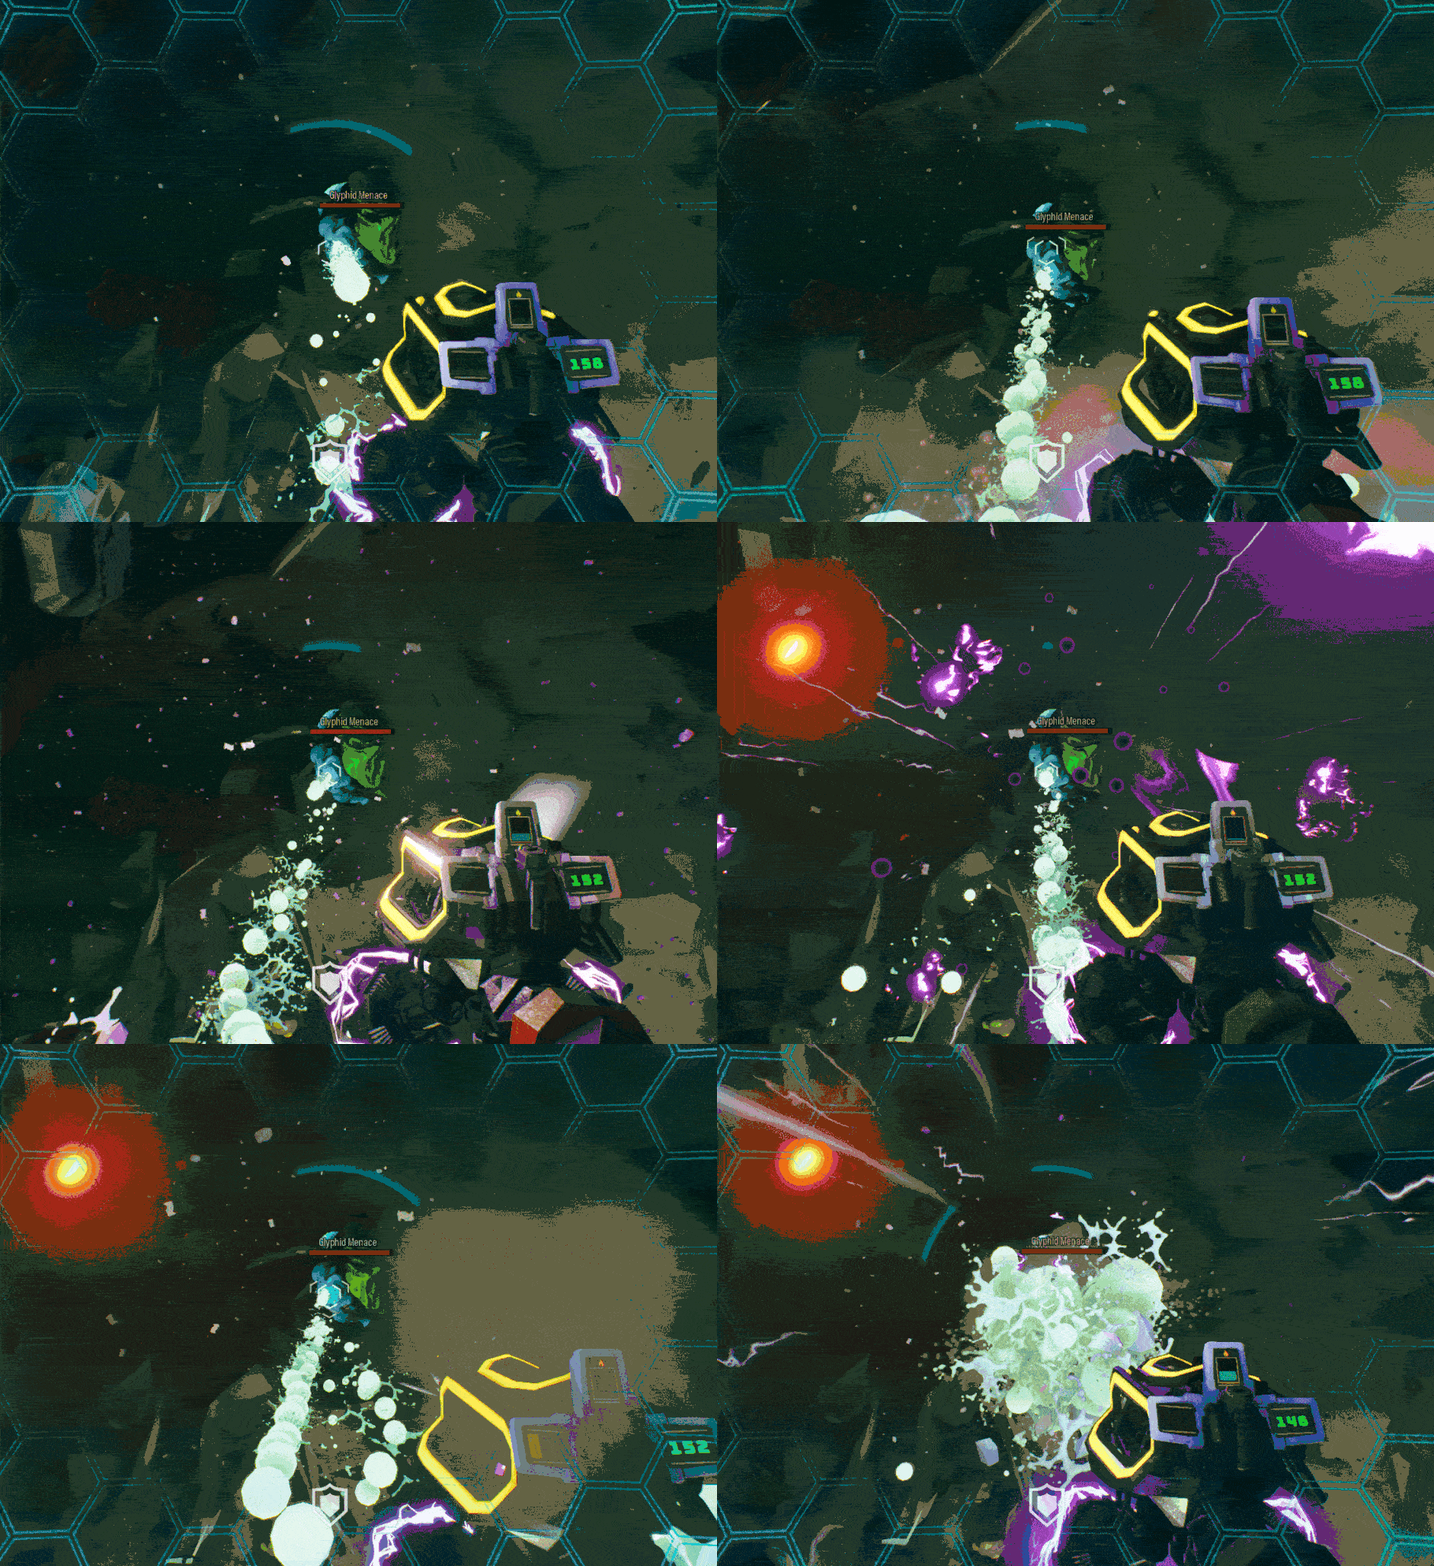 The main pointer here is to aim above, not at your targets. That pesky large hitbox will usually smack into the first Glyphid in the pack otherwise, and in order to deal maximum damage, you’ll want to maximise your area, which is achieved by aiming just above the host of ground dwelling foes that have come to take a nibble at your dwarven boots. Another thing to keep in mind here is that implosions might as well be useless – nay detrimental against ranged enemies and when being shot into lanes of heavy fire. Menaces will often cause you to implode your own face with their ranged projectiles and firing in front of the team’s gunner oftentimes results in the same outcome. It’s a tool best used sparingly to supplement your crowd control abilities and offers a nice alternative to quickly taking out hordes of Mactera.
Mining Utility
So we all know this is why you’re really here, to be that driller who renders our blue tinged grappling hook wielding friend mostly obsolete. Unfortunately, EPC mining has no magic trick, it’s something that simply requires practice to become good at. There are however some basic tips that can help you start hitting your shots. Who knew trying to blow up a stationary bit of rock was so tricky right?
The first big tip that I can give is to practice hitting shots while you’re standing close to your target. Chances are you’ll probably take a bit of damage doing this, but it helps you achieve a couple of things:

- You’ll instantly mine anything inside of the implosion, so entire veins of gold and minerals will be gone in a flash!
- You’ll accustom yourself to needing to time your detonating shot before your charged shot slams into a wall.
- You’ll gradually be able to get the timing down and move further and further away from your target.
By using this method, i.e. running up to a few meters away from a vein and attempting to EPC mine there, you’ll find that your shots will hit their target a lot more reliably. This is largely due to removing the role of timing when to fire that second shot in the EPC’s implosion cycle – (that aim, fire, aim, time your detonating shot, fire, profit loop we were talking about before). This works because being closer to the target lets you instantly send your detonating shot into the charged shot, while you and everything else are already in, or close to, the implosion zone.
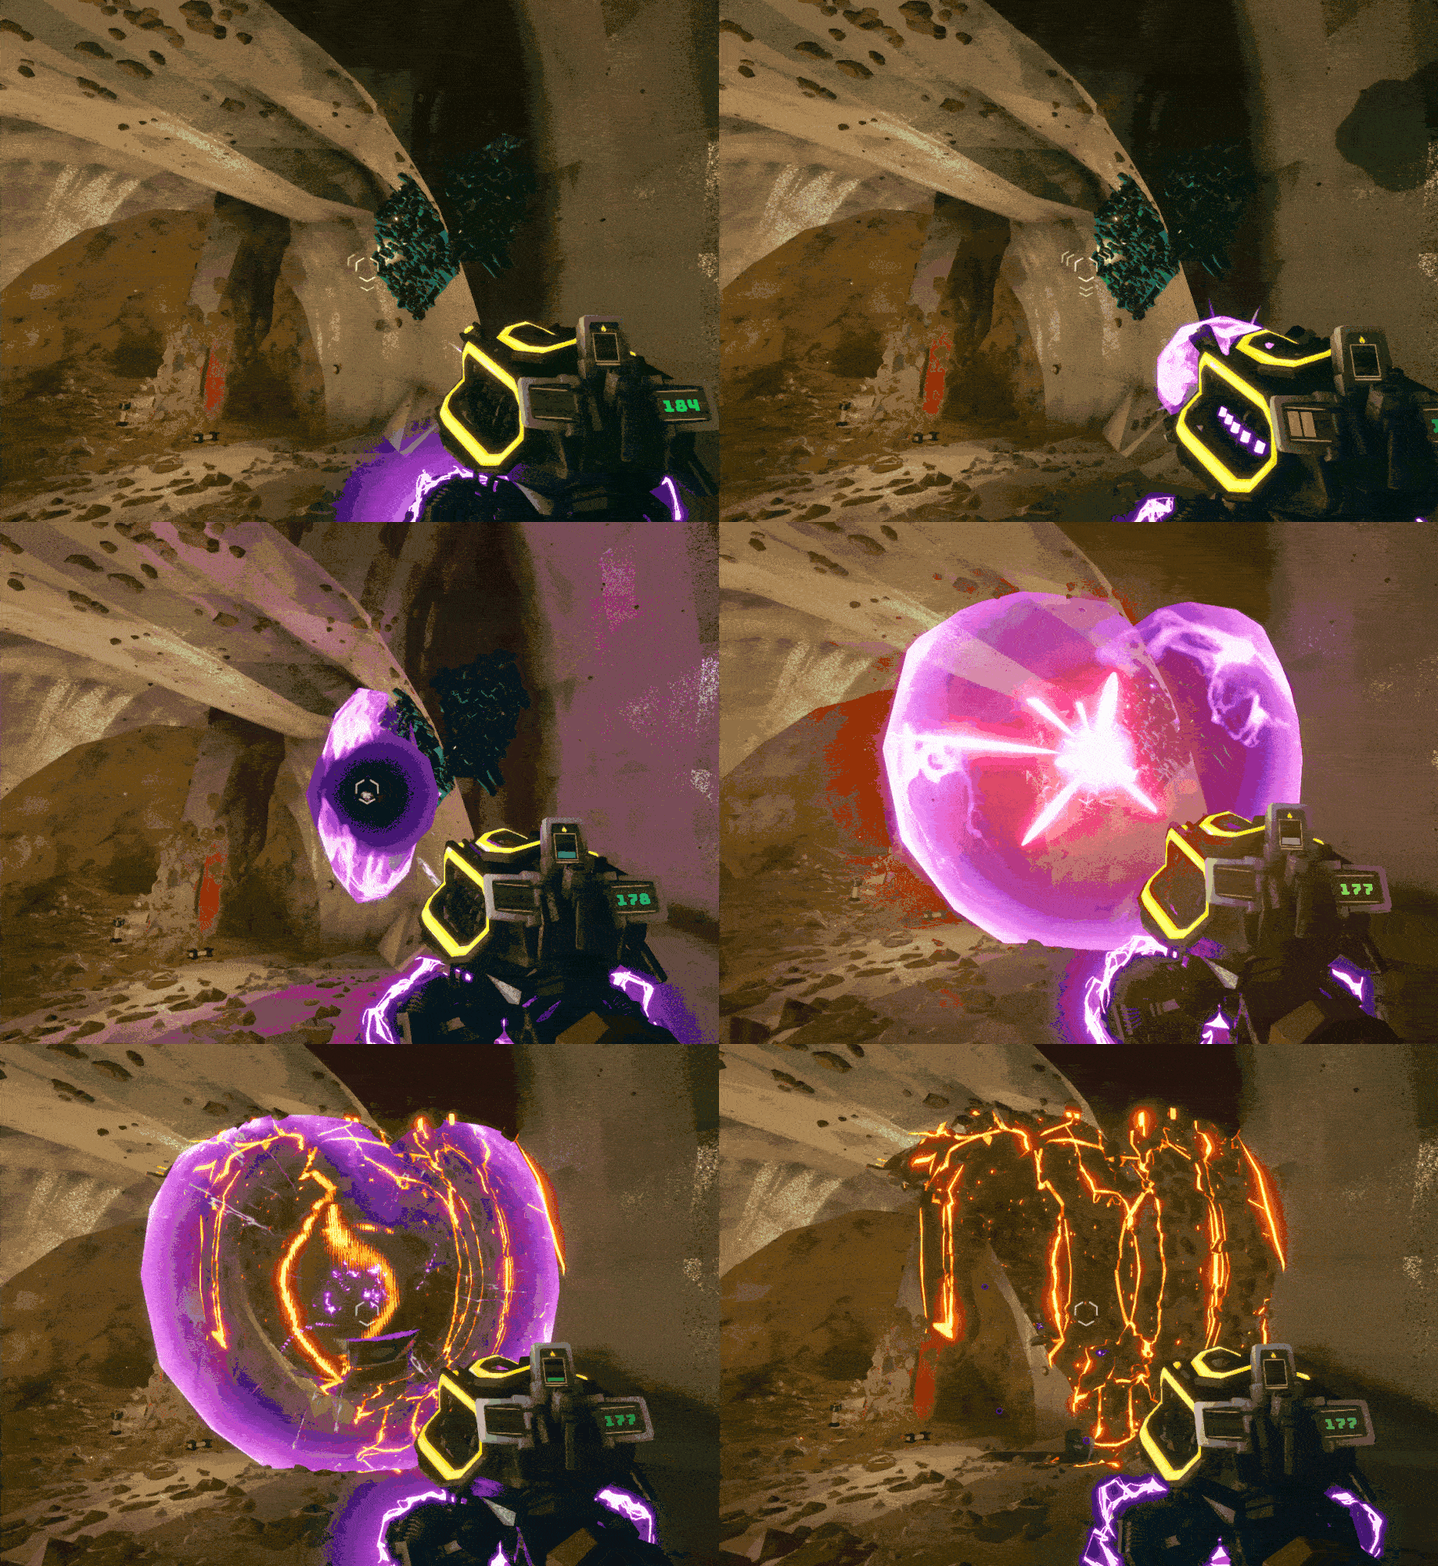 Another big tip is making sure you align yourself parallel to your target. It is substantially more difficult to detonate your shots in that goldilocks detonation zone when you’re facing your target head on due to the deceptively large hitbox of those pesky charged shots. Its the same logic we use when shooting above enemies instead of at them, by allowing yourself to shoot past your target, you’re also allowing yourself to utilise the entire radius of the spherical implosion, instead of the smaller, circular tip at the end; thus improving the grace period for being able to land the shot, and also being able to excavate more at the same time.
Additionally, when its nigh on impossible to be able to shoot past your target (as is the case if veins of minerals are high up and near the ceiling) then mirroring the angle of the terrain here can mitigate the sharp angle of what’s beyond your target and produce a similar effect to shooting parallel. This probably makes more sense visually than verbally.
Loadout & Weapon Build Variations
One of the wonderful things about DRG which is epitomised by the EPC is that nothing gets better simply by itself. There’s no arbitrary level scaling or gear rating system, and this cant be more true for the EPC. It’s a tool that scales to the wielder’s ability. All of these builds will revolve around the tier 5 mod ‘Thin Containment Field‘ as mentioned previously which unlocks at driller level 18.
With that being said however, some builds are definitely better than others and while it won’t make or break your time with it, there are some setups that are more ‘meta‘ than others.
I’ll aim to explain some of my rational behind each of these builds as well as what they’re best suited for in an attempt to help you follow along my logic and spice up changes where you need.
The first SUPER IMPORTANT thing to note is that Charged Damage, Charged Area Damage and Charged Effect Radius all refer to the effect of a charged shot making contact with an object NOT the result of an implosion. For this reason tier 1-C, tier 2-A and tier 2-C are all more or less useless for a thin containment field build. As such, that leaves us with only one option in tier 2, being tier 2-B (the middle one) ‘Overcharged Plasma Accelerator‘ which increases projectile speed by 25%. It’s important that no matter what you do, do not change this modification once you’ve started learning the EPC as it will change the timing of your shots – which is obviously not very rock and stone.
Next up in tier 1 the objectively best choice is 1-B ‘Larger Battery‘ which increases total ammo capacity by 24, allowing you to shoot more and create more implosions. This beats out 1-A ‘Increased Particle Density‘ easily, as the damage bonus from this mod only applies to single shot contact, and most of the time you won’t even be firing this weapon at enemies. Trust me on this, take the ammo.
In tier 3, 3-C ‘Tweaked Radiator‘ is often excluded, it’s bonus of increasing the cooling rate isn’t something that the weapon is readily lacking in, as such, 3-A or 3-B serve much more utility and produce much more significant effects. More on this in particular builds.
This is a similar situation in tier 4, where the value of extra 24 ammo from ‘High Density Battery‘ is just too good to pass up for ‘Heat Shield‘s’ ability to hold a charged shot for longer.
Obviously in tier 5 we’ll be taking thin containment field.
In my eyes, there are only 2 overclocks that seem to benefit a Thin Containment Field build directly, these being;
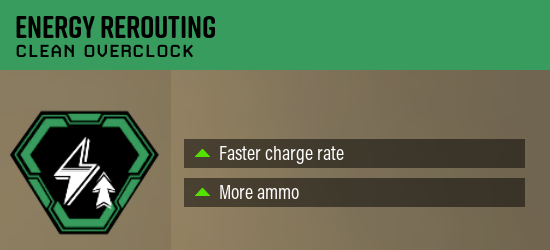
Energy Rerouting, a clean overclock that increases the speed of preparing a charged shot by 50% and increasing total ammunition by a further 16.
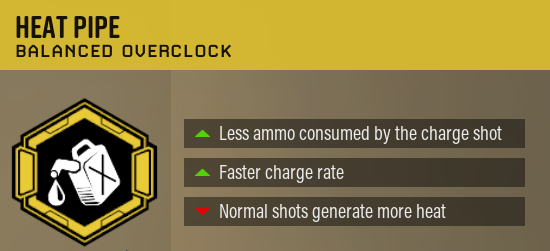
Heat Pipe, a balanced overclock that decreases the ammo cost of a charged shot by 2 and increases charge speed by 30%, at the cost of 40% greater heat generation from normal / single shots.
2,2,2,2,2, Heat Pipe
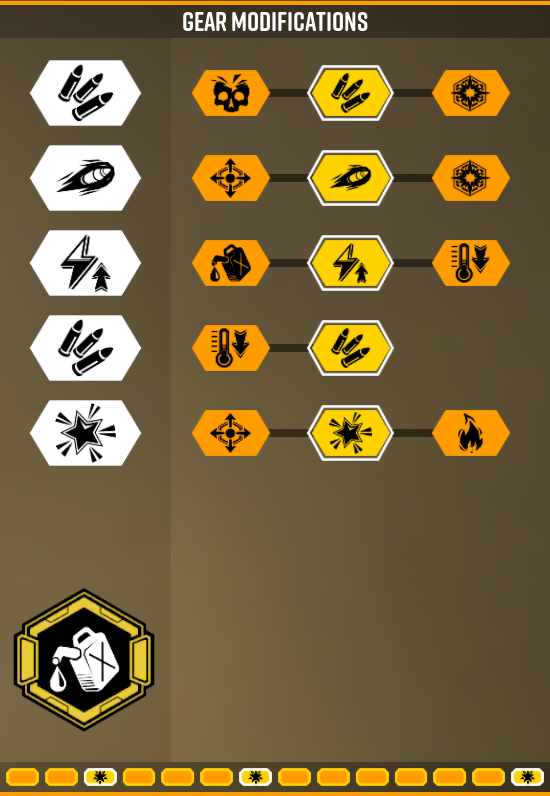
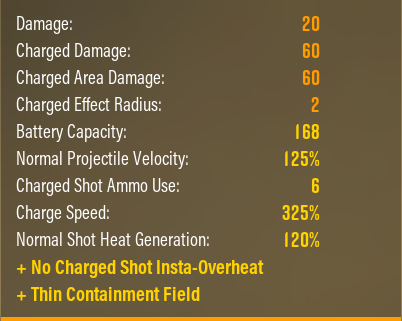
This is possibly the most common build for a TCF EPC, boasting the second highest charge rate possible and the third most amount of possible implosions (24), this build seems to be a community favourite. Personally however, this build feels like it commits too heavily into producing combat implosions with the increase in normal shot heat generation simply limiting combat versatility even more. I also find the high charge speed more difficult to aim with due to it’s reduced charge time.
2,2,1,2,2, Energy Rerouting
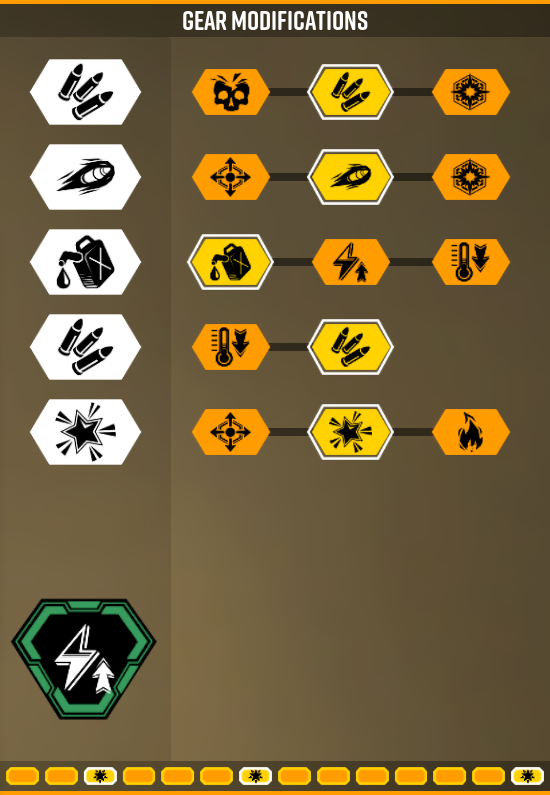
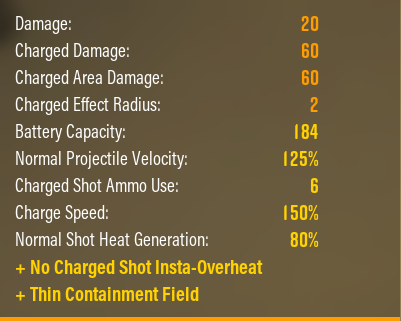
This one is my personal favourite, it allows for a solid 26 implosions off of a full battery, has decent charge speed, but not so fast as to hinder a dwarf’s drunken hands from making minor last minute corrections during combat. Ultimately, I think this build is the best out of the lot due to its increased versatility. The reduced heat generation from normal shots allows you to spam down frozen enemies with ease when need be, and the high number of implosions per resupply lets you mine all the nitra you can find.
2,2,1,2,2, Heat Pipe
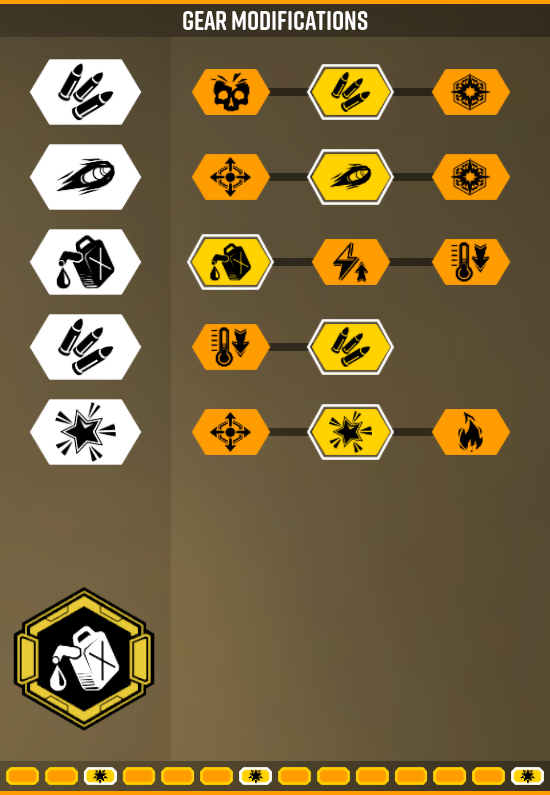
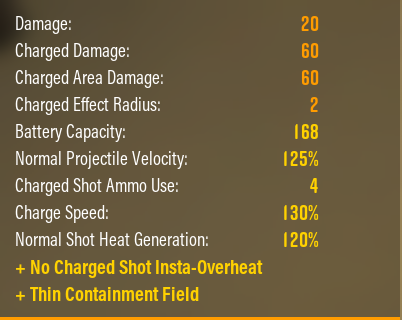
This is the most ammo efficient build, boasting an impressive 33 implosions off of a full battery. Indeed this build lends itself very well to EPC mining, however as you might of guessed brings many of the first build’s problems along with it. Players who use this build tend to focus more on mining and resource collection with the EPC and less so with supplementing their already strong crowd control dynamic.
2,2,2,2,2, Energy Rerouting
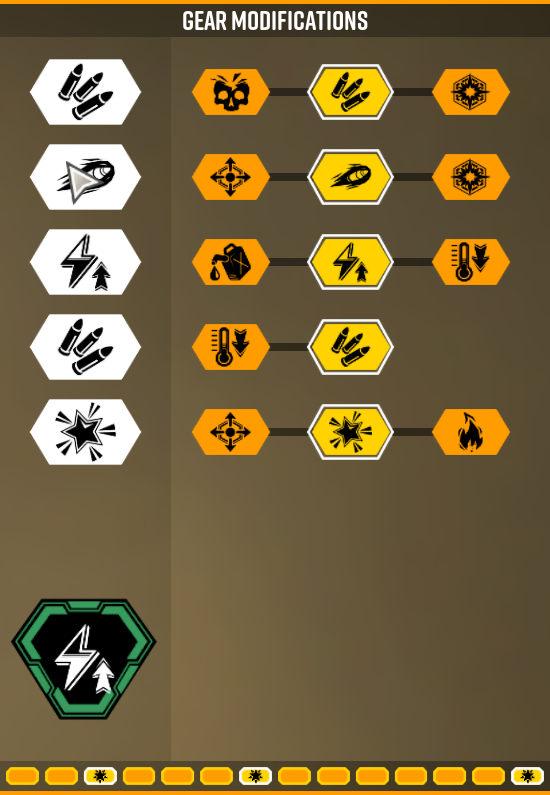
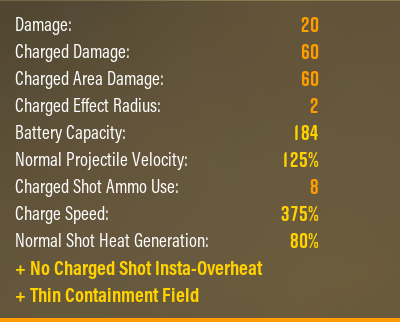
This is the fastest charging, and possibly strongest combat orientated EPC build currently possible. It does however beg the question, is it worth the trade off? With a mere 20 implosions per full battery and an insanely fast charge time, I find that dwarves who run this build tend to find themselves out of ammo sooner than they can say Rock and Stone! Personally, I find the charge rate here too quick, and may prevent you from making last minute adjustments.
Various Uses of the EPC
While the EPC is best known for being “that gun that mines stuff”, not many greenbeards recognise the true potential of R&D’s brainchild. Ultimately, it’s ability to modify the terrain opens up a whole host of new possibilities. Here are but a few of the unsung uses of the EPC, many of which have saved a run or gotten a fellow dwarf out of a dicey situation in my few hundred hours of use.
Perhaps most obviously we have mining
Followed closely by combat
Retrieving downed teammates
Obtaining mission items
Clearing the environment of hazards
Grabbing out of reach red sugar
Quickly mining out Crassus Detonator Craters
‘Popping’ enemy weak spots to avoid death effects
Stripping enemies of their armour for your teammates
Advanced Tips & Tricks
One thing to note is that while a specific, and often large amount of your total ammunition is used in generating the charged shot, you don’t need to have that amount ammo in order to do so. Let me explain a bit more clearly. Let’s say you have 4 ammo left for your EPC, and your charged shot ammo use is 6. In this instance, you can still fire off a charged shot despite not having the required ammo count. This is because the charged shot ammo usage is the figure deducted after the shot is fired, not the prerequisite amount needed to generate that shot.
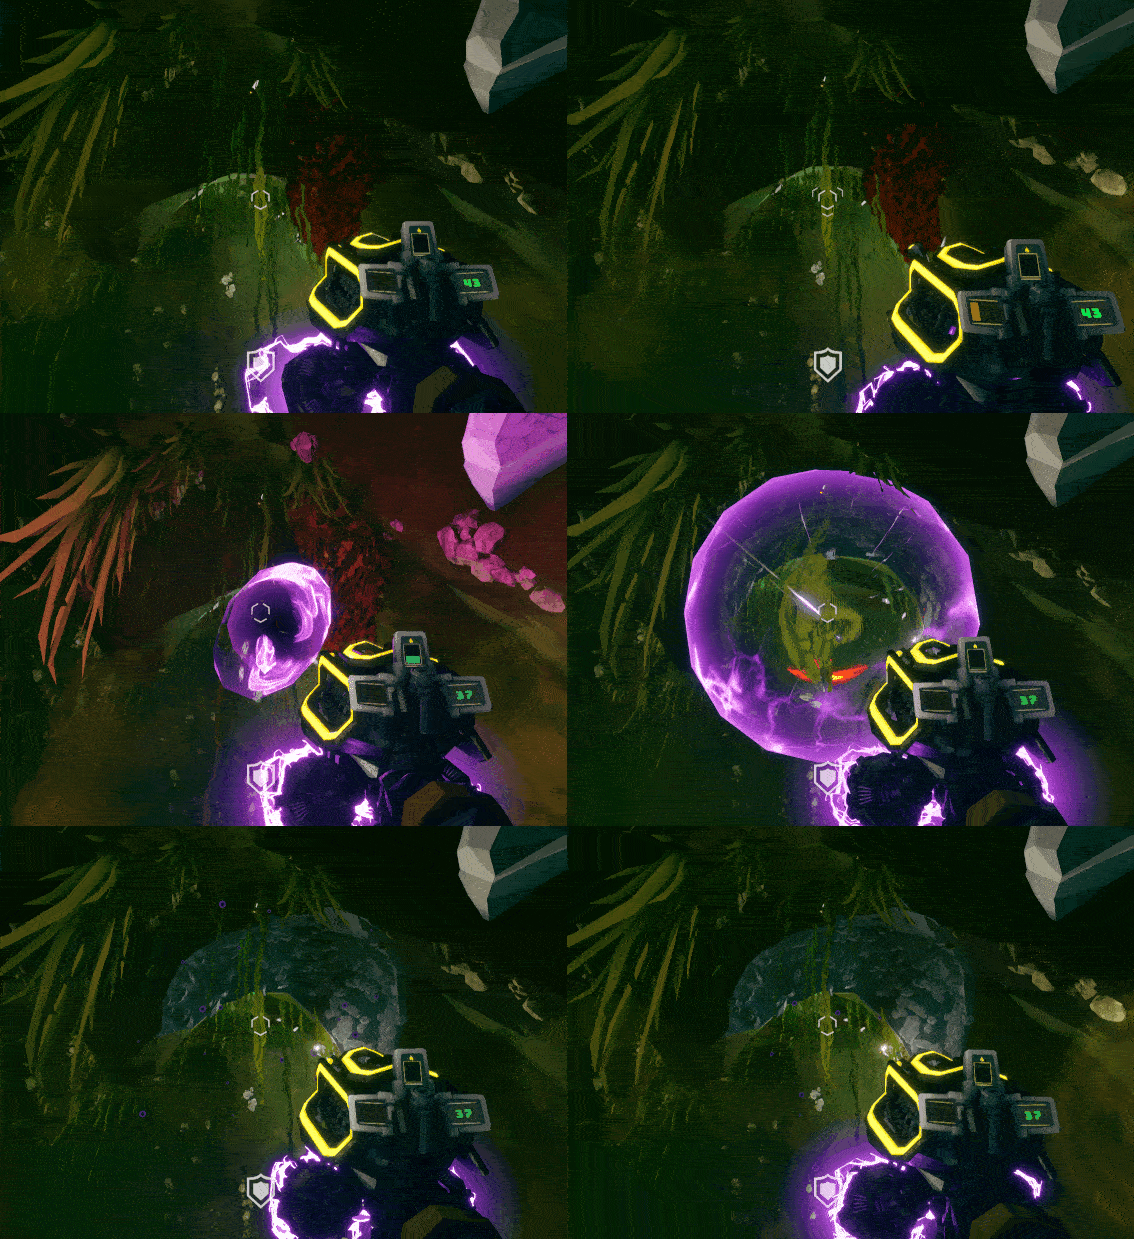 This opens up an interesting possibility, firing off a charged shot and then having a fellow dwarf detonate it with a bullet of their own to mitigate your lack of ammo for one final implosion. While I admit it isn’t always going to be practical, it’s helped save a run or two by quickly getting the last bit of nitra needed to call a resupply from its high up perch.
The obvious downside to this is that its dependent on your teammate knowing what to do, and at what distance to detonate your charged shot. While it seems impractical at first, with a bit of practice and some friends it becomes a niche technique that’s worth knowing just in case it comes in handy.
Another nifty trick with the EPC to help improve the timing of your shots is to look at the light emitted by the charged shot itself. Charged shots are regarded as light sources by DRG, and as such will emit a faint purple light around them in a 2 or so meter radius. Coincidentally, the radius of the EPC’s Thin Containment Field Implosion also just so happens to be a little over 2.5 meters…
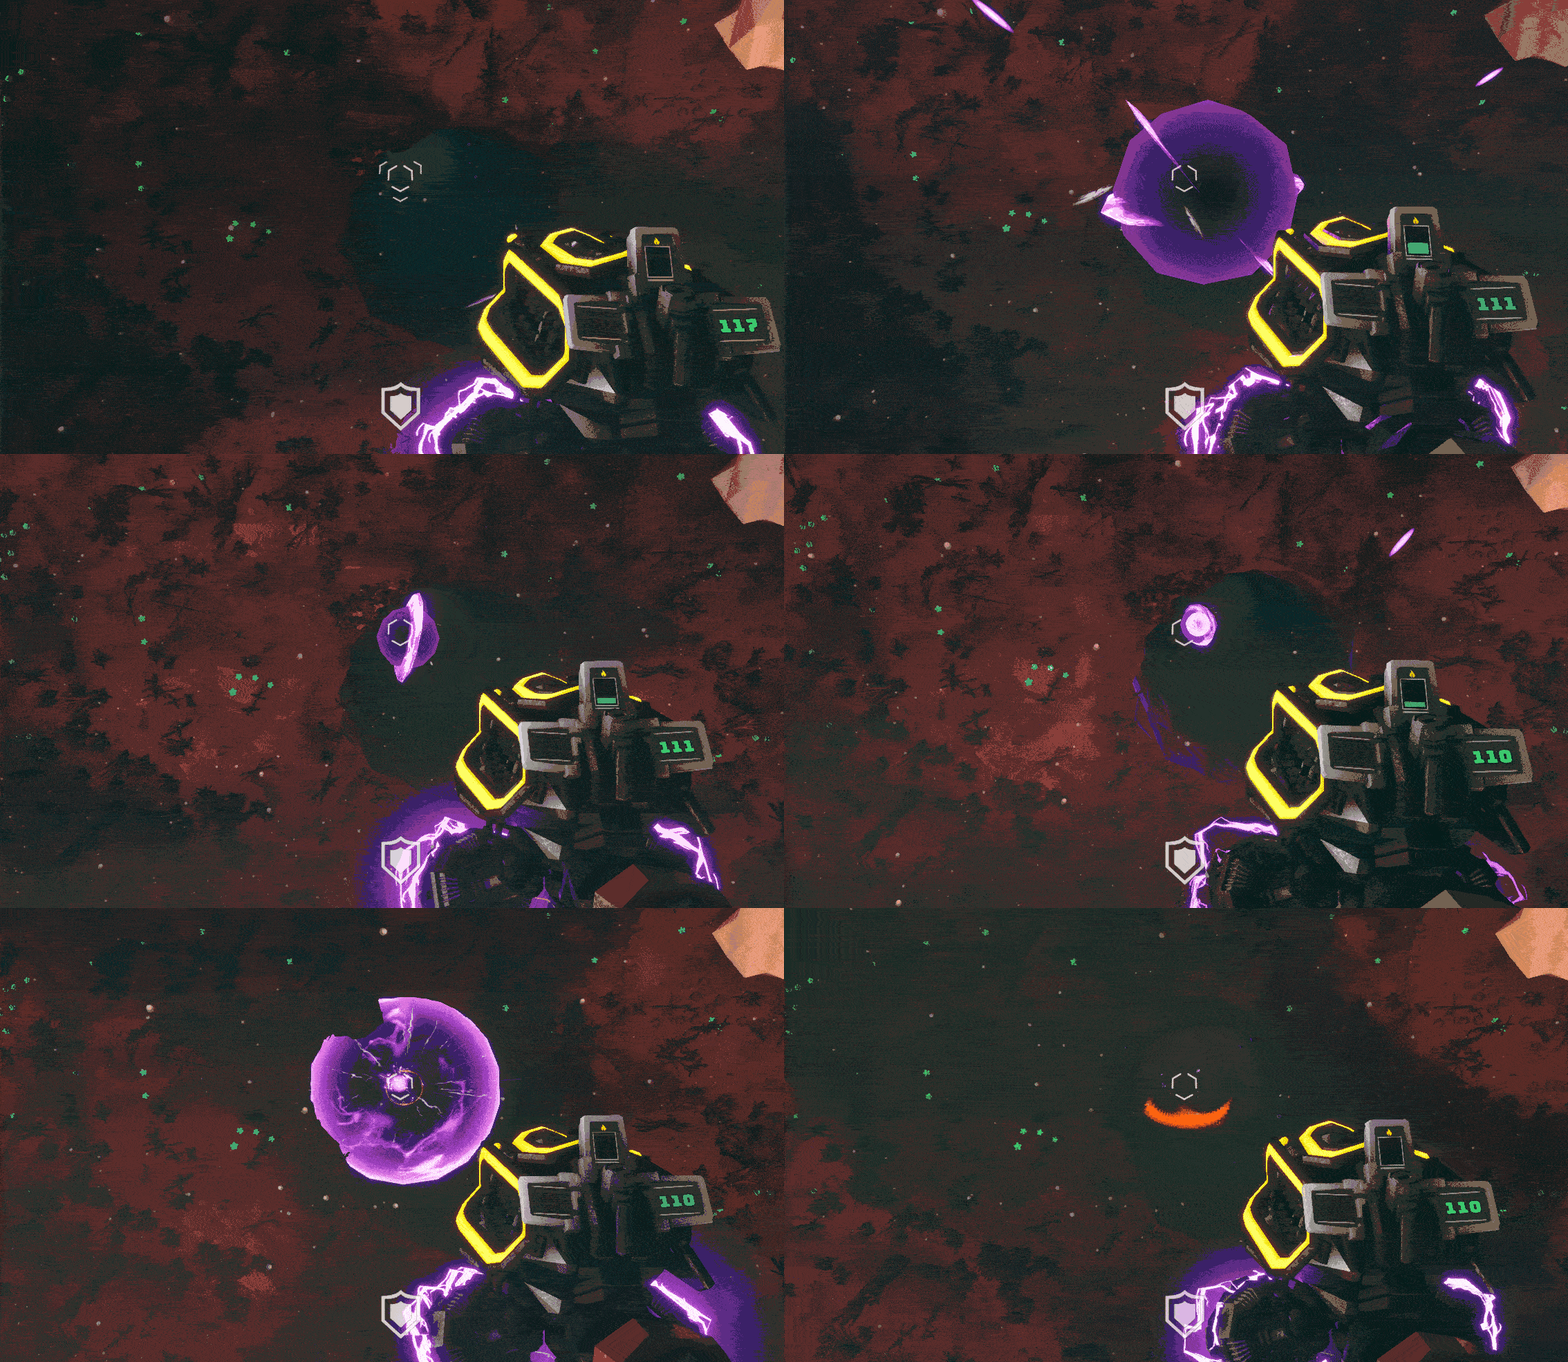 If you don’t see where I’m going with this, timing your shots becomes a LOT easier when you realise that you can accurately see where your charged shot is in relation to the environment by looking at the light it gives off. This effectively mitigates one of the main reasons dwarves miss their shots, they detonate either too early or too late when firing parallel to a target (which you should be aiming to do as much as possible).
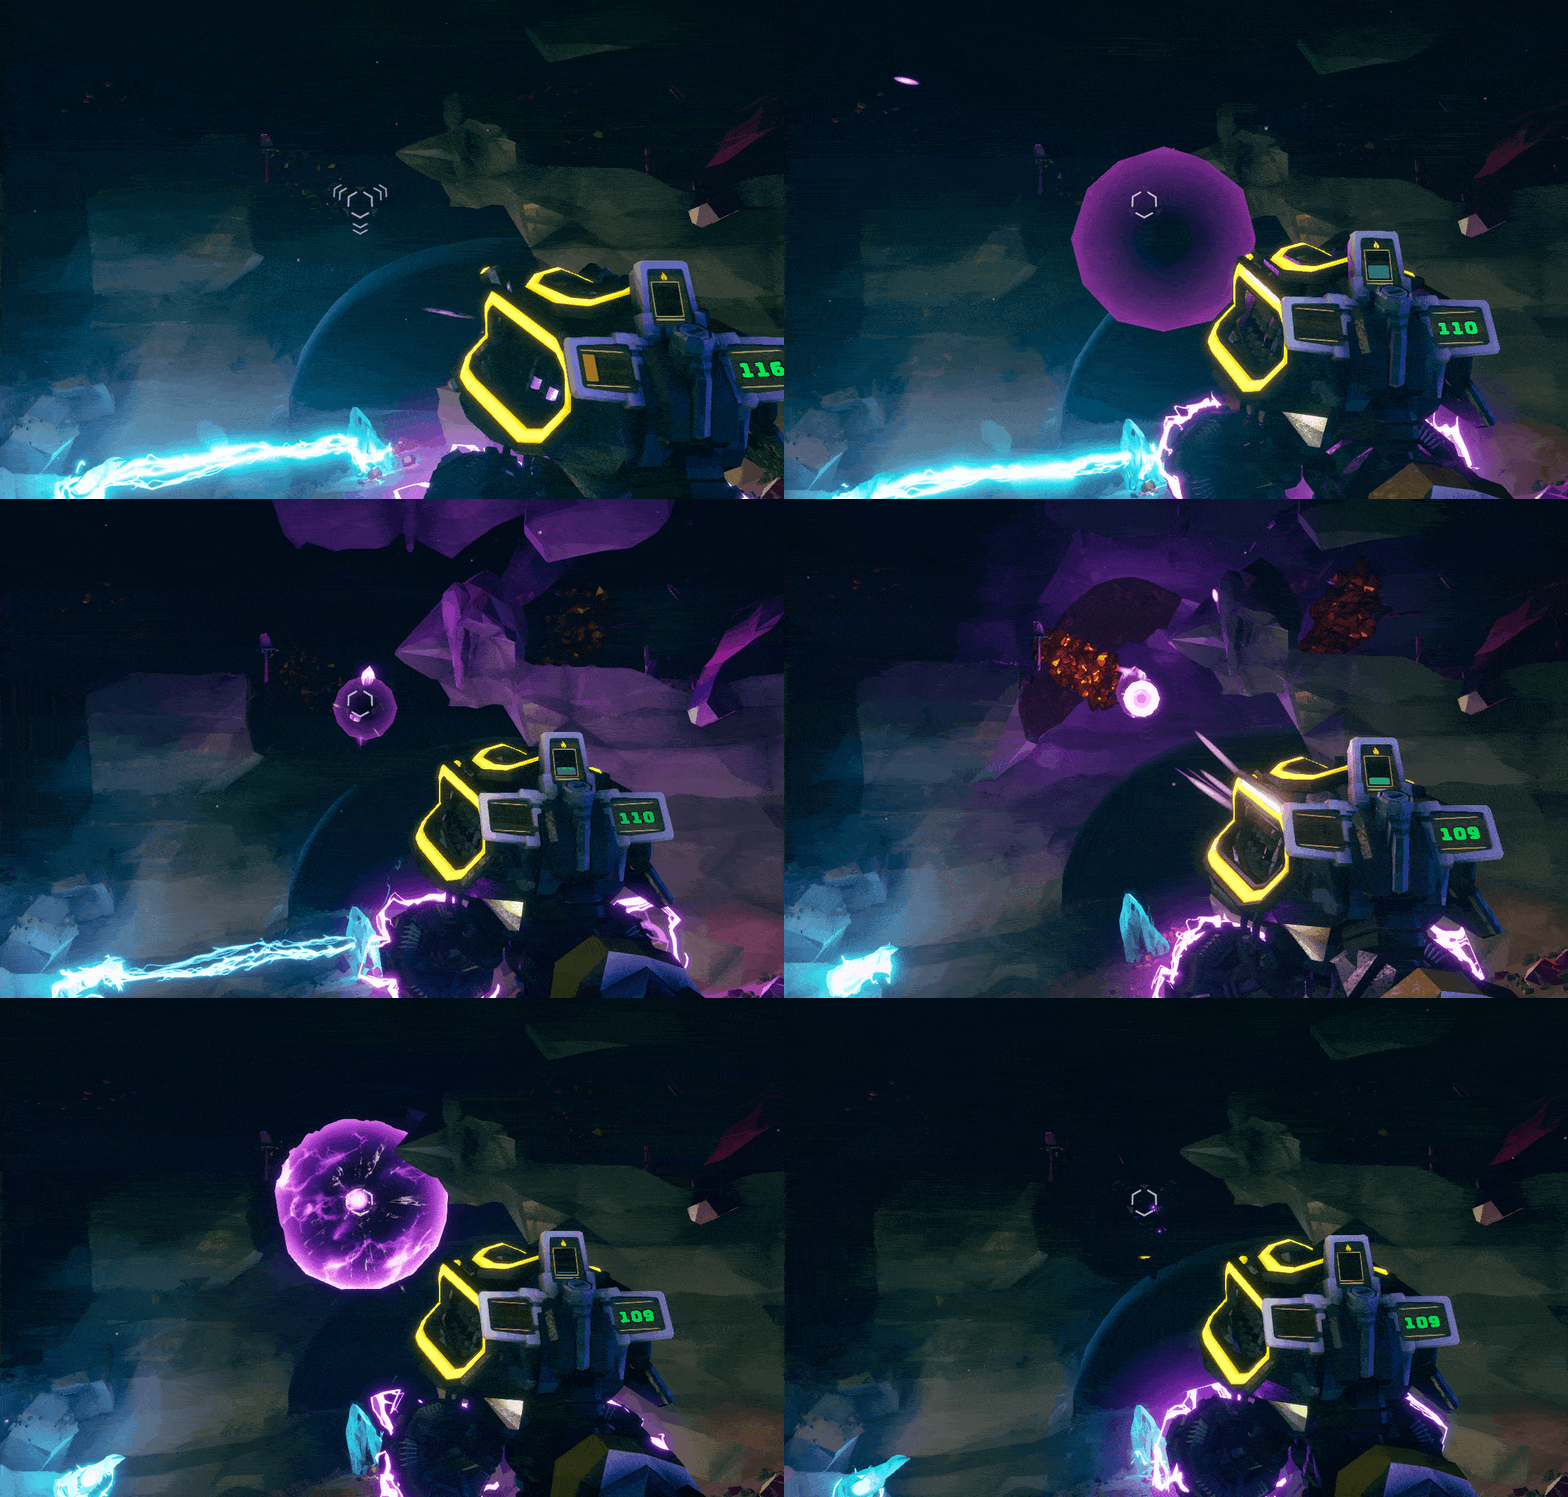 Assuming you’re using the ‘Overcharged Plasma Accelerator’ mod in tier 2 (which you really should be), then your detonating shot’s travel time only becomes a consideration over longer ranges. Regardless, to help with the timing of your shots, simply look at the far edge of the light emitted from the charged shot and fire your detonating shot when it reaches your target. This should put your implosion in the goldilocks zone for most mid-range targets.
Getting the timing down
If you’re still having trouble getting the timing down after a bit of practice then trusty old mathematics can lend us a hand here.
It’s important to note that all the following figures were obtained from in game testing, and are very much prone to both systematic and random error, these almost certainly aren’t the hard and fast numbers but they’ll do for the purposes of this guide.
Firstly, it seems that the diameter of the EPC’s Thin Containment Field implosion is more or less 5.5 meters.
Next up, the velocity of the EPC’s charged shot appears to be somewhere in the realm of 15m/s or 10m in about 0.6 seconds. Because it’s a constant velocity, you can extrapolate the linear relationship and say that every second is roughly 15 or so meters, producing the functio- ok maybe that’s a bit too much maths. Point is, 1 second = 15-20m, your terrain scanner has an in-built range finder, voila.
Now this is probably very inaccurate, and trying to find an exact, hard and fast ‘number of seconds to count before firing the detonating shot per range’ is probably more work than it’s worth, although probably possible if done by someone smarter than me. While it might seem that without hard and fast numbers we’re leaving ourselves quite the margin for error, when you consider that the implosion radius is over 5m large, you only need to detonate your shot within a nice and breezy ~0.3s window for maximum effect. Simple right? It’s for this reason that I don’t recommend using this method of landing your shots. There are simply too many variables that alter how you’ll move in relation to your target, how your detonating shot and charged shot will move, and how it all works in relation to one another. For me at least, doing it from intuition seems much more reliable, although I acknowledge that some people will find it easier using this method.
Ultimately, it’s easier than it sounds with the window being a lot more manageable that the numbers would suggest. Timing is really the biggest thing with learning to use the EPC, and is best improved with lots and lots of practice. Using the light source method above is probably the biggest tip for quick and easy improvements in this regard.
That’s all we are sharing today in Deep Rock Galactic Experimental Plasma Charger Guide, if you have anything to add, please feel free to leave a comment below, and we’ll see you soon.
Related Posts:
- Deep Rock Galactic Scout Build 2020 Guide (1.0 Release)
- Deep Rock Galactic Weapon Stats Breaking Down
- Deep Rock Galactic Definitive Characters Guide (Perks and Weapons Upgrades)
- Deep Rock Galactic Ultimate Drak Builds
- Deep Rock Galactic: Driller Build Guide
