
Introduction
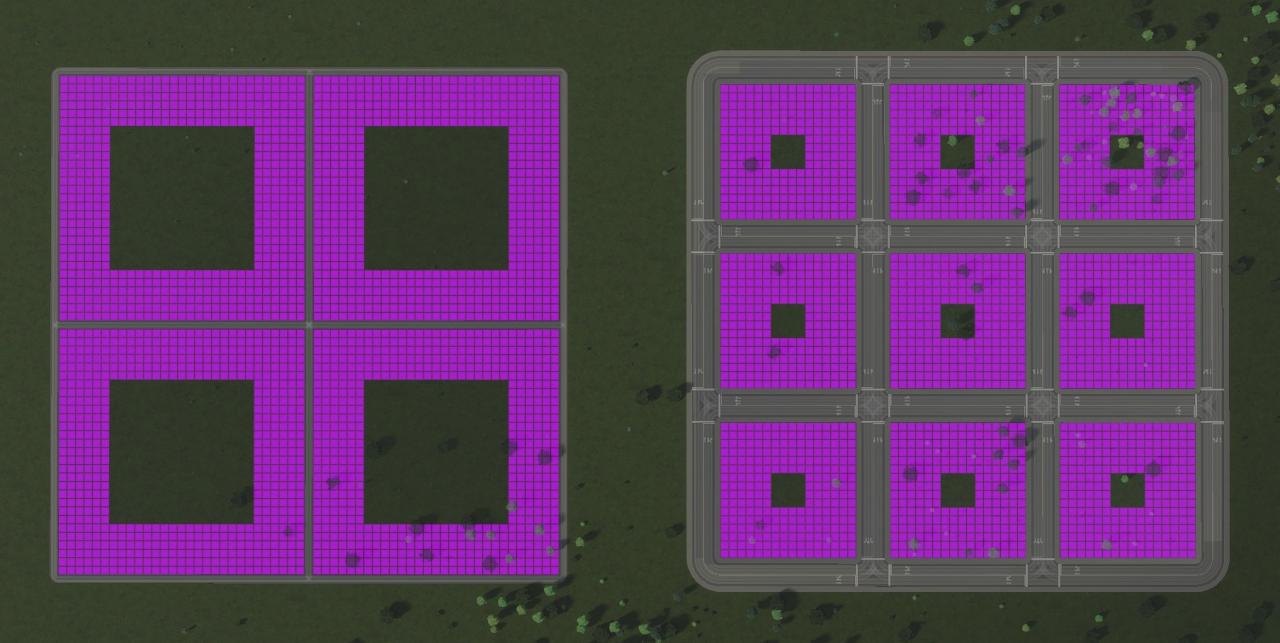
Which of the two square grids below do you think has more zoning cells?
Each covers the same footprint: 1008 metres for each edge, about 100 hectares.
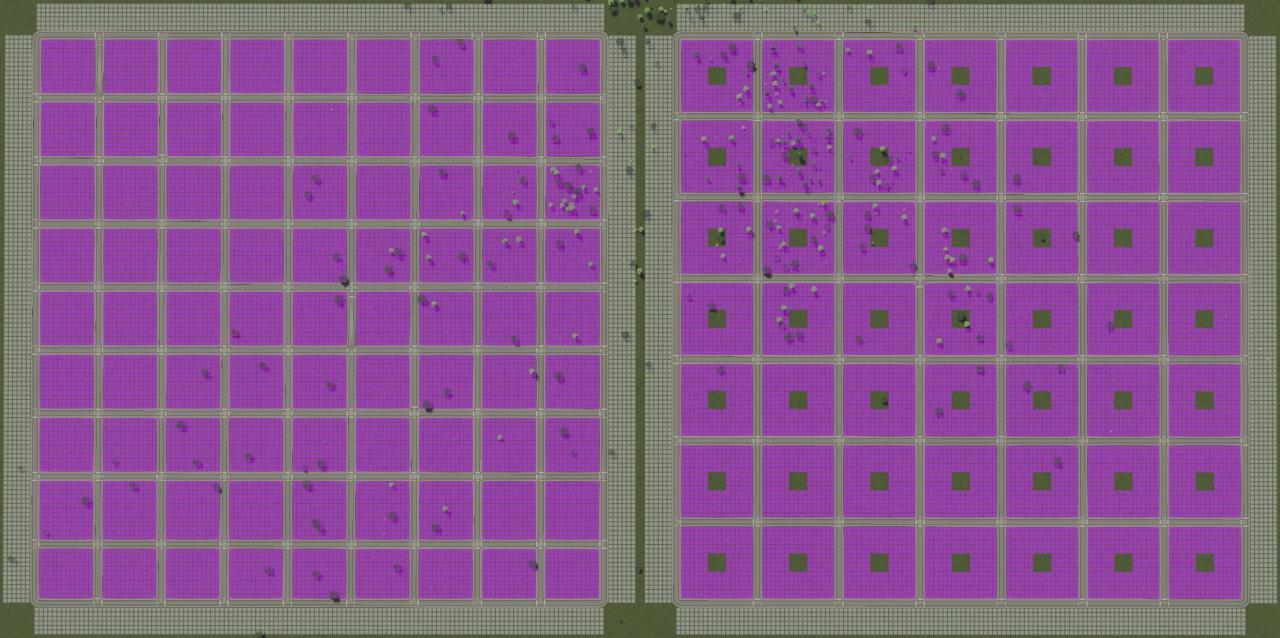
The one on the left sure looks like the obvious choice. It leaves exactly 12 zoning cell widths between the roads, the most you can get without leaving a gap. That’s one of the easiest lengths to draw with the road tool, since you just have to line up the zoning circles. It even happens to be the widest width you can get with the parallel road mode.
But if you count them all up (or as you might guess if you read my guide for the original Cities Skylines), the one on the right actually has more zoning cells despite the big holes in the middle of each block. The right is cheaper to build and maintain, too, since it has less roadway.
The left has 12²×9² = 11664 cells; the right has (16² – 4²)×7² = 11760 cells.
Can we do better? Let’s calculate it! (Spoiler: Yes, we can.)
Optimal Square Grids
 First, let’s define some variables:
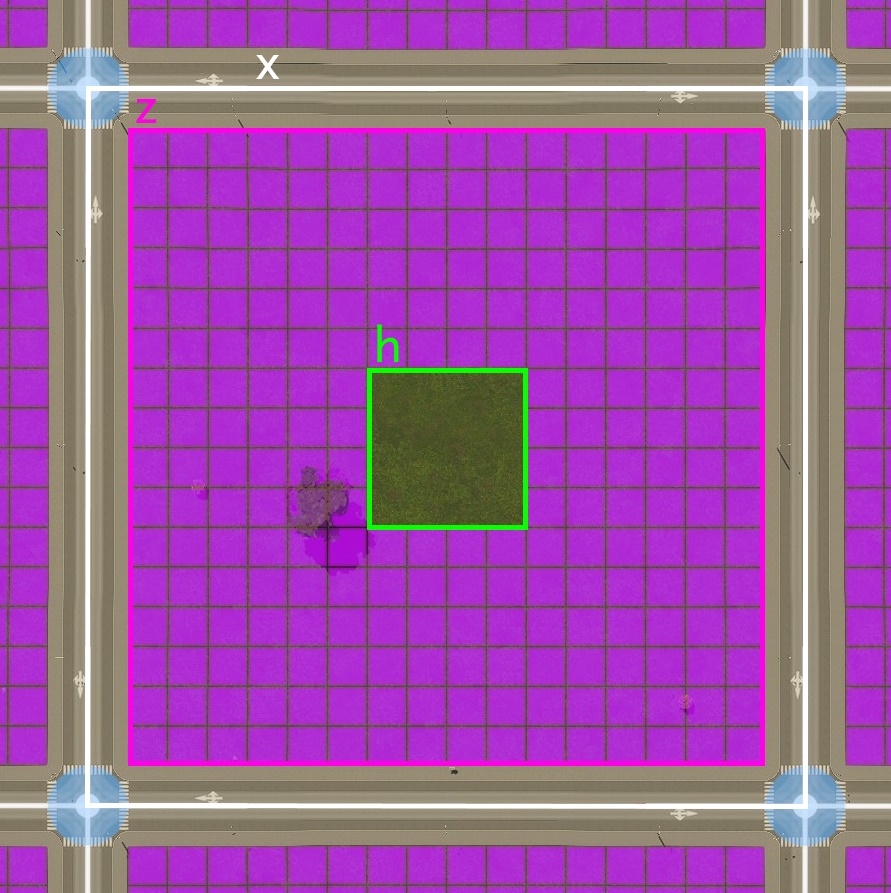
- x is the length of the road on one side of a block, as reported by the road tool
- z is the length of zonable frontage
- h is the length of the side of the hole in the middle of the zoning
- W is the width of the road being used
Pedantic math aside: the below is going to assume x > z > h ≥ 0 for simplicity. It’s possible to fix that by using things like h = max(0, z – 96m), but that no longer has a contiguous derivative, which is a pain. The maximum we’re looking for is in the convenient part of the parameter space anyway. That’s unsurprising, since z < 96m just means a higher road-to-zoning ratio without any offsetting bonuses elsewhere.
Using this, the zonable area in each block is the space inside the block (z²) minus the part too far from the roads (h²). But both of these are directly related to the block length, as the frontage is the block size minus the road width (z = x – W), and relatedly the hole is the frontage minus how far the zoning goes (h = z – 2 × 6 x 8m = x – W – 96m).
The density, which we’re trying to optimize, is thus
(z² – h²) / x²
= ((x – W)² – (x – W – 96)²) / x²
= 192×(x – W + 48) / x²
How do we maximize it? Calculus! The maximum is where the derivative is zero:
0 = d/dx 192×(x – W + 48m) / x²
0 = d/dx (x – W + 48m) / x²
0 = (2W – x + 96) / x³
0 = 2W – x + 96
x = 2W + 96m
Plugging that answer into the previous formula for the hole simplifies interestingly:
h = x – W – 96m
h = 2W + 96m – W – 96m
h = (2W – W) + (96m – 96m)
h = W
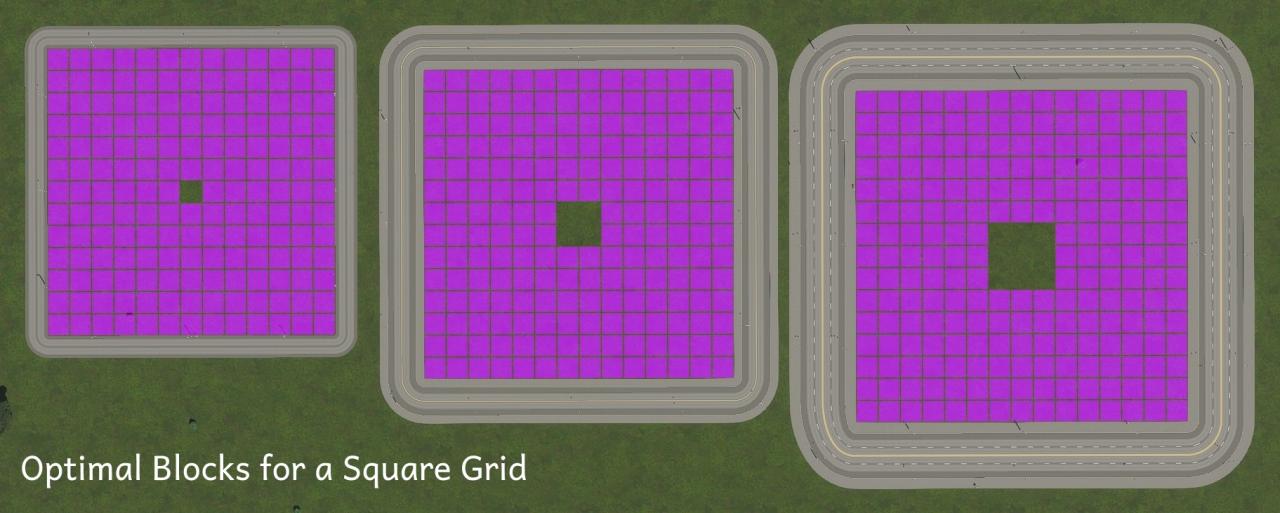
In other words, to make an optimal square grid, leave a hole in the middle the same size as the road you’re using.
Let’s look at how that works for a small road:
So with 16m roads, by using the optimal square grid you get about 2% more zoning cells in the same area yet pay about 14% less for roads (both up-front and in upkeep), compared to the square grid without the hole in the middle.
Thus for the best square grid, use a block size of
- 112m for tiny (8m) roads like the gravel road, giving a density of ⁶⁄₇ ≈ 85.7%
- 128m for small (16m) roads like the two-lane road, giving a density of ¾ = 75%
- 144m for medium (24m) roads like the four-lane road, giving a density of ⅔ ≈ 66.7%
- 160m for large (32m) roads like the six-lane road, giving a density of ⅗ = 60%
- 176m for extra-large (40m) roads like the eight-lane road, giving a density of ⁶⁄₁₁ = 54.6%
The Cost of Wider Roads
The previous section had lots of math. While that’s great for finding the one best answer, it can be hard to get an intuition from it.
Here’s a graph of the resulting densities for square grids using 8m (red), 16m (purple), 24m (green), 32m (orange), and 40m (blue) roads:
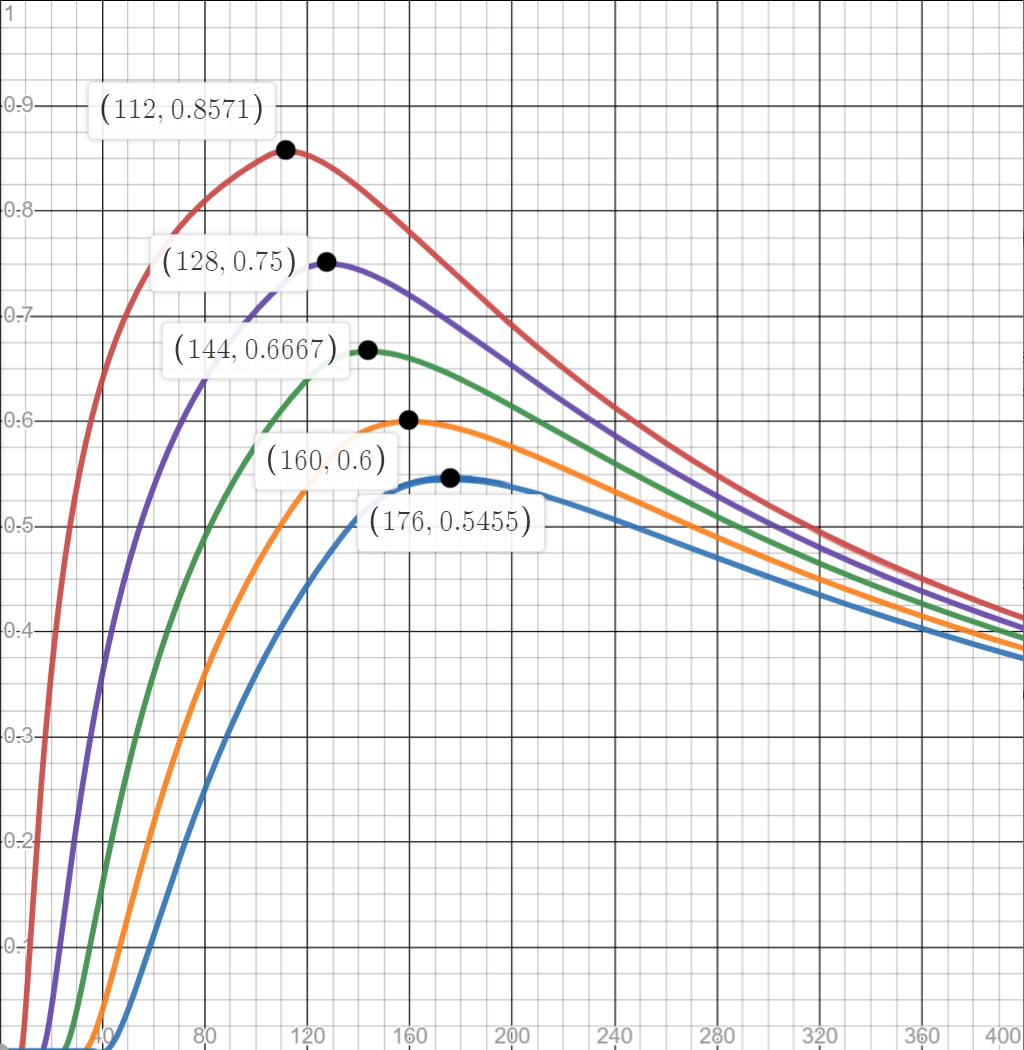
The thing that emphasizes to me the most is just how much density you lose to wider roads. A far-from-optimal block size using a narrower road will easily beat the optimal square block with a wider road.
Here are the ranges of block sizes where a square grid will give you particular target densities:
To make an extreme example of that, the left grid below is actually more dense than the one at the right, because the wide roads just take up so much space:
As such, never zone on large (or even medium, let alone extra-large) roads.
 If you feel a need for more lanes, consider using a grid of smaller one-way roads. For example, a 80m grid using 2-lane one-way roads (as seen at the right) has 64% density which, despite not being optimal, is better than the 60% density for the grid with large roads. And its traffic likely works better too, as there are far fewer conflict points for intersecting one-way roads compared to two-way roads.
Related Posts:
- Cities: Skylines II General Tip and Tricks
- Cities: Skylines II – Building Footprint Sizes Guide
- Cities: Skylines II – How to Run the Game on linux Using Proton [FEDORA]
- Cities: Skylines II – Guide for Increasing Perfomance
- Cities: Skylines II – Time Scales Guide