
If hololive Dreams won’t launch, crashes to desktop, or dumps you on a black screen right after the splash logo, you’re dealing with one of the most common PC ports headaches: a Unity title that’s picky about drivers, overlays, and compatibility settings. This guide walks through every fix that’s actually worked for players, starting with the fastest checks and moving into deeper system-level changes, so you can get back into the game without guessing.
What This Guide Covers
hololive Dreams on PC has a handful of recurring failure modes, and most of them trace back to the same handful of root causes: Steam configuration conflicts, outdated or overclocked GPU drivers, missing runtime files, or antivirus software blocking the executable.
The issues addressed below include:
- Game not launching at all
- Crashing at startup or crashing to desktop mid-session
- Game not loading past the title screen
- Getting stuck on the loading screen indefinitely
- Freezing during gameplay
- Black screen after launch (audio plays, but no visual)
Work through the steps in order. They’re arranged from quick wins to more involved fixes, so you won’t waste time reinstalling drivers before checking something as simple as your antivirus settings.
Step-by-Step Fixes
Restart Steam cleanly. Open Task Manager (right-click the Start Menu), find every Steam-related process, and End Task on each one. A half-closed Steam client is a surprisingly common cause of launch failures. Once everything’s closed, relaunch Steam as Administrator — search “Steam” in Windows search, right-click, and choose Run as administrator.
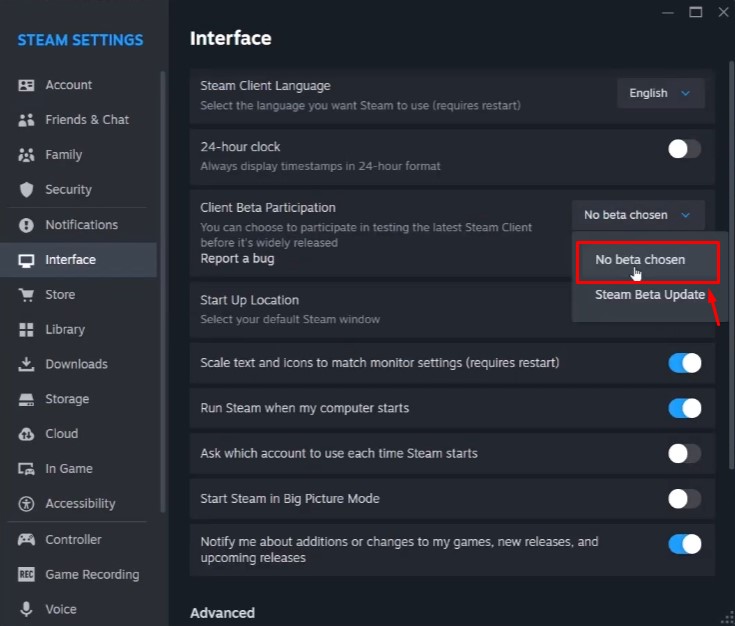
Check your Steam beta settings. Go to Steam Settings > Interface and confirm “No beta chosen” is selected. Being opted into a beta branch, even accidentally, can break launch behavior for individual titles.
Kill your VPN. If you’re running a VPN, disconnect it entirely. If you’re not, try switching networks — a phone hotspot is a fast way to rule out ISP-level interference during Steam’s authentication handshake.
Enable AES-NI in your BIOS. Some Unity-based games silently fail to launch if AES-NI is disabled at the hardware level. Check your BIOS for this setting, enable it if you find it, and restart.
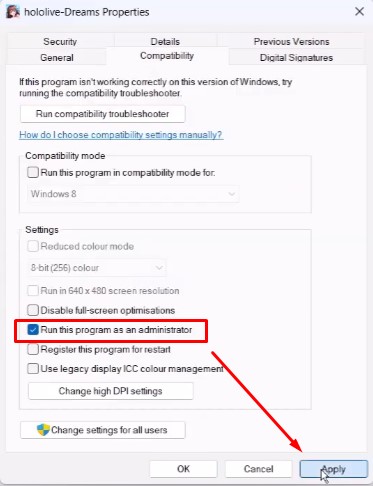
Launch the EXE directly, bypassing Steam’s overlay layer. Right-click hololive Dreams in your library > Manage > Browse local files, then double-click the game’s EXE. If it still won’t start, right-click the EXE > Properties > Compatibility tab > check “Run this program as an administrator.”
Force compatibility mode. In that same Compatibility tab, check “Run this program in compatibility mode for” and select Windows 8. Also check “Disable full-screen optimizations.” This combination fixes a surprising number of black-screen-on-launch cases.
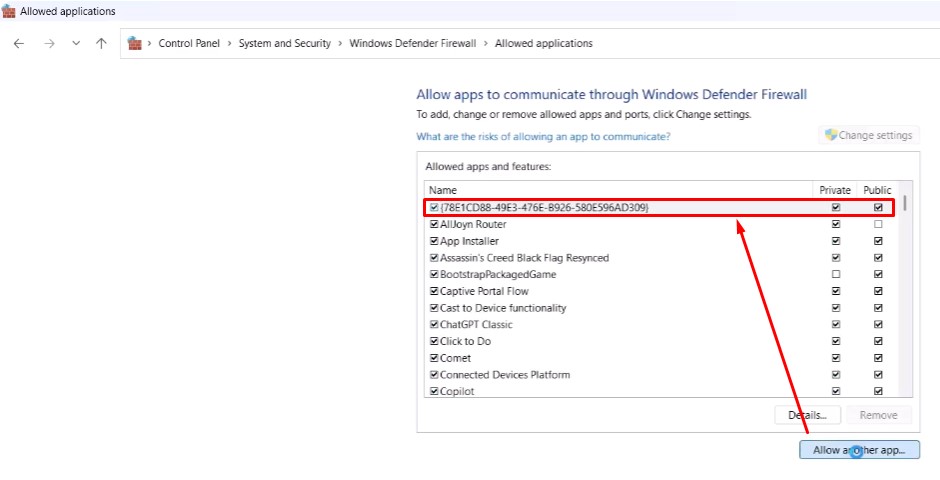
Whitelist the game in your antivirus. Windows Defender users: go to Settings > Privacy & Security > Windows Security > Virus & threat protection > Manage ransomware protection > Allow an app through Controlled folder access, then add the game EXE. Separately, open Control Panel > System and Security > Windows Defender Firewall > Allow an app through Windows Defender Firewall, and add the EXE there too. Running Avast, Norton, Bitdefender, or McAfee? Add the game EXE to each program’s exceptions list manually — this is one of the most commonly overlooked fixes for crash-to-desktop issues.
Simplify your monitor setup. Disconnect any secondary monitors and launch on a single display. If your main monitor runs at a high refresh rate like 240Hz, drop it to 120Hz or 60Hz before launching — some Unity builds don’t negotiate high refresh rates cleanly on startup.
Reset your save data (backup first). Navigate to C:\Users\[your username]\AppData\LocalLow\QualiArts — you’ll need to enable hidden items via View > Show > Hidden items in File Explorer. Copy the game’s folder to your desktop as a backup, then rename the original. Launching after this will reset your progress, but it clears out corrupted save data that can cause stuck-loading or freeze issues.
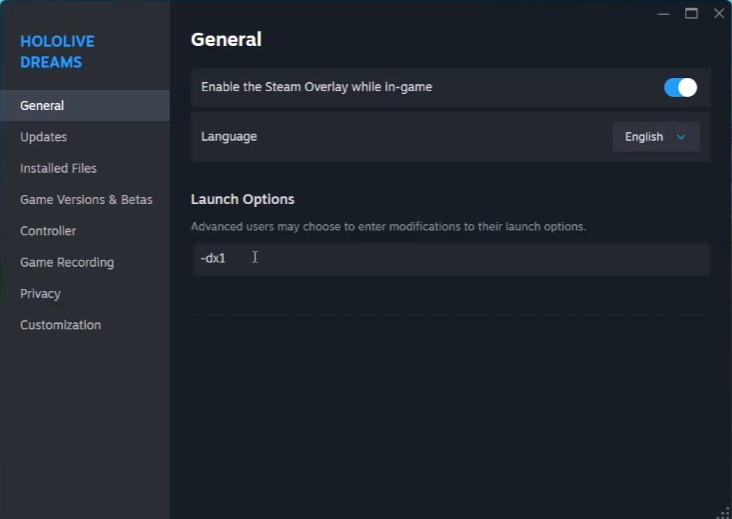
Try forcing a different rendering API. Right-click hololive Dreams > Properties > Launch Options, and type -DX11. If that doesn’t help, swap it for -DX12. If neither works, remove the launch option entirely — leaving a bad flag in there will break every subsequent launch attempt.
Toggle Nvidia Debug Mode. Open Nvidia Control Panel > Help (top-left menu) > check Debug Mode. This exposes additional driver-level logging and has resolved black screen issues for some setups.
Clear your Steam download cache. Steam > Settings > Downloads > Clear Download Cache. This forces Steam to re-verify its connection to the content servers and occasionally fixes stuck-loading behavior tied to corrupted cache files.
Verify game files. Right-click hololive Dreams > Properties > Installed Files > Verify integrity of game files. This is Steam’s built-in file-checker and it’s worth running any time you’re troubleshooting a crash pattern that started suddenly.
Reinstall Visual C++ Redistributables. Download both the x86 and x64 packages from Microsoft’s official page. If the installer offers Repair, use it; otherwise Install. Missing runtime files here is a very common cause of Unity-specific crashes, and installing only one architecture (x86 or x64) instead of both won’t fully fix it.
Disable every overlay you’re running. Steam overlay, Discord overlay, Nvidia app overlay — turn them all off. In Steam, right-click hololive Dreams > Properties and uncheck “Enable the Steam overlay while in-game.” Overlays are a known source of freezing and crash-to-desktop behavior in Unity titles.
Stop overclocking. Close MSI Afterburner, RivaTuner, or any GPU tuning software, and reset your GPU clocks to default. Overclocked hardware running even slightly outside spec is a frequent cause of random freezes.
Do a clean driver install. For Nvidia, grab the latest Game Ready Driver from nvidia.com/Download, choose Custom during install, and check “Perform a clean installation.” For AMD, update through amd.com/support. Restart afterward — don’t skip this part, since a stale driver state after installation can undo the fix.
Update Windows. Settings > Windows Update > Check for updates. Restart once it’s done.
Force the game onto your dedicated GPU. Search “graphic settings” in Windows search > Add desktop app > browse to the game folder and select the EXE. Once added, click it in the list and set GPU preference to “High performance.” This matters most on laptops with both integrated and dedicated graphics.
Check your physical cable connection. If you’re on a desktop, confirm your monitor cable is plugged into your dedicated GPU, not the motherboard’s video output. This sounds obvious, but it’s a real and common cause of black screens.
Disable integrated graphics as a test. Open Device Manager > Display adapters > right-click your integrated GPU (usually Intel) > Disable device. This forces the game onto your dedicated card. Re-enable it afterward if you need it for other tasks.
Toggle Hardware-accelerated GPU scheduling. Search “graphic settings” > Advanced graphics settings. Flip this setting to whatever it currently isn’t, then restart. This one’s inconsistent across hardware, but it’s fixed black screen issues for a meaningful number of players.
Switch to Power Saver mode. Control Panel > Hardware and Sound > Power Options > Power Saver. Restart. Counterintuitively, this has resolved crash issues tied to power delivery inconsistencies on some laptops.
Disconnect all external hardware. Unplug USB adapters, controllers, wheels, and pedals, and close any third-party background services you’re running. Peripheral drivers can conflict with game input handling in ways that cause freezes.
Reinstall to a different drive. If nothing above works, uninstall hololive Dreams completely and reinstall it on a different drive than where it was originally. If it was on a secondary SSD, move it to your C: drive, and vice versa. This is a last resort, but it clears out any drive-specific corruption that verification tools can’t catch.
Tips and Common Pitfalls
Back up your save folder before renaming it. It’s tempting to skip this step when you’re frustrated and want a fast fix, but skipping it means permanent progress loss if the reset doesn’t actually solve your issue.
Don’t install just one Visual C++ package. Both x86 and x64 versions need to be present — installing only one is a common mistake that leaves Unity crashes unresolved even after you think you’ve fixed the runtime issue.
If you’re on a laptop with switchable graphics, disabling the integrated GPU outright (rather than just setting a GPU preference) is often more reliable at forcing the dedicated card to handle rendering.
Hardware-accelerated GPU scheduling is one of those settings that helps some systems and does nothing for others — it’s worth testing in both the on and off position rather than assuming one is correct.
If you’ve gone through every step and you’re still stuck, the drive reinstall is genuinely your best remaining option. It’s tedious, but it resolves file-system-level corruption that verification and cache-clearing can’t touch.