
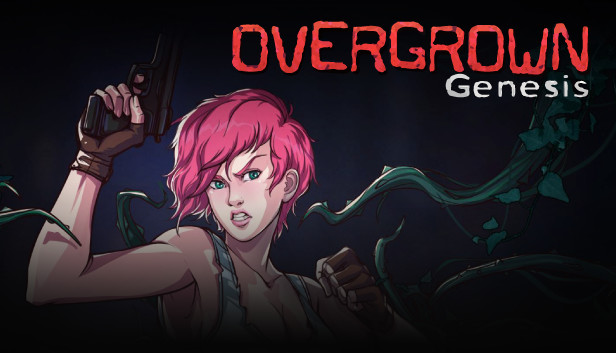
I’m putting together everything I know about finishing Overgrown: Genesis — the survival horror side and the completionist side. Whether you’re just trying to stay alive through your first run or you’re chasing the true ending with all eight notes and every quest in the bag, this is the roadmap I wish I’d had. If you’re new to the game and just want to stop dying in the first hour, the survival sections will carry you. If you’re going for 100%, the quest list, note locations, and ending triggers are all here.
I’ll be honest about why I wrote this: Overgrown: Genesis does not hold your hand, and it punishes you for missing things quietly. A note left behind in a room you can’t re-enter, a sidequest gated behind reading a letter you skipped — those are the kind of losses that cost a whole playthrough. Laying it all out in one place is the least I can do for anyone following behind me.
What Overgrown: Genesis Actually Is
Before we get into the weeds, you should know what you’re walking into. Overgrown: Genesis is an erotic survival horror game from Dystopian Project, and the tone is bleak — that grimness carries straight into the sexual content. If non-consensual encounters and heavy taboo material aren’t for you, that’s completely fair and worth respecting; this game won’t be your thing and there’s nothing wrong with that.
Mechanically it’s a survival horror game first. You play Juno Townsend, an engineer with gun-range experience trying to survive an apocalyptic landscape. She can hold her own in a fight, but she is not an army — avoiding enemies and moving carefully is usually smarter than spending resources. I’d estimate a first playthrough at roughly six to seven hours if you finish the sidequests and scavenge thoroughly. There are five endings, and only two count as truly good. Without spoiling them here: the best outcomes depend on completing sidequests and collecting specific items across the whole run, so keep your eyes open and take your time.
Juno’s Three Stats — An Overview
You’ll spend a lot of your mental energy on Hunger, Morale, and Infection. Each is treated with items and rest, each can grow over the course of the game, and letting any of them slide makes the game harder and eventually leads to game-overs. Here’s how each one actually behaves, because they’re not equally urgent.
| Stat | What It Does | How to Handle It | My Rating |
|---|---|---|---|
| Hunger | Required to rest — you need at least 100 to rest at a safepoint. | Restore with supplies (military rations, ground coffee, etc.). Only drains when resting, so you’ll usually have a surplus. | Low priority — but keep enough to rest |
| Morale | Acts as your health bar. Hit zero and one more attack is game over. | Fully restored by resting; limited items like painkillers also restore it. | Essential — treat like HP |
| Infection | Rises when attacked. High levels won’t kill you unless you rest, but cause green/red screen strobes and periodic stops where Juno relieves herself. | Purged with limited-use items or at certain points in the game. | High — hard to clear and risky |
Hunger is the least threatening of the three, but don’t ignore it — resting fully restores Morale, and you need 100 Hunger to do that. Since it only ever drains when you rest, most of the time you’ll be drowning in food, which is why food items are often more valuable as trade goods. If you find yourself resting a lot, though, you’d better make sure the pantry’s stocked.
Morale is effectively your health. Enemies and certain events chip away at it, and if Juno is attacked at zero, that’s the run. She can generally survive two hits and only risks a game over on the third, so a single lone zombie grabbing you is rarely fatal. Getting cornered by a group is a different story, especially because topping Morale back up outside a safe area costs precious supplies.
Infection is the sneaky one. It climbs whenever you’re attacked and won’t kill you outright — unless you rest with it high. What it will do is cloud your screen with green and red strobes and force Juno to periodically stop and relieve herself while moving, which is a nightmare in a room full of enemies. It’s hard to clear, so treat it as a standing problem rather than something you fix on the fly.
Combat Basics and the Grapple
Combat here works like classic Resident Evil: you have to stand still to shoot, reload, or stab. Against slow enemies you can manage this as long as you leave yourself room; against fast ones, that stillness is a genuine danger. Ammo is scarce, enemies are numerous, and you’ll be avoiding fights more than winning them.
The key defensive mechanic is the grapple. When Juno is grabbed, you get five seconds to mash P (or the attack button) to break free. Succeed and you shove the enemy back a few tiles and stun them briefly — your window to run. Fail, and an attack scene plays out. Here’s the part that catches people: after a successful escape, that struggle has to recharge for 30 seconds before you can use it again. Get grabbed in that window and the attack simply happens. The timer can be misleading if you go into dialogue, change screens, or rest while it’s counting, so I always give it a few extra seconds past when it looks ready before diving back in.
What an attack actually costs matters. Juno loses Morale and gains Infection — severity varies by enemy type — but the enemy is then gone, effectively killed. That creates a grim but real strategic angle: if you’re conserving ammo, letting a single zombie attack can cost you less than spending even a few bullets. Because the struggle still needs to reset, though, getting swarmed can turn into a stunlocked death, so this is a last-resort trick, not a habit.
Enemies and Weapons
Early on you’ll only face basic zombies — slow, prone to swarming, and easy to outmaneuver. Don’t get cocky. Their numbers and the tight spaces they occupy make them lethal, and even one can spiral into a disaster. A basic zombie takes three pistol shots to kill, which is a real investment. Melee weapons are rare and risky but conserve ammo beautifully, one-hitting most enemies.
Before you commit to a kill, try to walk around the enemy instead. Bait it, draw it out, then sprint past — you have infinite sprint and outrun most enemies. Lone zombies often lose interest once you’re far enough away. The catch is that sprinting blindly can drag you into a trap, and you need to be able to get back for whatever you were after. Spend weapons only when the target is worth it, like an important-looking area or a room full of supplies.
Enemy AI is genuinely erratic. Sometimes it tracks you perfectly, sometimes it ignores you sprinting right behind it. The genuinely nasty quirk is that enemies can detect you through walls, which can make clearing a doorway without being grabbed impossible. When that happens, my advice is simple: back out and re-enter the screen to reset them. It’s one of the few things I’d genuinely call a flaw in the game, but that workaround saves a lot of grief.
On weapons specifically: Juno finds a knife in her apartment in the first room of the game, and an early decision can get you a pistol a little sooner. That pistol is your workhorse for much of the run, so treat its ammo as precious. Reloading requires standing still and takes a few seconds. You’ll find other guns later that are nearly all better than the pistol — just rotate them based on the scenario and how much ammo each is holding. Melee weapons all deal the same damage but have different durability, and sneaking up on enemies from behind is a real option if you can manage the approach without getting grabbed.
All Quests — 20 Total
For 100%, you need every one of the 20 quests: 11 primary and 8 secondary (the count in the source lines up with a couple of dependent tasks, so work through them methodically). Here’s the full list, split by type.
Primary quests (11):
- Brookside
- West Greer
- Subway Station
- Hamilton Square
- Cold Pines
- North Brookside
- Fort Patton
- Jamesway Bridge
- Grand Hotel
- The University
- Area 66
Secondary quests (8):
- East Greer — Find Donny in Act 1 and deliver the Suicide Letter to him. You must read the letter first to unlock the quest and the dialogue option.
- East Brookside — Speak to Natasha during Act 2 and save Rebecca.
- South Brookside — Speak to Cassie during Act 2 and bring her tools back.
- The Sewers — Speak to Sofia during Act 2 and restore power to the water station.
- The Shelter — Discuss the Shelter’s needs with Sofia, Cassie, and Natasha. No quid pro quo is required for Ending E.
- B3 — Retrieve and bring Dr. Zara’s research to General Hawke.
- Hamilton Close — Find the recipient for Barton’s Brandy in Hamilton Close.
- Downtown — Find all 6 missing soldiers in the downtown area.
All 8 Notes — Locations
These notes matter because the true ending demands all eight, and a few are genuinely easy to lose. I’ll walk you through each one with the order of the game in mind.
- Note 1 (Rebellious Notes) — Moved from its original spot. It’s now in the gang’s hideout where you get the package for Billy. (Credit to Dunwood for the correction.)
- Quest note (Suicide Letter) — After being cornered by Gavin and company at the electrical station, go into the crawlspace to the left and pick up the note. Read it to unlock the later dialogue option with Donny in the next area.
- Note 2 (Guilty Notes) — After using the crowbar to clear the rubble in the subway station, it’s on the dead guard.
- Note 3 (Disturbing Notes) — In the room with David after bargaining for the Subway Key.
- Note 4 (Forlorn Notes) — In the hospital after acquiring the medkit. Do not leave the room before picking it up — you can’t come back.
- Note 5 (Tattered Notes) — In Kerry Porter’s Cabin in the woods. Cannot be missed.
- Note 6 (Indignant Notes) — In the sewers south of town, go up the ladder between the entrance and the exit. It’s on the body in the room.
- Note 7 (Tragic Notes) — Next to a body in the water treatment plant, during Sofia’s quest.
- Note 8 (Pensive Notes) — In the Dean’s room during the University sequence. The key is on the body next to the Dryad when you walk in.
The Forlorn Notes are the one that’ll bite you if you’re not paying attention — that hospital room locks behind you, so grab it the instant you snag the medkit. I always double-check that pickup before moving on.
All Five Endings — How to Trigger Each
Here’s the branching that decides which of the five endings you get. Read this before the late game so you don’t accidentally lock yourself out.
| Ending | How to Get It |
|---|---|
| Ending A | When given the option to give the HAF sample, give it to Dr. Zara. |
| Ending B | Give the HAF sample to Dr. Fareinstein, enter the warzone area, and get caught by an ACE drone. |
| Ending C1 | Give the sample to Dr. Fareinstein, clear the warzone without being caught, choose “nod head” during the trial, then choose “resist”. |
| Ending C2 | Same as C1, but choose “Accept regime” during the trial instead of resisting. |
| Ending D | Complete the three base-building sidequests without asking the soldiers for “favors”. |
| Ending E (True) | Complete every quest and sidequest (20 total), finish the three base-building sidequests without asking for “favors”, and collect all 8 notes. |
One thing that trips people up: you cannot reach Ending C1 or C2 if you meet the requirements for Ending D. If you’re gunning for the regime endings, be careful about how you approach those base-building tasks. And if you want the true ending, everything needs to align — all 20 quests, the base-building done without favors, and all eight notes in your collection.
100% Save File with All Endings
If you’d rather jump straight to seeing the endings rather than replay the whole game five times, there’s a full save file with each branch ready to load. The saves map out like this:
- Save 1 — Ending A (speak to Zara, give the sample)
- Save 2 — Ending B (get caught by an ACE drone)
- Save 3 — Ending C1 (choose the first option) and C2 (choose the second option)
- Save 4 — Ending D
- Save 5 — Ending E
The download link for the save pack is available on Google Drive.
Wrapping It Up
That’s the whole picture — survival fundamentals, every quest, every note, and every ending path in one place. Take your time, watch your Morale, and don’t let a locked hospital room cost you the true ending. Good luck out there.