A guide to learn how to create clothing mods and get them into Unturned.
Navigate to your Unturned files and go to Unturned>>Bundles>>Sources>>Animation>>Texture. This is the template for Unturned pants and bottom textures (which you need to make a copy of).
Step 2:
Once you have made a copy of the Unturned Texture Template go ahead and open it in paint.net or whatever photo editing type software you’ll be using. Start designing your texture.
Step 1:
Open up Unity 2017 and create a new project (you can just make it a 3D project, it doesn’t matter).
Step 2:
Create a folder called Bundler and another called Assets.
Step 3:
Navigate to your Unturned files and go to Unturned>>Bundles>>Sources>>Tools and drag the Bundle Tool into the folder called “Bundler” in Unity. Go to Unturned>>Bundles>>Sources>>Examples and import the example you need (shirt, pants, etc).
Step 4:
Drag the two folders created when you imported the example into “Assets”. Then go into Assets, Resources and to where it says the name of the example item. You can change the name of that folder to what your item is called. Next, delete the texture and material inside that folder.
Step 5:
Import the texture you made into Unity where the old/example texture was. Rename it to the corresponding item:
Shirt
Pants
Step 6:
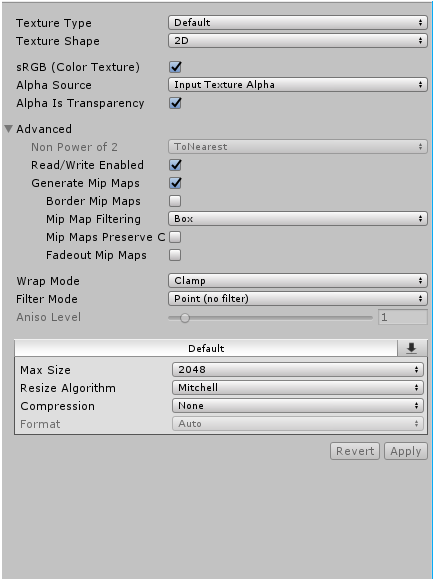
Then using the inspector window give the item these settings:

Now drag the “item” from the hiearchy onto the item in the bar at the bottom.
Step 7:
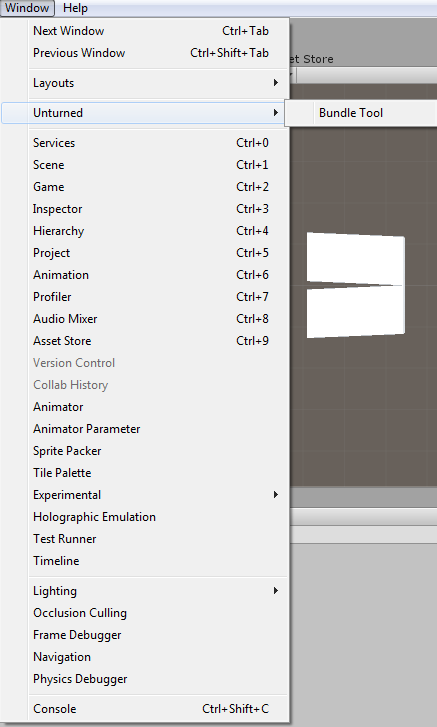
Now, navigate to the folder behind the one with your shirt/pants and go up to the top and press window. A bar should come down.

It may look a bit different for you.
Now press the folder and press “grab” on the bundle tool.
If haven’t done already; create a folder within the Unturned files (Unturned>>Bundles>>Items>>corresponding item folder).
Step 2:
Export the Unity.3d file to the folder that was just newly created.
Step 3:
Move the folder with the name of your clothing item (which should have the texture, material etc) on the “main page” where the “Assets” and “Bundler” folders are located.
Step 4:
Click the folder of the clothing item you want to export and then click grab on the Bundler Tool Window. Then click export and save it to the newly created folder in the Unturned files.
Step 5:
Now open up an existing item (the same one as your clothing) and copy the asset.dat and english.dat. Paste the copied files (asset.dat and english.dat) into the folder of your clothing item. Remove the GUID and the ID (don’t forget the ID that’s in the crafting recipe) (also make sure you are editing the copied version and not the original).
Step 6:
Once the asset.dat and english.dat are edited and the Unity.3d file is in the same folder; go back into the asset.dat file and make sure at the bottom you have Exclude_From_Master_Bundle if the folder will be in a folder that uses master bundles (which in this case it does).
Step 7:
Start up Unturned and check error logs (Unturned Menu>>Workshop Menu>>Error Logs). If everyone was done correctly there will be no error logs for the clothing item. It can now be spawned in Unturned (which can be tested in singleplayer on any map).
Related Posts:
- Unturned How to Connect Raid Alerts on LITE SURVIVAL UNTURNED
- Unturned All Exclusive & Secret Items & Cosmetics
- Unturned “Generic” Vehicles V3 ID List (GV3 Mod)
- Unturned: Complete Animal ID
- Unturned: Colour Code Lists

Could you do a tutorial of how to make models for different clothing say if youd like to make a dress or such? id be very grateful if you could