

It is built for players mid-sort who want the next concrete action, not a lore tour. Where the source is thin on a specific step, that gap is flagged rather than filled with guesswork.
What the Full Run Actually Requires
The 100% finish is not just shelving everything in sight. It depends on a few systems working together, and knowing them up front changes how you spend early coins.
- Room unlocks gate progress. You cannot finish sorting a category until its room is open, so clearing the current room efficiently is what pushes the next unlock.
- Spells and familiars are speed, not decoration. Glimmer auto-collection and the cat familiar’s tidy-up and shelving help turn a room from a slog into a few passes.
- Tarot cards are permanent buffs. Buying the right ones early compounds across every later room.
- The bell exists for a reason. When an item will not surface, that is the tool to reach for instead of re-searching the same shelves.
- The ending hinges on the missing brooms. Full completion, including the Secret Room and Secret Crypt, is what triggers the finish — not simply emptying the visible rooms.
The biggest time sink in a run this size is a single lost item. Learn the bell and the familiar early; they pay for themselves across thousands of sorts.
Tutorial & Bedroom: Learning the Shelves
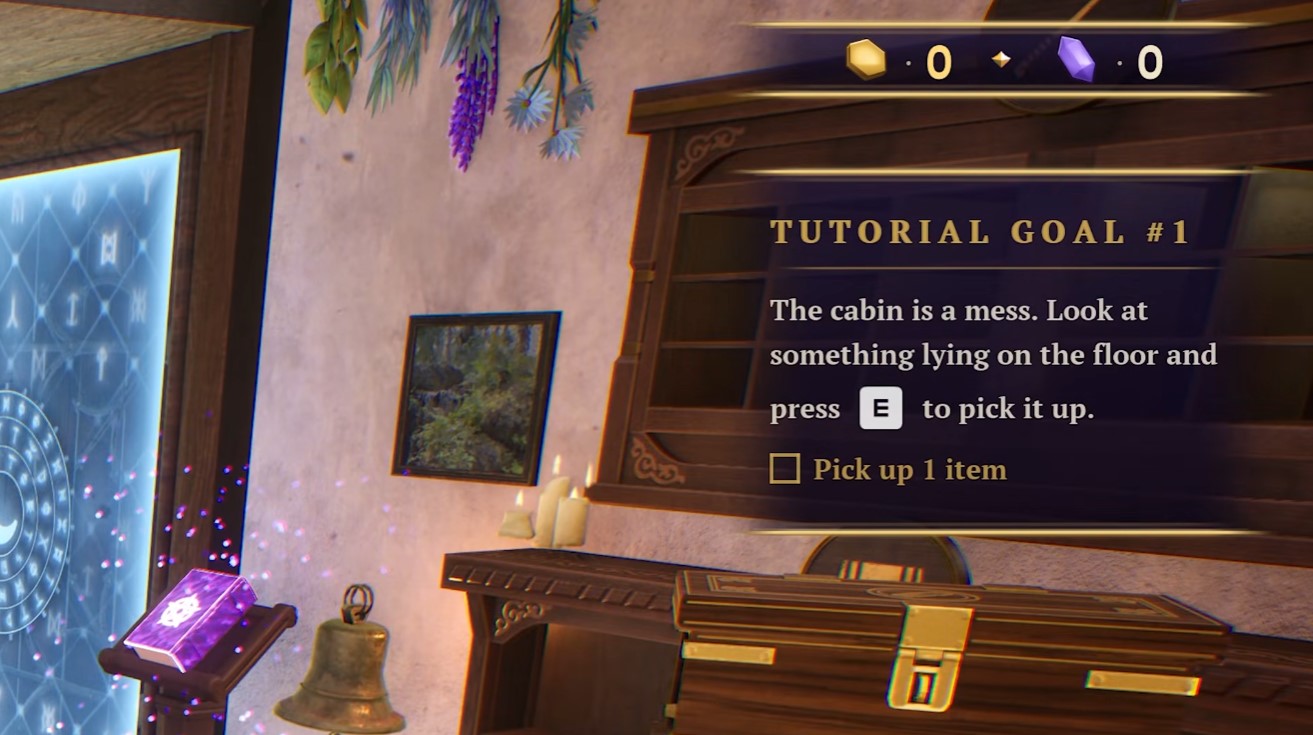
The cabin throws you straight into sorting with almost no hand-holding: look at a loose item, press E to grab it, and get it onto the right shelf. Your hands are the first real constraint — you can carry only four items at a time, so every trip is a small routing puzzle. Learn the shelf language here and the later rooms go much faster.
Picking Up and Shelving Basics
Follow the tutorial prompts until the game hands control over. The core loop is simple: pick up, walk to the matching shelf, place. If you grab the wrong thing or change your mind, Q drops the item so you can free a hand slot.
- Potions go on their matching shelf and pay out coins when correctly placed — coins are your upgrade currency, so shelving accurately is also how you earn.
- Blue bottles have their own shelf; keep them separate from potions so you don’t waste a trip.
- Purple crystals belong on the crystal shelf. Group them by color once the shelf fills up.
- The tutorial also asks you to pick up two different items and shuffle them around, plus hit a 10-coin objective — you’ll already be past that with the coins you start with.
Upgrades Worth Buying First
Open the book to spend coins on upgrades. Two early picks do the most work:
- Becken — fills your inventory with copies of an item, which is a strong starting spell for clearing clusters of the same object.
- Stack Weaver — stacks loose items so you’re not making repeated trips for singles. It runs on an 80-second cooldown, so fire it when a pile is genuinely messy rather than on every stray bottle.
Treat Stack Weaver as a burst tool, not a constant. Wasting the cooldown on two items means waiting out the timer while a real pile builds up.
Clearing the Rest of the Bedroom
With the basics down, work through the remaining categories. Each has a dedicated home, so sweep the floor by type rather than by proximity:
- Hats to the hat shelf.
- Books to the bookshelves.
- Brooms to the broom rack.
- Wands to the wand shelf.
- Jewelry boxes to the jewelry box shelf.
- Any leftover crystals back to the crystal shelf, grouped by color.
Finishing every item in the room brings the bedroom to 100% and opens up progression. Along the way you also unlock the tarot feature and the first coven — the game’s framing for new magical abilities and, likely, new item types to sort in later rooms. Clear the bedroom fully before moving on; a half-sorted room leaves you guessing which shelf a new item type belongs to later.
Apothecary & Potion Sorting
The Apothecary is the first room that asks you to think in stacks rather than single items. Potions come in several types, shelves cap out fast, and a couple of upgrades here decide how much of the rest of the cabin feels like busywork versus a slog. Get the room unlocked and the right tools bought before you start hauling bottles around.
Opening the Apothecary and Ringing the Bell
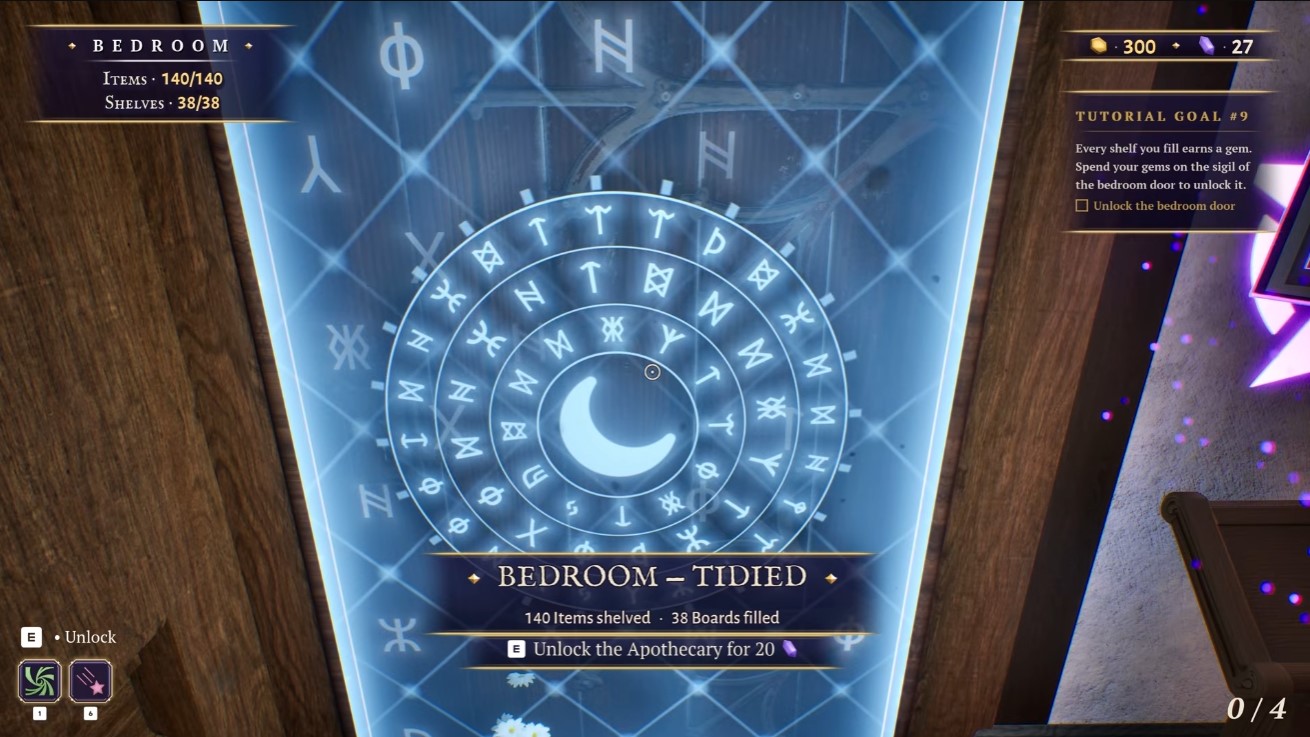
Spend 20 gemstones to unlock the apothecary room. The moment you walk in, ring the bell. It summons loose items that have glitched through walls or floors, so anything you thought was lost usually reappears on the floor instead of staying stuck in geometry.
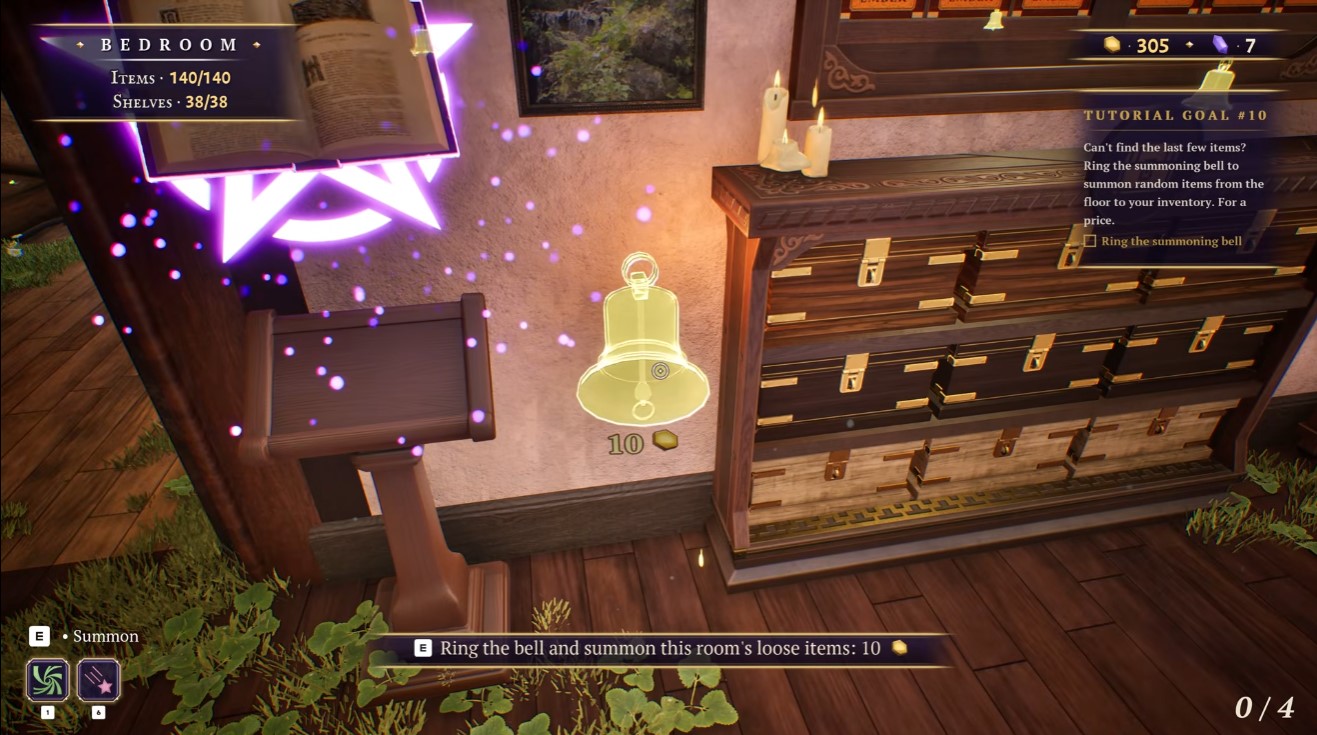
Keep the bell in your routine for the whole run. When the item counter says you’re short, ring first and search second.
Reading Counts and Using the Stack Weaver
Each item type shows a collected-versus-required count, like 10 out of 12. That number is your checklist: it tells you exactly how many of a potion are still missing, so you stop guessing whether a shelf is finished.
The Stack Weaver is the tool you’ll lean on, but understand what it actually does. It groups items by type, not by identical item. That’s fine for general tidying, yet it won’t always merge two of the same bottle the way you expect.
- Use the Stack Weaver to pull similar items into one area, then fine-tune by hand.
- Trust the item counter over the visual stack when deciding if a type is complete.
Shelving Potions and Buying Upgrades
Place potions on the designated shelves. Each shelf holds up to 12 of a given potion type, so fill one type per shelf and move on rather than mixing bottles.
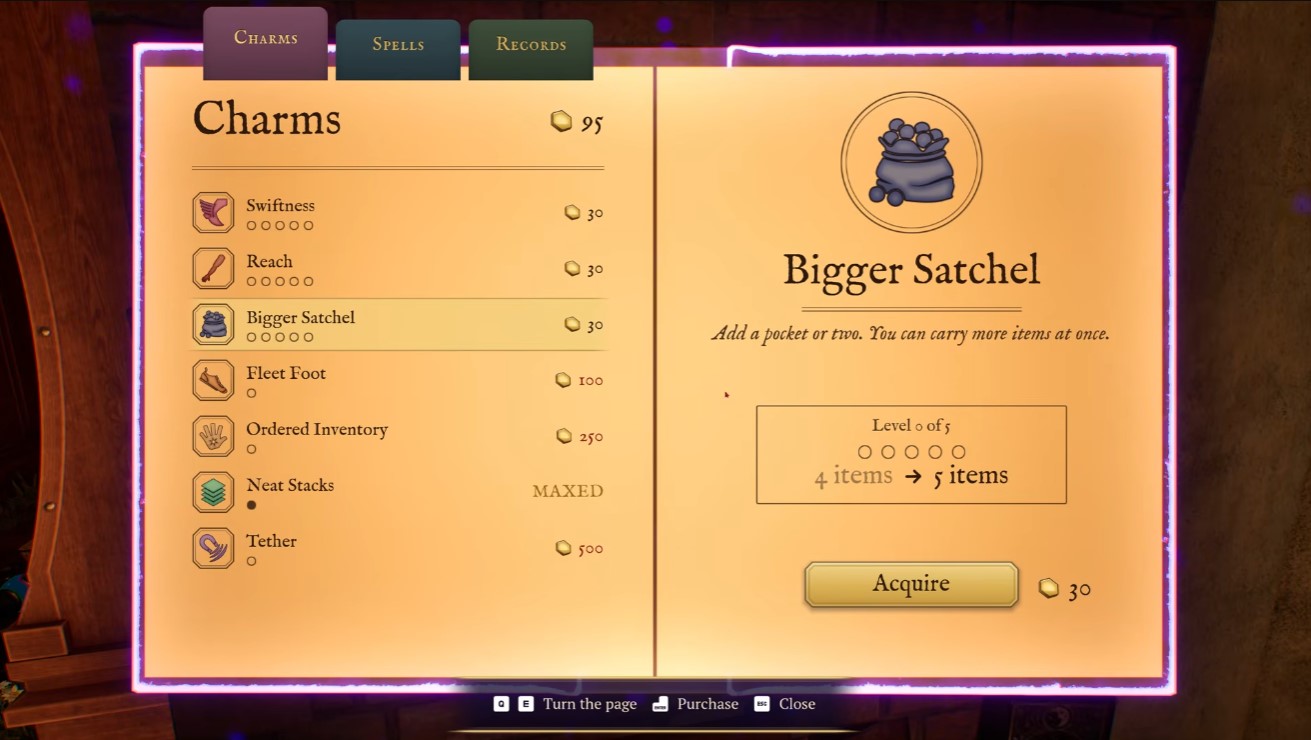
Prioritize the Neat Stacks upgrade. It automatically groups identical items into stacks, which cuts the manual sorting time more than any other early purchase. Save for it before spending on convenience items.
Satchel upgrades cost 30 gold doubloons each and raise carrying capacity from 4 to 6 items, so fewer trips between the shelf and the floor.
Rooms, Sprinting, and Golden Tarot Cards
Once the Apothecary is running, expand outward and pick up speed:
- Broom closet — 5 gemstones.
- Greenhouse — 30 gemstones.
- Enchantment hall — 30 gemstones.
- Sprint upgrade — 100 gold, worth it for cutting travel time across the cabin.
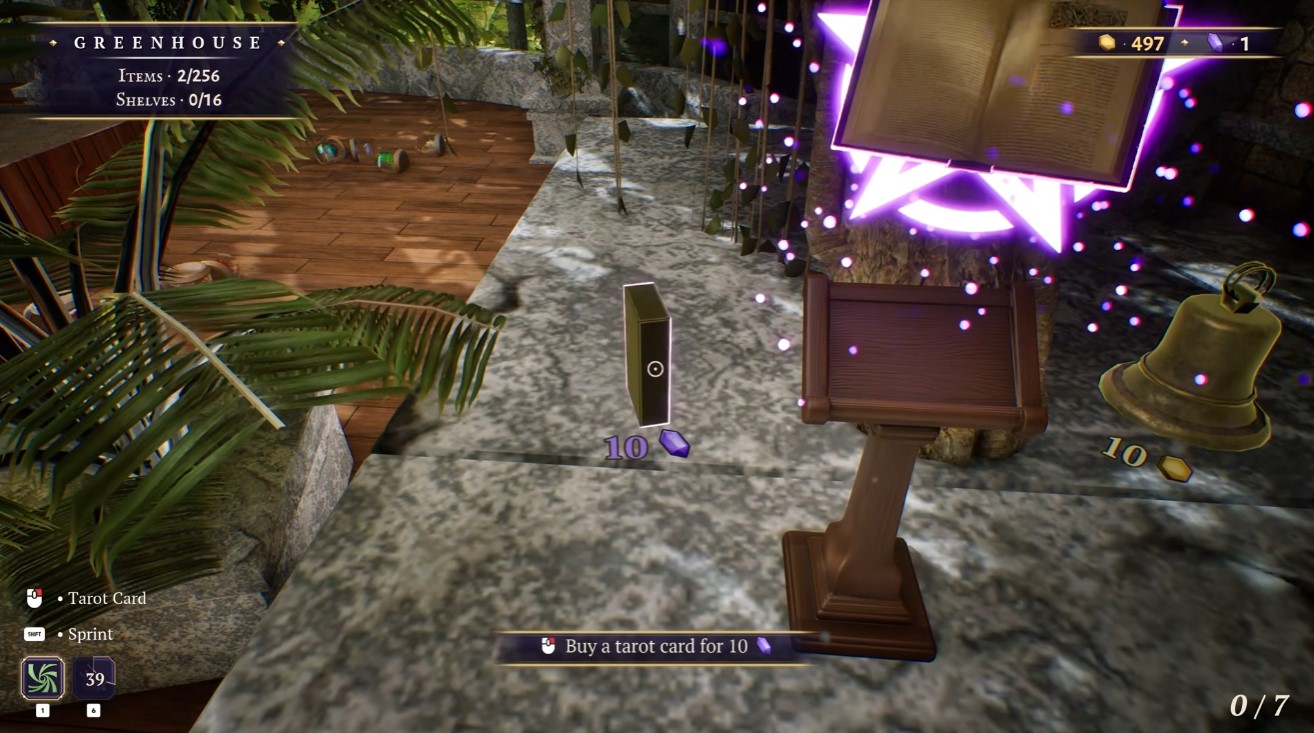
Golden tarot cards are scattered around the house. Each one grants a permanent buff, such as reduced spell cooldowns or cheaper door unlocks, so grab them as you pass rather than saving them for later.
If the last potion of a type won’t turn up, don’t tear the room apart. Ring the bell, then recheck the item count — glitched items are the usual culprit.
Broom Closet & Greenhouse
The broom closet is your first real test of the sorting rules, and it punishes sloppy grouping. Brooms come in three families — regular, magic, and evil — and a few of them are sitting in rooms you can’t reach yet. Get the shelf logic right here and the rest of the cabin goes faster.
Filling the Broom Racks
Once the closet is unlocked, bring in every broom you can physically carry before you start placing anything. Some are scattered across other rooms, so a quick sweep of the cabin saves a second trip. On the shelf, group by type and orientation:
- Regular brooms together, twigs facing the same direction.
- Magic brooms in their own cluster.
- Leave a gap for the evil brooms you haven’t found yet — you’ll want the space later.
If you try the summon spell to pull in the missing brooms, it fails: those are locked behind doors in other rooms that need crystals to open. Don’t burn time retrying it. The same applies to the closet’s locked door — it opens through progress elsewhere, not through anything in this room.
Potion Shelf and a Detour to the Greenhouse
While you’re here, clear out the colored potions. Green, blue, and yellow all go on the shelf, spiky shapes included — appearance doesn’t change where they belong. You may think the potion room is done and move on, but it usually isn’t; come back and finish the remaining bottles before you call it complete.
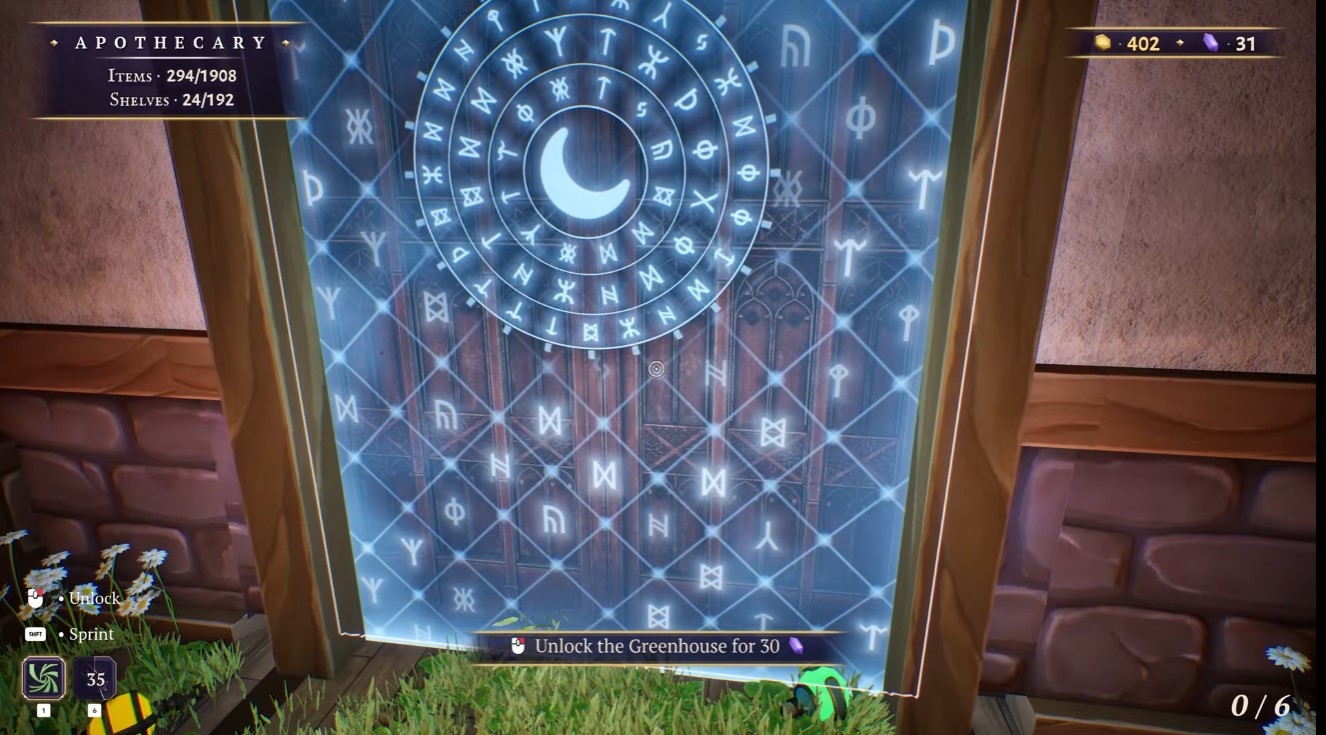
Head to the Greenhouse next. It’s the productive stop for this stretch: plant the Fire Flower Sapling while you’re there, and check the room for any brooms tucked away before you leave.
Cards Worth Buying Now
Card packs are the cheapest long-term upgrade in this section. Prioritize these pulls:
- Emperor — cuts upgrade costs by 5%, so buy it before you spend big on anything else.
- Hanged Man — shortens spell cooldowns by 5%.
- Temperance, Justice, The Lovers, The Empress — grab them as they appear in packs.
- A card granting a 5% chance at double gold — small, but it compounds over a full run.
Satchel, Familiar, and Spell Upgrades
Gold spent on the satchel pays for itself: a bigger hand means fewer trips between a pile and its shelf. The familiar (your cat) matters just as much. Its Tidy Up ability auto-shelves items, which is the single biggest time-saver in the cabin.
Buy Tidy Up early and lean on it. Manually carrying every item is what makes the 6,920-item count feel endless.
After that, put money into the cat’s cooldown and duration so Tidy Up stays available, and reduce the Beckon cooldown. Pick up the Homeward spell too — it sends items straight to the shelf on a 40-second cooldown, so cast it whenever it’s up rather than hoarding it.
Expanded Sorting & Upgrades
With the basics of the cabin handled, this stretch is about turning your spells and shelves into a self-running sorting machine. The room you’re working on sits at 1841 of 1908 items placed, so the goal is to close that gap while building the upgrades that make every later room faster.
Make the Cat Shelf Work for You
The cat familiar stocks items based on what’s already sitting on a shelf, so it can’t guess where a brand-new item type belongs. Seed each shelf with at least one of every item you plan to store there before letting the cat loose.
- Place a single sample of each type first, then let the cat fill in the rest.
- Summon the cat to throw items across the room for bulk movement — it’s strong enough for heavy lifting, though it will occasionally clip you in the face.
- When a specific item is missing, spend coins on a summon spell to pull it straight into your hand instead of hunting the floor.
Spend Crystals and Coins on Permanent Buffs
Crystals, stones, and metal nuggets (bronze, gold, green, garnet) are your upgrade currency, so sweep them up whenever you pass. Tarot cards are the biggest long-term buys:
- The Hermit — spells last 5% longer.
- The Chariot — 50 coins for faster walk and sprint speed.
- Other cards add strength, reach, extra gemstone chance, and longer spell duration. Grab these as crystals allow.
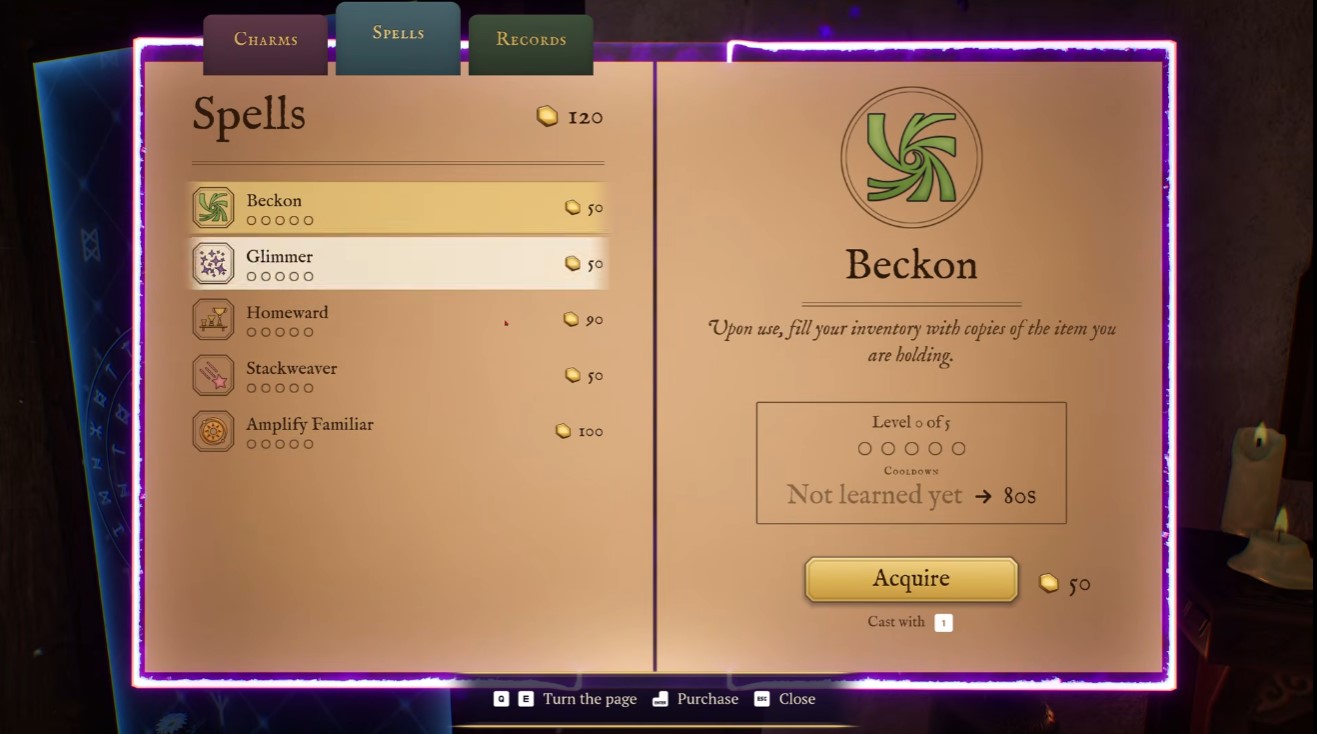
On the spell side, max Beckon to cut its cooldown to 48 seconds, then push Glimmer hard. A fully maxed Glimmer costs 1200 points but drops the cooldown to 25 seconds with a 16-second duration — close to continuous uptime. Pair it with Tether so matching items get pulled into your hand automatically, which keeps collection moving even while other spells are recharging. Reach is worth adding afterward for a longer arm and quicker walking.
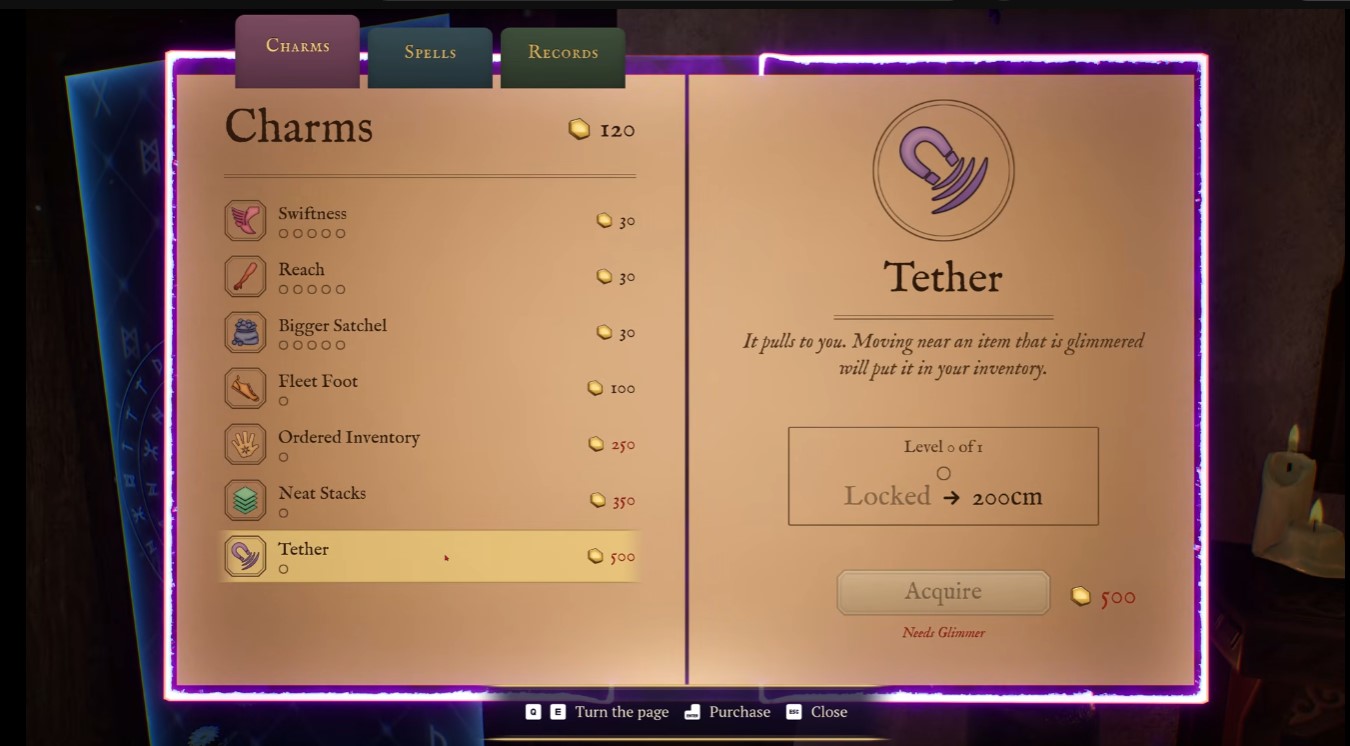
Run past highlighted items with Glimmer active rather than stopping to grab them — the auto-pickup does the work, and the duration is long enough to clear a whole cluster of saplings or loose loot in one pass.
Shelving Rules That Keep the Cabin Readable
Neat rows aren’t just cosmetic — they make missing items obvious at a glance. Use rows of four per item type and keep similar categories together: oils, wines, spice jars, flasks, hourglasses, and ladles each get their own stretch.
Sort by Material
- Ladles grouped by wood: ebony, cherry wood, oak.
- Scales grouped by metal: copper, brass, silver, iron.
- Pull mismatched pieces — brass tongs don’t belong on a ladle shelf.
- Give ogre teeth their own shelf, separating purple from red.
Once the shelf layout is set, summon spells can route whole item types directly to storage — summoning every birch ladle, for example, sends them all to their home shelf in one cast. Use that trick to finish the room’s remaining spice jars and Bunsen burners and close out the 1841/1908 count.
Planters and Saplings
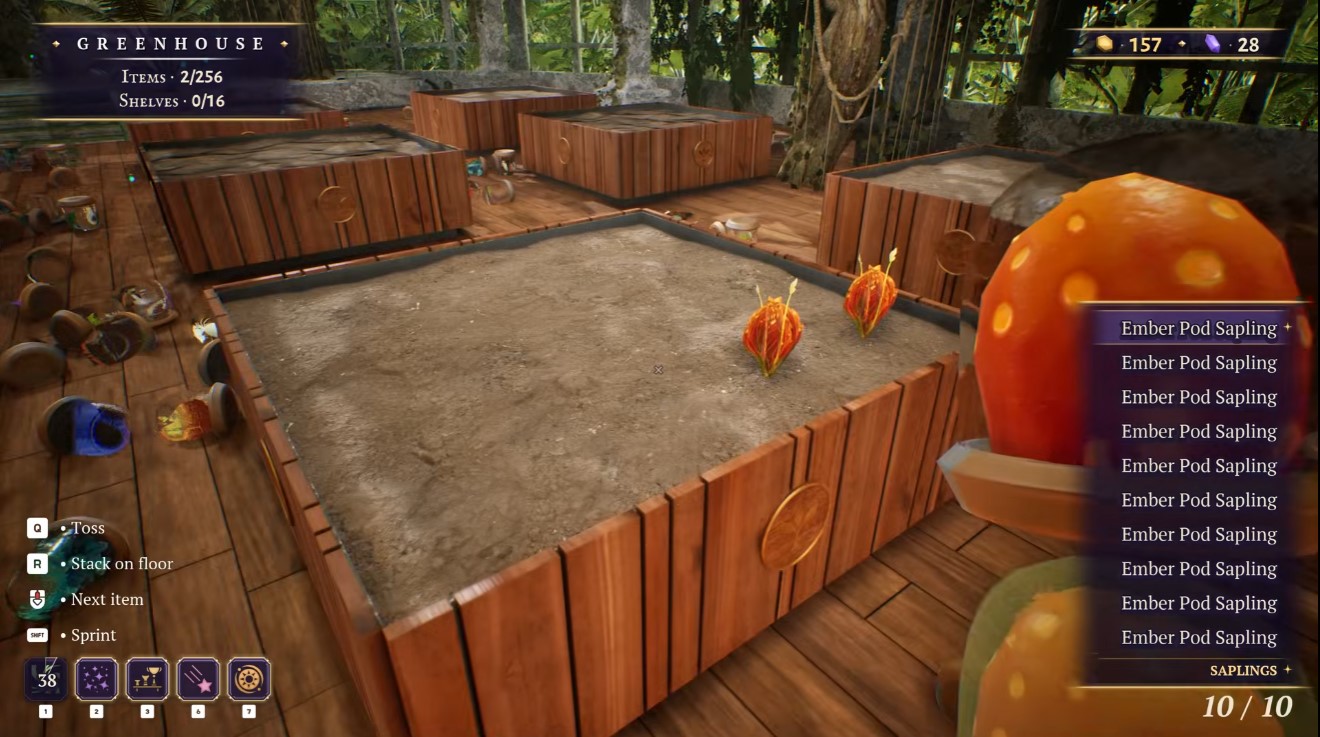
Saplings like ember pods and fire flowers go into planters, and filling a planter makes the plants bloom. There’s no strict biome grouping — any placement works, so place one of each plant type and use the already-planted ones as your reference for what’s still missing. Maxed Glimmer is ideal here: activate it and circle the area to sweep up every sapling before the duration runs out, then top off the planter completely.
Unlock the End Area
Gemstones open new zones. Spend them on the End area now and leave the Arcane Library for last — it’s the more demanding unlock, and clearing the End first keeps your upgrade income flowing before you take it on.
Staffs, Wands, and Gemstones
This stretch of the cabin is where the item variety really opens up: long-handled staffs, color-coded wands, elemental scepters, raw ore, finished ingots, and a jewelry-box collection that needs its own sorting logic. The wall shelves are already partly stocked, which is your best clue for where new pieces belong.
Wall Shelves: Staffs, Wands, and Scepters
Start with the long items. Pick up staffs and place them on the wall shelves — the crook staffs in particular have no obvious label, so look for the shelf that already holds other staffs and match them there. If a staff is out of reach, use the summon ability to pull it into your hand instead of hunting for a path.
Homeward Bound is the faster option once you know the destination: cast it to send staffs straight to their shelves rather than carrying each one across the room. Wands follow the same wall-shelf treatment — gather the different colors and shapes and slot them onto the shelves.
Scepters split into two clear groups before you touch the colored trays:
- Frost crystal scepters go on the left shelf (five of them).
- Fiery quartz scepters go on the right shelf (five of them).
- Blue, pink, green, and yellow scepters each go on their own matching tray.
While you’re in this area, grab the free tarot card The High Priestess — it extends spell duration by 5%, which quietly improves every Homeward Bound and Homework cast you make from here on.
Gemstones, Ore, and Ingots
Gemstones come in stacks, so the efficient rhythm is: collect ten, fire off Homeward Bound to send them to the correct shelf, then collect the remaining ten to finish the stack. The cat can hoover up gemstones for you, but don’t lean on it — it can get stuck on shelves and stop working entirely.
Ore and ingots are pure matching work. Place each ore type on its designated shelf: orichalcum, iron, copper, green copper, gold, mythril, cobalt, coal, and silver. Ingots work the same way — copper, gold, bronze, iron, cobalt, platinum, and steel each have a home on the ingot shelf. If a slot looks empty at the end, steel is the one most likely missing.
Rune stones go on their own shelf. The Homework spell shuffles items to the appropriate shelves automatically, which is the reliable way to clear a backlog when the cat has stalled.
Jewelry Boxes and Elemental Wands

Jewelry boxes arrive in a spread of materials — diorite, pine, gold, iron, silver, slate — and the first pass is simply getting each one onto the correct shelf. The real structure comes after: every material type has four variants, so regroup the boxes into four categories (stone, metal, crystal, water) with four subtypes each and place them in their designated areas. Doing this early prevents a pile of unsorted boxes from swallowing shelf space later.
Wands get a second pass by element rather than color. Group fire-themed wands — dragon, ember, ash, blaze, phoenix — together and drop them into the matching colored box, then repeat for the other elemental families.
Where to Spend Points
Cash in points on spell cooldown reduction and push your familiar to max level. Shorter cooldowns keep Homeward Bound and Glimmer Glamour cycling, and a stronger familiar does more of the collecting for you. Skip movement speed upgrades — sprint already covers ground fast enough, and the points are better spent elsewhere.

Glimmer Glamour makes items float, so cast it and run a lap collecting everything in the air rather than chasing individual pieces. With several short-cooldown abilities available, you should always have something to cast — chain them instead of standing around waiting on one spell.
Library & Secret Room
The Library costs 29 gems to open, and it is the first room where the sorting rules change: books are grouped by genre as well as color, so eyeballing a single shelf is not enough. Clear your skill tree before you start hauling, because the room rewards preparation more than speed.

Opening the Library and Finishing Your Build
Pay the 29-gem entry, then drop 50 gemstones on the Hierophant tarot card. With that purchase in hand, max out every skill and ability — including Stack Weaver. Stack Weaver is the one that matters here: it groups loose items automatically, so you spend your time shelving instead of chasing individual books across the floor.
Your tarot set finishes later in this room. The Wheel of Fortune card costs another 50 gemstones and completes the collection, so keep that amount in reserve while you work.
Sorting the Bookshelves
Books are color-coded by genre — charms, enchantments, spirits, necromancy, and the rest — which means the spine color tells you the destination shelf. Match color to category, not just to the nearest empty slot.
- Cast glimmer to send books floating upward, then grab them mid-air and shelve them. It is faster than lifting from the floor.
- Cast Stack Weaver whenever loose books pile up. Grouping them first turns a scattered mess into a handful of pickups.
- For the tail end of the room, gather the remaining books by category and drop each pile in front of its shelf, then cast the organization spell to stand them upright. Vertical books are far easier to grab and slot.
Stack Weaver pays for itself the moment the floor gets crowded. If you have been shelving one book at a time, switch now — the last stretch of this room is much shorter with grouped pickups.
The Last Few Items and the Hidden Door
Finish the stragglers before you expect anything to happen. The final 21 books go onto their correct shelves using the same drop-and-organize method. Two oddities sit outside the normal genre flow: Forbidden Beasts and Where to Not Find Them belongs on its own shelf, and the evil broom goes into the broom cupboard rather than anywhere on the floor.
Shelving the last book on a shelf triggers the payoff — a secret door opens into another cleanup room holding 880 items: cards, daggers, and owls. There are no further abilities to unlock at that point, so the new room is pure sorting. Treat it as a victory lap rather than a new progression system.
Secret Crypt & Final Items
The Curses and Protection sign is the last thing standing between you and the endgame. Behind it sits the Secret Crypt, a room holding 880 items, plus the two brooms that have quietly been keeping your completion count from hitting 100%. Clear this room and the cabin is done.

Opening the Crypt and the Broom Closet Shortcut
Walk behind the Curses and Protection sign to enter the Secret Crypt. Before you start hauling items, open the door inside the crypt that connects straight to the broom closet. That doorway turns the closet into a fast drop-off point, so you are not running the full length of the cabin for every load. Set up that route first, then start shelving.
Sorting the Crypt’s 880 Items
Work through the room in passes rather than grabbing whatever is closest. The inventory auto-sorts, and scrolling to the first slot shows everything ordered from lowest to highest, so you can pull items in the exact sequence the shelves expect. Use that ordering constantly; it is the single biggest time-saver in this room.
- Tarot cards: The Tarot of Wands, pentacles, swords, and cups all belong in the designated tarot room. Bring the cat along to help sort them, and expect a layout that echoes the alchemy shop from the earlier game.
- Crystal balls and soul gems: Gather them together and place them on their matching shelves as one batch.
- Statues: The last remaining statues go up on their shelves to finish the room.
Once the tarot, crystal balls, soul gems, and statues are all placed, the Secret Crypt is complete.
Tracking Down the Last Two Brooms
Two brooms are still missing at this point: one regular and one evil. One is sitting in a room, and the other is parked in a corner. Sweep the rooms you have already finished rather than the ones you are still working, since a broom in a cleared room is easy to overlook. Pick up the first, then check the corners for the parked one.
If your count still will not close out, recheck corners of rooms you consider finished. A broom parked out of the main walking path is the usual culprit.
With every item shelved and both brooms collected, the witch’s cabin is fully tidied and the run is complete.
Ending: Leaving the Cabin Behind
There is no final boss and no hidden timer waiting at the end of the sort. The last thing the game asks of you is a single, deliberate action — and it is easy to miss if you are still hunting for one more item to file.
Triggering the Final Cutscene
Once your sorting work is done, walk out the front door. Leaving the house is what fires the ending sequence, so nothing happens while you stay inside rearranging shelves or second-guessing your last placements.
- Stop sorting and head for the exit — the door is the trigger, not a menu option.
- Expect the cutscene to take over control; you do not need to press anything special to advance it.
- Watch for the cat’s ascent — that is the closing beat of the story.
Before You Step Outside
Because the ending locks in the moment you leave, treat the doorway as a point of no return for this run. If you still want to tidy anything, do it now rather than after the cutscene.
If you were expecting a confirmation prompt or a “finish game” button, there isn’t one — the exit itself is the commitment.
If the Ending Doesn’t Play
Sorting 6,920 magical items sounds like busywork until you realize the whole game is built around shaving seconds off every pickup. The difference between a room that takes ten minutes and one that takes three is almost always a tool you forgot to upgrade or a container you never noticed. This guide walks the full run from the tutorial bedroom to the ending, with the mechanics that actually move the needle.
Mechanics Worth Mastering for 100%
- Stack Weaver upgrades multiply throughput on every shelf — buy them before cosmetic or minor buffs.
- Tarot cards give permanent buffs that stack across the whole run; grab them the moment they appear.
- The bell is your missing-item radar — ring it as soon as your count stalls, not after minutes of searching.
- Cat familiar commands clear clutter so you can focus on items only you can place.
- Maxed Glimmer automates collection and is the single biggest time-saver in dense rooms.
- The secret room and Secret Crypt hold final items — check them before assuming a room is done.
If the ending won’t trigger, the cause is almost always a missing broom or an unshelved item in a room you thought was finished. Ring the bell and re-walk your completed rooms before anything else.