
For Stranded: Alien Dawn players who want to play the game with some mods, this is a step-by-step guide how to use the Map Modding, let’s check it out.
Required mods
Before starting map modding, you need several mods. Here is the list:
- Map Editor
To unlock the dev map editor. The mod unlocks a lot of additional dev tools as well, that are great for debugging. Hit F3 to activate the map editor, or F5 to change map. - Map Modding
To make possible saving and loading modded maps. The mod introduces a new mod item for maps. - Passability Overlay
To monitor the passability in the map. This is optional, but highly recommended to have. Toggle the overlay by Ctrl-9. - Test Mod Map
This is a copy of a vanilla map, with some small edits. Not required at all, but it shows how to make a new map and a new region as example.
Learn by example
Inspect the mod “Test Mod Map”. It has 3 mod items: a Biome, a Map and a Region
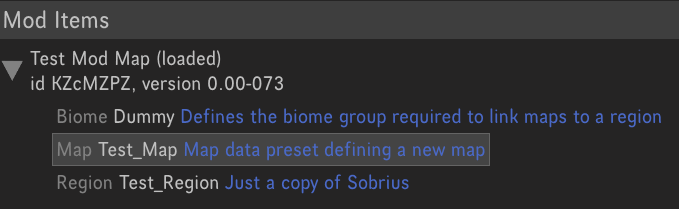
The Biome is a thing used only for the map generation. We need it only for its Group property, which is the link between all the maps in a region.
The Region defines many common map properties, like the active seasons. The region in the test map is a copy of Sobrius, but with changed Biome Group. We need an unique region, because otherwise if the map is made for an existing one, then the unique seeds will start producing different maps. If that is the point, or an existing map should be changed, then the biome and region items are not required.
The Map defines the map itself and allows the map to be saved and loaded. Its parameters, like the size, should be the same as the ones of the other maps. The test map is a copy of an existing map as well, with some simple edits.A real example for a modded map and region is the Nebula mod:
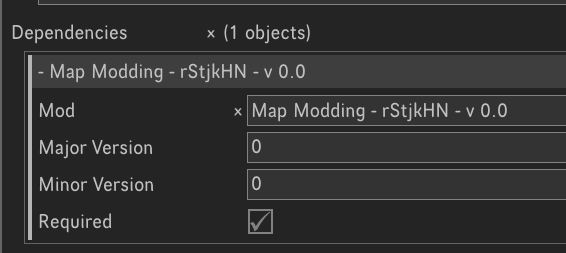
Create a mod and add the Map Modding as a dependency.
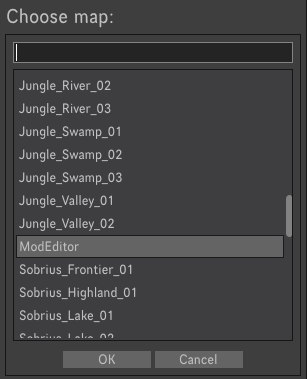
After having your own map mod item added to you mod, it’s time to start editing the map itself. If you are already experienced in map editing, then the map creating could start form scratch. Otherwise hit F5 to open a list with all maps and double click a pre-generated map from one of the existing regions.
After loading the map, hit F3 in the game – this is the shortcut toggle to enter or exit map editing mode. Here everything is changeable, but only the modded map can be saved after being changed in the editor. In order to save the map after being loaded, an additional reload is required inside map editor mode, to ensure that the game logic isn’t started. To do so hit Ctrl-F5. Now, inside the map mod item, hit the button Import Loaded Map.

This will save the map inside the mod, under the map mod item. Now hit F3 again and navigate to your map. Reload the map before start editing it via Ctrl-F5. After making the changes, hit the button Save Loaded Map inside the map mod item.
That’s all we are sharing today in Stranded: Alien Dawn – Map Modding Guide, if you have anything to add, please feel free to leave a comment below, you can also read the original article here, all the credits goes to the original author injto4ka