

Stormrock gave me more trouble than any other map in Species: Unknown before I actually understood its layout, and I suspect I’m not the only one. This walkthrough is written for players who aren’t yet familiar with the map — it’s a straightforward route with a handful of tips I wish I’d had on my first run. What it deliberately leaves out: exact locations for disks, money bits, pods, tier 3 guns, tier 2 guns, and similar collectibles. If that’s what you’re hunting, this isn’t the guide for you. If you want to actually finish the objective without getting lost, read on.
Before You Dive In: The Map at a Glance
I’ll be upfront — the final step of this walkthrough contains a spoiler for the ending sequence. If that matters to you, back out now. Otherwise, treat the numbered route below as your lifeline. Stormrock is a lot of verticality and a lot of doors, and the fastest way to lose fifteen minutes is to take a wrong turn in the power tower.
The Route to Power and the Colony Doors
- Exit the ship through the staircase in the middle — it’s the same path you use to enter the ship back in the lobby.
- Head right onto a catwalk and enter the control tower building.
- Find the huge room with a staircase and go up.
- Go left or right and enter the room with the elevator and the staircase wrapped around it.
- Climb to the 3rd floor, then exit the staircase and enter the control room.
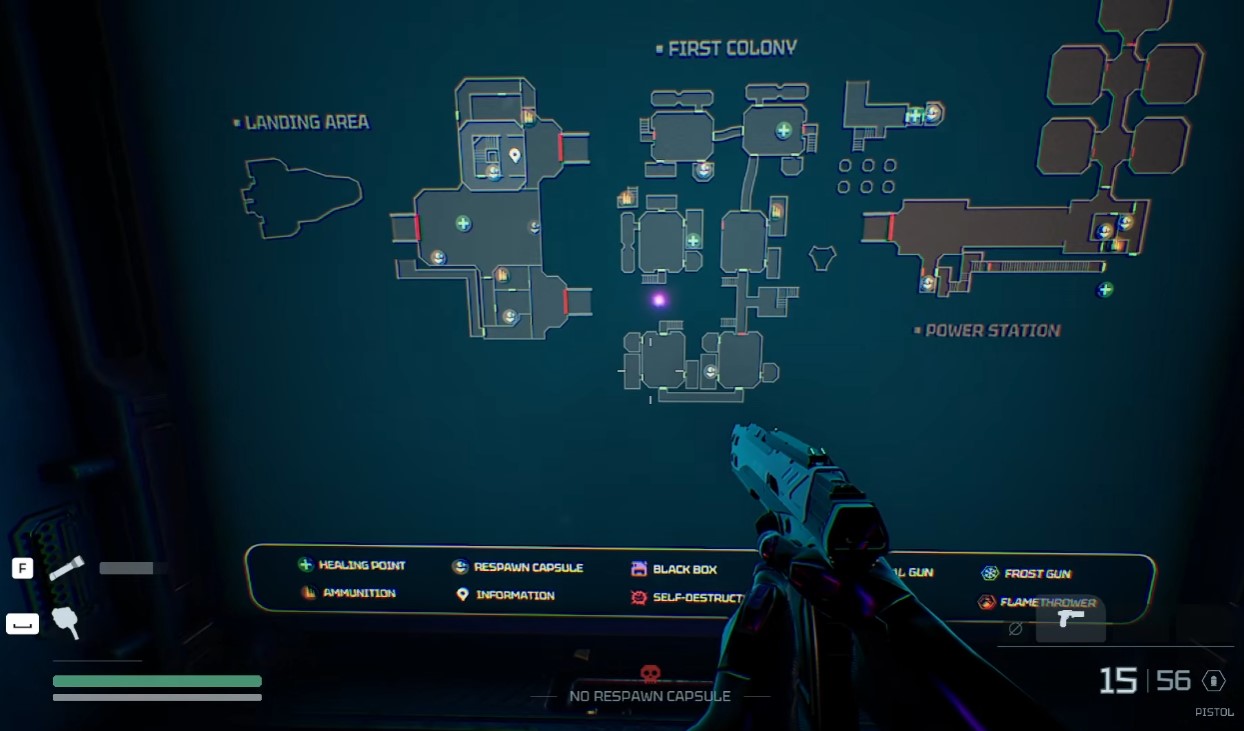
- Activate power and look behind you — the main map will be there, the same one shown in this guide’s preview screenshot.
- Go downstairs, or take an elevator for a cool sequence if you want the show, and make your way to the rooms with big doors.
- Opposite the doors, there’s a room behind glass. Enter it and activate the door. It will attract the specimen to your location, so be ready for that.
Which door you pick determines where you get access, and this is the part I’d have saved myself headaches on if I’d known it going in. Taking the right door gives you direct access to First Colony’s sections 1–3, though some doors will be locked and you’ll have to loop into adjacent sections to open them from the other side. The left door gives you direct access to sections 4–6. For reference, the labeling runs like this: 1 is middle left, 2 is bottom left, 3 is bottom right, 4 is middle right, 5 is top right, and 6 is top left.
Small Creatures and the Storm Sway
The moment you exit the control tower building, you’ll be met by a swarm of small creatures — facehugger-like spiders or snake-like sandworms, possibly other variants, but all of them small. Here’s the reality of Stormrock’s storm conditions: your aim sways heavily, which makes spray-and-pray not just the best strategy but honestly the only one. Fire with whatever you’ve got and don’t try to be precise about it.
I’d strongly recommend grabbing additional guns as soon as you can, because these things seem to respawn indefinitely — or at least, they kept coming back on every run I’ve seen. One small edge worth knowing: facehuggers seem to spawn a bit more rarely in snowy conditions than the snakes do in rainy weather, so the current weather is a rough difficulty indicator. Watch the sky and plan your movement accordingly.
Raw Materials and the Printer
As you sweep through all the colony sections, keep your eyes open for white cylinders with pins on them — these are the raw materials the printer eats. You might stumble onto them in a side room of some random section, or the maintenance monitor will point out their location later. Either way, don’t walk past them.
When you’re ready, head to the Power Station section behind the First Colony. Before the elevator, take a left — there’s a small staircase that leads to the maintenance console. Start the maintenance sequence, and once it finishes, press the Request part button on the screen. That sends the blueprint to the printer and reveals its location in one of the colony’s sections if you haven’t already found it.
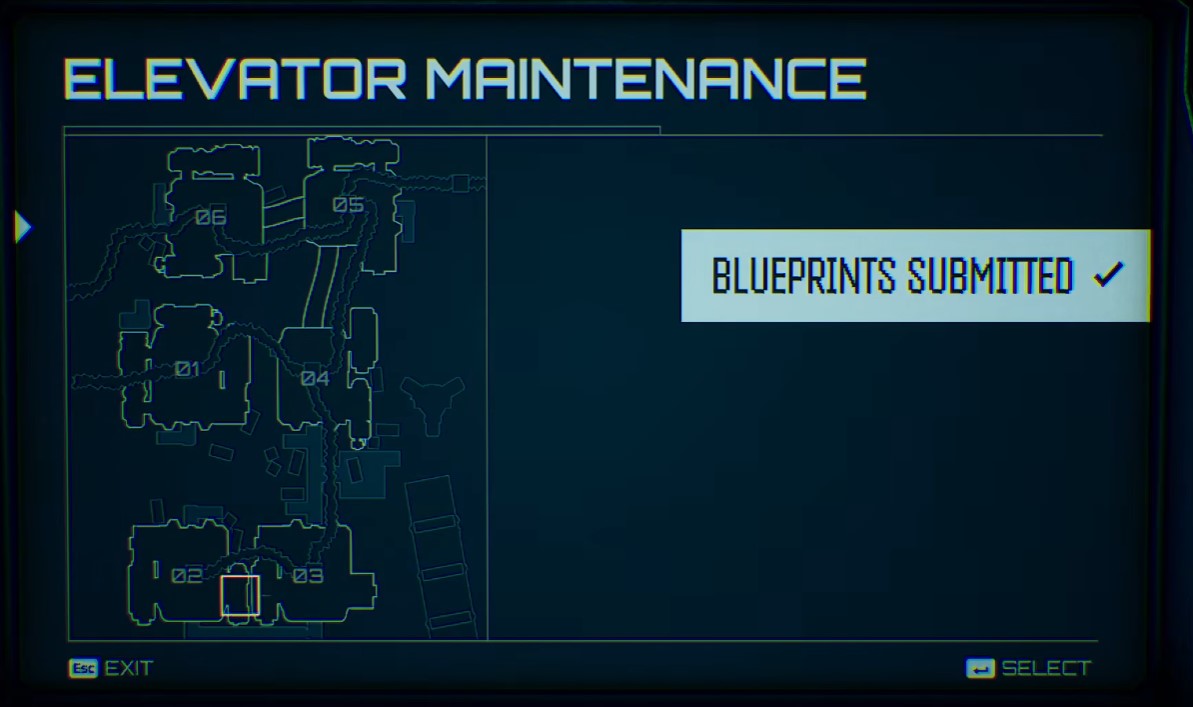
Now look directly behind you and remove the wheel — that’s the part you’re replacing. Take your materials to the section with the printer and insert everything you’ve gathered. From what I can tell you need at least 5 of them to reach the 5000 threshold required for printing. There’s a small door to the right of the printer where the materials go in.
The Extraction Sequence
Once the print starts, wait for the wheel to finish and pick it up. One thing to know: while you’re carrying it, you can’t use guns or equipment, so it pays to have the route memorized — or to follow a friend who does. Insert the wheel onto the cart and enter the elevator. It’ll start descending.
When it’s fully down, enter the room in front of you and open the correct hatch — for extraction, that’s always hatch 5. Only one hatch can be open at a time, so don’t waste time fiddling with the others. Exit the room, go right, then right again. There’s a hatch next to a pod — head down.
Go through the ventilation system. From my limited experience with this map, it seems you’re safe from the specimen in there, though I can’t say that with total certainty. When you reach the selected room, grab what you came for.
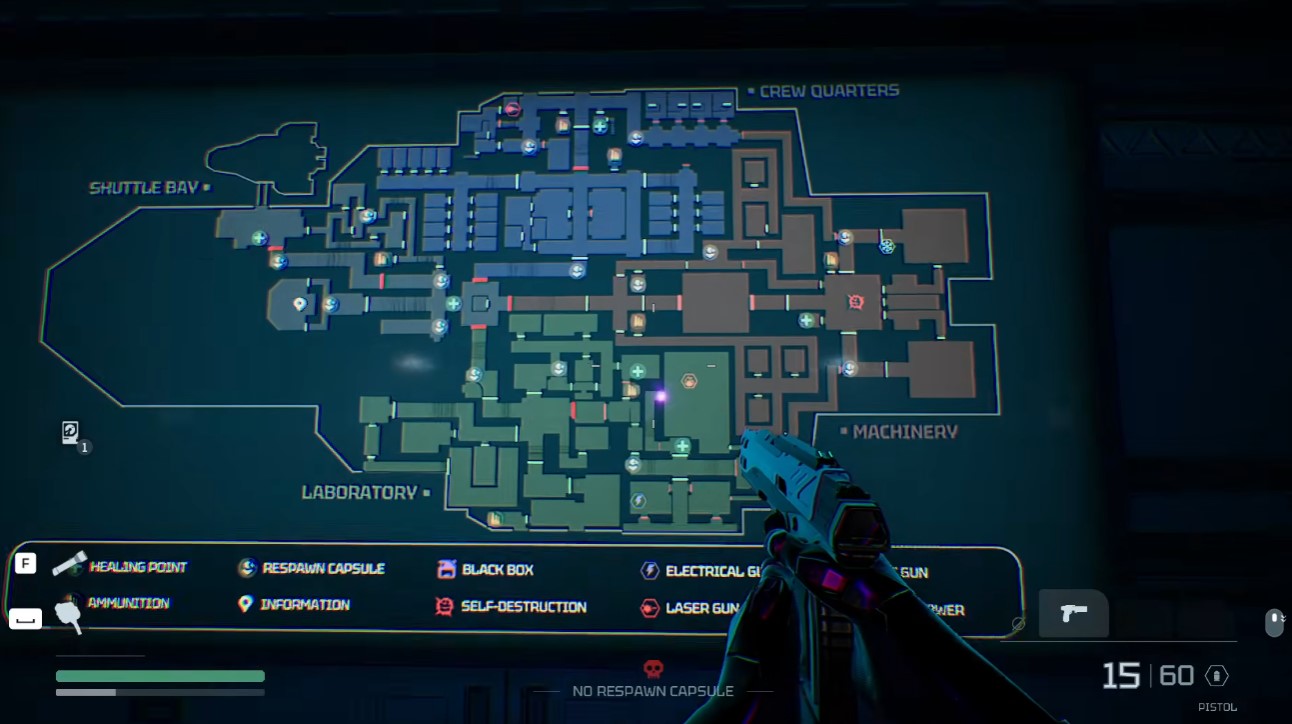
One last thing worth memorizing, because it saved me from a very bad moment: if you can’t take the elevator — say a friend rode it back up — and the specimen is right on your tail, take the stairs instead. If you’re facing the elevator, look left and you’ll find a door that leads up to the surface, exactly as marked on the map below the Power Station.
Conclusion
Stormrock is a map that punishes wandering, so once you’ve run this route a time or two, the pieces click together fast. Keep your materials in mind, know which door you’re taking before you activate it, and never turn your back on the storm.