For Project Zomboid players who want to set up your windows dedicated server, this guide will show you how it work on windows 7,8,10,11
Setup!
we can get it from the wiki HERE by clicking windows or this direct link here SteamCMDonce you download and extracted SteamCMD.exe,
now put it in its own folder(important) call it whatever you want, then run SteamCMD, it will update it self first run, download the file it need to work, once it has finished, it will ask you to log in, at this point we need close it.
open a new text file and paste this into it.
and and save as “update_zomboid” and copy it to the same folder as SteamCMD
Run SteamCMD and type
this will download zomboid server files.
once thats done we need to run it once to change the admin password
in the folder with SteamCMD there now should be aa folder called zomboid
and in that folder there should be now a file called
run that, change your admin password once it finishes loading up type
and shut it down.
in a new text file type this(or copy and paste):
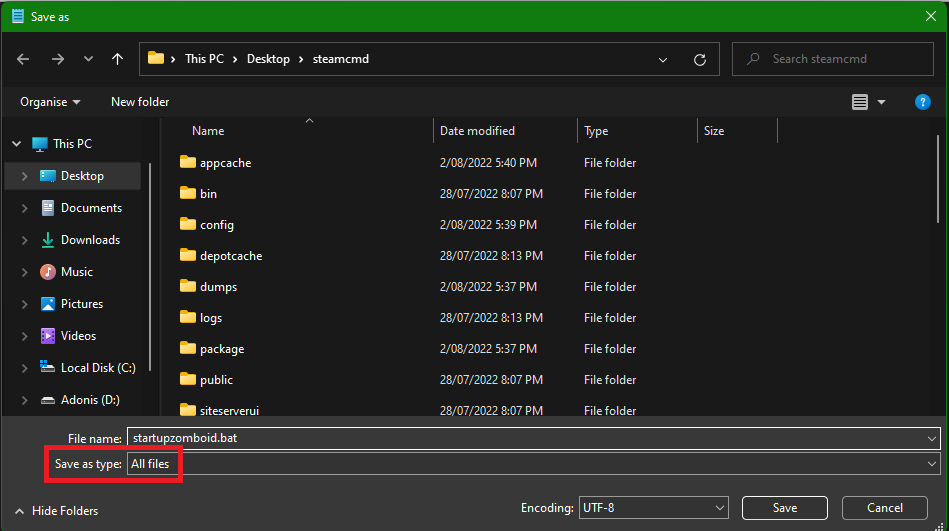
IMPORTANT click SAVE AS then change the FILE TYPE to all files
save the file name as
and save it in the SteamCMD folder.

this will be your server updater and launcher.
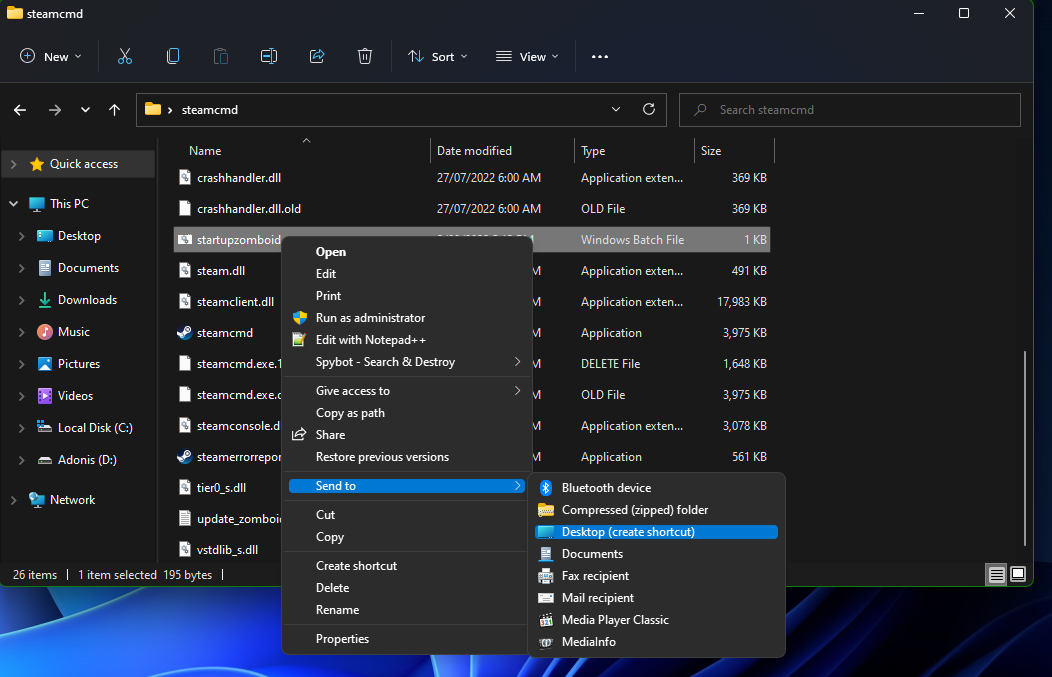
to create a short cut to your desktop right click on startupzomboid.bat, mouse over SEND TO, then click on the word desktop.

Now to change setting on your sever,
(and for some reason the dev team has decided to make it harder by not keeping everything inside of the server folder for some extremely odd reason)
go to
Read through servertest.txt file and remember to change/add the RCON password EVEN if you never plan on using it.
you also can change the setting in servertest_SandboxVars.lua, servertest_spawnpoints.lua and servertest_spawnregions.lua by right clicking and “open with..” option and selecting notepad.
Server Modding!
now that you have downloaded and edited the setting the way you like, time to add some mods!
in steam click on zomboid then click on workshop and look for the mods you want or on steams website, witch ever easier for you, you will see at the end of there mods post a ModID and modName
keep both those id’s we will need them in this next part,i recommend using notepad to keep track of the ModID and modNames.
we need once again to open
press CTRL + F to open search box and type “Mods=”
this is where you gonna put ALL our modNames each sperated with “;” like so
Note the last one doesn’t have the “;”
next where need to find “WorkshopItems=”
we need to do the same as above but with the ModID numbers again leaving the last one without the “;”
once all that is done we will have to run StartServer64.bat in the zomboid folder, this will download the mods to your server, you might have to do this a few times, because it may fail due to some unknown factors, but once its done you will have a modded server up and running,
Related Posts:
- Project Zomboid How to Configure a Dedicated Server (Windows Server 2019)
- Project Zomboid How to Fix Connection Errors
- Project Zomboid How to Reset a Broken Character File without Affecting Other Players
- Project Zomboid How to Fix Workshop item version different than server’s (Updated)
