For Project Zomboid players, this guide is about how to configure a dedicated server using Windows Server 2019, let’s check out how
Introduction.
Try starting server by this guide first.
If you experience miscellaneous issues, check these guides:
[QnA] Admin Helper – build 41 MP
[QnA] Client Helper – build 41 MP
If you experience miscellaneous issues, check these guides:
[QnA] Admin Helper – build 41 MP
[QnA] Client Helper – build 41 MP
Choose and rent a dedicated server/VPS for PZ.
You can find different server providers to buy a server from on the internet by simply searching for “dedicated server” hosts.
There exist several requirements to be able to run a Multiplayer server:
– Having an SSD disk is extremely recommended.
– 4+ core CPU.
– RAM: 4Gb + 100-200Mb per player at least, and leave at least 2GB for the system itself.
– A public IP from the server provider.
There exist several requirements to be able to run a Multiplayer server:
– Having an SSD disk is extremely recommended.
– 4+ core CPU.
– RAM: 4Gb + 100-200Mb per player at least, and leave at least 2GB for the system itself.
– A public IP from the server provider.
Install “Windows server 2019”.
After you have a dedicated server host or VPS purchased, you can access the control panel for your server on the provider page.
Choose “Windows server 2019” and install on your server. (if it’s not installed yet)
Choose “Windows server 2019” and install on your server. (if it’s not installed yet)
Connect to your server by RDP.
– See IP and Login/password to connect to your system on your hosting server website.
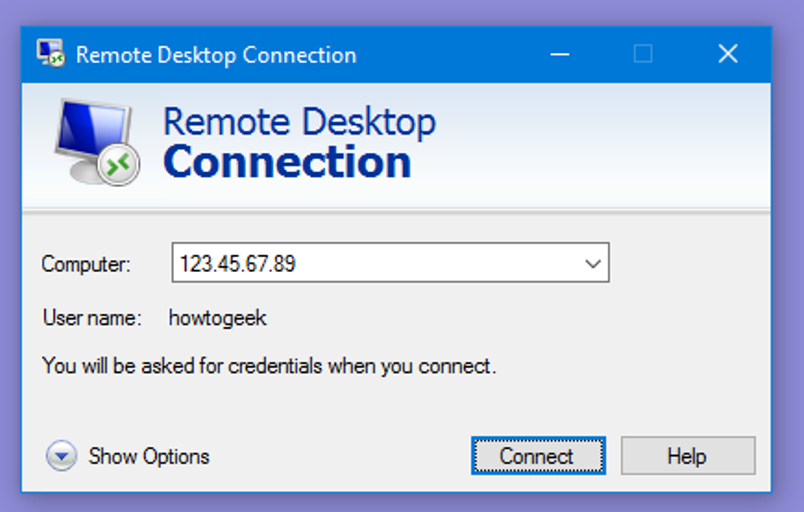
– Open Remote Desktop Connection app. (If your system is Linux – install external program to connect by RDP to your server)
– Enter your IP and login/password.

– Click connect.
– Open Remote Desktop Connection app. (If your system is Linux – install external program to connect by RDP to your server)
– Enter your IP and login/password.

– Click connect.
Update system.
– Check for updates and update your windows server system.
– Reboot the system.
– Wait and reconnect to the server by RDP
– Reboot the system.
– Wait and reconnect to the server by RDP
Install “Project zomboid dedicated server” via steamCMD.
1. Download SteamCMD on your Windows server
https://developer.valvesoftware.com/wiki/SteamCMD
2. Unzip SteamCMD in to the folder of your windows server
For example: C:\steamCMD\steamCMD.exe
3. Run steamCMD.exe
4. Write next commands:
force_install_dir “Directory of the install, for example C:/PzServer”
login anonymous
app_update 380870 -beta b41multiplayer validate
// This will Install the server
quit
Open ports.
1. Open windows firewall.
2. Go to advanced settings.
3. Choose inbound rules.
4. Add rules for these ports:
2. Go to advanced settings.
3. Choose inbound rules.
4. Add rules for these ports:
UDP: 16261, 8766, 8767[/b]
If you don’t know how to do it you can check the video in the end (last paragraph of this guide)
Configure amount of RAM for your PZ server.
1. Open dedicated server folder
C:\SteamCMD\steamapps\common\Project Zomboid Dedicated Server
2. Open StartServer64.bat in text editor
3. Change next parameters:
Delete the -xms paremeter
Change the -Xmx to however much RAM you need for your server
Example: -Xmx6G
Recommend amount of RAM: 3-4Gb as a start + 100-200Mb per player
So if you want play in team of 10 players, need (4 + 0.2*10)=6Gb of RAM
4. Save and close this file.
Configure PZ server settings.
1.To have the Zomboid folder appear (where the settings will be stored) – you need to run server by running the StartServer64.bat file
2. Wait until you see “Enter new administrator password” in the Console.
3. Write and confirm your admin password.
Later you will be able to connect to the server by logging into the “admin” username and using this password
IMPORTANT – Dont lose this password!
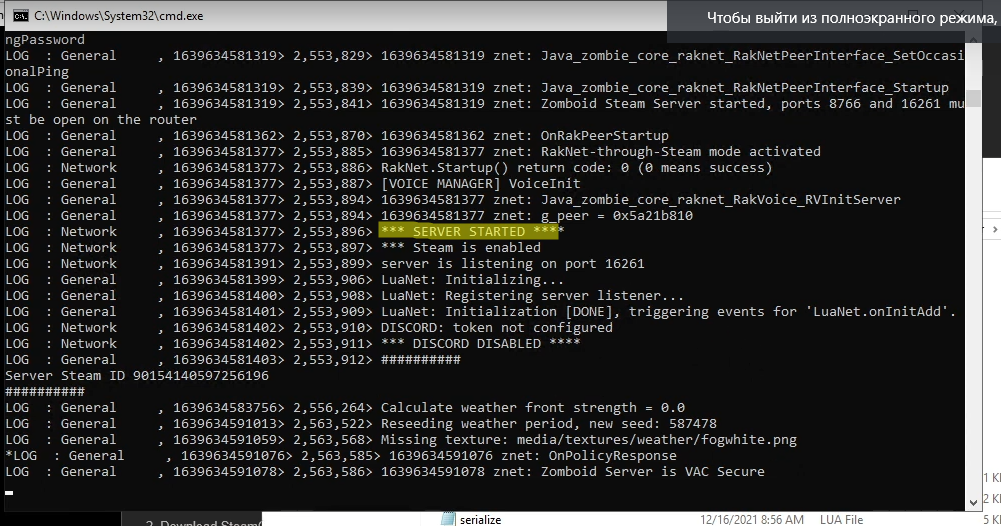
4. Now wait until you see the following text. (see image)

5. Close console (server will be terminated)
6. Open C:\Users\YourPCUsername\Zomboid\Server folder.
7. Here you can change the server setting files. Configure server the way you want.
Configure server guide
2. Wait until you see “Enter new administrator password” in the Console.
3. Write and confirm your admin password.
Later you will be able to connect to the server by logging into the “admin” username and using this password
IMPORTANT – Dont lose this password!
4. Now wait until you see the following text. (see image)

5. Close console (server will be terminated)
6. Open C:\Users\YourPCUsername\Zomboid\Server folder.
7. Here you can change the server setting files. Configure server the way you want.
Configure server guide
Launch the server.
– Run StartServer64.bat
– Wait for server to launch.

– Done! Your PZ server up!
Don’t close console! (this will shutdown server)
You can close your RDP program – server will be still running.
– Wait for server to launch.

– Done! Your PZ server up!
Don’t close console! (this will shutdown server)
You can close your RDP program – server will be still running.
Connect to PZ server from your PC.
1. Start Project Zomboid
2. From the main menu, click Join, then fill out your server info on the right side of the screen.
2. From the main menu, click Join, then fill out your server info on the right side of the screen.
- Server name: Your Server name.
- IP: The IP of your rented server.
- Local IP: Skip here.
- Port: 16261 (Is a default port, no change)
- Server password: Server password (If you will be using one)
- Description: Use a description if you want for your server, this will only show up for you.
- Account Username: Write your nickname that you want to use on the server.
- Account Password: Write your password that you want to use on the server.
To log in as admin write ‘admin’ in account name and insert password for admin account that you wrote when server first started.
3. Click “Save”, now the server should show up in your Favorites tab
4. Connect to server.
5. Enjoy!
Video
That’s all we are sharing today in Project Zomboid How to Reset a Broken Character File without Affecting Other Players, if you have anything to add, please feel free to leave a comment below, you can also read the original article here, all the credits goes to the original author Aiteron, Spiffo and bread
Related Posts:
- Project Zomboid Windows Dedicated Server Guide with Mods!
- Project Zomboid How to Fix Connection Errors
- Project Zomboid How to Reset a Broken Character File without Affecting Other Players
- Project Zomboid How to Fix Workshop item version different than server’s (Updated)
