For Prodeus players. this is a basic information about the level editor. I will update more along the way as I am learning along. Let’s check it out.
Introduction
Hello!
While I’m learning the ropes about the level editor, it seems like a good idea to gather that information and turn it into a guide. There are some tutorials on Youtube but sometimes it’s easier to just read. That’s where this guide is for. It will not be complete at first, but will get updated along the way. English is not my native language, so there may be any grammatical errors.
*Note: This guide is nowhere near completion, I will add stuff from time to time whenever I want. I hope you already got some use for it. Thank you. Feel free to message me for contribution!
Basic Controls + Hotkeys
Hold Right Mouse Button to look around. And use most of the controls.
W = Camera Forward
A = Camera Left
S = Camera Back
D = Camera Right
Q = Camera Down
E = Camera Up
Shift = Move Camera Faster in a direction.
Scroll Wheel = Zoom in or out.
ESC = Deselect Current Objects
Ctrl + S = Save
Ctrl + Alt + S = Save As
Ctrl + C = Copy Selected Object
Ctrl + D = Duplicate Selected Object
Ctrl + V = Paste Copied Object
[ = Grid Down
] = Grid Up
Caps + 1 = Pistol
Caps + 2 = Shotgun
Caps + 3 = Minigun
Caps + 4 = Rocket Launcher
Caps + E = Mover
Caps + R = Relay
Caps + S = Splat
Caps + D = Toggle
Caps + F = Light
Caps + T = Trigger
Caps + B = Stairs
Note: This is copied straight from the official Discord.
Noclip = Ctrl + N
Disable AI = Ctrl + i
Give Health = Crtl+”
Give Armor = Crtl + ;
Give Ammo = Crtl + L
NoClip = Ctrl + N
Ignore Player = Ctrl + I
Toggle Nav Mesh Vis Ctrl + ,
Toggle Static Nav Mesh Vis = Ctrl + .
Rebuild Static Nav Mesh = Ctrl + /
Back To Editor = Ctrl + E
Gizmo Collision Toggle = Hold Ctrl (allows you to select things through the Gizmo)
*Note: This guide is nowhere near completion, I will add stuff from time to time whenever I want. I hope you already got some use for it. Thank you. Feel free to message me for contribution!
Icons
This section of the guide will explain them one by one.*Note: We use a brush, but I will call it an object in this guide.
![]() This is the first set of icons on the left.
This is the first set of icons on the left.
These are very important and you’ll use them a lot.
First icon is the select function. It is used for selecting a whole brush or object.
(Hotkey: Shift + Q)
The second icon is the move function. It lets you move the object along the grid. Drag using the mouse on the arrows to move the object.(Hotkey: W)
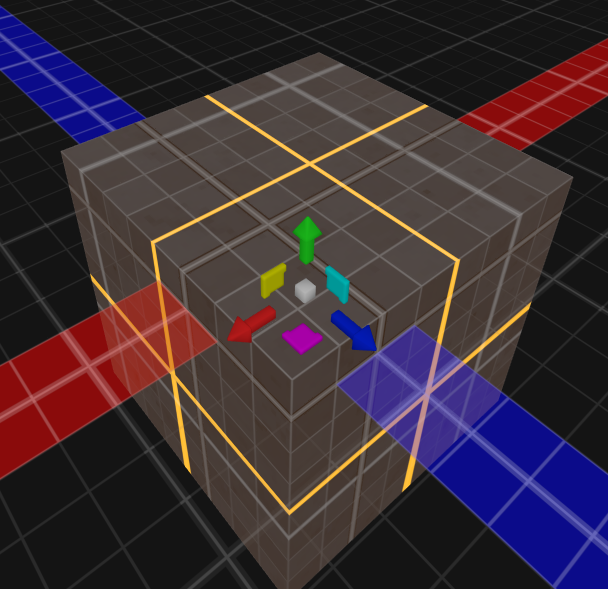
The third icon is the rotate function.It lets you rotate the object around it’s axis. Rotate using the curved arrows.
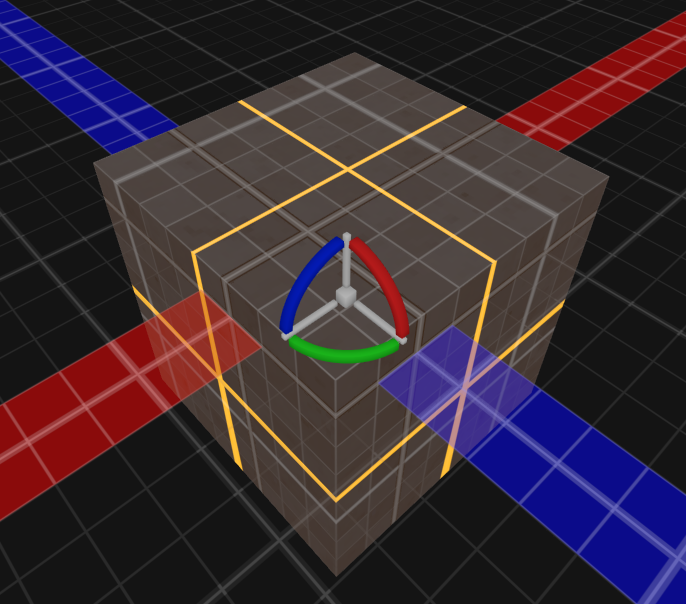
The fourth icon is the scale function. It lets you expand the object using one of the four arrows pointing outward from the object.
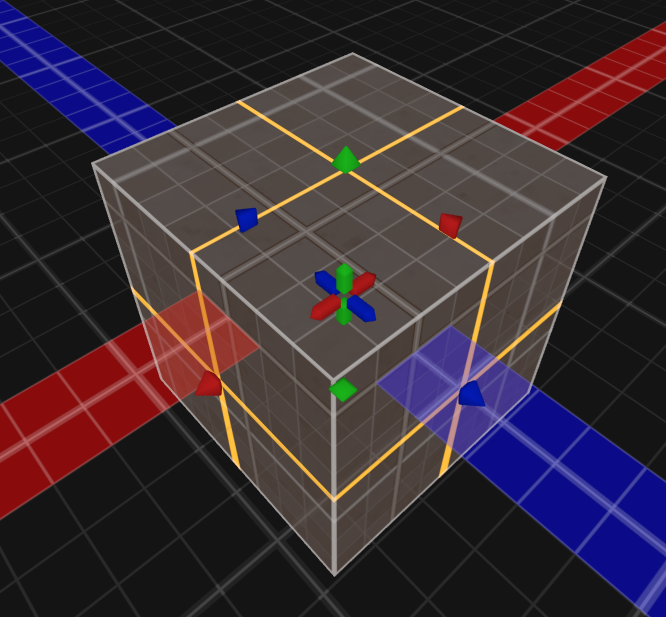
![]() This set of icons is used for selecting different faces, edges or vertexes.
This set of icons is used for selecting different faces, edges or vertexes.
Also very important, and some take a little while to get used to.
For example, you cannot select a face directly. You will have to select first and then choose a face.
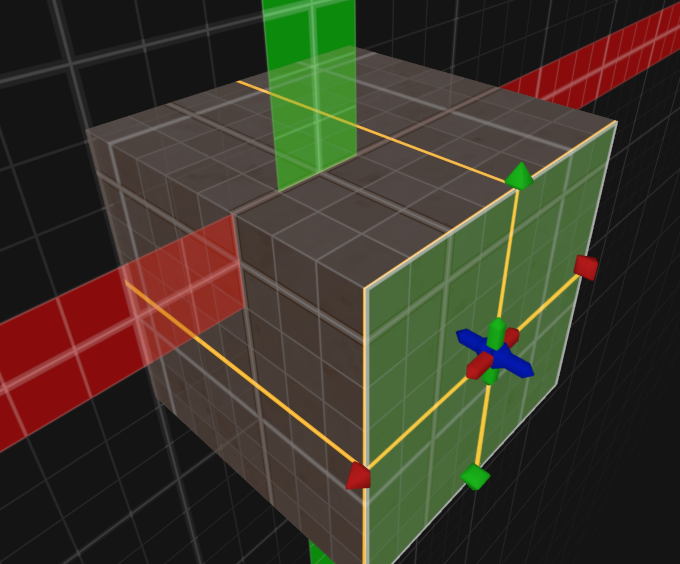 A face is one side of an object. (Brush) You will use this tool a lot for a lot of things, that we will get on later.
The first icon is the standard object select.
The second icon is the face select.
Simply click on an object and click on the icon. Now select one side (or more with CTRL + Click) and you now have one side of the object selected.
Tip: Press ESC to quickly deselect everything.
The third icon is used for selecting an edge. Click on the icon when you have selected an object. When you’ve done that, you can now select an edge, and use the different move buttons I explained earlier to move the edge.
The fourth icon selects a vertex. Look closely while you select this function, you will see small boxes around each corner of your object. You can select them individually and drag them. You can play around with it to get a feeling for it.
![]() A lot of stuff but not very difficult to understand.
A lot of stuff but not very difficult to understand.


![]() These next symbols are used for quick mirroring and rotating of the object.
These next symbols are used for quick mirroring and rotating of the object.
![]() —–
—–
![]() These symbols are useful for quick coloring and texturing your faces. Say you have a wall with a texture and color you want to use, on a different wall. Click on the pencil icon and click on the desired face. After that click on one of the two paint bucket icons. (The half bucket is for faces, the full bucket is for whole objects.)
These symbols are useful for quick coloring and texturing your faces. Say you have a wall with a texture and color you want to use, on a different wall. Click on the pencil icon and click on the desired face. After that click on one of the two paint bucket icons. (The half bucket is for faces, the full bucket is for whole objects.)
*Note: This guide is nowhere near completion, I will add stuff from time to time whenever I want. I hope you already got some use for it. Thank you. Feel free to message me for contribution!
Menu’s
So now you know what the symbols mean and do, it’s time to explain the menu’s.
I will explain them expanded one by one.
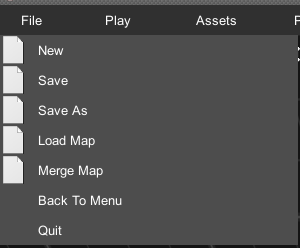
New
Opens new map.
Save
Save current map.
Save As
Save current map as “name”.
Load Map
Loads a different map.
Merge Map
Merges two maps together.
Back To Menu
Back to the game menu screen.
Quit
Quits to desktop.
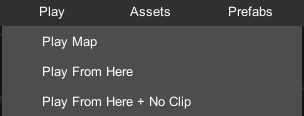
Play Map
Starts playing the map at the current player start point.
Play From Here
Starts playing the map from current view.
Play From Here + Noclip
Starts playing the map from current view with noclip on. (Flying and moving through walls).
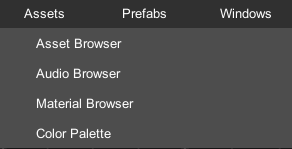
Asset Browser
Opens the asset browser. Where you can find all stuff for your map. Including entities, particles, monsters, player start points, triggers, movers and more. In another section of the guide this will be explained more.
Audio Browser
Opens up the audio browser. From here you can selects different sounds for your map to use with the “Sound” function.
Material Browser
Your texture browser. Upper screen is textures available and lower screen is the textures you “downloaded” to your map. The devs explain this as a sort of shopping cart in one of the videos.
Color Palette
The color palette is used for coloring different materials (textures) and other objects.
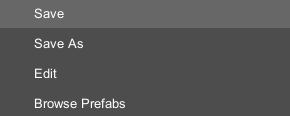
Prefabs (or props) are certain objects already made for you to use. You can make your own prefabs in a blank map, or you could download them from other players in the discord. As we speak there isn’t such a function in game to download any. There are some standard prefabs already here when you open the editor for the first time, like doors and switches.
Save
Saves the current made prefab.
Save As
Save as a different name.
Edit
Edits the current selected prefab.
Browse Prefabs
Browse different prefabs. Here is the menu where you can select different objects, like doors and switches.
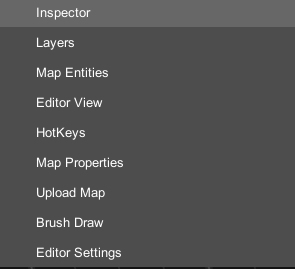
Inspector
Opens up the object inspector. Also can be brought up using double click on an object/face/edge or something else. Note that the object select and face/edge/vertex select gives a different inspector window.
Layers
Lets you hide certain objects or whole rooms for that matter. Useful when creating stuff where things overlap. (Like many monsters in the same room with different triggers).
Map Entities
Lets you see the map entities if you are looking for one.
Editor View
Lets you toggle different stuff, like objects, showing you an ingame version of your map without playing it, grid down and up, and more.
HotKeys
Shows all the hotkeys in the editor with the ability to adjust them to your needs.
Map Properties
Lets you edit a snapshot for your map, description, tags, and more. Also the background music can be changed here.
Upload Map
Uploads your map to the Prodeus workshop.
Brush Draw
A sort of menu for different brush drawings, like cylinder cube and more.
Editor Settings
You can show and hide stuff in the editor here.
*Note: This guide is nowhere near completion, I will add stuff from time to time whenever I want. I hope you already got some use for it. Thank you. Feel free to message me for contribution!
Functions
A button function, lets the player interact with their specified key binding for interaction. (Default E)
Let’s the camera shake in game.

Let’s the player save their progress at the desired location.
Creating a Simple Room
So now we covered all of the basics, it’s time to make your first room! A simple one I rather say.
First off, open a new map if you didn’t have already.
If you have a blank map with nothing in it, it’s easier to go to Assets -> Asset Browser -> Brushes -> Brush_Cube. Drag and drop it into your blank map and tada! You have a simple box.
Begin with adjusting a larger shape for you to fit in with the Scale function. (Hotkey: R)
Drag the arrows until you have something like this:
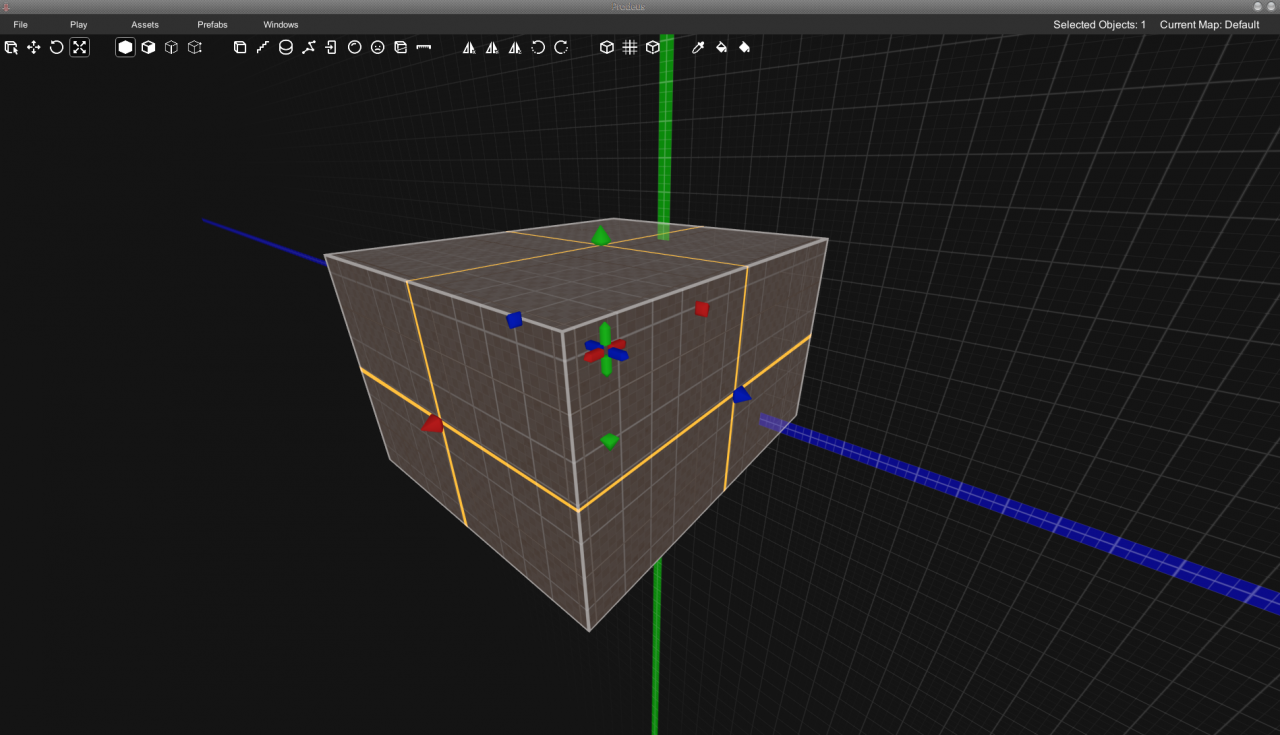
Now double click the object. You will get to see the Property Inspector.
(Alternatively you can click on Windows -> Property Inspector)
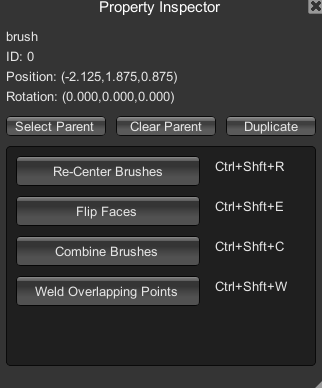
For now, click on “Flip Faces” and you will see magic happen. (Ctrl + Shift + E)
If done correctly, you will have your own indoor cube.
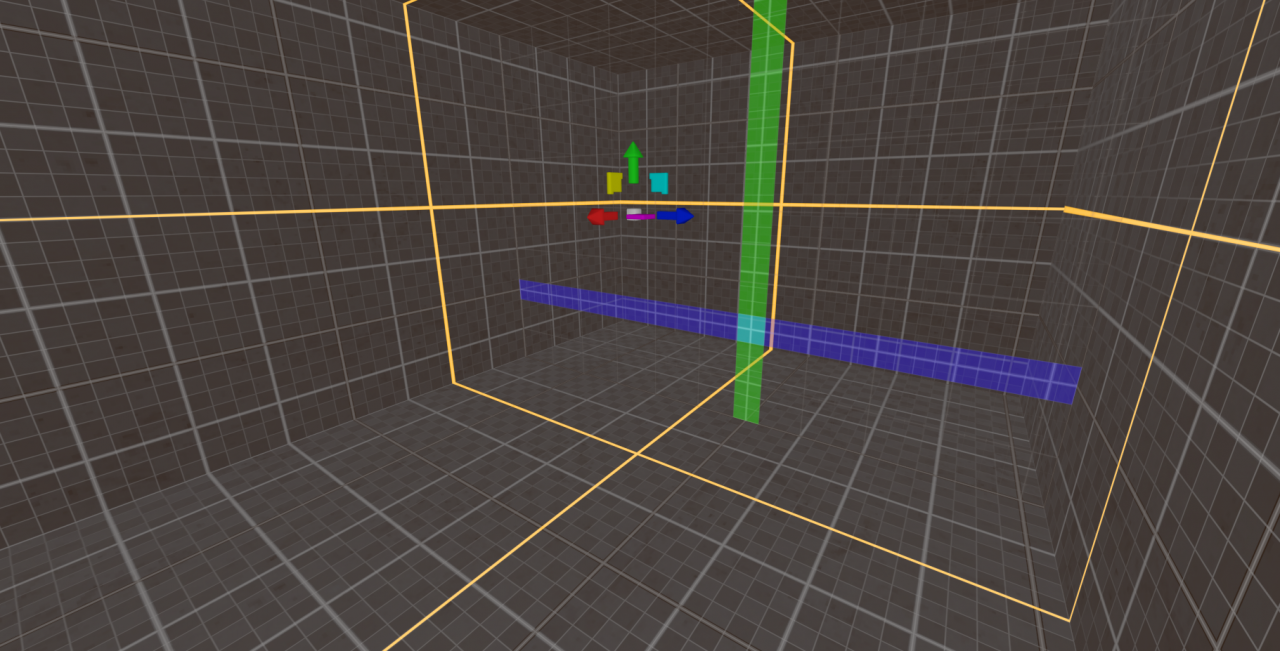
Why not try it out in-game with the “Play from here” button.
*Note: This guide is nowhere near completion, I will add stuff from time to time whenever I want. I hope you already got some use for it. Thank you. Feel free to message me for contribution!
Expanding rooms using the Extrude function
Once you know how the extrude function works, it makes your life so much easier expanding rooms, and adding on top of that.
Faces play an important role in this function.
Choose the face and the direction you want to expand to. If you double click the face, you will see the Property Inspector.
Somewhere in this menu, you will see the “Extrude Seperate” and “Extrude Same” functions.
Extrude Seperate means it creates a new brush.
Extrude Same means it will be attached to the same brush.
Once you selected one of the two, press it. Now the face will pop out larger. Move the face in the opposide direction and it will expand.
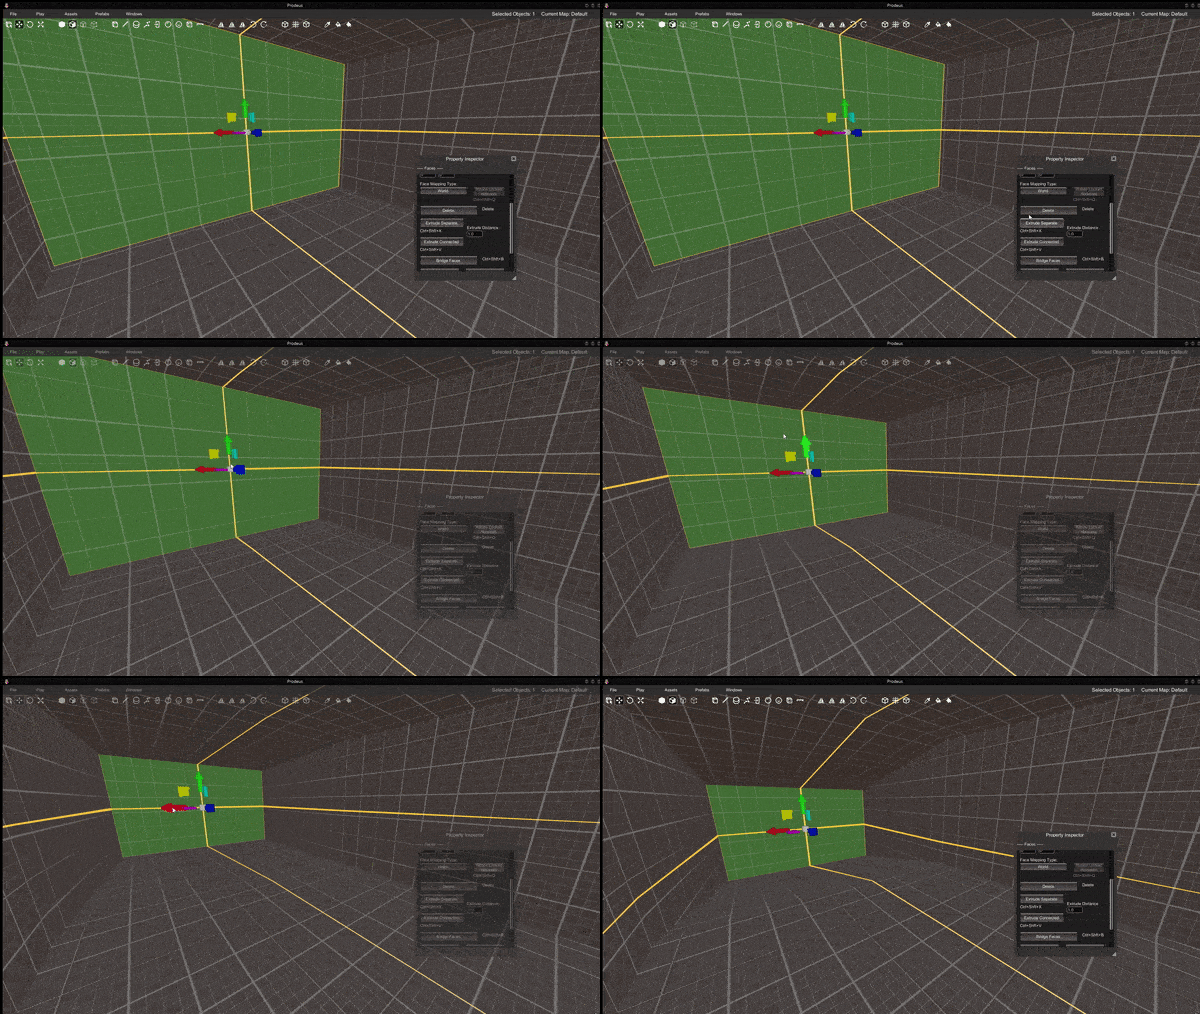
*Note: This guide is nowhere near completion, I will add stuff from time to time whenever I want. I hope you already got some use for it. Thank you. Feel free to message me for contribution!
Moving Your First Cube using the “Mover” function.
 This is the mover function. It will allow you to move any brush in a direction which you prefer.
Go to Assets -> Asset Browser -> Function -> Mover, and drag and drop the mover into the map.Double click the mover and this window will open up:
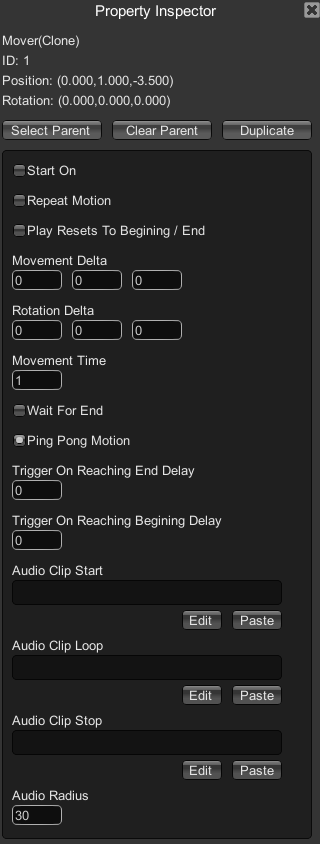
Set a desired value in “Movement Delta” and tick “Start On”.
Set movement time to a value you can actually see it moving. For example, use 5.
Now for the important part, you actually want to move the brush and not only the mover.
In this tutorial I will use a basic cube.
Select the brush you would like to move. Double click it, and press “Select Parent”.
You will notice a blue line moving to your cursor, click on the mover and now the brush will be linked to the mover. An example is given in the gif below.
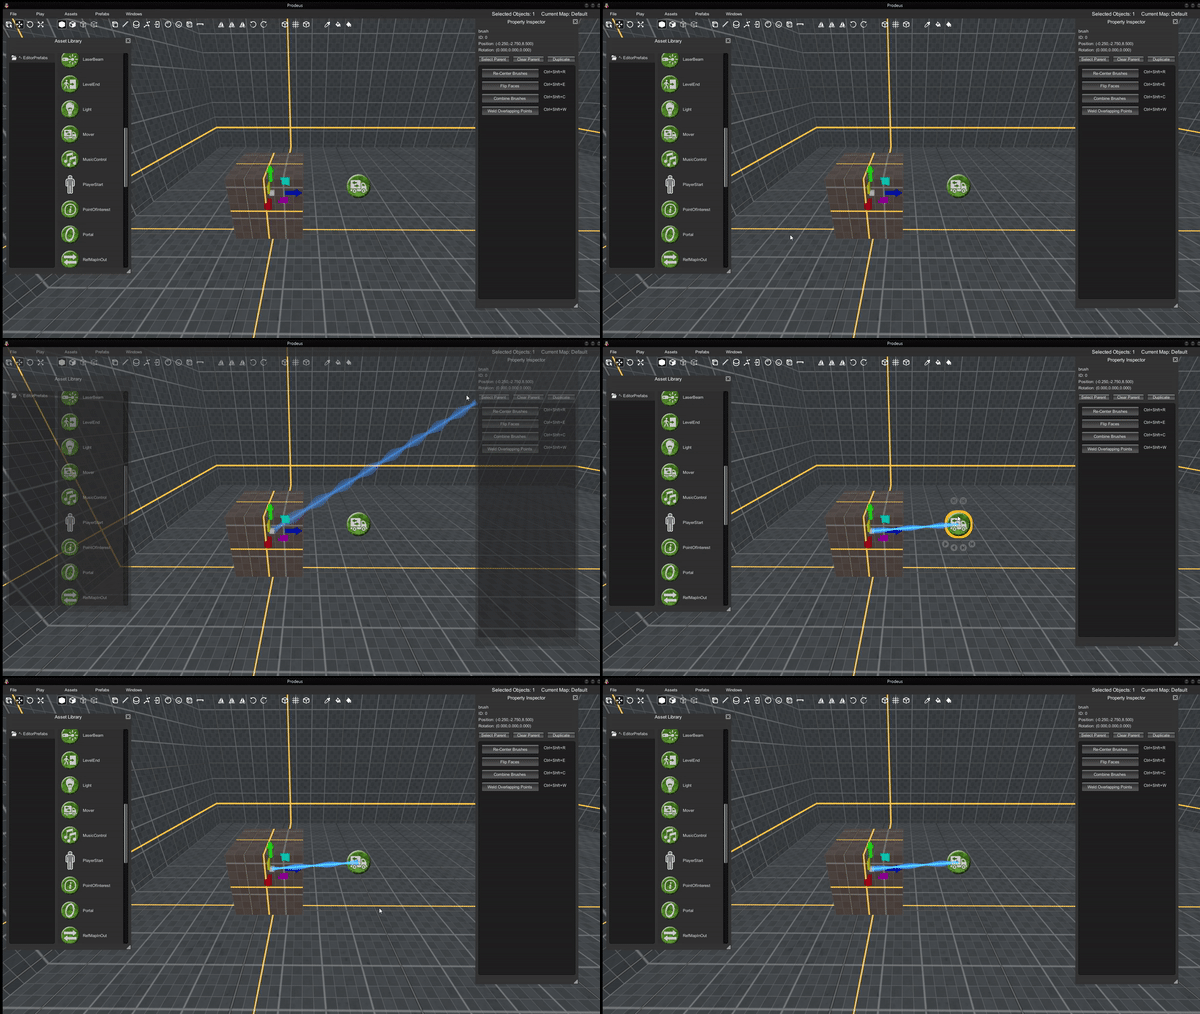
You are now ready to test the mover. You can set it to repeat its motion in the Mover settings. And play with the different settings.
These settings are explained in the “Function” section.
You can also attach multiple movers to a brush. Useful for if you want multiple movements at the same time. Parent the brush to the first mover, and parent that mover to the next mover. If you keep this pattern when you add movers, all movers will be attached to eachother.
*Note: This guide is nowhere near completion, I will add stuff from time to time whenever I want. I hope you already got some use for it. Thank you. Feel free to message me for contribution!
Triggers
 Triggers are very useful and you will be using them a lot. A trigger’s area can be modified and you can program them when walking through them.
For all the different inputs and outputs you can check the “Functions” section.In this tutorial I am going to explain the different uses of a trigger.
It is useful for;
- Spawning in enemies when player walks through.
- Making something move.
- Playing certain sounds.
- Using particle effects.
And the list goes on.
You can draw a trigger with the 
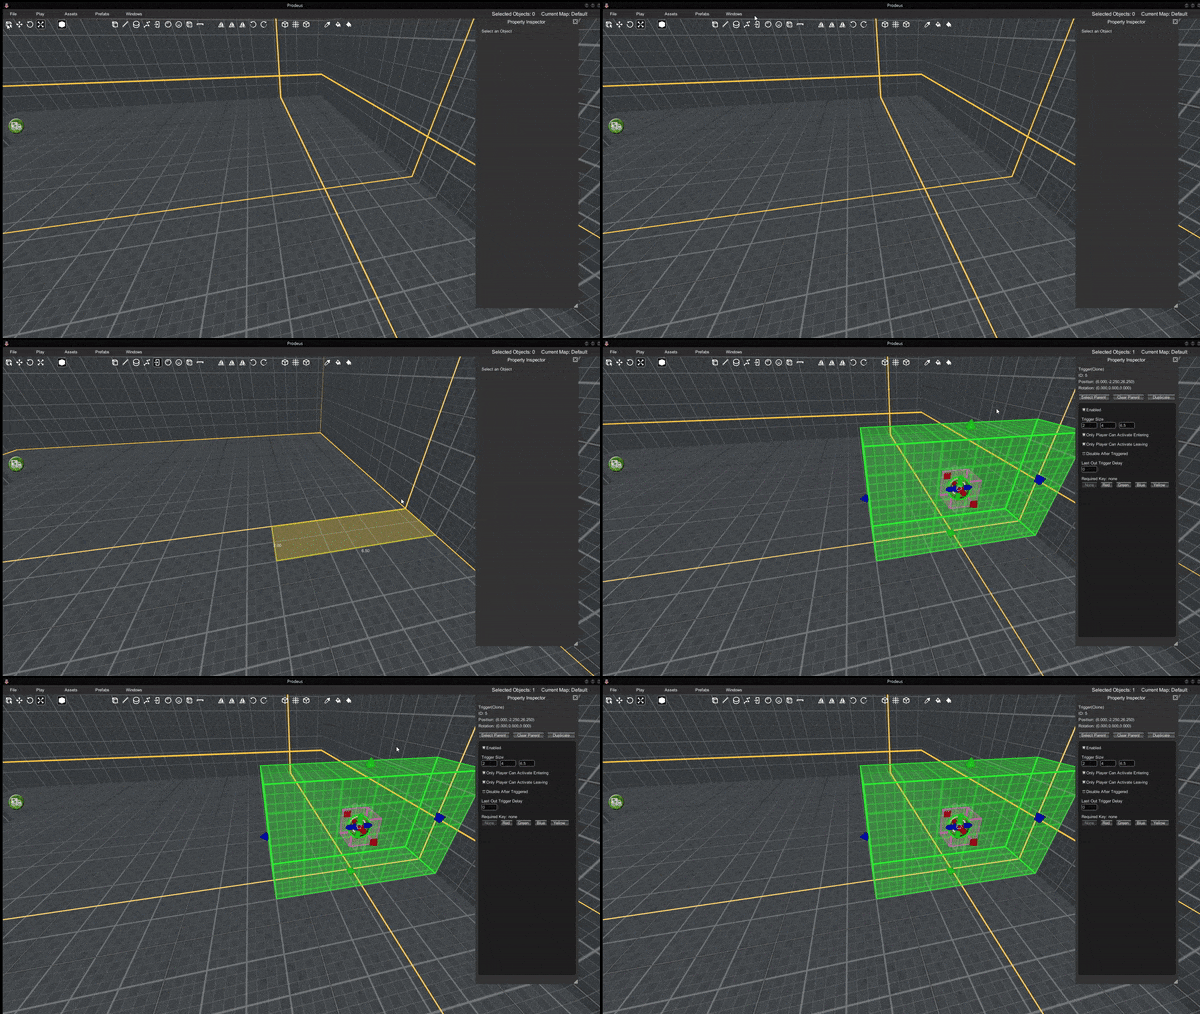
Test it out using a zombie with “Start On” disabled and “Use Spawn Effect” enabled.
Select the first input of the trigger and drag it to the Power function of the zombie.
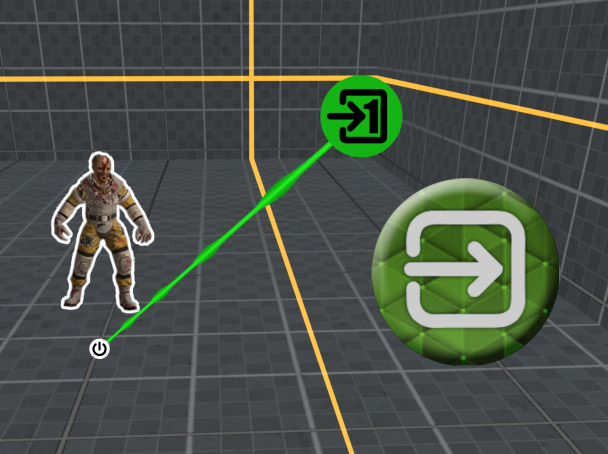
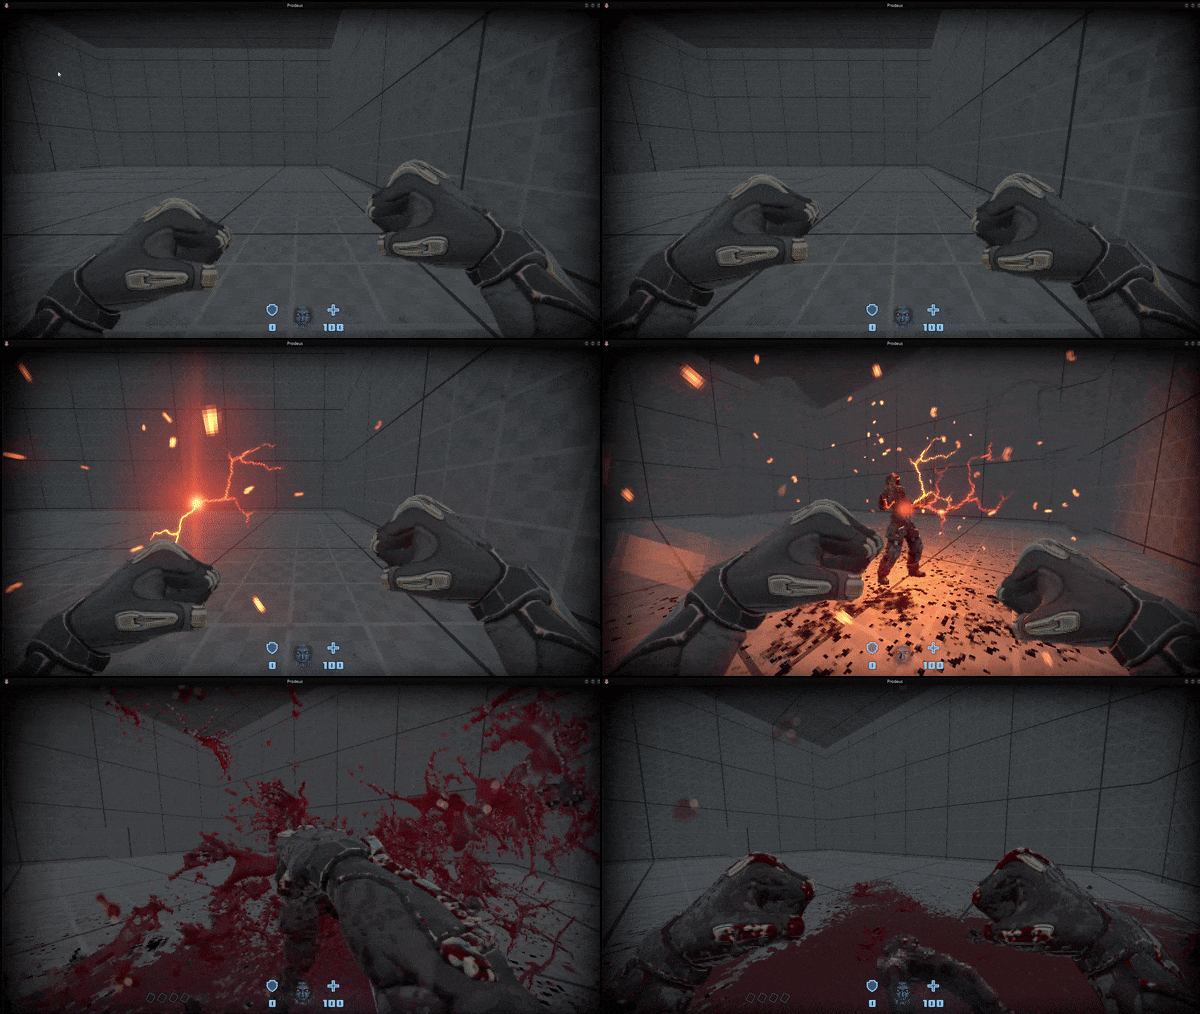
Now the zombie only spawns in when the player walks through the trigger area. Make sure you enable “Disable after triggered” if you only want the zombie to spawn in once. Otherwise everytime the player walks through the trigger, it will spawn in again.
Test it out in game and enjoy!
Relays
 Relays are powerful for very different things. You can trigger stuff in a specific order and activate after it has been triggered by another object, 1 or more times. There is more stuff, but I will explain the basics here.
Let’s say you have a number of enemies, 5 to be exact. You only want to trigger a door to open after the player kills 3 of them.
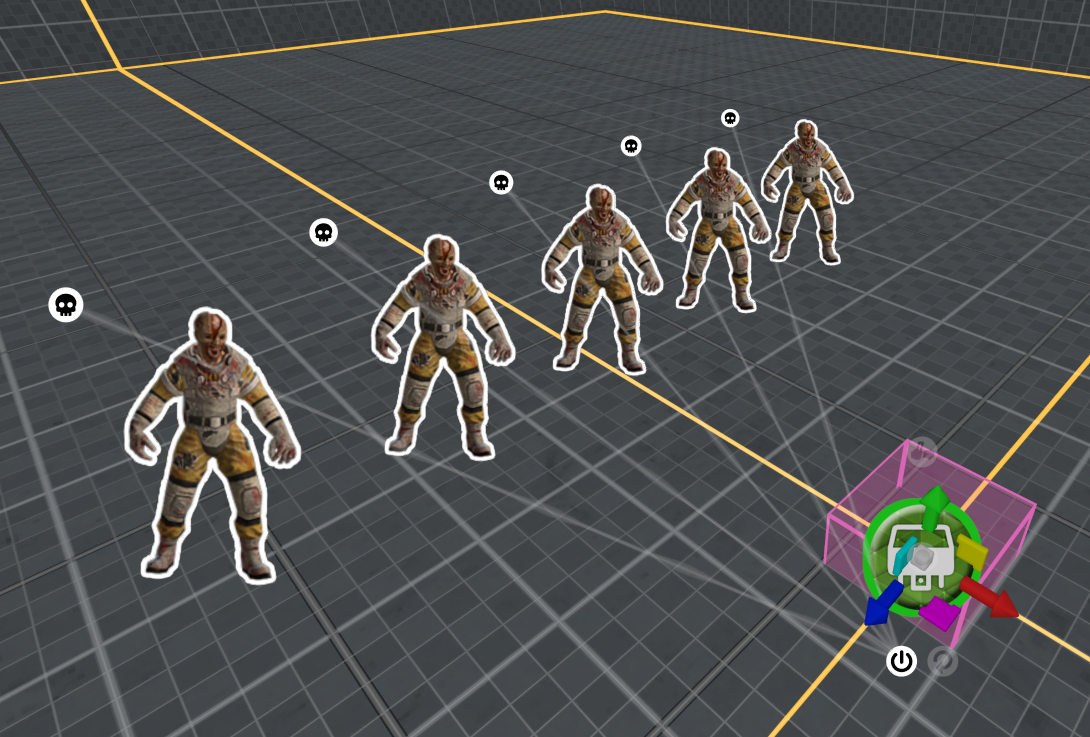
Connect all the “Skull” outputs to the input of the relay like the picture above.
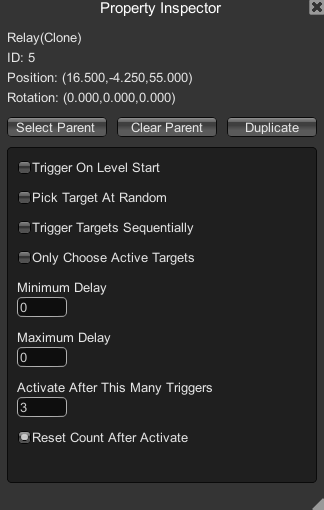
After this double click the relay, and set the value “Activate After This Many Triggers” to 3.
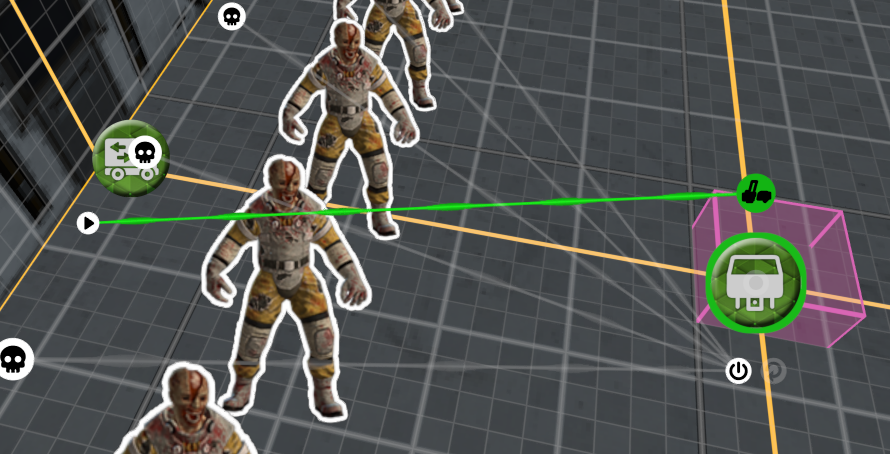
The relay is now set, all you have to do is linking it to something else.
In this tutorial we are going to attach it to a mover. And all you have to do for this is make a door with a mover function. Disable “Start On” on the mover and attach the output of the relay to the input from the mover.
The next step is to test it out!
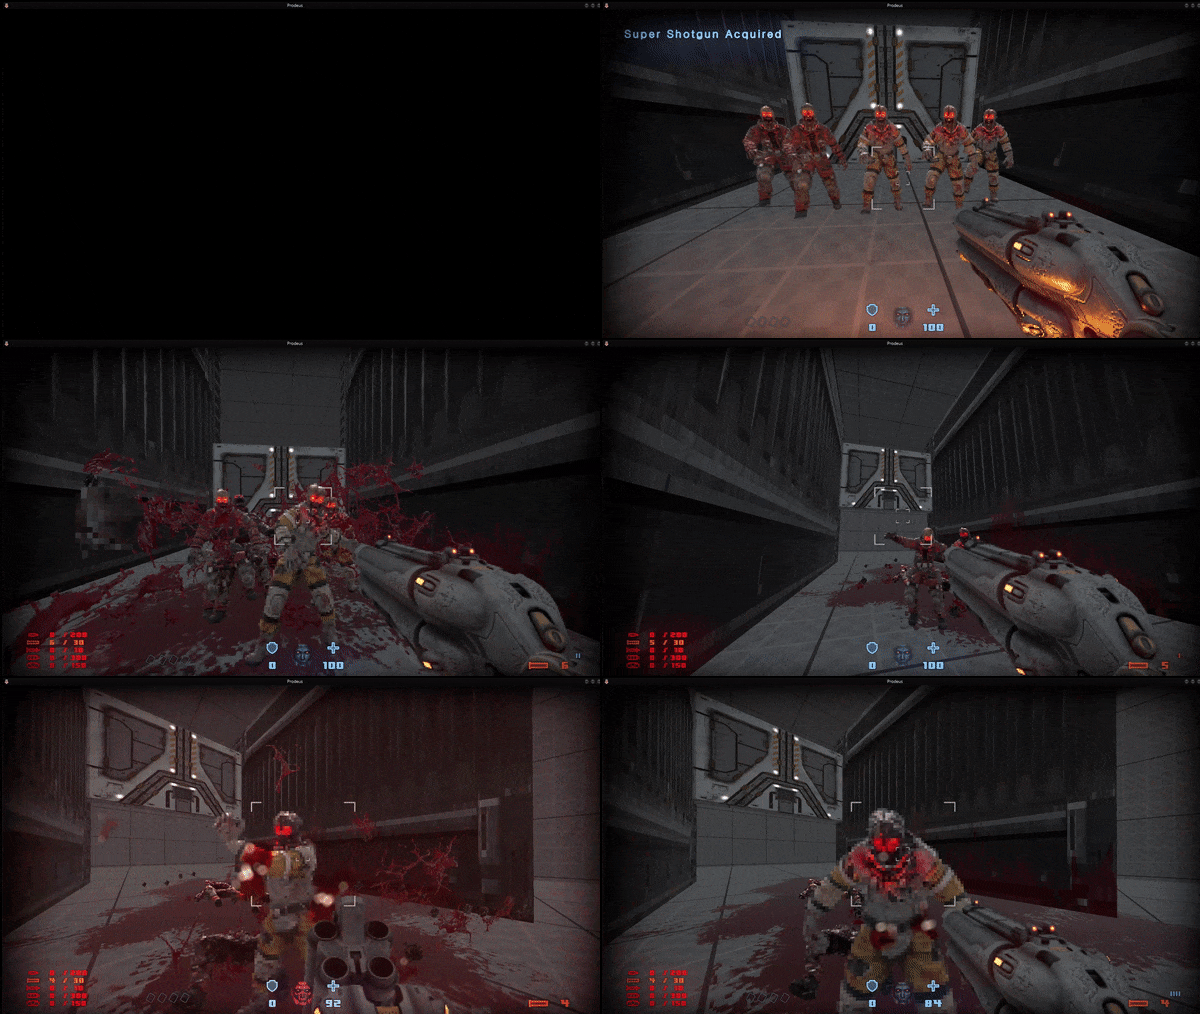
Note: If you use half or less the enemies, you can trigger the relay again. Disable “Reset Count After Activate” to let it stop after activating once.
This is just one of the examples what you can do with relays. You can trigger stuff the order you put them on, by ticking “Trigger Targets Sequentially” or let it “Pick Targets At Random”.
Environment Probe and Lightning
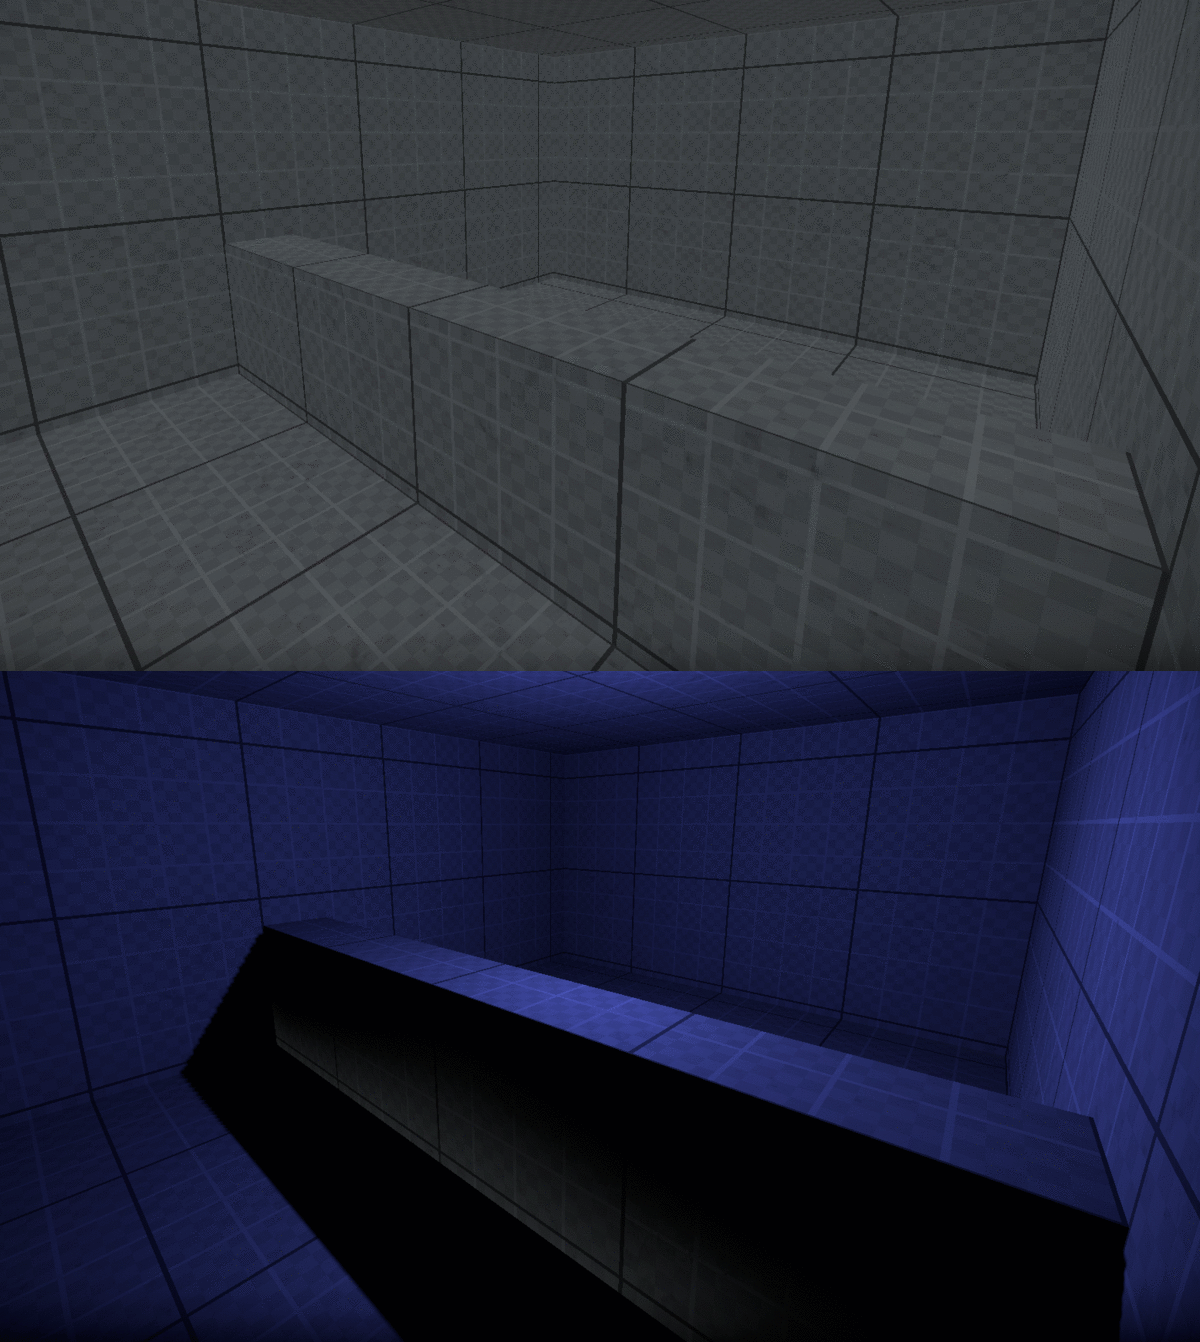
A map with good use of lights and environment probes can make it so much better looking!
To achieve this, you have to make an environment probe that surrounds the area.
See this “Environment Probe” as a sheet that covers your map. It will be entirely dark. Only with lights, you are able to make it brighter again.
Select the env probe from either the top panel or from the Asset Browser.
Place it in your desired room, and drag it until the room is fully covered with the env probe.
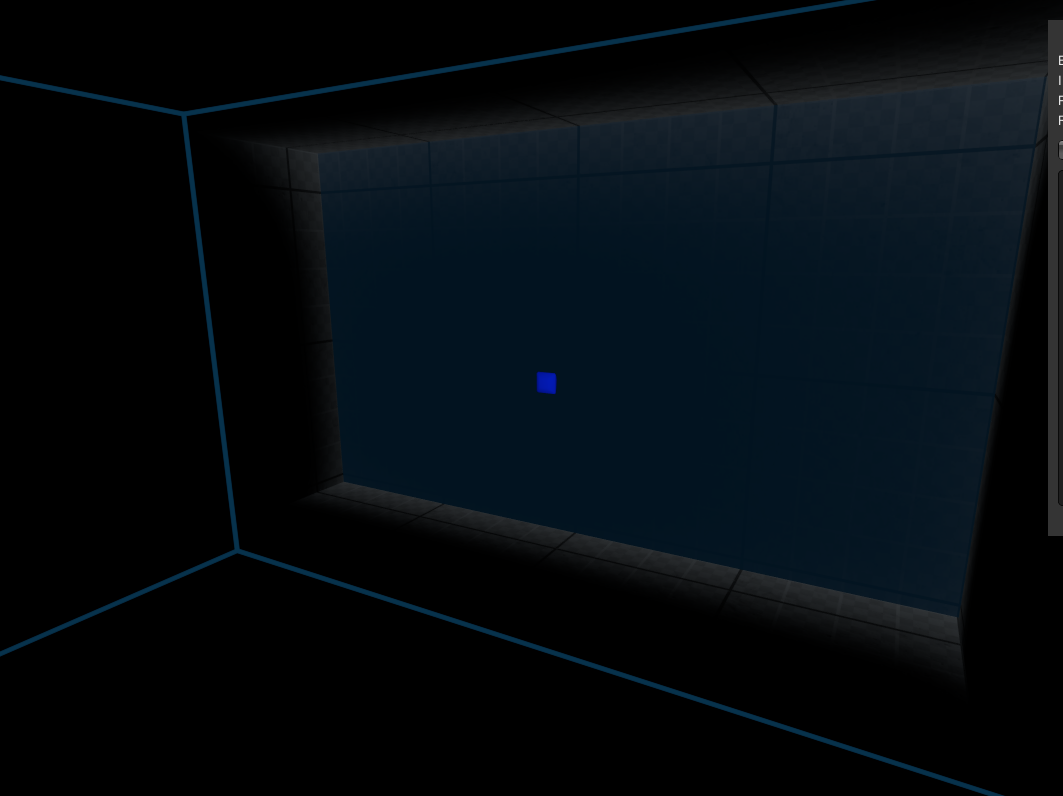
You have to drag it beyond your room a bit to prevent light coming through your walls.
Wrong:
Right:
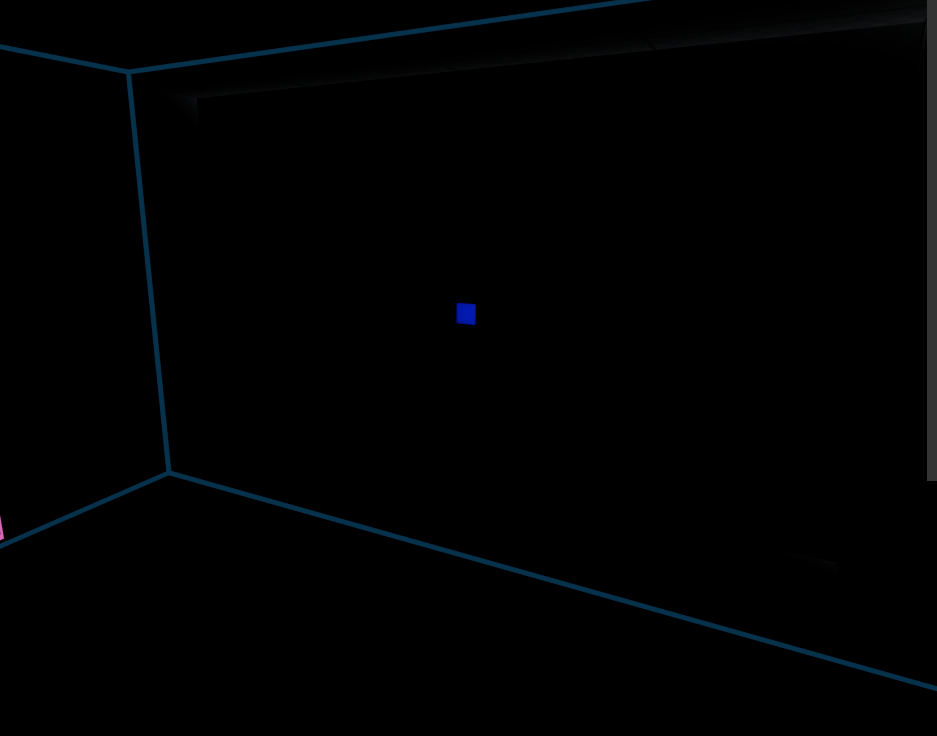
Now that your room is pitch black, it’s time to let it shine once more, but with lights instead.
Select the light function from the Asset Browser and drag and drop it into your room. It will brighten up a bit already. You can adjust the settings from the light, to make it cover your whole room, or use mulitple lights. We will use one light for now.
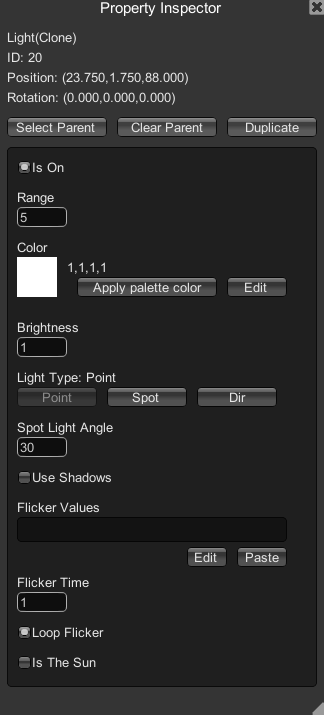
Play with the range and brightness to create a desired effect. Tick “Use Shadows” if you want that as well.
If you want it even more darker, you can double click the Env Probe and change its Brightness to 0.
Creating an Invisible Wall
Creating an Invisible wall is easy to do and is done in 10 seconds.
Go to the Material Browser and select the EnergyField01_Gen material.
After that, open the Color Picker and set both normal color and emissive color to black.
Useful Tips
Use ESC to quickly deselect everything.
Use the “[” and “]” keys to make the grid smaller or bigger.
If something seems off grid, use CTRL + Shift + G (Deep Snap To Grid) or Ctrl + G (Snap To Grid) to align it to the grid again.
Try to learn yourself the duplicate, and different select modes hotkeys.
Duplicate = Ctrl + D and 1, 2, 3, 4 are for the different select modes.
It will make your life much easier!
Don’t forget the “Disable after triggered” while using triggers. I often play maps where you can spawn enemies in everytime you walk through an area.
*Note: This guide is nowhere near completion, I will add stuff from time to time whenever I want. I hope you already got some use for it. Thank you. Feel free to message me for contribution!
External Links
Note: This is copied straight from the official discord from one of the devs.
I highly recommend joining the official discord. You will get most help there, and can share your maps or just talk about other stuff.
Official discord link: https://discord.gg/GY3gCQU
That’s all we are sharing today in Prodeus Level Editor Guide, if you have anything to addm please feel free to leave a comment below, and we’ll see you soon.
Credit to Wiͥldͩrͬiͥdͩeͤ300
Related Posts:
- Prodeus How to Increase FPS for Low-End PC
- Prodeus Save Files Location and How to Delete It
- Prodeus 100% Achievement Guide


Thank You!