For Pathfinder: Wrath of the Righteous players, this guide provides theexplanation of Enigma Puzzle Solutions, let’s check it out.
Introduction
I’m going to assume here that you, the prospective guide reader, have already found all four of Nenio’s masks. In case you haven’t, they are located in the following locations:
1. Heart of Mystery. You don’t have to solve any puzzles to find it, it’s inside the cave but right outside the puzzle area.
2. Ivory Sanctum: In the central room with the Baphomet statue. Use the code 3654 to spawn the chest containing the mask.
3. Pulura’s Fall: Non-Angel paths have to wait until chapter 5. Go to Pulura’s Fall, and in the temple, solve the constellation puzzle by clicking on the tiles in the following order: Newlyweds, Daughter, Patriarch, Pack, Follower.
4. Ineluctable Prison: Cannot be done until chapter 5 even though Demon goes here in chapter 3. Use the code 4365 to unlock the chest containing the mask (which is not in the room with the Linnorm or near the worm).
There are, essentially, only four puzzles, just with various iterations. They are the arrow puzzle, the tic-tac-toe puzzle, the memory puzzle, and the final puzzle.
Puzzle 1: Tic Tac Toe
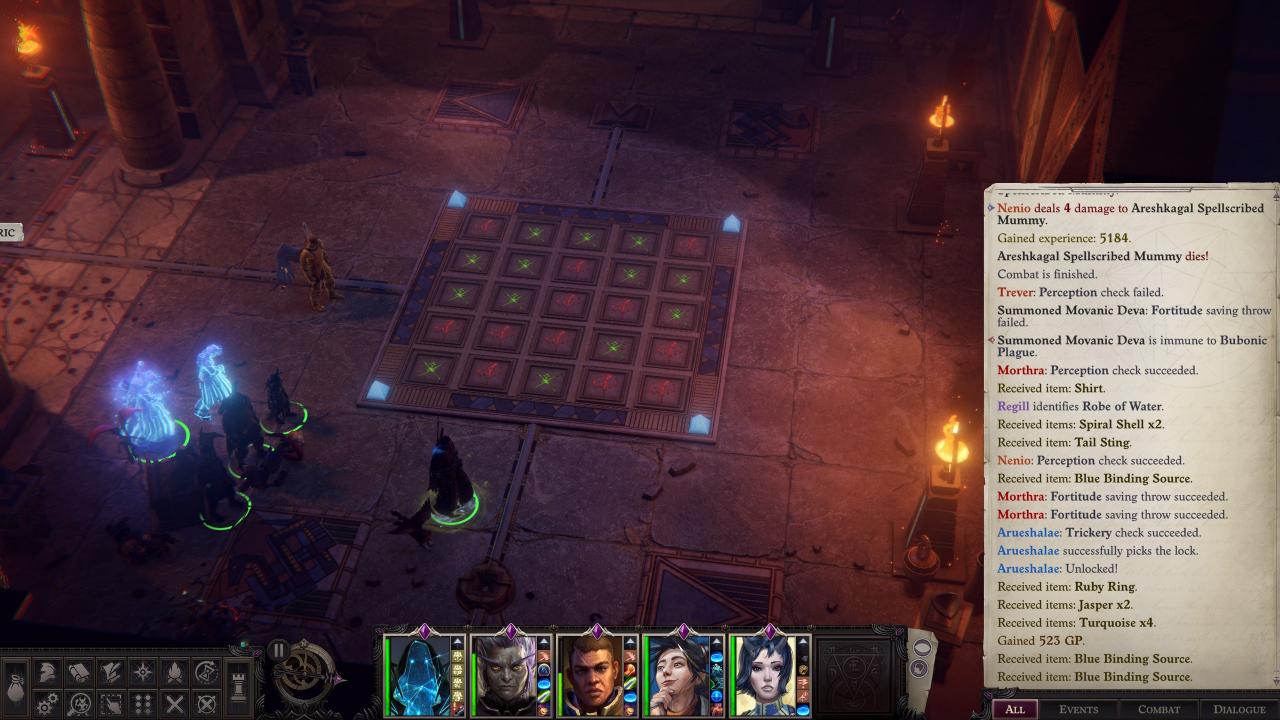
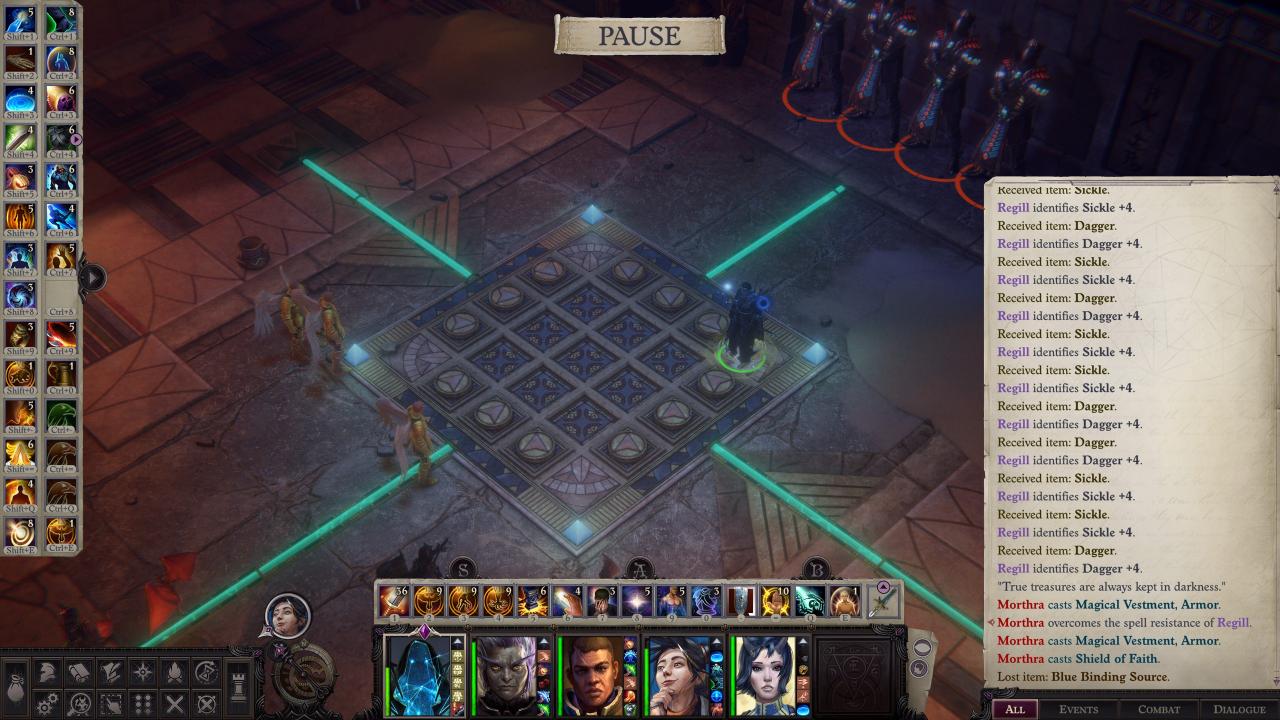
But to simplify it, it’s tic-tac-toe, and looks like this:
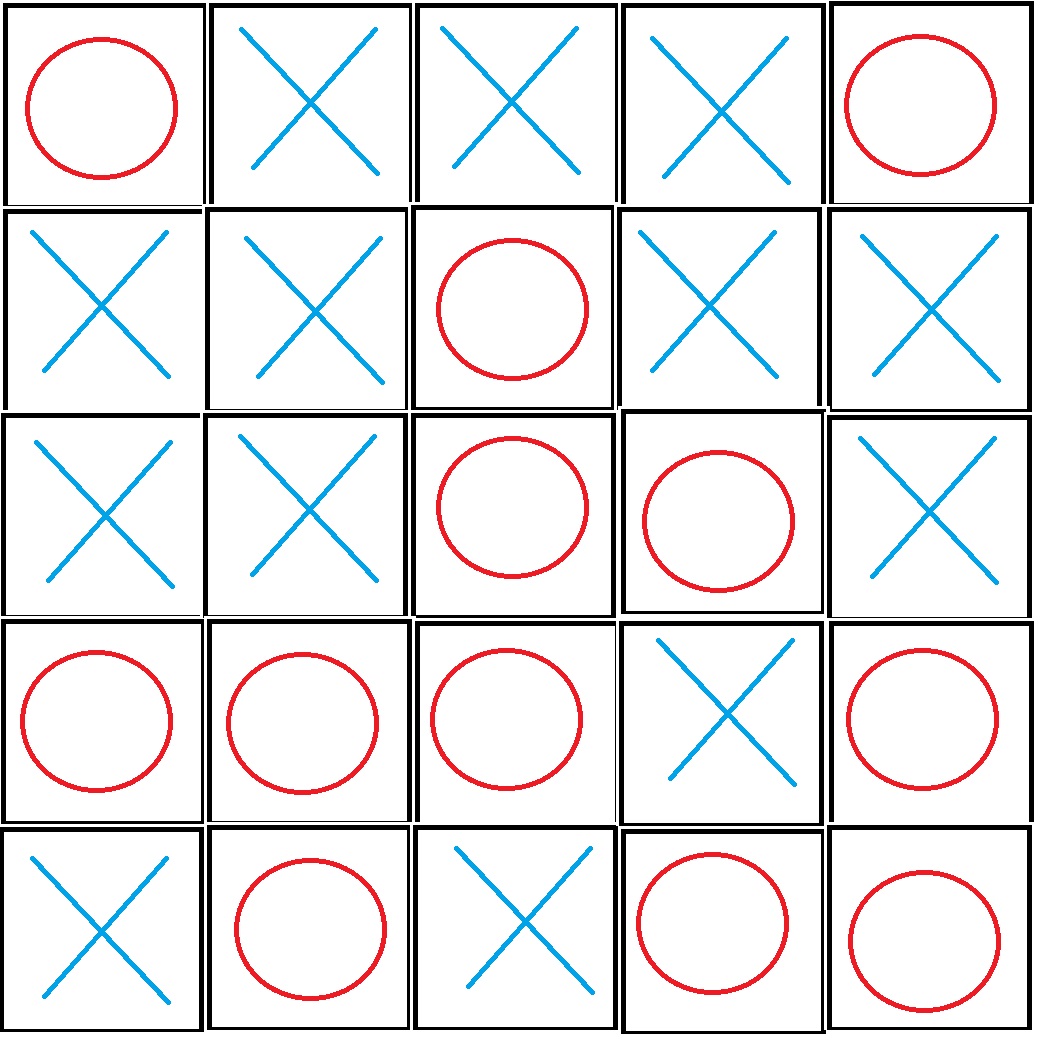
Note that before you do this puzzle, you have to go through the pyramid depths to pick up blue crystals to power the central stone, in addition to having two extra crystals.
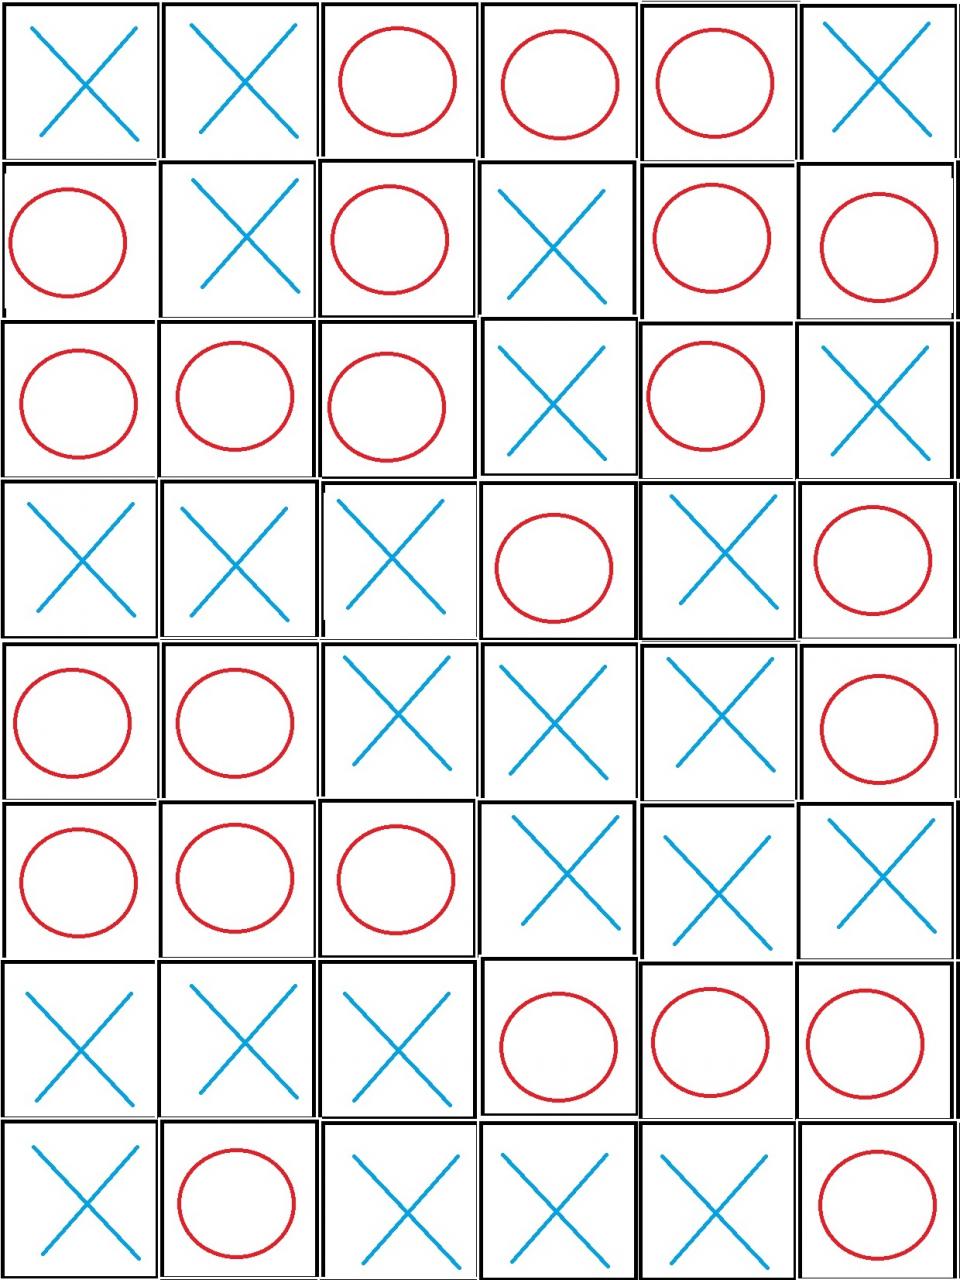
The second such puzzle appears later, and is essentially the same puzzle, albeit with a larger grid. Again, the implemented solution is this:
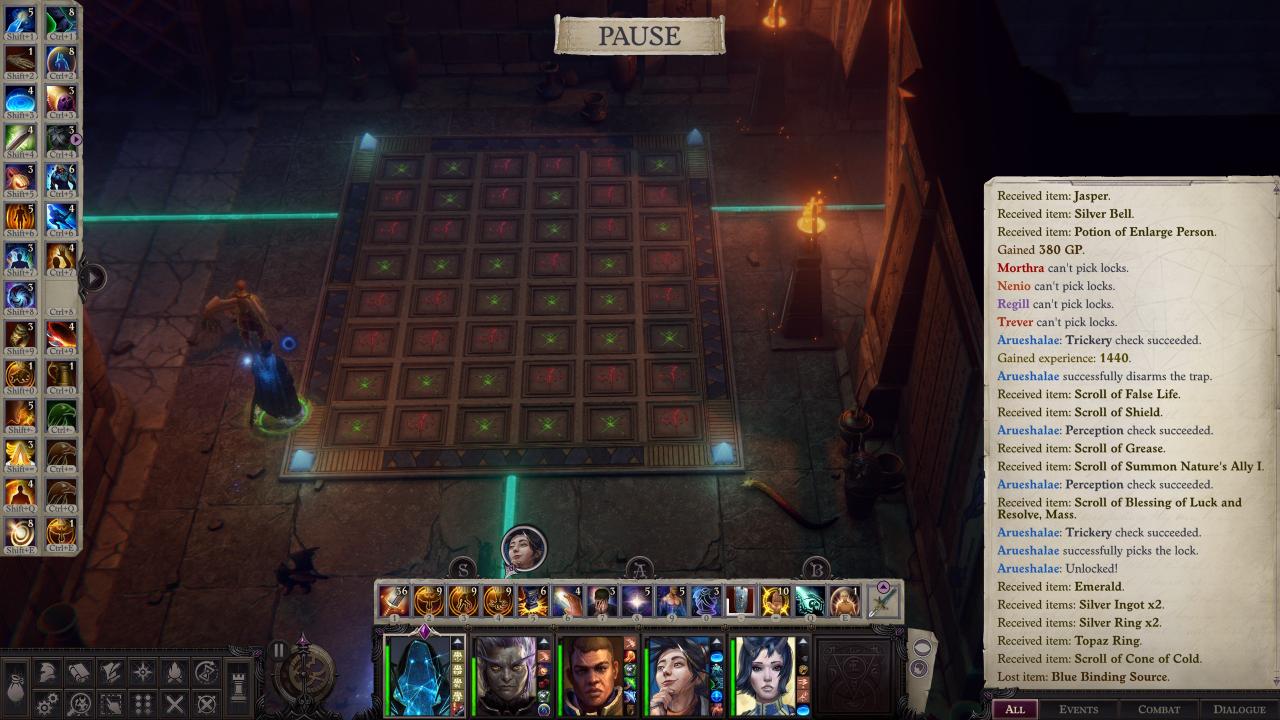
Which in its simplified form looks like this:
Puzzle 2: Arrows
The first arrow puzzle is as follows:
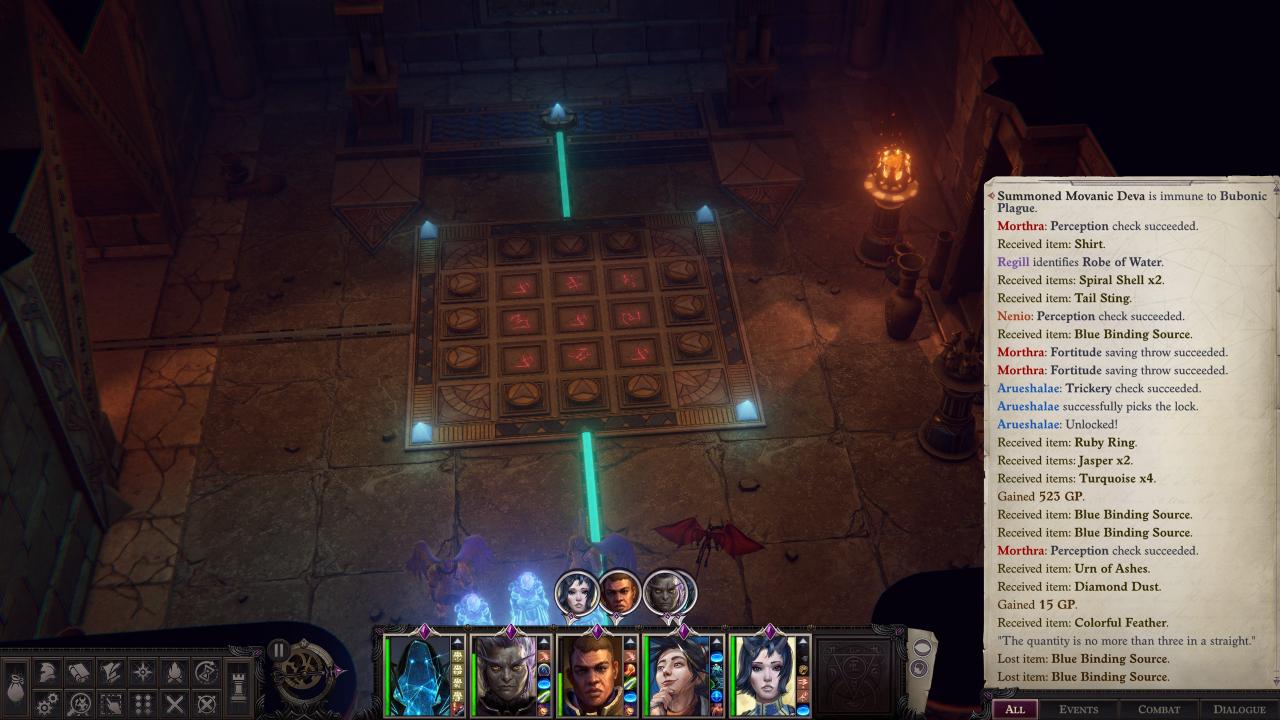
The numbers that each symbol correspond to are:
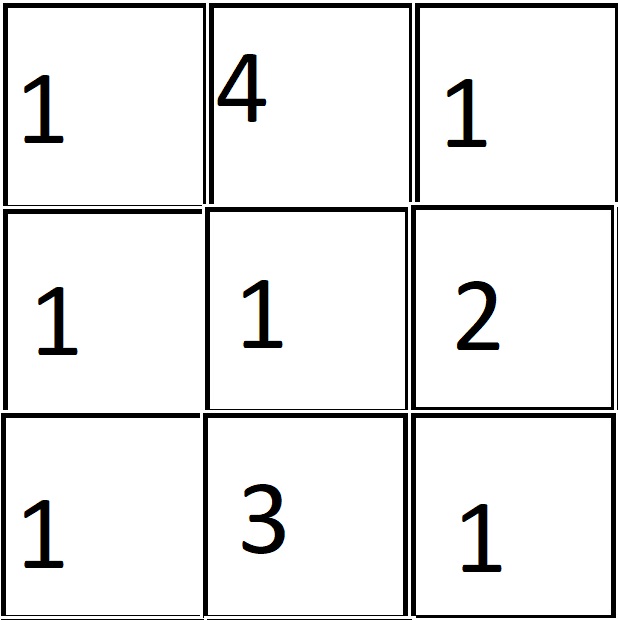
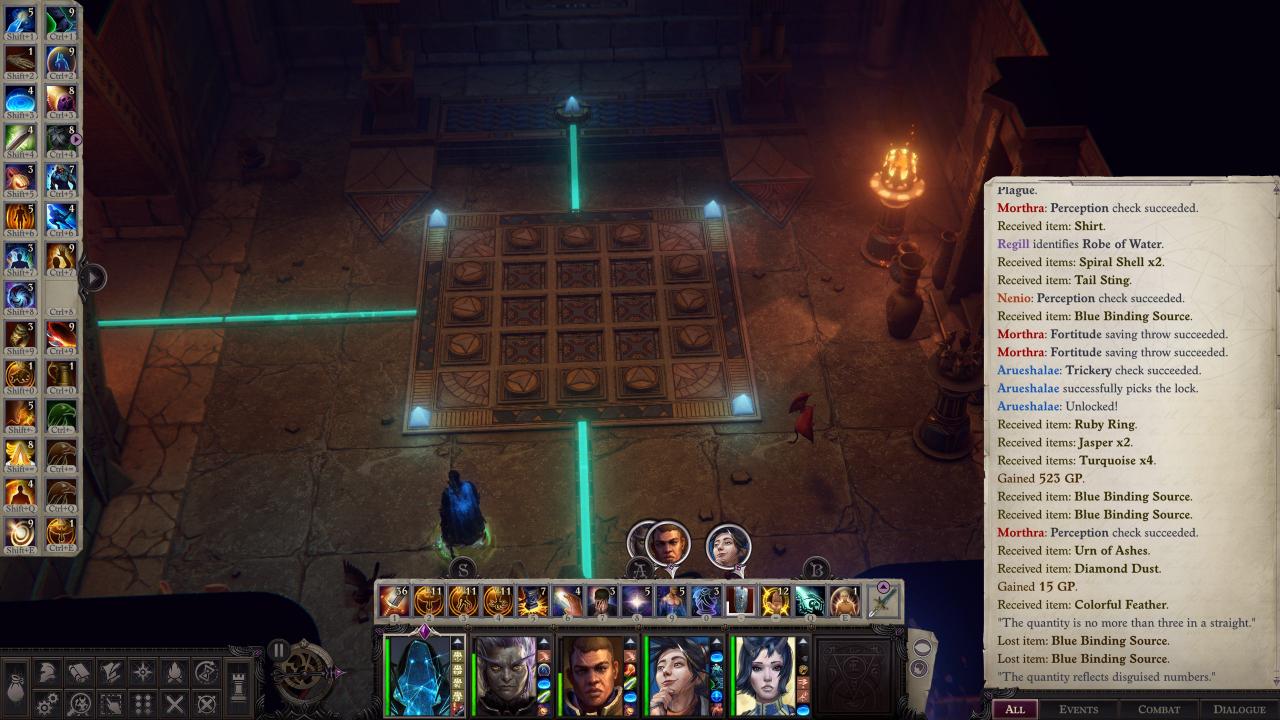
So therefore, the arrows are adjusted such that you get the solution, here:
The second arrow puzzle is a little trickier because one of the symbols doesn’t appear elsewhere in the dungeon (representing zero). Remember not to loot anything in this section besides the crystals.
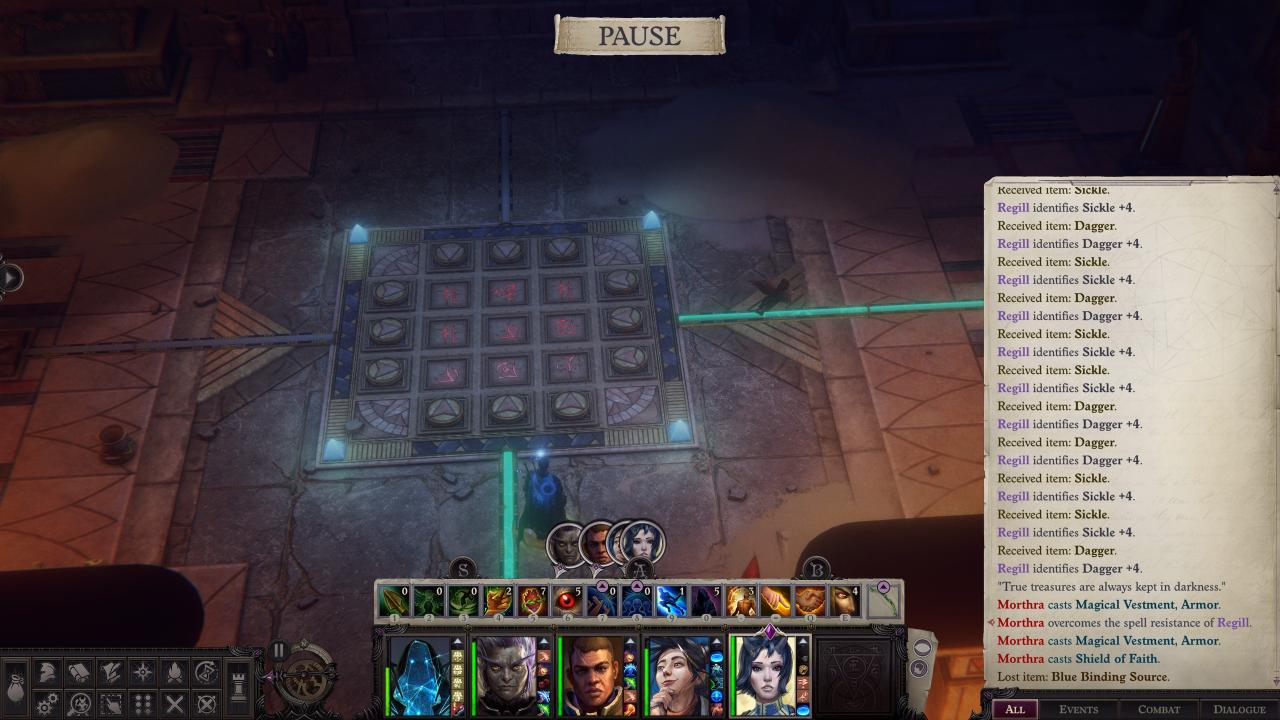
However, when you break it down it functions exactly the same –
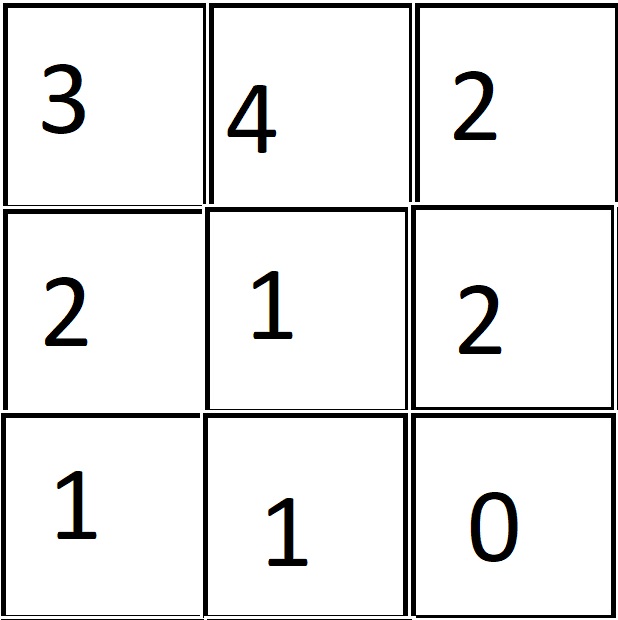
And when solved gives you this:
The Final Puzzle
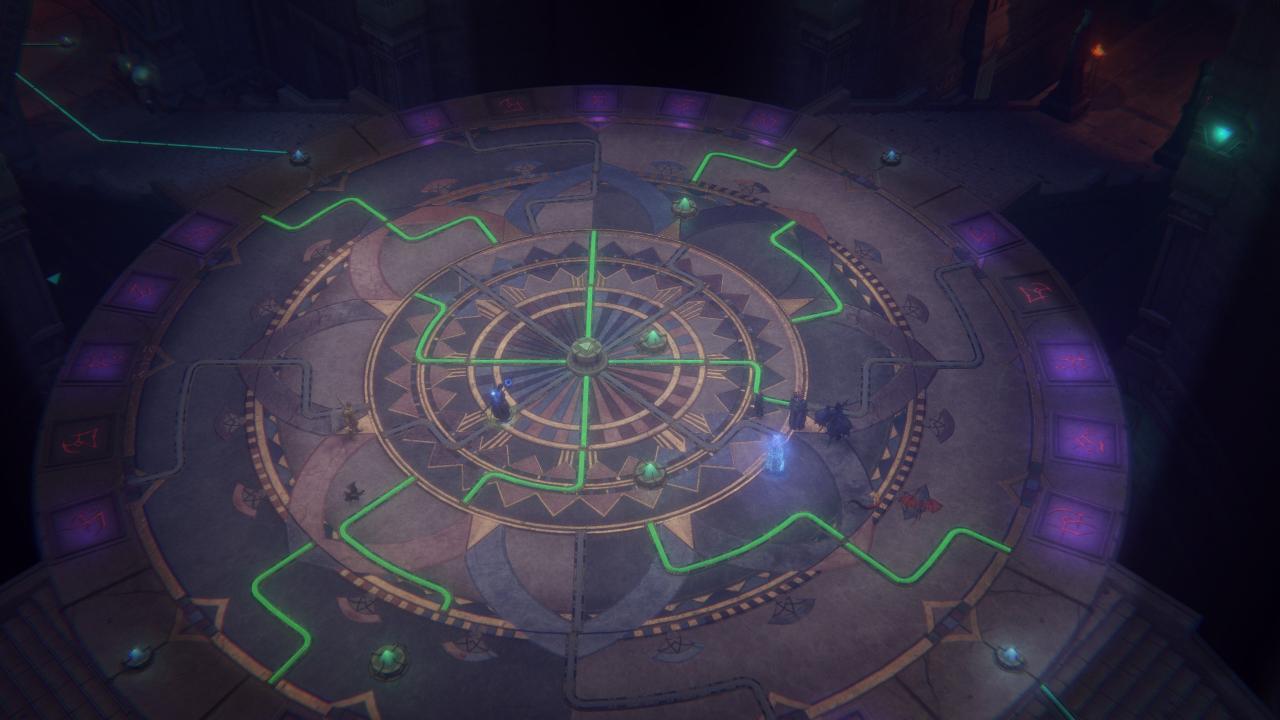
There are actually two solutions to this final puzzle – the main solution is to put the green crystals into the four outer springs and the blue crystals into the central springs, then step on the tiles that the pipes that aren’t lit up are pointing to (the pipes that would light up if you had put green crystals in the springs), then to press the button.
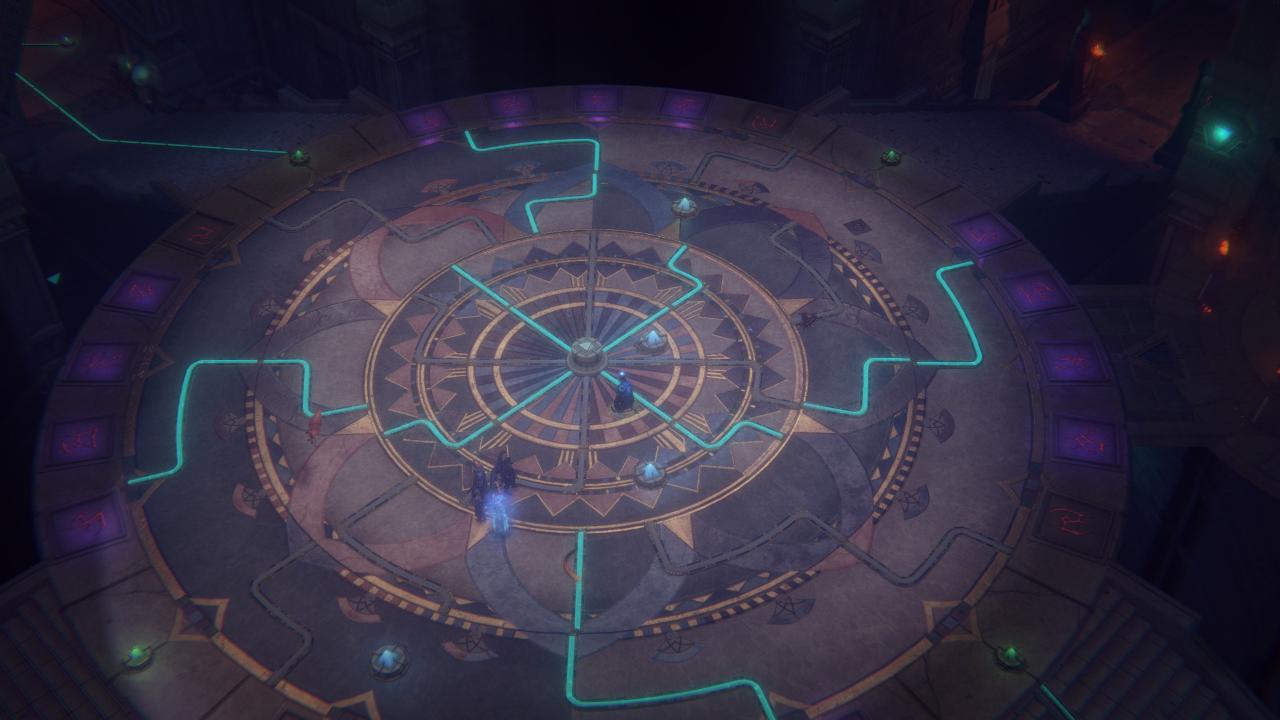
The other solution is to do the inverse. This sends you to a secret area containing goggles that increase your caster level by 2, and the DC of mind-affecting spells you cast by 2.
Related Posts:
- Pathfinder: Wrath of the Righteous Ivory Sanctum Buttons Puzzle Solution
- Pathfinder: Wrath of the Righteous Shield Maze Puzzle Solution
- Pathfinder: Wrath of the Righteous Core Of The Riddle Solution
- Pathfinder: Wrath of the Righteous Secret Ending (Ascension Achievement Guide)
- Pathfinder: Wrath of the Righteous All Unique Items of Prologue and Ch. 1
“then step on the tiles that the pipes that aren’t lit up are pointing to (the pipes that would light up if you had put green crystals in the springs), then to press the button.” This part needs to be elaborated on and shown in screenshots.
I suspect the buttons you’re supposed to step on are the ones the glowing pipes would point at if you spun the circles so the pipes were contiguous. It’s a little hard to tell without actually being able to spin the circles though.
they are shown in the pictures as NOT LIT UP PURPLE
those ones
took me a while to figure it out also
You seem to have at least the first arrow puzzle completely wrong – your solution has 6 arrows pointed at the one you have labelled 4. And you don’t seem to have the logic for it right either – this is the symbol described elsewhere in the dungeon as “I am the marilith that brings evil with every hand”; mariliths have 6 hands, so this symbol should have 6 arrows pointed at it.
It’s confusing to me how you could have the right solution and not only write that down wrong, but clearly not understand the puzzle.
Hello! Make a article about why you would be a great fit for the YYGS summer
school program (100) world’s
First arrow puzzle array is supposed to be [(1,6,4);(2,1,3);(1,3,1)]. The correct answer is in the image though.