For Microsoft Flight Simulator players, landing at an airport with an ILS glideslope is much easier, here’s how to capture and follow one. Using ILS approach allows for night-time landings, and for landing in limited visibility conditions.
Pre-flight checks
For this procedure to work, your destination airport must be setup with ILS equipment. The ILS frequency can be found in-game for each runway at the airport that supports it. Find the NAVAID point at the end of the runway and click on it, the frequency will be shown in the box on the right. Make a note of it somewhere as you’ll need to dial it in manually before you use it. If you don’t see the NAVAID points, check your filters.
This guide uses a sample flight which you can follow along for practice. The flight uses the Cessna 172 Skyhawk with Garmin G1000 glass cockpit.
I believe that you currently must select an arrival airport before flying for the ILS procedure to work; I could not get it setup when selecting an arrival airport while in flight.
Getting setup
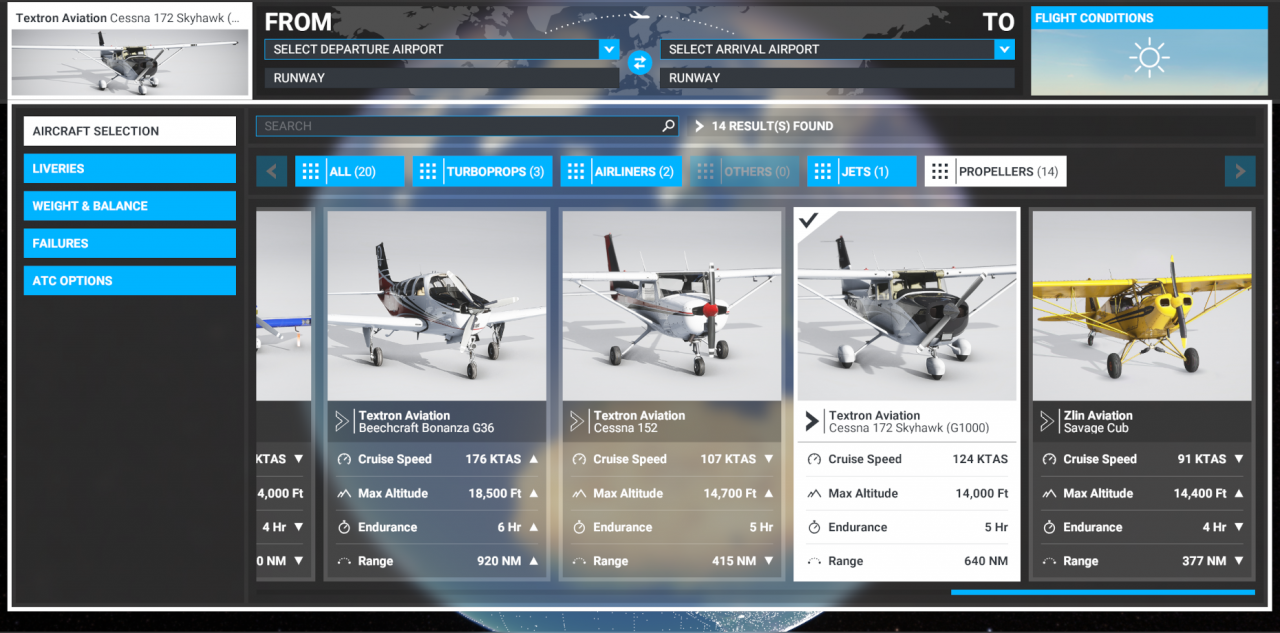
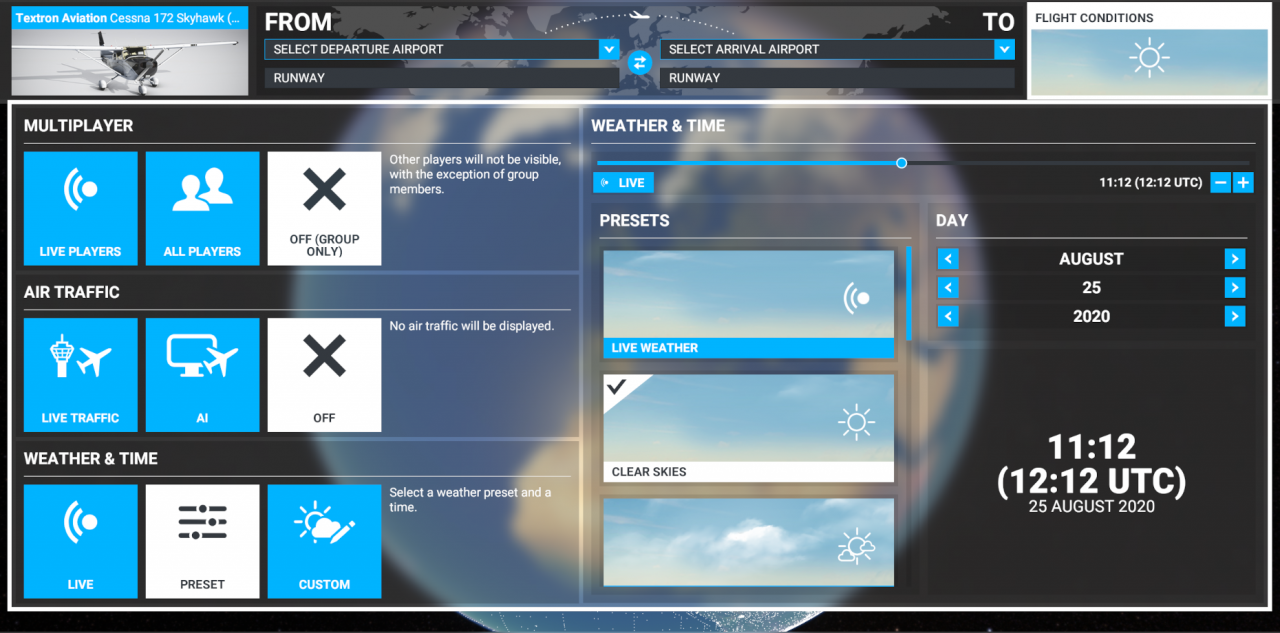
In the sim, go to the world map, pick the Cessna 172 Skyhawk as aircraft. On the other side, for flight conditions, pick a time around middle of the day, and select clear skies.
Back on the world map, choose LFBX as the departure airport, and choose LFBE as the arrival airport. Below the plane picture, choose IFR flight, low airways.
Adjust the dropdowns below the chosen airports:
- for departure, select runway 29 and direct departure
- for arrival, select direct arrival, and automatic approach
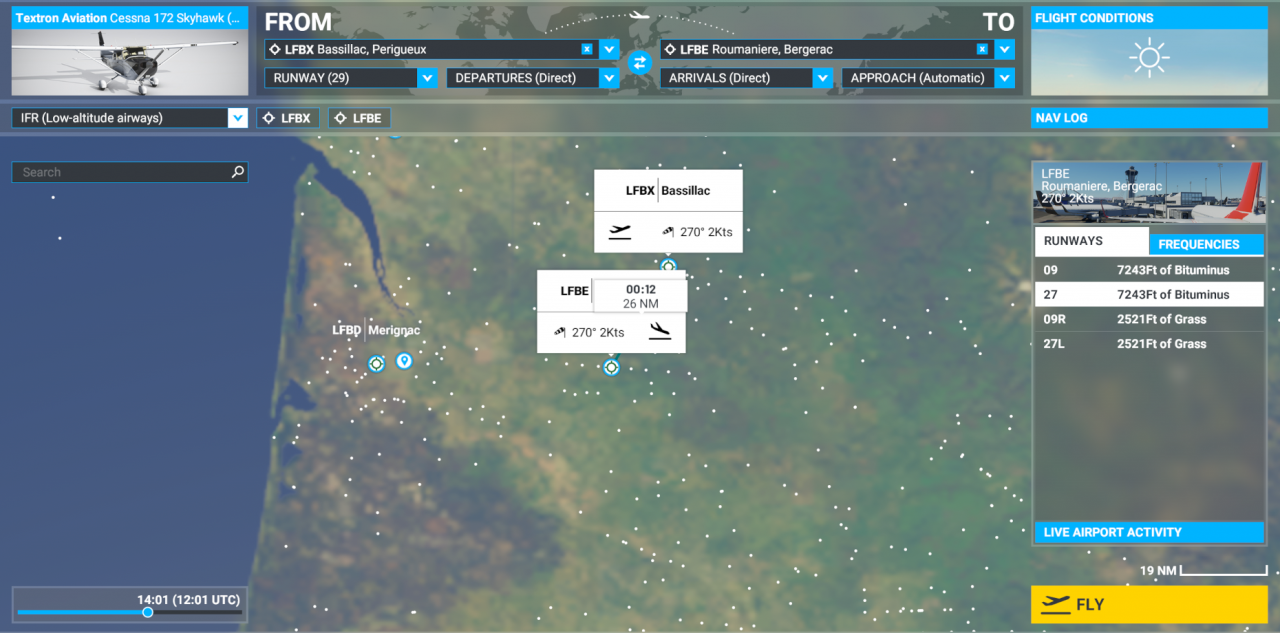
ATC will advise you during the flight for the landing runway and approach transition, so this will mimic arriving at an airport where you haven’t been to before.
Before flying we need one more piece of information: the ILS frequency!
Click on the LFBE airport icon, and choose “Zoom to details”. Look for the NAVAID icon at the end of the runway and click on it. The box on the right will update, and will give you the ILS frequency, which in this case is 108.15.
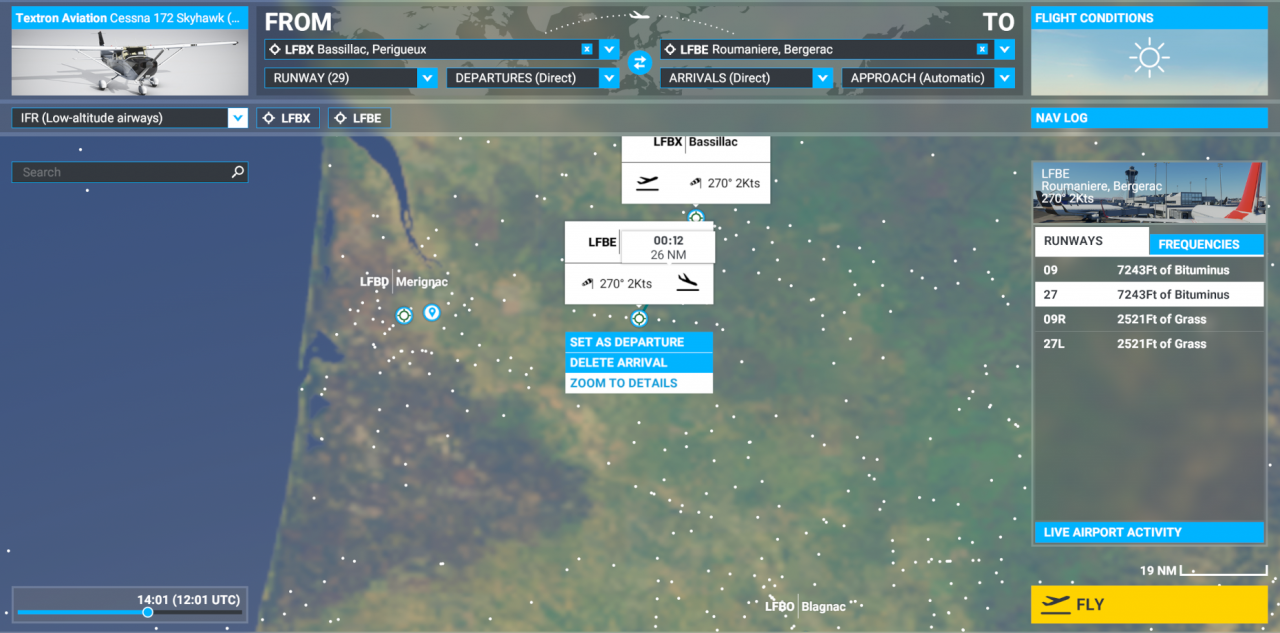
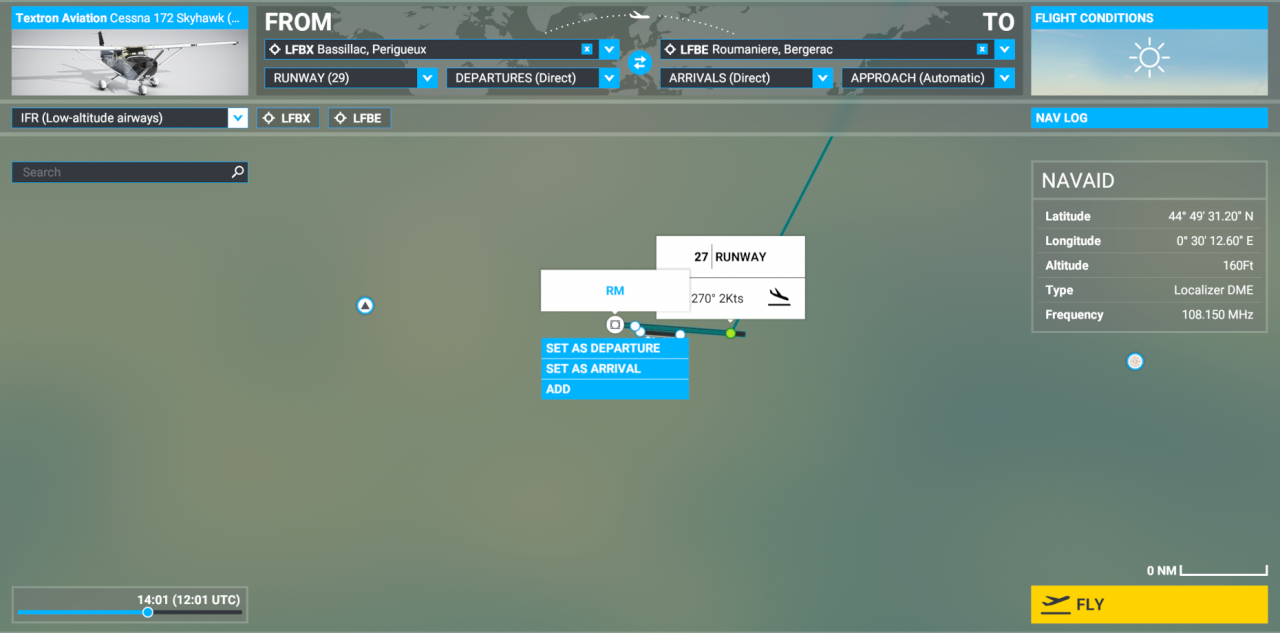
Make a note of it somewhere close by.
If there is more than one runway at your destination airport, you will need to make a note of all the ILS frequencies, one for each runway, if you are not sure which runway ATC will direct you to land on.
Click FLY to begin your flight.
Before taking off, we can manually dial in the ILS frequency (you can also do it during the flight if you wish). The display on the left is called the PFD (Primary Flight Display), and it’s the one that will be used for all the maneuvres below.
On the PFD’s top left corner, click on the double-ended arrow, which will swap the order of 113.9 and 110.5 in the top left corner of the display. Use the dial below the arrow to change the frequency – there’s 2 levels of dial in this case, the big bottom dial will move the Mhz (number before the decimal) from 110 to 108, and the smaller top dial will move the Khz (after the decimal point) in increments of 5. Set the frequency to 108.15, as noted from above.
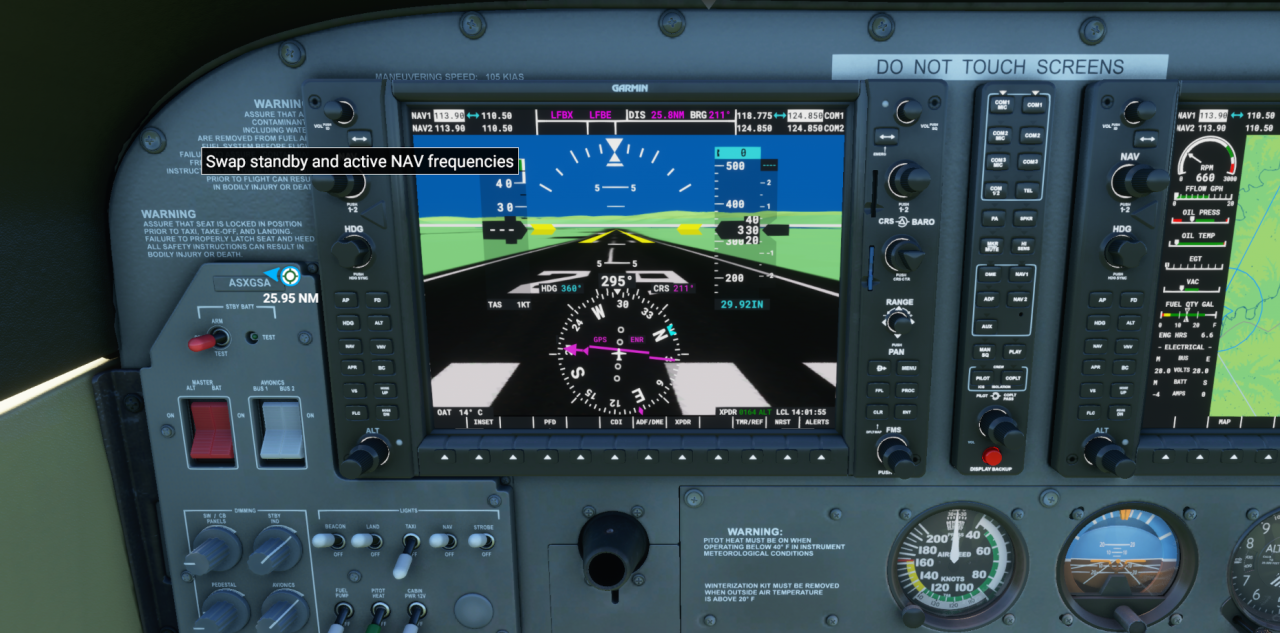
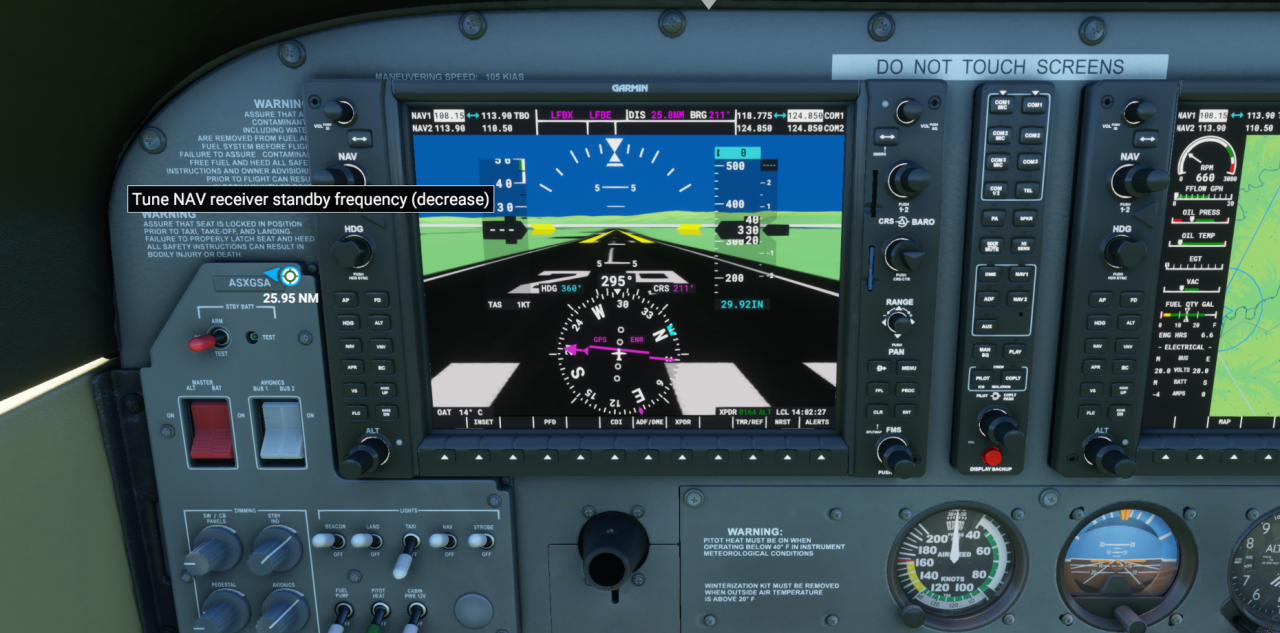
Once set, click the double-ended arrow again to swap the frequencies.
Note: If you are heading to an airport with multiple runways and you are not sure which runway you will use to land, this step will have to be done after you receive instructions from ATC.
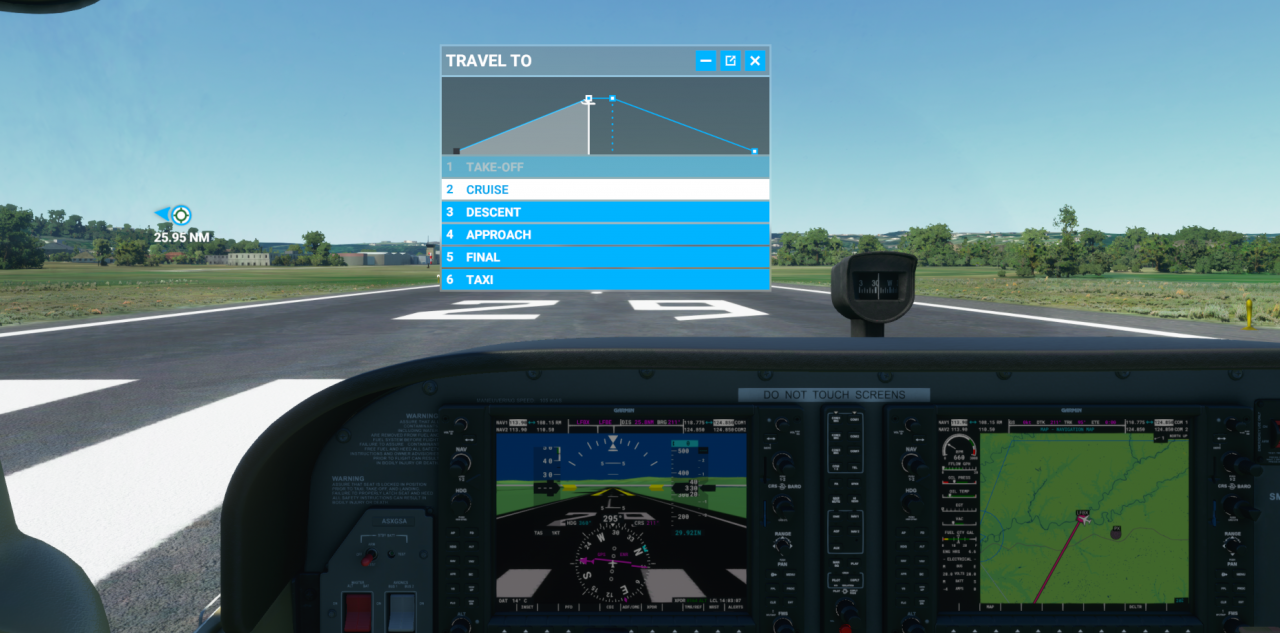
At this point you can either take off manually or go to the activity bar and select “Travel to”, choosing “Cruise” waypoint.
Flying to the ILS
Alrighty. You’re now flying level at 3000 feet heading directly towards LFBE. Autopilot is already switched on.
Along the bottom left edge of the PFD, click NAV to set GPS mode for the autopilot, and click ALT to hold 3000 feet. This will lock the aircraft on the flight path visible on the display on the right (the MFD).
You can adjust your throttle here too, to about 70%.
Open the ATC panel, and tune & contact Bordeaux Center. Shortly you will be given instructions for landing at LFBE.
In this scenario, the instructions given will be:
Expect ILS runway 27, approach via RM17 transition
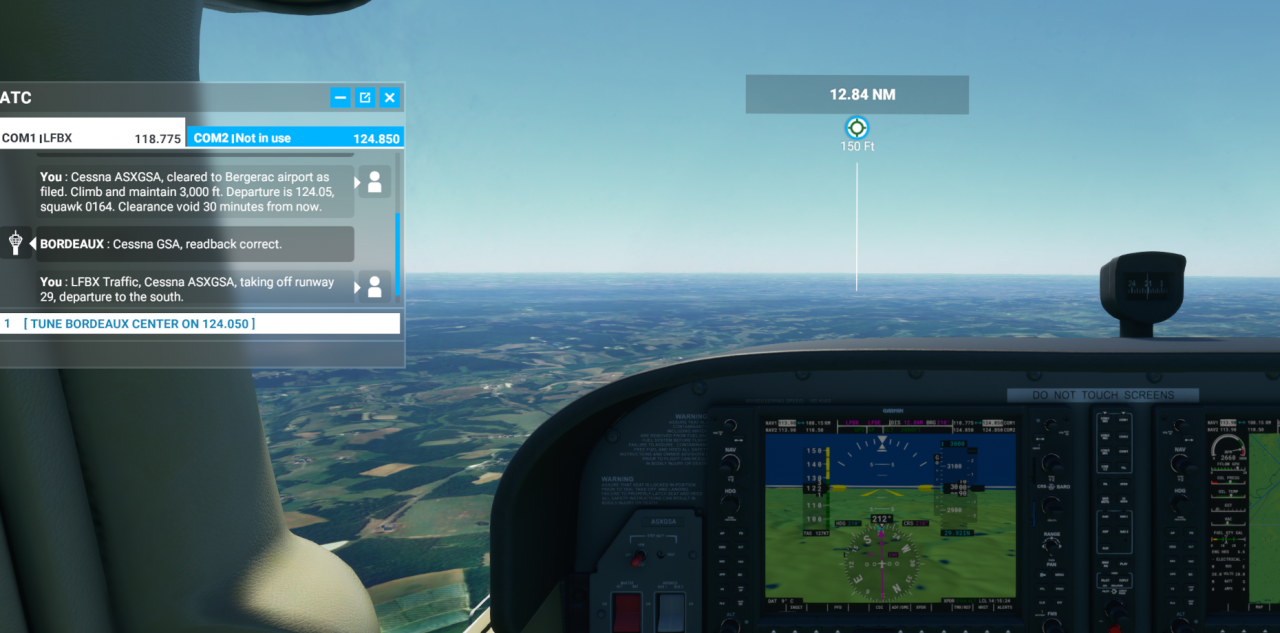
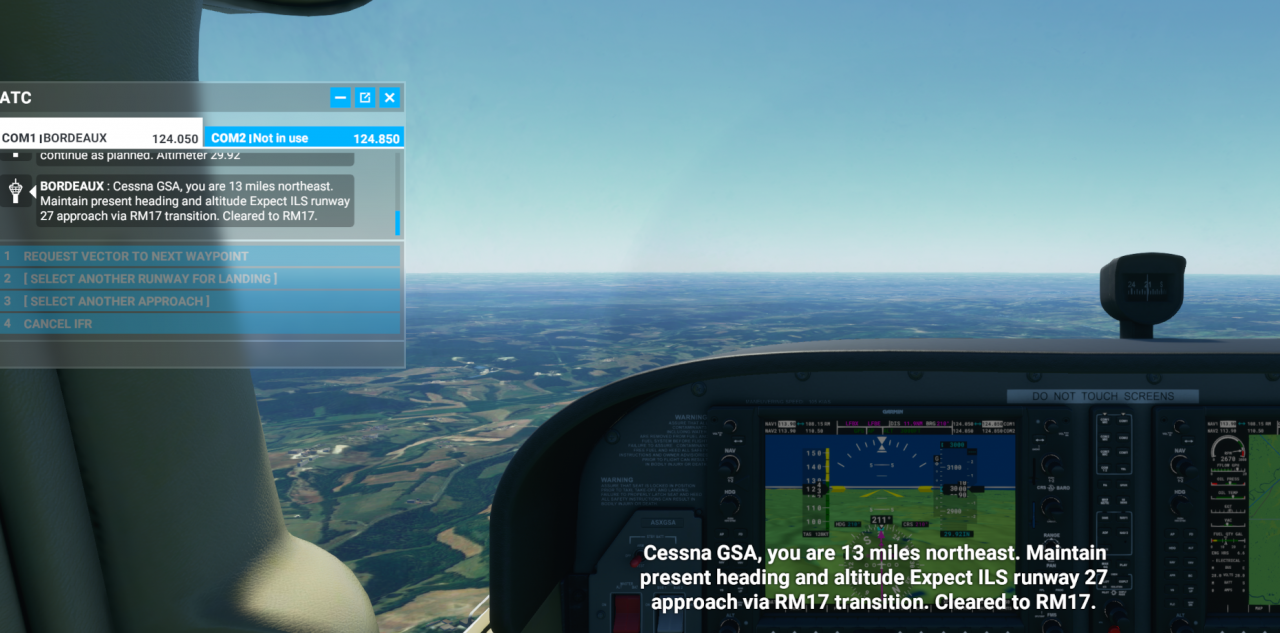
To adjust course, the G1000 must be set to the correct parameters.
On the bottom right of the PFD, click PROC button, then select SELECT APPROACH with the FMS dial on bottom right corner (if not already selected, that is). Press ENT soft button to confirm.

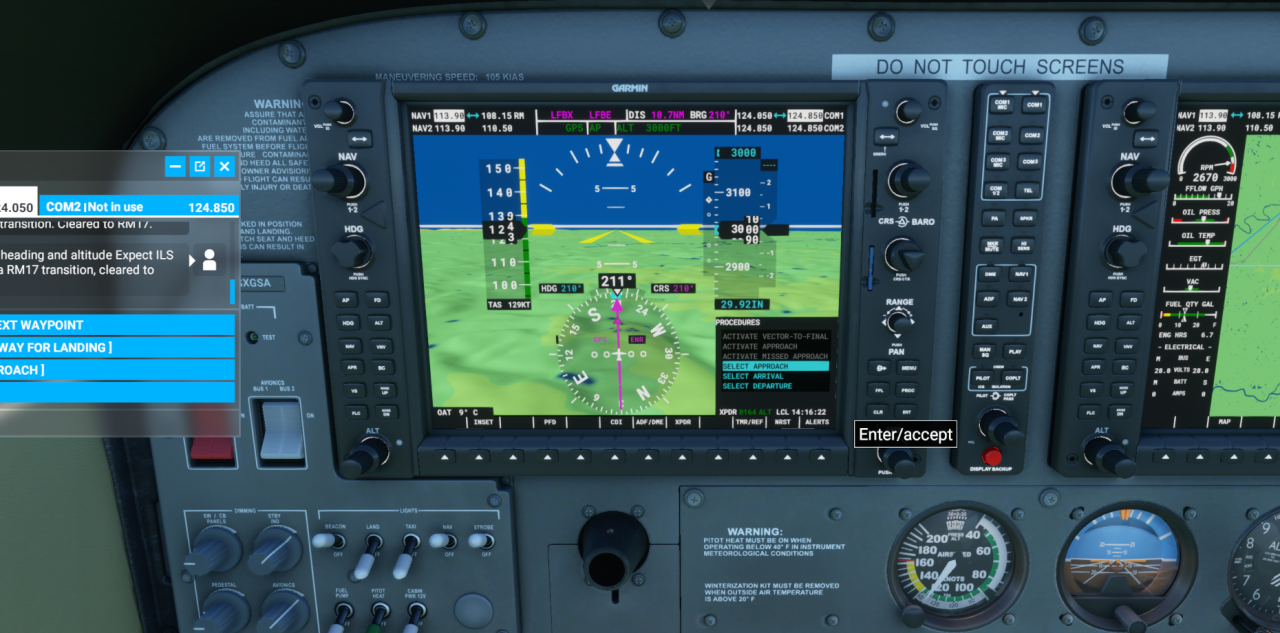
The bottom right corner of the PFD will update. You will now see your arrival airport details. The approach for this flight will already be selected so there’s no need to change it, but you can change it if you need to (with the FMS dial).
TRANS is your transition. Use the FMS dial to move the blinking cursor to the TRANS field, then click ENT soft button. A new submenu will popup, and there you can see the RM17 option.
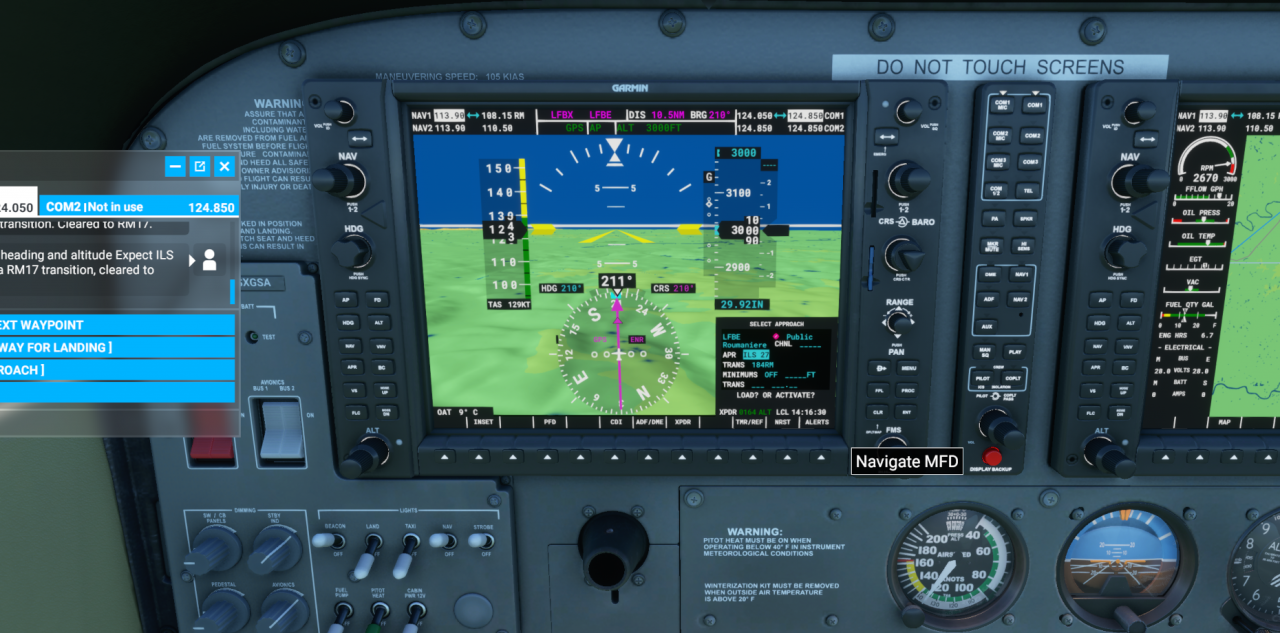
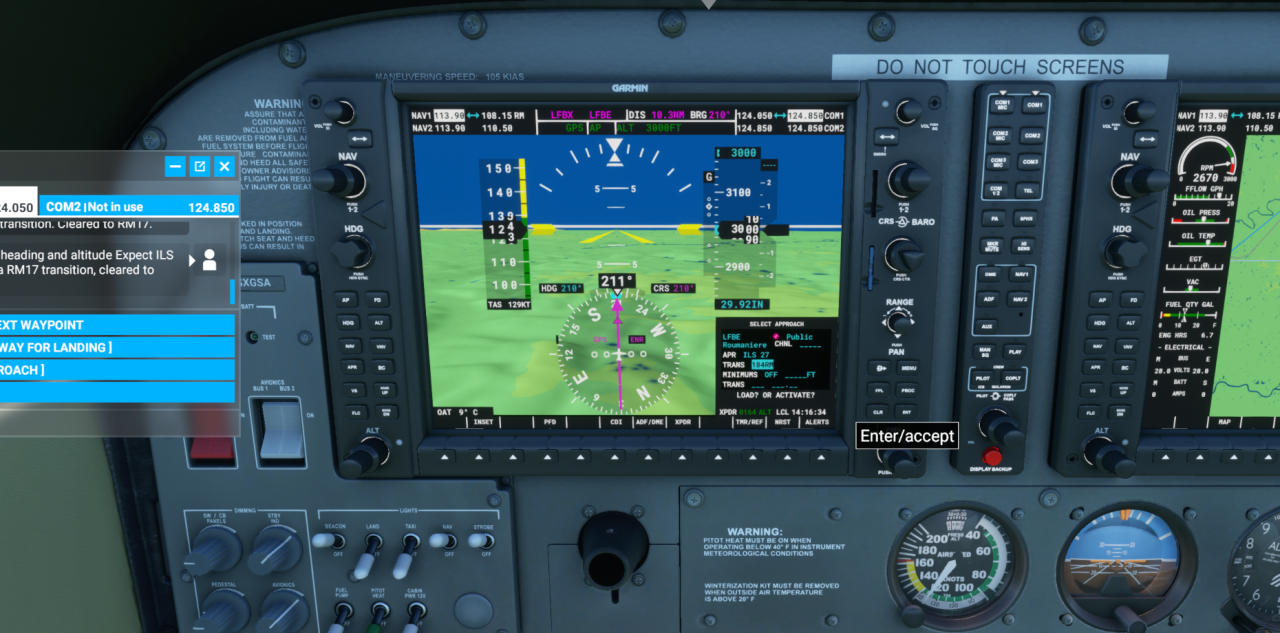
Use the FMS dial to move the cursor to the RM17 option, press ENT softkey to confirm.
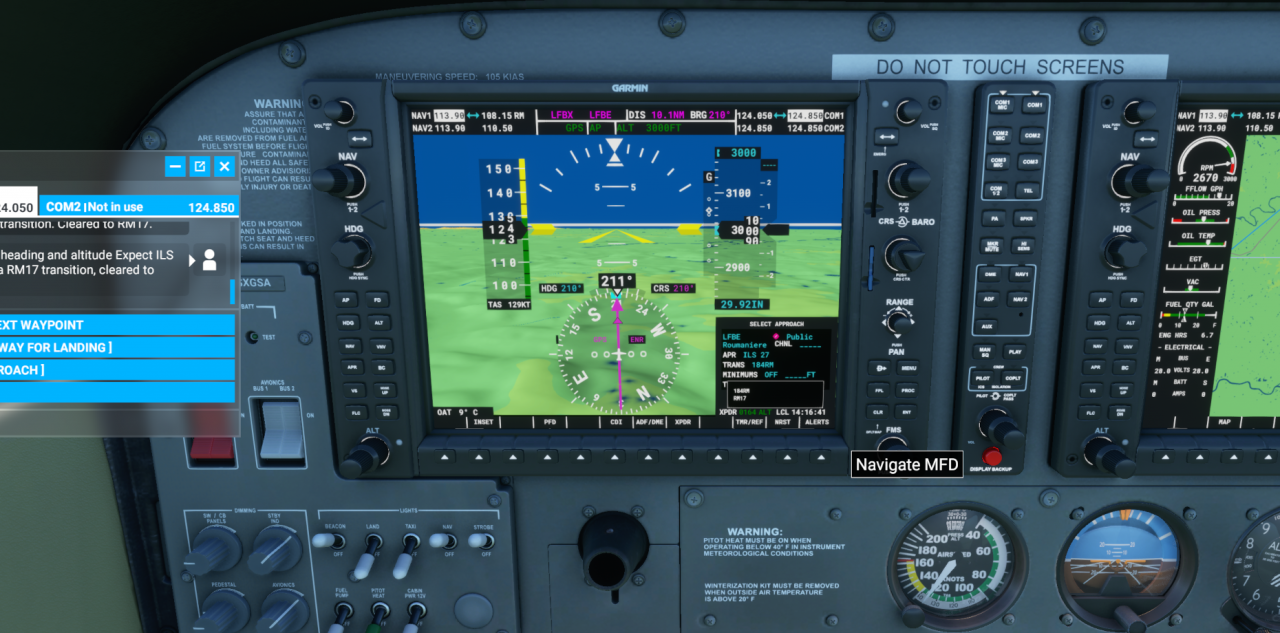
One more step: you need to LOAD the details into your flight plan.
It’s a bit quirky, but possible:
Press the FMS button to show the blinking cursor again, use the FMS dial to move it to the LOAD? option, then press ENT softkey.
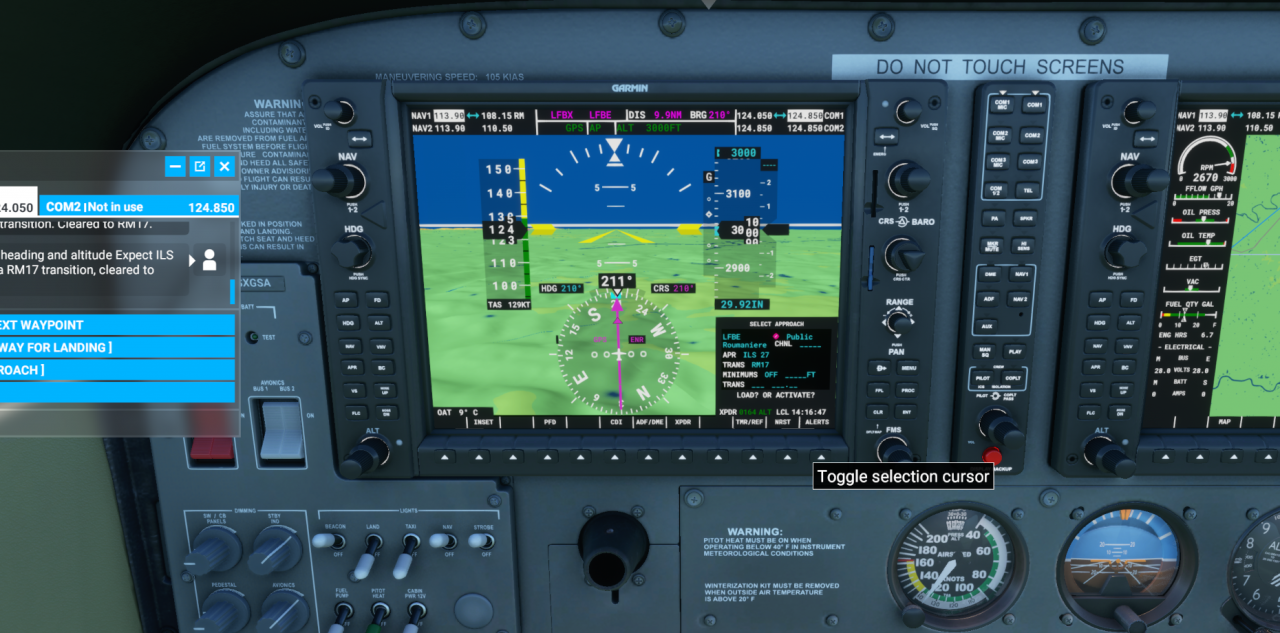
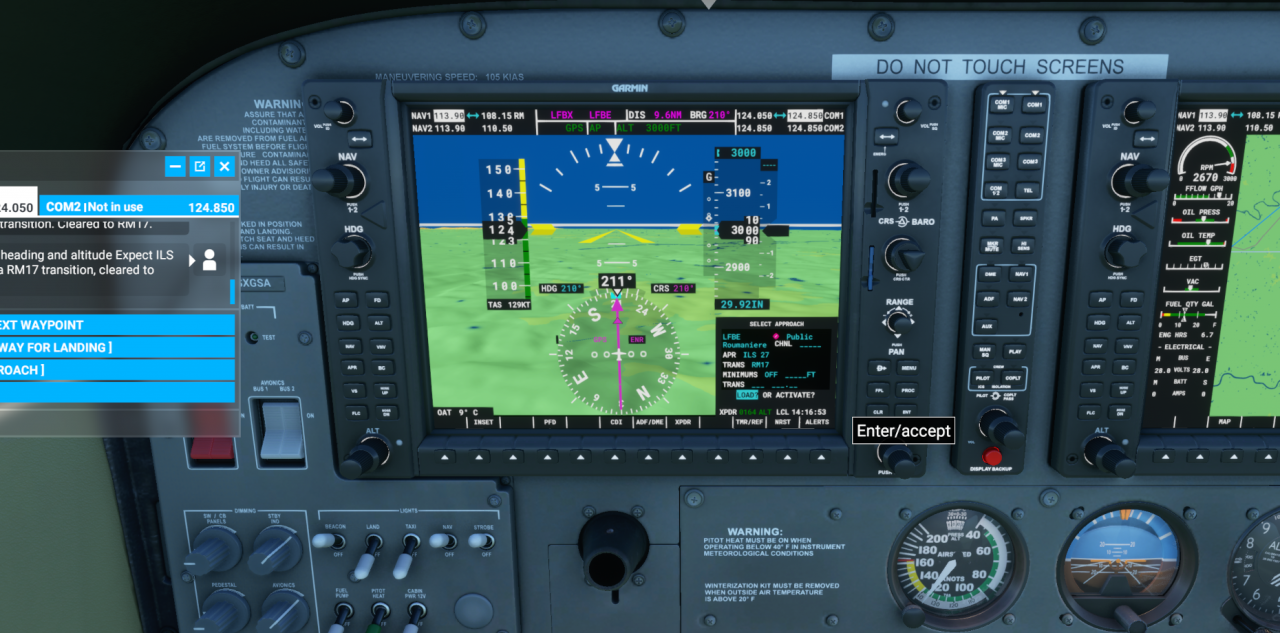
Woooaaaaah my plane is turning!!!
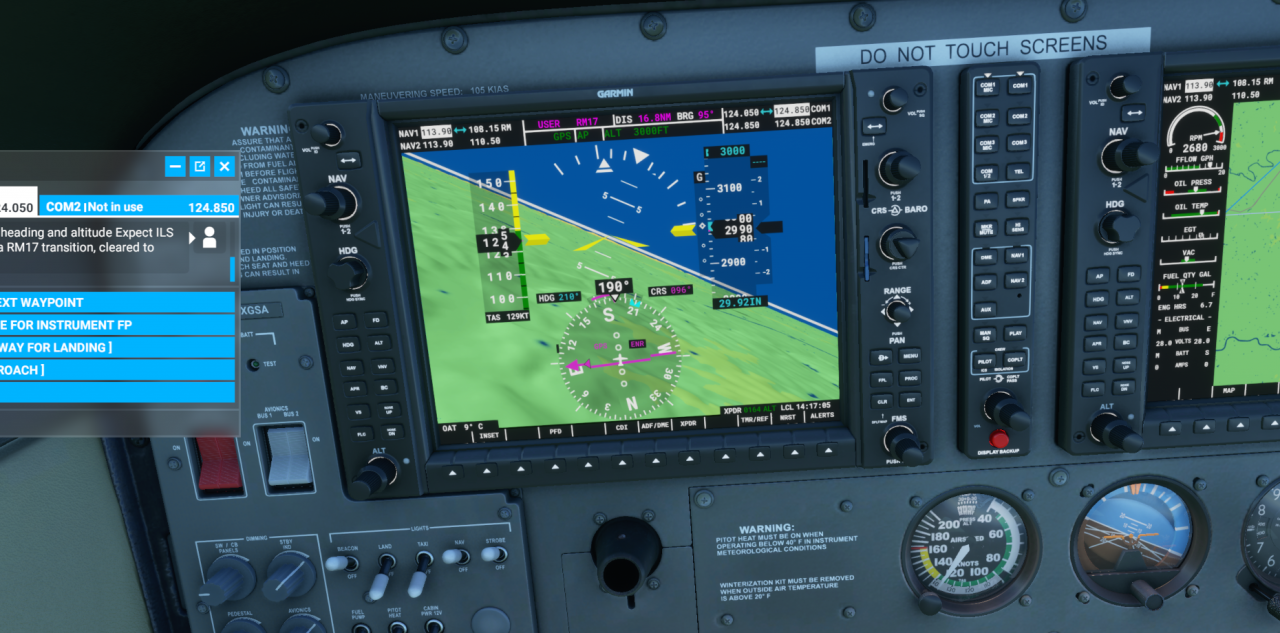
Do not panic. The autopilot is set to GPS, and your course has changed, so it is aligning itself back onto the flight path. You can see your new flight path on the other display. After a few moments your plane will stabilise itself on the new course.
Enjoy the views for a few minutes before the plane starts turning towards the runway.
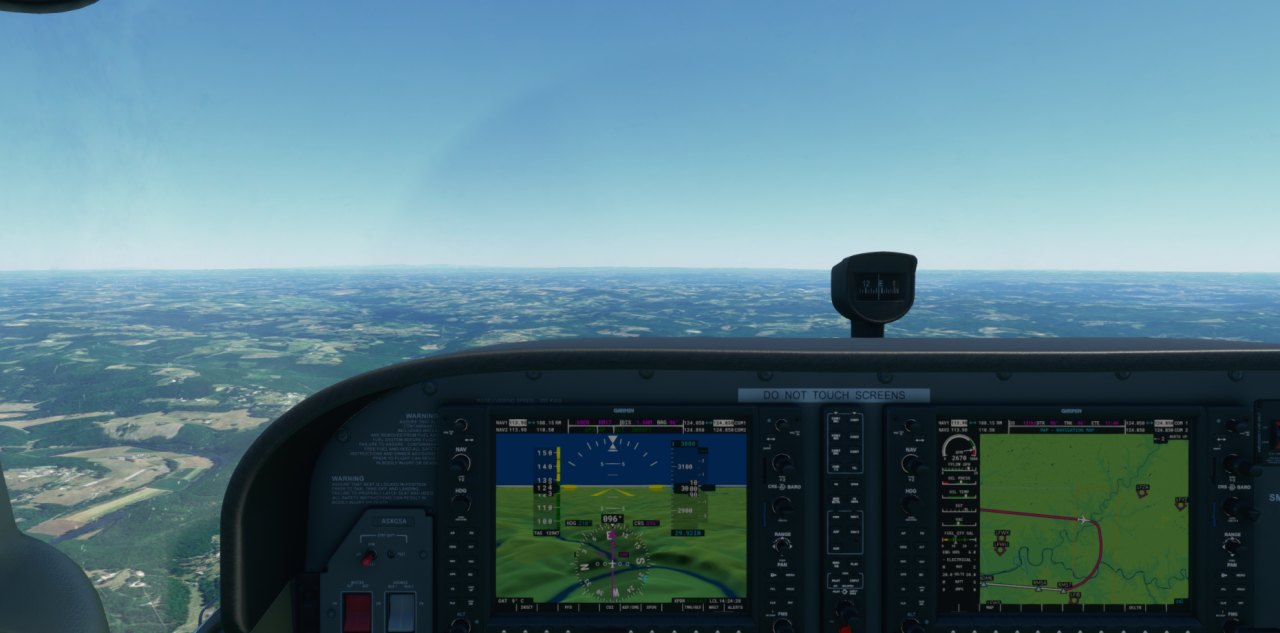
Eventually you will reach RM17 “waypoint” and your plane will be pointing directly towards LFBE, heading 276. You should be able to see the airport lights right ahead of you, blinking in the distance.
ATC will shortly instruct you to change your flight level to 2500 feet.
On your PFD, you should now see a thin strip with 4 dots directly to the left of the altimeter, topped with a G. Just below the G is a white diamond.
That’s the glideslope indicator.
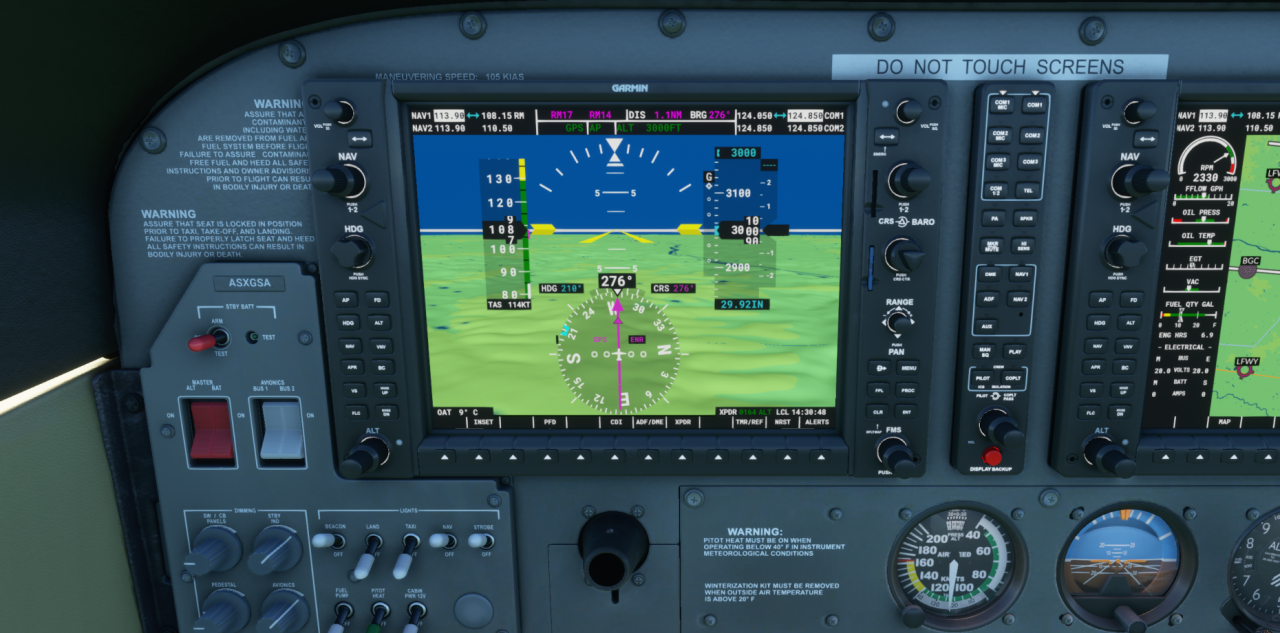
Keep flying straight and level for a few more moments.
Engaging the ILS
As you get closer to the runway, the white diamond will slowly start moving down the strip of dots.
When it is between the 2nd and first dots, you need to switch the G1000 to use the glideslope.
On the bottom row of softkeys, press the CDI one. The G1000 will now use the localizer for directions to the runway. The white G and the diamond will turn green.
On the left hand side of the PFD, click the APR softkey. This instructs the G1000 to capture and use the glideslope.
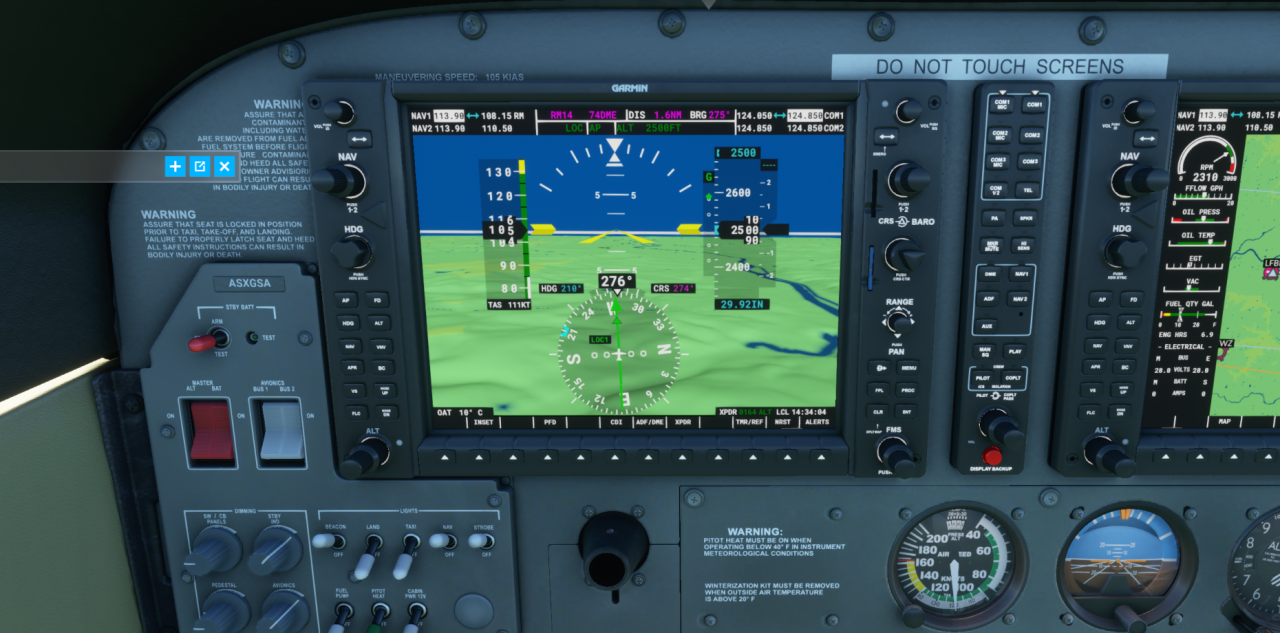
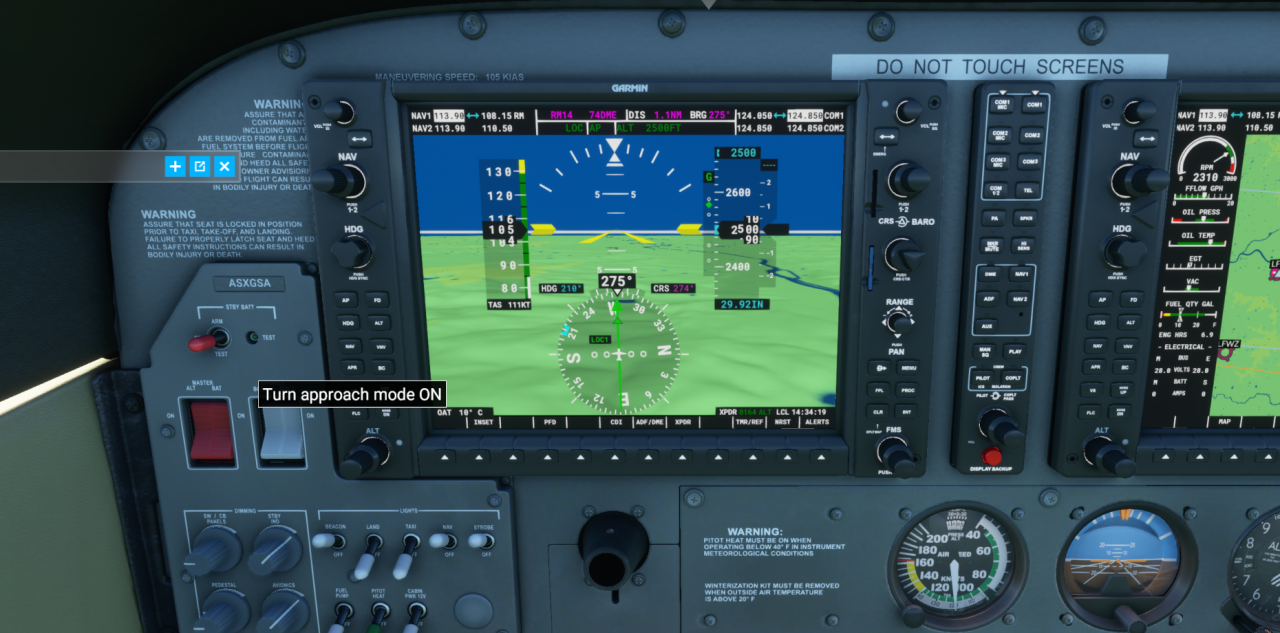
You will need to manage your throttle (about 20% or so) and flaps (once you are in “flaps speed zone”) to avoid under or overspeeding, but the aircraft should now be on a gentle 3-degree path to the runway, slowly heading towards a soft landing (which you must complete manually!).
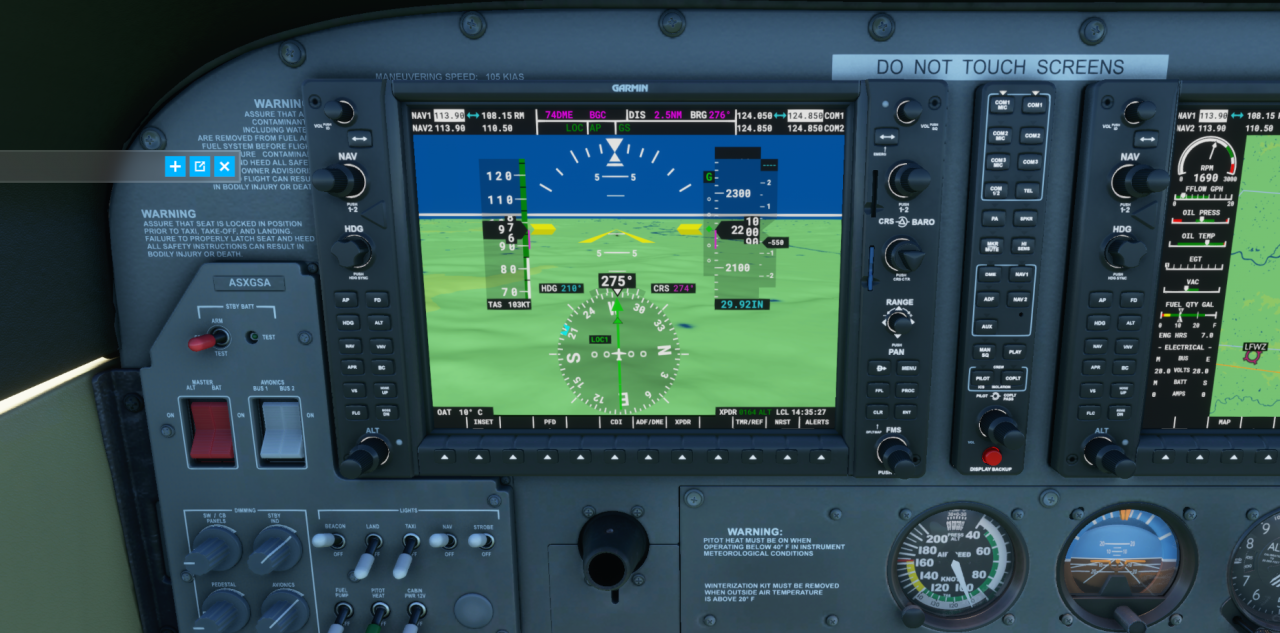
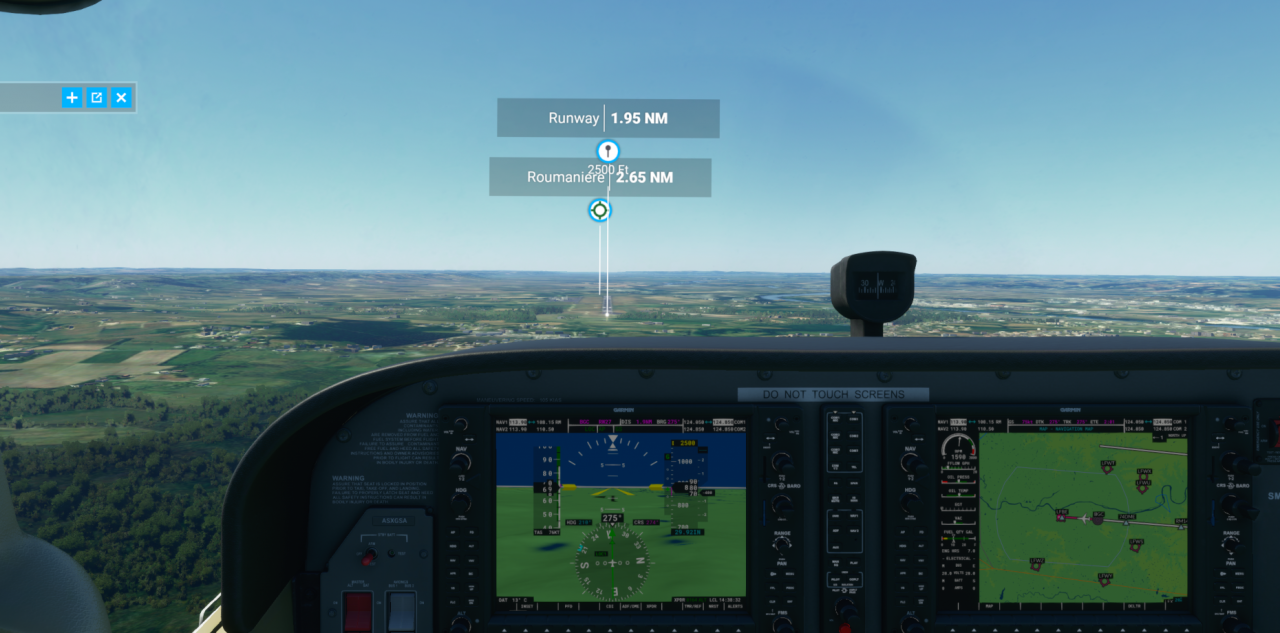

And now hopefully you complete a very gentle landing.
Related Posts:
- Microsoft Flight Simulator Auto Pilot Guide
- Microsoft Flight Simulator 2020 Achievement Guide
- Microsoft Flight Simulator How to Find Your House (or anywhere!)
- Microsoft Flight Simulator Refueling During Bush Missions Guide
- Microsoft Flight Simulator How to Fix TrackIR

Thank you very much!
hi thanks for this very informative . dont suppose you fancy making a similar easy to folow guide for ils landing of the a320