
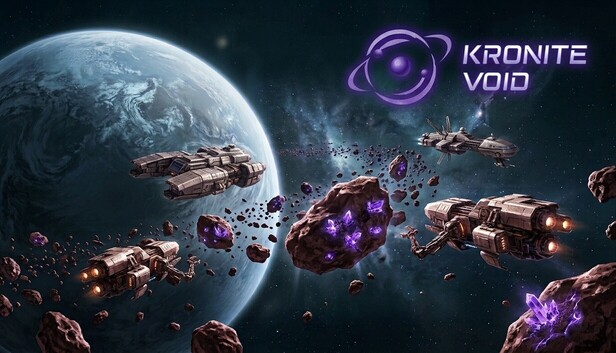
Your first day in KRONITE VOID can go one of two ways: you figure out the rhythm early and build something that actually fights, or you burn your best pieces on a test run and spend the next week recovering. I’ve watched enough new commanders stumble through the opening hours to know which path is more common. This walkthrough is the one I wish someone had handed me before I touched the Forge — it follows the order you’ll genuinely do things, and it takes about five minutes to read.
For context: KRONITE VOID is free-to-play, and the entire loop circles around one resource. You send fleets on expeditions to bring back KRONITE, then pour that KRONITE into a warship you’ll eventually take to Scorch Line to fight other players. Everything below serves that loop.
One housekeeping note before anything else: the window that pops up when you launch the game carries the latest news, and you can pull it back up anytime from the Help screen. That Help screen is also where the reference tables live — all the hard numbers, in one place. Bookmark it mentally.
The Forge: Your First Ship and Crew
Everything begins here. If you only remember one habit from this guide, make it this one: every single day you get one free ship and one free crew member from the Forge. Claim them. Missing a day is leaving value on the table for no reason.
Beyond the free pulls, extra forges cost KRONITE — ships starting at 150 and crew at 100 — and the price creeps upward with each paid forge you buy. Rarities run across five tiers: Common, Uncommon, Rare, Epic and Legendary.
There’s a mechanic here that isn’t obvious at a glance, and it’s worth understanding early: every paid forge nudges your odds of higher rarities upward for the forges that follow. It builds over time. Free forges, however, don’t contribute to that luck at all — so if you’re chasing better pulls, the paid path is the one that tilts the table.
Two structural facts to keep straight. Ships carry anywhere from 1 to 5 slots depending on rarity. Crew members carry MP, and the rarer the crew member, the higher that MP climbs. And everything you pull — every ship, every crew member — lands in your Steam inventory as an actual item.
Building Your First Fleet
Head to the Inventory and assemble a fleet: choose a ship, then slot crew members into its available spaces.
The crew’s total MP is what determines reach. Planet 1 asks for 10 MP; planet 10 demands 1,000. Meanwhile, the average rarity of what you’ve assembled sets the fleet’s rank — D, C, B, A or S — and that rank dictates how many expeditions the fleet can run before it retires. A D-rank fleet gets 5 runs; an S-rank gets 10.
At the start you’re working with 2 fleet slots. The Season Pass expands that: up to 4 on the basic track and up to 6 with VIP. Worth knowing before you get attached to having room.
Now the part that catches people. Assembling a fleet consumes the ship and every crew member you put into it — they stop being inventory items and become the fleet itself, with a fixed lifespan of expeditions. This is why I’d tell any new commander the same thing: do not use your best pieces on your first test fleet. Build something disposable, learn the ropes, and save the good material for a fleet you’ll actually care about.
Expeditions
Open Planets, select one your fleet has the MP to reach, and launch.
There are ten planets in total. Planet 1 takes an hour; planet 10 takes ten. Add the same duration again as cooldown once your fleet returns — so a planet 10 run is a real time commitment, not a quick errand.
Distance scales the reward and the danger together. Farther planets pay more KRONITE and carry more risk. A run can end in success, failure, a bonus item — or the loss of the entire fleet.
Here’s your safety net: your very first expedition can never destroy the fleet. Use it. It’s a free lesson, and there’s no reason to waste that cushion on a planet you didn’t actually want to test.
One more layer worth noticing — planets that everyone is hammering pay out slightly less, while quiet planets pay slightly more. It genuinely pays to shop around rather than defaulting to whatever’s popular.
And a practical trick: if your fleet has 500 MP or more, sending it to a planet below its maximum range noticeably improves the odds of success. You don’t always need to stretch for the farthest reachable target.
The Recycler and the Season Pass
Anything you don’t need goes to the Recycler, and recycling returns KRONITE and experience.
That experience feeds directly into your Season Pass level — 30 levels, with a reward waiting on every single one. Two tracks run in parallel: the basic track, free for everyone, and the VIP track, which consistently gives more.
Unlocking VIP takes a VIP Ticket, purchased for 15,000 KRONITE. Note that carefully — it cannot be bought with real money. You grind for that ticket, or you don’t get it.
The Recycler has its own gating logic that trips up newcomers: before you can recycle a given rarity, you first have to recycle some of the rarity below it. Ships, crew and fleets each track their own separate requirements, and the Recycler will tell you exactly how many you still owe. Work through it in order rather than fighting it.
There’s a payoff for completing a full column in the Recycler’s unlocks panel — a one-time reward per season, which can be a legendary ship, a legendary crew member, or KRONITE. That’s the real reason recycling isn’t just cleanup duty.
Your Warship
The Hangar is where you construct the ship you’ll actually fight with, and it’s built from modules across three families:
Attack — cannon, targeting system, piercer, overdrive.
Defense — shield, armour, damper, repair bay.
Resources — generator, cargo hold.
Leveling the ship itself opens up more slots, and individual modules can be leveled too. You can also install pieces into modules to strengthen them — ships go into attack and defense modules, while crew members go into resource modules. Be aware of the cost: whatever you install is consumed, and the item leaves your inventory for good.
Finally, the generator. It fills your fuel tank with KRONITE — once per day, up to its capacity. That daily fill is the heartbeat of everything combat-related, so don’t lose track of it.
Scorch Line
Once your fuel tank is at least half full, you can launch toward Scorch Line straight from the Planets screen.
The journey out takes an hour. From there you explore and run into other commanders’ ships. After each fight you get 15 minutes to decide: keep pushing forward, or turn around and head home.
The stakes on each engagement are simple. Win, and you take part of your rival’s cargo. Lose, and they take part of yours. Matching is always power-based, so you’ll be facing ships in a similar weight class rather than getting steamrolled by someone far ahead of you.
Your performance feeds three leaderboards — loot, power and win streak — and five leagues: Scrapper, Explorer, Corsair, Predator and Legend.
Every fight gets recorded, too. You can replay any of them shot by shot in History, which is genuinely useful for figuring out why a build worked or fell apart.
Quick Tips
Claim your free ship and crew every day — no exceptions.
Start on the nearest planets and expand outward only as your MP grows.
Recycle duplicates instead of hoarding everything you pull. The Season Pass is where the worthwhile rewards actually live.
Keep one eye on your fuel tank — it only refills once a day, so plan your Scorch Line runs around that.
If something breaks, report it in the Bug Reports forum. If you’ve got an idea, drop it in Suggestions.
Good luck out there, commander.