For Infection Free Zone players, this is the map editor manual for testers and early backers who are interested in editing the playable areas in Infection Free Zone.
0. Intro
Map Editor allows you to edit maps and save your changes to play in updated areas.
In the future, as Map Editor changes, we will expand and improve the above guide.
1. Load Map
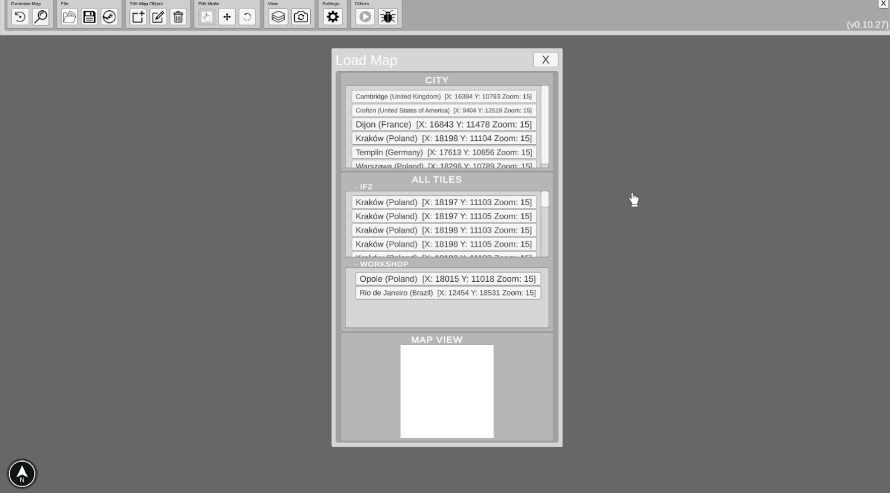
You can load a map from panels:
CITY
In this panel are listed all Cities downloaded from the “Infection Free Zone”. Each city is in “game format” which is size 3 x 3.
ALL TILES
All “single tile” available from the game “Infection Free Zone” in formats 1 x 1. This is useful when there is no need to edit the full city map, but only a part of it.
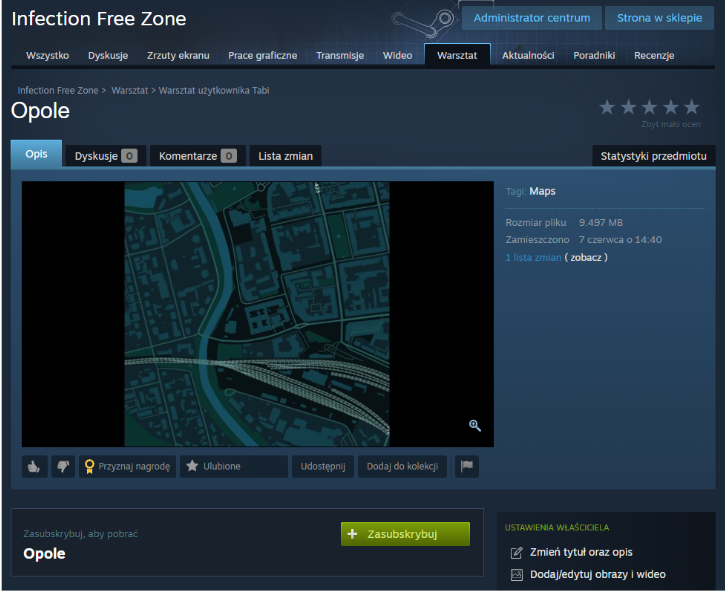
WORKSHOP
Maps downloaded from Steam Workshop. (Available in the future)
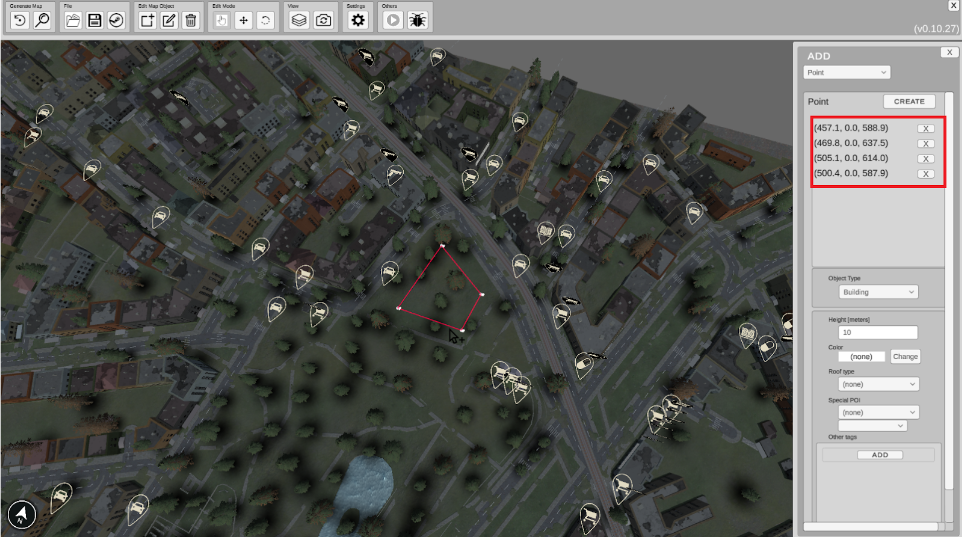
2. Add a Map Object
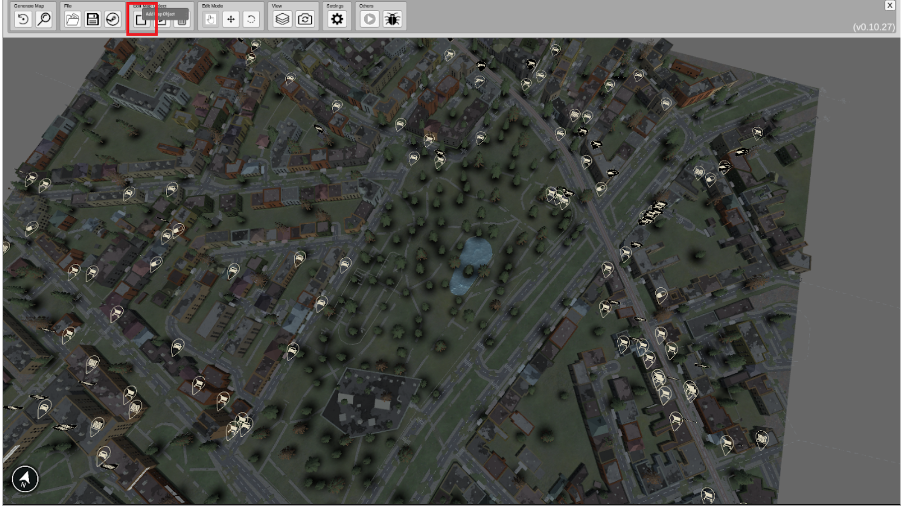
After that, you are allowed to add points from which the Map Object will be created (notice that you should not have any object selected before that operation, otherwise the points will be added to that selected object, you can use the ESC button to deselect objects):
To define features of a Map Object there is a need to define tags. As default in each Map Object, you can add tags manually and using special tools. The manual way is possible, by default, in a field called “Other tags”:
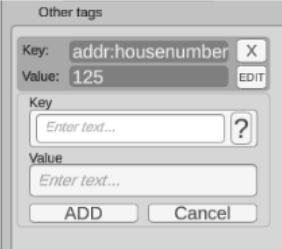
Use an Open Street Maps Wikipedia to check tags available for adding:
https://wiki.openstreetmap.org/wiki/Tags#Keys_and_values
To add tags using tools you need to select Map Object Type. The type of the Map Object you want to create has to be selected from the list:
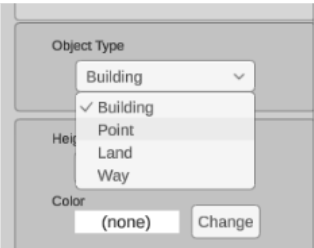
ADD A BUILDING
To add a Building you need to set the Map Object type to: “Building”. After setting the points on selected positions you can use building tools to define “tags” (“osm tags”) to declare special features.
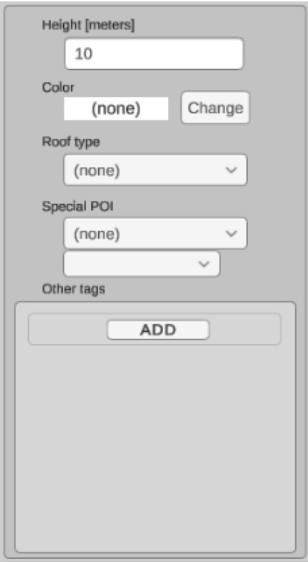
- Height (Osm Tag key: “height”): defines the height of the building
- Color (Osm Tag key: “building:colour”): the color of the building (notice that you will not see color changes in the edited building, the color will be visible after map reload)
- Roof type (Osm Tag key: “roof:shape”): the type of roof (available values are: “flat”, “pyramidal”, “gabled”, “dome”, “hipped”, “half-hipped”, “onion”, “round”, “saltbox”, “gambrel”, “skillion”, “mansard”)
- Special POI (key: “IFZ”) – the usability of the building (such as “Hospital”, “Police”, etc.)
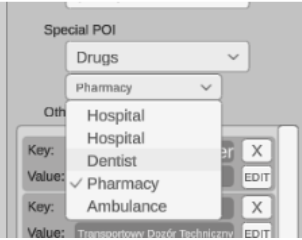
This field defines the role of building in the game. First dropbox defines general usability and the second specific ones. The key and value of the tag are not connected to the OSM system, they are custom for the Infection Free Zone.

ADD A POINT
Includes any Map Object defined by a single position on the map. Currently, there are 3 options available:
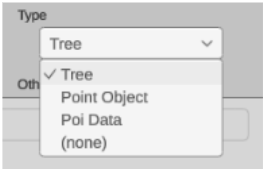
- Tree (OSM tag key: “natural”, value: “tree): adds a single tree to selected position
- Point Object: all other single objects (currently available are: “Adverts”, “Antenna”, “Bench”, “Waste Basket”, “Wreck”)
- Poi Data: usability in a selected position (not only Buildings). You can use one of the available positions such as: “Parking”, “Police”, “Prison”, “Hospital”, “Pharmacy”, etc. These options create a tag related to the OSM system.
ADD A LAND
To define the area’s usability you need to use this option. Notice that this will not create any physical objects. This is information that could be used later in the game for object generation or other features.
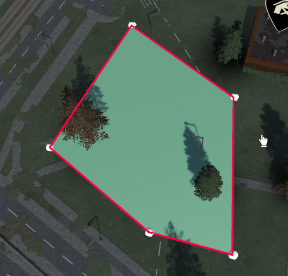
List of available landusage types for selection:
- “Park” (OSM tag key: “leisure”, value: “park”),
- “Wood” (OSM tag key: “natural”, value: “wood”)
- “Water” (OSM tag key: “natural”, value: “water”)
- “Parking” (OSM tag key: “parking”, value: “surface”)
- “Railway” (OSM tag key: “landuse”, value: “railway”)
- “Grass” (OSM tag key: “landuse”, value: “grass”)
- “Residential” (OSM tag key: “landuse”, value: “residential”)
- “Industrial” (OSM tag key: “landuse”, value: “industrial”)
- “Construction” (OSM tag key: “landuse”, value: “construction”)
- “Pitch” (OSM tag key: “leisure”, value: “pitch”)
ADD A WAY
You can also add Map Objects, declared by a line of points. Currently, Map Editor has two “Way” types:
- Barriers – physical objects used to split a space. Currently are possible to declare types of “barriers” such as: “fence”, “gate”, “wall”, “hedge”, “kerb”, “bollard”, “lift_gate”
- Road – a road object. Paths that are used in the game. You can declare roads of types: “footwalk”, “footway”, “path”, “cycleway”, “primary”, “secondary”, “tertiary”, “residential”, “service”. Each type of road can be set as a “Bridge”. To see the road objects there is a need to enable the road layer.
Example – how to add a Bridge:
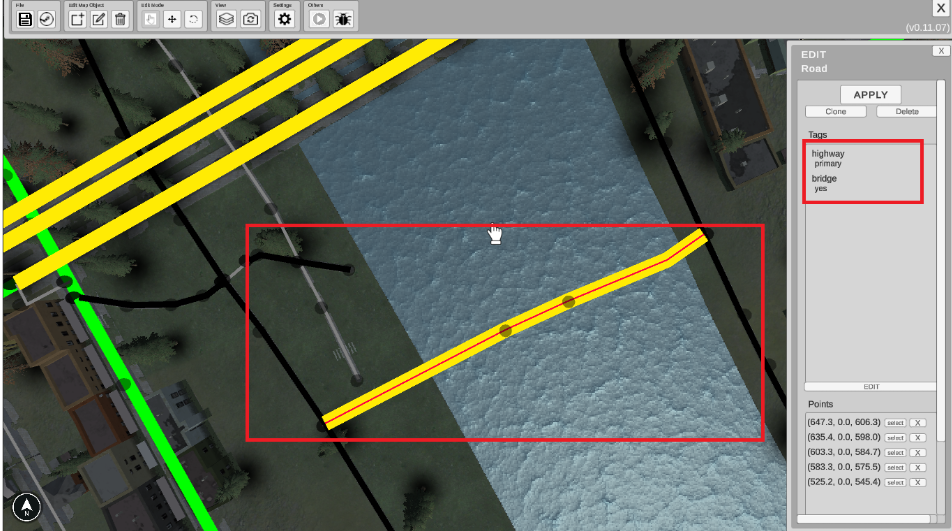
- 1. Set the points on the map (you can attach lines to points of other road objects)
- 2. Use “Road” tools to add special features: select road type and set “Bridge” toggle
- 3. Click on “Create” button (or use “Enter”)
- 4. A new “bridge” should be visible in the Map Editor.
- 5. Remember to save the changes.
3. Edit a Map Object
Edit by “Edit Panel”
Inside this panel, you can use the following tools:
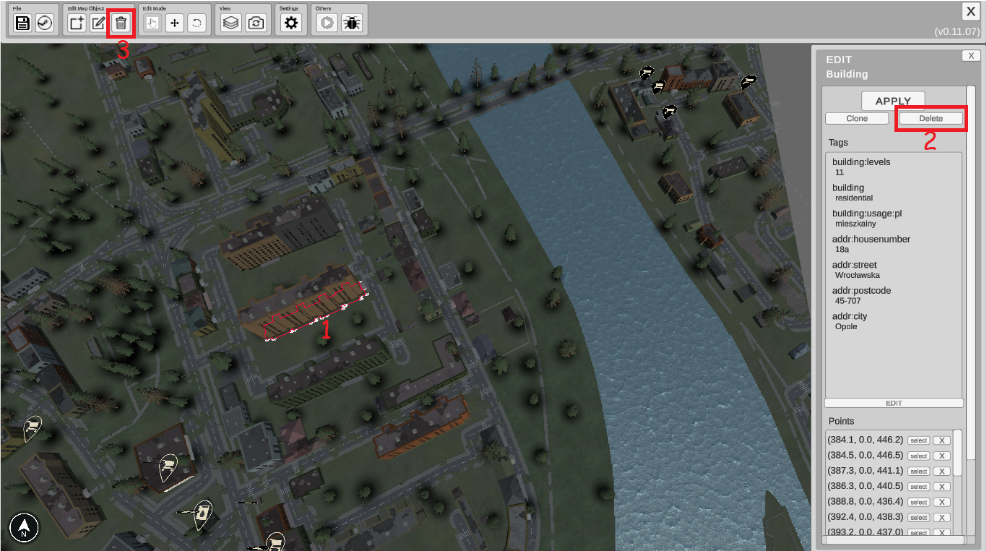
- Clone – to clone selected Map Object (cloned Map Object will be in the same position as base one, so keep the focus on it)
- Delete – to remove selected Map Object
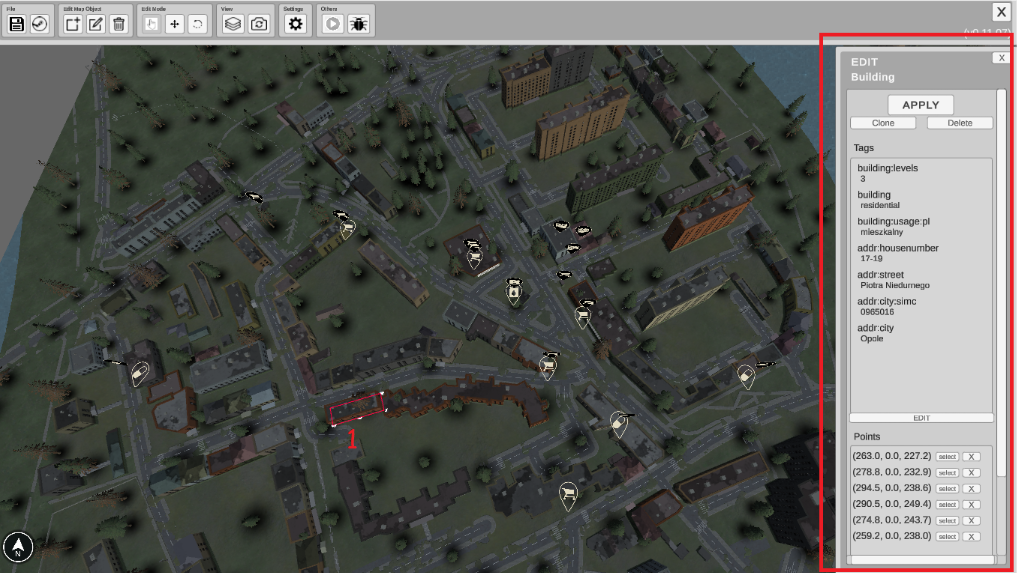
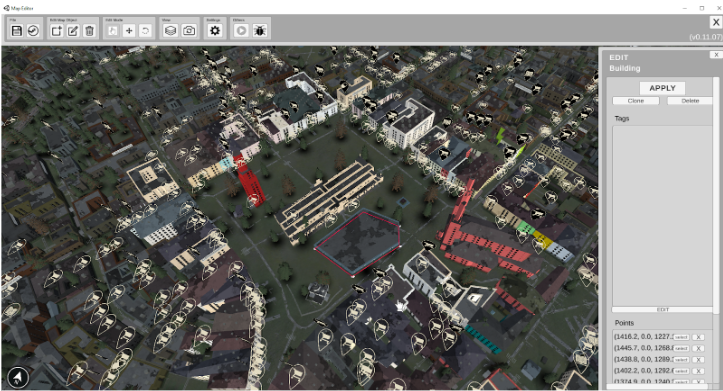
- Edit Tags – opens “edit tag” panel. This panel is the same as in the “Add Map Object” process for the current object type (Building, Way, Point, Land). E.g.: for Building Object you will see the panel below after clicking “EDIT”:
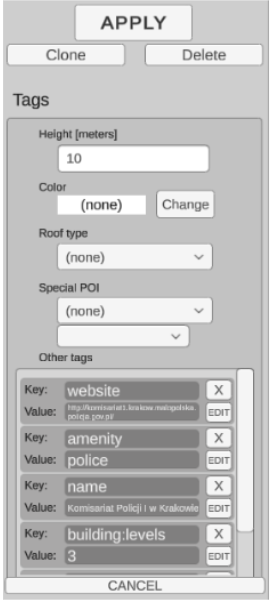
You can edit the tags from this panel. To apply changes and regenerate the object click on the “APPLY” button (or use “ENTER“). If you click “CANCEL” the panel returns to a static information state, without any changes to tags.
Edit Points (panel)
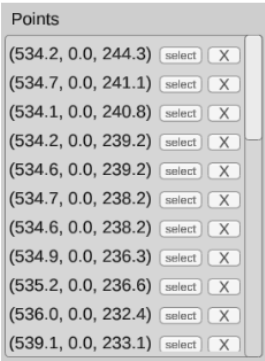
From this panel, you can delete some points of the Map Object. You can also use the “select” button to check the point to “edit”. The points are movable if you properly set “Edit Mode”.
Edit using the “Edit Mode” options
Edit mode options allow you to modify a Map Object by mouse interaction (move, rotate). You can also modify points of selected Map Objects.
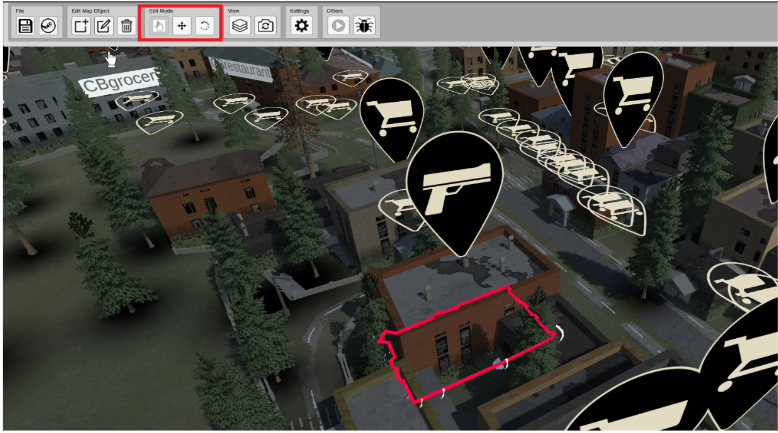
There are currently 3 options available:
- Select – in this mode you can only select objects (if you click SHIFT + next object you can select more than one)
- Move – allows to move the Selected objects (you can in this mode also select objects)
- Rotate – allows to rotate the Selected objects (select objects are also allowed)
4. Remove Map Object
5. Save Map
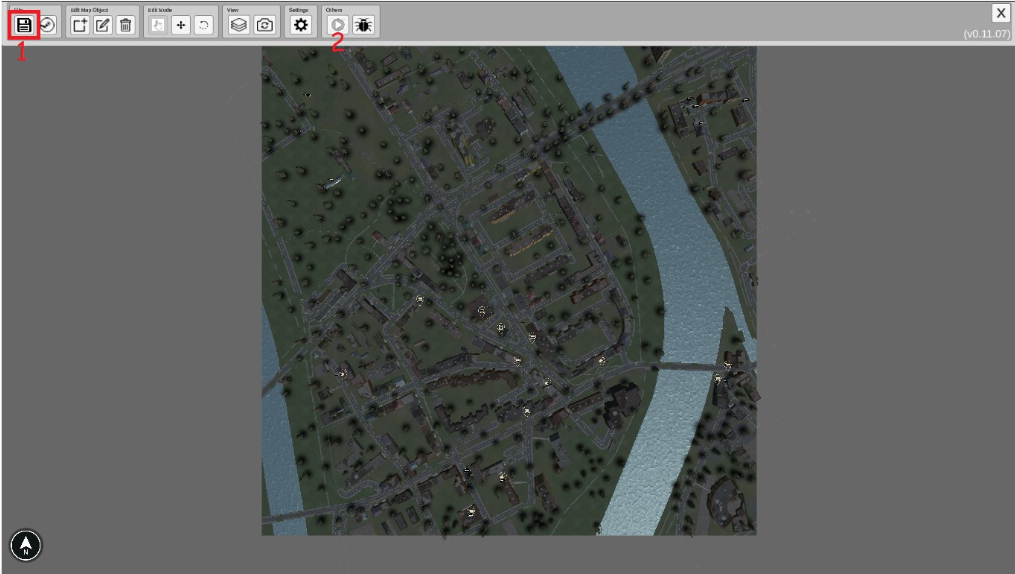
Then you are allowed to test an edited map inside the game, using the “Test in game” button (2). The changes should be visible inside the game.
Added Object in Map Editor:
Added Object in Infection Free Zone:
6. Save to Workshop
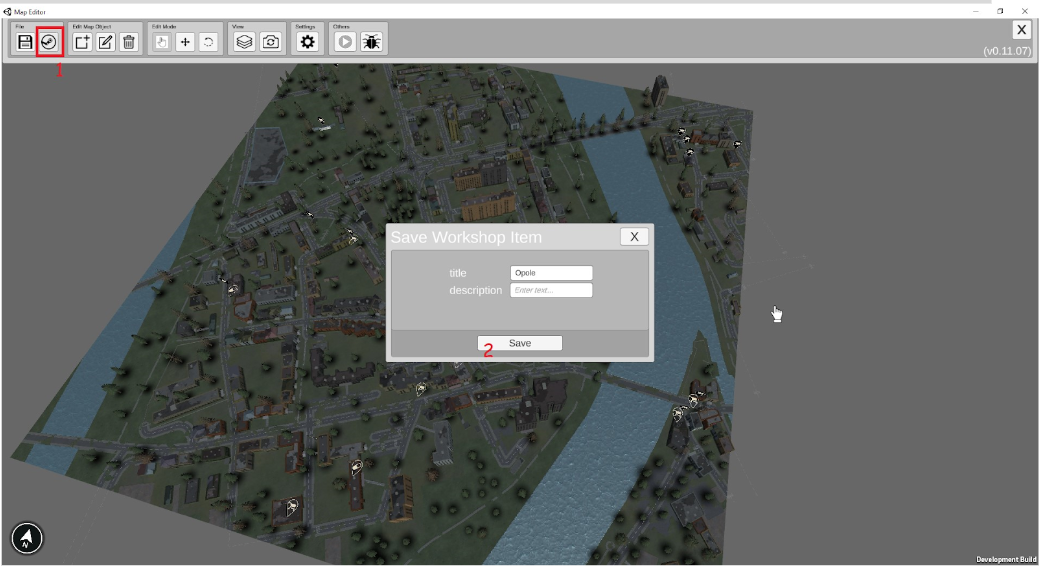
Then you can add a description, change the title (optional), and use the “save” button. After a few moments, your work should be saved to the game’s Steam Workshop.
7. Keyboard Shortcuts
- ESC – quit the “Edit Mode”
- Enter – apply edited object/ create new object
- Delete – remove selected Map Object
- CTRL + S – save
- CTRL + Z – undo step
- CTRL + Y – redo step
- CTRL + C – copy
- CTRL + V – paste
Related Posts:
- Infection Free Zone – How to Gain Resources More Efficiently
- Infection Free Zone: How to Use Commands
- Infection Free Zone: Food Production Calculations