Downloading assets
In this guide we are using Amnesia Rebirth ATDD Asset Pack by TechOFreak & Patrisiogames.
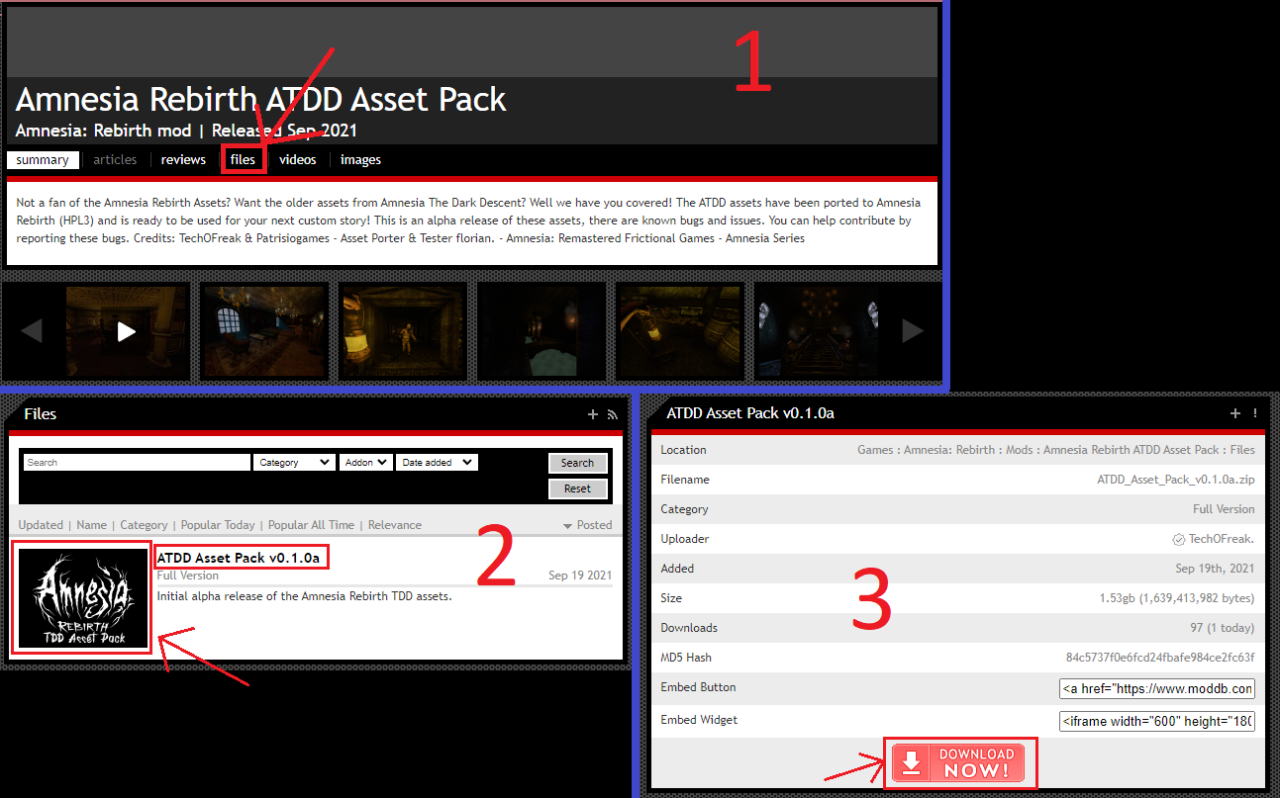
To download a file in moddb:
1. Go to files
2. Click the file
3. Click Download now button.
Copying assets
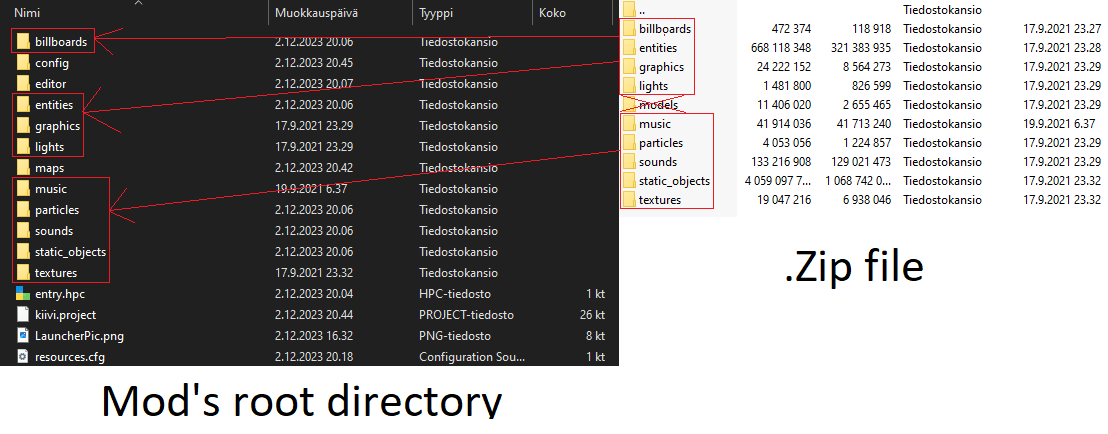
Assets must be copied in your mod’s root directory: Amnesia The Bunker\mods\YOUR MOD\
Do NOT copy them into: Amnesia The Bunker\mods\YOUR MOD\Assets\
1. Open the Zip. file and go to assets folder (image 1)
2. Drag and drop the folders you want to: Amnesia The Bunker\mods\YOUR MOD\ (image 2)
Do NOT copy models folder since that is for Amnesia: Rebirth and will NOT work in Amnesia: The Bunker
image 1
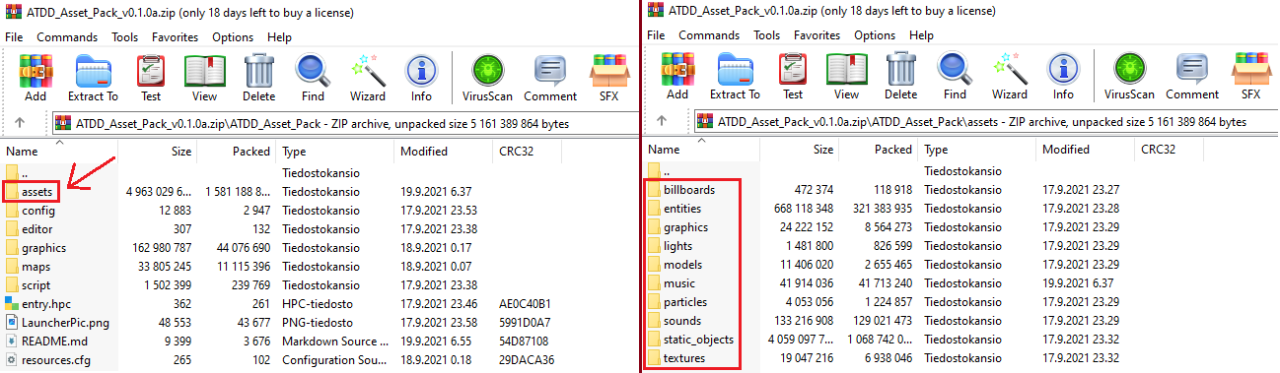
image 2
Adding necessary files
Now we need to create some files to make the assets work.
- Create a new .txt file named resources.txt in your mod’s root directory:\Amnesia The Bunker\mods\YOUR MOD
- Open the file and paste directories you wantExample:
<Resources>
<Directory Path=”/billboards” AddSubDirs=”true”/>
<Directory Path=”/config” AddSubDirs=”true”/>
<Directory Path=”/entities” AddSubDirs=”true”/>
<Directory Path=”/graphics” AddSubDirs=”true”/>
<Directory Path=”/maps” AddSubDirs=”true”/>
<Directory Path=”/music” AddSubDirs=”true”/>
<Directory Path=”/sounds” AddSubDirs=”true”/>
<Directory Path=”/static_objects” AddSubDirs=”true”/>
<Directory Path=”/textures” AddSubDirs=”true”/>
</Resources> - Go to File->Save as…
- Change the file name from resources.txt to resources.cfg and click save.
You can delete the unnecessary .txt file
- Create a folder named editor in your mod’s root directory:\Amnesia The Bunker\mods\YOUR MOD
- Open the editor folder
- Create a new .txt file named lookupdirs.txt
- Open the file and paste the categories you wantExample:
<Directories>
<Dir Category=”StaticObjects” Path=”assets/static_objects” />
<Dir Category=”Entities” Path=”assets/entities” />
<Dir Category=”Billboards” Path=”assets/billboards” />
<Dir Category=”Particles” Path=”assets/particles” />
<Dir Category=”Sounds” Path=”assets/sounds” />
</Directories> - Go to File->Save as…
- Change the file name from lookupdirs.txt to lookupdirs.cfg and click save.
You can delete the unnecessary .txt file
- Make sure you have launched LevelEditor.exe atleast once.
- Go to C:\Users\YOUR USER\Documents\HPL3
- Create a new .txt file named WIPMod.txt
- Paste your mod’s entry.hpc file location between “”Example:
<WIPmod Path=”C:\Program Files (x86)\Steam\steamapps\common\Amnesia The Bunker\mods\YOUR MOD\entry.hpc” />
- Go to File->Save as…
- Change the file name from WIPMod.txt to WIPMod.cfg and click save.
You can delete the unnecessary .txt file
That’s all we are sharing today in Amnesia: The Bunker – How to add custom assets, if you have anything to add, please feel free to leave a comment below, you can also read the original article here, all the credits goes to the original author Kiviviki ♪
Related Posts:
- Amnesia: The Bunker How To Uncap the Framerate
- Amnesia: The Bunker All Collectible Guide
- Amnesia: The Bunker Basic Surviving Guide
- Amnesia: The Bunker 100% Achievements Guide