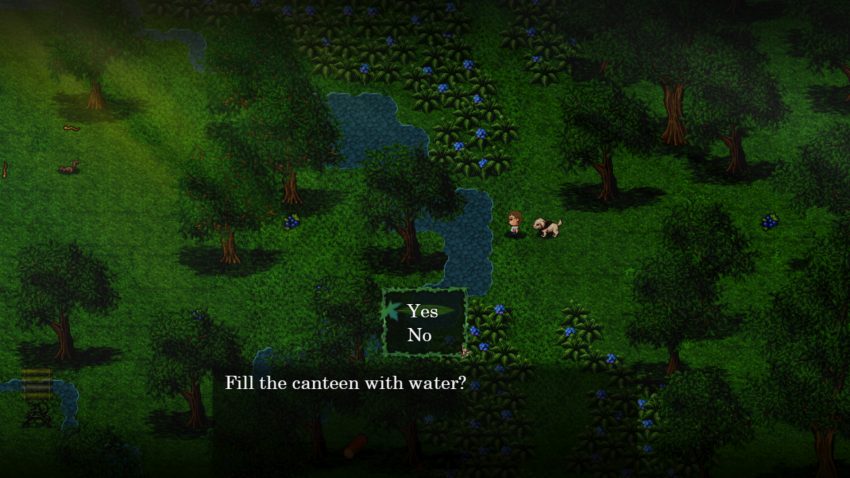
Here is the official walkthrough for Don’t Go into the Woods game.
Opening
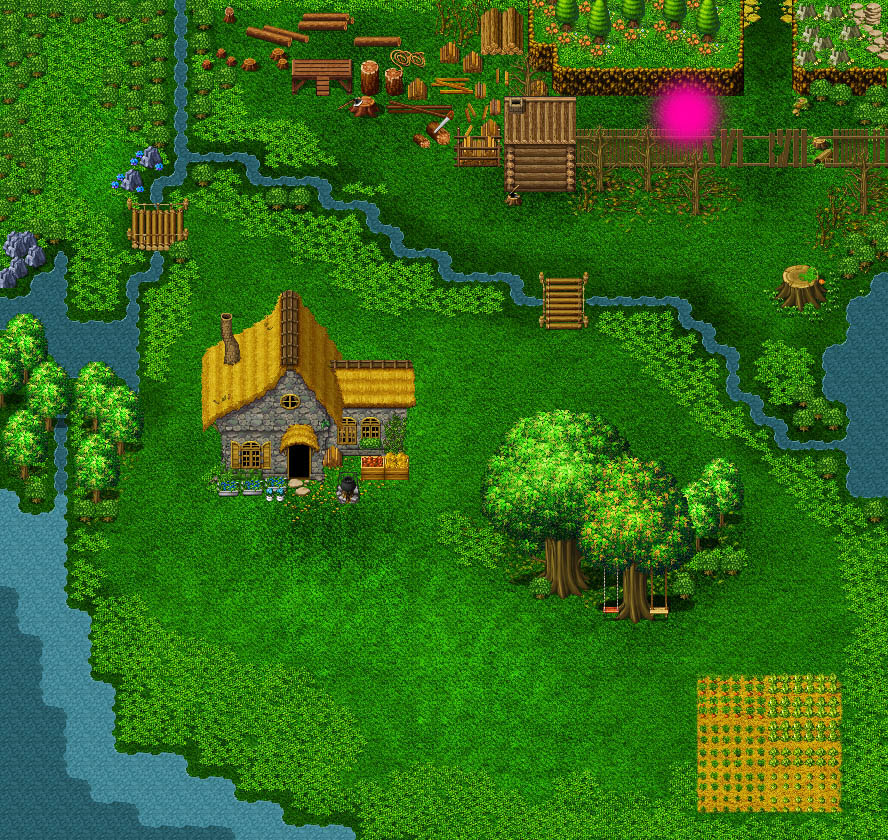
- You’ll start by waking up in your home. Lily wants to go play outside. Before that, feel free to take a look around, pick up your toy in the hall, eat breakfast (Lily will tease you for this) and explore outside if you wish.
- When you’re ready, interact with Lily’s swing outside (the one on the right of the big tree) for a scene. You’ll now go through the tutorial phase of gathering items and materials.
- First, your dad will make you gather some wood. You can find all 3 pieces you need up by his shed in the lumber yard. Take them back to your dad when you’ve gathered them.
- Next, you’ll need to find food and water. For water, simply examine and dark blue river running through the area. For food (berries in this case), you can find it in the top-left corner of the map outside.
- Once you’ve completed the gathering, Lily will give you some busy work to get you out of the house. (Before continuing, go ahead and explore if you wish. You won’t return here for quite some time!) Fetch her some flowers near where you got the berries, in the top-left portion of the map. When you try to return to the house, you’ll get a scene and have to chase Lily into the woods…
- Jump through the hole in the fence and go into the woods. You’ll soon become trapped in the woods. Just walk along the only available path (to the right and then up) and you’ll get another scene. This is where the tutorial phase ends and the survival begins!
- When you first become trapped in the woods, you won’t be able to explore very much of it. Grab some berries nearby and water from a stream to manage your survival, then head north when you’re ready. There’s a path leading up in the top-right portion of the map.
- You don’t have to play any of this game in a particular order. Most players will likely enter the first unusual place they see though, and you should probably do the same. As you head north you’ll see a strange mushroom hut. Interact with the door to go inside for a scene. You’ll now be tasked with gathering rare ingredients from all corners of the Wood.
- To the west of the mushroom hut you’ll find more materials such as rock as well as 2 merchants. These will be detailed later in the guide (in the ‘Northern Woods’ section). Further west you’ll exit the map and come to the fields, and just to the south of here is the Lakeside. This is where you can find rare metal and cloth.
- With all ingredients now available, you should start by crafting larger bags to carry more materials. You’ll need a balance of every tool in the end, so craft a little bit of everything for starters.
- The rest of this guide will be broken down into each location, what can be found there, and what you’ll need to advance.
Southern Woods
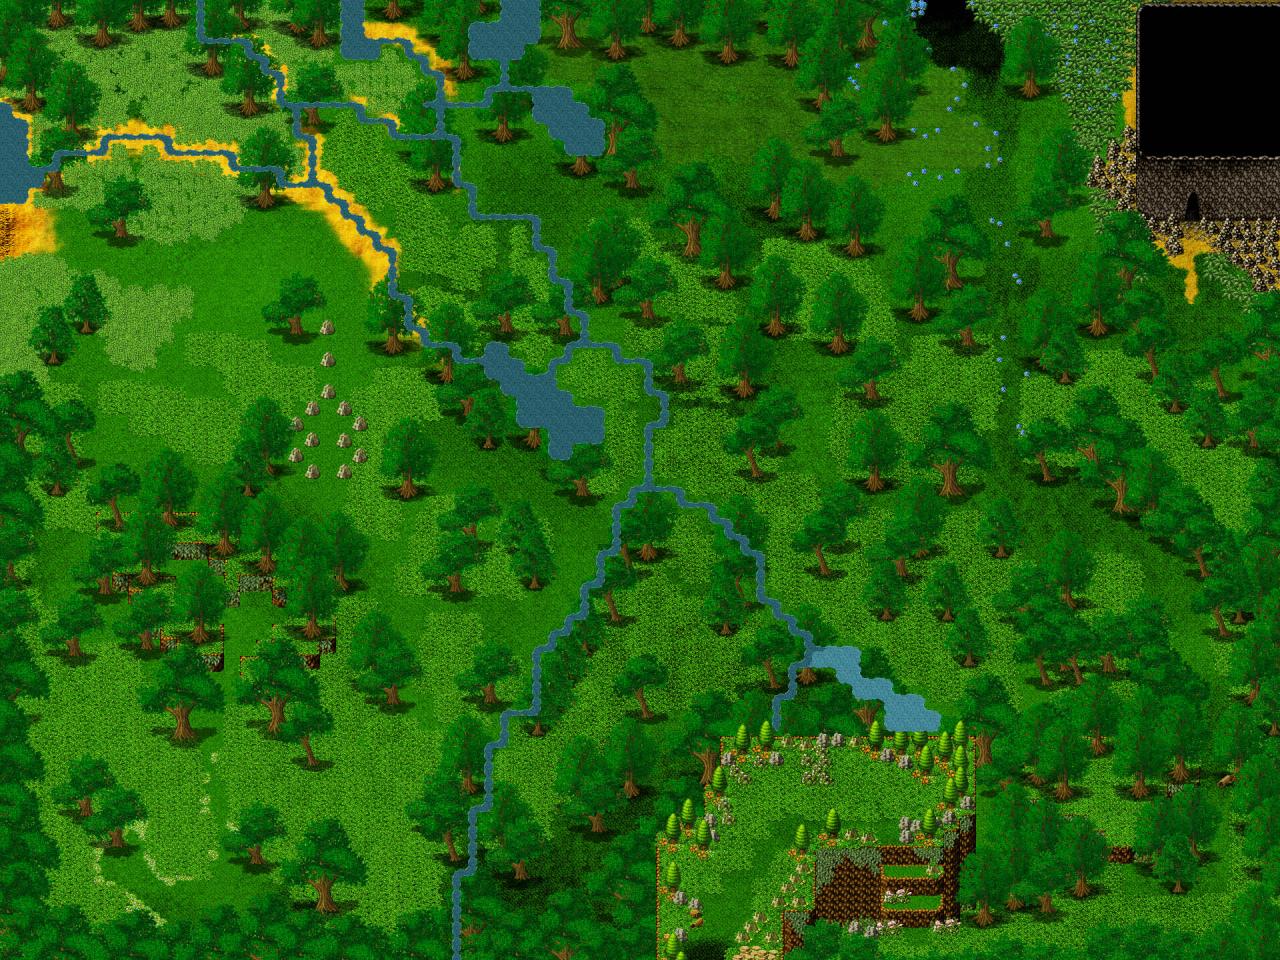
- There’s a campfire (save point) in the east-central area of the woods. It’s at the bottom end of the blue flower path.
- Wood is plentiful here, and there’s a couple cloth in the top-right corner of the map. There’s also a few rocks near the Dark Cave (top-right corner of the map) and towards the Lakeside exit (left side of map).
- Several wood bridges can be built to make passage easier here. They require 4 Wood each, so you’ll need to upgrade your bag before you can build them.
- You’ll need Hatchets and Pickaxes to break through certain obstacles here like thorns and boulders. Most notably, you’ll need a Pickaxe for the boulder blocking the entrance to the Dark Cave in the top-right corner of the map and later to reach the Bear Cub in the bottom-left portion of the map.
Bear Cub
- Once you’ve entered the Dark Cave and met the Momma Bear, she’ll send you out to find her cub. He can be found in the woods here towards the bottom-left corner. Before he returns home though, he’ll ask you to find him some ‘friends’ (aka food). Catch a couple nearby rabbits (they’re in the Southern and Northern Woods) and he’ll go back to his mom.
Dark Cave
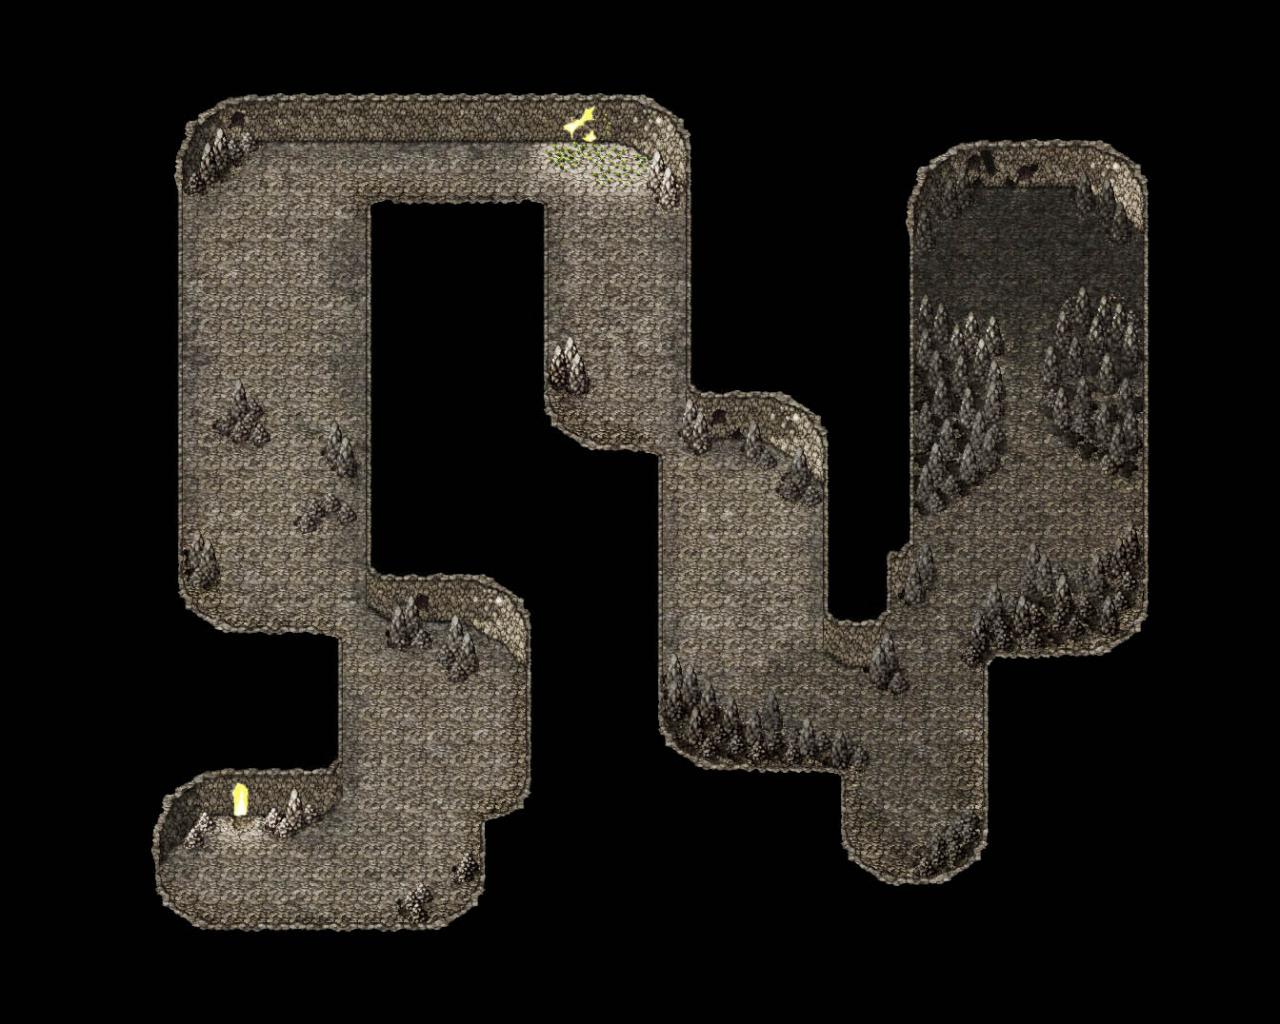
- The only campfire here is deep in the cave, accessed only after helping the bears inside.
- You can catch the lizards inside the cave, though they’re hard to see and grab hold of. You’re better off catching animals in the woods if you want meat.
- You’ll need torches to see inside the cave, so bring two or three with you. Remember to use them with the ‘T’ key.
- There are very few materials in the cave aside from rocks and, deeper inside, some metal.
- Head far north and east to find the Momma Bear. Once you return her cub to her, she’ll break down some rocks so you can reach the end of the cave, the campfire, ad the Bat Prince.
Momma Bear
- The bear wants her cub back, and you can find him in the Southern Woods (see that section for getting him to come back home).
- Once you’ve returned her cub and she’s opened the way forward, you can speak to her again for another quest. Bring her all the animals she wants for a big boost to your stamina.
Bat Prince
- You can find the bats and their ‘prince’ at the very end of the cave, past some boulders you’ll need a Pickaxe for. The Bat Prince wants to build up his tolerance to the light so he asks you to light the braziers nearby. You’ll need to upgrade your bag to carry enough wood to light them, and you’ll need a torch for each one too.
- Your reward for helping the bat will be another ingredient to help Lily. You can also chat with the ‘powerful’ and ‘intimidating’ prince and dictate how loud he speaks to you.
Northern Woods
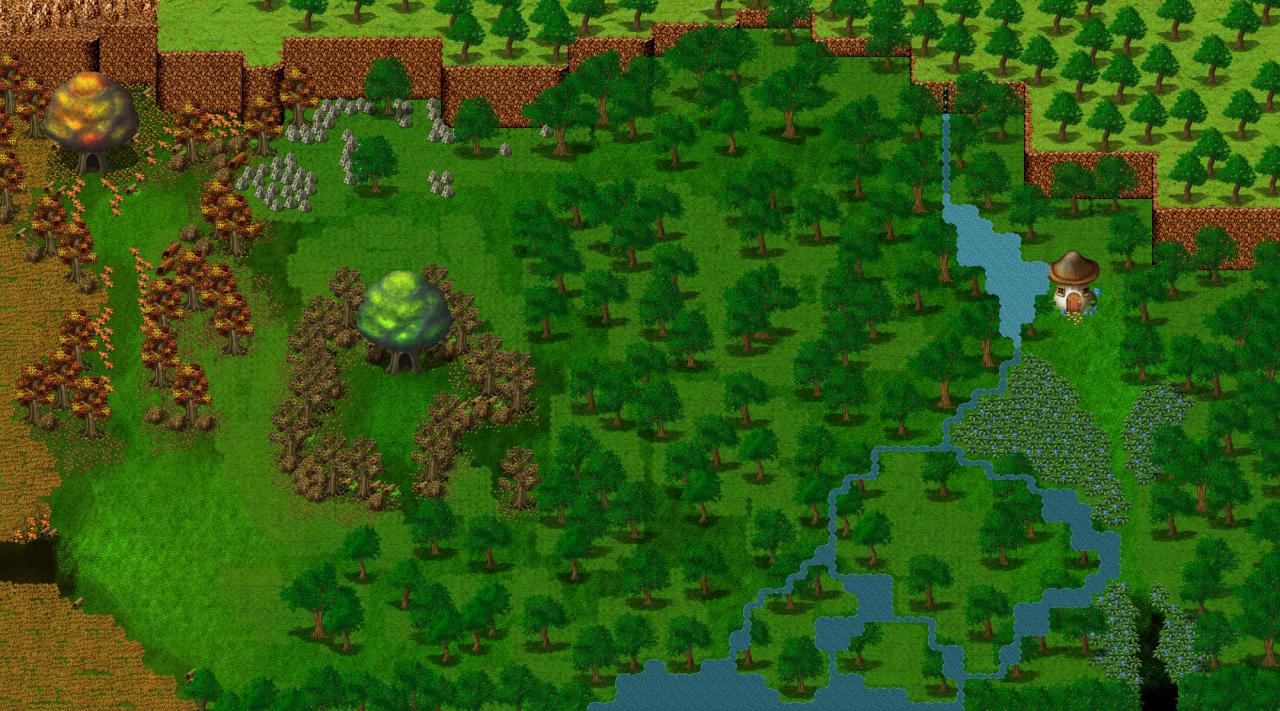
- There are 2 campfires here, one outside the Mushroom Hut and another near the central big tree (beside the Materials Trader).
- There’s a lot of animals to catch here, and they can be ‘exchanged’ (aka butchered and cooked) to the little guy in the top-left corner of the map. This is how you acquire meat, which greatly satisfies Hunger.
- Wood is common here, but most notable is all the rock available along the north side of the map.
- In the center of the map there’s a large tree with the Materials Trader inside. This is a very useful spot to trade in common materials like wood and rock for rarer ones like metal and cloth. Deliver in bulk as you craft larger bags so you can maximize efficiency and get more metal and cloth at once.
- As you first come into the woods here, you’ll no doubt notice the Mushroom Hut on the east side of the map. Inside, you’ll find Gob and your sick sister, as well as some food and a little kitten.
Gob
- Gob acts as a central hub for the player to gather information. After some scenes, you can ask him about the woods and creatures living in it for hints on where to go and who to seek out.
Kitten
- If you visit the Cow in the Fields, you can bring some Milk to the kitten. Gob will reward your kindness with Stamina Berries to boost your sprint duration.
Lily
- Lily lies sick in the Mushroom Hut until you gather all of the necessary ingredients to craft some medicine. Each ingredient is kept by one of the creatures around the Woods so you’ll need to help each one wither their problems before you can craft the remedy and heal your sister.
- Once Lily is healed, she’ll follow you around the Woods, but just because she’s better doesn’t mean you can just walk home yet…
Fields
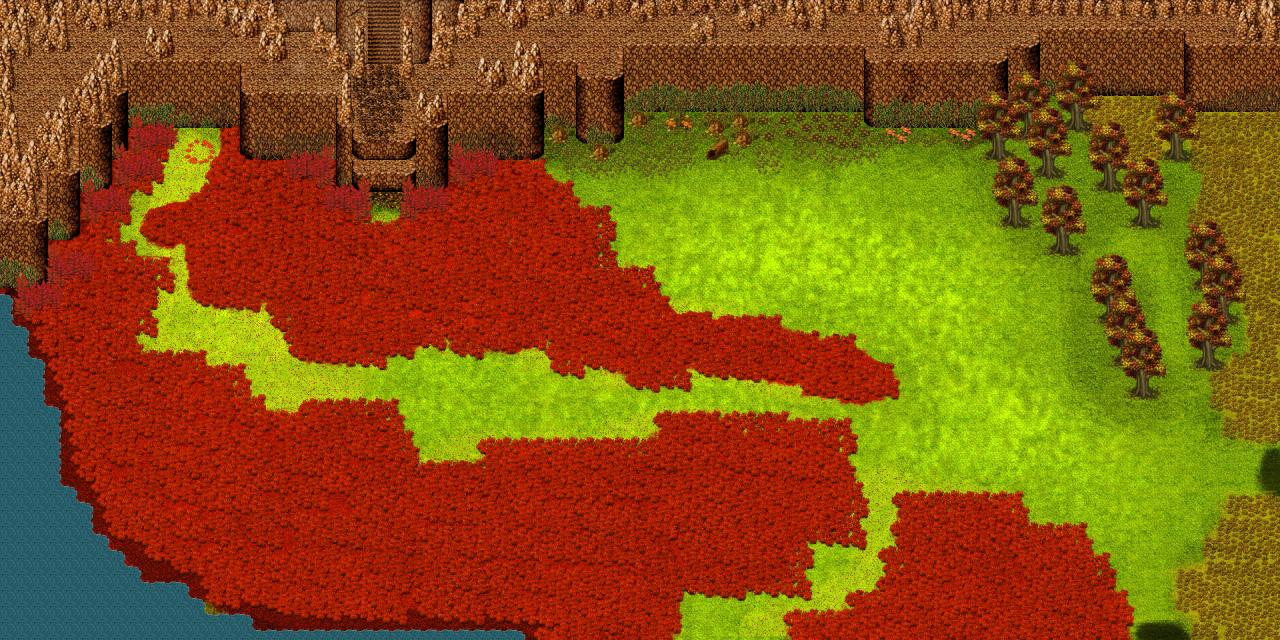
- There’s a campfire in the east part of the mat, near the exits to the Northern Woods and Lakeside.
- There are rocks along the mountainside and some wood, but materials are not plentiful here.
- Among the farm animals oddly present here, there’s a cow down the green path to the bottom-part of the map. You can empty your canteen to get milk from it and deliver to the kitten in the Mushroom Hut.
- You’ll need Pickaxes and Rope to climb the mountainside here and access the Mountains, which leads towards the final area of the game.
- Along the green path west, you’ll come across the Boar, one of the earliest and easiest creatures to find and help.
Boar
- Once you meet the wild, erratic Boar, he’ll ask you to craft him a new tusk. You’ll need metal and cloth to craft the item; both materials can be found to the south on the Lakeside or by trading in wood and rock back in the Northern Woods.
- Give the Boar his new tusk for one of the ingredients to cure Lily. You’ll even get to name the wild boar for your efforts, although Aiden isn’t exactly known for giving the best names…
Lakeside
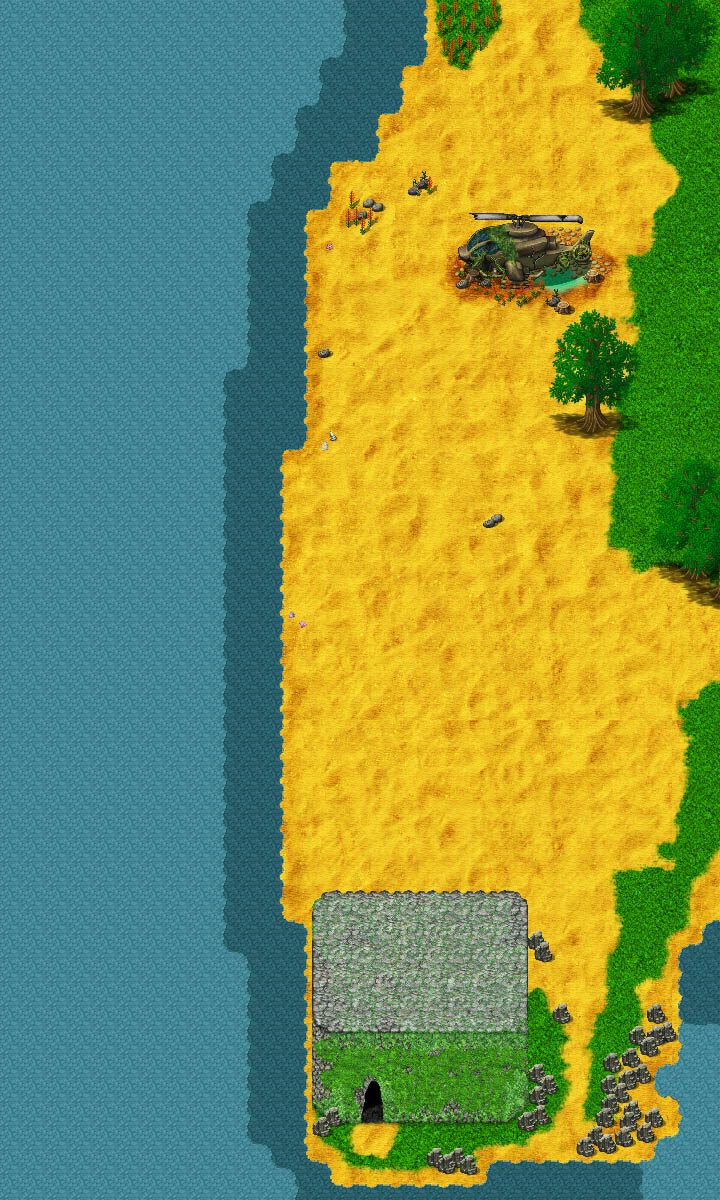
- The Lakeside is the last of the easy-to-reach areas. You’ll find a campfire by the Southern Woods exit.
- You’ll find a lot of metal and cloth here by the crashed helicopter. As soon as you get here, it’s a good idea to craft larger bags and a variety of items so you can begin traversing the Woods and reaching all the areas.
- You’ll need a Pickaxe to enter the Moss Cave to the south, but more noticeably you’ll need a whopping 10 wood to craft a raft in order to reach a nearby island. Once you craft the biggest bag available, you can easily find the wood and cloth to make the simple raft.
- A file is located by the crashed helicopter, though much of the document is illegible.
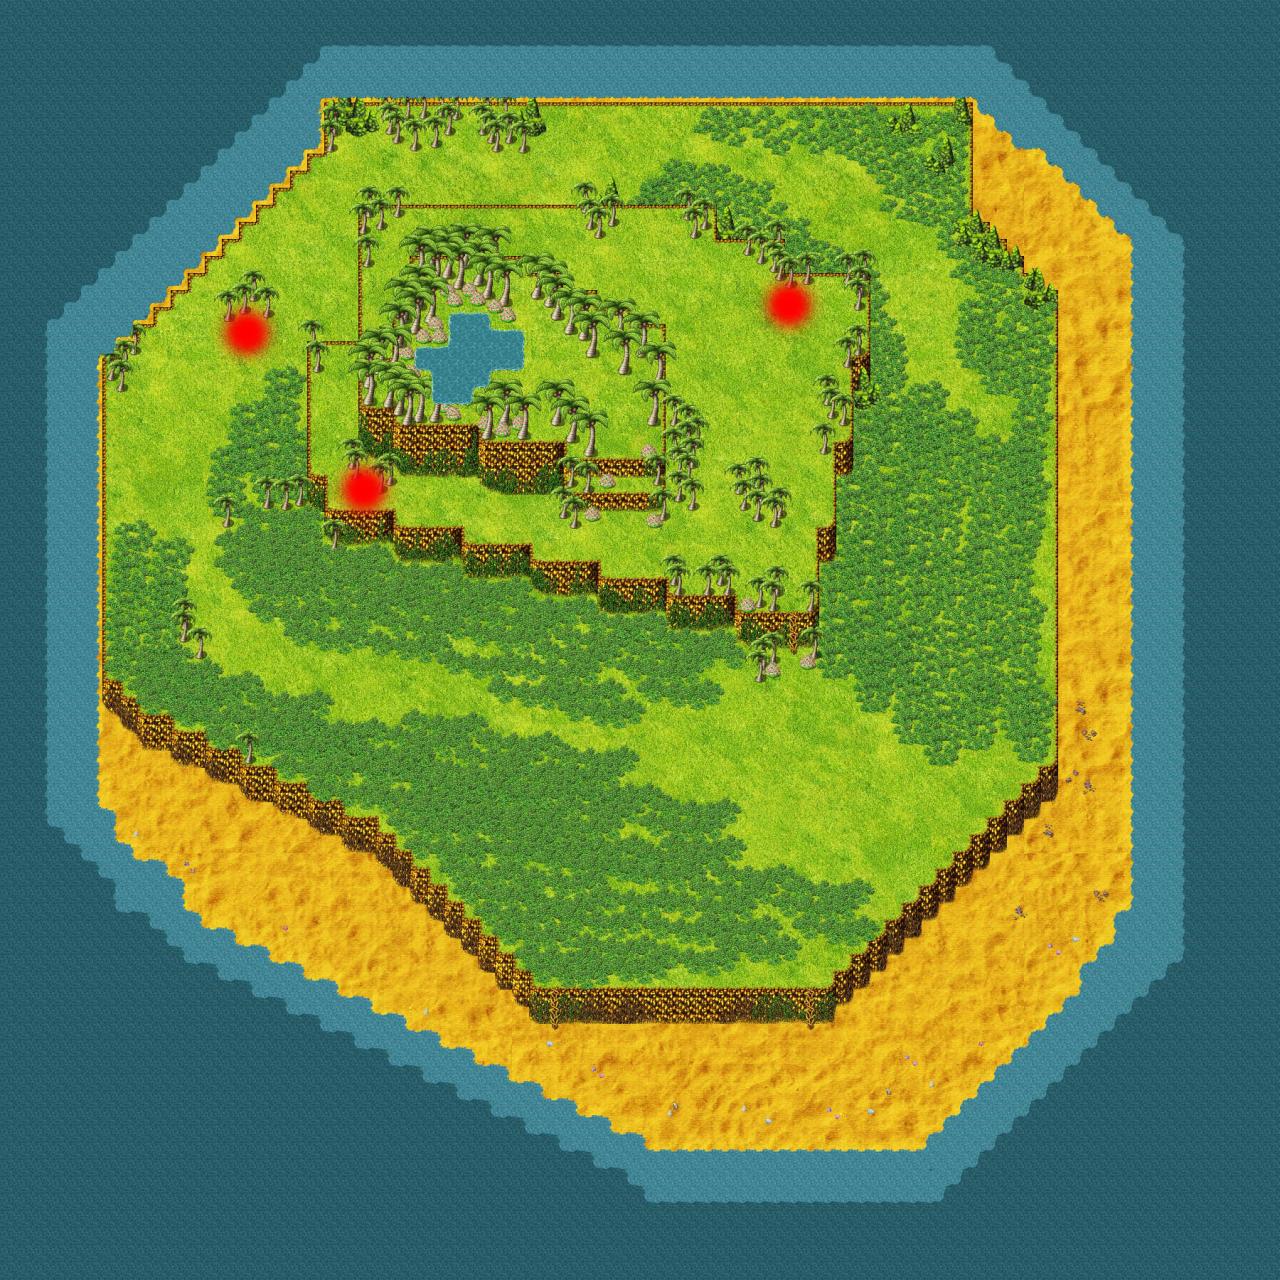
Island
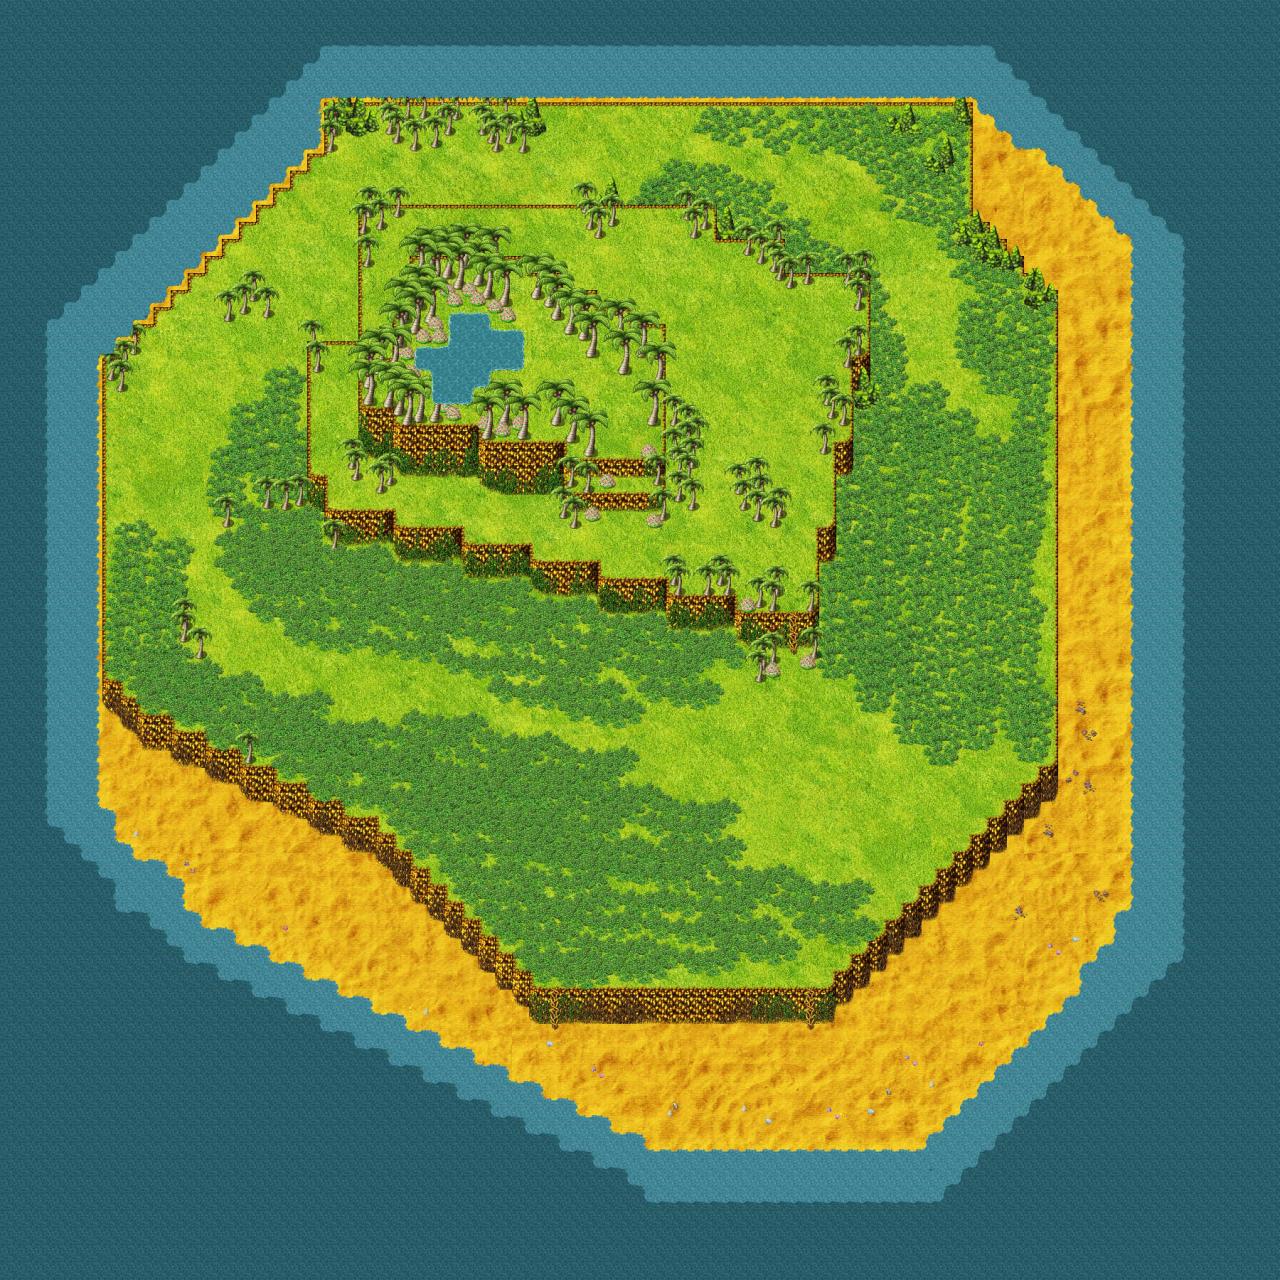
- Once you arrive from your raft, there’s a campfire along the south beach.
- There’s a good amount of cloth and metal scattered across the island since the helicopter originally flew over it as it crashed ashore. There’s also plenty of berries and wood available too.
- To the north, in the shallow water, you’ll see a larger fish that you can speak to. He doesn’t advance the main story or reward you with ingredients to cure Lily though and is completely optional.
- You’ll need Hatchets to navigate your way to the center of the island where you’ll meet the Swan Princess. Complete her quest for another ingredient to save Lily.
Big Fish
- Catching up to the Big Fish can be tricky, but once you find him he’ll order you to clean the metal out of his water. There are six specific shards to collect around the island’s shallow water before he’ll take the time to speak to you.
- Once you’ve cleaned the water, the Big Fish wants you to bring him smaller fish to feed on. There’s plenty of the little fish swimming about, but you’ll need to be quick to catch them. Try standing still and waiting for them to swim up to you if you’re having trouble.
- Once the Big Fish eats his fill he’ll reward you with some extra stamina.
Swan Princess
- You can find the swan at the center of the island in a small pond. She’ll grant you a lot of extra stamina just by speaking to her, but to get an ingredient for Lily’s medicine, you’ll have to find some Shiny Stones scattered along various shores.
- Each Shiny Stone drifted away by the current, so they’re all need water of some kind.There are six in total:
- 2 on the Island, one by the campfire and another to the far west side of the beach.
- 2 are on the Lakeside, one south of the raft and another just north of it.
- 1 is in the Fields to the far west side.
- 1 is inside the Moss Cave. You’ll need to create 3 wood bridges (12 wood in total, so you’ll need to make a couple trips at least) and use a Pickaxe to reach the stone. It’s just atop the first vine you can climb up.
- With all six stones, return to the Swan Princess for another medical ingredient for Lily.
Moss Cave
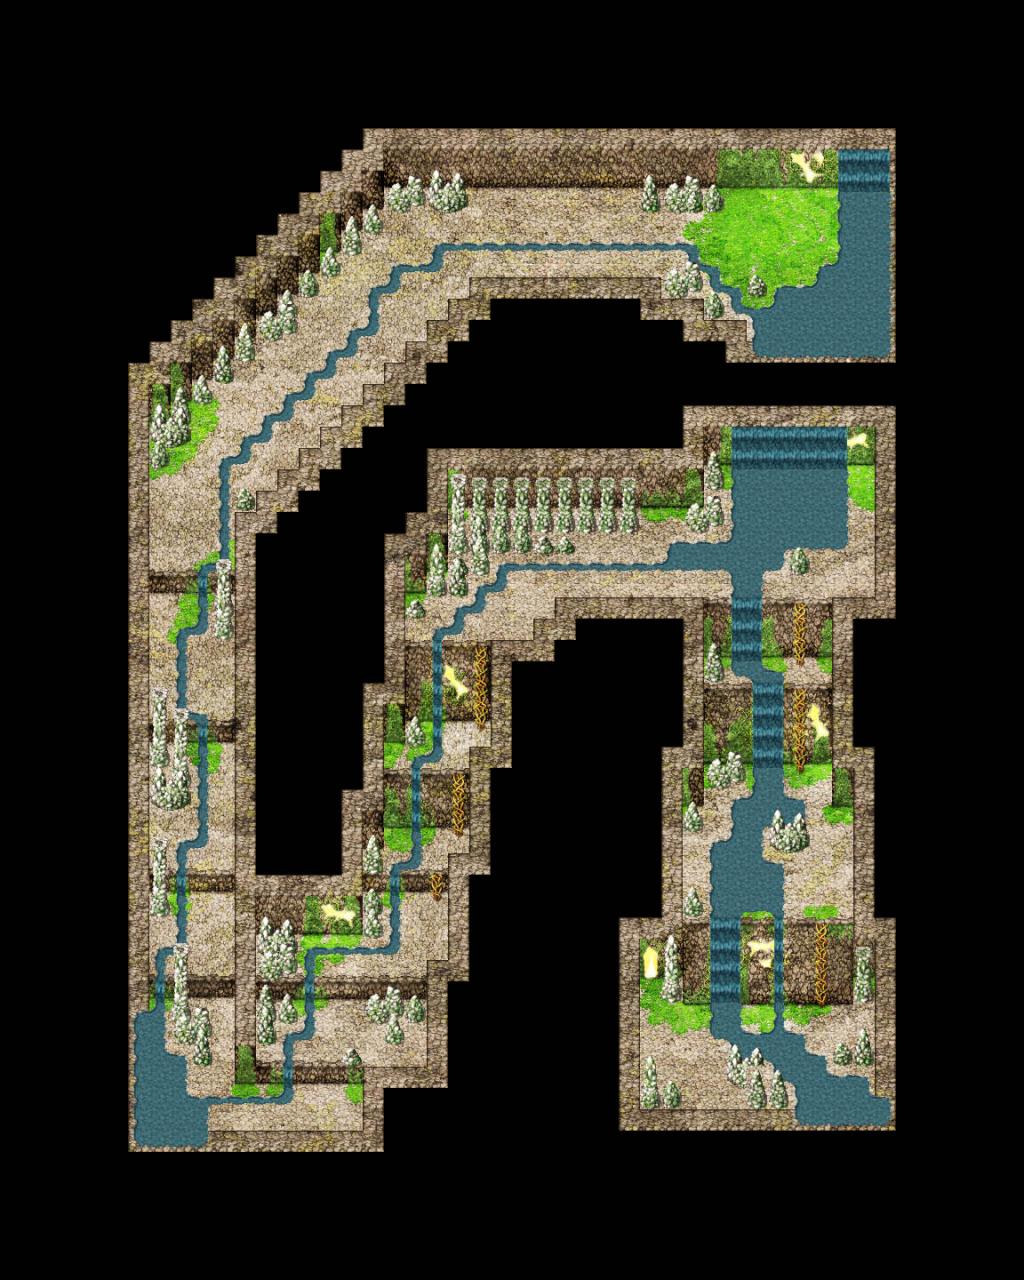
- The Moss Cave is the longest and most difficult area to navigate due to every path being blocked by another obstacle. You’ll need to make several trips to fully explore the cave. In all, you’ll need a lot of wood to build small bridges (12 right off the bat to even begin exploring), 2 Pickaxes for six boulders, and 6 ropes to climb various walls. For the creature inside, you’ll need a whopping 30 berries, so make sure you upgrade your bag and bring a lot with you.
- Towards the end of the cave you can collect some metal and there’s a little cloth and rock scattered about, but this ins’t the best place to gather materials.
- The only campfire is deep inside the cave after you’ve crafted your way through it all.
- At the end of the cave you’ll find the Ant Queen, and helping her will net you another ingredient to help Lily.
Ant Queen
- The Ant Queen is one of the easiest creatures to help once you finally reach her. The cave itself is far more of a challenge instead.
- You’ll need 30 berries to satisfy the queen, but they’re very easy to collect outside in the Woods. She’ll reward you with another ingredient to craft medicine once you’re done.
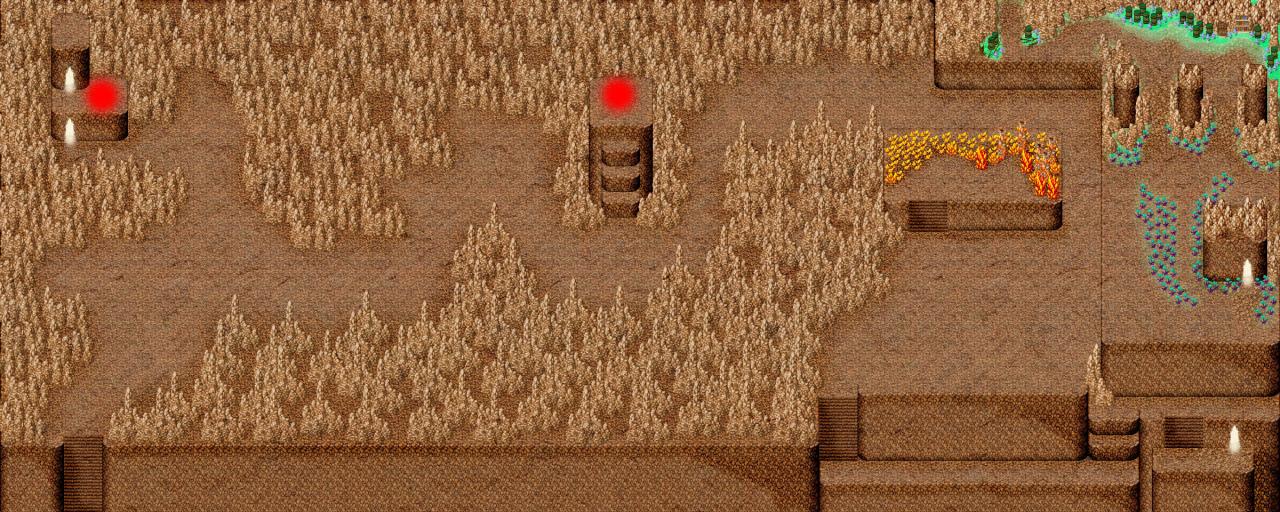
Mountains
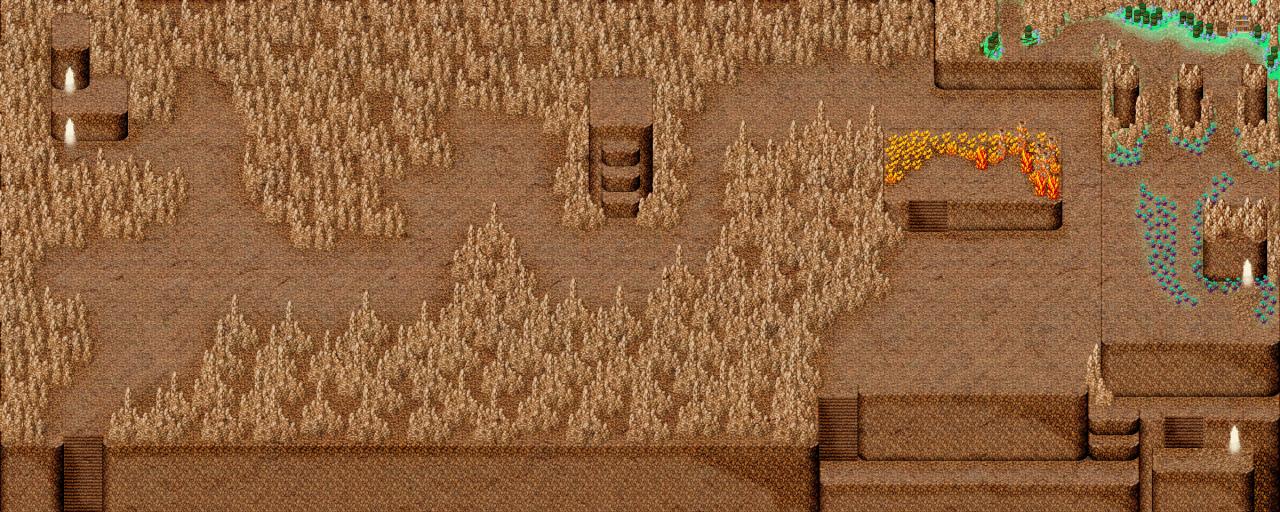
- The Mountains are one of the last areas of the game and probably one of the last you’ll visit, though you can come here almost right away if you wish. All you need is some rope and pickaxes to scale the mountainside back in the Fields.
- There’s a campfire once you enter the area, but another until you reach the next, final location with Lily by your side.
- There’s plenty of rock here but not much else (no food at all, so come prepared). You’ll also need a few pickaxes and several ropes to continue through the whole area.
- As you head east, you’ll spot some colorful orange crystals. There’s a large Ogre among them you can speak to, and further on you’ll find the king of the Woods among the ‘green ooze’.
- You won’t be able to proceed beyond the mountains until Lily is with you, and to heal her you’ll need to craft the medicine from ingredients given to you by all of the creatures around the Woods.
Ogre
- You can speak to the big ogre at any time, but you won’t get far with him until you’ve spoken to King Carbuncle. Even then, you’ll need to help the Boar back in the Fields before the Ogre will task you with crafting an item for him as well.
- Once the Ogre tells you about wanting a new club, you can craft one out of wood, rock, cloth, and metal. It takes a lot of materials but gathering them shouldn’t be too hard by the time you’ve reached the mountains.
- Give the crafted club to the Ogre for one of the ingredients to help Lily.
King Carbuncle
- When you first meet Gob back in the Mushroom Hut, he advises you to come see the king. Carbuncle is an eccentric creature that offers some vague insight into the truth of the Woods, but he doesn’t actually ask for help for himself. Instead, he tasks you with helping all the creatures in the Woods, including yourself and your sister.
- Return to Carbuncle once you’ve healed Lily and he’ll allow you access to the final area of the game, the Forbidden Land beyond the mountains.
Forbidden Land and Ending
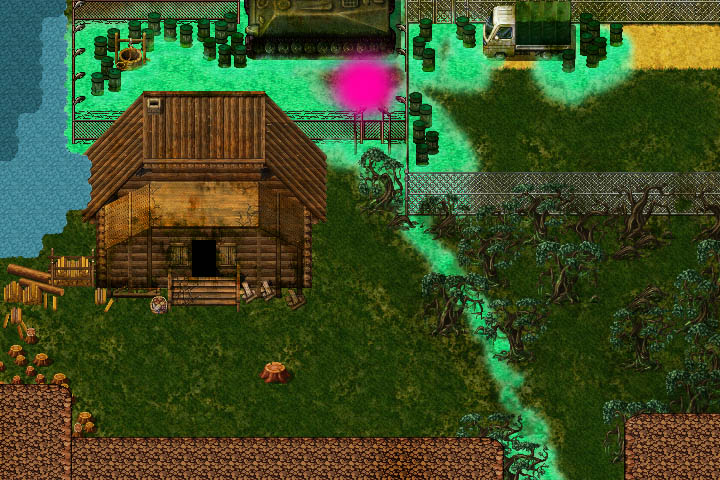
Forbidden Land
- Make sure to examine the Wanted Poster outside the rundown cabin. This is how Aiden learns how to call for help later on. Without it, you won’t be able to get the ‘Good Ending.’
- Enter and explore the dilapidated cabin to find some files and explanations as to what really happened here. Collecting the journal on the table also unlocks crafting for the final tool you’ll need to descend the well outback.
- Craft the Extended Rope out of a lot of cloth and metal, then hop through the broken fence and walk through the toxic waste to reach the old well. Climb down to find what you’ve been looking for a way back home at long last.
Home
- You can return home as soon as you craft rope and climb back up the cliff you fell down at the beginning of the game, but your father has locked up the fence with a sturdy gate.
- After retrieving the key from the well, you can finally return home and find your dad. He’s not at his shed or seemingly in the house, but if you examine the bookcase in his room, you’ll find that it opens up into a secret room.
- NOTE: Once you go inside the Secret Room behind the bookcase, there’s no going back. This is the end of the game.
- There’s a few items in the Secret Room, as well as a final journal to read. You’ll mainly need two small keys to open the door here, one of which is with the journal and another is by a gun. You can take the gun or not, but it might help in the final confrontation.
- Use the small keys on the door and examine the teddy bear. You’ll find a hidden item but then find yourself cornered as the final event begins.
Final Confrontation
- The final event consists of 3 parts as you get further and further cornered. You can try talking your way out of the situation or slow your enemy down using Coco or the gun (if you took it earlier) or by calling for help (if you found the Wanted Poster and learned who to call).
- Your enemy’s dialogue changes on each stage of the event, so try whatever you can to buy time and survive.
- When you’re cornered for the third and final time, you won’t have many options left and any mistakes will result in severe consequences. Choose carefully if you want to escape unharmed.
- If you don’t want to try it for yourself or need help, read below for how to get specific endings.
- NOTE: It’s not wise to send Coco if your enemy has the gun (which he steals from you if he gets too close or has by default if you didn’t take it to begin with).
Endings
- Follow these steps to obtain the desired ending. As always, no spoilers.
Good Ending
- Find the Wanted Poster back in the Forbidden Land.
- Call for help on the first stage of the final confrontation. This will give help enough time to arrive. Calling after the first event will not unlock the Good Ending.
Neutral Ending
- Take the gun before initiating the confrontation.
- On the final stage, when you’re completely cornered, shoot your enemy.
Bad Ending
- This ending occurs if your enemy catches you in the final stage when you’re completely cornered (this ending is basically a game over).
Stamina Berries and Scraps of Paper
- Stamina Berries are buried under mounds of soil spread across the maps. They can be dug up using a Shovel, though many patches of soil contain materials or berries and aren’t worth digging up. Stamina Berries, on the other hand, greatly increase your sprint duration and also unlock an achievement once they’re all collected.
- Scraps of Paper can be found and assembled into a completed file for some story explanation. Like the Stamina Berries, they are scattered and buried across the Woods.
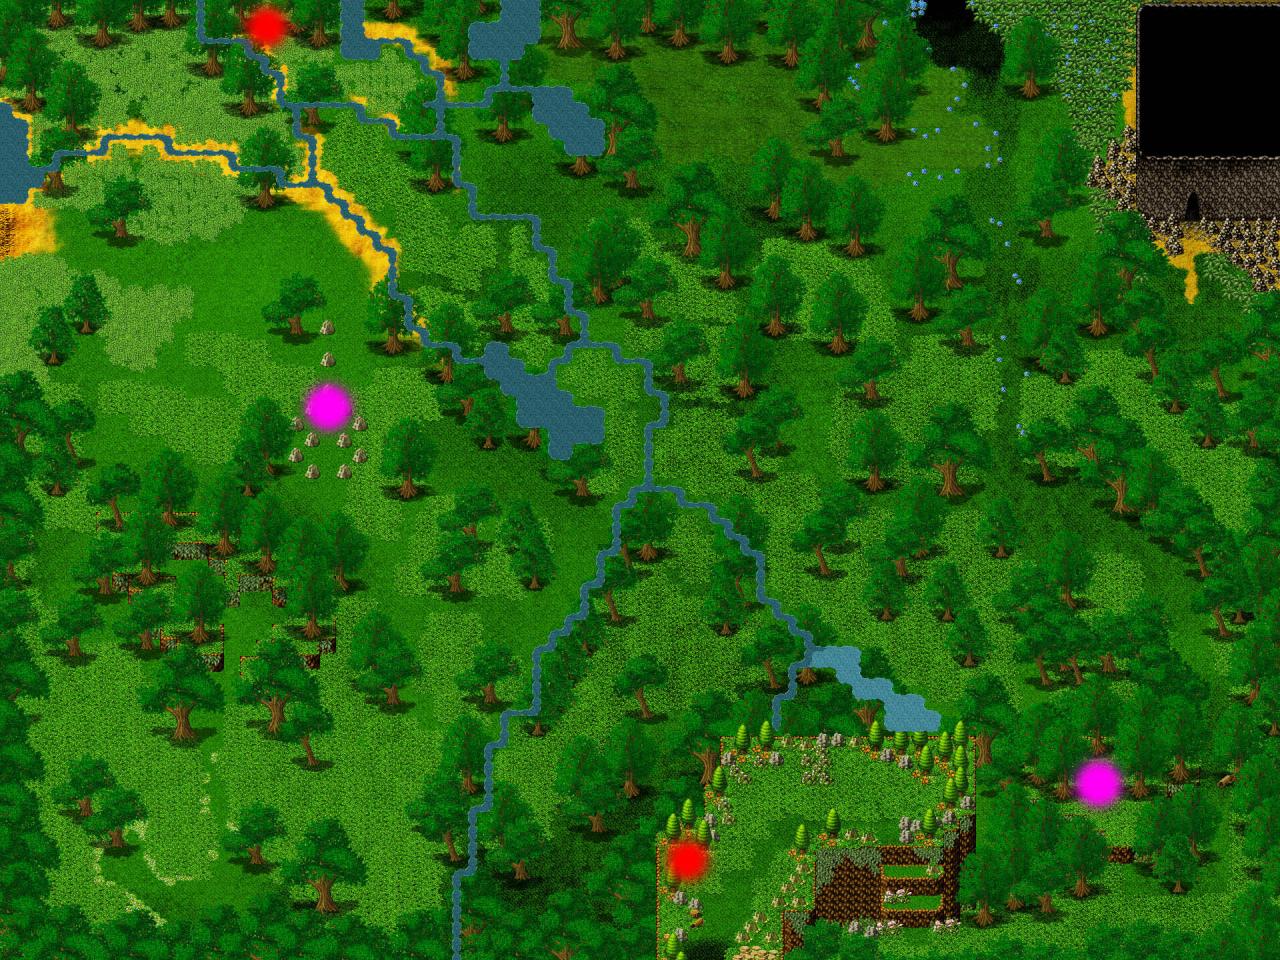
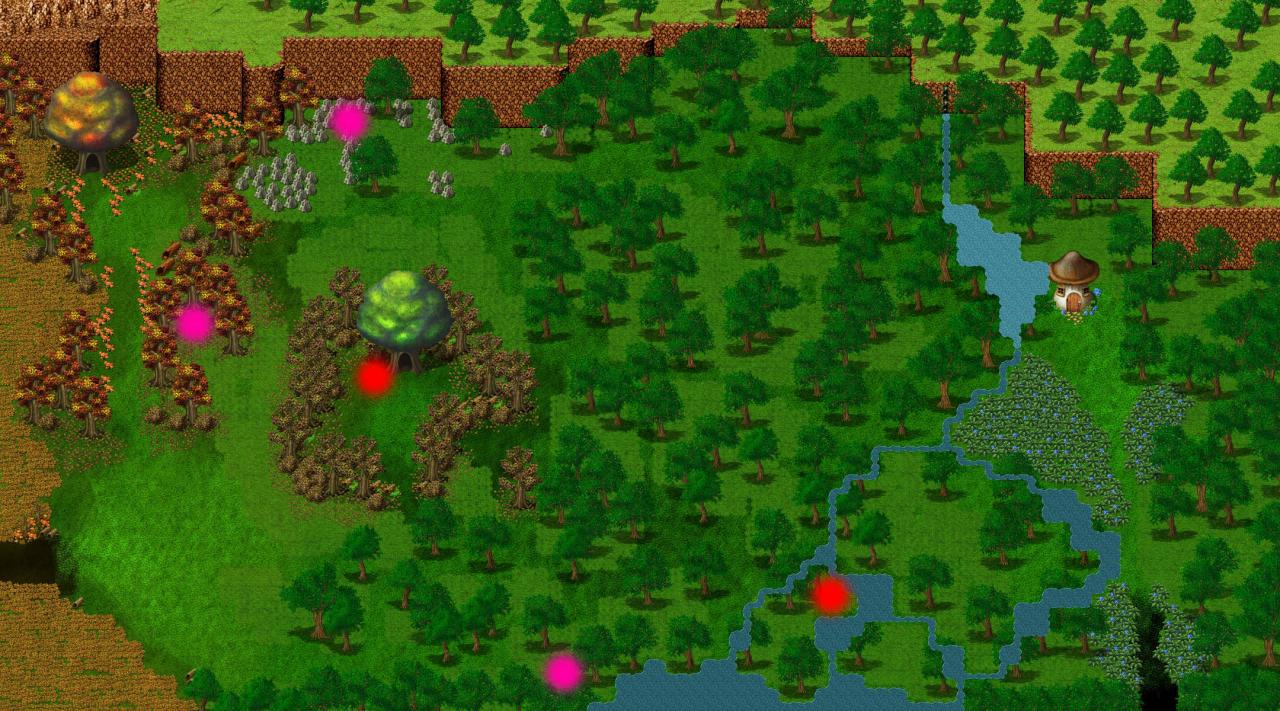
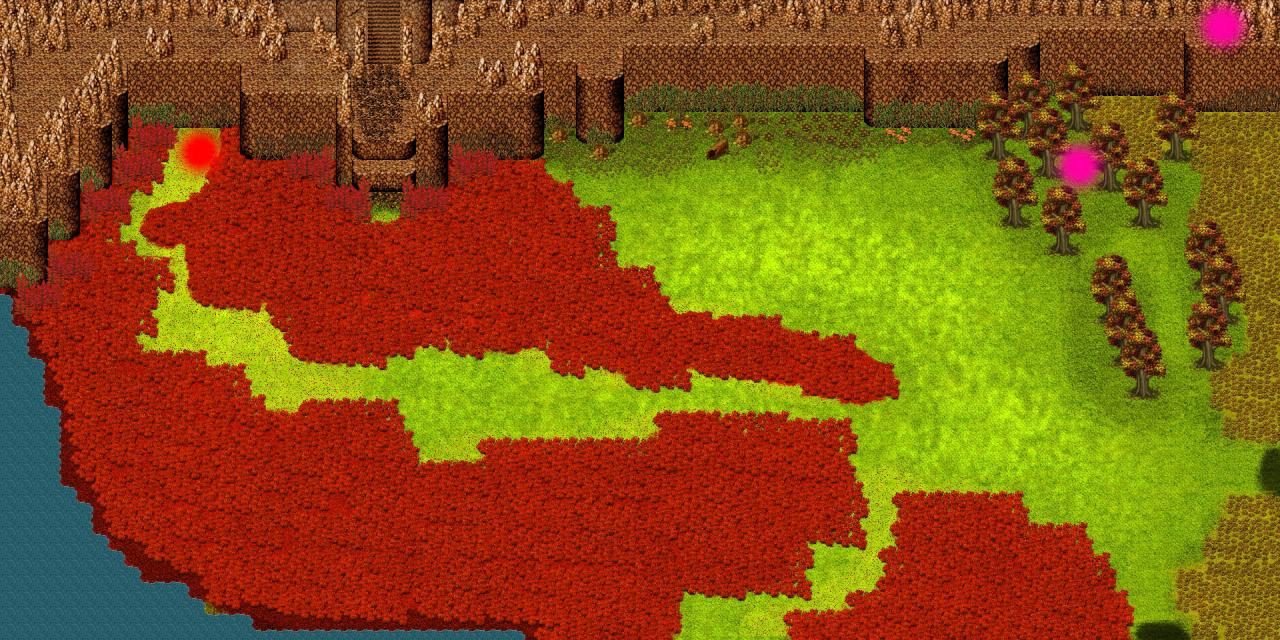
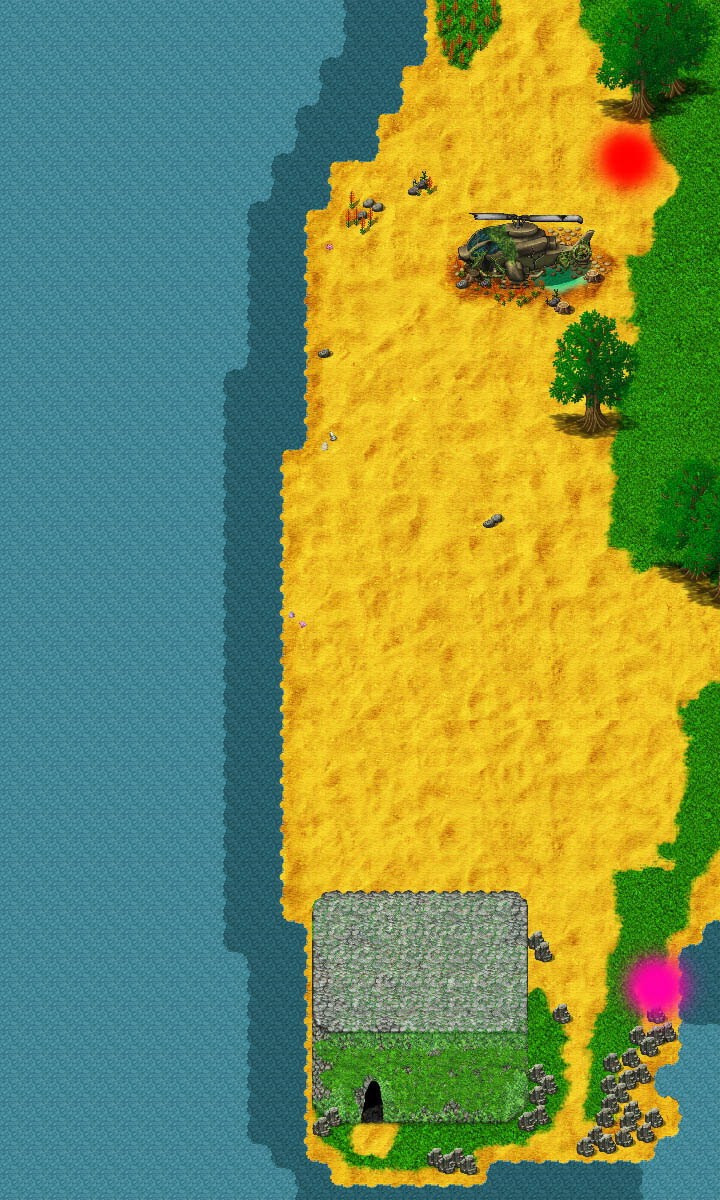
- For this guide, see the attached images for reference. Red Dots indicate a Stamina Berry, and Pink Dots indicate a Scrap of Paper.
Southern Woods
- 2 Stamina Berries
- 2 Scraps of Paper
 Northern Woods
 - 2 Stamina Berries
- 3 Scraps of Paper
 Fields
 - 1 Stamina Berries
- 2 Scraps of Paper
-
Lakeside
- 1 Stamina Berries
- 1 Scrap of Paper
 Island
 - 3 Stamina Berries
 Mountains
 - 2 Stamina Berries
 Forbidden Land
 - 1 Scrap of Paper
 Home
Home - 1 Scrap of Paper
Written by clecota
