For Phasmophobia players, this is long comprehensive guide to try and cover everything the community knows about Phasmophobia. While it spoils a lot of the “discovery” for the game, it might prevent you a lot of gratuitious scares and generally save you some deaths, while making you a lot more useful in a team
Introduction
Welcome to this large guide which will attempt to cover everything known about this game, and especially give as much verifiable information about the game and its mechanics as possible to give everyone an even playing ground starting out and make Amateur missions a breeze and prepare you for Intermediate.
Obviously, as a horror game, there is a tradition to discover things as you go and not read up in advance to keep the suspense. This guide won’t provide that and will mercilessly dissect as many mechanics as possible. If you really want to keep it secret, you’re free to skip.
A lot of this information comes from other sources, both other guides, Youtube guides and most importantly decompiled information hosted on Github that gives lots of exact values. I won’t just copy and paste them into the guide, so I invite you to follow this guide if you want all the information: https://github.com/azsry/phasmophobia_mechanics
This guide is still pretty short on actual images of events inside the locations. I’m not good at taking them, especially wandering in solo just snapping pictures of extremely dangerous situations, and I’m not going to pilfer them. I will try to split it up as much as possible to ensure it’s readable, but most of this stuff should be obvious after a few rounds (plus it keeps some mystique to it!). When in doubt, ask your teammates what things look like!
The Tutorial
When you first boot up your game, you will be forced into the Tutorial. You cannot play or do anything else until you’ve at least given it a try, and honestly it can be genuinely unnerving when starting out. While the ghost is intentionally neutered, it’s not disabled, so you will get a somewhat genuine, if very low difficulty (both Solo modifier and Tutorial tweaks) mission.
First of all, let’s get the obvious out of the way. If you do not want to do the Tutorial, just start up the truck again (same button you used to open the door) and you will leave and “complete” it. Solo missions are by far the scariest in the game, you have no-one else to speak with and no-one who has your back if anything goes wrong, and you have to stick your face everywhere to collect clues. No-one will blame you for noping out and joining your team in a 4-man Amateur mission.
The Tutorial always takes place on the same starter map (Tanglewood Street). It is the simplest map in the game, with one floor (plus basement), really good light coverage and good location hints (the alarm car in the Garage notably). It obviously makes for a good place to learn the game if the ghost is sufficiently pacified, which is provided to you during the Tutorial free of charge.
The TV will dispense you a quick tutorial, which you can scroll through with your remote. Most importantly however, it will straight up tell you which room is the Ghost Room. Obviously the rooms are not labelled on the map, so you might still need to look around a bit to find the room you are looking for.
All and all, the Tutorial is frankly low interest, especially since it doesn’t teach you genuinely important information in a controlled environment like how to actually find the ghost room or what to do during a Hunt. Don’t be ashamed of skipping it, though it makes good practice to quickly throw the testing items in there to see if you can figure out the ghost type by yourself.
Lobby Preparation
Before any ghost investigation, it is important to prepare well for your upcoming mission. Generally speaking, you will want to get a full team of four players on every mission with functional microphones. Every extra person means more ground covered, more items contributed to the pile and more chances to catch specific events or take critical pictures… and of course, one more target for the ghost if things go badly. Also, the ghost does not scale with the amount of players past playing alone.
Choosing the map is an important way to tweak the difficulty. The bigger a map, the more dangerous but the more rewarding (identifying the ghost on a bigger map gives more money). The more difficult, the more payout but the ghost will be more active. Shown below is an example beginner map with three starter maps.
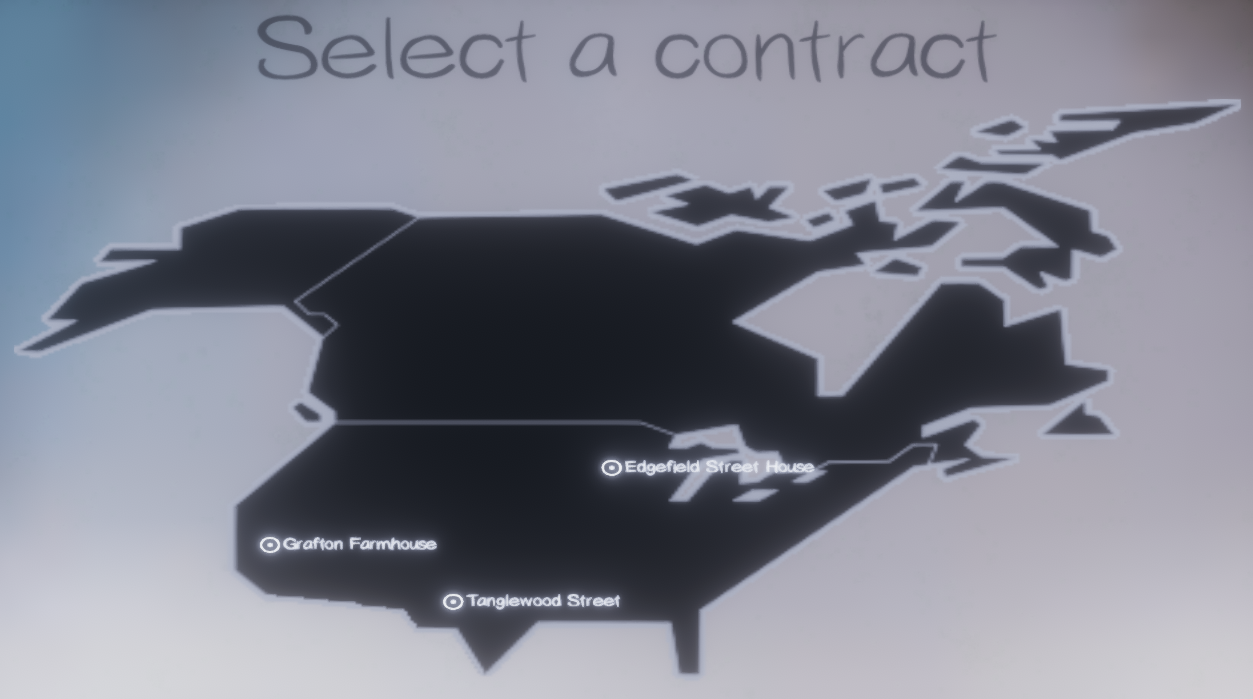
You will have three kinds of maps, unlocked each at different player levels in rough order of “actual size”:
- Small Maps. Tanglewood Street, Edgefield Street House, Ridgeview Road House, Grafton Farmhouse, Bleasdale Farmhouse. Unlocked immediately, they are decently small and can be swept before the safety timer is up with ease, especially if you split up. You should play these until you get more confident with the game, starting with the normal houses and moving up to the Farmhouse as an “intermediate” step once you have gear and a few successes.
- Medium Maps. Brownstone High School. This map has two full floors and close to 40 rooms, giving you a quick bearing of just how big “medium” can get. While it has some good Ghost Room clues, it is strongly recommended you don’t play on there until you have enough gear, including a full set of Sanity Pills. Unlocked at Level 3.
- Large Maps. Asylum. As of this Early Access version, the one and only. It is a gigantic map with long, winding, dark hallways. Even on Amateur, this map is sure to be painful to any team without full gear and lots of experience under their belt. Unlocked at Level 5.
You will also encounter three kinds of difficulties as you level up, with a random selection of difficulties in all your contracts.
- Amateur. This difficulty is the starter difficulty and a very good way to ease you into the game until your team has full gear and double digit levels (remember that you can play on bigger maps to ratchet up the difficulty naturally without making the ghost super dangerous). At this difficulty, you will get five minutes of setup time once the truck is opened, allowing you to quickly case the house without risking an attack. The ghost will be relatively peaceful even if active and you are likely to finish the level without a hunt if you work quickly and efficiently.
- Intermediate. This difficulty is more of a standard for the game and a good way to get the training wheels off once your team feels ready for some brawn. Setup time is lowered to two minutes, giving you a brief safety window to locate the ghost room and get your gear in place before things start getting dangerous. The ghost will be more hostile and is very likely to start hunting a bit earlier to put your team on edge. Unlocked at Level 10.
- Professional. This difficulty will test you even with full gear and a solid understanding of the game, especially on bigger maps. You will have no setup time, meaning that the ghost can start acting against you the second you step through the front door, including a blitzkrieg hunt. Expect relentless pressure and a catastrophy unless you quickly pin down the ghost room and apply safety, and don’t overstay your welcome! Unlocked at Level 15.
You will also have access to the Item Store. By default, you will have no money and a small set of “starter items” that are provided for free, allowing you to do very basic investigation but still find all the clues if you operate efficiently. Of course, this will be inadequate extremely quickly and leave you in danger, and as a result you will want to buy items with your hard-earned mission cash to bolster your inventory.
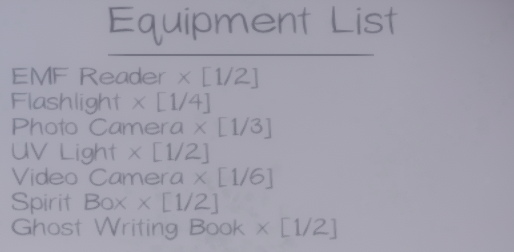
Featured below is the default, free equipment list. The first number denotes the amount, the second number denotes the maximum allowed per level. Note that there is plenty of extra equipment you can add to the list!
Make sure everyone adds their gear (don’t be shy, more gear means faster work, and you can recoup bad missions on Amateur more easily), readies up and you can start your match! We’ll guide you through a first theorical match, and then go back to visit how items work, ghosts act, maps look and other oddities.
The Truck
Once you spawn into the level, you will be tucked away safely inside your ghost hunting truck, parked right outside the location you are about to poke and plunder for clues. Until the front door is opened, the level is frozen in time, so don’t hesitate to hold everyone up until everyone is ready and geared up. Every second counts!
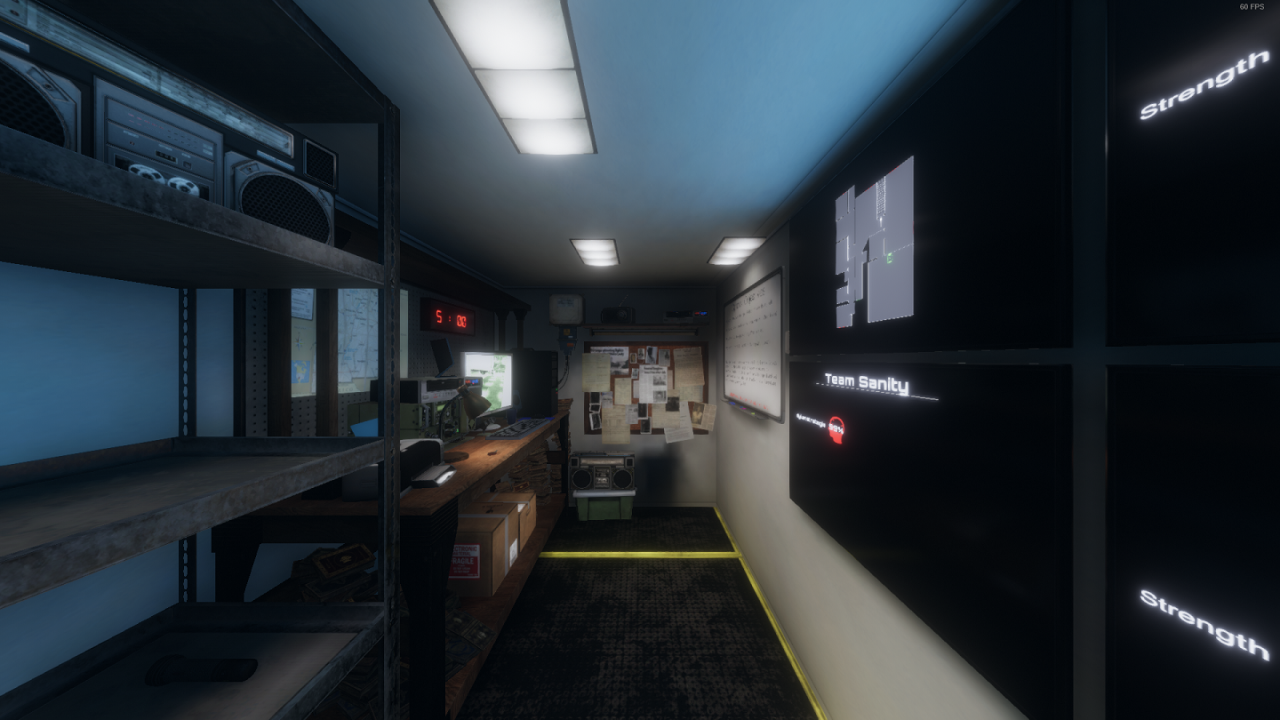
Once everyone has spawned in, the actual mission will fully load in, giving you a few things to survey. First of all, your mysterious handler will broadcast a short form briefing on the radio at the start of the level. Most of it is fluff, however there is a varying part that will claim that the ghost is either calm and relatively dolice, aggressive and dangerous, or that there is no further intel. While it’s not known if it truly affects the ghost’s aggressivity, you would do well to take head of this.
Second of all, you will notice a whiteboard covered in various information. While full of padding, there are a few critical nuggets of information to collect!
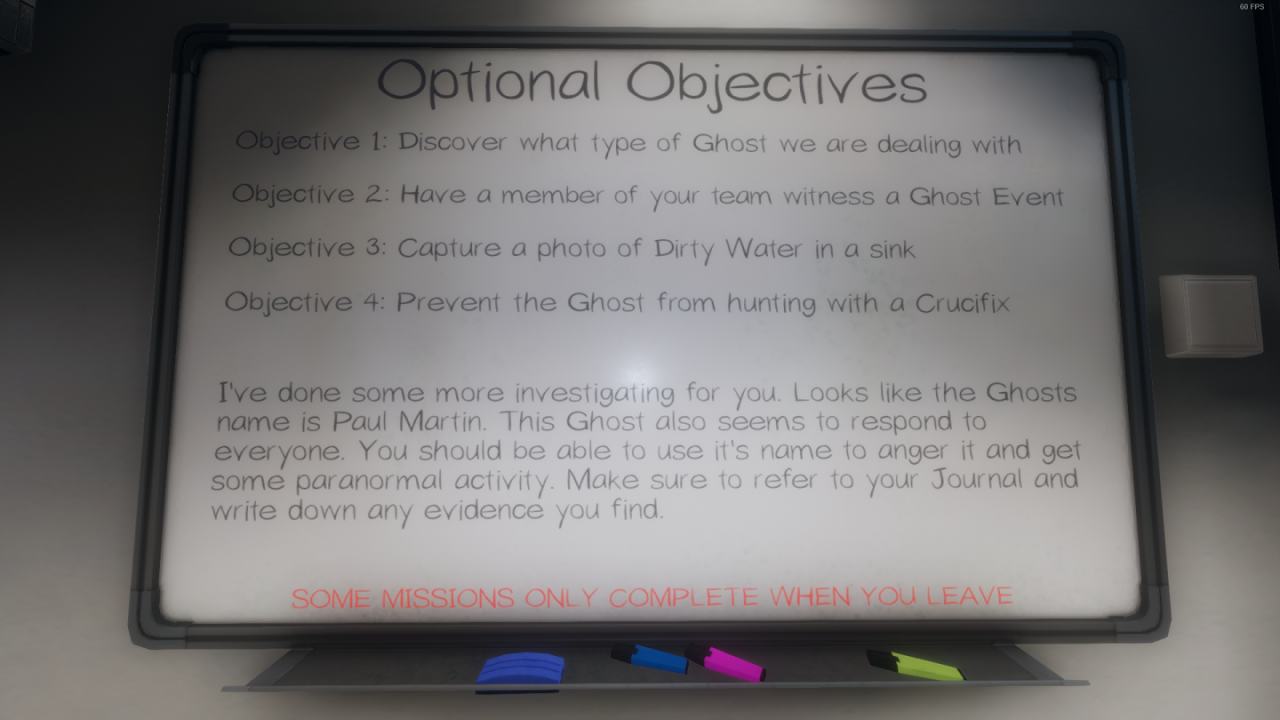
- Objectives. You will always have four objectives in every mission, the first of all will always be “Discover what type of ghost we are dealing with”, which you will need to fill in on the last page of your journal. The other three objectives are often known as the “optional” objectives but give a big payout so try to do them if you can! Greyed out objectives are completed, but the ghost objective only completes when you leave.
- The Ghost’s Name. In this case, our spooky geezer answers to the name of “Paul Martin”. This is not fluff, as the ghost will react quite strongly to his own name. Tactical name calling can get the ghost to act up for you, or even make it aggressive if needed for objectives. Of course, you might want to not say it otherwise.
- The Ghost’s Group Preference. The ghost can either desire responding to and acting against full groups (“Everyone”) or responding and acting against a single person (“Alone”). Note that this means alone in a room, do not send a single person into the house!
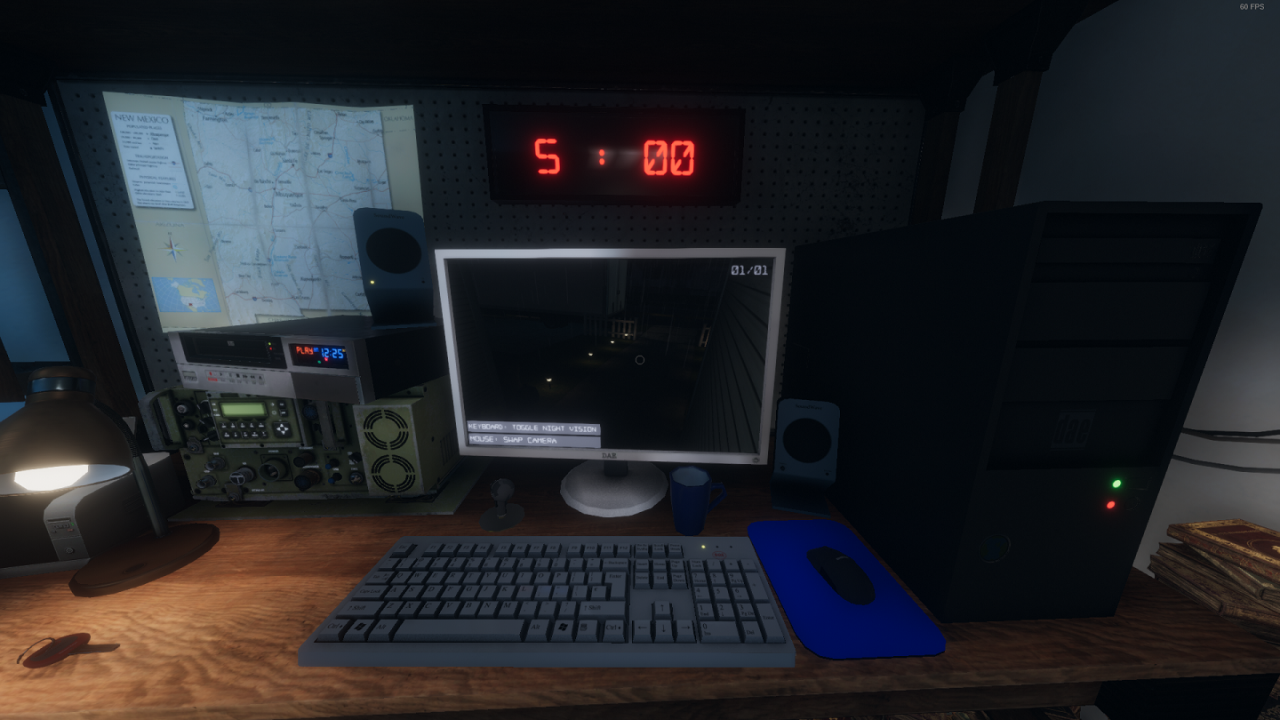
On the other wall, you will notice a computer with a screen showcasing a camera view from the location (starting out in night vision mode). This computer is your camera monitor, allowing you to review every camera on the map (both natural surveillance cams, and any cameras you place in there, including video cameras or head-mounted cameras). You can use the keyboard to toggle night vision, and the mouse to switch to additional cameras if any (the counter is on the top right corner of the screen)
The clock above shows your safety timer (here five minutes as we started the map on Amateur difficulty). It will start ticking down as soon as the front door is open, so make sure to plan before you leave! Also take note of the key on the bottom left of the image. This is the entrance key, which you will need to pick up to enter the map.
As you go along the other wall, you will notice four, big digital monitors with big, imposing readings on them. All of those are really important (minus the top right one starting out, as you need Sound Sensors to use it)
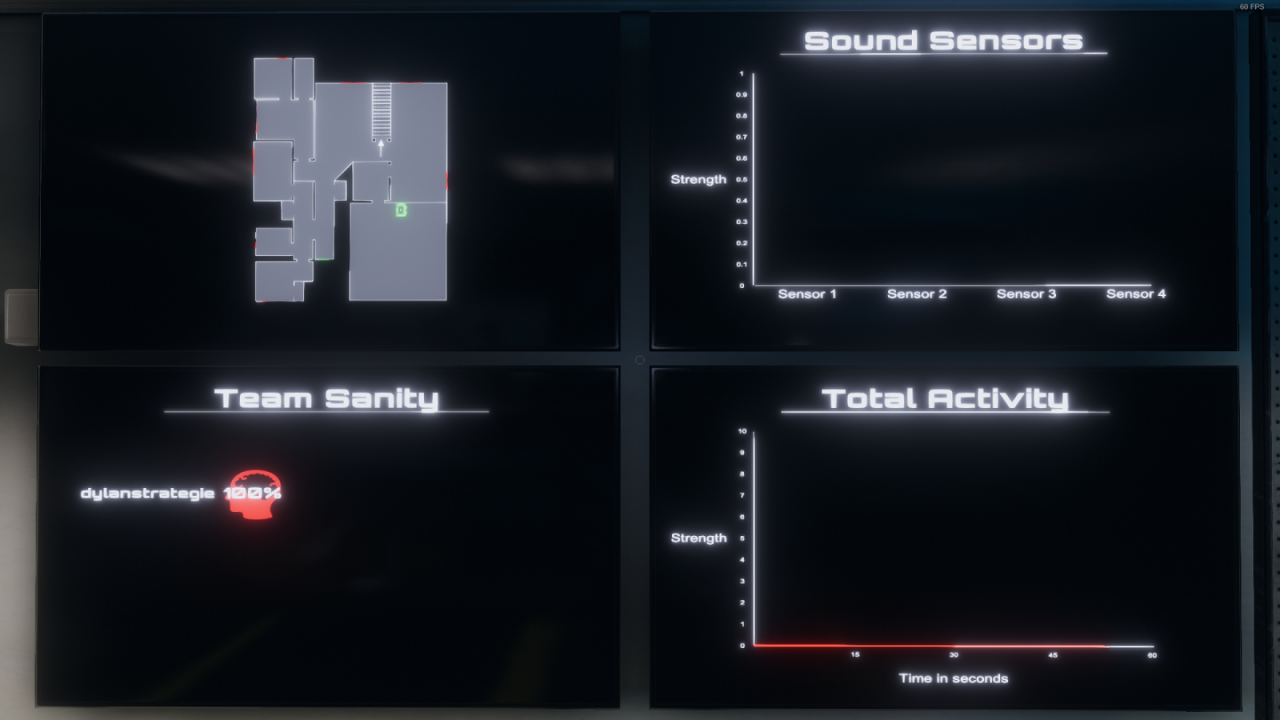
- The Location Minimap. Situated top left, this minimap will show you a full floor plan of the house. It will only show you one floor, which you can toggle with the interruptor on the left of the screens. It will also you a lot of additional info, including teammates inside the house (green orbs), the location’s power breaker (green rectangle with a light bolt), the exits (green lines), the windows (red lines), sound sensor coverage (yellow boxes) and motion sensor coverage (red squares). This map is critical to make sense of how the mission is going if you are in the truck monitoring things!
- The Team Sanity. Situated bottom left, this lists all teammates in the mission with their full name and a head with a percentage inside. This is their sanity, going from 100 % to 0 % with a small constant variation of 1-3 %. Sanity is a critical value that should always be monitored, as it affects ghost hostility and thus how safe the mission is. If the meter is remplaced with an interrogation mark, the individual listed is deceased or disconnected.
- Sound Sensors. Situated top right. Starting out, this screen will be totally useless, but once your gear list extends, this can be a godsend for finding a ghost on a big map. Every sensor you placed will be named based on the room it is in and monitor sound based on the yellow area shown on the map. If it picks up any sound (player or ghost), it will add to its sound intensity for a few seconds. Any amount of noise in an area no-one is in means ghost activity!
- Total Activity. Situated bottom right. Pretty famous and with the varying effect of being information noise or a total brown note, this delimits the EMF activity of the ghost across the entire map during the last minute on a scale of 0 to 10. This is the same activity that is picked up by the EMF scanner (minus EMF 5, which is clue-only) and adds up. It will not pick up additional activity above 10, though the meter will be locked at 10 during a Hunt. It is also worth noting that EMF events linger for 20 seconds!
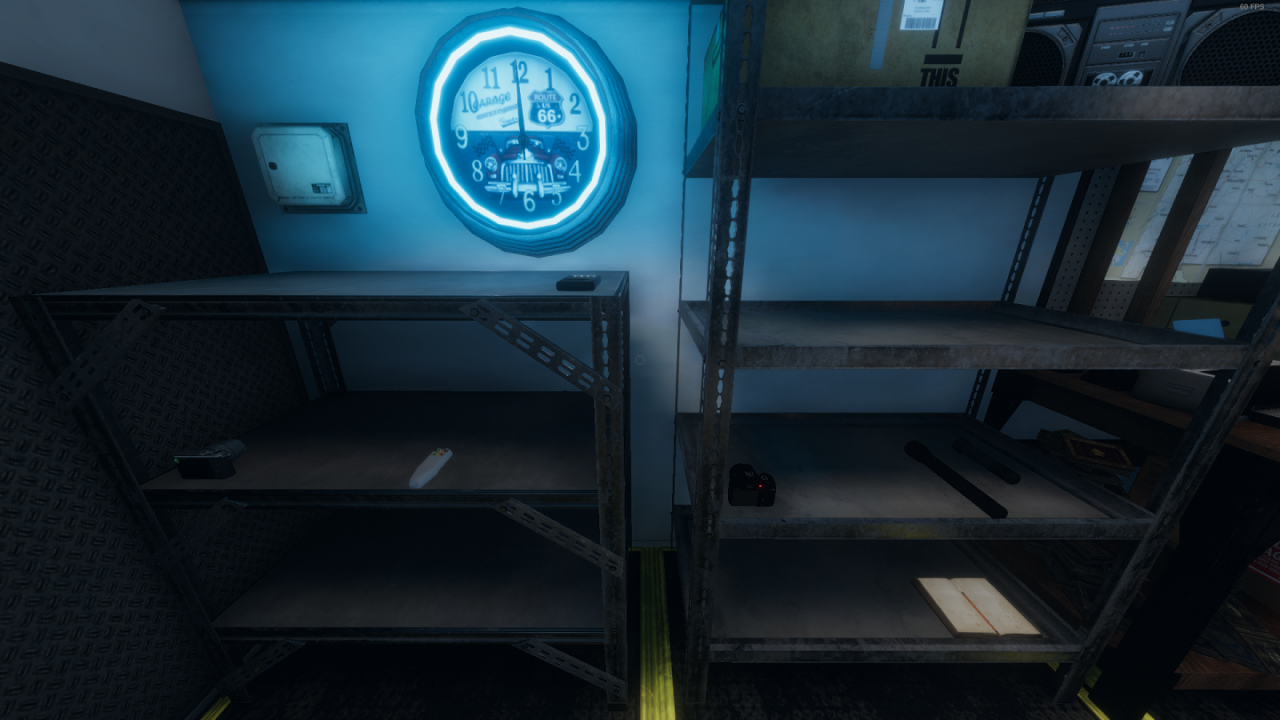
Finally, the humble equipment shelf, here featured with only the starter equipment. This will fill up quickly as you spend your cash on more gear and bring it in, and empty as quickly as people pick stuff up and chuck it into the house. You do not need to bring stuff back here at the end of the mission, you will always get your gear back unless you die, then you lose everything even if brought back!. Make sure to take inventory and equip everyone before leaving. Also note that head-mounted cameras are in their own position near the door opening button.
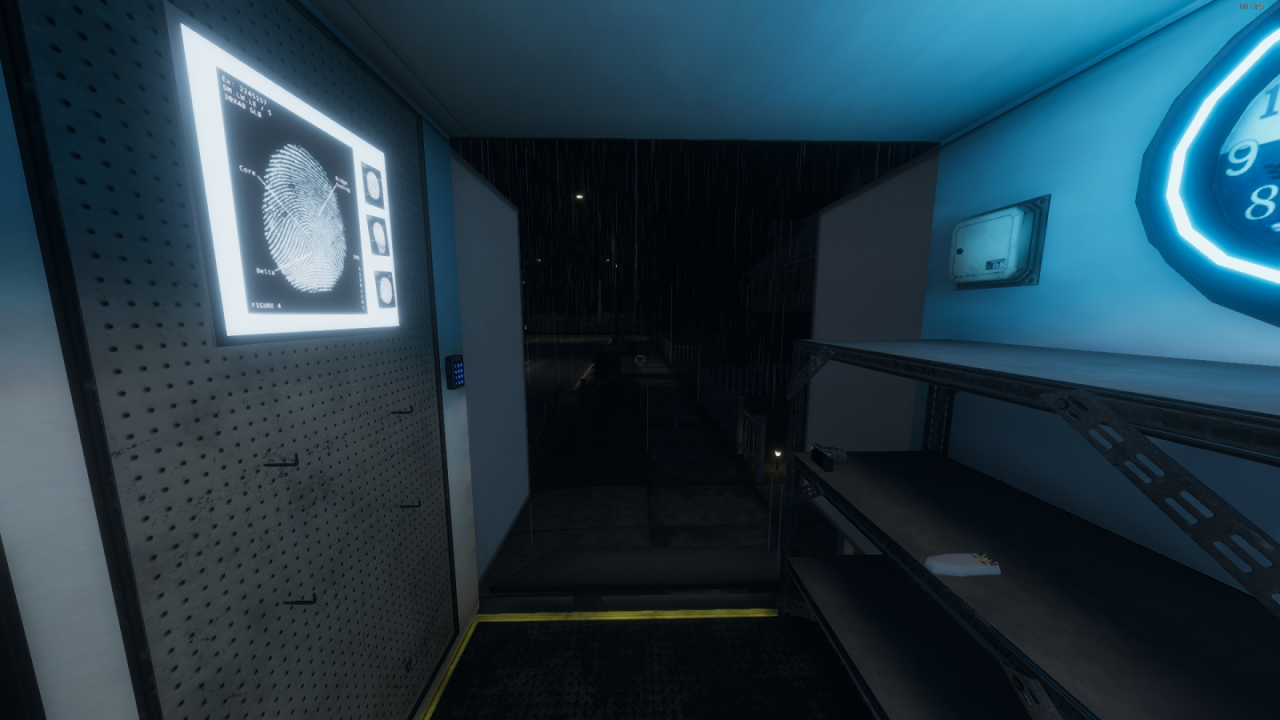
And so it begins! Get your gear, step out of the truck and steel your nerves. The mission is about to truly begin, and our destination is the humble front door.
Breach and Clear
A few steps away from the truck lies a foreboding door. The entrance door. From the moment the house key is slotted in, everything begins. The ghost will spawn in and start spooking, and the safety timer will tick down. As a result, it is critical that your first breach into the haunted location is quick and comprehensive. No-one should be in the truck as there is nothing useful to monitor on first entry, so bunch up at the door and go for it!
Your first entrance is by far the safest and you will not come under attack. However, that is no excuse to chill out or mess around. Handled properly, a proper sweep of the house will secure the important parts, pinpoint the ghost room and allow you to start the second entrance with safety and testing items before the safety timer is even up, allowing you to cruise through and finish without danger (at least on Amateur).
So, what does a good sweep looks like ? Simple, there are three critical things to do as soon as you step into the front door.
- Create safe transit areas. While detailed later, there is a “light budget” on the map, and lit areas calm your nerves both behind the screen and ingame by preventing sanity dropping! It is important to light big rooms or good lights up, and other common transit areas like the main stairwell or main hallway. Act like a five year old making sure the monster isn’t here after being awoken from a nightmare, but be careful not to blow the fuse…
- Sweep rooms one by one with investigation items. Getting nice and cozy in the house is a plus, but you won’t get anywhere if you don’t find the ghost. Again, while detailed later, you need to carefully go into every room and check for any ghost events or other hints like temperature drops, sound pings, EMF reads or spirit box answers. The most effective is the true and tried thermometer sweep, though it isn’t part of the starting kit. Overlook nothing, the ghost can haunt a toilet, a closet or a hallway/stairwell!
- Prepare equipment and areas. Make sure to shut lights you don’t need and close out rooms that are totally ruled out to not waste light budget and nerves on rooms that are useless to you, and if you have free hands, start bringing safety items or things like cameras or books into the house. Efficient teams can mostly skip bringing equipment in until the ghost room is located beyond a doubt, though there is no huge harm in having one person go in and out to bring items in, especially if the three others are all bunched up already.
There is always a debate about keeping grouped up for the nerves versus splitting up to cover ground faster. Note that splitting into four is a bad idea as you won’t have enough good equipment for everyone, and being alone is likely to psych most people out and cause issues, especially if they do stumble onto the ghost room by accident and it is aggressive. There is no harm in staying in one big cohesive group, especially on Amateur! The noise and company will keep everyone’s nerves down and keep the light budget reasonable if you open and shut lights as you go. Even if the ghost only answers to people being alone, it can’t hide low temperatures.
Note that there are a few extra things to keep an eye on as you wander around for huge value. Sometimes you may encounter paranormal items, these will net you a massive cash bonus if you get evidence of them with a photo camera. Make sure to always check in the journal to see if the picture worked as it can be very capricious, you also need to be relatively close:
- Ouija Board. This item is a doozy and dangerous to use, but a photo of it can net you a nice bonus. Light it up by clicking on it, do not say anything, and snap a picture of it. Spawns irregularly, and doesn’t have to be in the ghost room.
- Bone (DNA). A small white bone, easily overlooked but worth its weight in gold. A picture of it will give you a nice chunk of change, and you can then pick it up for an extra bonus!
- Voodoo Doll. These tiny dolls count as interaction evidence but can be obtained immediately. There are reports you may need to move them a bit to make them evidence, though these might have actual effects attached to them.
If possible, do your best to physically locate the map’s breaker so you can head there in an emergency (the breaker can blow if someone turns on too many lights, including the ghost, or the ghost can simply will it off if active). As you will be stumbling in full darkness until it is restored, you really want to know your way to it! Use the truck map to get the general location of it before leaving.
Eventually though, this phase ends when you find the ghost room. Most ghosts tend to stick to a specific room (interchangably called the “ghost room” or “favourite room”), rarely wandering into nearby hallways or connected rooms to spook things up a bit. Once you can narrow down where the paranormal activity is happening (even roughly), you need to get the entire team out of the building to preserve sanity and get new equipment, starting the second phase.
CSI: Spook Team
Finding the ghost room is a deciding event of every round, as it allows you to finally test for the six different proofs that allow you to narrow down what ghost you are looking at. Additionally, the ghost will generally be gravitating around its favourite room outside of hunts, giving you a clear target for virtually all objectives.
The main way to find a ghost room is to find a room that has any of the following:
- An ambient temperature below 10°C/50°F or obviously freezing. This means the ghost is nearby, as it will always drop the temperature of the room it is in. Make sure you point your thermoteter into the room, it picks up temperature in a straight line!
- Obvious paranormal events in the area. Doors suddenly being opened ajar, full or closed. Sinks filling with dirty water, items being thrown, any amount of noise that is obviously not coming from teammates, or if you are unlucky a full on apparition. As ghosts tend to stick around their favourite room, this is a pretty solid hint.
- Picking up proofs. Things like Ghost Orbs, EMF Level 5 readings, Ghost Writing Books being filled or an answer on the Spirit Box can give you a clue if you are all out of ideas. These can only happen in the presence of the ghost, and thus near the ghost room.
As soon as it is located, leave for the truck and prepare investigation gear. You will need a nice variety of items back into the house and near/in the room to check for clues, along with some safety items to not get killed if the ghost starts getting angry at your intrusion. The clues we are looking for are in the order given by the game:
- EMF Level 5. The ghost can give a special pulse of EMF energy when producing various kinds of petty paranormal activities (anything but throwing items or appearing) with a one in four chance. This can trigger quickly or take a while depending on your luck and how active the ghost is. A good thing to do is put an EMF Reader in clear view of a monitoring camera in the ghost room to pick up an EMF 5 event remotely. Make sure it is not EMF Level 4, which denotes an apparition!
Six ghost types are able to do this, making it common: Phantom, Banshee, Jinn, Revenant, Shade and Oni. - Spirit Box. The ghost can answer any questions broadcast through a Spirit Box as long as the lights in the room are turned off, the ghost is close enough, and you respect the alone/everyone rule. “Nothing Detected” means it heard your question but the ghost didn’t answer, any male robotic voice answer means the ghost answered!
Seven ghost types are able to do this, making it frequent: Spirit, Wraith, Poltergeist, Jinn, Mare, Demon and Oni. - Fingerprints. The ghost can leave fingerprints when interacting with specific items, notably lightswitches, windows and doors. Only fingerprints count, footprints are photo evidence only! Make sure to check both sides of a door, and give the ghost some time to mess with stuff. You also need an UV Light or a Glowstick to see the fingerprint!
Five ghost types are able to do this, making it uncommon: Spirit, Wraith, Poltergeist, Banshee and Revenant. - Ghost Orb. The ghost’s presence can cause ghost orbs to appear, which can only be picked up by night vision (and thus video cameras of any kind). Since night vision is ultra sensible to light, you will need a camera pointing at a fully dark room to see them (UV light sources do not disturb it). Be patient as they appear every dozen seconds and can be subtle. They look like small white dots that briefly fly across a part of the screen, kind of like big dust particles.
Six ghost types are able to do this, making it common: Phantom, Poltergeist, Jinn, Mare, Shade and Yurei. - Ghost Writing. The ghost may choose to write on any open books as a form of paranormal activity, leaving random scribbles on it. Any book that is written in, regardless of the contents, count as ghost writing! You will usually need to leave the book well within the ghost’s roaming ground and on the floor, except for VR users who can have their book written on freely.
Six ghost types are able to do this, making it common: Spirit, Revenant, Shade, Demon, Yurei and Oni. - Freezing Temperatures. Every ghost causes a drop in temperature around them, but certain ghosts can drop the temperature below water freezing. While a thermometer easily proves this by showing a temperature minus 0°C or under 32 F, you can also tell if you see your breath misting from the cold! Just make sure not to mistake it with a smudge stick effect.
Six ghost types are able to do this, making it common: Wraith, Phantom, Banshee, Mare, Demon and Yurei.
Most of these need specialized equipment brought in (except for Freezing Temperatures, which can commonly be ruled out the second you see your own breath when entering the ghost room, leading to thermometers often being an opening-only item that get discarded quickly). They all also need lenghty monitoring as they require the ghost to act up to cause the events to happen, so unless you are lucky they may take a while to collect.
Be careful about ruling out clues unless you are certain you are doing them properly. Ghosts have been known to wander off enough to make their ghost room too hot for freezing, or take a few tries to answer the Spirit Box, or take long minutes to give an EMF Level 5, Fingerprint or Ghost Writing clue. If your nerves are failing, try setting up a camera to monitor your equipment from a safe distance! Also remember that you have infinite time as long as you stay in a lit room (though the ghost will likely slap the breaker box eventually, or it may start a spontaneous hunt)
This step only really ends when you have identified the ghost fully, though it intersects with the next step regarding both safety and optional objectives (which sometimes even overlap!). And of course, you need to start thinking about your safety quickly, as your sanity will start dropping fully after setup time.
Hunts and the Power of Christ
Investigating the ghost is all and good, but the ghost often doesn’t like being investigated. Beyond giving you some quick scares to try and get you to leave, it might try and move on to more… persuasive arguments. The kind of arguments that will leave one of your friends with a terminal heart attack.
Ghost Hunts are literally the most dangerous event in the game, as these denote the only time where the ghost will fully materialize and actively seek out people. If the ghost actually catches up to someone during a Ghost Hunt, they will die after a small period of suffering. This is the only way someone can die and will seriously hurt their income and lose their items forever.
The Ghost Hunt starting should be obvious assuming you are taking precautions. The Ghost will immediately appear in full form (instead of a shadowy form or brief full flash during apparition events), with a constant heartbeat for anyone in his line of sight and/or his target. All lights in the level, including static lights, lamps, flashlights and UV lights will also flicker constantly until the Hunt is over, making it a critical hint.
As a bonus, all exit doors will close and lock on you, meaning there is no exiting the location until the event is over, and the radios will all melt into static, making radio communication impossible. As soon as the Hunt starts, you only have a few seconds before the Ghost starts moving, often fast if it is one of the more dangerous types, so be quick to hide!
What you should do during a Ghost Hunt is simple:
- Get well clear of the Ghost and his room. If you are unlucky enough to actually be in physical presence of the ghost while it manifests (notably if you hear a heartbeat), you need to leave, and fast. Do not stay in the room with the ghost, you will die, even if you enter a closet.
- Do not try to leave the location. All exit doors are fully locked and you will make an absurd amount of noise moving around which opens you up to being tracked. Find the nearest room to hide in instead.
- Hide in another room. Find a room that isn’t the ghost’s room and the room the Ghost is currently appearing in. Close the door to break line of sight. If you can, find another item in the room to hide into, especially a closet, locker, or any item you can crouch behind, as the Ghost mostly works based off line of sight.
- Make yourself quiet. The Ghost listens to sound and can sometimes also react to your light. Shut up, if you talk the ghost will beeline for you. Don’t make any noise, don’t play with your door, your items or wander around in your hiding spot. If you can, shut off your flashlight, the room light should be fine to have on.
- Radio check once the Hunt is over. Ideally, if someone was outside the house, they should radio in as soon as the Hunt is over to get people to stop hiding! If everyone is inside, whoever can clearly see the lights not flickering anymore warns first. If no-one can, press your radio key without saying anything and check for obvious static, then speak up if it seems fine.
Now of course, as you can imagine, Ghost Hunts are extremely dangerous and thus best avoided, but thankfully there are some ways to predict and prevent them:
- Crucifixes can abort a hunt immediately if the Ghost tries to materialize in a 3 m radius (5 m for Banshees). This is by far your biggest safety ticket, and while not perfect, it can save you if you find the Ghost Room quickly and toss a crucifix in. Held Crucifixes are unreliable, and crucifixes are useless once the Hunt begins. Always drop a Crucifix in the Ghost Room, and another nearby, as soon as it is pinpointed.
- Low Sanity opens up Hunt risk and quickly raises it. The average sanity of all crew members inside the location determines hunt risk. Below 50 % sanity, every ghost becomes likely to start a hunt. Below 25 % sanity, hunts become even more frequent. Demons can start Hunts at 15 % Sanity higher for all these thresholds, same with Mares in darkness with 10 % more!
- Ghost Activity factors into Hunt risk. While less intense than the other factors, an uneasy ghost is more likely to fully flip out and enter a Hunt stage. This is often why a string of sudden activity can go into a full Hunt. Avoid pissing off the ghost by calling its name, insulting him or asking it for activity until you are ready for a Hunt.
- Smudge Sticks can pacify the ghost for a while. While it will severely reduce activity and thus proofs, a smudge stick burned in the ghost room or near the ghost (up to 6 meters away) will massively dump its activity and thus make it less likely to start a Hunt for a while. In general this translates to a medium window of safety. Additionally, if you get caught by surprise by a Hunt, burning a smudge stick will delay the ghost fully entering hunt mode for a few extra seconds.
- Demons and to a lesser degree Mares are hunt-prone. Demons are always more likely to start a Hunt and will go from giving rare hunts abnormally early to spamming them if things get bad. Mares also have an innate extra chance to start Hunts if the room they are in is unlit, and inverse if it is lit.
Ghost Hunts are the bane of any good ghost hunter team. Losing team members means losing lots of money and one more person to solve a mystery. Do your best to not be caught by surprise by them, but should they happen (and they will happen as difficulty goes up) you need to keep your cool and hide properly to live another day!
Hopefully, with all this, you should have all your evidence and get out. This is your first round, but this is only the start of a long career of ghost hunting. Now we’ll move on to a fascinating concept that can also limit hunts, the light, before getting back to equipment, ghosts and maps!
The Light Budget and Breaking It
Lighting comes at a premium in this game. As you no doubt noticed so far, every undisturbed map is pitch black from one end to another, and only you are able to light it up. Thankfully, all of them still have a -somewhat- functional power grid, allowing you to turn lights in rooms back on to avoid going totally loopy and inevitably getting massacred by the ghost.
So, why not just slap every light on until you’re basically in a nice, cozy American home ? Well, anyone who has tried that will get the answer very quickly as another light switch suddenly slams the entire house into pitch darkness. The power grid might still work, but the breaker box is sensitive. The light limit in the game is often disputed but usually sits around 6 to 10 lights before the breaker snaps.
Also, just in case it needs to be said, outside of witnessing the Ghost or ghost events, standing in darkness is the only common thing that will dump your Sanity. Being in a lit room will stop sanity drain. Managing your map’s lighting poorly and constantly wandering around dark rooms and hallways will cause your sanity to nosedive and quickly open you to an attack.
So you’re going to have to pick and choose lights to turn on, while being mindful of the fact that the ghost can still randomly decide to click a light switch on for funsies, which can overload the grid if you are right on the limit. Generally speaking, I’d categorize lights like this:
- The entry light. Every map has an entrance, and every entrance tends to have lights on or near it. Generally speaking this light should be always on for multiple reasons. Stepping into a nicely lit room has a big psychological effect and keeps people focused, it is often a big transit point and can avoid panic in bad situations, and it allows to see extremely quickly if a hunt is ongoing, or the breaker was hit, both from inside and outside.
- The main room. Multiple maps have big rooms that can often keep the level in darkness if not lit, notably the living room or kitchen on the house maps. While not a transit room (and sometimes totally ignored if the ghost is upstairs), having those lights on will also help massively with nerves. Just try to budget smartly!
- Transit hallways/stairwells and landings. A long, dark hallway is a big factor of fear, and you will spend a while in hallways and stairwells on most maps, especially the big ones. Wandering in dark hallways might as well be a synonym of death. Don’t hesitate to have every stairwell lit top and bottom (especially on maps where the stairwell connects to the entrance or main room) if you need to transit on them.
- Ghost Room light. Once you have found the Ghost Room, deciding wherever it should be lit or not is a big issue. On one side, lighting it up makes it more inviting for testing purposes, on the other you will definitely need to turn the light off to test for orbs or a spirit box. Additionally, some ghosts like Mare get significantly weakened if their Ghost Room is lit.
- Room lights. Without trying to be too verbose, any light in a room you are not planning to visit again (outside of hiding) must be turned off. Don’t waste lights in rooms you don’t use and the ghost doesn’t visit, you will already be close to budget with hallway and big room lights, especially on bigger maps.
So, are there any ways you can light the house outside of the light switches ? Actually, there are plenty at your disposal!
- TVs. Yes, seriously. If you click on the remote, you’ll turn them on. While they output an annoying amount of static, they also output a huge amount of light, almost certainly enough to even be able to turn off the light in some rooms. On two House maps, they can act as a free light to cover otherwise scary blindspots.
- Freestanding Lamps. You can often see them especially in House maps. While it’s unclear if they consume a light slot or not, they are often in convenient locations to give more lighting in spots not covered by hallway lights or room lights. Try them!
- Candles. People often forget about those little cuties. If you carry a lighter on you, you can simply light them. They will stay lit for a few minutes and can be relit, and obviously still work even in a blackout as you’d expect. Useful to use both for emergency lighting and to keep your nerves during a hunt or breaker incident. The candles on the map are free lighting!
- Flashlights. Yes, we know, a massive “duh” statement. But outside of carrying them with you (remember to press T or Flashlight button to use them off-hand!), you can simply drop them lit on the ground to cast light. While not the strongest light in the world, it will still give you a nice cone of light, is free (as long as you have extras), and can give you a warning during Hunts or visual help in blackouts.
- UV Flashlights and Glowsticks. While UV lighting is not the brightest, it will stil cast out pitch dark rooms. Obviously, you should try to lob them into ghost rooms both for free lighting and to reveal footprints and fingerprints. As a bonus, it does not drown out night vision.
- Infrared Light Sensor. Will give a ping of blue light when triggered. It’s free light, especially if in the middle of the ghost room.
However, you will inevitably have to use the breaker. Even if you are careful with lights, the ghost can simply decide it doesn’t like the map being lit and hit it, causing the entire map to immediately black out. Being in a dark map is dangerous and will get you killed, so you need to quickly get someone to the breaker room to reset it. The lights that were on will be back on immediately, unless you blew the power, in which case it will randomly turn off a few lights.
Equipment and Using It (Part 1)
Equipment is your main tool to actually hunt ghosts and survive said hunt, and as such is a critical topic to cover. Proper use of your equipment can allow you to wrap up an investigation quickly or save everyone’s lives, and improper use can waste items or make you miss big clues. So without further a due, let’s begin!
Price: $15
Level: Starting
Amount: 1/2
Used For: Scouting, Investigating, Objectives
Bring: Always (One). Leave in Ghost Room in Camera View
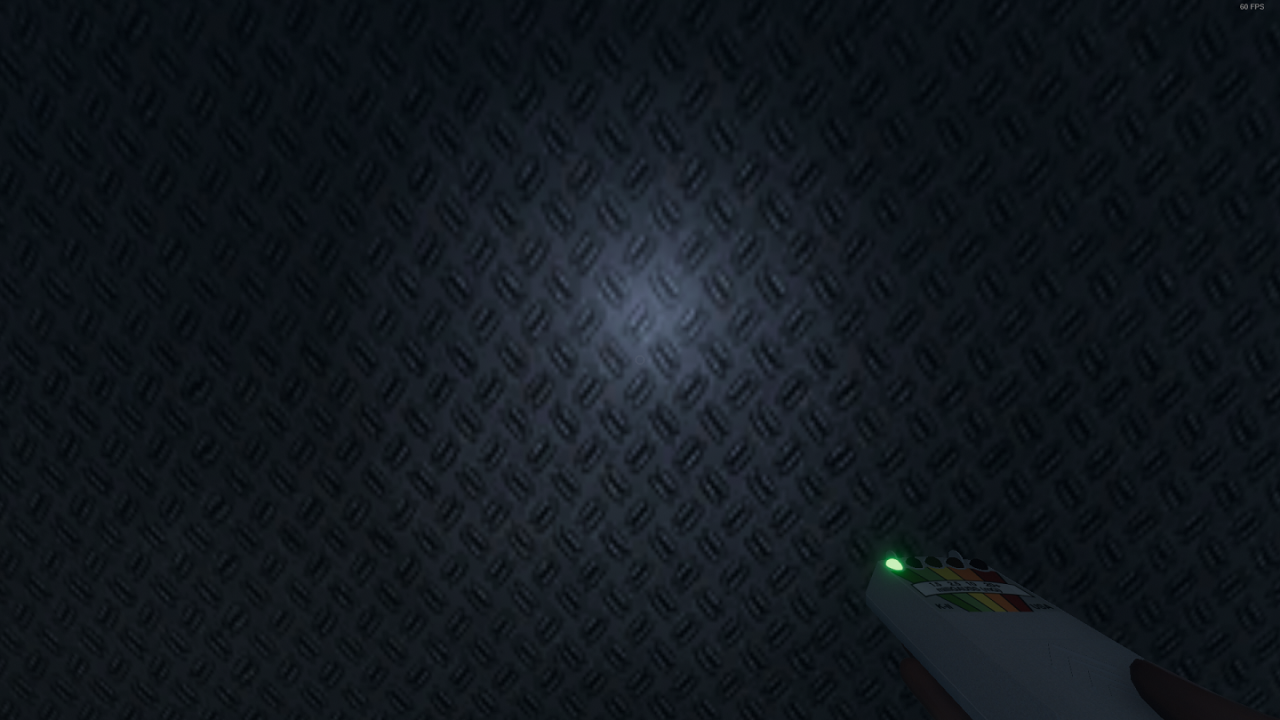
The EMF Reader is an item that can give you a surprising amount of intelligence… or nothing at all if the ghost feels like not doing anything. Every time the Ghost does something within a radius around the EMF Reader, it will pick it up and immediately let out a loud shrill, along with lighting up depending on the (maximum) event:
- EMF 1. Indicates the EMF Reader is primed. If the light is not on, it isn’t on.
- EMF 2. A paranormal event happened in the radius, generally meaning any interaction that isn’t an item being thrown or an apparition. This satisfies the EMF Reader objective.
- EMF 3. An item has been thrown by the ghost.
- EMF 4. The ghost has physically appeared nearby, this also includes the Ghost slamming a door closed.
- EMF 5. A paranormal event pulsed a specific energy. Counts as an investigation clue.
EMF “spots” as they are called last for 20 seconds, this counts for the EMF Reader, pictures for “Interaction” events (yes, even on doors or light switches) and the EMF chart in the truck. The EMF chart in the truck and the EMF Reader both detect the same events, but the EMF chart tracks globally and ignores EMF 5.
Flashlight
Price: $30
Level: Starting
Amount: 1/4
Used For: Light
Bring: Always if no Strong Flashlight. Else place.
The humble Flashlight, how much more introduction does it need ? When held (or off-hand, by pressing the Flashlight button) it will cast a cone of light in front of you, allowing you to see at least somewhat in the dark.
It is still pretty effective if dropped, so if you have extras for any reason, consider dropping them in hallways or doorways to get some free light.
If your flashlight is flickering, a Ghost Hunt is beginning. Hide and turn it off.
Price: $40
Level: Starting
Amount: 1/3
Used For: Objectives, Bonus
Bring: Always (One).
The Photo Camera is a humble little item with five charges, but used properly can literally double or even triple the payout of your mission. Every time you take a picture of an unique phenomenon or a paranormal item (within 5 meters, with no obstruction), you will gain money. This stacks up quickly compared to normal objectives, and some objectives require photos. The list of items you can photograph are:
- Interaction (EMF Reader 2 Event). Anything the ghost clearly messed with can be photographed if you get there before the event ends. Photographing the EMF Reader does not count. Includes doors, thrown items, lightswitches, fuse boxes, sinks, cameras, etc.
- Dirty Sink. While an EMF Reader 2 event, this one is permanent. This is also a potential secondary objective. However, it is hard to get as the Ghost needs to wander near the sink and decide to do an interaction event.
- Ouija Board. These are extremely capricious, but a photo of an Ouija Board, if the game decides it counts (it often works best when it’s moved a bit and turned on), will be good money.
- Voodoo Doll. Can only be found on Farmhouse, these count as Interaction clues for some unknown reason.
- Bone (DNA). Take a picture before picking them up for extra cash.
- Fingerprint. As long as it is lit with UV (sometimes barely), it will count.
- Footprint and Salt Print. Same as above. Salt Print does not need UV to count.
- Dead Bodies. If your teammate dies, you can get pocket change from taking a photo of his body as evidence, gnarly!
- The Ghost itself. As dangerous as it is, getting an actual picture of the Ghost is cash money. Apparitions, Shadow Apparitions and Hunting Phase all count. Obviously, a Hunt is not a good time for a photo unless you are ballsy or about to die.
If you can, always check in the Journal to make sure your picture counted! The system is very capricious and can often throw out perfectly good pictures for no apparent reason.
Price: $10
Level: Starting
Amount: 0/2
Used For: Light, Safety
Bring: Early (Low Prio). Later (With Smudge Sticks)
The Lighter has a singular use, lighting things. As dumb as it sounds, it’s mandatory to use two other items: The extremely useful Smudge Stick, and the situational Candle
Always have one with those, though having an extra is rarely a bad idea. Additionally, if the level has candles (as it often does), it’s free light for everyone.
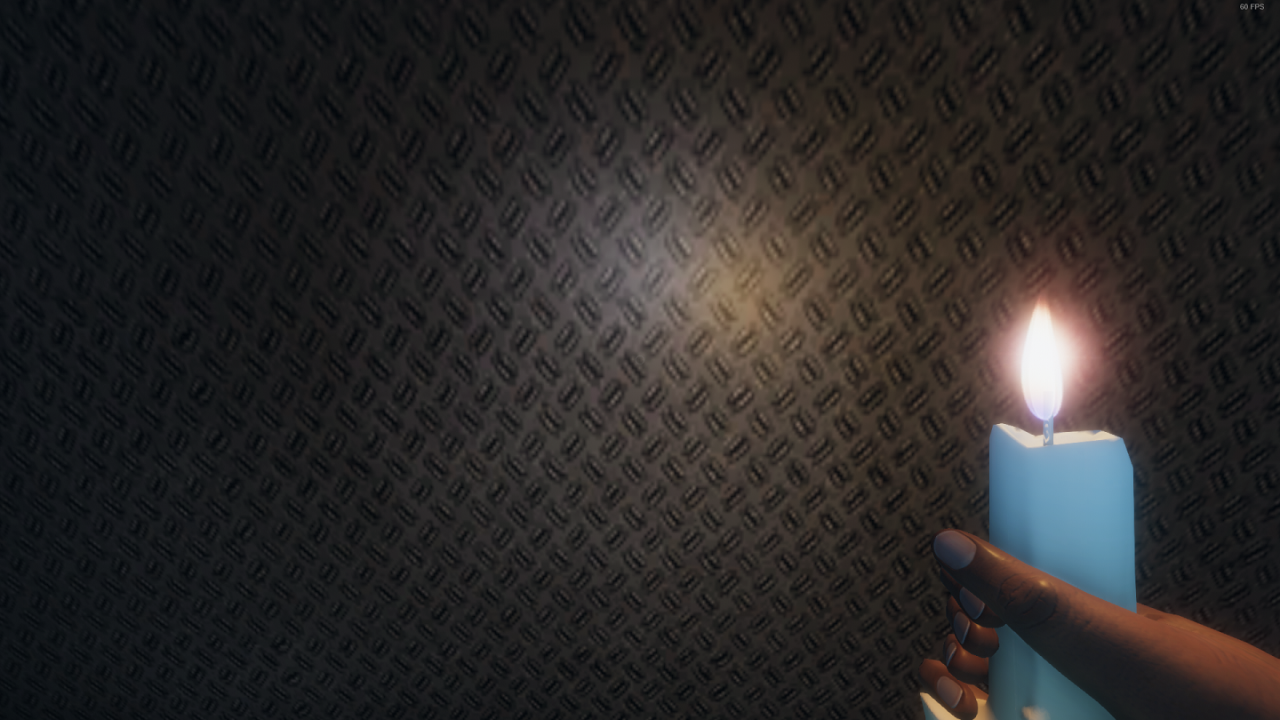
Price: $15
Level: Starting
Amount: 0/4
Used For: Light
Bring: Later (Add Lights)
Free portable light that the Ghost can only kill if it specifically blows them out. If dropped/placed on the ground, it will stay alight for a few minutes, but it will stay on forever in your hands.
Use it as a beacon and safety lighting, though don’t overrely on it as it will go out.
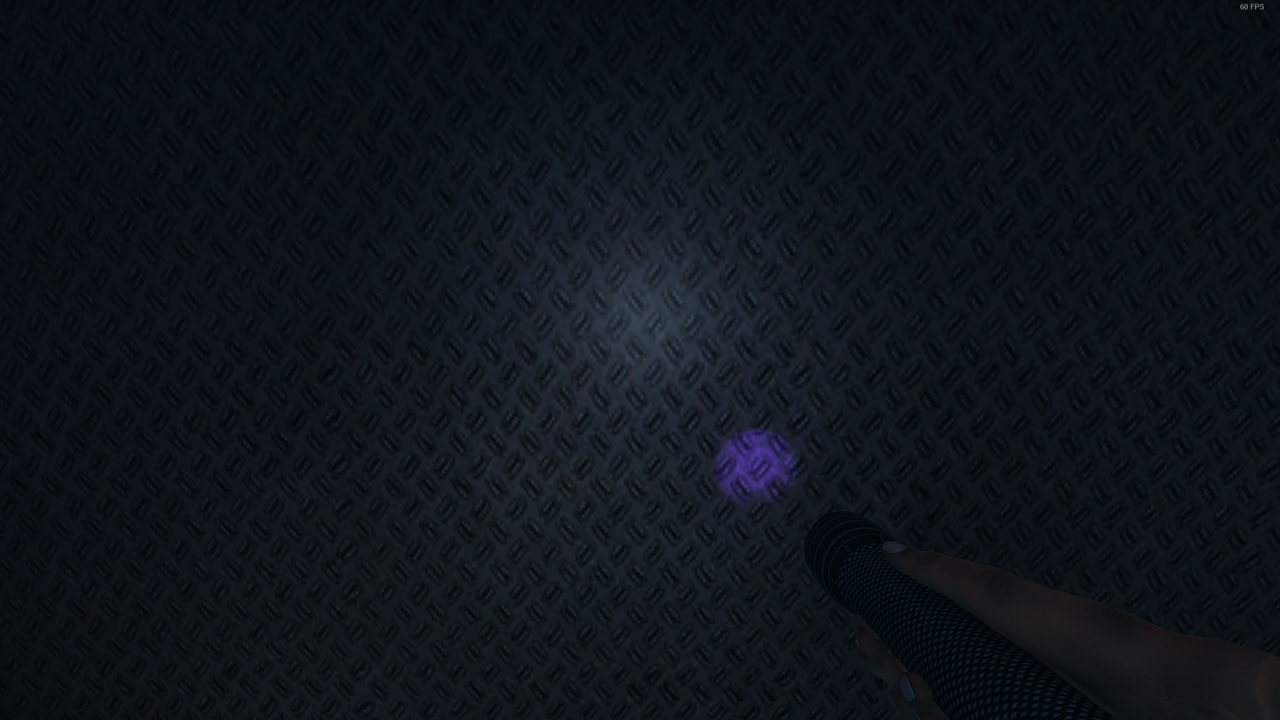
Price: $35
Level: Starting
Amount: 1/2
Used For: Investigating, Objectives, Light, Bonus
Bring: Later (Ghost Room). Place if Investigation done
The UV Flashlight acts as a weird, oddly tinted light source that doesn’t mess with night vision. However, this is not its only use. The main use of the UV Flashlight is to scan for fingerprints and footprints, and if found make for good photos. Always bring one to the Ghost Room and check both sides of doors!
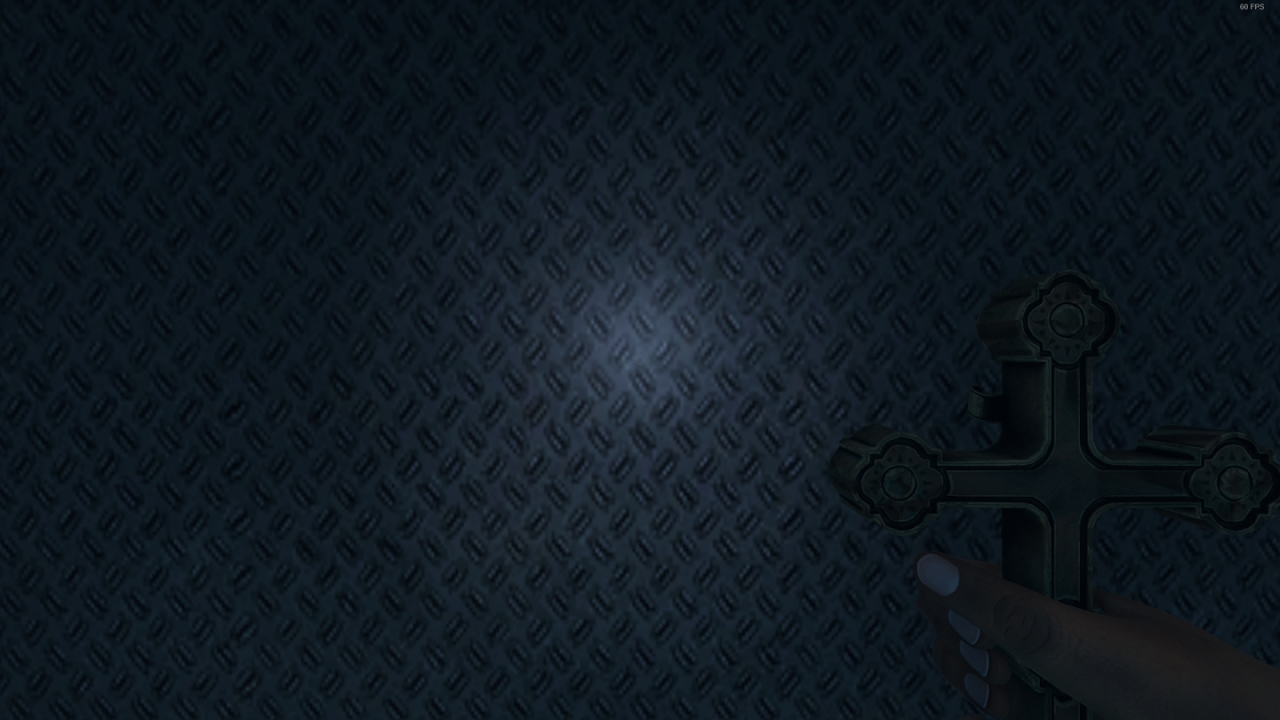
Price: $30
Level: Starting
Amount: 0/2
Used For: Safety, Objectives
Bring: Later (High Prio once Ghost Room found)
As noted previously, Crucifixes are essential to keep your team safe and out of harm’s way. If a Ghost attempts to materialize to attack you within 3 meters of it (5 meters for a Banshee), the attack will immediately be cancelled. The Crucifix can do this twice before disappearing without a trace.
While holding Crucifixes in your hand looks badass, it’s not clear if it acts the same than on the ground, it will also do nothing if a Hunt is happening! Throw them into the Ghost Room and nearby hallway to keep safe, leave if they break as the Ghost is starting to get very aggressive.
To satisfy the Crucifix objective, you have to trigger a Hunt that is immediately cancelled by a Crucifix. Just aggravate the Ghost and drop below the Sanity threshold, get out once it looks good.
Equipment and Using It (Part 2)
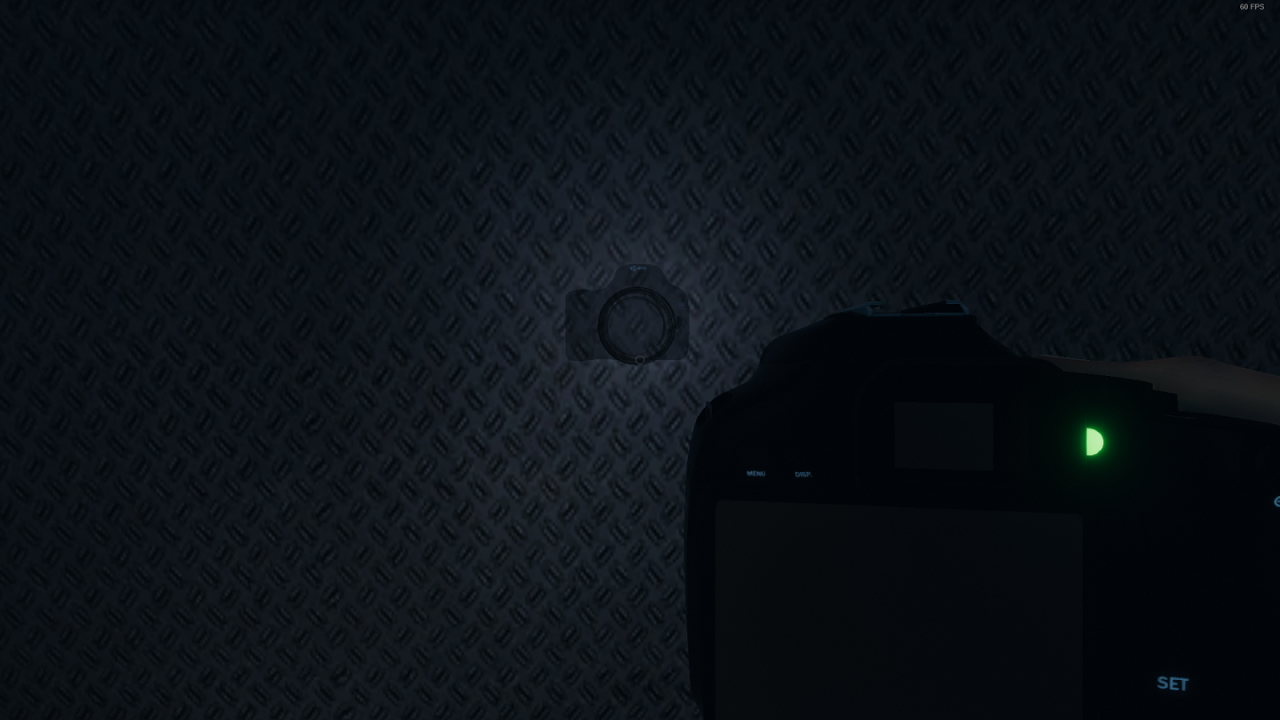
Price: $50
Level: Starting
Amount: 1/6
Used For: Investigating, Support
Bring: Later (Ghost Room found)
The Video Camera is a huge piece of equipment and critical for a succesful mission. When set up in a room and turned on (right click on it and check green light), it allows you to remotely monitor it from the Truck. In theory, it is only needed to check for Ghost Orbs by putting it in good view of the Ghost in the dark and letting it do its thing, but this is by far not the only use it has.
Unsurprisingly, remote monitoring is really useful. One of the best things you can do is put multiple other items in view (Ghost Writing Book, UV Flashlight and EMF Reader notably) to allow you to monitor them from a distance and see if they are giving critical clues. This can allow you to check 4 out of 6 clues from the comfort of the truck instead of risking your life waiting in the location for the stupid EMF Reader to go off, which is invaluable!
Additional cameras can be put in miscellaneous spot inside or near the Ghost Room to check for orbs or other items, or monitor the team. Note that pictures of the Truck Camera computer sadly don’t count at all for evidence, so there is a trade-off!
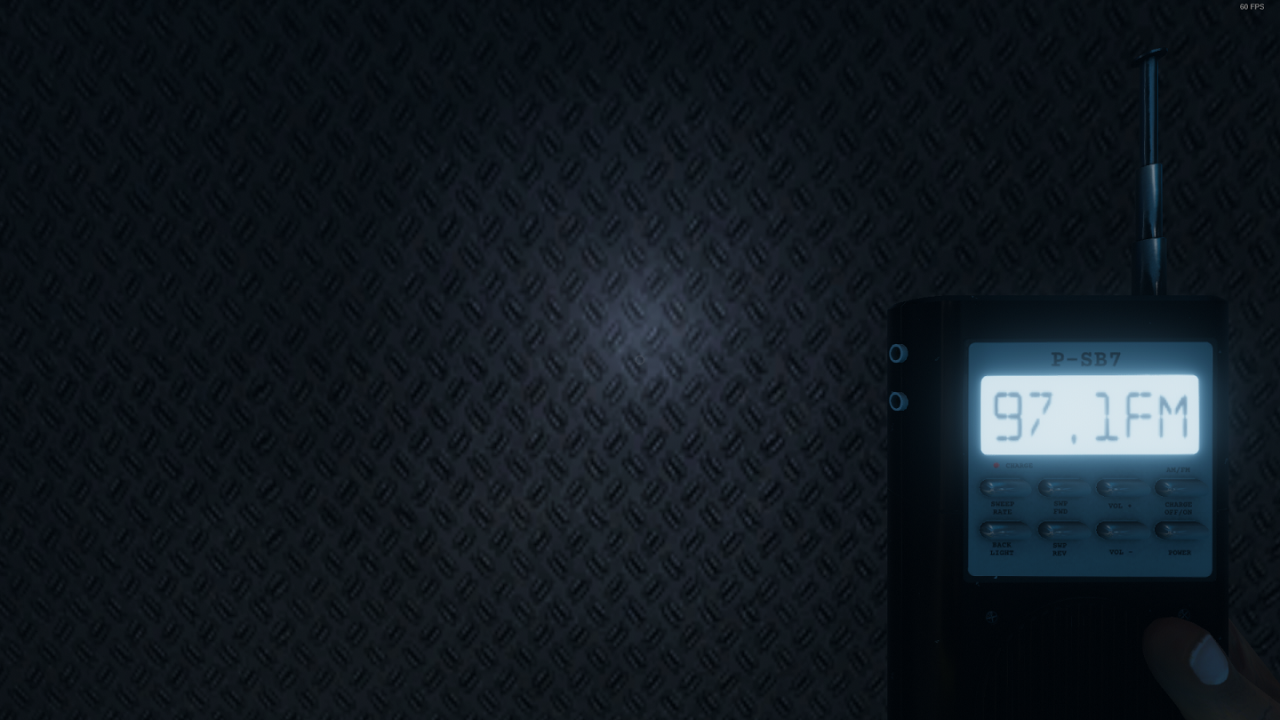
Price: $50
Level: Starting
Amount: 1/2
Used For: Scouting, Investigating
Bring: Early (If free slot). Later (Ghost Room found)
The Spirit Box has a singular use, but as the most common clue in the game, not a small one by any mean. If it is used and receives an answer, it will immediately complete a third of your investigation. However, it can be complex to use, for it to work you need the following:
- You need to be in the Ghost Room or near the Ghost. You will not get an answer if you are too far from the ghost.
- You need to be in the dark. You cannot use the Spirit Box in a lit room, so steel your nerves and flick the light off. If you are having trouble, just look at a corner and keep backup behind the doorway.
- You need to respect the Ghost’s crowd rule. If it said Alone, you have to be alone in the room to get an answer. If it said Everyone, everyone needs to be in the room! Make sure to look at that information before bringing a Spirit Box in to not waste valuable time and sanity.
The actual answer does not matter, as long as there is one. While the answers can also be used as an early warning when scouting, it should be discarded (and turned off to avoid disturbing players) as soon as you get your answer.
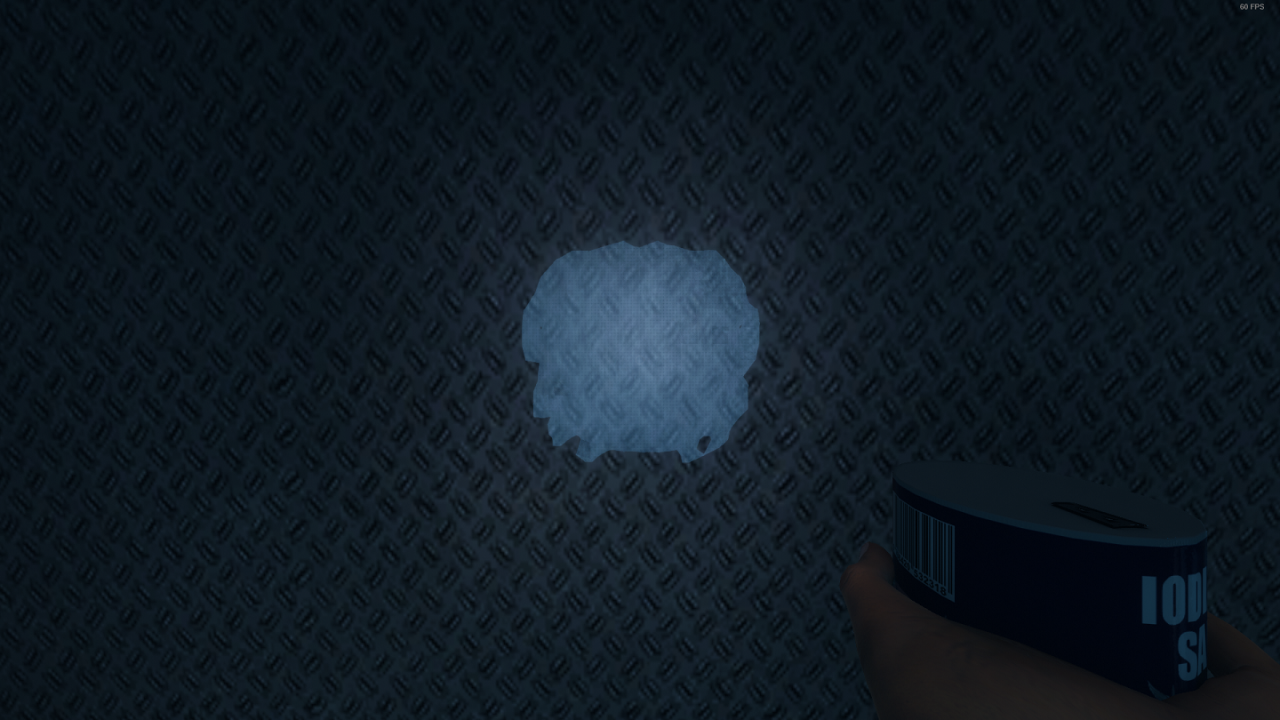
Price: $15
Level: Starting
Amount: 0/2
Used For: Scouting, Bonus
Bring: Early (Ghost Room not found), Later (Ghost Room found)
Salt is underrated (though at $15 a shaker, it is hilariously overpriced). Every shaker has three charges of salt, which can be placed on any ground in the house. If the Ghost steps over the salt pile, it will create a foot step that can be photographed as evidence. This allows you to track the Ghost’s movement and notably see which rooms it is entering or leaving, or simply put right in the Ghost Room for free evidence money.
If you are at a loss as to where the Ghost Room actually -is- with capricious wandering ghosts, dump salt in doorways and tight hallways, leave to have a coffee break at the truck, and check which ones have been stepped in to find your room or hallway.
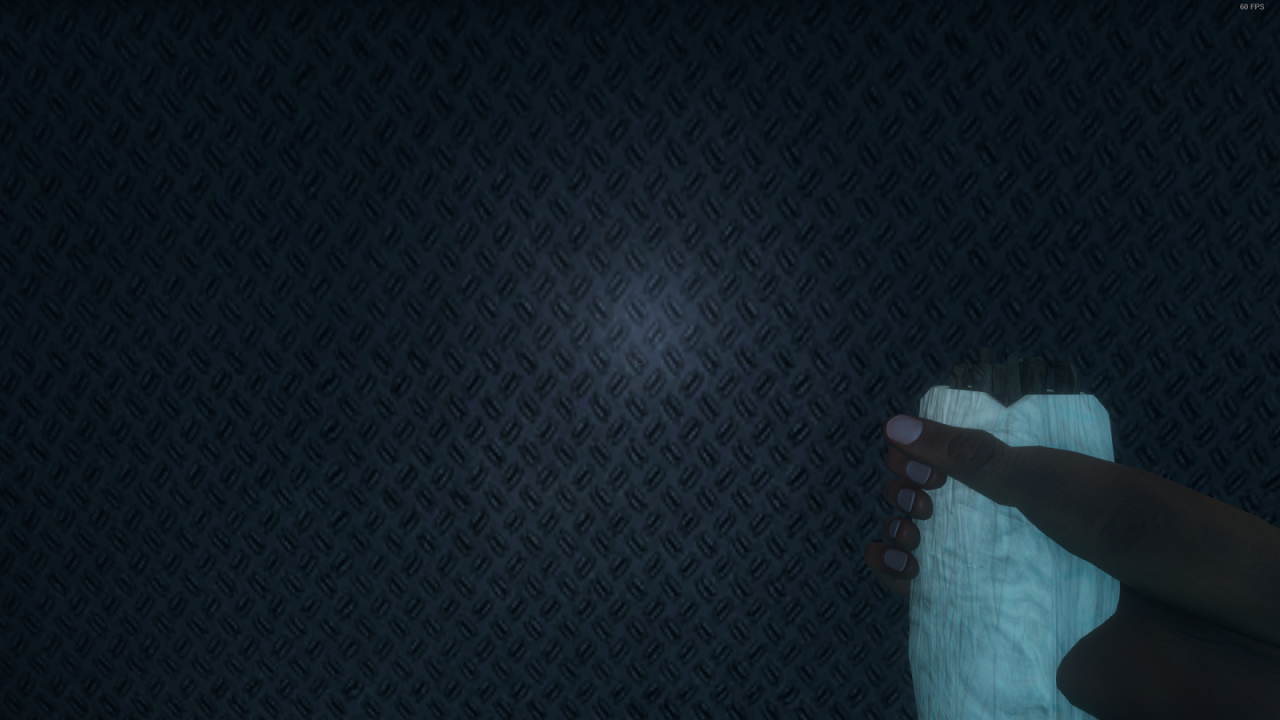
Price: $15
Level: Starting
Amount: 0/4
Used For: Safety, Objective
Bring: Later (Low Sanity or need to cleanse)
Smudge Sticks are a pretty important safety item. While not as flashy as the Crucifix, burning a smudge stick can easily save your team’s life if timed correctly, and you get as many as four to go around.
To light one, you need a lighter that is lit in your inventory. Then, simply press the Use key when holding the smudge stick. It will last a few precious seconds.
When a smudge stick is lit (usually near a ghost, but unclear), it will pacify it and prevent a Hunt until the stick burns out. If a Hunt is already underway but the Ghost hasn’t fully materialized yet, it will delay the Hunt until the smudge stick burns out, which can save someone’s life if the Ghost materialized on top of them.
To satisfy the Cleanse objective, you need to bring a Smudge Stick right into the Ghost Room and light it. Wander around a bit and check side rooms to make sure to get it. This will also pacify the Ghost a bit, so it can be a good reset if you are nearing the end of the mission and sanity is shaky.
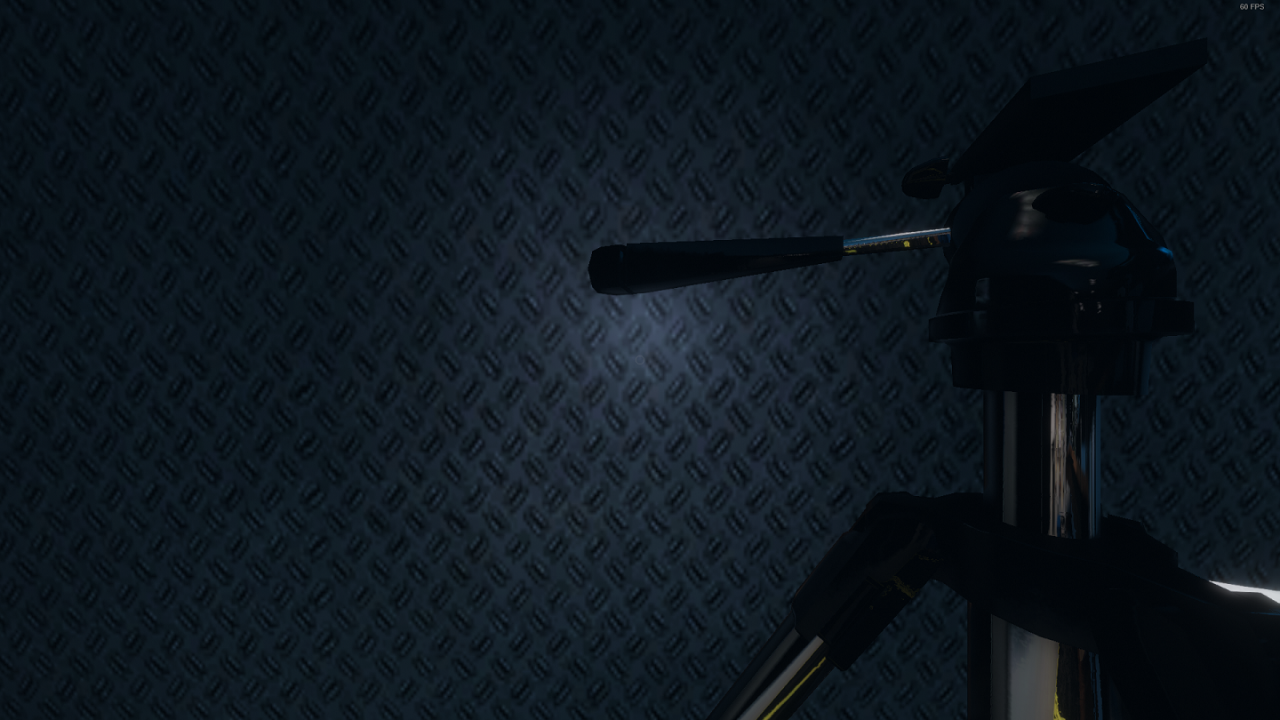
Price: $25
Level: Starting
Amount: 0/5
Used For: Support
Bring: With Video Camera Later
The Tripod alone, while a hulking beast, is useless. However, paired with a video camera, it becomes the perfect way to neatly and quickly place cameras for remote viewing. The height is pretty much perfect to get a good view of the room too!
To pick them up, you will need a free hand. It will fully occupy your hands until you drop it. Use your special action button to put a video camera in your hands onto the tripod, and make sure to turn it on!
Price: $50
Level: 3
Amount: 0/4
Used For: Light
Bring: Always
Strong is a bit of an understatement for this little wonder of modern technology. While it is quite pricy, it will cast a far more intense light, ensuring you have close to no blind spots even on bigger maps. A must-have for everyone and something you should buy at least one of to bring to any level.
If you have these and still have a set of Flashlights, you should have a spare player intentionally come in with weak flashlights and place them in quick, useful spots to give you good backup lighting if the fuses blow. Prioritize furniture to get the full cone out of them.

Price: $100
Level: 6
Amount: 0/4
Used For: Scouting, Objective
Bring: Early (Doubts on Ghost Room), Later (Ghost Room found)
The Motion Sensor is a fairly underwhelming item. While it allows you to perfectly track where the ghost is by giving a map ping every time a ghost crosses it (or a player, but you can clearly see players on the map), you will no doubt already have a good idea of what the ghost is doing from interactions.
The main use of the motion sensor is to get the optional objective linked to it. Simply slap it in a nice spot in the middle of the Ghost Room and cross your fingers.
Equipment and Using It (Part 3)

Price: $80
Level: 7
Amount: 0/4
Used For: Scouting
Bring: Early (Place and check Truck monitor)
The Sound Sensor is a massively underrated piece of technology. While mostly useful early on, it allows you to monitor all the sound that happened recently in a given area. Obviously, if that sound did not come from you, then it must have come from the ghost.
The best way to use it is to place it on entry, making sure to create a big, sweeping scanning range, and then going back to the truck to see which ones activate. If there is sound, then the Ghost Room has to be nearby, and from there it’s a process of elimination. Extremely loud sensors probably indicate the ghost room is fully within the sensor.

Price: $45
Level: 5
Amount: 0/4
Used For: Safety
Bring: Later (Use in Truck)
Sanity Pills are a simple item, but they can be crazily invaluable on larger maps or higher difficulties. The Ghost’s hunts are directly linked to your sanity, so when your team sanity is getting low, you are putting yourself into mortal danger by continuing to go into the location. Even if you stick to lit areas, a single breaker hit could be enough to get you below the hunting threshold.
Sanity Pills solve that simply. Pop one, and you immediately get 40 % Sanity back. While you will only have one bottle for each person, this can easily allow to refresh your team before you dip below the Hunting threshold (or for Demon and Mare, a few percent into it, be careful!).
Price: $30
Level: Starting
Amount: 0/3
Used For: Scouting, Investigating, Objective
Bring: Early (Drop once Ghost Room found)
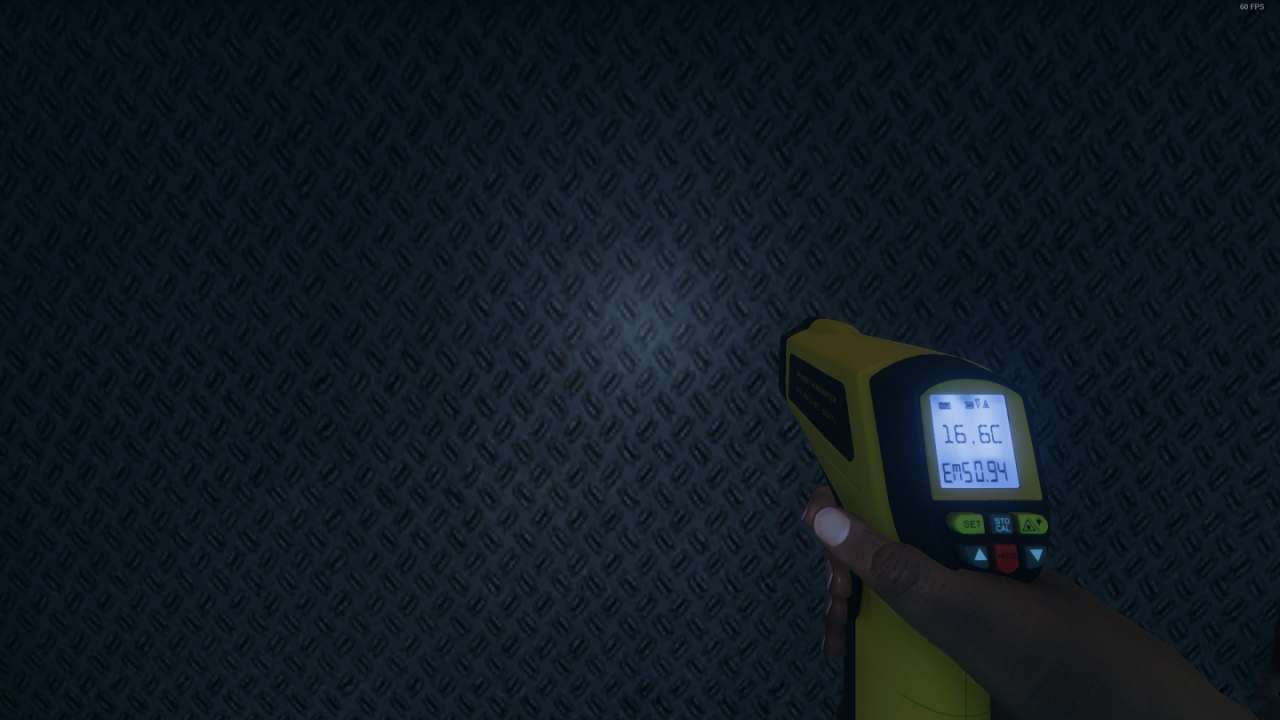
The Thermometer is probably the most powerful scouting item you can bring into the game, despite ironically being pretty useless at the one investigation it is for. The location will always be at the same ambient temperature, except the Ghost Room which will be at an unnatural temperature:
- 4 – 10°C (40 – 50°F). This is the temperature of a Ghost Room without Freezing Temperatures. Enter the room to make sure it is cold all thorough, warn the team and drop the Thermometer.
- -10 – 4°C (15 – 40°F). This is the temperature of a Ghost Room with Freezing Temperatures. You will usually see your breath condense and mist when entering it. Warn the team for both and drop the thermometer.
The temperature always varies by 3-4°C and will be measured 6 meters ahead of the thermometer. If you point near a door and see a temperature drop, it is almost certainly the ghost room, so check inside, but always enter rooms to check as the ghost can be in a small sub-room!
To satisfy the objective, simply bring a thermometer to the Ghost Room, you should fullfill this in all games unless you couldn’t bring one.
Price: $40
Level: Starting
Amount: 1/2
Used For: Investigating
Bring: Later (Ghost Room found)
The Ghost Writing Book is a blank book that can be filled with automatic writing by any Ghosts featuring this trait. While you can rarely scout with it, its main use is placing it in a Ghost Room and waiting to see if it is written on.
If you can, place it in front of a camera to avoid wasting precious time going back in to check for writing, it is fairly obvious from an elevated angle.
Price: $65
Level: 6
Amount: 0/4
Used For: Light, Scouting
Bring: Later (Ghost Room found)
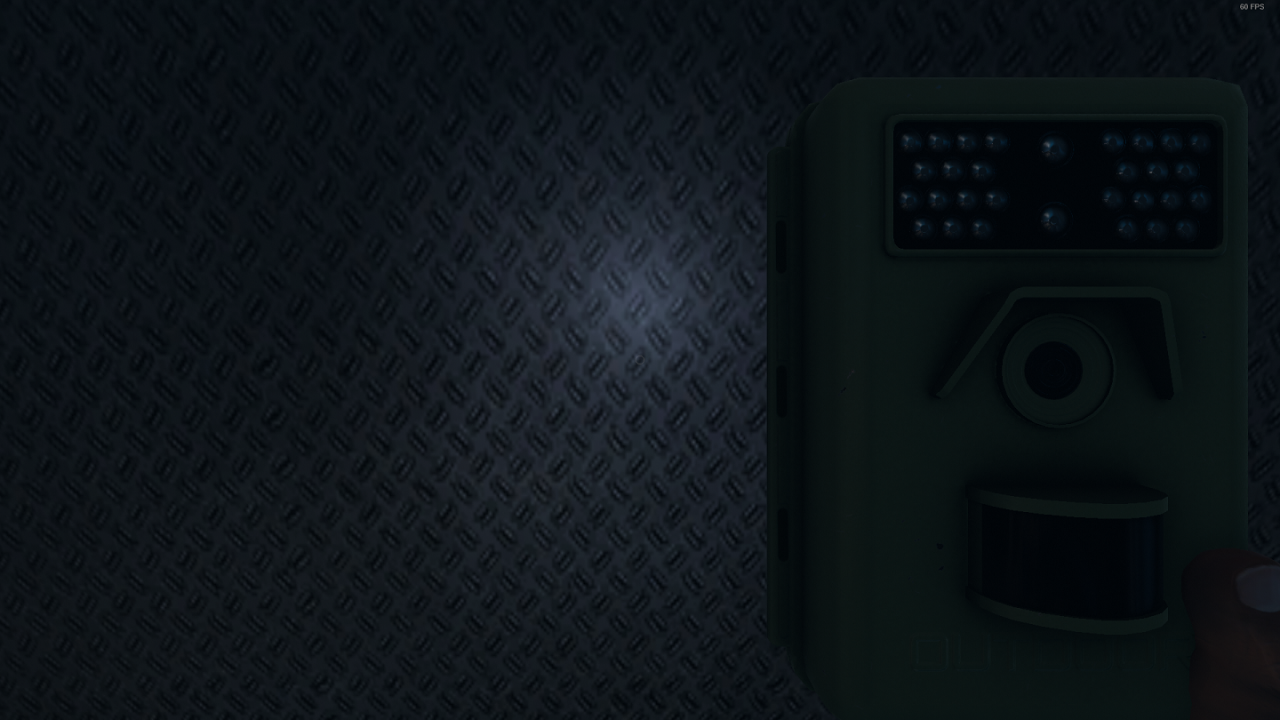
The Infrared Light Sensor is a bit of a joke item. It acts the same as the Motion Sensor without fullfilling its objective, but will shine a weak light when triggered. Bring if you have a LOT of money to waste only.
Price: $50
Level: 7
Amount: 0/2
Used For: Scouting
Bring: Early (Drop once Ghost Room found)
The Parabolic Microphone is deceptively powerful and can allow you to zero in on the Ghost Room terrifyingly fast if the ghost decides to flip out a bit. Its use is simple, point it in a direction and it will give you a sum of all the recent sounds it detects similar to the Sound Sensor. Assuming the Ghost is noisy enough and you are not accidentally picking up your teammates, it will allow you to quickly narrow down your search in the same way you would from hearing sounds yourself.
If you are gonna bring one, bring it immediately. Drop it once you can ascertain what the Ghost Room is.
Price: $20
Level: Starting
Amount: 0/2
Used For: Light, Investigating
Bring: Later (Drop in Ghost Room)
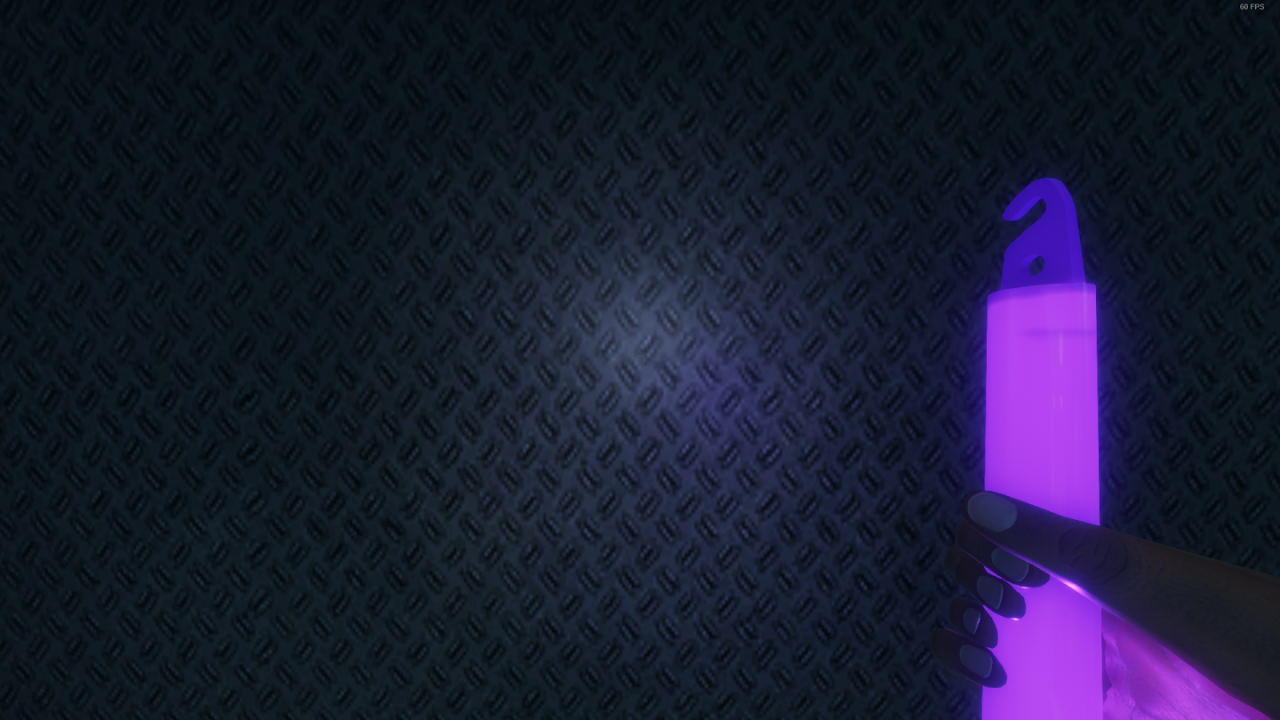
The Glowstick is a humble UV emitter that can be used with the UV Flashlight to reveal footprints and fingerprints. However, it can also be used as a literal glowstick, to mark locations of interest with a weak but permanent light.
One of the best things you can do is either throw them in the Ghost Room to allow you to be in the dark without being blind, or throw one to indicate the way to the breaker or truck on big maps.
Price: $60
Level: Starting
Amount: 0/4
Used For: Support, Investigating
Bring: Always (Free Slot)
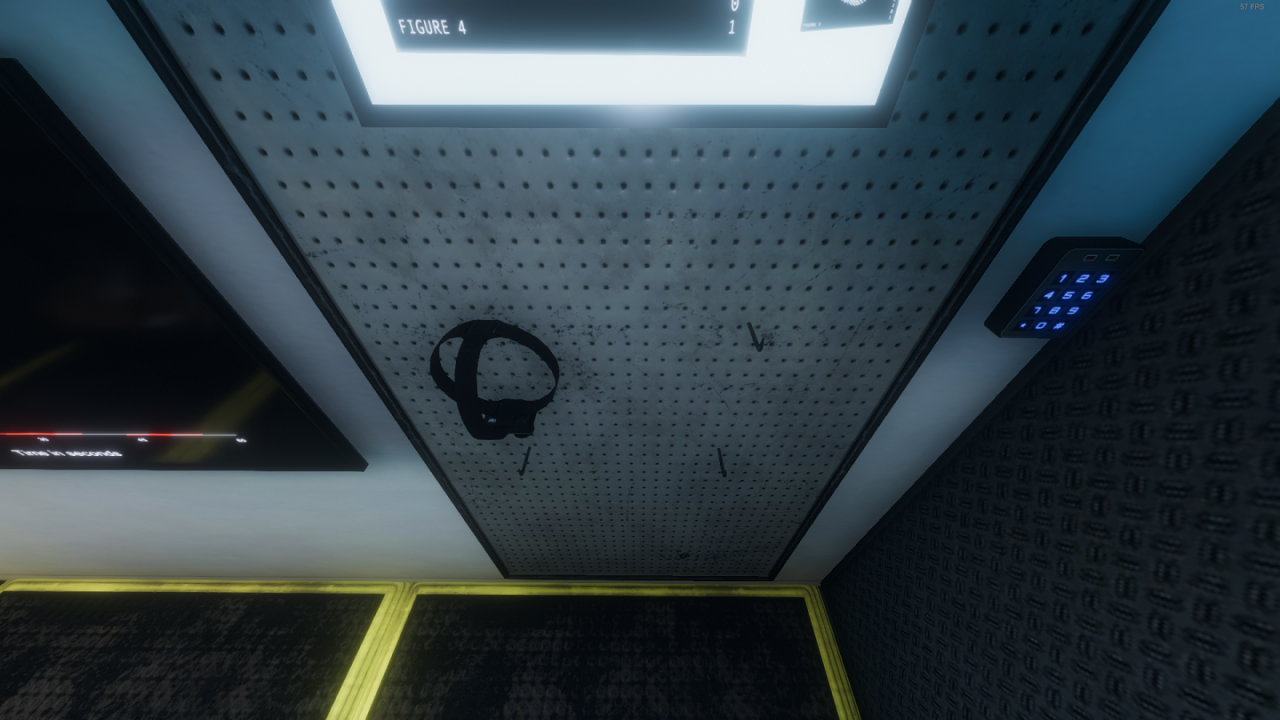
The Head Mounted Camera is a simple but effective item. Once grabbed, it will go on your head and allow you to carry your own video camera on your head, which can be watched for everything a camera can be like ghost orbs and other events.
It is an interesting item, most fit for teams willing to leave someone behind on the truck. While it can be dodgy for ghost orbs, a quick eye and minimal use of lights can quickly spot it out. Additionally, it allows you to monitor where people are if you really want to handhold them around.
Ghosts And Fighting Them (Part 1)
With equipment out of the way, it’s time to learn about what they’re used against. The feared Ghosts, of which there are currently twelve types in game. However, each one of them shares a long list of characteristics that we have to get through first.
First of all, the Ghost will spawn in once you open the front door, starting in a specific room which will for the rest of the game be known as its favourite room. While the Ghost can wander around, the Ghost Room is the room where it will spawn, respawn, reset after Hunts or Apparitions and will generally have 75-90 % of the activity as it has a tendency to go back in there to idle often. Finding it and setting up safety and investigation items near it is absolutely critical for your success!
The Ghost will alternate between wandering around the house and straight up idling for a few seconds, along with randomly rolling to mess with nearby objects, or more rarely things across the map. This can include things from randomly poking doors ajar or pushing items off shelves, to far more startling events like slapping the breaker shut or even appearing for a bit to scare players.
The Ghost reacts to people chatting. Generally speaking, it will react to the following information:
- Clear questions or orders. From the famous ones like “Give us a sign” to really any question like “Where are you ?”.
- Saying its name. The Ghost’s name is not to be used in vain and will quickly agitate it. Do not say the ghost’s name casually inside the house.
- Insults. As any good Christian, the ghost will flip you if you are an absolute potty mouth. Try not to curse like a sailor when stressed as it will rapidly anger the ghost.
- Fear keywords. “Spooky”, “run”, “hide” and such will increase the chance of the ghost acting up.
Most of the time, the Ghost will spend its time pushing doors ajar (this makes it a great sign of a ghost room if you are having trouble with other clues, notably on maps with tons of rooms!), randomly nudging items or messing with items inside its room, including clue items if you left them in. Generally speaking, the best way to drown it out is to stay in a group and move quickly, a sudden ghost apparition isn’t that scary when faced down by a full group of people chatting and lighting things as they go and make for great cash money with picture cameras.
Note that as far as we know, every Ghost has fully randomized behaviour outside of their specific strength and weakness. A Demon can only hunt once or barely hunt, a Spirit can go nuts when a group gets near them, or a Jinn can slam the breaker shut. The only special behaviour they have is innate to their ability as coded ingame, so don’t be too quick to identify a ghost based on vague behaviour clues!
Without further a due, let’s start going down the list of spooks you will encounter ingame, and some quick field notes on what makes them special. Every ghost has a chance to trigger an “ability” which allows it to use a special move if it has one, often to the ghost hunters’ detriment.
Unique Strengths: Nothing.
Weaknesses: Smudge Stick use will double the safety window before it can hunt again (180 seconds/3 minutes instead of 90 seconds/1 minute 30).
Evidence: Spirit Box, Fingerprints and Ghost Writing.
The Spirit is by far the most basic ghost you will encounter with no strength or special ability, and its weakness is genuinely extremely crippling and basically allows you to summon a partial safety clock at will if you have smudge sticks to spare.
There is not a ton to say about this one, though don’t underestimate it. If you don’t smudge it, it can vey much be active and even attack very quickly!
Unique Strengths: Little to no footsteps visible on UV, no UV footsteps in salt. The Wraith can randomly teleport next to you (hidden, and yes it can happen in a Hunt apparently, which may explain its “wallhack kills”. This causes an EMF Reader 2 event)
Weaknesses: If a Wraith steps in salt, it will have an effect equivalent to a Smudge Stick, making it very unlikely to start a Hunt for a bit.
Evidence: Fingerprints, Freezing Temperatures and Spirit Box.
The Wraith is a particularly dangerous ghost that can easily surprise a team and be especially deadly if pushed into a hunt. While it does not “travel through walls” as often claimed (at least as far as the code says), it will happily teleport onto players to cause mayhem, causing it to send activity spiking around random parts of the location.
The inability to reliably track him is a more minor downside, though salt piles can be used to totally neuter him if you are lucky, leading to him being unable to hunt if it steps into salt at the wrong time.
Unique Strengths: Looking at a Phantom (appeared or in hunt) drops your sanity twice as fast. Phantoms can choose to straight up navigate to your position as a forced ability (hidden, unknown if it can happen in a Hunt). Phantoms also flicker out of views during hunts more.
Weaknesses: Taking a photo of the Phantom will immediately make it vanish. However, this doesn’t appear to stop hunts!
Evidence: EMF Level 5, Ghost Orb and Freezing Temperatures.
This ghost can have a set of moves somewhat in-between a Jinn and Yurei (in terms of sanity drops) and Wraith or Banshee for mobility, making it a bit confusing to track down. However, encountering an apparition or slammed door from this ghost will collapse the sanity of whoever witnessed it.
A hard tell for this ghost if you are foolhardy enough to get it is to take a picture of an apparition. It will vanish immediately if a Phantom, though make sure you did not take the picture too late and that it vanished naturally!
Unique Strengths: The Poltergeist can throw every prop it has access to at once as an ability. Poltergeist will drop your sanity as it throws items in the location (hidden).
Weaknesses: If it doesn’t have props to throw, it will idle more and generally be a basic ghost.
Evidence: Spirit Box, Fingerprints and Ghost Orb.
The Poltergeist is that ghost that everyone can probably tell from habit alone. While every ghost can throw items around and merely chucking a few items around won’t certify it, a large amount of items being moved quickly (and especially instantly) will very rapidly betray the presence of a Poltergeist.
This ghost can be insidious however. If it decides to throw only single items, it can slowly but steadily sap the team’s sanity, and if not identified properly a full poltergeist event can severely damage sanity. Make sure to get a good camera in the ghost room to watch for that rare mass throw!
Obviously, if the Poltergeist is in an empty room, it will be a sad, sad ghost that will require more normal investigation techniques.
Ghosts and Fighting Them (Part 2)
Unique Strengths: The Banshee will pick a target and stick to it until it leaves the house or dies. The Banshee can initiate a spontaneous hunt for its target if it teleports to it and the target is still available but out of sight after 20 seconds (hidden)
Weaknesses: The Banshee is more sensitive to the Crucifix. It is prevented from hunting from 5 meters away, instead of 3 meters.
Evidence: EMF Level 5, Fingerprints and Freezing Temperatures.
The Banshee is an absurdly dangerous ghost due to its unique and very intense ability to simply teleport to its target and start a hunt without any warning and often clear out of crucifix range (unless they were hanging out around one, notably in the Ghost Room). This is compounded that this hyperfocus on one target will likely not be noticed until it is far too late, making it the “true Demon” of the current ghost roster
If you witness a hunt that happens absurdly early (for example when the team is at 90 % average sanity), it is a nearly perfect tell of a Banshee that got a really -un-lucky roll on its special ability and managed to trigger a hunt with it. Assuming you could already get one or two clues, you may want to leave and slot it in.
Unique Strengths: Jinns more extremely quickly when the breaker box is on and their target is 4 meters away or more (“two times Unity default movement speed”). They can randomly create a pulse that will raise the insanity of anyone within 3 meters by 25 % if the breaker box is on (hidden).
Weaknesses: No power, no ability, duh.
Evidence: Spirit Box, Ghost Orb and EMF Level 5.
A Jinn’s ability set is rather clear. As long as the breaker box is on and the location is powered, it will be far more powerful. However, the part that’s hidden and that can definitely catch people off guard is that the Jinn can randomly teleport to you and nuke your sanity. This is both a curse, and surprisingly a blessing
If you find that someone’s sanity has been dumped by a crazy amount, and they have not been wandering off alone into the darkness, seen the ghost or messed with an Ouija Board, then you have a pretty strong hint that you might be dealing with the one of the sanity draining ghosts.
Of course, the Jinn’s ability can be a Damocles sword. While he is impotent when the breaker is off, this also means you will be in permanent darkness, which will slowly drain your sanity, so be careful!
Unique Strengths: Sanity threshold for Hunts is 10 % higher if the Mare is in total darkness (60 % for minor, 35 % for major).
Weaknesses: Sanity threshold for Hunts is 10 % lower if the Mare is in a lit room (40 % for minor, 15 % for major).
Evidence: Spirit Box, Ghost Orb and Freezing Temperatures.
The Mare is a rather straightforwards ghost and functionally the opposite of the Jinn and a bit of a Demon-lite. When a Mare is in darkness, it will be likely to attack earlier and generally with more intensity, however if it is constantly wandering in lit areas, it will be neutered by a bit.
This is rather unreliable as the Mare can naturally wander into some dark side room, or it can simply slam the breaker and force darkness upon the location for a good minute or so, giving it a massive opening for an attack. Tread carefully!
Unique Strengths: Moves twice as fast when chasing a player.
Weaknesses: Moves 1.5 times slower when not chasing a player.
Evidence: EMF Level 5, Fingerprints and Ghost Writing.
The Revenant is a nasty piece of work. While it is otherwise unremarkable, its true strength comes when the level drags on for enough (and all of its evidence require you to wait for it to give you clues).
Once it does, except the Revenant to genuinely outrun you if you are being chased, leading to a quick death if you get trapped (though not as quick as a powered Jinn). Now of course, if you manage to hide, it will be a bit worse off and move rather slowly, meaning it tends to roam less.
Unique Strengths: The Shade is likely to be less active around groups (no code proof)
Weaknesses: If there is more than one player in the same room as the Shade when it decides to Hunt, the hunt will be cancelled immediately.
Evidence: EMF Level 5, Ghost Orb and Ghost Writing.
The Shade is one of the more peculiar ghosts, with a massive drop in activity when near groups, and even being unable to hunt if you manage to get into its room as a group. It is a blessing and a curse once again, being safe in groups will definitely do a lot to help with nerves, but it also means that the Shade will not give you many clues until you split up.
If you suspect a Shade, you will need to intentionally piss it off to generate clues, or if someone is courageous enough send them ahead to be bait (note that a Shade never answers the Spirit Box, so it doesn’t matter if you get an alone/everyone clue). Be careful not to misidentify! Being cocky in a group can mean death with other ghost types.
Unique Strengths: Sanity threshold for Hunts is 15 % higher at all times (65 % for minor, 40 % for major).
Weaknesses: Using an Ouija Board succesfully will not drop sanity (minus 1/3 40 % sanity drop chance ?)
Evidence: Spirit Box, Ghost Writing and Freezing Temperatures.
The one and only, probably needing little introduction. The Demon is well known for its propensity to hunt very often and intensely, making it well feared within the community as being a harbringer of pain.
The sanity threshold it starts hunting at is quite high, allowing it to open on a team that is sweeping big, dark map, making it pretty dangerous at all difficulties and an absolute nightmare at Intermediate+. If you see your breath freezing in the Ghost Room, it might be worth puckering up a bit, as it can mean Demon or Banshee, both of which can attack insanely early.
Generally speaking, you can test for a Demon with a Ouija Board, but it is unreliable and very risky due to the side effects of the board. Try it if you wish, but beware!
Unique Strengths: Map-wide sanity drains are stronger (no code proof)
Weaknesses: Smuding a Yurei will totally paralyze it, locking it out of wander mode for 90 seconds along with disabling hunts.
Evidence: Ghost Orb, Ghost Writing and Freezing Temperatures.
The Yurei is another fairly infamous ghost due to its very simple but very effective effect of making your sanity drain far faster, leading to you meeting the sanity threshold for hunts way ahead of schedule and putting major pressure on your team.
Generally speaking, if your entire team’s sanity has dropped dramatically, and especially if you didn’t all stick together to witness events, you can take a pretty good guess at a Yurei! Remember to smudge a Yurei to disable it (or generally smudge for Freezing Temperatures, as they hide three extremely dangerous ghosts)
Unique Strengths: Being in the same room as an Oni will make it far more active.
Weaknesses: The activity spike when entering an Oni room makes it very obvious, especially if smudged.
Evidence: EMF Level 5, Spirit Box and Ghost Writing.
The Oni is a bit of an oddball and the true “territorial” ghost of the game. When it gets near a player, it will flip out intensely and basically spam interactions and other activity clues, making it an interesting way to guess it out early if clues go the right way.
Onis are not too much more likely to attack per se but can definitely be distressing due to how hostile they get. Make sure to get a group on the game to not leave a player alone facing such a wild spirit… except if it need Alone Spirit Box questions
Locations and Surviving Them (Part 1)
Every ghost hunt happens at a particular, fixed indoors location that the ghost is haunting in. While you will no doubt have to discover every location by yourself and familiarize yourself, knowing what every map brings to the table can quickly get you up to speed and make the harder contracts far safer to undertake. Even a humble house can be learned inside and out to make your experience more enjoyable, let alone the High School or Asylum.
This list is ordered from effective size of the location (at least in my humble opinion), starting from the old, reliable Tanglewood Street all the way to the dreaded Asylum. So without further a due, the last big list of this guide! Breaker locations on featured maps are one of the random rolls and can be different on your map!
Ground Floor:
Basement:
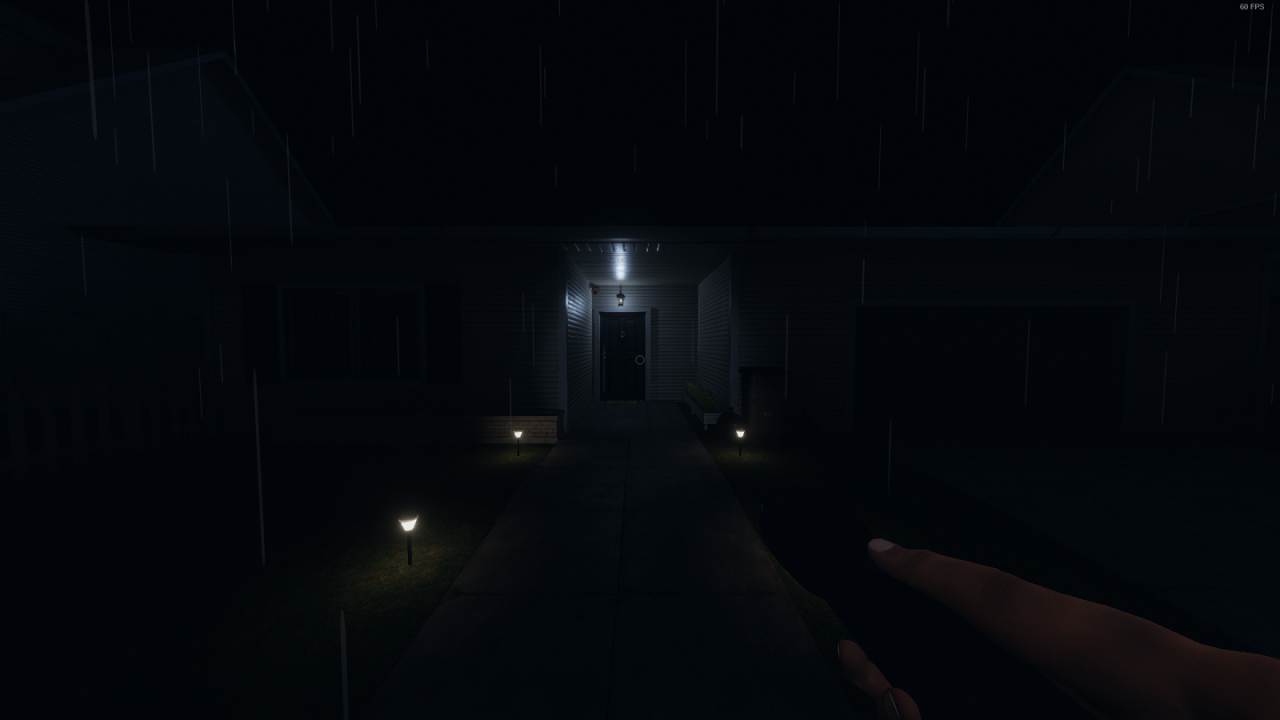
Front:
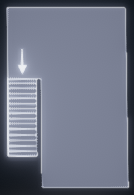
Breaker Locations: Garage, Basement.
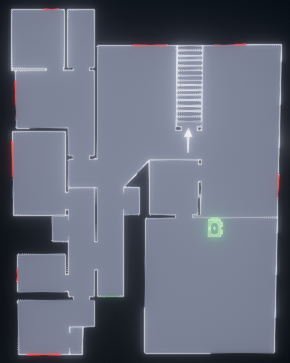
Tanglewood is a simple, single story house with a humble, single room basement connecting from the living room to kitchen hallway. All and all, it is by far the easiest location in the game by a long shot due to it having at best 10-11 rooms plus a few very short hallways, all in a very compact location.
Unsurprisingly, this small size also makes it incredibly trivial to light up and secure. A single crucifix is guaranteed to totally secure the ghost room, and the second crucifix can easily shut down a ghost that isn’t roaming heavily. The TV at the end of the entrance hallway in the living room only makes it even more laughably easy, giving you an enormous amount of light coverage.
A sweep in this house is about as trivial as it gets. Enter, light the “main hallway” (entrance hallway, small side hallway, TV and living room, kitchen). And then pull out that thermometer and look for the spooper who is haunting this budget location.
While the ghost can haunt any room, the most common are Garage (if the car alarm goes off, it is in there), Basement (make sure to check all the way down the stairwell and into the room!) and the multiple bedrooms on the side hallway. A competent team will take 30 seconds at most to pinpoint the room even with difficult ghosts and splitting up is obviously an option as you can easily just light everything up.
If for any reason you are in this map for long enough to trigger a Hunt, hiding locations can be slightly lacking. With the Ghost Room as a stricken location, try to go into one of the rooms. Avoid the hallway closets if you can as they appear to be bugged and the ghost will kill you if it moves nearby.
And yes, it always rains on this map, deal with it.
Ground Floor:
First Floor:
Basement:
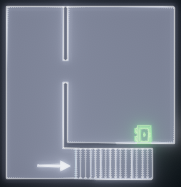
Front:

Breaker Locations: Garage, Basement.
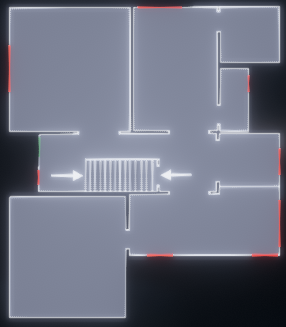
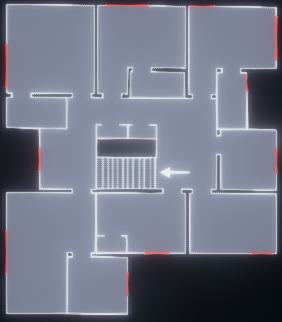
Edgefield is a fairly standard two-story sub-urban home, and one of the two step-ups to the humble Tanglewood. While both it and Ridgeview are about equivalent in amount of rooms, Edgeview is a bit more compact with a standard stacked floor plan and short hallways. The amount of rooms isn’t that dramatically higher than Tanglewood, minus an extra serving of bathrooms.
This map can still be covered pretty easily with lights. The entrance hallway and upstairs hallway are both easy to light with three lamps total, though the main downstair rooms can quickly consume a large amount of lights, forcing some budgeting. The TV on the side living room can be a nicely positioned free light for safety however.
This maps benefits from a simple floor-by-floor sweep, ruling out every room downstairs and the basement along the way before shutting down unneeded lights and moving upstairs. While the stairwell increases the complexity of the map, it can easily be handled like a Tanglewood+
Hunts on this map can be pretty oppressive, especially downstairs as there is a very clear lack of closets and rooms with doors to hide into. Flying upstairs might actually be a good idea if you are being hunted by a downstairs ghost. Upstairs though, you have a wide selection of closets and bathrooms to hide into. Just don’t pick the ghost room.
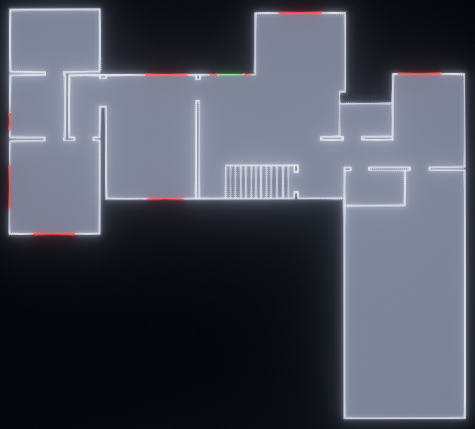
Ground Floor:
First Floor:
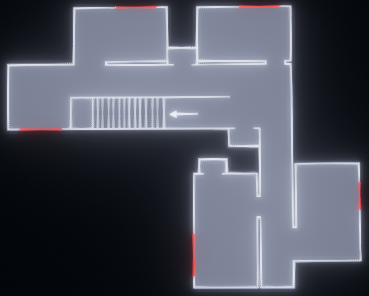
Basement:
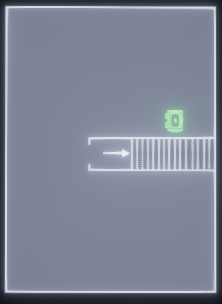
Front:
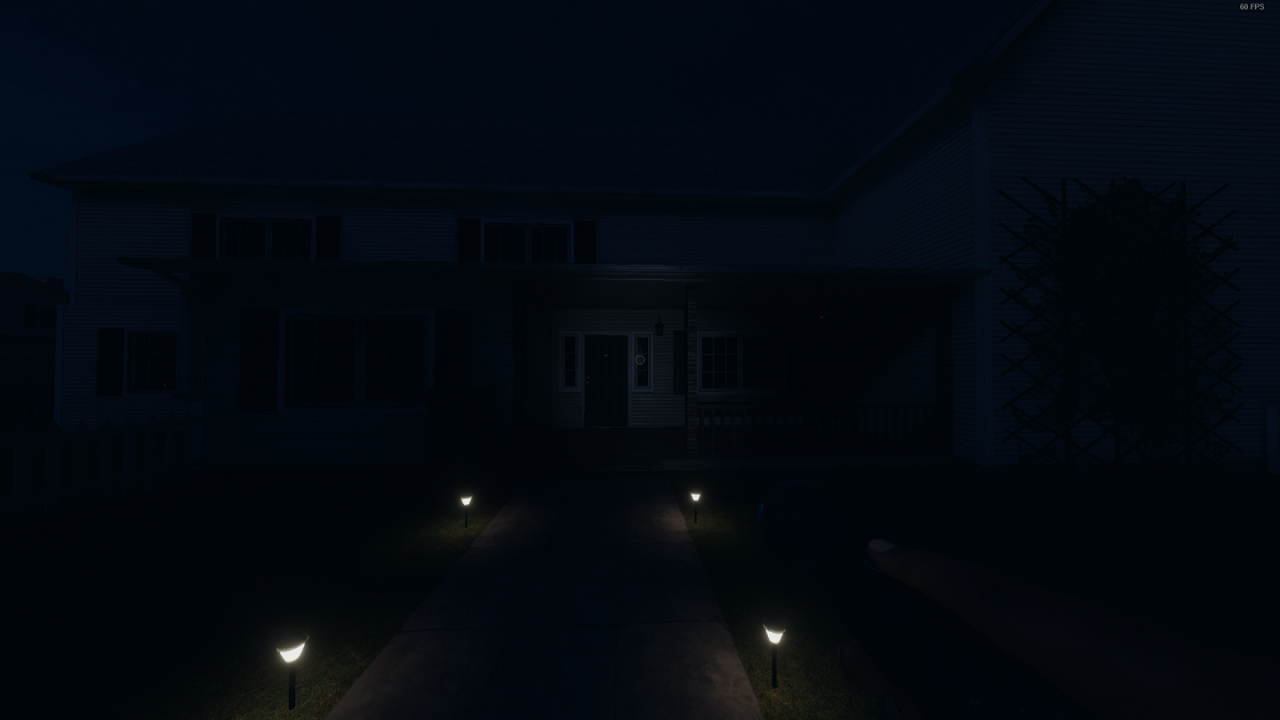
Breaker Locations: Garage, Basement.
Ridgeview is the last spin on the humble sub-urban home. This is probably the biggest one in terms of how long it takes to sweep, though only a minor step up from Edgeview and a bit under both farmhouses. The main issue with it is that it is rather elongated, increasing transit time around both floors, especially as you have to check multiple rooms in a row to clear a wing.
The lights on this map are annoying, forcing you to light about 4-5 lights to get really good coverage, which will immediately tax your light budget. The upstairs hallway light is also hilariously bad, which can definitely unnerve people going up (use the lamp backup light if you can!).
Hiding from a Hunt on this map isn’t a big problem. Downstairs you have a huge selection of rooms and closets to hide into. Upstairs you might be looking at some difficulties but can still probably hide just fine. Whatever you do, get good distance from the Ghost Room and then hide!
Ground Floor:
First Floor:
Front:
Breaker Locations: Workshop, Utility Room (Upstairs)
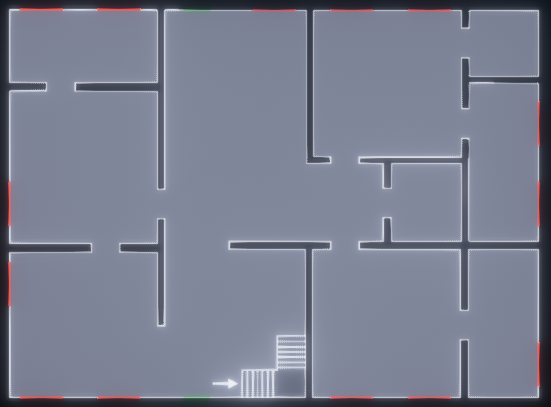
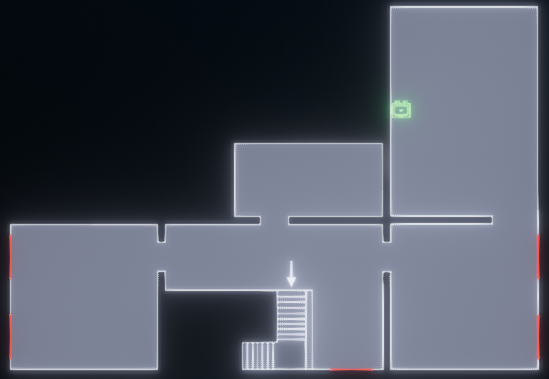
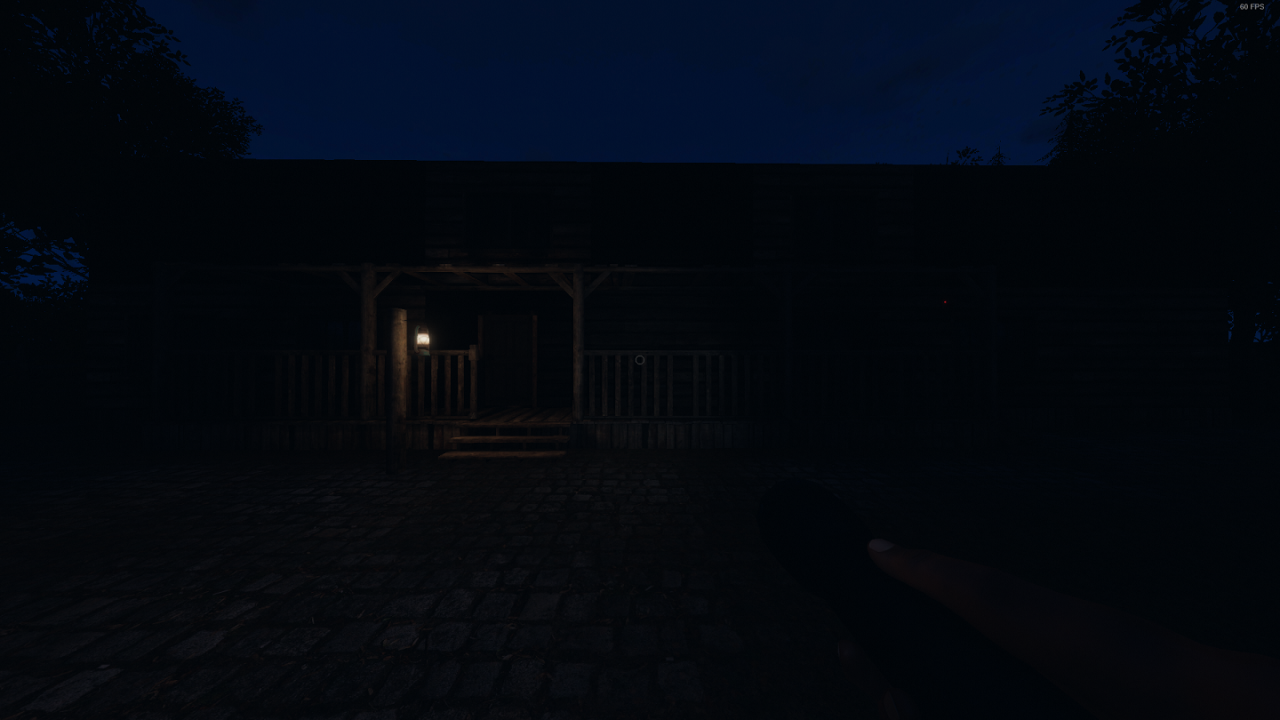
This two-story farmhouse can definitely be quite imposing to a beginner, but handled properly there is nothing to it. While definitely larger than the two-story houses and with a breaker that is reputed to be much weaker, it doesn’t have many rooms and has straightforward hallways, making it quick to clear.
One of the big features of this farmhouse and the other (Bleasdale) is that they both have really bad lighting even in “lit” rooms, leaving lots of dark spots and thus feeling bigger and scarier than the suburban homes.
This farmhouse is a lot easier to clear than the other. A recommended clear plan is to flip the entry light on, go up the stairs flipping the stair landing light along the way to create a big safe spot, and clear the upstairs room. Once this is done, assuming the ghost room isn’t up here, sweep downstairs, keeping only the stair landing light upstairs on.
Hiding spots are realy thin on this map, though you can switch floors during a hunt to limit the damage. Move fast and secure the room to get a good experience on this map.
Locations and Surviving Them (Part 2)
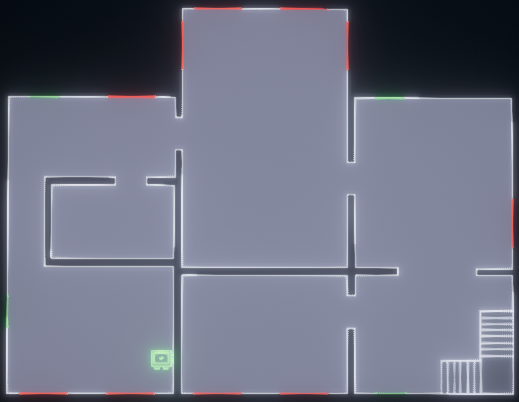
Ground Floor:
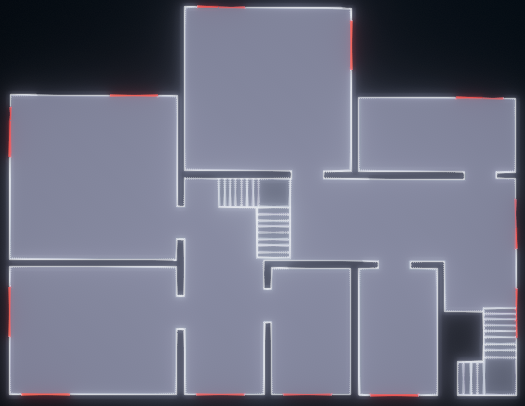
First Floor:
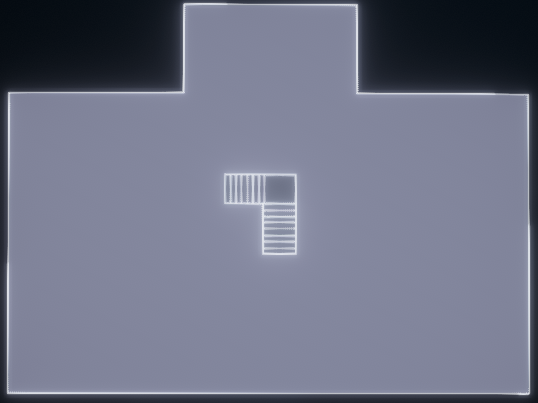
Attic:
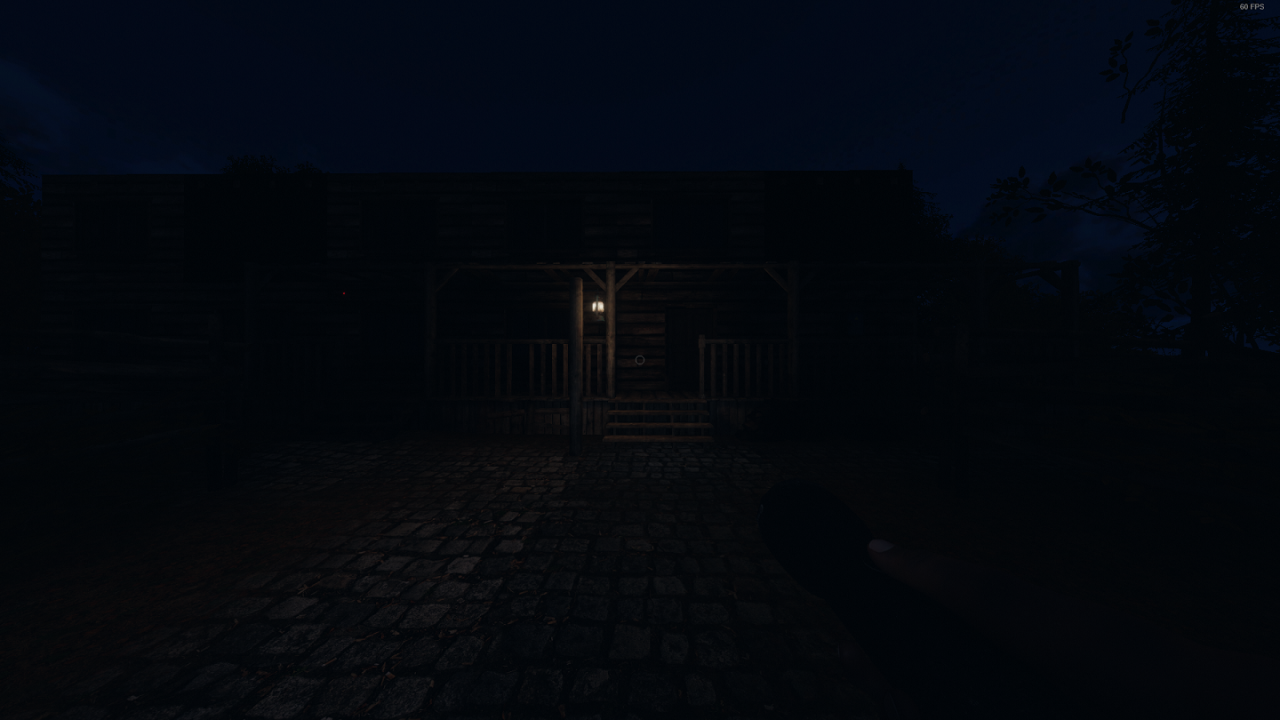
Front:
Breaker Locations: Utility Room (Ground Floor), ???
Bleasdale Farmhouse is the evil cousin of Grafton Farmhouse, featuring a far more chaotic floor plan with a dreaded attic and even weaker light coverage. This map is definitely the most difficult “small map” by far and can definitely be a good last training step to ensure you are ready for the high school.
There is not much more to be fair about it that wasn’t said about Grafton, though the clearing plan has to be tweaked a bit. Clearing the first floor, and especially the attic, is probably the best thing you can do to allow you to finish your setup time clearing the ground floor. If you are lucky to have a ground floor ghost, you can play this like a remixed Grafton. If you aren’t, get ready for staircase madness.
Ground Floor:
First Floor:
Front:
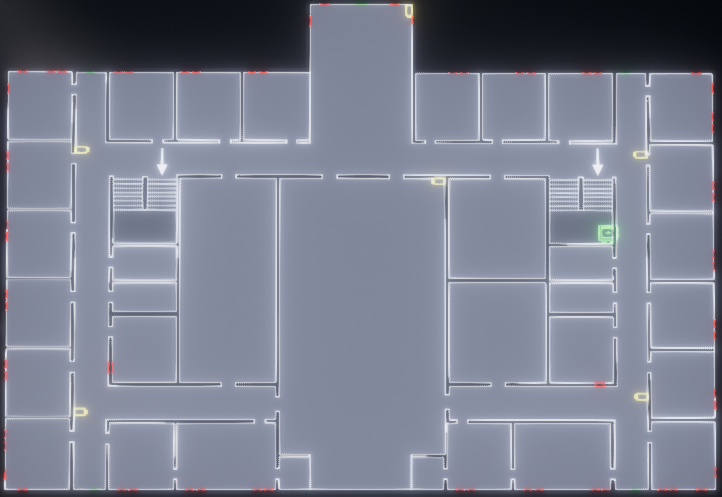
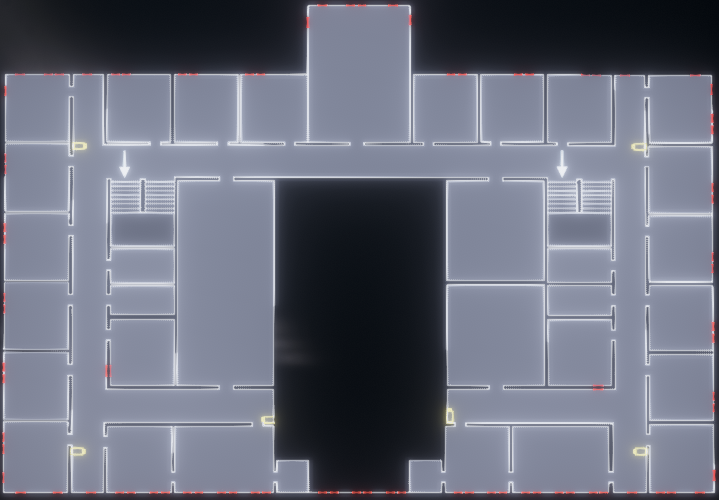
Breaker Locations: Under Left Stairwell (Ground Floor), Under Right Stairwell (Ground Floor), Utility Room (Upstairs, Left Hallway)
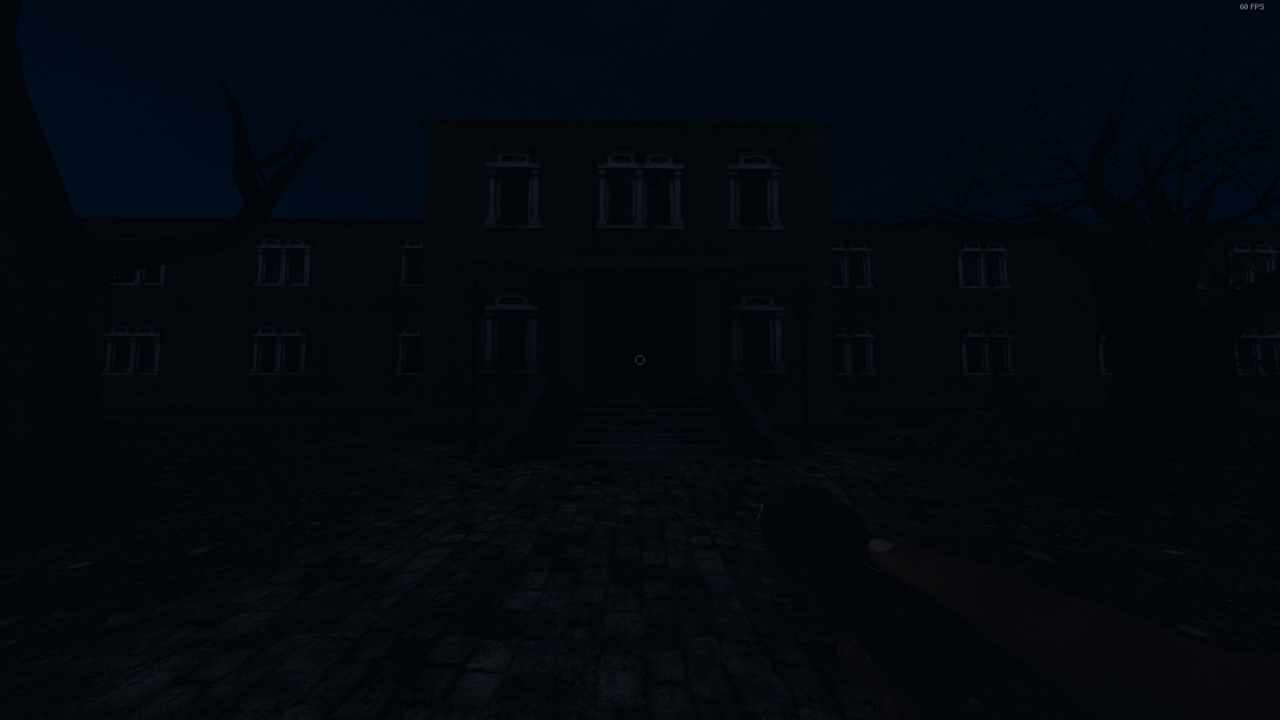
The High School hardly needs any introduction for seasoned players. With a room tally nearing 40 to 50 rooms and two stories full of doorways with long, winding, barely lit hallways, it is definitely a nice taste of what “Medium” means, and a warning that the Asylum will truly be something else.
The main danger on this map is taking too long to find the ghost room. While sanity drain is a bit slower than smaller maps, you can still be surprised by some things like a Banshee hunt, Jinn sanity drain or Mare/Demon early attack. So move fast, and if possible split into two groups with thermometers (be careful not to blow the fuse by lighting too many hallways).
Proper use of the parabolic microphone and sound sensor screening can make this map a breeze. Or of course, you might just hear a phone going off in a class room, instantly pointing you in the right direction. Whatever the case, light hallways to preserve your sanity, and don’t forget the second floor exists for double the fun.
Once you find the ghost room, remember to cut through the side entrances if it gives you faster trips, cut down on unneeded lights so you can get a fully lit path to the ghost room, and do your tests. If you get hunted, you have no shortage of rooms to hide in, but be careful about being stuck in a hunt loop if you overstay your welcome!
Ground Floor:

First Floor:

Front:
Breaker Locations: ???
The Asylum. What else is there to say about it ? Sadly, I have not yet had the nerves to play on this map, but it goes without saying that it is the biggest map in the game and thus the most dangerous. An enormous amount of rooms to check, an elongated setup that maximizes time spent walking up and down hallways, two stories that can give confusing sound feedback, and while the lighting isn’t bad, there is no way you will have enough lights for most ghost rooms.
This map is nightmarish and definitely the epitome of a good player to master. If you’re able to complete it well, especially on Intermediate+, and let alone as a Solo, kudos to you! Sanity pills are almost mandatory, a full kit can only help to fight his hellhole of a map.
While I can’t talk from experience, it goes without saying that good use of the parabolic microphone and sound sensors, with thermometer sweeping as a backup, is the only way to move quickly on tis map. Once you have your room, dump your proving items in, if possible in front of a camera, and pray to get the intelligence you need. In a hunt, find a room to hide in and hope for the best.
That’s all we are sharing today in Phasmophobia A Comprehensive Guide That Covers Everything the Community Knows, if there are anything you want to add please feel free to leave a comment below and we’ll see you soon.
Credit to dylanstrategie
Related Posts:
- Phasmophobia Beginners Tips (Sanity, Tracking, Salt, Item, Hidding, Camera)
- Phasmophobia All Ghost Types (Strengths and Weaknesses.)
- Phasmophobia Investigations Method Guide
- Phasmophobia Basic Information For Beginners (Tips And Tricks)
- Phasmophobia Crucifix Guide
“Make yourself quiet. The Ghost listens to sound and can sometimes also react to your light.”
Correction: Data miners have checked the game files and there is nothing in there that says that the ghost can track you down by flashlights/candles/glowsticks or talking/sounds during a hunt. This was also confirmed by the Dev in the official Discord. As of December 6th, 2020, they only track by line of sight and nothing else.
Anytime someone claims they were killed because they were talking or had their flashlight on, it is just coincidence. I can reasonably explain why some players claim sound and/or flashlights attracted the ghost.
1. Wraiths. Doors might as well not exist to them and they can go through walls. The only way to break their line of sight is to move behind walls away from the doors. Closets and lockers are the worst hiding spots against this ghost. Sometimes it can phase through walls so it’s just bad luck if it finds you this way.
2. Banshees. This ghost will select 1 player to always target during a hunt. How it works is a bit complicated but basically when it chooses its target it will never change targets again unless they are not in the building when the hunt begins, or they are dead. It’s ability makes hiding useless and it will always go after the player it targeted regardless of where they are. Your only solution is to place crucifixes (has a 5m radius against Banshees) in the ghost room before it hunts or outrun/loop them.
However, the dev has hinted that there may be future plans to code the ghost being able to track by sound. 🙂