A collection of useful pieces of advice for all players. As soon as I discover or hear about a tip, I will add it here.
Before Sandbox…
If you’re a faster player and rush to the end on easy, you should be able to easily complete the entire game in less than 10 hours. Not only does this net you personal experience with the game before making your sandbox aquarium, but also it gets you most of the achievements along the way.
Basic Advice
I put tips here that I consider too simple for their own section.
OVER-SATURATE TOOLS AND FOOD
Every time you expand, upgrade, or move stuff, make sure there are appropriate items nearby. Got new fish? Make sure their food is within a couple tiles from the feeding deck. New filters and heaters? Check that toolboxes are in close proximity. Moved your bathrooms so guests stop complaining? Put a sponge sink in the nearest staff room. The costs of tools and feed is minimal in comparison to the profits you make, especially once you start a gift shop. It can save you a lot of prestige to make sure your fish don’t die because the nearest food is a five minute walk.
BASIC LAYOUT
Make your aquarium a simple shape thats easy to navigate. You should also make it easy to expand, so you don’t have to do too much moving around when you unlock a new fish or tank that you want to use. A circle or a square works best, that way it’s difficult for guests to get lost. Making your aquarium a labyrinth may causes guests to get lost and upset, making them leave in frustration, losing you potential prestige.
IMPORTANT MAIL
Your mailbox can get quite cluttered later on with all your “X has grown to size Y” emails. An easy solution to this is the important mail button. In the mail window, at the top left you’ll see a little mail icon with an exclamation mark. Click that once. Now, the only mail you’ll see are important messages such as employee level ups, traders and merchants, story stuff, and unread messages.
FORCE GIFT SHOPS
As soon as you unlock any gift shop items, play the greedy manager who just wants money. You’ll see this all the time at theme parks and zoos, placing the gift shop either directly in the shortest path around the park, or tantalizingly close. A ridiculous number of guests will buy souvenirs of any kind. Once you get even the first bookshelf set up, income management becomes a non-issue. On top of admission, drinks, and food, gift shop income will drastically outweigh the upkeep of supplies and feed, allowing you to spam them more effectively.
USE NURSERY TANKS
On very rare occasions you’ll find two fish you want in the same tank, and both of their adult versions can live well together, but at some point in their development they will be incompatible. In these cases, having one species grow up in an isolated tank is a great idea. Then you can simply pick up the species and drop it in the actual tank once it’s grown to a safe size for it’s tank mates.
PLAY SLOW
The last bit of advice I’ll give in this section is to take your time and think about your plans. There is no time limit on anything in the game. As long as you aren’t rushing full speed ahead, you’ll be able to afford every expansion or upgrade you make, and you can avoid mistakes you may not have had you gone ahead without thinking.
Staff Basic Pointers
Make sure that you tell your staff to only do jobs they’re good at. In the staff management window, you can click the green bars by their levels to change their priority. Green means low focus, Blue means medium focus, and Pink means heavy focus. Grayed out means they ignore all tasks of that type. If you have a designated fixer, make sure his fix is Pink while his feed is green or even gray if its low. You don’t want a 10 fix/1 feed stuck feeding a fish that requires skill for the whole day. (Or 10 feed/1 fix repairing a high level filter)
SPECIALISE YOUR STAFF
When you level up your staff, try maxing out one skill at a time. It’s much better to have one max rank feeder and one max rank repairman than two who are mid rank for each. They’ll get their jobs done quicker, which lets them take care of more difficult jobs more efficiently. The only time you should have a “jack of all trades” is at the way beginning when you only have tier one filters and fish, or at the very end when staff are all maxed out on everything.
TRAIN APPROPRIATELY
Staff typically have low levels to start out at, the highest level I’ve seen for any starting staff was level 5 with no other skills. This was at the end of the last campaign stage. Typically, you’ll only hire people with skill level 3 or lower. You’ll want to stick these people in lower difficulty job areas, start them off feeding the small tropical fish you get at rank 1 before moving them up to rank 12 manta rays and sharks. It’s not good when your rank 10 feeder is done feeding their zone an hour into the day when your rank 2 feeder only has one fish fed by closing time. That being said, you will likely juggle staff around a lot when you hire new people.
PICK UP YOUR STAFF
Sometimes your staff take bad routes, making a detour to grab tools or food out of the way of their current path. When this happens, you may lose some prestige due to a fish looking stressful, or even dying. Feel free to pick you staff up as they make a hundred tile trek to put one green pellet in the tank at the opposite end of the building. They don’t drop their items when you do this, I typically only do this in actual life or death situations since it is very immersion breaking.
Zone Your Staff (And Use Names)

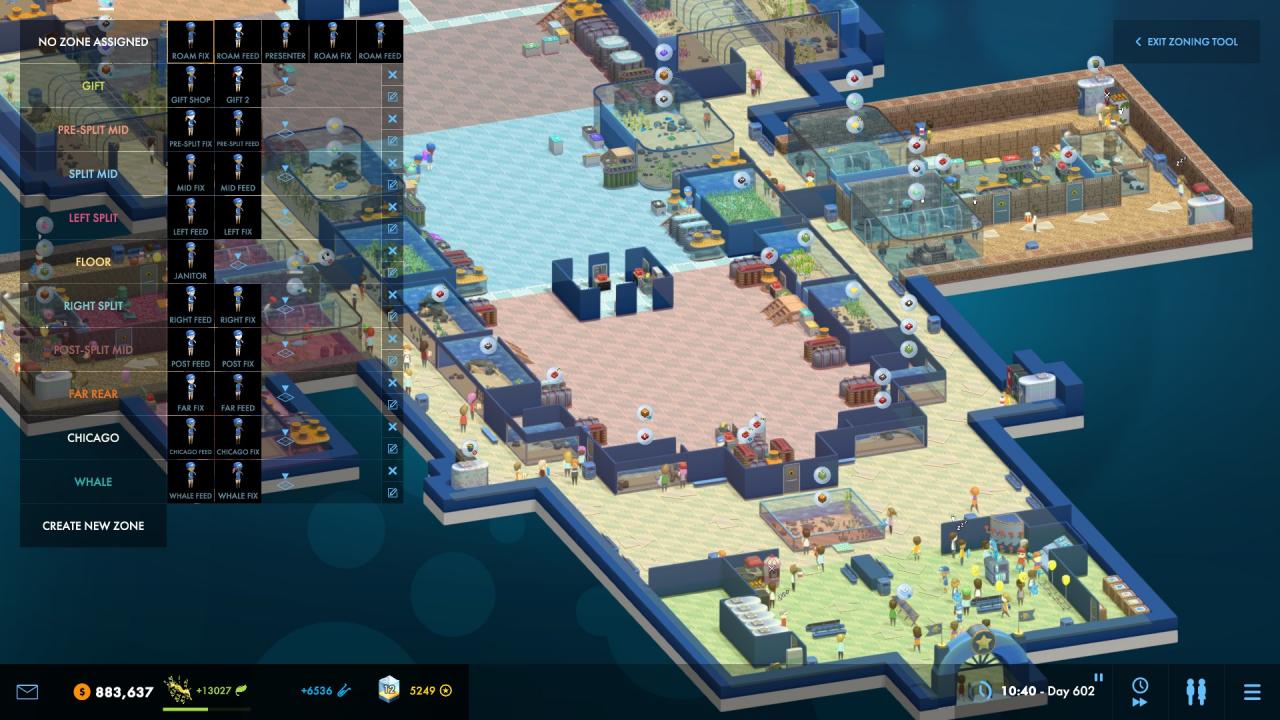
Remember to rename your zones! Use something you can easily recognize which area it is at a glance. For example, in my screenshot I described the areas. You can also do something such as “Cold”, “Tropical”, “Crustacean”, “Sharks”, or whatever else you find works best for you.
Make sure to assign appropriate staff to each area. I typically use one or two feeders, and one fixer for each area, depending on how big the zone and the type of creatures. Zones with lots of tanks or fish that require skill to feed would require more feeders than zones with few tanks and easy to feed fish. Animals that require supplements also take a while to feed and you should keep that in mind when assigning staff.
Make a “Cleaning”, “Gift Shop”, and “Talking” zone. Assign staff with high priority on these skills to this area. I will have a few staff run ONLY cleaning and mark every tile that guests can walk on. I also typically have one gift shop with one or two employees stocking it where only they are allowed in. Talking employees also seem to get lost and occasionally miss talks if they aren’t assigned to their podiums.
Once you have your zones set up and staff assigned, feel free to rename your staff. Click on them to open their personal window. Double-click their name to change it. From there, name them something like “ZoneName Feeder” or “ZoneName Fixer” so that when you level them up, you don’t need to worry about forgetting what they do.
Always Buy And Trade
Yes, I know you may be able to unlock the fish at the next prestige rank, but getting it early makes reaching that rank that much easier. Considering how you are somewhat limited in prestige earnings, cutting any corner you can is beneficial. Especially once you consider that its progress on achievements.
Guests
Keep an eye on your guests, see how far they get through your aquarium before they get hungry or tired, and consider making a small rest area, even if its just a bench, bathroom, and vending machine crammed in the wall. Guests have very little attention span when it comes to satisfying their needs. If they get hungry, they’d rather walk back 100 tiles to the last vending machine than forward 40 to see the one you have hidden around the corner. Even if you think you figured out the perfect location, always make it a slightly shorter walk, just in case.
ARROW YOUR FLOORS
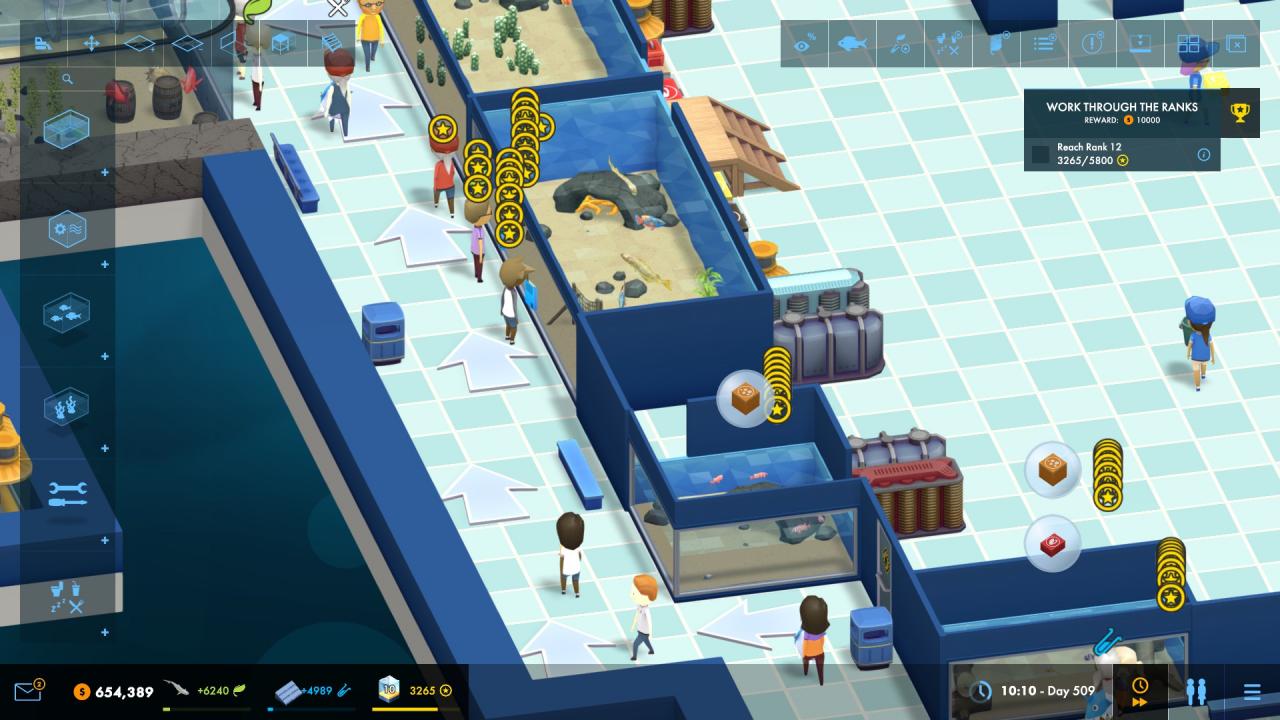
Guests are stupid, like, extremely stupid. They lose their way very easily, and will turn around and leave if they can’t find their way around. So, I always over-use the arrow signs. As you can see in the screenshot, I leave very little, if any, space between my arrows.

Reducing the space between arrows from 20 to 2 almost instantly gave me an additional 1000 prestige points on the last campaign stage. If space allows it, also make arrows pointing at the tanks. Many of my guests walk right by most of them, making their view percent less than 30, when it could easily be higher. You don’t earn prestige if guests don’t stop to view the tanks. Tunnel tanks are an easy workaround for this as guests will almost always stop and look at the tank at some point.
Prestige
FISH SIZE AND POPULATION
Whenever a guest views a tank, the game provides a random number for each species of fish (and decoration type) in the tank. This number determines whether or not this viewing produces prestige from each species. The size of the species, and the population count determine the odds the prestige is earned. For example, if you have 10 clown fish have higher odds of producing prestige than 1 clown fish. A manta ray, being significantly larger, also has a much higher chance of producing prestige. If the species and tank mates allow, try placing in multiple of each species in the tank. REMEMBER: The prestige is based on the species and not the individuals. So 1 clown fish produces the same number of prestige points as 10, or even 100. The higher population counts increase the odds of prestige generation though. All of this extends to decor.
DON’T RE-USE FISH OR DECOR
Spamming the same kind of fish or item in one tank is fine, in fact, you become more likely to gain prestige when a guest views them like that. 10 clown fish have a higher chance of producing prestige than 1. However, if you spread those 10 clown fish out amongst 10 tanks, you’ll actually lose prestige. Customers don’t like seeing the same thing over and over again, and you will lose prestige when this happens. All of this extends to decor, again.
LISTEN TO GUEST THOUGHTS
Click on your prestige bar to open the prestige window, then on the guest thoughts tab. This brings up a list of thoughts your guests have. This shows every production and loss of prestige in your entire aquarium, and even shows you neutral thoughts. At the bottom of the list is where the prestige losses are. Make sure you fix any prestige losses. If they say a fish looks stressed, investigate why and make sure to meet their need. If your aquarium is untidy, consider hiring another employee for cleaning. If they say they’re sick of a fish/decor, remove them or move them to an area with the same one. Above the negatives but below the positives you’ll find neutral thoughts that neither give nor remove prestige. Consider these as warnings. If a guest says “I’ve already seen clown fish.” then don’t add more to another tank, or move all your current ones into one tank. Fish and decor in one tank only count as one collective viewing, even if you have 20 of the same object!
Questions
Do fish deaths permanently reduce prestige base, or only temporarily?
Is it cost-efficient to have multiple gift shops?
Do guests tire of certain species faster than others?
Do guests keep their names if you rename them?
Achievements
Have 1000 guests enter your aquariums.
Easily completed early on. Should have done by first three stages in campaign, will be done before the tenth. Can be easily completed by leaving your game running while doing something else.
Grow 50 animals to full size.
Again, easy to complete. Should be done by stage four or five in the campaign. Can be easily done by making several tanks and placing growing fish in them and setting up staff to take care of, then leaving your game running.
Name an animal by opening its window and double clicking its name.
Another super easy one. Explained by the achievement…
Buy 1000 animals.
More easy achievements. The only achievement I didn’t have complete by the time I finished the campaign. Just make a massive mega tank and spam it full of clown fish until you get the achievement.
Complete 5 trades.
You guessed it, easy….again. If you didn’t complete it already in the campaign, boot up a sandbox and set it to quick start, you should receive trade requests from collectors very quickly.

Thanks for the useful tips! Something I read just earlier is that you can rename your tanks by double clicking on them. Hope this helps someone! https://www.reddit.com/r/Megaquarium/comments/9hl6oe/some_more_random_tips_ive_come_across_feel_free/
I do want to point out that your central staff section is -way- too large. That’s a lot of extra unnecessary walking for your staff. Also, linking pumps (which never break) to two/three tanks allows you to spread out and more efficiently use filtration/heating/etc as it evens them across -all- connected tanks; that mean fewer machines. I completed the level ten campaign with only two fixers using a compact central core for 90% of my aquarium.
Condensing the visitor areas as well will help direct them without having to use arrows, which I’ve found I never need.
Placing gift shop items near your central core’s staff doors, with resupply crates just inside, also allows staff to be super efficient, without needing to devote a massive area for visitors to mill around in.