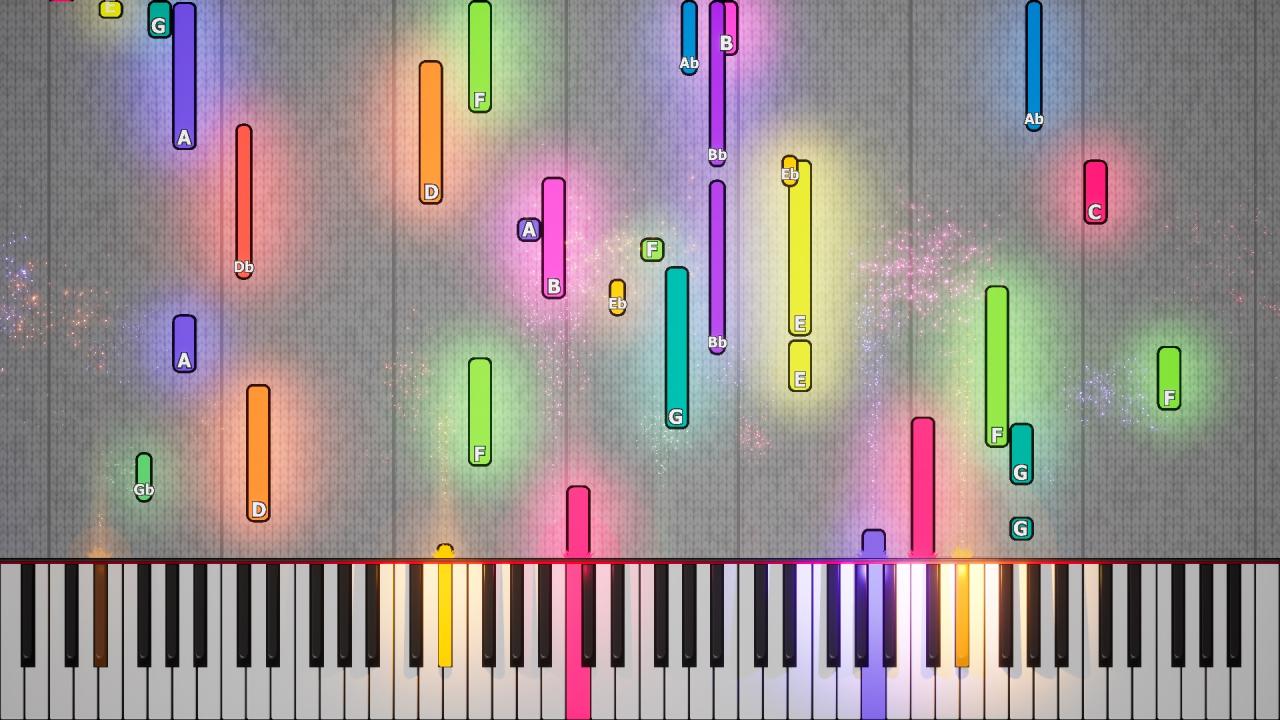
For Keysight players, this guide covers how to attach note labels to notes using Pulses; similar to other visualisers like Synthesia
Requirements
[Guide written using Keysight 1.6.2]
Welcome! This guide will cover how to use Pulses to achieve note labels that track note objects. We are going to work from a template to do this, rather than attempt to build it from the ground up, since otherwise this guide would be rather long. You will need:
- This .KSpreset file to work from[drive.google.com]
- To be in Advanced mode in the menu
Importing and using the template
Instructions time!
- Import the provided .KSpreset file using the “IMPORT” button in the top left of the menu
- Decide whether or not you want sharps or flats for note spelling. (Note: it is possible to change this spelling midway through a midi if you want to maintain good enharmonic spelling by choreographing a preset change. You can duplicate your desired preset and use the alternate spelling on the duplicate, and then switch to this preset at a set time and the only thing which will visually change is the spelling!)
- Decide on whether you need top-down or bottom-up direction labels
- Enter the Advanced Pulses tab on your freshly imported “Note Labels” preset
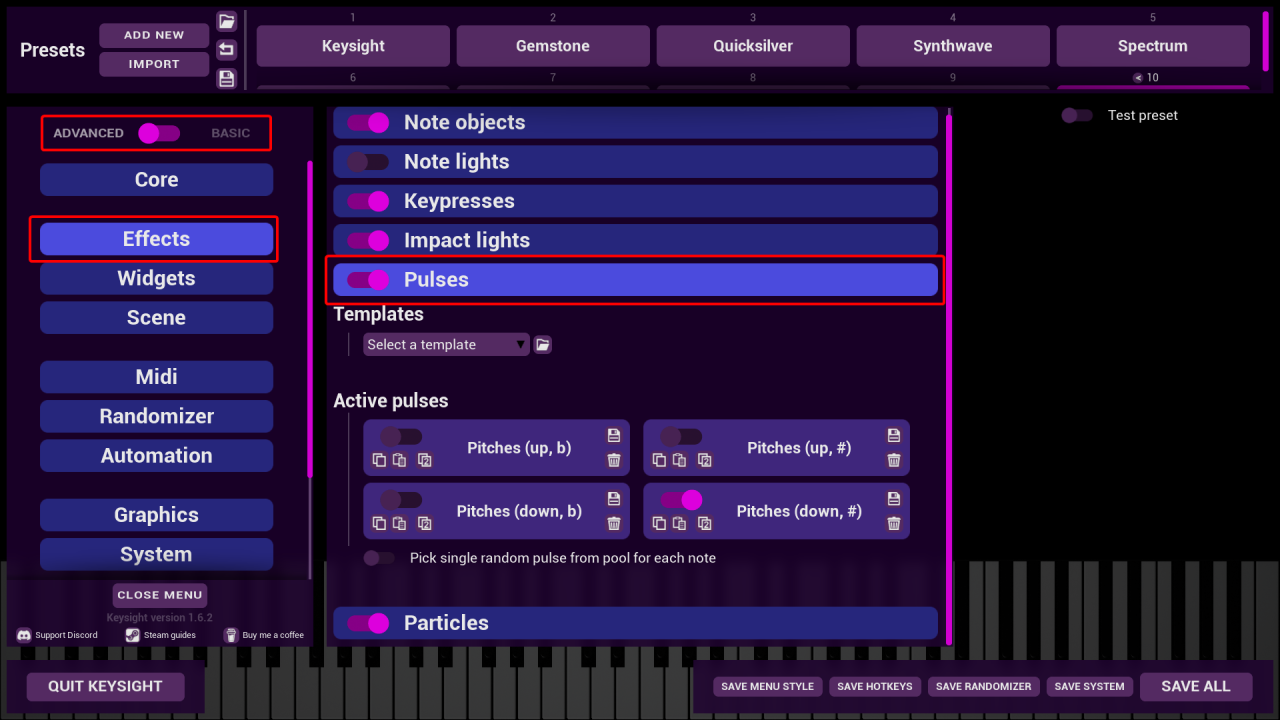
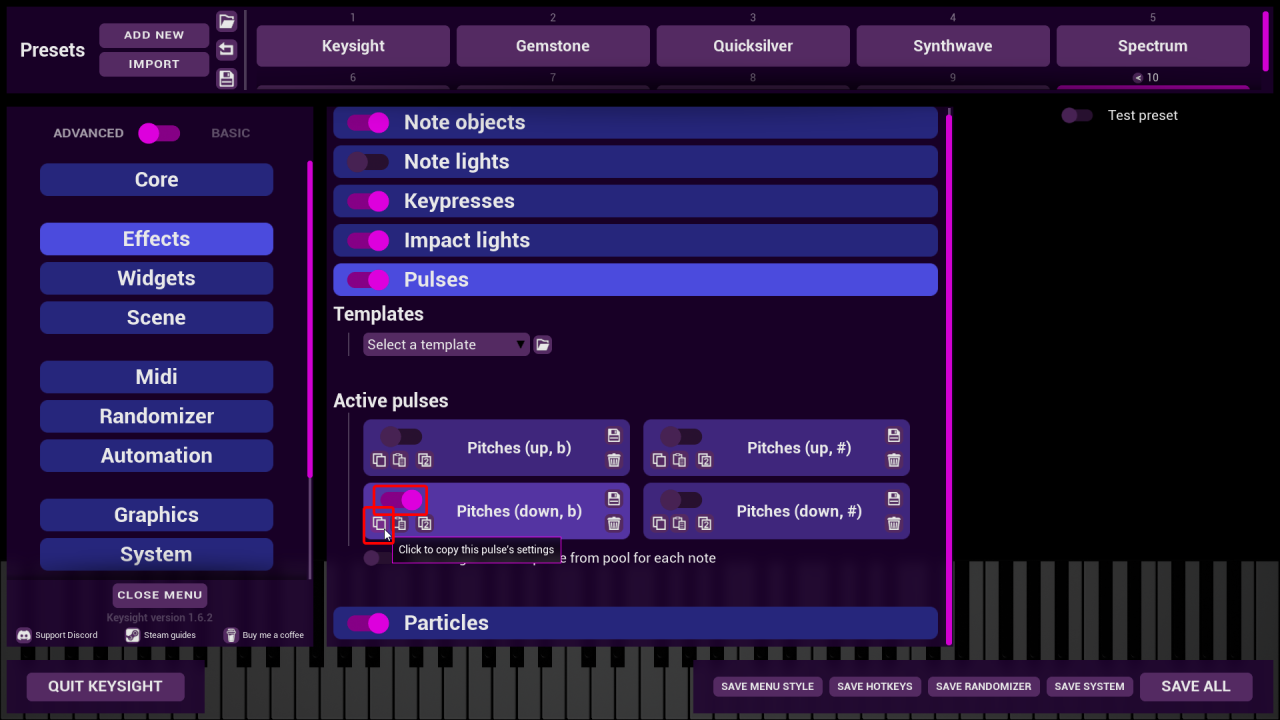
- Activate and copy the desired Pulse slot. For top-down flats, I am copying this one
- Move over to the preset you would like to see note labels on
- Duplicate any existing Pulse (or add a new one from a template)
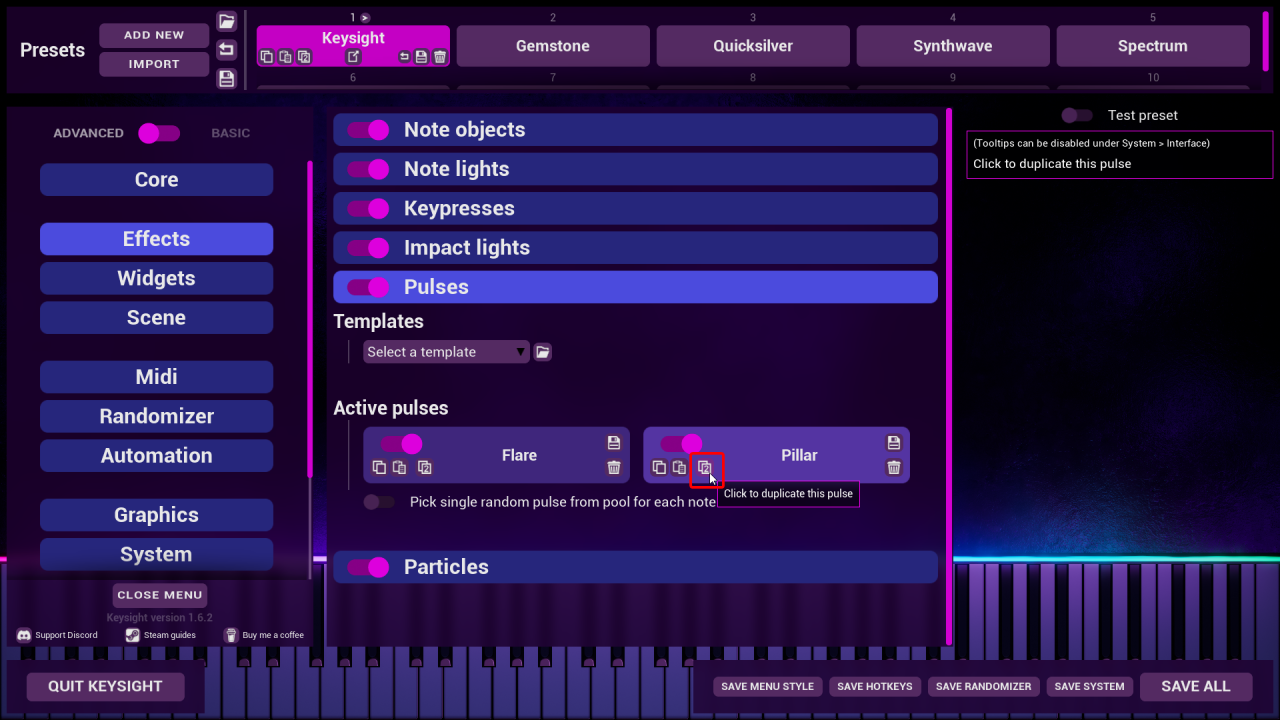
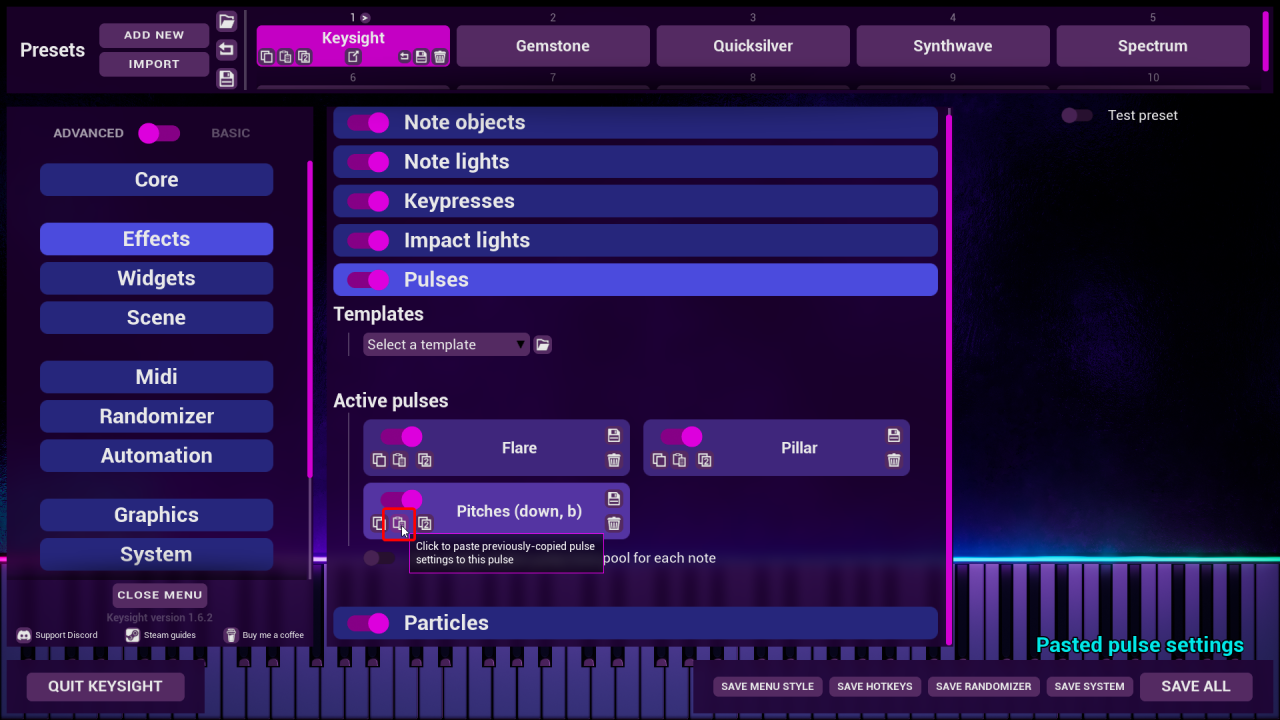
- Paste the copied Pulse from Note Labels onto this new slot
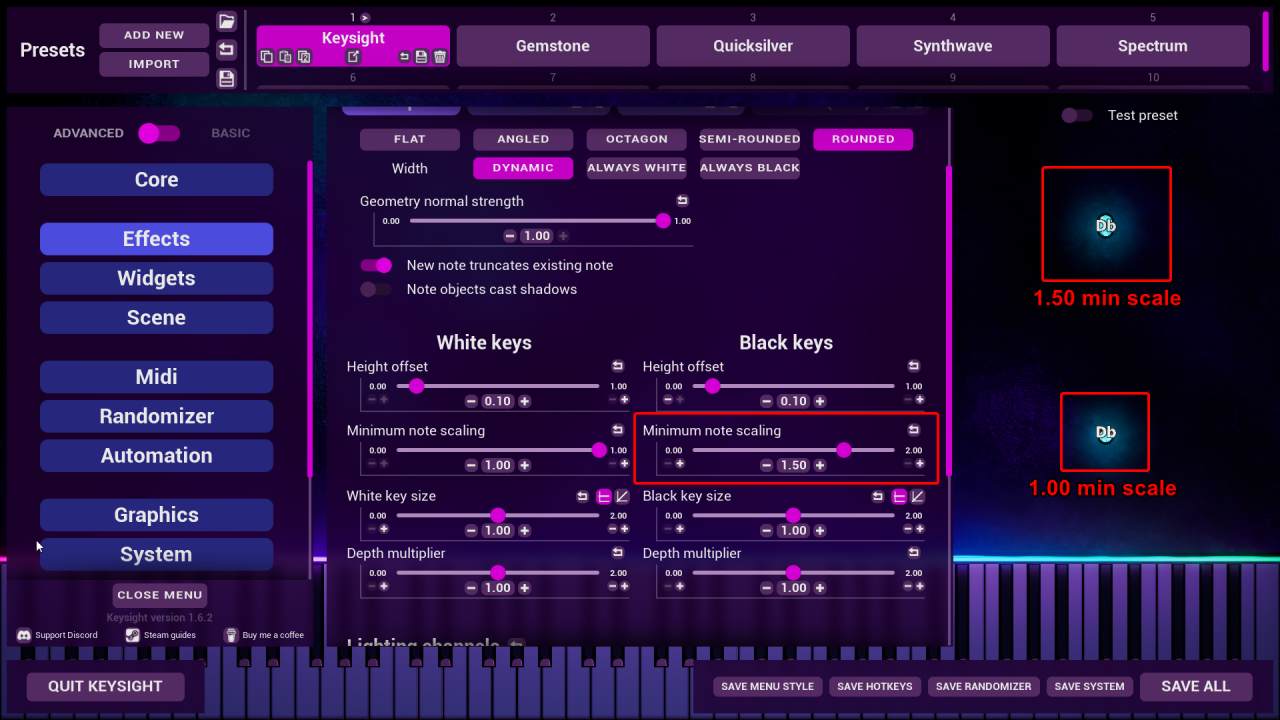
- OPTIONAL: you may wish to slightly increase the minimum size of black notes. With standard 1.00 minimum size, short black notes have a label which is note centred. I recommend changing Note Objects > Shape > Black Key > Minimum Note Scaling to 1.50
Done! At least, on the assumption that you are using stock Visual Layout settings under Core. Let’s go over how to edit the labels if they have become de-synced from the notes.
Editing the note labels
I’ll explain this a bit more in the next section, but the note label is not actually attached to the note objects; it is following a set path which is intended to match the note object path. As such, if you have non-standard visual layout affecting note object motion, you will need to edit the label’s path accordingly. You will need to know:
- The travel time of the notes
- The height of the backdrop area
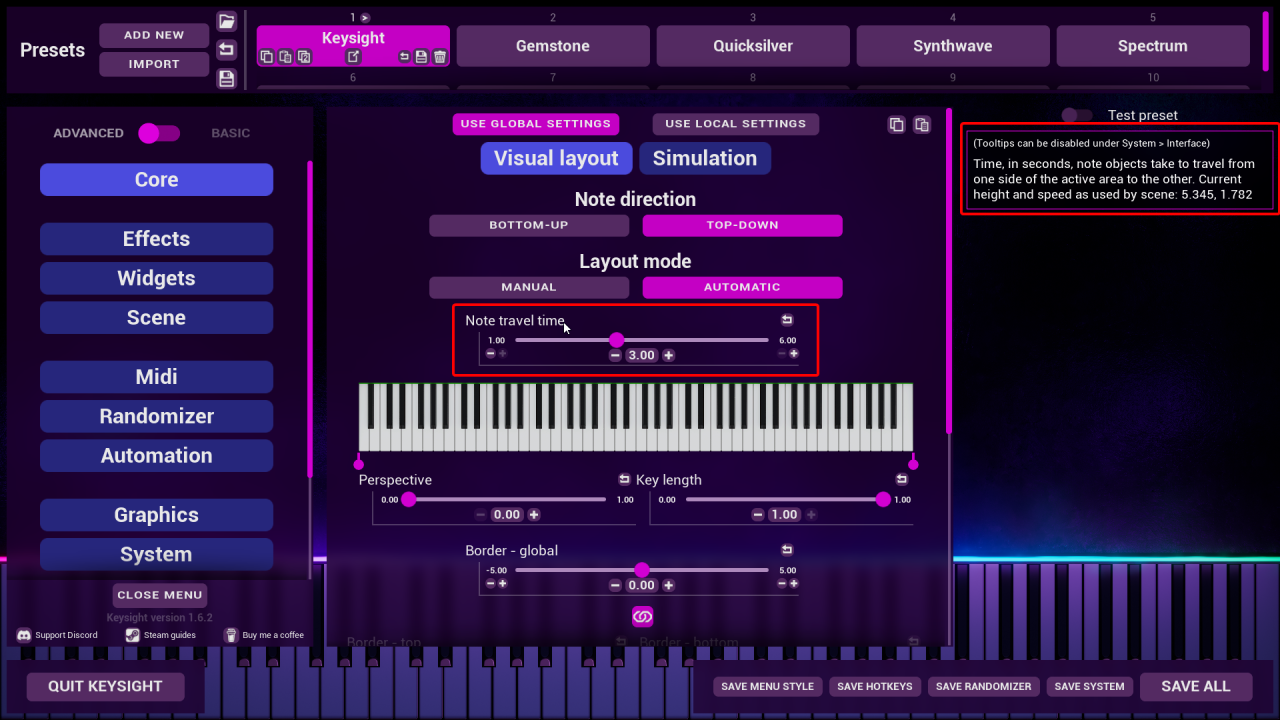
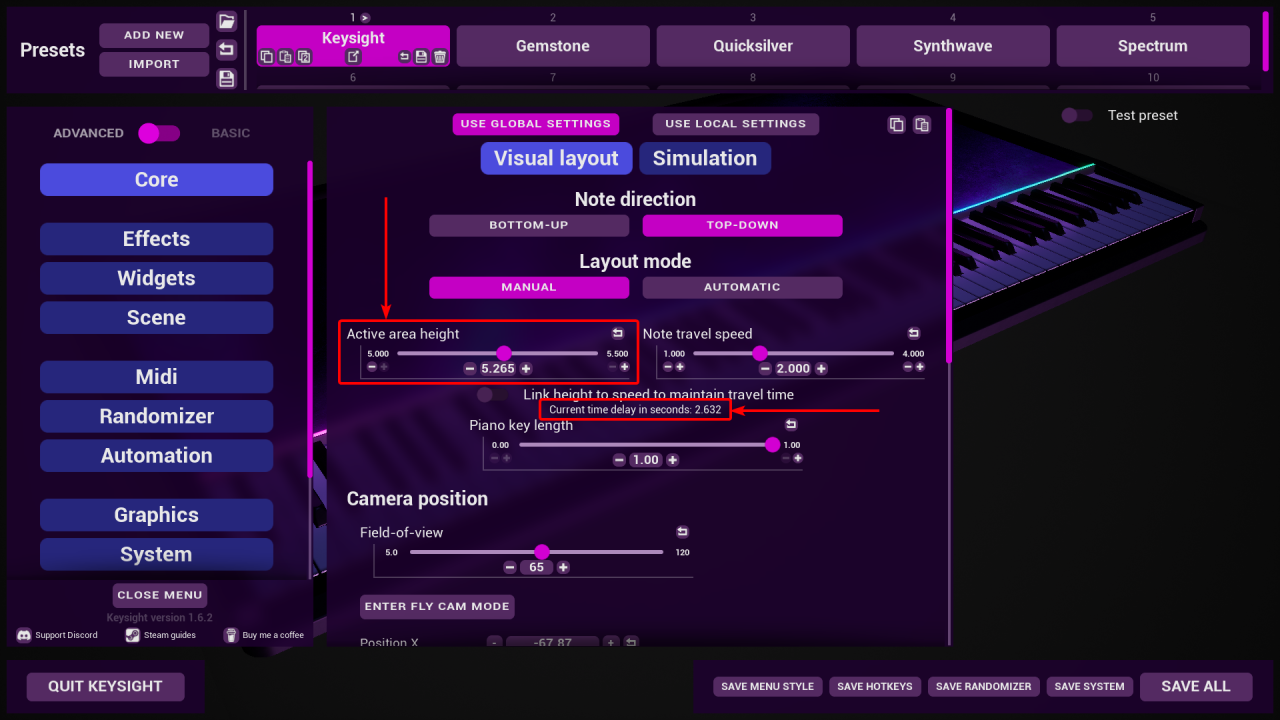
This can be found under the Core menu. If you are in Automatic camera mode, the travel time is the one as-set, and the active area height can be found by mousing over the title of this slider and reading the tooltip:
If you are using Manual camera mode, these values can be found here:
——————————————————————————————————
For the purposes of demonstration, I have changed “Note travel time” to 1.50 and added a 5cm border to the top and bottom of the active area in Automatic camera mode. As you can see, the labels are now completely broken!
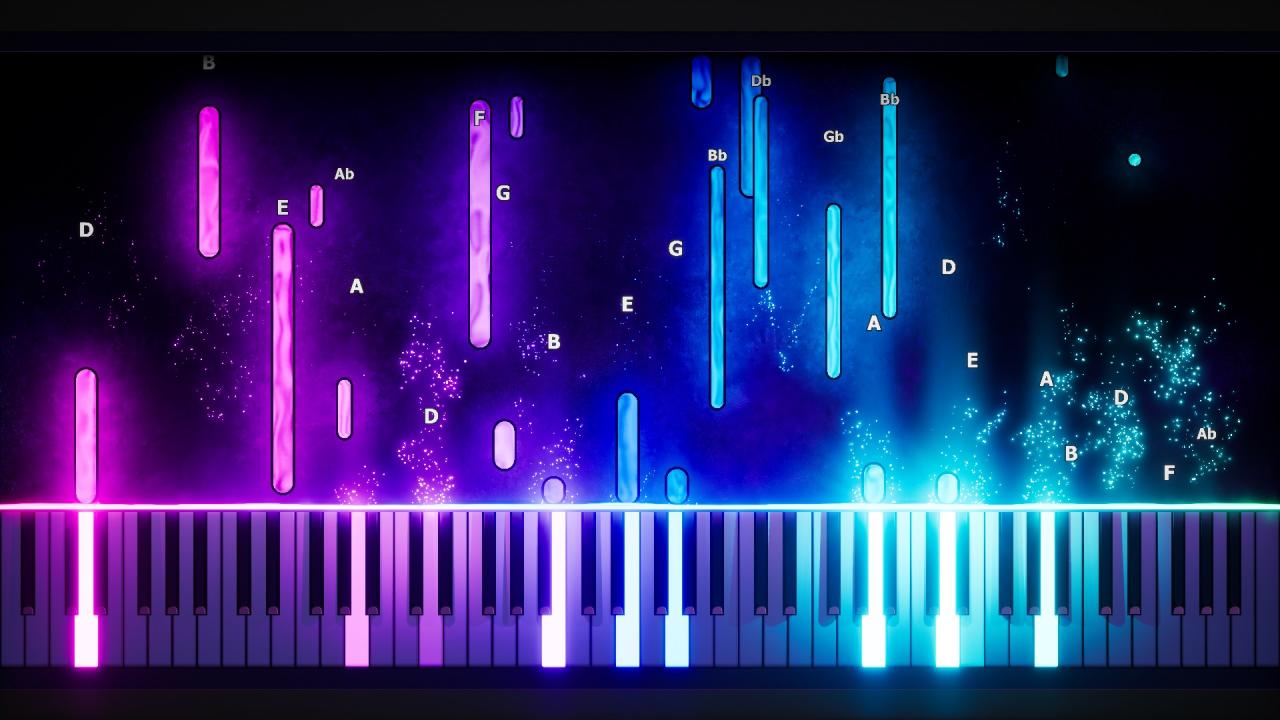
Hovering over the tooltip, I know my active area height is 4.345, and my travel time is (obviously) 1.50
- Enter the labels Pulse slot
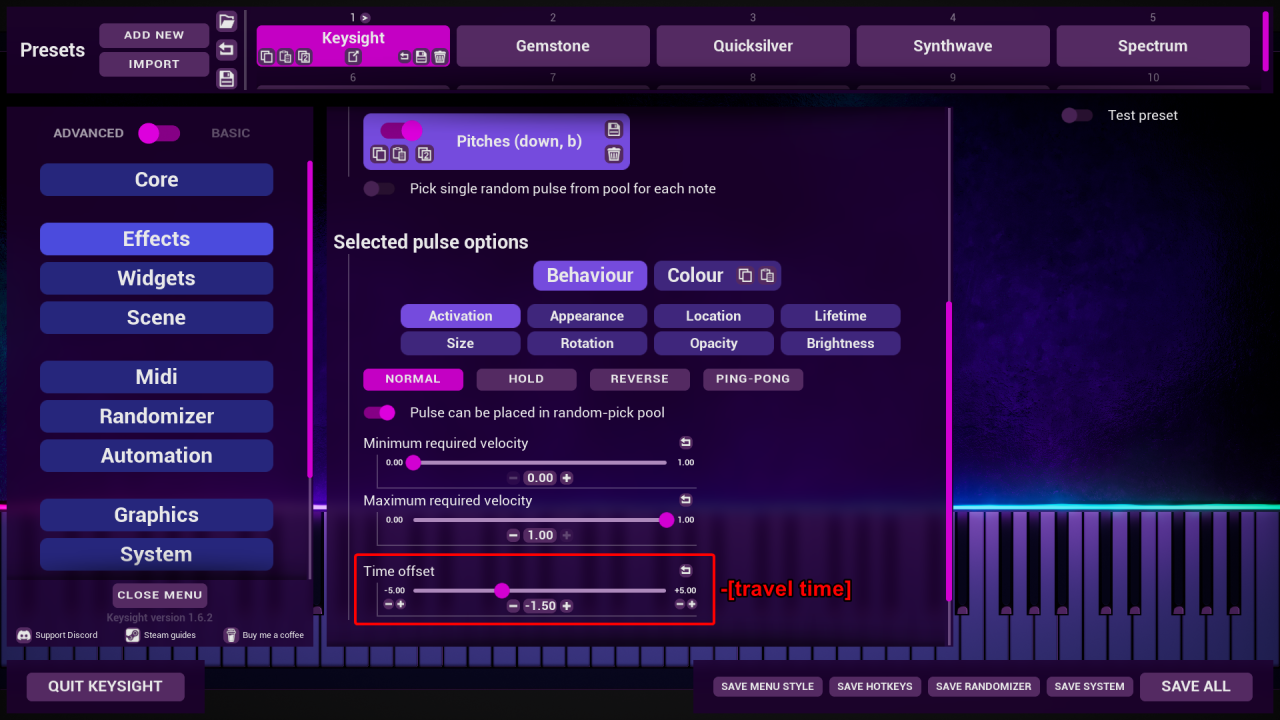
- Under Activation, change “time offset” to negative [travel time]. Therefore I am setting it to -1.50
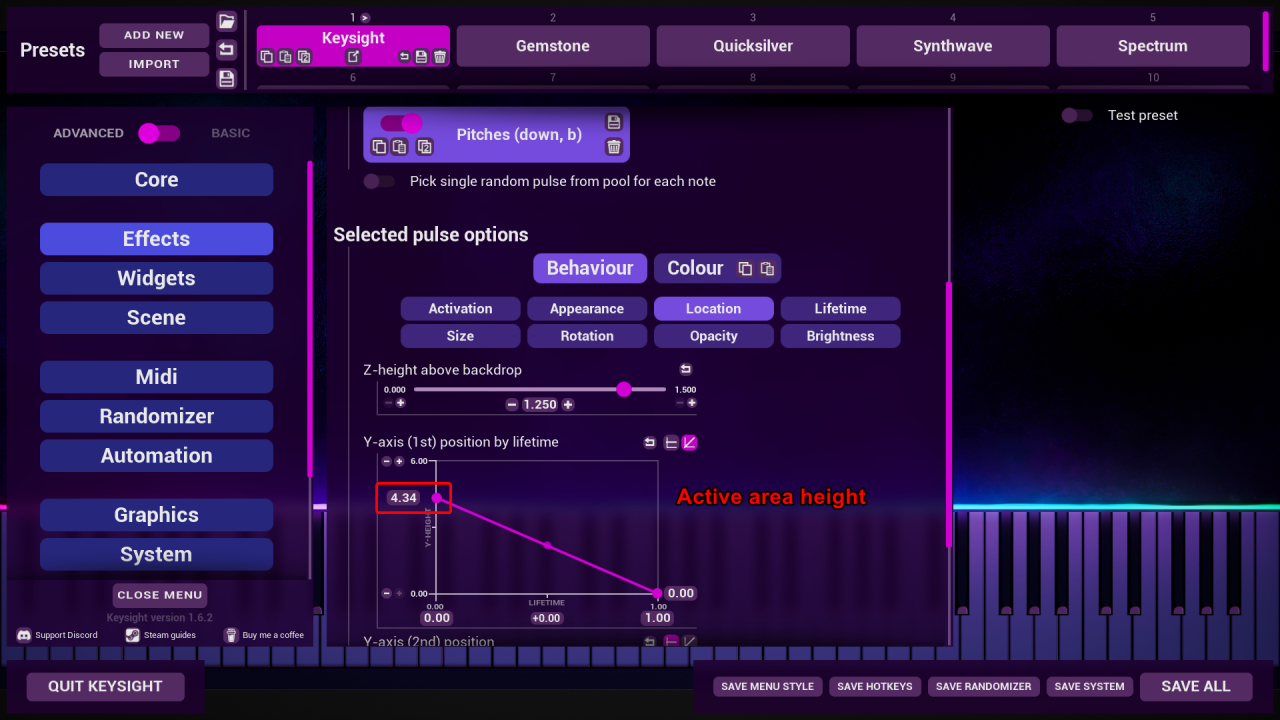
- Under Location, change the non-zero side of the “Y-axis (1st) by lifetime” to your [active area height]. This will be the left handle for top-down, and the right handle for bottom-up
- Under Lifetime, change the Lifetime to [travel time]
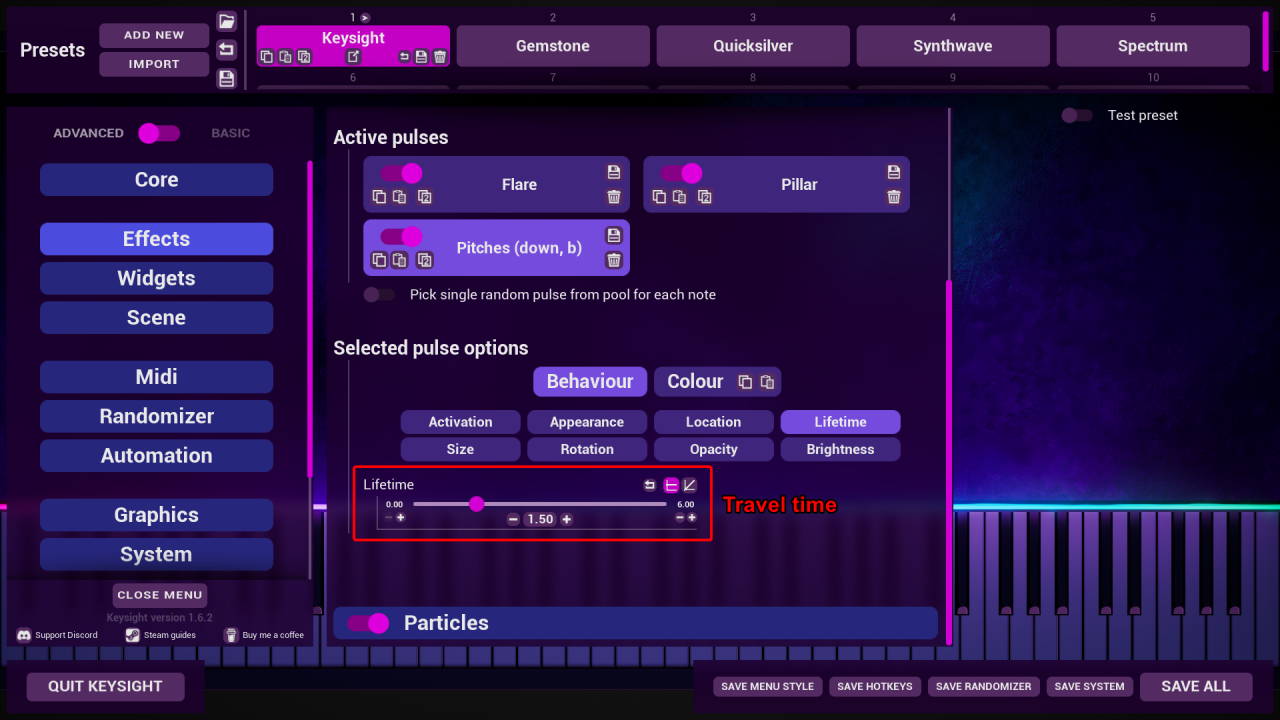
Done! The labels are now re-synchronised
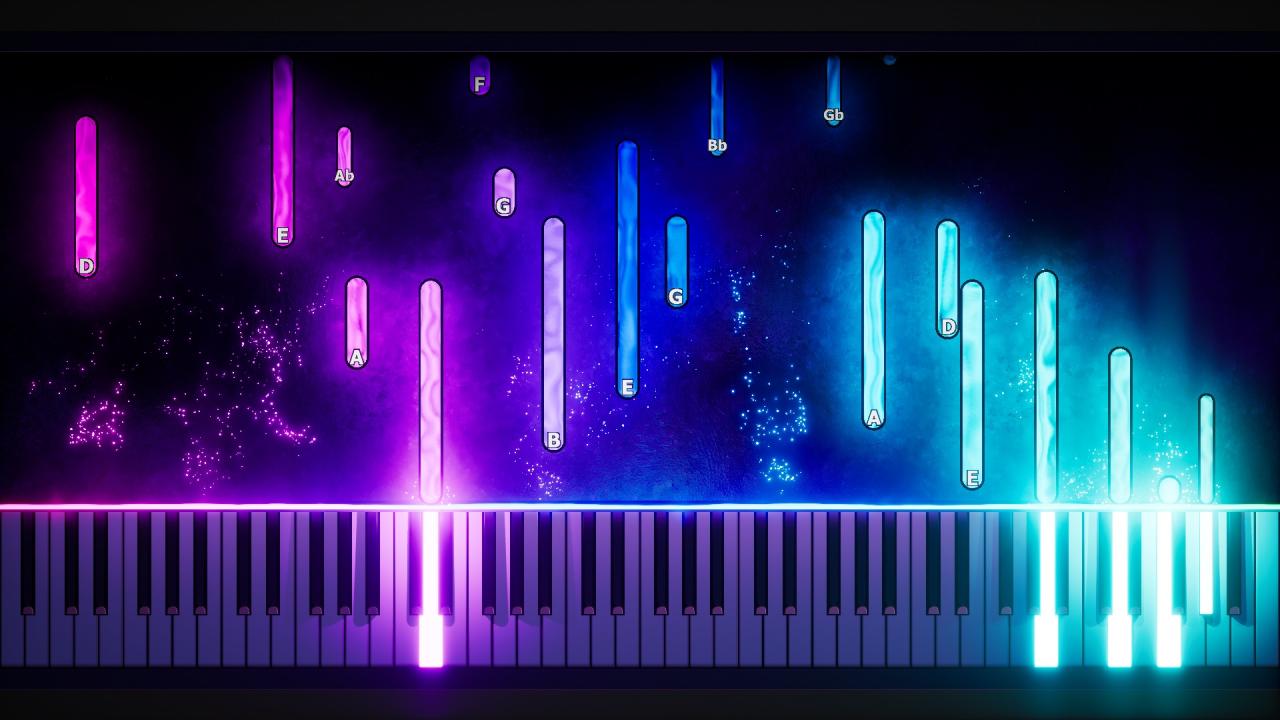
Keysight is 3D, and this can cause unwanted perspective distortion if you use a high field of view (the “Perspective” slider in Automatic camera mode). Note labels sit at 1.25 Z-height (that is, height above the backdrop) by default; and note objects reach to 0.6 and 1.1 for white and black notes respectively by default. This is what the issue looks like:
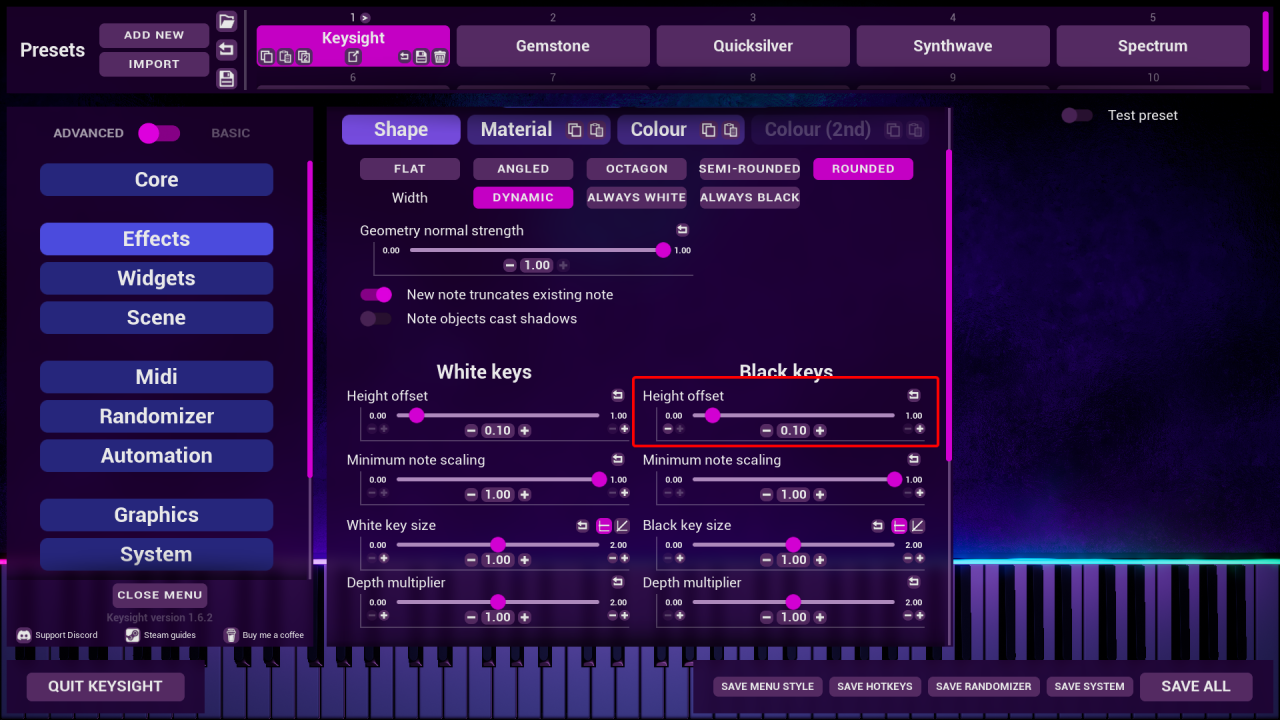
In order to fix this, head into Note Objects > Shape and change the black key height offset to 0.1 to match white keys. Warning: this will make black notes adjacent to white notes clip into each other. But it puts the tops of every note object at the same Z-height. (If you want to avoid clipping, consider setting “Depth multiplier” on both note objects to 0.00 and setting black key height offset to 0.11)
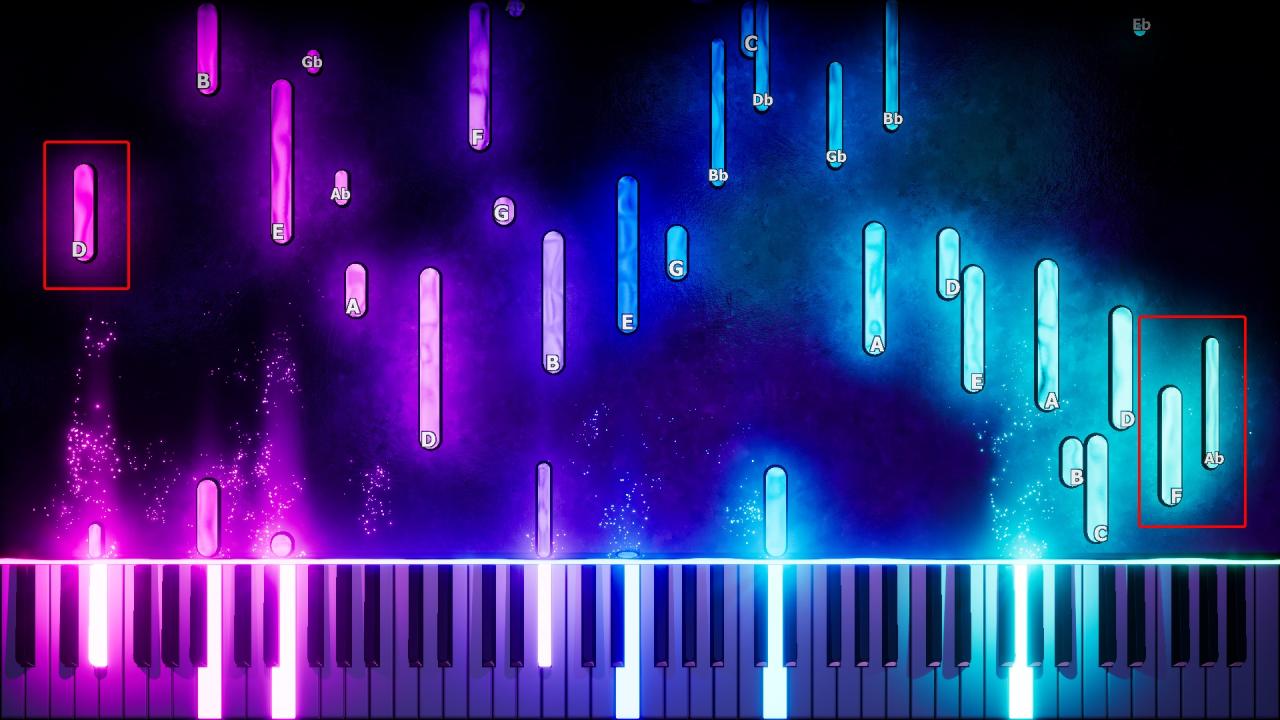
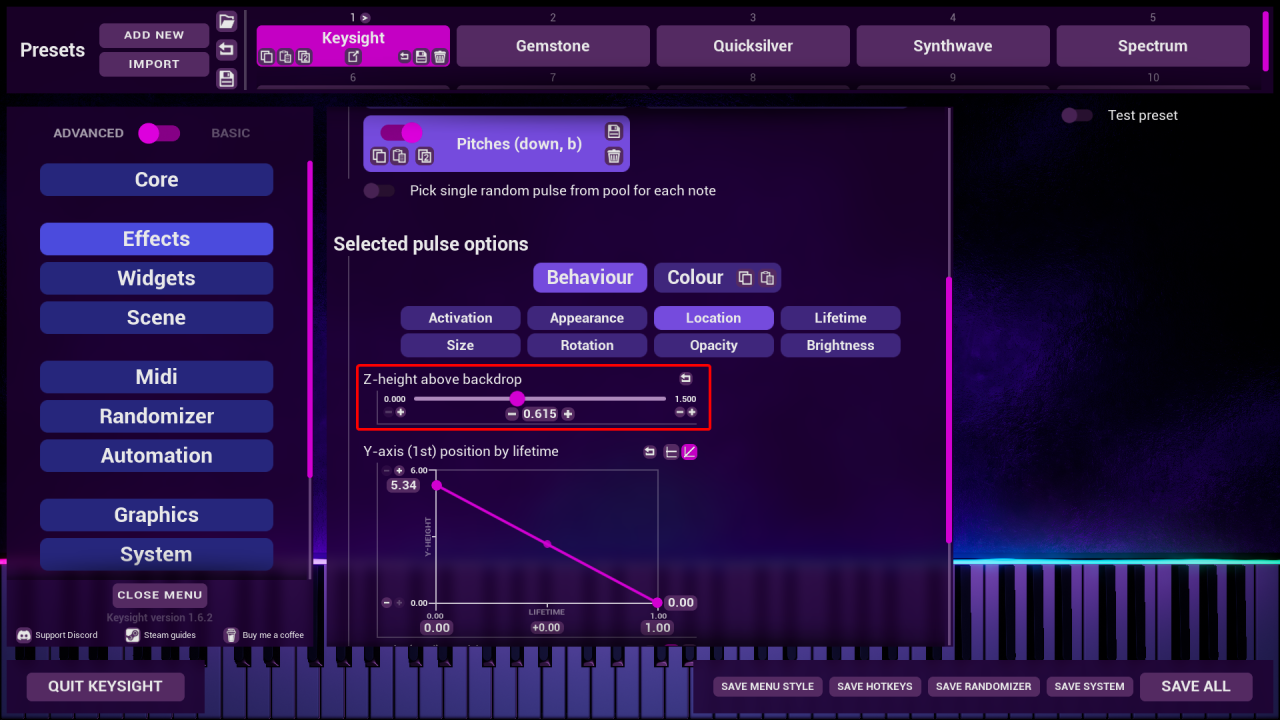
Next, head back into your label Pulse and the Location tab, then set the height to 0.615 (this number is derived from: the largest value of [note object height offset] + ( [depth multiplier * 0.5] ), plus a little bit. Therefore if doing the anti-clip settings, set height to 0.12)
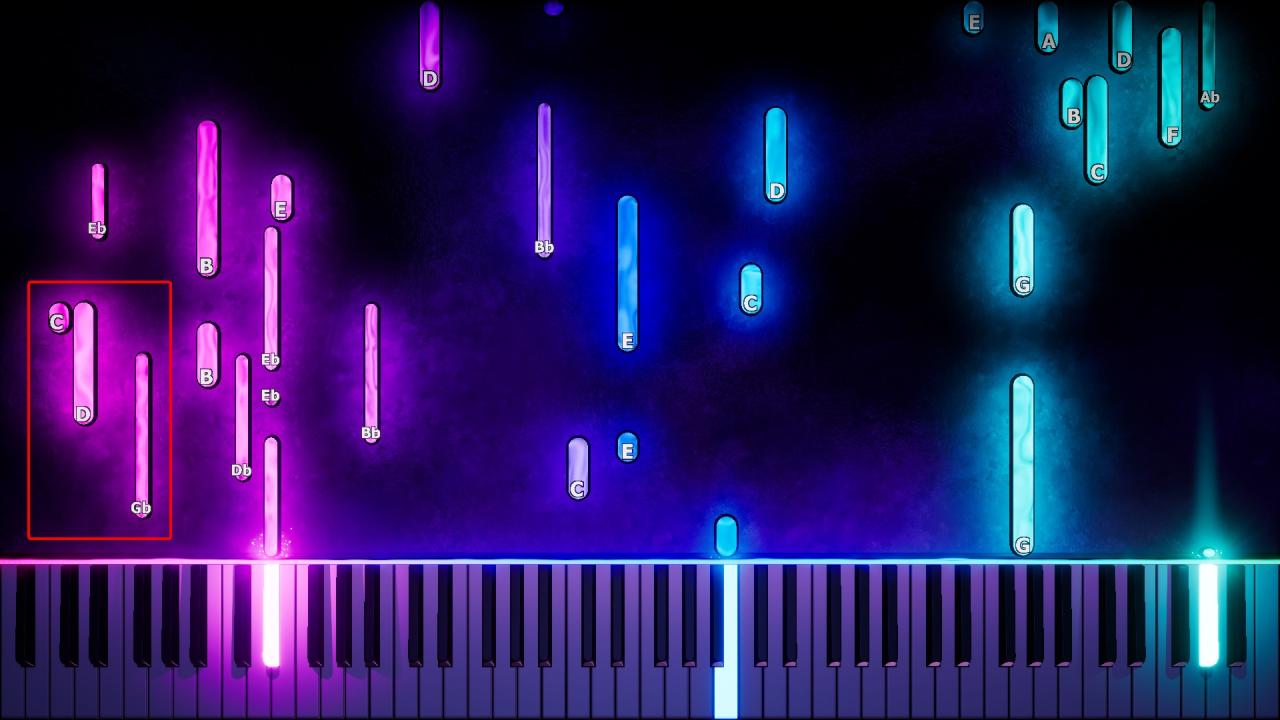
And there we go! Outer edge labels are no longer horizontally de-synced
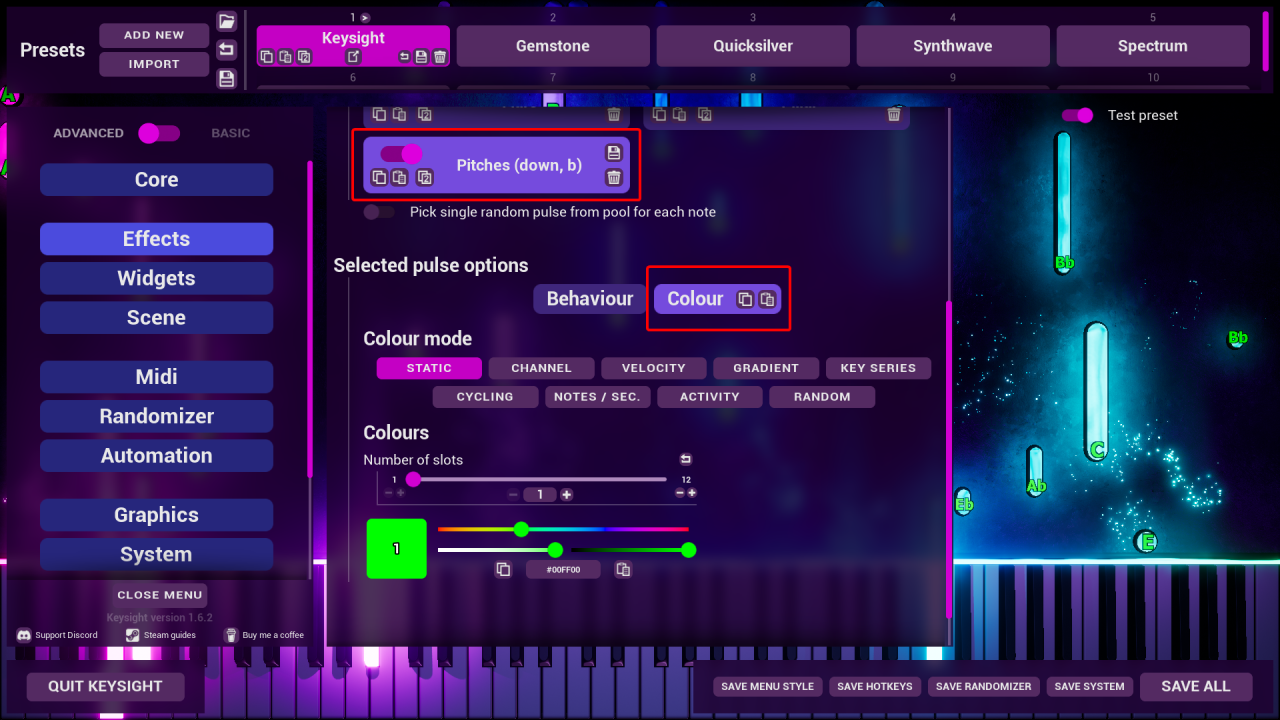
Note label colour is determined by the Pulse stencil (that is, the image giving you the shapes of letters) multiplied by the pulse slot’s colour. Note labels with the provided template will always have a black outline, making the note labels easier to read. I recommend sticking to white with a black outline, but you can edit the colour of labels via the Pulse slot’s colour settings
The labels are created via a 12-image “sprite sheet” (that is, a horizontal row of square images). By changing out the sprite sheet, you can change the note label font (the provided template just lazily uses b for flats, rather than the accurate ♭ symbol). Here are both images for flats and sharps as somewhere to start for making your own image!


Explanation of how it “works”
So, “note labels” are not an official feature of Keysight. Pulses have an incredibly flexible set of variables for location, spawn timing and pitch-based appearance that allows them to stand in as note labels though! Here’s a breakdown of how a normal “pulse” turns into a label:
- Lifetime is set to the note travel time
- Time offset is set to the negative travel time in top-down so the pulses spawn with the beginning of note objects, rather than when the notes hit the keyboard
- Location-over-time is set to travel between 0 and the active area height with Y (1st). This makes pulses move with note objects
- Another bit of location editing is done via Y (2nd) to align the pulses nicely onto the note objects vertically
- Opacity is set to fade in and out to avoid uncomfortable snapping on and off of labels at the extreme ends of the pulse’s lifetime
- Finally, the magic bit: pulses use a Sprite Sheet image as their stencil with 12 frames, and then use the “use note position as static sprite frame” option to lock each pitch to a specific frame in the sprite sheet. Since there are 12 frames, the sprite sheet “wraps” every octave
TL;DR
– Copy the desired pulse template from the imported preset
– Paste the template over a pulse in your desired preset
– Read the guide if you have desynced labels and need to edit their position
