
Starting out in Ginormosia can feel overwhelming, especially when you’re unsure where to gather essential resources or locate key towers. This guide breaks down the early-game map into clear sections, helping miners (and other classes) efficiently navigate the world and progress through ranks.
Resource & Tower Locations by Biome
The map below highlights different biomes, each offering unique resources and tower access.
Note: These details apply to Level 1 towers—higher-level towers may unlock additional rare spawns in other zones.
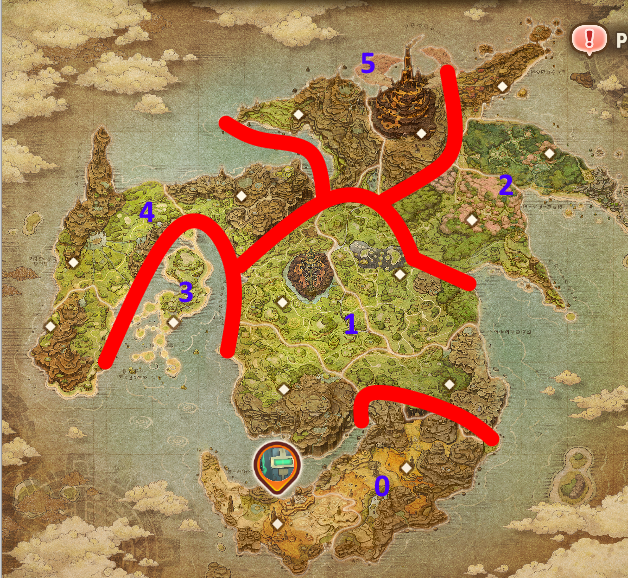
Image: kapola.craft
Zone 0: Tutorial Area (Desert)
- Resources: Basic starter materials (similar to those found behind your base, per the in-game encyclopedia).
- Past Counterpart: None, as this is the tutorial region.
Zone 1: Chapter 1-3 Biome (First Island Equivalent)
- Resources: Copper (ideal for early crafting).
- Rank Unlock: Fledgling (starter progression).
Zone 2: Chapter 4 Biome (Second Island Equivalent)
- Resources: Iron (upgraded material).
- Rank Unlock: Apprentice (mid-tier progression).
Zone 3: Chapter 5 Biome (Third Island Equivalent)
- Resources: Silver (valuable for advanced gear).
- Rank Unlock: Adept (higher-tier progression).
Zone 4: Expert Tier (Levels 23-36)
- Resources: Gold (high-tier crafting).
- Rank Unlock: Expert (endgame-ready).
Zone 5: Master Tier (Levels 29-42)
- Resources: Platinum (rare, top-tier material).
- Rank Unlock: Master (peak progression).
Exact Tower Locations
(Visual reference needed—check the in-game map for precise placements.)
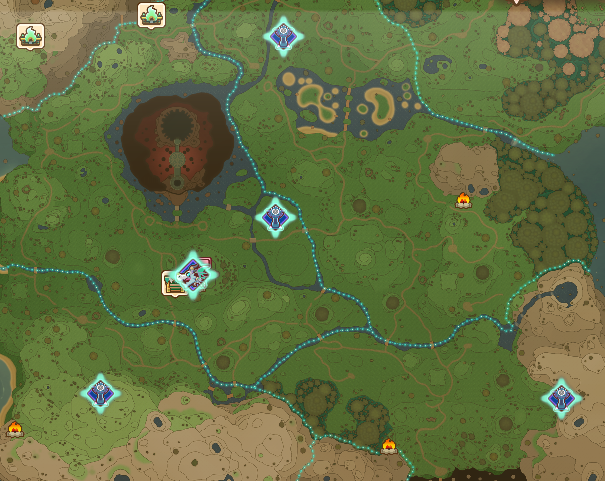
Image: kapola.craft
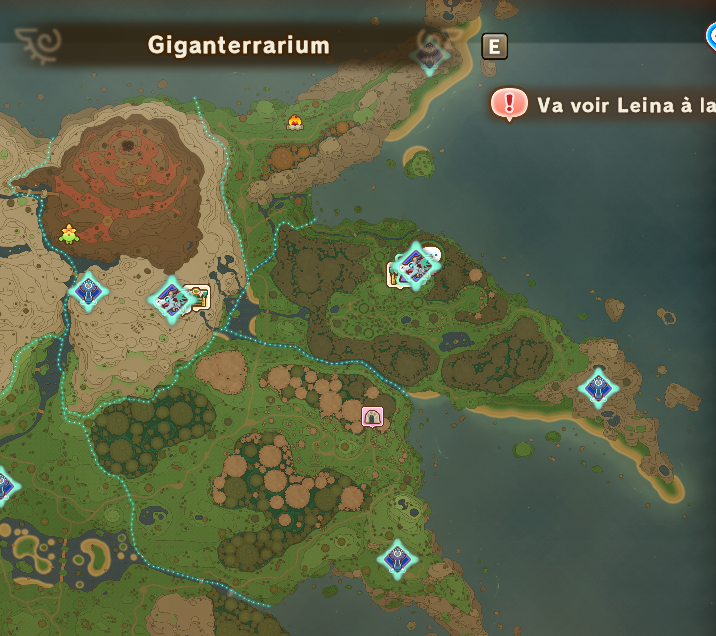
Image: kapola.craft
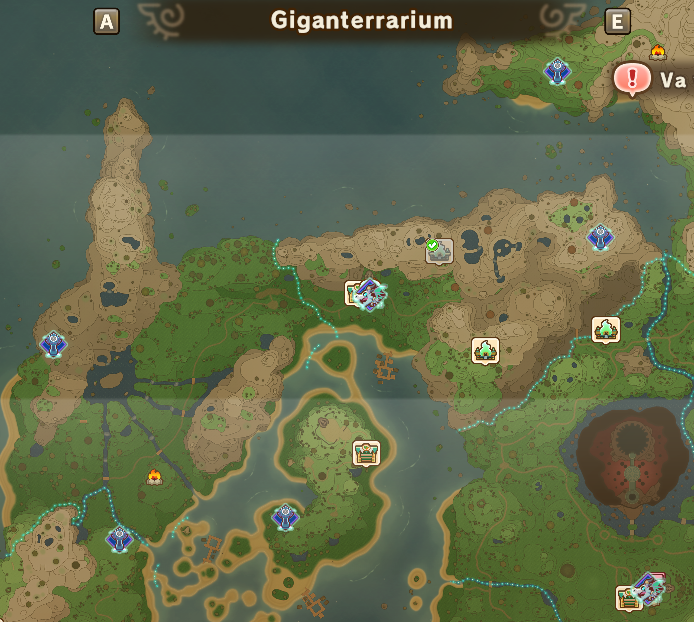
Image: kapola.craft
Final Tips & Interaction
This guide simplifies early-game navigation, ensuring you know exactly where to farm materials and rank up efficiently.
Pro Tip: Revisit zones after tower upgrades—higher levels may spawn rarer resources!
Related Posts:
- FANTASY LIFE i: The Girl Who Steals Time – All Mysteria Legendary Gathering Spots List
- FANTASY LIFE i: The Girl Who Steals Time – All Alchemy & Smithing Materials List