This guide will detail how to complete Psycho Circus 2 in Escape First 2.
Spawn Room

At the bottom of the poster there will be a date.

Take note of the date (11) and the year (1939). The day and the month do not matter.
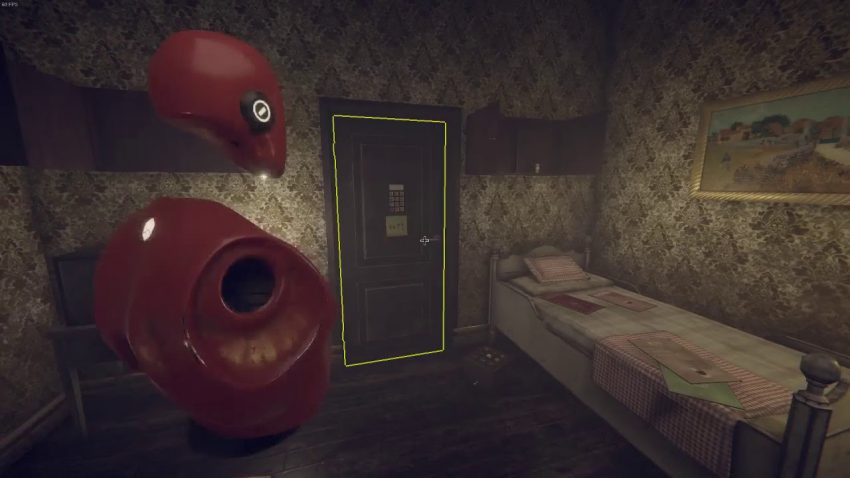
Enter this in to the box located in the back left corner of the corridor.
Once open there will be a cipher paper inside, line this up with the hats on the shelf directly in-front of you.
The word you are trying to make is “CLOWN”.
Use this code to open the door on the other side of the room.
Stage Room

you will be greeted by the Ticket Stand.
On this stand you will find a log book of all members of the audience that have collected their tickets.
These entries should match the tickets you found in the Spawn Room and the tickets you will find scattered amongst chairs round the corner.
Once you round the corner you can find a Wrench on the stage which can be interacted with.
Pick-up this wrench and walk back to the Ticket Stand. Still holding the Wrench, left click the Blue Jar to the side of the Log Book. This will shatter the jar, revealing a final ticket belonging to Maxwell who you will notice is not in the Log Book.


Head back to the main room and notice that there is a letter sitting on the side of the raised seating area.


This letter details a selection of people observed by the author. As Maxwell is the only person to have a ticket although not arrive it is safe/correct to assume that this letter was written by his seats occupant. As by now you will have noticed the seats have directions (up/down/left/right) on their fabric and that the letter is written from the authors point of view.

Following the list of people the author details and where their seats are in relation to his this will draw a path through the chairs. Following this path from start to finish will give you the code needed to unlock the door. We have taken the liberty of creating a diagram for you to follow should you need it.

The code for the door to The Mask Room can be seen below:
Up Left Right Down Up Right Left Up Down
Mask Room
The first line on the paper shows TEDD, this is the middle letter of all the 5 character words
You will have to repeat this using the second line: witch; ghost; siren; guard.
This will give you: TORA


The box will contain some cards and a piece of paper. The paper will tell a short story about a man walking in the woods.

5 of the cards will be relevant to the story of the man, these are The Sun, The Hermit, The Moon, Death and The Hanged Man.
If you arrange these in order of when they appear in the story it will look like this:

Each of he cards will have Roman Numerals at the top of them, this is what they will look like when translated: 19 9 18 13 2
At the bottom of the TORA box there will be a 1 that is crossed out.

Use this to remove all the number 1s in the code above, this will now look like: 99832
Enter the code to the box in the corner.

Inside this box there will be a radio and a price of paper, using this paper we can tune the radio.

Masks: there are 4 masks in the room, one above the door you came in through and the three on the wall.
0: Leave this as 0.
Hats: There are 3 hats in the room, one on top of the drawer and 2 inside the drawer.
Costumes: There are 3 costumes in the room.
Tuning the radio will look like this:

You will be able to open the top of the radio now and grab the key inside.
Take this key back to the stage room and use the key to open the doll cabinet.
Inside there will be a switch, turn this on and the dolls will move their heads.


You can use the direction that they are facing along with the arrows this will give you:
Use this code for the door at the end of the room.

Projector Room


Using the Throwing Knife Boards we can see that each has three triangles overlapping. Each of these triangles will encompass three numbers only. On the larger board adding together all three numbers will give you a total of 25 for both triangles with three numbers. Using this information it is safe to assume that the third triangle will have a sum of 25 also. If we then take the two numbers remaining in the third triangle and add those together we will get 13, making the difference 12, which will replace the ? on the larger throwing knife board.
The second/smaller Throwing knife board is much the same as the first however the total will be 20 instead of 25 this time. Again if we take the sum of 5 and 1 (6) this will leave us with a difference of 14
Please see the image below for a diagram detailing the two complete sets of numbers on each board.

Putting the two differences together we have no completed the 4 digit code for the cabinet under the Projector: 1214
Inside the cupboard there will be 3 different colour cartridges.

You will need to make the colours that are displayed on the board, and take note of the numbers that are projected:

Orange: Red + Yellow:
Blue: Blue: 
Purple: Blue + Red: 
Green: Blue + Yellow: 
Enter the following in to the last keypad: 4697

Well Done, you have now completed Psycho Circus 2!
Wheres the guide to the 2 other rooms im stuck in torture chamber on the last part????
The seating paper does not add up? ”Two rows behind me sits a man” but it’s in fact a woman. Ok, she wears a hat and a beard so that one I can understand but on his (her) left ”sits a woman I know from my shows” bit she is in fact a man and in the same seat bot in ghe front row sits the director but at tihs point nothin adds up because the director sista in S2 R1 and not in S4 R1.