
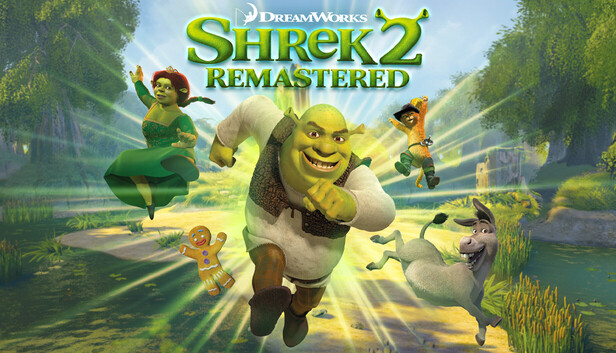
I lost count of how many times I wandered past a glowing little Magic Bean without noticing it until it was already behind me. If you’re chasing a full collection, this is exactly the kind of collectible that punishes a rushed playthrough — some sit right out in the open, others are tucked behind a chest or waiting for a specific object to roll by. What follows is the chapter-by-chapter route I use, with the timestamp for each pick so you can jump straight to the one you’re missing instead of replaying an entire level.
Beyond the beans, these same runs also sweep up the other collectibles tied to the chapters: The Seven Dwarves, Worms, Prisoners, and the Three Blind Mice. I’ve flagged which timestamps double up on those so you don’t have to do a second pass for them.
Chapter 1: Shrek’s Swamp
The opening chapter is generous — it hands you almost the entire set in a short stretch, which makes it a good place to build momentum. The The Seven Dwarves are interleaved with the beans here, so keep an eye out for both at once.
- Magic Bean 1–2 + The Seven Dwarves 1 — 00:00
- Magic Bean 3–4 + The Seven Dwarves 2 — 0:35
- Magic Bean 5 + The Seven Dwarves 3 — 1:12
- The Seven Dwarves 4 — 1:42
- Magic Bean 6 — 2:07
- Magic Bean 7 — 2:20
- Magic Bean 8–10 + The Seven Dwarves 5 — 2:37
- The Seven Dwarves 6 — 3:20
- Magic Bean 11–12 + The Seven Dwarves 7 — 3:54
Chapter 2: Spooky Forest
This one is where the beans start hiding in containers. Two of the twelve are sealed inside wooden chests, so if you’ve been breezing past chests without cracking them, that’s likely your missing count. I always check the box before moving on here.
- Magic Bean 1 — 00:00
- Magic Bean 2 — 0:08
- Magic Bean 3 — 0:22
- Magic Bean 4 — 0:47
- Magic Bean 5 — 1:12
- Magic Bean 6 — 1:35
- Magic Bean 7 — 2:14 (found inside a wooden chest)
- Magic Bean 8 — 2:31
- Magic Bean 9 — 2:58
- Magic Bean 10 — 3:15
- Magic Bean 11 — 3:37
- Magic Bean 12 — 3:49 (found inside a wooden chest)
Chapter 3: Far Far Away
Far Far Away has one bean that won’t show up on demand — for Magic Bean 5 you need to wait for a carriage to appear, then grab it from there. If you charge through at full speed, you’ll sail right past it. Give the carriage a moment to roll in before you commit.
- Magic Bean 1 — 00:00
- Magic Bean 2–3 — 0:15
- Magic Bean 4 — 0:37
- Magic Bean 5 — 0:55 (wait for a carriage to show up)
- Magic Bean 6 — 1:12
- Magic Bean 7 — 1:27
- Magic Bean 8–9 — 1:40
- Magic Bean 10 — 2:18
- Magic Bean 11 — 2:39
- Magic Bean 12 — 3:11
Chapter 5: Walking The Pach
By this point the beans get spaced further apart, and this chapter’s route covers a lot of ground across roughly five minutes. I like to follow the timestamps in order rather than hunting freeform — the pacing saves me a headache.
- Magic Bean 1 — 00:00
- Magic Bean 2 — 0:19
- Magic Bean 3 — 1:00
- Magic Bean 4 — 1:43
- Magic Bean 5–6 — 2:11
- Magic Bean 7 — 3:21
- Magic Bean 8–9 — 3:44
- Magic Bean 10 — 4:04
- Magic Bean 11 — 4:27
- Magic Bean 12 — 4:50
Chapter 6: Jack And Jill’s Farm
This chapter is the busiest one in the whole collection run — it’s the only place where the Worms cluster together with the beans. Ten worms are packed in here alongside the twelve beans, and several timestamps grab you a bean and multiple worms at once. If you’re doing a worm hunt anyway, do it here and save yourself a return trip.
- Magic Bean 1 — 00:00
- Worm 1 — 0:08
- Magic Bean 2 — 0:24
- Magic Bean 3 — 0:56
- Magic Bean 4 — 2:03
- Magic Bean 5 — 2:36
- Magic Bean 6–7 — 3:00
- Magic Bean 8–9 + Worm 2–6 — 3:25
- Magic Bean 10 — 4:24
- Magic Bean 11 — 4:53
- Worm 7 — 5:08
- Worm 8–9 — 5:56
- Magic Bean 12 + Worm 10 — 6:34
Chapter 7: Fairy Godmother’s
A quick, tidy chapter — everything comes together inside about three minutes, which I appreciate after the sprawl of the previous one. No chests, no waiting objects; just follow the order and you’ll clear it cleanly.
- Magic Bean 1–2 — 00:00
- Magic Bean 3–4 — 0:13
- Magic Bean 5 — 0:34
- Magic Bean 6–7 — 0:47
- Magic Bean 8 — 1:04
- Magic Bean 9 — 1:25
- Magic Bean 10 — 2:03
- Magic Bean 11 — 2:19
- Magic Bean 12 — 2:35
Chapter 8: Prison Break
This is the second collectible-dense chapter, and it’s where the Prisoners and the Three Blind Mice overlap with the beans. Eight prisoners live here, and the mice appear in groups as you go. Two of the earliest beans come paired with prisoners, so try not to rush the opening stretch.
- Magic Bean 1 — 00:00
- Magic Bean 2 — 0:23
- Magic Bean 3 — 0:39
- Magic Bean 4 + Prisoner 1–2 — 1:11
- Magic Bean 5 + Prisoner 3–4 — 1:39
- Magic Bean 6 + Three Blind Mice 1 — 2:24
- Magic Bean 7 — 2:44
- Prisoner 5 — 2:57
- Magic Bean 8 — 3:14
- Magic Bean 9 — 3:29
- Magic Bean 10 + Three Blind Mice 2 — 4:38
- Magic Bean 11 + Prisoner 6–7 + Three Blind Mice 3 — 5:04
- Magic Bean 12 + Prisoner 8 — 5:45
Chapter 9: The Mines
The Mines is a straightforward sweep with nothing hidden in chests or triggered by scenery — just twelve beans across roughly three minutes. I find it one of the calmer chapters to finish off when I’ve been stuck on a single missing collectible elsewhere.
- Magic Bean 1 — 00:00
- Magic Bean 2 — 0:24
- Magic Bean 3 — 0:41
- Magic Bean 4–5 — 0:55
- Magic Bean 6–7 — 1:15
- Magic Bean 8 — 1:38
- Magic Bean 9 — 1:54
- Magic Bean 10 — 2:02
- Magic Bean 11 — 2:29
- Magic Bean 12 — 2:49
Chapter 10: Cookie, Cookie
The final chapter closes the run on an easy note — all twelve beans come quickly, most within a few seconds of each other, and it wraps the whole set. If you’ve been following along, this last stretch is the satisfying victory lap where the counter finally ticks over.
- Magic Bean 1 — 00:00
- Magic Bean 2 — 0:10
- Magic Bean 3 — 0:24
- Magic Bean 4 — 0:41
- Magic Bean 5 — 1:05
- Magic Bean 6 — 1:24
- Magic Bean 7 — 1:48
- Magic Bean 8 — 2:01
- Magic Bean 9 — 2:18
- Magic Bean 10 — 2:27
- Magic Bean 11 — 2:40
- Magic Bean 12 — 2:55
The End
That’s every bean across the ten chapters, plus the dwarves, worms, prisoners, and mice that share their spots. Keep the chapter order handy and you’ll finish the collection without a single backtrack.