For readers of this guide of Dream Engines: Nomad, we’re assuming that you have already played the tutorial and know the game’s basic controls and this guide will walks you through the main features and mechanics of surviving
First steps: basic needs
Before you can start making real progress through Research, you’ll be required to get your city’s basic needs in order – Food, Power and Flux. In order to produce those, you will first need to find and produce some of the most basic resources. You’ll have to explore your city’s immediate surroundings with Tiny, find some resource nodes, and set up production lines for building materials.
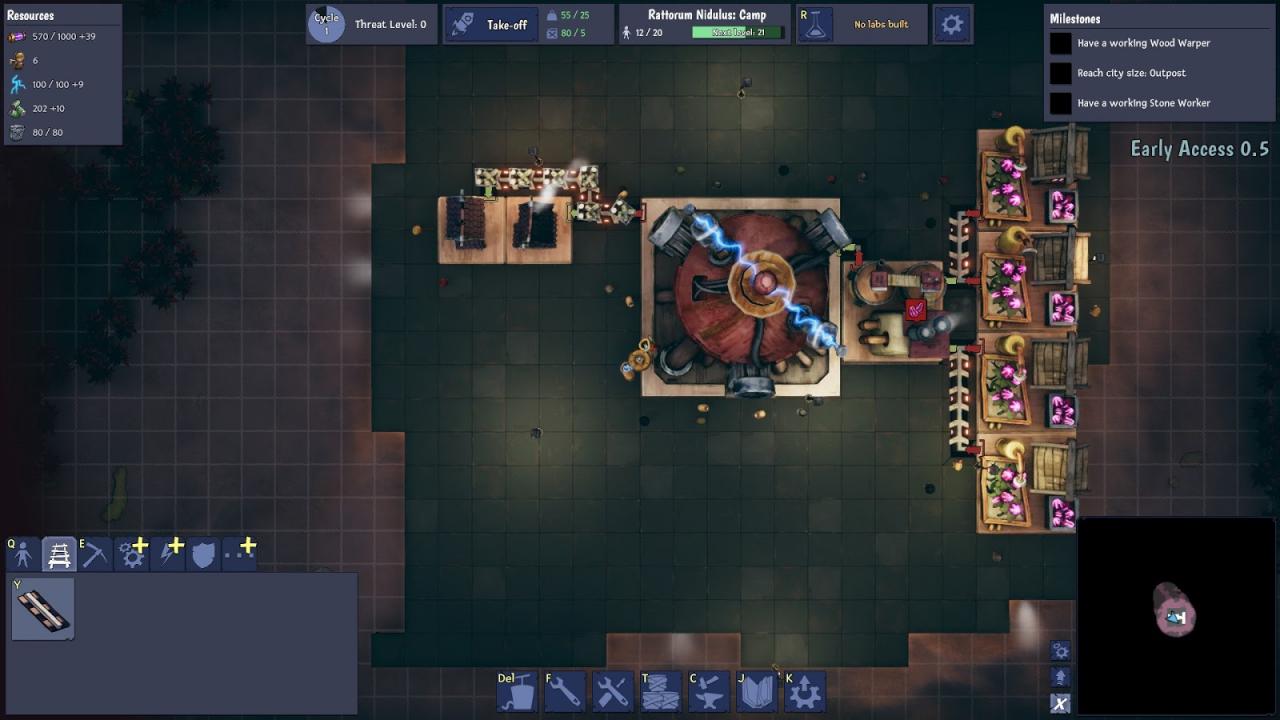
Before you start exploring, you can use the few starting resources to build some basic structures. Start off by building 4 purptato farms and 1 food plant, the rails that connect the farms to the plant, and finally send the processed food to your core. You’ll have enough bloodwood left to build two houses; make sure they get food from the core city. After all this, you’re still producing a +9 surplus of food, your houses can accommodate some of the workers (you’ll need them soon enough) and also produce Flux, so your city will still be producing a net gain of resources while you explore.
Exploring with Tiny
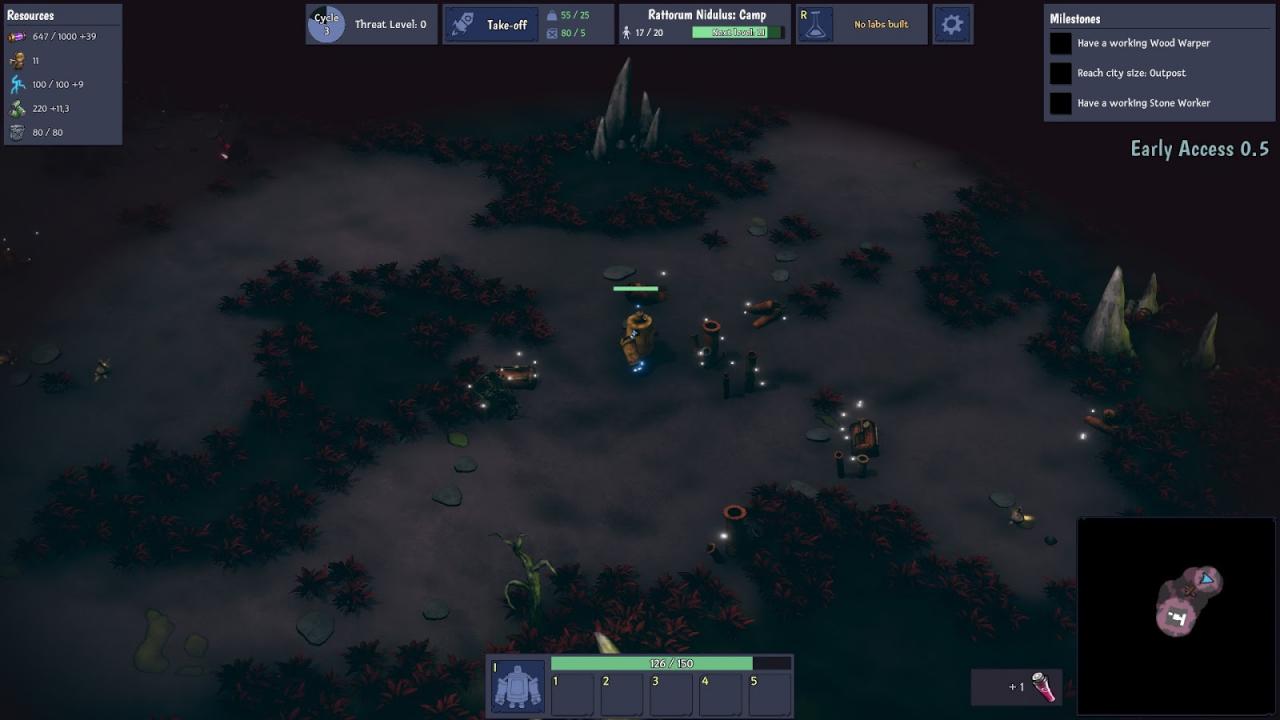
Next, grab some makeshift repair kits from the city core and equip them on your quick access shortcut of choice, as you learned in the tutorial. Now you’re ready to venture into the wilderness! But don’t get too enthusiastic yet. The goal of this first expedition is not to clear the whole map from the get-go. Instead, you’re looking for the closest Bloodwood and Featherstone nodes to start gathering resources as soon as possible – and while you’re at it, make sure you break all the debris you can find to gather some extra materials.
As you play the game and explore further, you will also find Ancient Ruins — remnants of their long-lost civilization with some machinery that appears to be partially functional. With the right materials (see below how to produce advanced resources) you can use them to craft useful stuff, like new gear for Tiny or fuel for your city. On the other hand, you can also scrap the whole place for parts — which in the first map would probably be the best idea, as you don’t have the resources yet to craft anything of significance, while these materials can be a nice push.
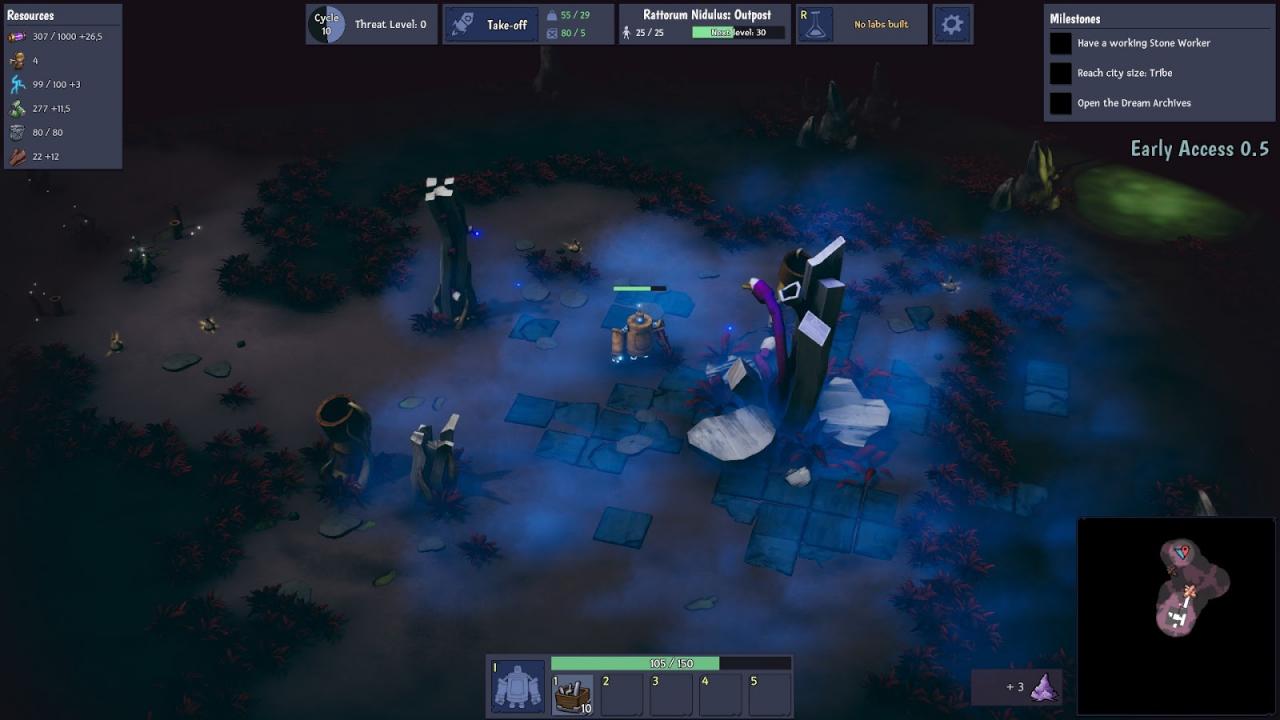
Exploring is also a good way to get some extra materials if you feel your production has stalled or slow- destroying debris grants you resources, flux and sometimes even upgrade materials (see below in the Workshop section to understand what they are for). As you explore, you will have to fight some monsters that will also drop both raw resources and materials that you can use for crafting. However, be careful you don’t bite on more than you can chew: getting Tiny killed increases the local threat level which makes raids on your city tougher, which in turn makes it harder to stay on the same map.
Bloodwood Production
The first resource you will need is Bloodwood — this is required for building houses to increase your workforce. Once you have found the closest node to your base, it’s time to start gathering resources. Build a gatherer on the node and put rails to get the raw materials closer to your base. If possible, you should try to build the factories to convert these raw materials either in the outer rim of your main clearing where your core sits, or nearby if there’s another clearing big enough.
Later on you’ll have to build more gatherers further away from your base as the closest ones get depleted. The point of building these initial factories as close as possible to your city core is to have at least some of them in a defensible position. Eventually, the dream plagues will start raiding your city; they spawn on the outer rim of the map and move towards your base in the center. If they stumble upon your gatherer and your factories are there, they will destroy them before moving on, so you will have to build extra defenses there or leave them unprotected and rebuild the whole thing afterward. Gatherers are comparatively cheap to build and monsters don’t destroy rails, so bouncing back after an attack is much easier if your factories are still standing.
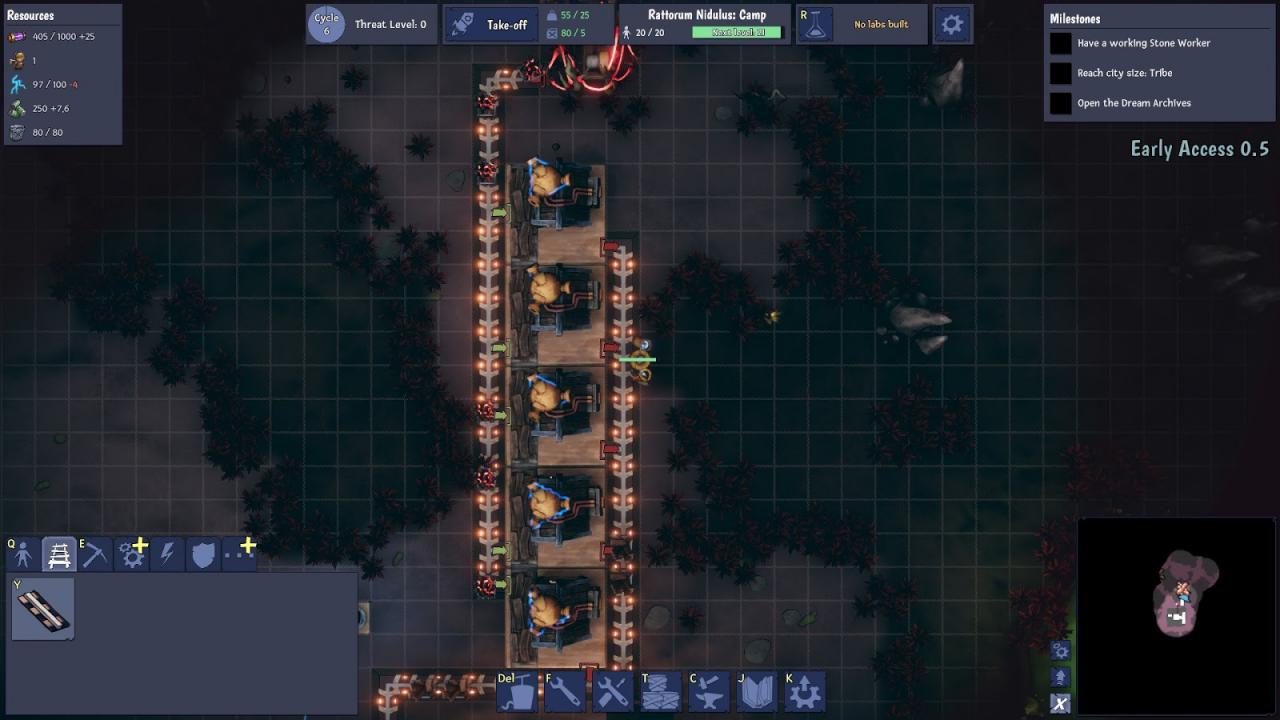 You can place your wood warpers this way: one rail brings raw materials, the other takes away the bloodwood planks.
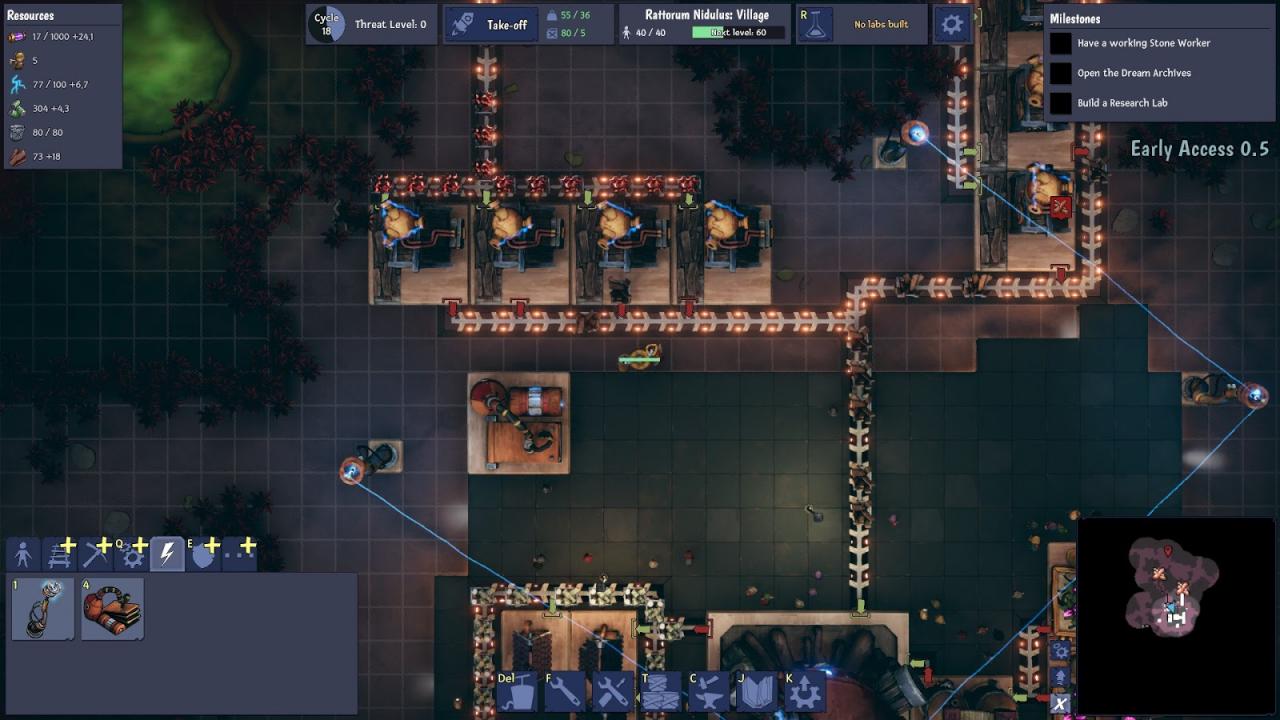 You can also arrange them horizontally — just make sure that the rails in the crossroad aim in the right direction.
It takes 5 wood warpers to match the production speed of a Bloodwood gatherer. However, once a resource node is depleted, its output is reduced by 50% and 3 factories are enough to manage its entire output. This brings you to two obvious approaches- either build 3 factories from the get-go or build 5 and connect a second resource node later. The second strategy is better: it will allow you to produce raw materials faster, and you can always move these buildings later. Plus they are fairly cheap.
Keep in mind that raw, unrefined resources cannot be carried with you when you fly away, so there is little point in sending them to storage. It’s usually better to send them directly to the processing buildings, and then store the refined resources which you can use or take with you when you leave.
Keeping your city supplied
As you expand and build more factories make sure you have enough houses for the workers required to support all these production facilities, as well as ensure you have enough purptato farms so that your food production can sustain your growing population. A single non-upgraded food plant can handle 6 non-upgraded farms, assuming no other bonuses or penalties are applied. You won’t need a second food plant at this point.
Once your city grows into an Outpost (over 20 workers), you will be able to build power generators and Flux Vats. Both Flux and Power are required to maintain existing buildings, and Flux is also required to build almost anything, including rails. Build enough power generators to reach a positive balance, because you are already consuming more than your core produces. Then build some Flux Vats and try to maintain at least +40 Flux production to fuel your growth. Remember that houses also produce Flux.
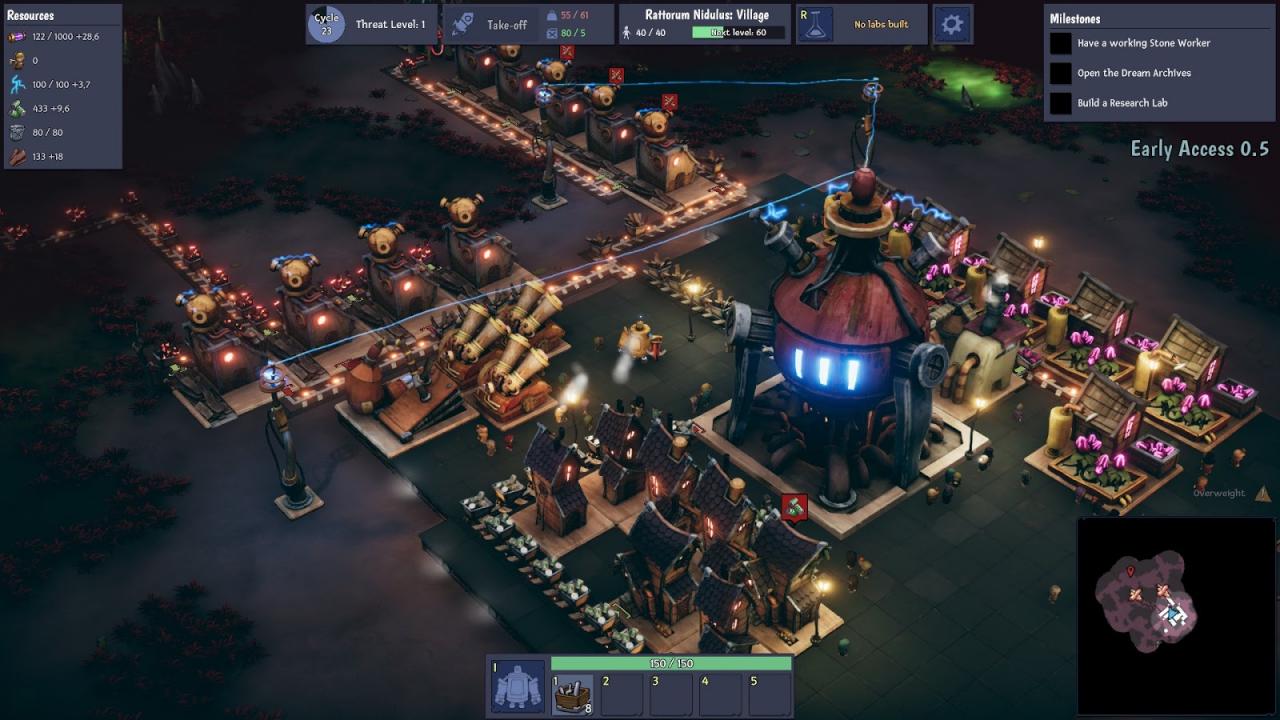 This is starting to look like a city!
Don’t be afraid of building basic flux and power production facilities outside of the main city platform. These are fairly inexpensive and you’ll need to build far more than you can carry early on.
Featherstone
Once your city’s basic needs are met, go ahead and find the nearest Featherstone node in order to build the rails and Stone Workers for gathering and processing it. A Featherstone node should always be present in a clearing adjacent to your city in the starting map.
Featherstone is the second basic resource and it is required for many of the essential constructions (such as Power Generators) as well as for upgrading some buildings. At this early stage, however, Bloodwood is more important, and with your limited resources you should focus on that. Two or three Stone Workers should be enough to start off with, and you can build more later when you have the resources available.
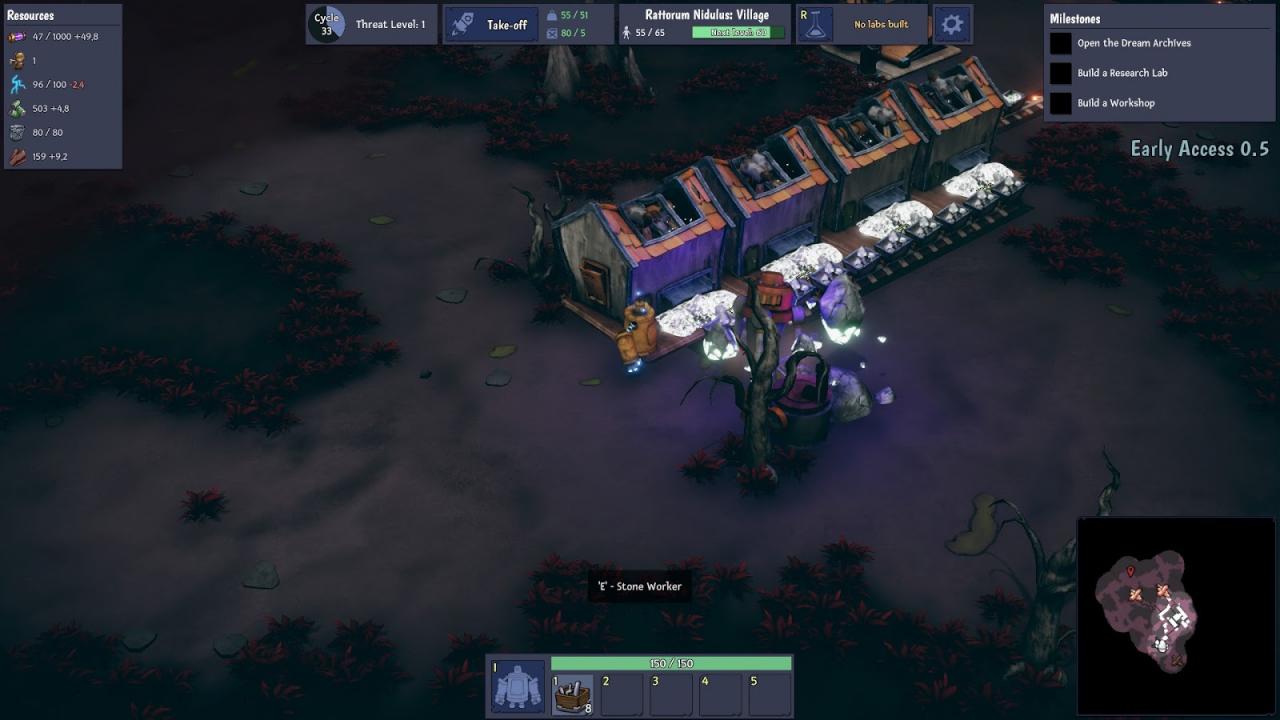 A Featherstone production line
Time to grow: Let’s research!
Now that you have a balanced food, power and flux production, and are regularly refining Bloodwood and Featherstone, it’s time to grow! If you haven’t yet reached a population of 30, build more houses — you’ll need 4 in total. Once you reach that population milestone you gain access to a couple of new construction options: the Research Lab and the Tar Extractor.
Star-stuck Tar (in short, Tar) is a resource that can be gathered anywhere. You don’t need to build it on any resource node like Bloodwood and Featherstone. It’s used for many basic production recipes -including research- and later on for more efficient power and flux production.
Build a research lab and a tar extractor and connect them with rails to send tar to the lab, and then open the research window and select a research subject. There are four main types of research:
- Building blueprints that let you construct new buildings: these usually unlock the first production recipe of that building as well if it’s a production building.
- Crafting recipes let you craft consumables and new gear for Tiny. Alternatively, you can craft resources out of materials like scraps, nightmare juice and drep dust (stuff you get from exploration and combat).
- Production recipes unlock new types of resources or alternate, more efficient recipes to create resources that you can already produce. Some of these recipes require building add-ons which are usually unlocked by the same research, or upgrading the building.
- Bonuses, such as free infrastructure upgrades (more on this later), city expansions, or more efficient resource harvesting.
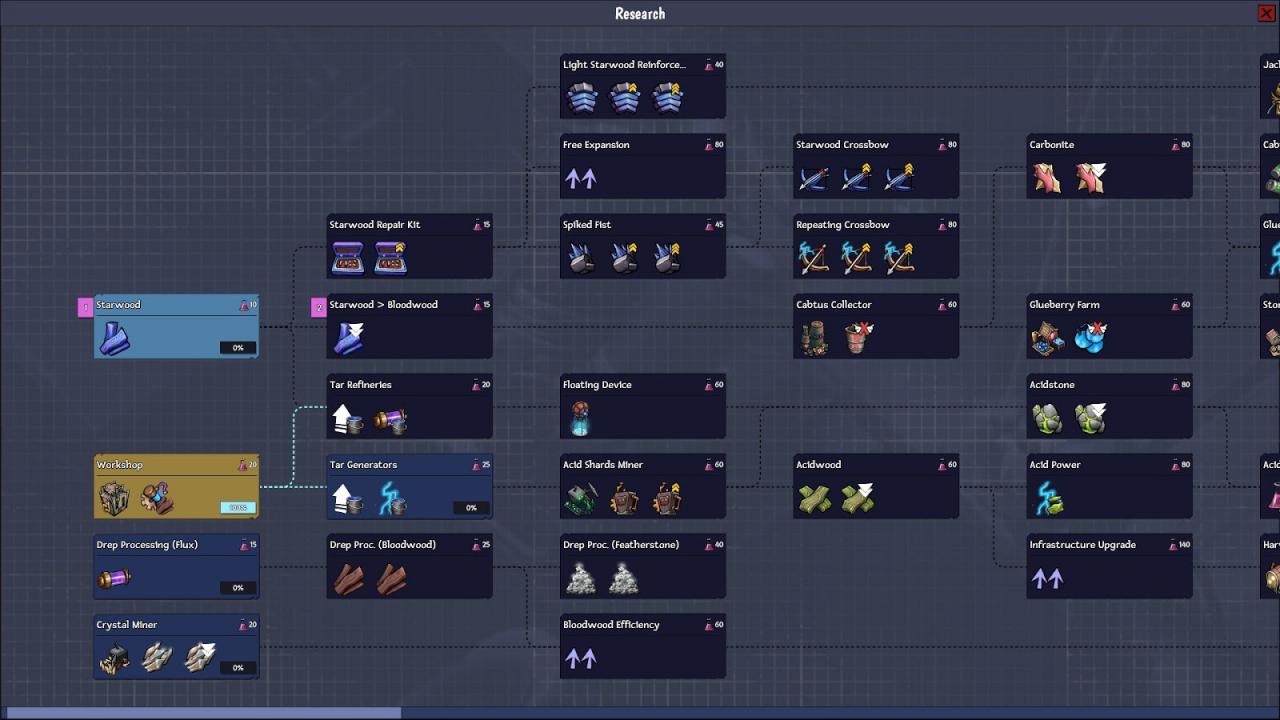 After researching the Workshop, we want to unlock Starwood as soon as possible
I recommend starting with the Workshop, followed by Starwood and then Tar Refineries, followed by the Tar Generators. You can hold shift & click to queue up research subjects. After that, choose what to research depending on the situation and your playstyle, but it usually doesn’t make much sense to research very advanced technology early on, since you don’t have access to the resources to exploit it. Another point to remember is that some resources only exist in higher difficulty maps (more on that later).
The research lab itself requires 8 workers, so make sure you have enough of them- build more houses or disable other buildings if necessary. Performing research also costs flux, so keep an eye on your balance, and power as well. Build more generators and flux vats if necessary.
You may also store any excess tar in your city core, but keep in mind that like other raw materials, this resource will be lost when you fly. So storing it is of limited value, you can only use it within the same map. You can also build additional labs to hasten your research, but at this early stage the drain on your resources may be too much (remember — you can always toggle buildings off when you’re low on resources).
What happens if I grow too fast and run out of resources?
You need to balance your growth with your city’s production capabilities and amount of resources. You can afford having a net of -1 energy per cycle for example, but only for a while — eventually your reserves will dry out. If that happens, the consequences vary depending on the resource you run out of, but ultimately, they all have one thing in common: if you don’t take care of it fast, the situation will quickly escalate. Furthermore, keep in mind that when you fly away you will leave many buildings behind, such as farms, and you can run out of resources very quickly if you don’t have sufficient resources stored before flying.
If you run out of food, your workers will start dying, and you need workers to keep your buildings running, which means there could be a chain reaction where your food-producing buildings will be disabled and your food shortage will deepen. Alternatively, If you run out of power, buildings that need it will stop working — usually the last ones you built, but it could be random. Even houses could become disabled, and then your workers will start dying. Same story with flux, and on top of that you won’t be able to build almost anything.
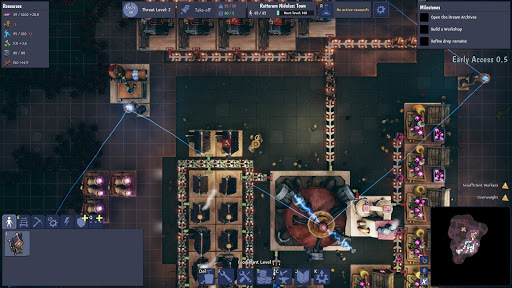 We’re in trouble here: we lack workers, but we can’t build houses fast enough because we are also losing energy!
To get back on your feet you will need to disable (keyboard shortcut ‘O’ lets you enter “toggle on/off mode” when in management mode) non-essential buildings to reduce your spending. Research labs are usually my first candidates, followed by workshops. This will help stabilize the situation, freeing workers & resources in order to maintain the essential buildings such as power, flux and food production. If it’s food you ran out of, sometimes it’s best to disable a few houses and make do with fewer workers until you can increase your food production Of course, this also means you’ll also have to disable some nonessential buildings if you run out of workers.
Once you stop the downward spiral, you can slowly increase the production of the resources that you were short on, until you have enough and you can start enabling all those buildings and get back on track.
Defending your city
At some point, you will have to cope with the first few Drep raids. Depending on the difficulty level you might be able to fend them off at first just with Tiny, but it’s usually better not to risk it and build defenses. The current map’s threat level will increase with time. Basically, your very presence alerts and agitates the dream plagues, and the longer you stay the tougher their raids will become. This increase doesn’t depend on the size of your city: it just increases after a certain number of cycles, and the more you stay on that map, the faster it will grow. It does grow a few cycles worth if Tiny activates the emergency teleport (aka, runs out of health), so try to avoid that.
Building defenses is relatively straightforward. You can see the general direction from which the raids will arrive in advance, so use walls to slow the Drep down while your turrets fire at them. It’s very important to protect your turrets with walls, they can’t take too much punishment by themselves.
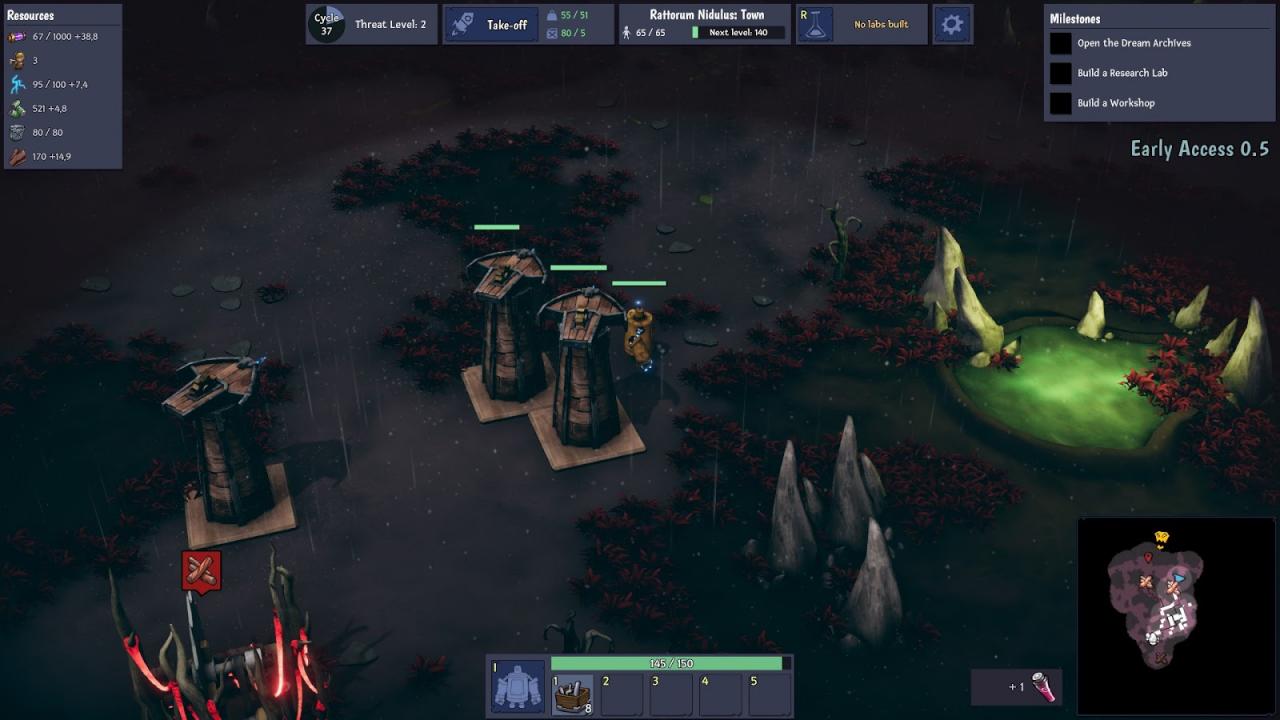
Take advantage of natural choke points to force your enemies to fight their way through narrow passages, where your turrets’ explosive projectiles will be more effective. You can put several layers of walls to slow them more and/or put doors so Tiny can make a sortie and help in the fight (just keep an eye on your health!). Remember to protect your Tesla towers. If they are destroyed the turrets may lose power and stop working. You may need to build several layers of defenses to survive the stronger hordes.
Note that currently enemies will stop and attack walls, so they are effective even if they are not hermetically sealed. The drep will not swarm through a hole in the wall (although, this will probably change in future updates).
The raid warning gives you time to put your defenses in place, but only if you have the required resources. If an attack finds you with a drained economy, you may be in trouble! Keep a close eye on your stocks, and try to always have a surplus of planks for walls and turrets, as well as Flux.
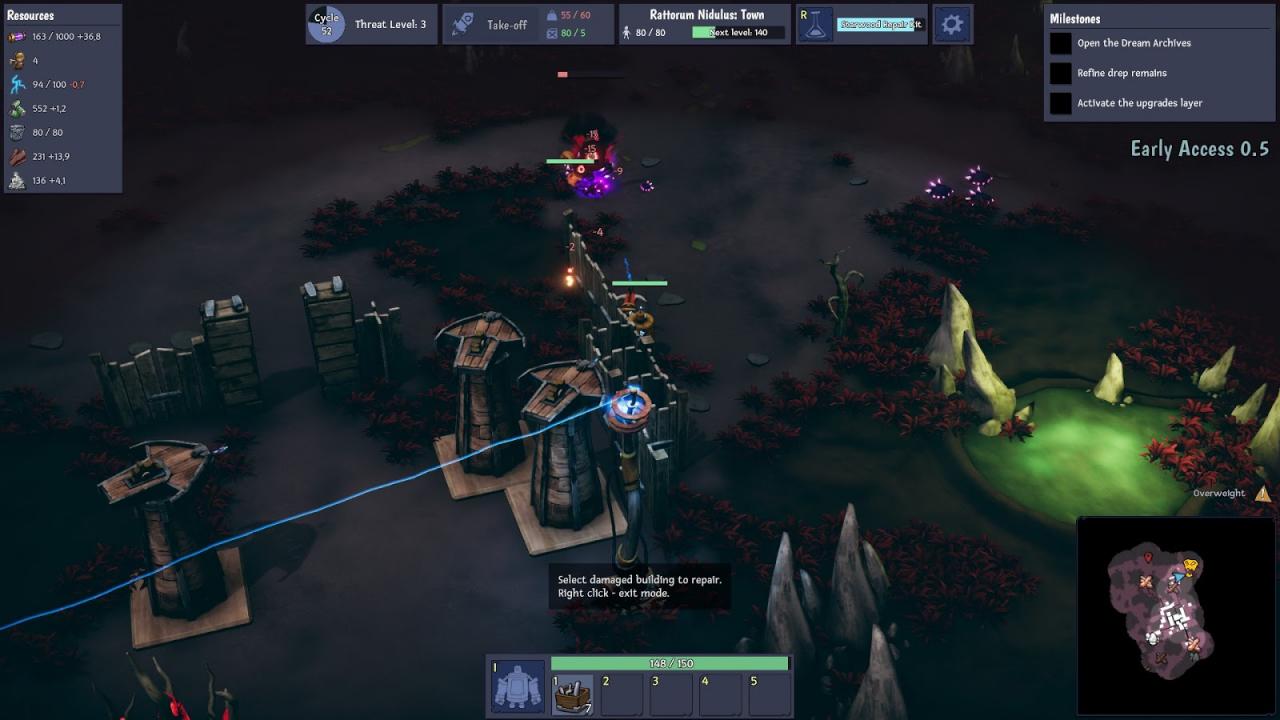 A stronger defense, ready to fend off bigger raids
While you cannot move walls, you can move turrets. However, this can only be done when there is no active raid or raid warning. Don’t count on building just a few turrets and moving them to wherever the next wave will come from. You also can’t nor repair any structure if there are enemies nearby. So don’t wait until the last moment: once an attack is announced, if it arrives from a direction that is not already protected, stop whatever you’re doing and focus on making sure you can repel this attack (or take off before it’s too late!).
One last piece of advice, you can use Tiny to thin the dream plague herd somewhat before it reaches your base. You can approach them, attack from afar and flee before they reach you, and even try to divide them and divert a small group to another section of your defenses. However, you would be taking a risk here: remember that getting Tiny destroyed costs Flux and increases the threat level timer.
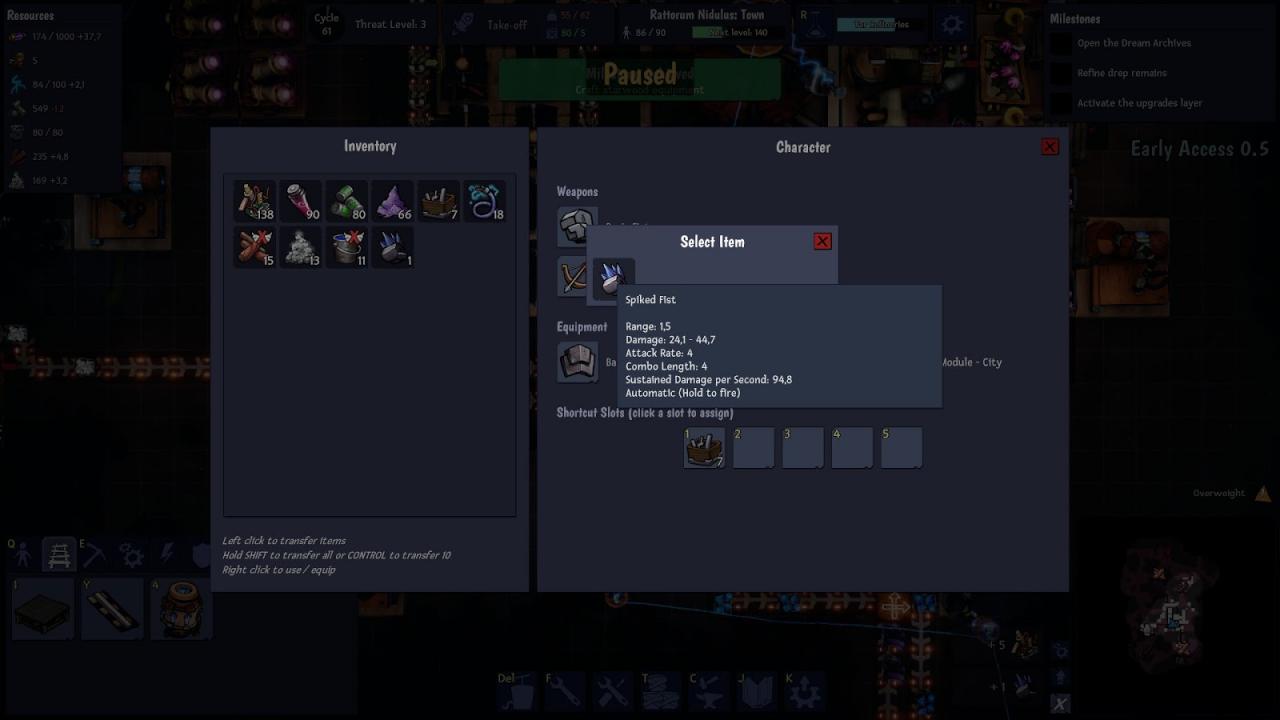 Craft and equip more powerful gear for Tiny, it will be useful not just for exploration, but for defending your city from raids as well
Improve your infrastructure with your Workshop
As mentioned before, you should research the Workshop as soon as possible, so you can start upgrading your infrastructure. Your Workshop consumes flux and bloodwood in order to produce Upgrade Materials. If you open the Infrastructure menu (hotkey ‘K’ by default) you’ll see what these Upgrade Materials are for: you can use them to gain infrastructure points that can then be spent to enhance your city or Tiny’s skill trees- Offense, Survival, Gathering or Administration.
Every level you buy in one of these four trees gets you a different bonus per level: Offense increases your damage by 5%; Survival increases Tiny’s max health by 5%; Gathering increases your harvesting and refining of resources by 5% as well as your loot by 2.5%; and finally, Administration gives you +5% in flux and energy production.
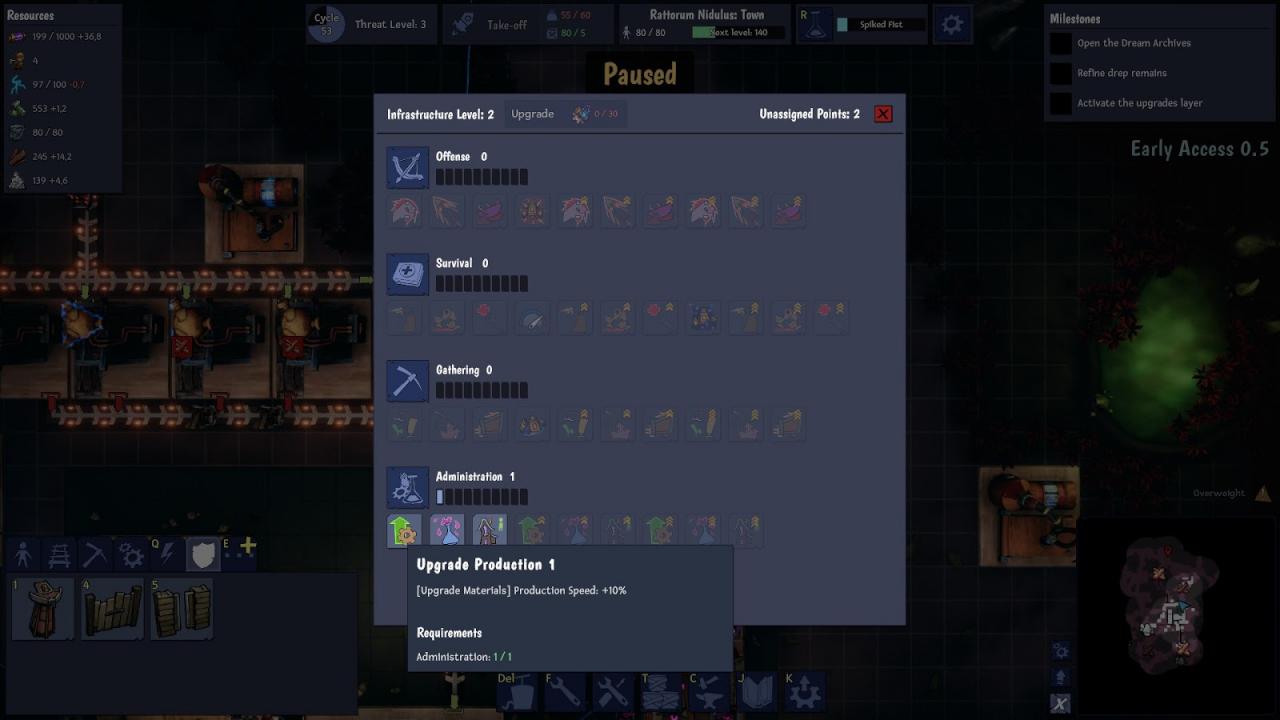
Each of these four areas also has its own upgrade tree with more specific ‘Perks’ that you also claim by spending Upgrade Points. Each of these perks requires a minimum level in the infrastructure area, and some require other perks to be earned first. For example, you’ll have to spend at least 1 point in Gathering if you want to buy one of the three initial skills; then you can choose between Farming (to increase the production speed of your farms), Renewable Gathering (increase production of Tar Extractors and other resources-less harvesters) and Autocart Speed (increase cart speed, and hence the throughput of each rail node).
Every additional infrastructure point costs more than the previous one, so think carefully how you want to spend them! There’s no wrong way to approach this, mind you: you can play to your strengths or use them to compensate for your weaknesses. At first you’ll have enough with one Workshop, but at some point its output won’t be enough to keep upgrades coming at a reasonable pace, so you’ll need to build more workshops, and eventually research the more efficient production recipes for Upgrade Parts.
Upgrading buildings
With a couple of exceptions (namely Tesla Towers and walls), you can upgrade pretty much all your buildings to make them more efficient, and in some cases to allow new production recipes. Click on a building and see the Upgrade button right under its name in the building window. Hover over the button to see the resources required to upgrade this building to the next level.
Generally speaking, upgrading is less cost-effective than building more of the same type, unless it unlocks a new recipe or new functionality. However, building space, especially inside the flying platform, is a scarce resource, and so upgrades can be very effective.
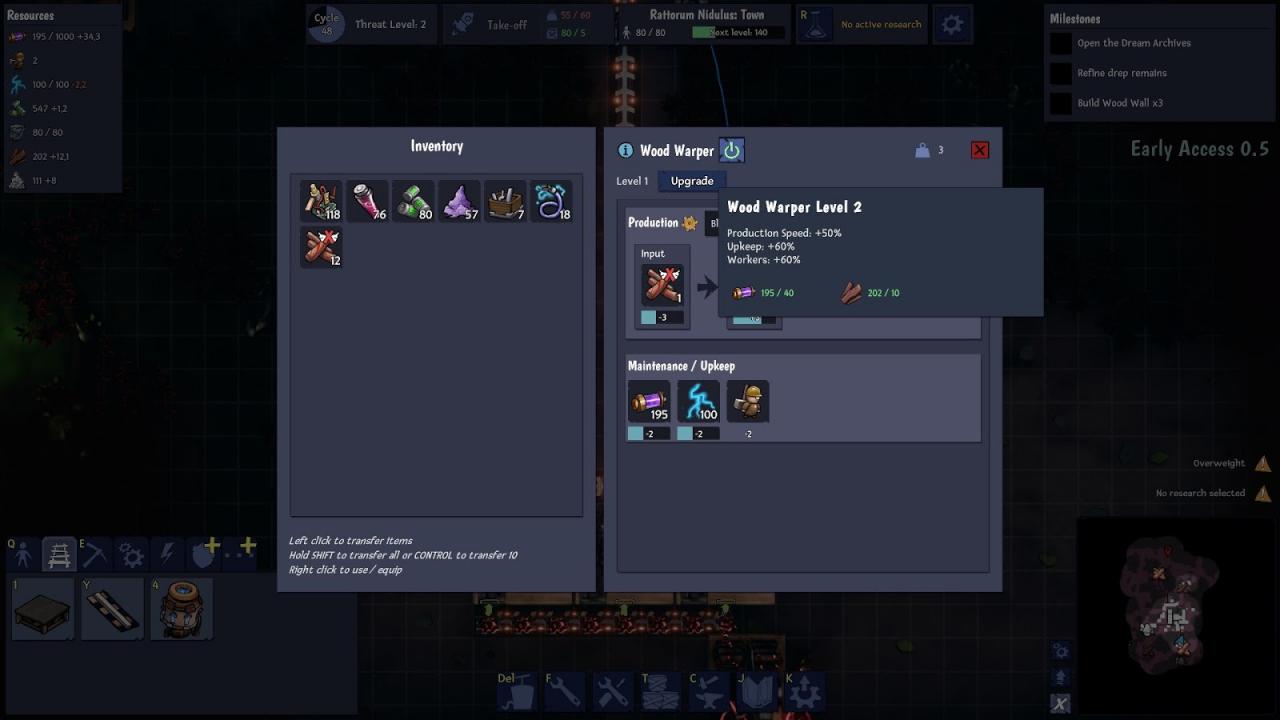 Let’s upgrade this Wood Warper…
You can also upgrade your city core, which is highly recommended. It increases the carrying weight capacity (so you can take more buildings with you when you fly), its flux/power output, and even the cart speed. The first upgrade will only require Flux and Featherstone; after that, any more upgrades will require more advanced resources. Actually, most building upgrades require advanced resources, so we’ll talk about producing them in the next section.
In Management Mode, there is a handy upgrade layer (a small button to the left of the minimap). When activated, you will see each building’s level, and an upgrade button right next to it – directly in the game view. This is a great way to upgrade many buildings at once, such as houses. It works exactly the same, but you don’t have to open each building’s window.
How to produce Starwood (and other advanced materials)
Advanced materials usually require more raw materials to produce, some of which are renewable resources such as Star-Stuck tar, while other resources are harvestable. Some resources can only be found in higher-difficulty maps.
To produce these materials, you first have to research them, and the first one is Starwood. If you hover over the Starwood production recipe, you may notice it requires a level 2 Wood Warper. So after researching Starwood, you need to upgrade your Warper (which only costs Bloodwood Planks). Once that is done, open the warper window and you’ll find that there is a production recipe drop-down menu, where you can change what this building produces. Press it, and set the building to produce Starwood. Now all you need to do is send tar to this building in addition to the regular bloodwood logs.
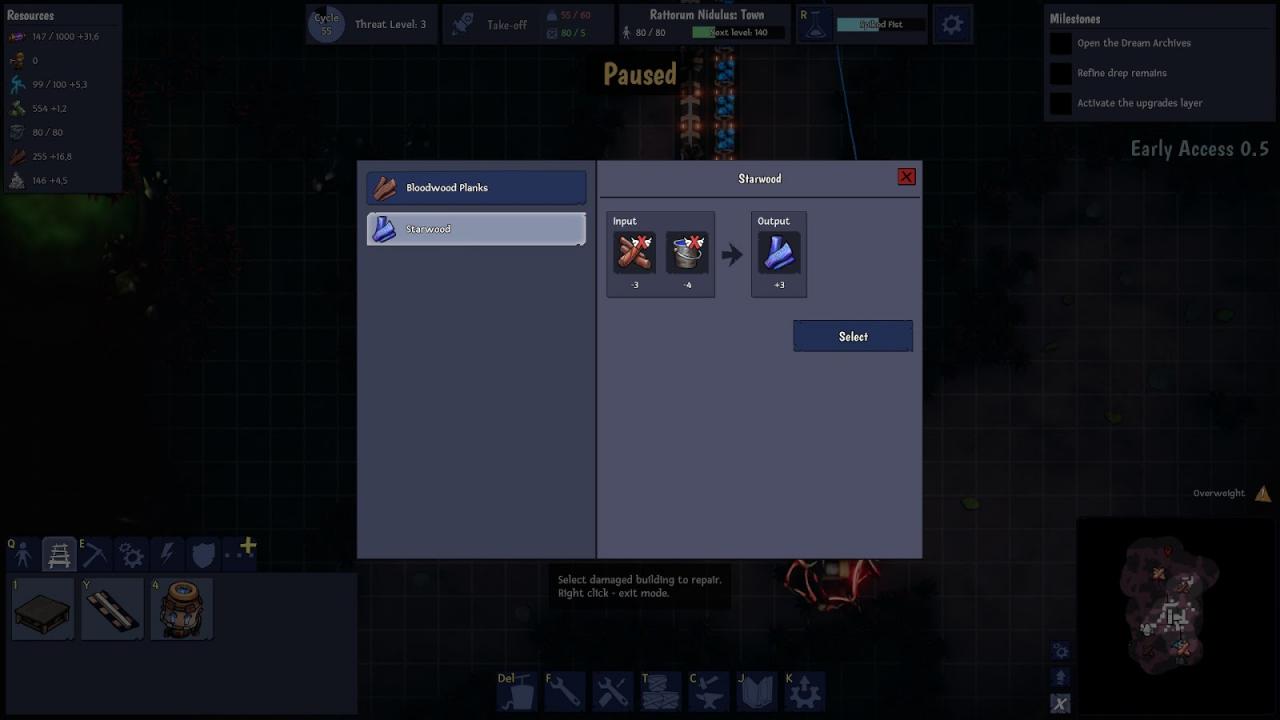
Starwood is the first advanced resource that you can use to upgrade some of your basic buildings (such as your Houses and Flux Vats), as well as craft the first upgrades for Tiny’s gear. You’ll need a lot of Starwood in the long run, so it’s a good idea to begin producing it as soon as possible.
Increase your flux and power production with Tar
As your city grows, you’ll see it’s more and more difficult to keep pace with its flux and power needs, especially after landing in a new unexplored map and leaving all those heavy Flux Vats and generators behind. Don’t despair, science is your friend! Once you research Tar Refineries and Tar Generators, you can produce flux and power at a much higher rate, using tar as a raw material.
To utilize these more advanced recipes, you need to build an add-on. These add-ons can be built from the building window, they work similar to upgrades, but are more expensive and significantly increase the building’s upkeep as well as the number of workers required. After building these add-ons, select the new recipe, and send Tar to start producing.
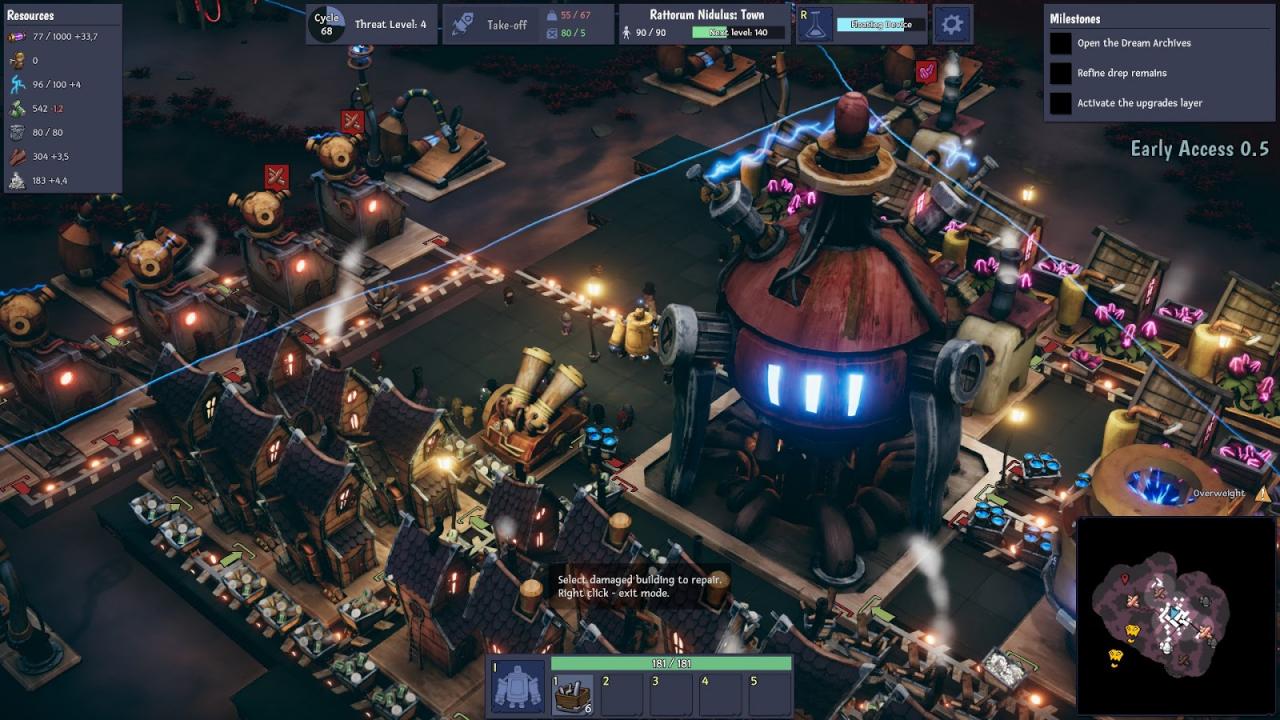 Feeding an upgraded Flux Vat with tar to increase its productivity
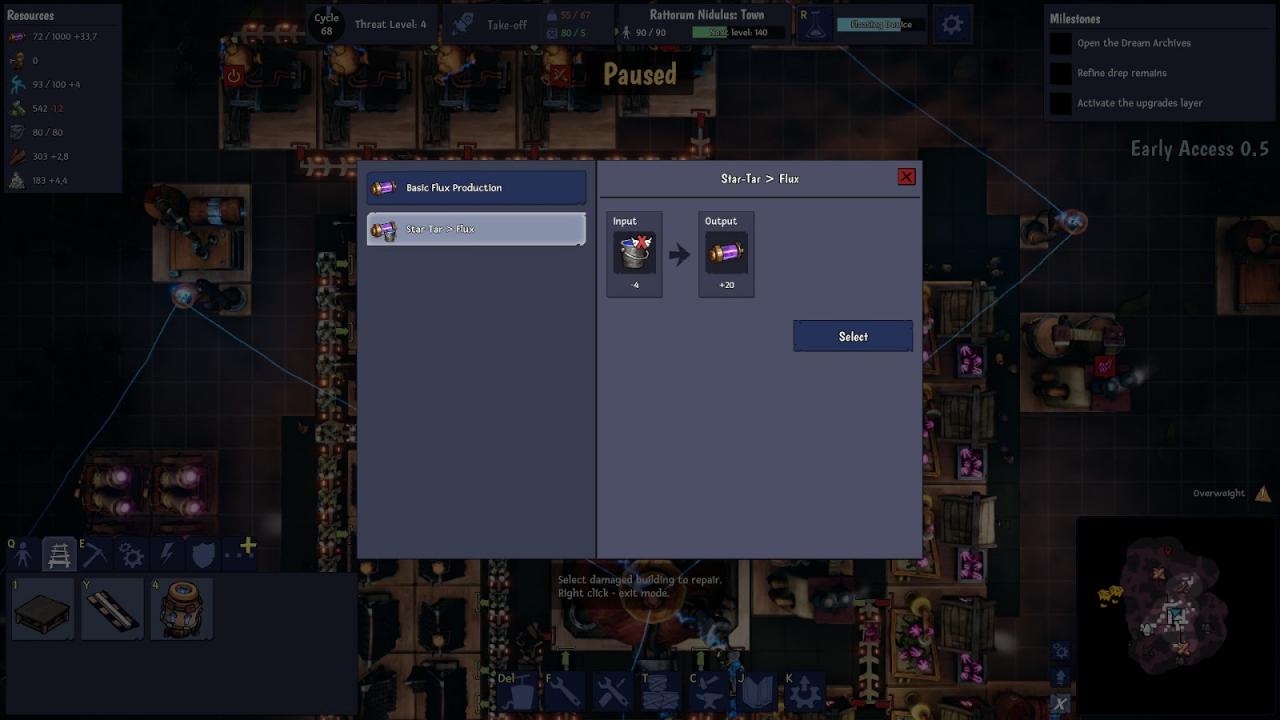
These buildings with the add-ons are much more efficient, but are also a lot more expensive to build; so it’s probably best to build them within the flying platform and not leave them behind. You can then upgrade them to make them even more effective. The tar harvesters can be built inside the city if you have the room and carry capacity, but they can also be built outside and left behind, they are not that expensive, unless you upgrade them of course.
With these buildings producing Flux and Power within your city on the flying platform, landing in a new area will be a much better experience, and you’ll hit the ground running since you won’t be starting from scratch each time.
Expanding your city and increasing your weight capacity
At the beginning, your city area (the platform that flies with you when you leave a map) is relatively small. You can’t take too much with you anyway, since you’re also limited by your maximum weight. But as you grow and approach the moment you’ll be running for your life, you’ll want to expand your core and increase your weight capacity so you can bring more stuff with you to the next map, leaving less behind.
You can expand your city area in one of two ways. The first is by getting a free expansion, either through research or crafted at some ruins (more on ruins later). The second is by spending resources to expand – which gets more and more expensive every time, requiring more advanced materials. However, bear in mind that the second option only becomes available after you reach the 60 population milestone.
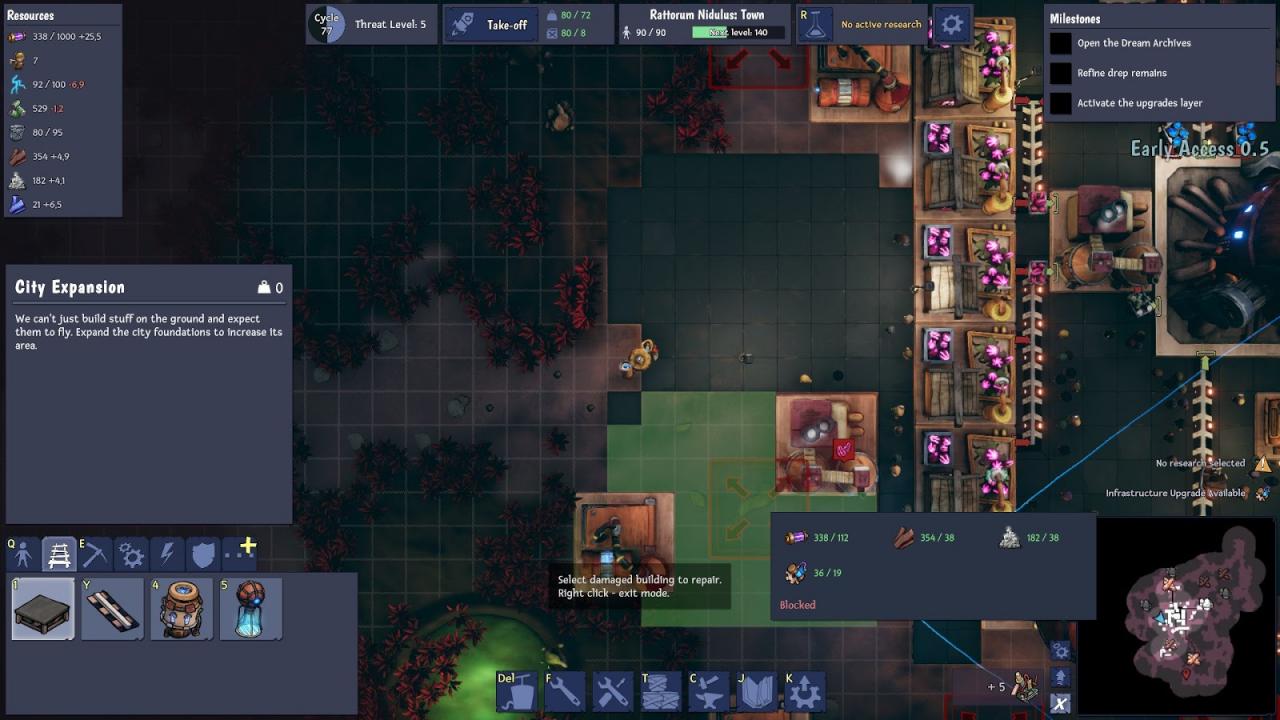 We just used a free expansion — but notice how you can’t expand the city where there’s something already built
Once you unlock the expansion option, or gain a free expansion, you’ll find the City Expansion construction option in the Infrastructure section. When selected, you’ll see a few expansion icons on the map, these represent areas in which you can expand. Hover over each of these icons to see the area that will be added to your city, the costs to expand (unless it’s free), and you’ll also be able to see if there are any constructions that block the expansion. You can’t expand if you have built something that blocks the expansion area. You’ll have to move or destroy whatever is blocking you there. Often, a good tactic is to expand as soon as you land in a new area.
As your city grows and you put more, heavier buildings in the city area, your total city weight increases — and eventually it will be too much for you to fly off should you want to. You can, of course, just move buildings out of the city to lose some weight if you need to make a hasty escape. Upgrading your city core will increase the weight you can carry, but this can be expensive and you can only upgrade it so many times. The other option is to build or upgrade Floating Devices, a building that increases your maximum city weight. Floating Devices need to be researched before they can be built.
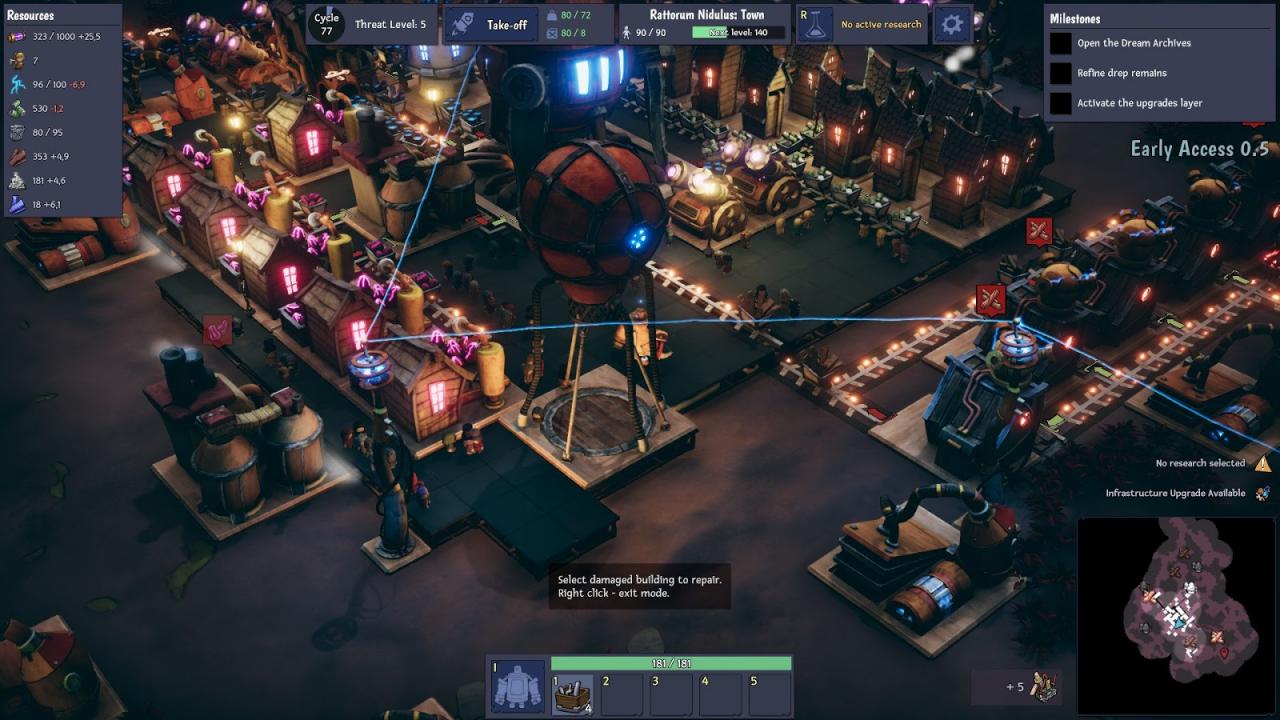
Keep an eye on your fuel, Floating Devices and city core upgrades increase the amount of fuel you will need to fly away! While this won’t be a problem the first few maps, fuel is not easy to find in the early stages of the game (you can get some from Ancient Ruins, mind you), so if you use too many floating devices and fly too often, you might find yourself stuck without Fuel. Plan accordingly.
Preparing to leave
As the Dream Plague raids become stronger and more numerous, you will start to feel the pressure. If you don’t fly away soon enough, they will just overrun your defenses and destroy everything in their wake. If you survive a raid by the skin of your teeth and you find yourself saying, “phew, that was really close”, it’s probably a good time to prepare for your departure!
But don’t hit the Take-off button yet. First, move buildings that you want to take with you into the city area; you should usually take the most expensive ones with you, those you have upgraded, and those which are light enough so that they are not a burden on your city weight. The basic purptato farms are cheap enough to be left behind, but if you do have some free space and weight you can take some with you to have some food production from the start. You should usually take the Food plants with you, you don’t need too many of them.
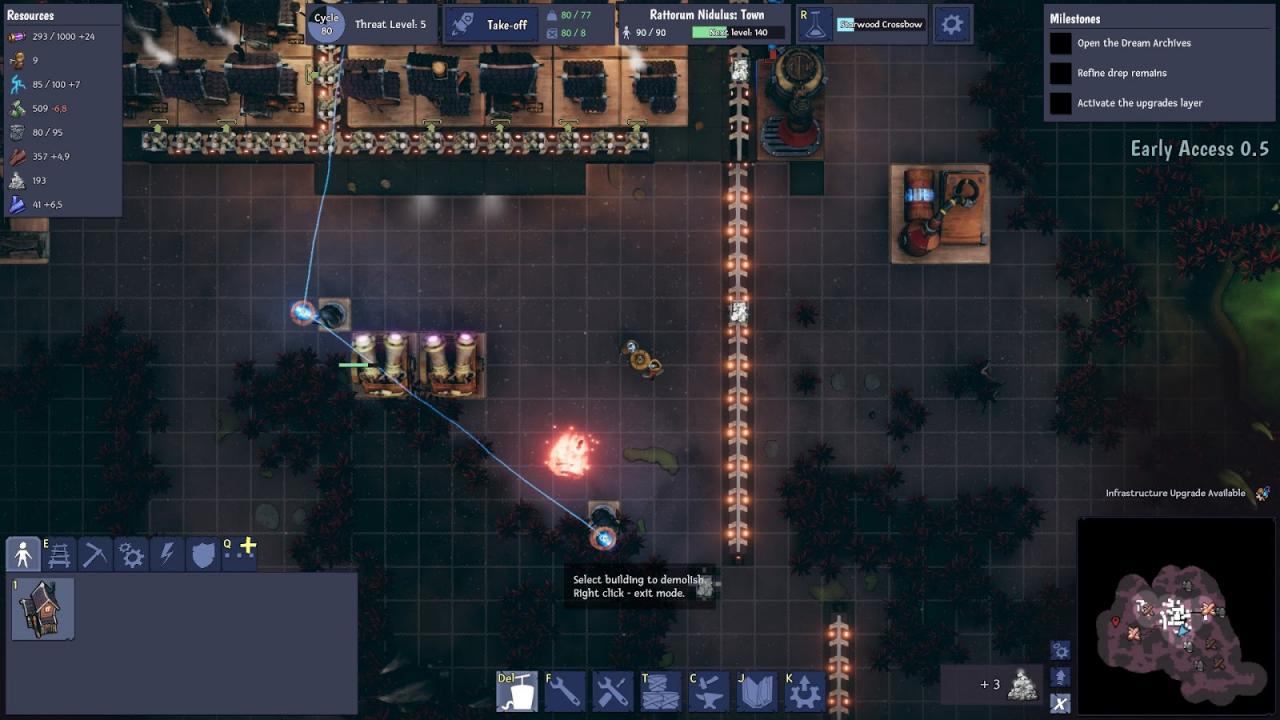 Scrapping everything to be left behind to get some materials back
Flux vats and generators that don’t have the tar add-on should probably stay, as well as most refineries (again, unless upgraded). Same with Tar Collectors. Turrets are cheap enough to build, but they’re also very light and can come in handy early on, so it’s a good idea to take a few with you to help defend the new landing location, especially upgraded turrets. Keep in mind that if you want to take turrets with you, you’ll have to move them in advance; you can’t move turrets after a raid begins.
Generally speaking, you should plan which buildings go with you in advance, and build them inside the city to start with. That way you won’t have to rebuild all the rails and set-up the buildings again and again. But if you do have free space and carry capacity, feel free to move random stuff from outside to take with you.
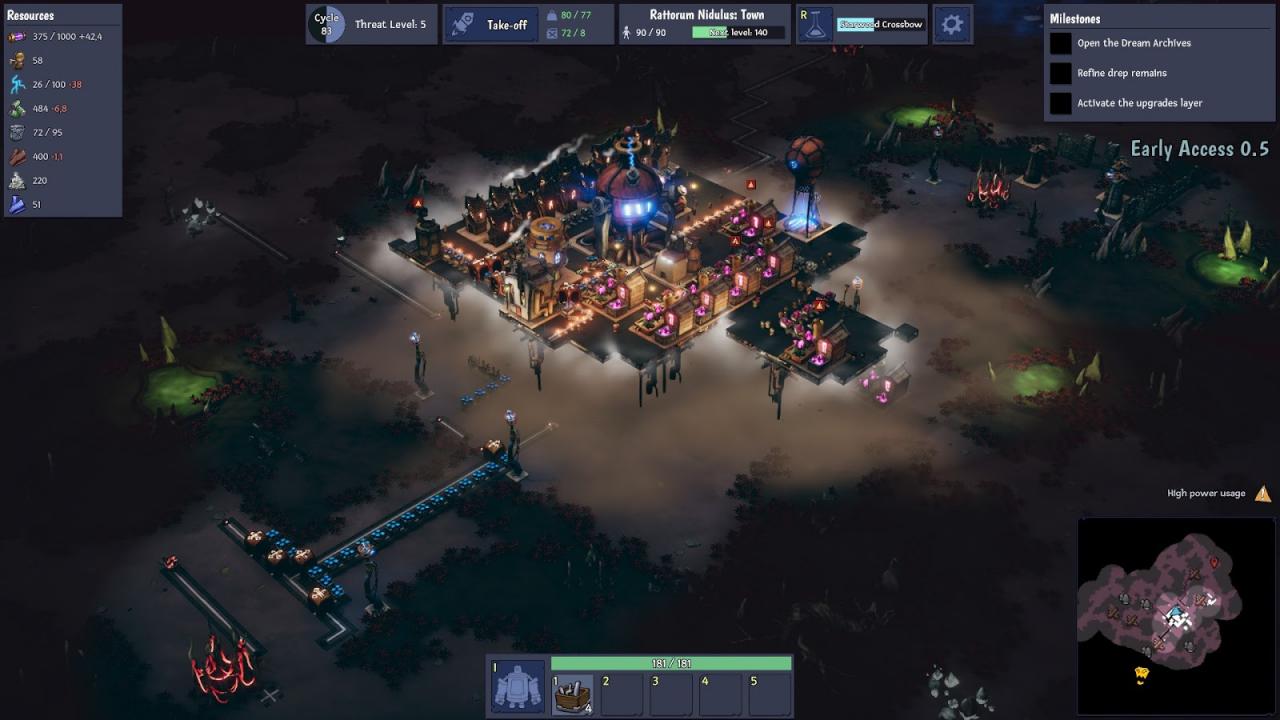 …and off we go!
When you’re ready to leave, you can still wait and keep gathering some more resources until the next Drep raid is about to begin. Once you get the notification- then you can hit the Take-off button. It will take a few moments to charge before you actually take off, but it also takes the Drep some time to reach your city, so you should be fine. While you’re waiting for the take-off to charge, destroy all the buildings you’re leaving behind to get some of their costs back. Note that you only get construction materials back, not Flux, so no point in destroying rails and other buildings that only cost Flux. Most importantly, make sure Tiny is within the city area when the engines are charged, or the emergency teleport will activate and you’ll have to pay a fine of Flux.
Another reason to leave is not that the enemies are getting too strong, rather because you need a resource that is not available in that particular map. In that case, this advice still applies, more or less, but sans the urgency: just do what you need to do and leave when you’re ready.
Now, sit back, relax and enjoy your flight!
Choosing a new destination
Now you face a meaningful decision: picking the next area where you want to land. In the map selection screen that pops up when you take off you’ll find six different options. The content of every choice depends mainly on the biome and difficulty. The difficulty on the other hand depends on the global infestation level: that is a meter that states how active the Dream Plagues are in this particular playthrough. This parameter increases with time, and it behaves like a countdown – the higher it is, the more difficult your potential destinations will be, and if your economy and defensive capability are not up to par, you may be in trouble, forced to land in a region that you won’t be able to survive in. Some difficulty settings prevent the global infestation from increasing over time, and it will only increase when you choose to land in higher difficulty maps, if you prefer to play without a race against time.
Now, depending on the infestation level, you’ll get a selection of six maps. Each map has a difficulty level, a biome, a list of resources, and a few random traits. The resources and possible traits are affected by the biome, and each biome also has some bonuses/penalties that are consistent across maps of that biome. Hover over the trait icons to see these bonuses, and generally speaking you’d want to choose a map with as many good traits as possible. However, depending on your situation, some bonuses/penalties may be more important than others, as well as the resources. Some biomes only appear at higher difficulty maps, so your choice of biomes will increase later in the game.
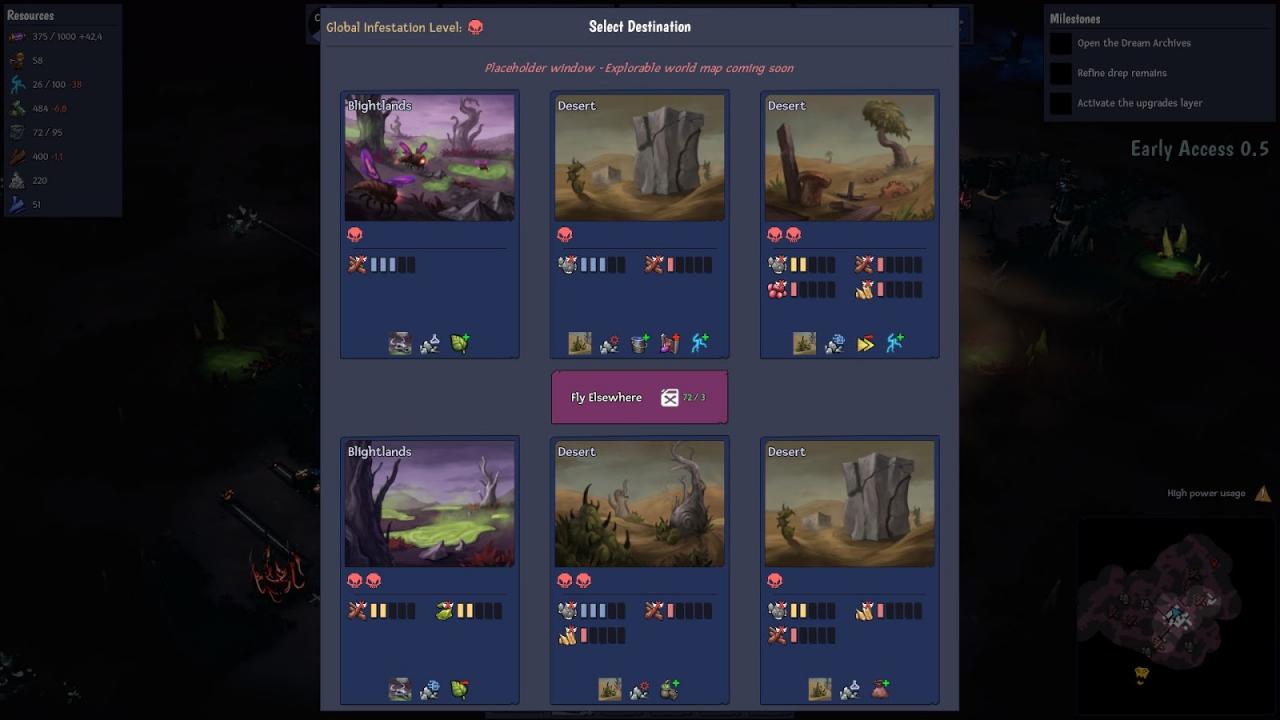
In the Blightlands (the purple maps, like the one you started in) tar production is faster, but featherstone comes slower. In the Desert your purptato farms will produce more slowly, but you get more featherstone, and it has crystals which are an important early game resource.
Now, select a map that best caters to your current needs and abilities. Usually, you’ll want to stock up on Bloodwood and Starwood early on, and then move to a desert map to produce some feathercrystal. Unless you have a very large amount already, it’s best to try to search for Blightland maps that also have some featherstone, and desert maps that have a bit of bloodwood. Those are the basic resources and you’ll need a lot of them. Pay close attention to the map difficulty! A 2-skull map will start at threat level 4, and each additional skull will increase the starting threat level by 5. In addition, the enemies that spawn on the map and that you meet while exploring, will also be stronger if there are more skulls. On the other hand, higher skull maps have more resources. Choose carefully.
You may have noticed the “Fly elsewhere” option: use it to re-shuffle the available landing areas at the cost of some fuel (half of the take-off costs). Be wary of wasting too much fuel, it may seem like you have a lot of it early on, but you’ll only be able to produce it by yourself much later in the game, so the starting fuel will have to last you for a while.
Remember, choosing a map with more skulls than the current infestation level will immediately increase said infestation to that level. This is fine if you feel you are advanced enough and want to move things along. That is bound to happen, especially in lower difficulty settings.
