For Atomic Heart players, this guide explains the mechanic to deactivate enemies and prevent their repairs, so that you can explore the open world areas freely for a limited time.
Intro: How Enemy Deactivation Works
The process to deactivate all enemies in one of the Areas of Atomic Heart is not particularly complex, however the game never explains it properly at any point, thus causing frustration because you’ll never have a moment of peace while exploring, unless you know how to do it.
Basically what you have to do is locate a series of interactable structures that we will call The Controller and The Antenna Relay from now on. Finding and using these structures, present in each of the Areas of the open world, is the key to deactivate all mechanical (not organic!) enemies within that area’s radius (indicated by a white circle on the map, if you’re wondering what that means) for approximately 15 minutes, allowing you to explore freely.
In time, the system will be repaired automatically and get back to work (there is no countdown or anything to determine precisely when), but it can be deactivated again if you wish.
You CANNOT do this process in the first open-world area (the one you encounter the first time you reach the surface). You will only be able to do what is described in thsi guide after you take the “train ride” to the main open world area of the game.
Step 1: Find & Use The “Controller”
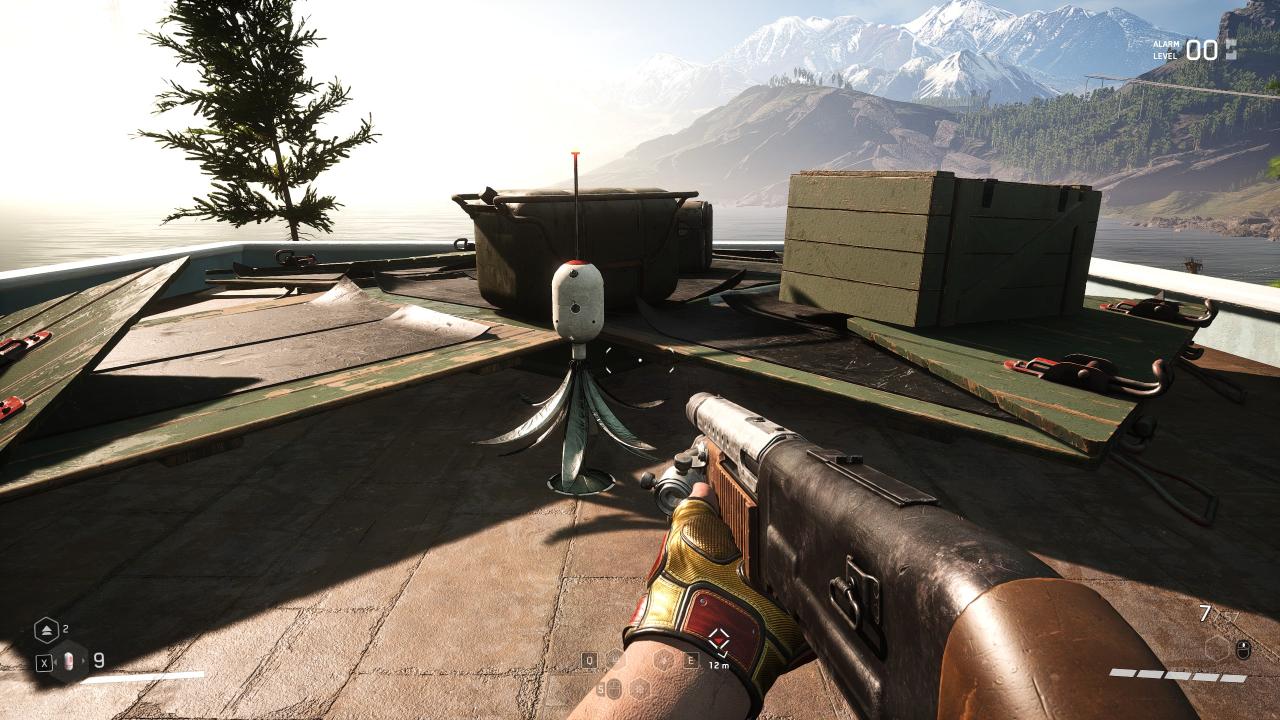
The first thing you want to do is to find the Controller in an area. To do so, activate your Scan Mode (Default Key: Left ALT) while nearby an active camera: you will see red lines coming out of the camera and trace back in a certain direction. That direction is where The Controller is located – always. So simply follow the red line and keep scanning all the time, soon you will see a green highlight with a lot of red lines converging there – that is your Controller.
Here is an image of the Controller:
—
 —
—
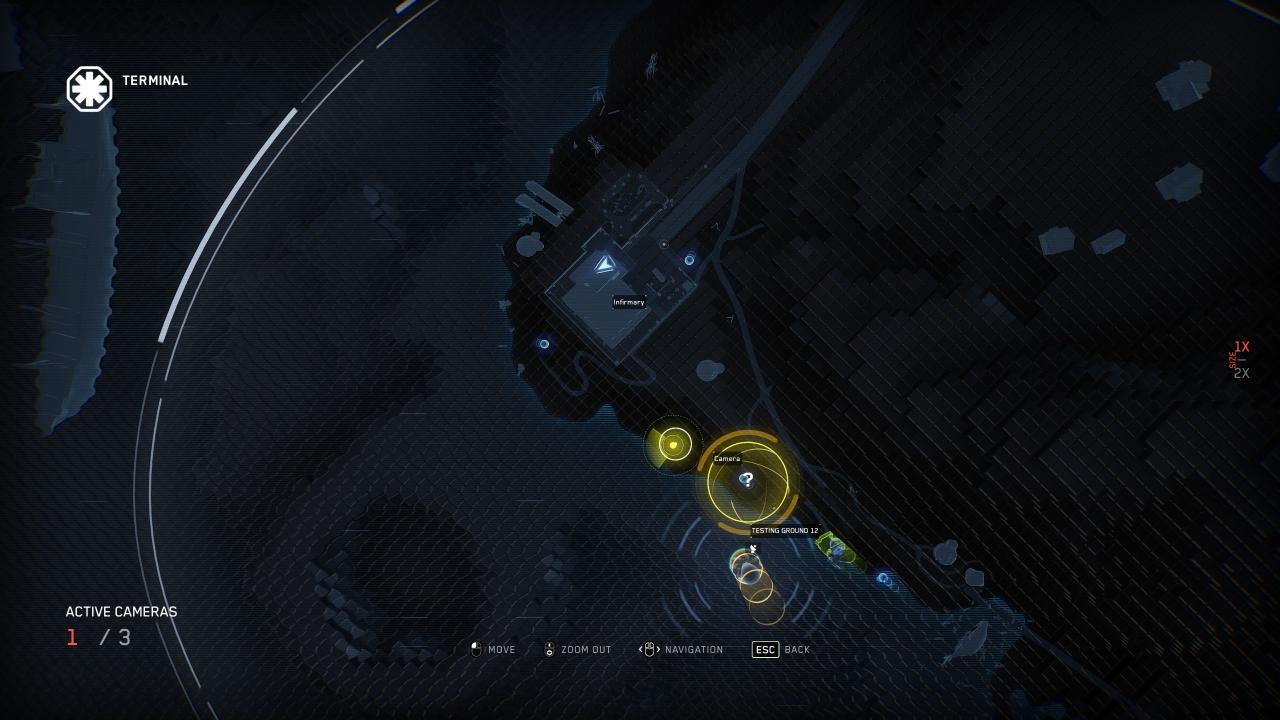
When you reach the Controller, interact with it using F. You will now see a top-down map of the area, showing all Cameras as yellow dots, destroyed ones as red dots, and unreachable ones as grey dots. Click on a yellow dot to take control of that camera, allowing you to see through it and also use Scan Mode (L ALT) with it. If a camera is unreachable, it means that it’s controlled by another Controller, and not the one you’re currently using.
Here is an image of the top-down interface:
—
 —
—
Continues in Step 2.
Step 2: Use Cameras to Find the Antenna Relay
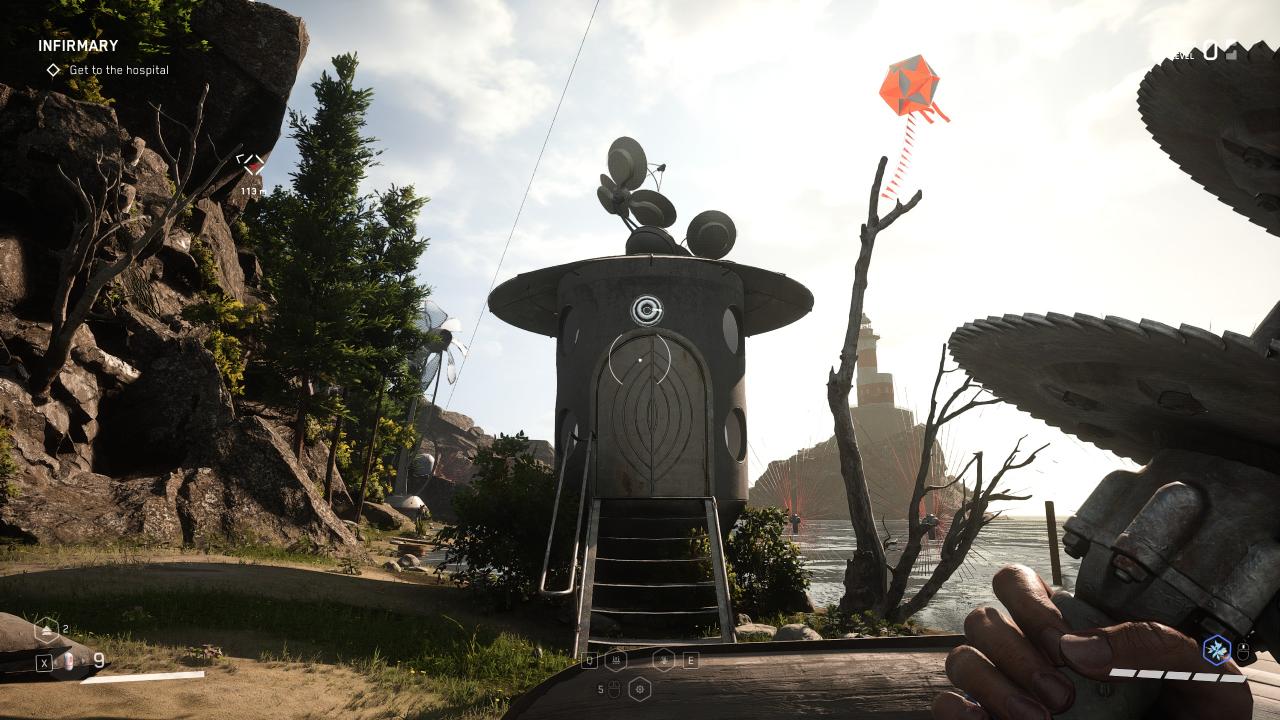
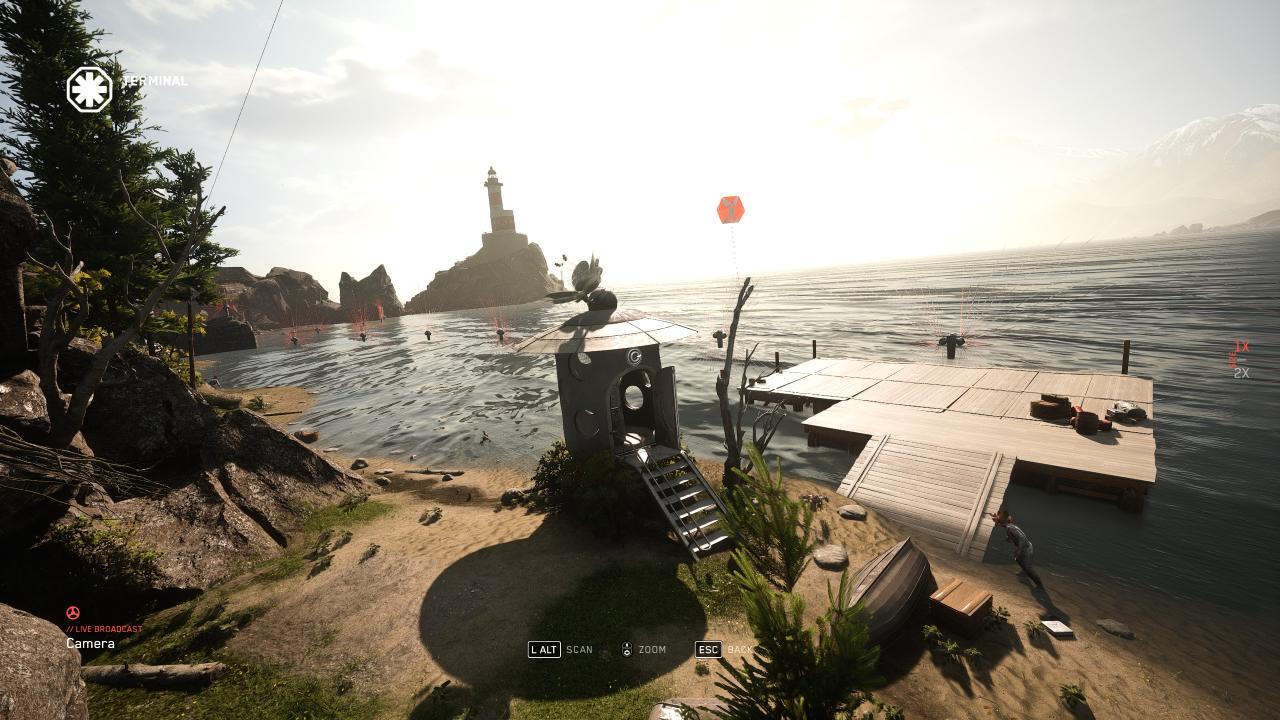
Once you have control of the cameras, you need to find the Antenna Relay. This structure is a small cylindrical grey hut with several rotating antennas on top of it.
Here is a picture of the Antenna Relay, it always looks the same:
—
 —
—
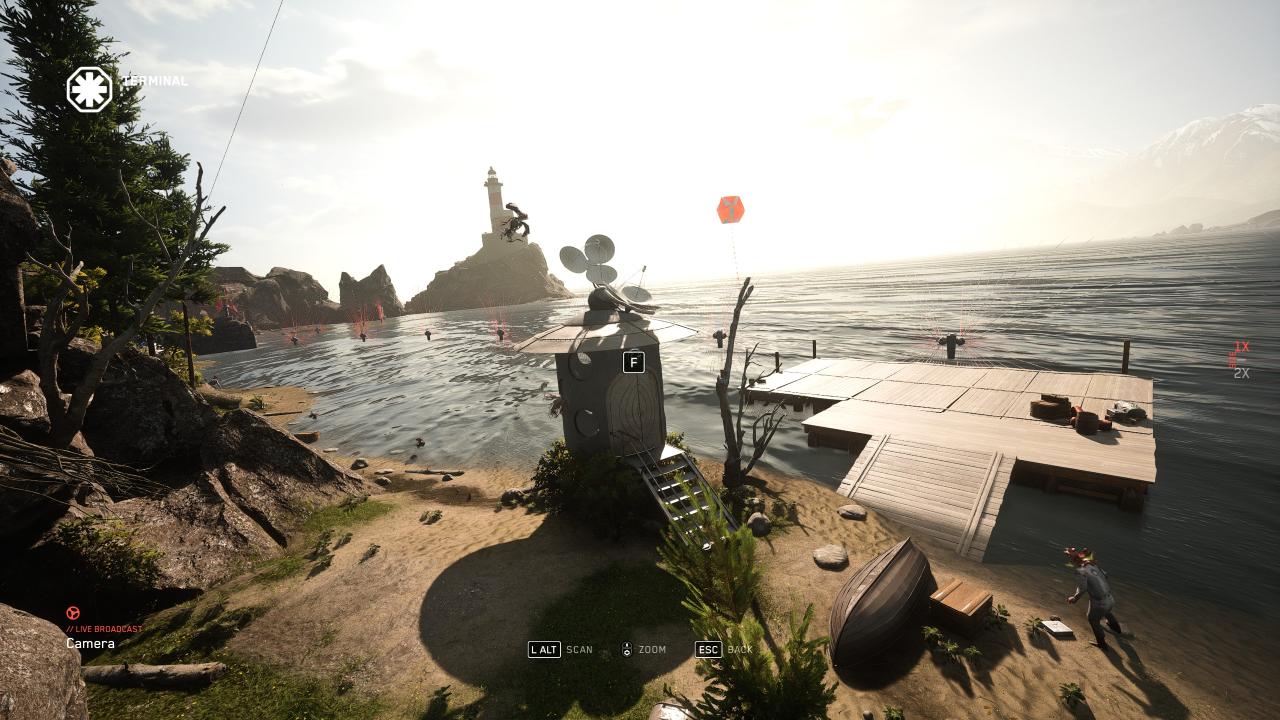
You’ll have to scroll through all the cameras until you’re able to see the Antenna Relay through one. Once you have it in your screen, put it in the center until you see a Use (Default: F) prompt:
—
 —
—
Press Use (F) and the door will open:
—
 —
—
When the door is open, you can leave the Controller and continue to Step 3.
Step 3: Enter & Overload the Antenna Relay
You now need to phisically enter the Antenna Relay. Remember where it’s located, and head there rushing past all enemies / stealth – if possible do not pick a fight and destroy any pursuers before entering the Relay. If you have an Alarm Level (top right) of 1 or 2 wait until it goes away, you don’t want to be interrupted while doing this.
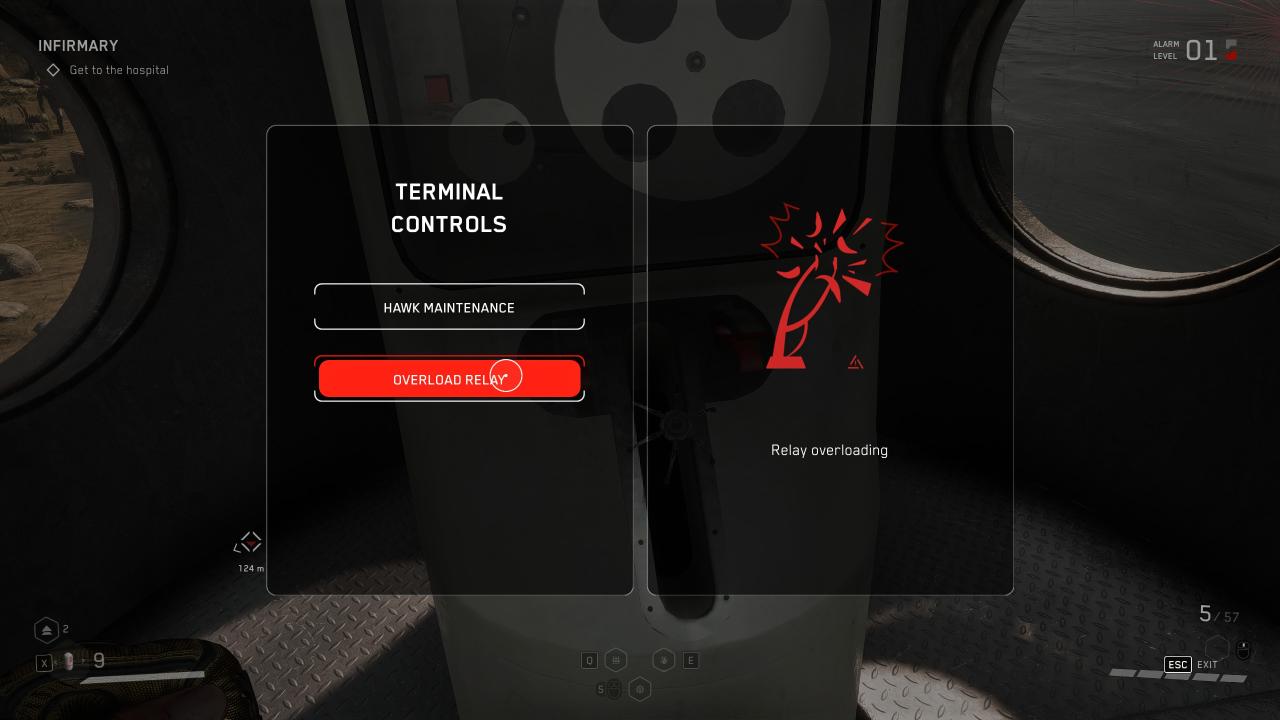
Enter the Antenna Relay hut and interact with the panel inside. After a brief cutscene, an interface will show:
—
 —
—
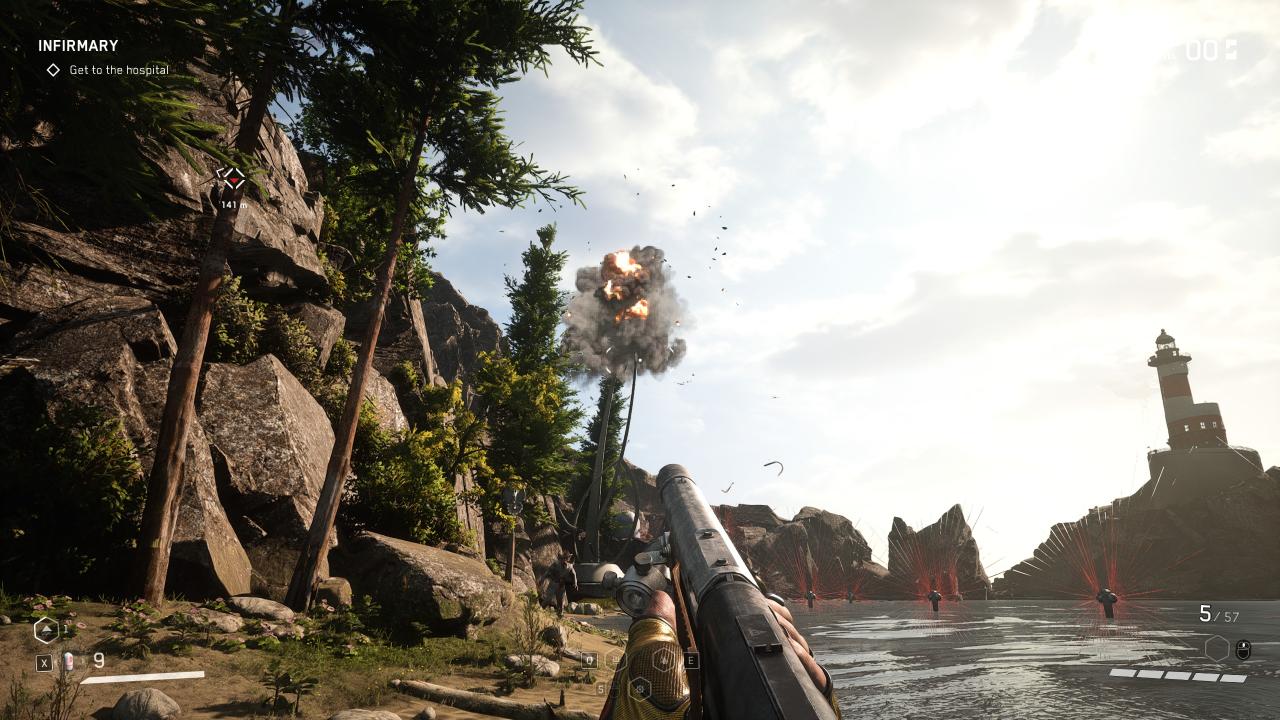
Select “OVERLOAD” – after about 10-15 seconds, you will hear an explosion in the distance and all robots, turrets and security cameras will turn off and stay immobile on the spot, within the white circle area of the map.
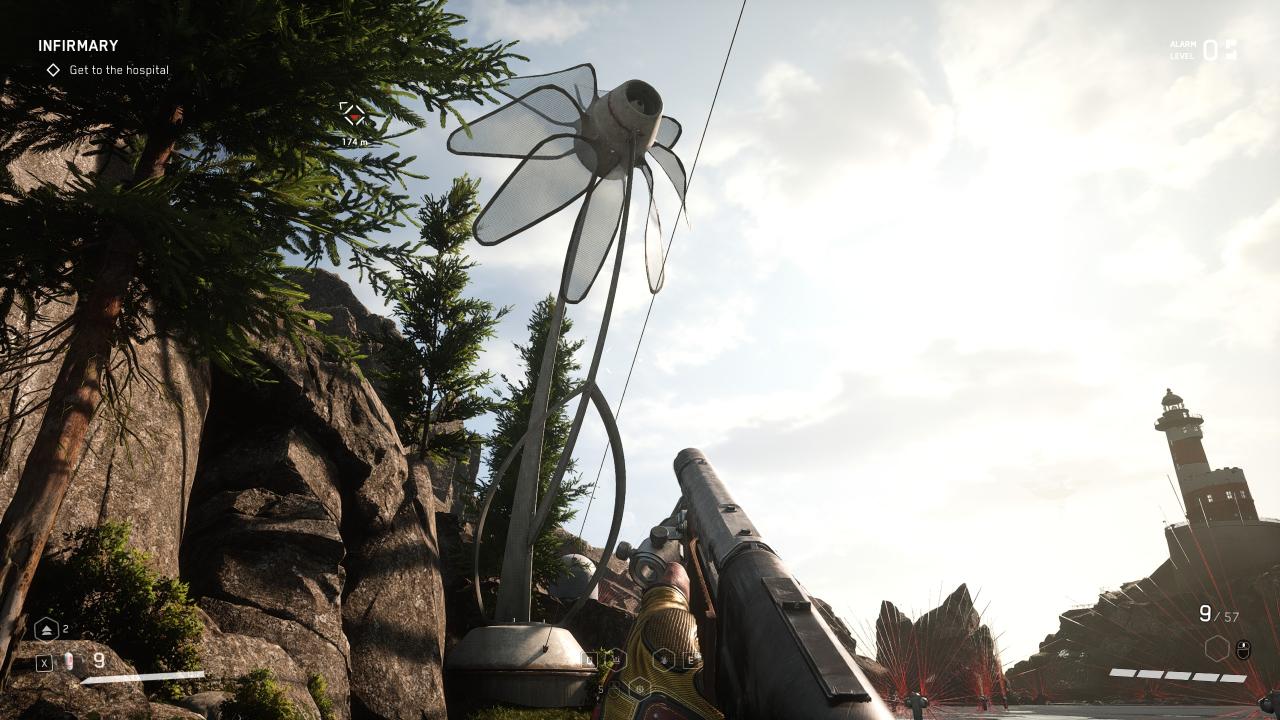
What you just did has destroyed the Turbine, which powers the robots:
Before:
—
 —
—
After:
—
 —
—
The turbine will be repaired in about 15 minutes or so – you can check the repair state by looking at it: when you see that the turbine looks “solid” and not made of blue energy, with most of the blades looking fine, it means it’s close to being fixed.
During this grace period all repairs and mechanical enemies will be suspended: you can explore with impunity, but watch out for Organic enemies, as they will be unaffected.
You can repeat the whole process unlimited times.
Related Posts:
- Atomic Heart How to Unlock Your FOV from 80
- Atomic Heart Uncensored Mod for Nu Pogodi Cartoon
- Atomic Heart How To Disable and Enable Skins
- Atomic Heart The Last Puzzle Guide
- Atomic Heart Save: At Baba Zina’s Hut (Game Pass)
