This guide will tell you how to edit your Abiotic Factor player save file to spawn in items, give yourself traits, and do some other stuff
Introduction
Do you hate the Leyak so much that the thought of spending another minute without an x-ray turret appalls you?
Or you’re so upset that you didn’t pick the Fanny Pack trait at character creation and now you’ve lived to regret it?
Maybe even want (subjectively) the ultimate weapon?Well fear not! All of the above is possible with the magic of save editing!*I haven’t checked if stacks of 10000 are possible.
Downloading Rust
Before we can get to the fun part, you’ll need to download the Rust programming language (relax, we won’t be writing any programs in assembly).
1- Go to https://rustup.rs/.
2- Install rustup-init.exe
3- Run rustup-init.exe
4- Command prompt will open now. If the message “Rust requires a linker and Windows API libraries but they don’t seem to be available” appears, proceed to the next step. If it does not, skip to step 8.
5- Press “1” and enter. Once the installer appears, you can accept the proposed settings.
6- Wait for the installer to finish installing.
7- Press “skip this for now” and then close the installer. Return to the command prompt.
8- Press “1” or “Enter” to proceed with the Rust installation. Wait for install to complete.
You should now see this message:

If you do, great! Rust is now installed.
Downloading (and using) uesave-rs
If you’ve ever tried to open Abiotic Factor’s .sav files, you would’ve noticed that they are composed almost entirely of human-unreadable (and worse, un-editable) digital non-unicode vomit.
Do not worry! We can use a program called uesave-rs to turn that digital vomit into a readable (and editable!) JSON file. While uesave-rs was originally made to cheat in Deep Rock Galactic, it works just fine for cheating save editing in Abiotic Factor as well.
Luckily, installing uesave-rs is much easier than installing Rust.
All you need to do is paste this into your command prompt:
cargo install –git https://github.com/trumank/uesave-rs.git
And that’s it! Just like that, uesave-rs is now installed and can be used.
You’ll notice that you’re not seeing an install wizard or any new app on your desktop. That’s because you’ll need to use uesave-rs from the command prompt as well.
To edit a save file, you’ll need to know where Abiotic Factor stores player saves.
These saves are found at:
C:/Users/{{faver}}/AppData/Local/AbioticFactor/Saved/SaveGames/{{76561198984427717}}/Worlds/{{whitemesa}}/PlayerData/
Note: parts of the file path written in double curly brackets vary (or at least probably) per person.
Now that you know where the player save file is stored, you can now edit it. Copy the player save file path from the savegame you would like to edit (or alternatively, simply copy the player save file itself). You will then need to type “uesave edit ” into the command prompt followed by the file path.
When you are done, it should look something like this:
uesave edit “C:\Users\faver\AppData\Local\AbioticFactor\Saved\SaveGames\76561198984427717\Worlds\whitemesa\PlayerData\Player_76561198984427717.sav”
Image attached for additional clarity:

Now the save editing can begin.
Changing how much of an item you have
The easiest way to save edit, you can change how much you have of an item (i.e., give yourself a stack of 9999 Magnum ammo).
First, press Ctrl+F and type in the ID of the item you want to edit. You will usually not know this ID, so type in some text that you think may be a part of the ID.
(i.e. If you want to find your Talagi Magnum, but don’t know the ID, typing “magnum” into the search bar would be a good place to start looking).
Let’s assume you’re like every player of this game ever, and want yourself more staplers. You have some in your inventory, but you need MORE. Type “stapler” into the search box, and it takes you the inventory slot responsible for holding your stapler(s). Scroll down a little and you’ll notice this section of text:
"CurrentItemDurability_4_24B4D0E64E496B43FB8D3CA2B9D161C8_0": {
                                      "Double": {
                                        "value": 100.0
                                      }
                                    },
                                    "MaxItemDurability_6_F5D5F0D64D4D6050CCCDE4869785012B_0": {
                                      "Double": {
                                        "value": 100.0
                                      }
                                    },
                                    "CurrentStack_9_D443B69044D640B0989FD8A629801A49_0": {
                                      "Int": {
                                        "value": 3
                                      }
                                    },
                                    "CurrentAmmoInMagazine_12_D68C190F4B2FA78A4B1D57835B95C53D_0": {
                                      "Int": {
                                        "value": 0
                                      }
                                    },
                                    "LiquidLevel_46_D6414A6E49082BC020AADC89CC29E35A_0": {
                                      "Int": {
                                        "value": 0
                                      }
                                    },
                                    "CurrentLiquid_19_3E1652F448223AAE5F405FB510838109_0": {
                                      "Byte": {
                                        "value": {
                                          "Label": "E_LiquidType::NewEnumerator0"
                                        },
                                        "enum_type": "/Game/Blueprints/Data/E_LiquidType.E_LiquidType"
Change the “value” part in it to whatever you like (though I have not tested going beyond quadruple digits). Make sure to not add a decimal point or your game will freak out and die. Miserably. Probably.After you’ve changed the stack size, save your edits to the JSON (top left under “File”) and close VSCode. You should be returned to the command prompt and uesave will write this message:
File modified, writing new save.
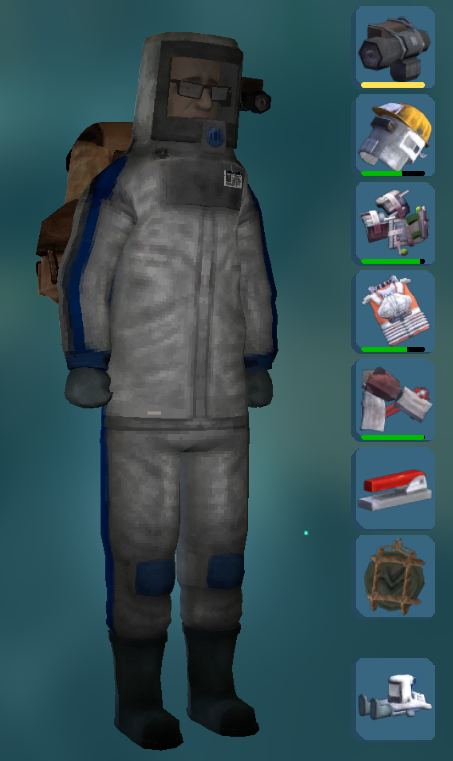
There you go! That means you should now have an absurd amount of staplers. (Or, alternatively, bricked your save depending on what you put in there). Example image of what this slot would look like:

Note: this can be done to any item, even things like weapons, which normally cannot stack, giving you, for example, ten shotguns in one slot.
Summoning items from the aether
More like transmuting items. The most obvious (though not necessarily the easiest) use for save editing.
First, load up your game and find a slot. Grab a low-value item (like a metal scrap) and place it in an empty slot. This will be the sacrifice (and I will refer to these kinds of items as such for the rest of the guide). After you’ve made enough filled slots with a sacrifice item, exit the save and return the main menu.
Afterward, open your save file in uesave using the same command we’ve used earlier.
Now, search for the ID of your sacrifice (in our case, “scrap_metal”).
Once you’ve found one, replace the “scrap_metal” with the ID of the item you want (let’s assume this is a material item, i.e. a stapler). Since we want to add a stapler, we will delete “scrap_metal” and write “stapler” in its place.
Now, set the “CurrentItemDurability” to 100.0. Set “MaxItemDurability” to 100.0 as well (do this for all items that cannot lose durability, like metal scrap, Kizz Cola, or personal teleporters).
After this, set “CurrentStack” to however many staplers you want (again, no decimals, and I haven’t tested quintuple digits).
If your item is not a liquid container and does not have a battery, then you should be done. If it has a battery, you need to scroll down to “CurrentLiquid” and find this part:
“Label”: “E_LiquidType::NewEnumerator0”
Change the 0 at the end of “NewEnumerator” to an 8. This will make the item’s current “liquid” be electricity.
Save your edits and close the VSCode window. You should receive the message from uesave again.
Note: sometimes your new items may be in unexpected locations if you replace something else!

Why the sacrifice? (and “ghost items”)
The sacrifice is necessary to prevent what I call “ghost items”. These “ghost items” are the result of creating an item with an incorrect Asset ID. The sacrifice’s Asset ID exists, and is always correct since it is made by the game. The Asset ID is nothing like the Item ID and it is just a long string of text and numbers. The “Empty”, however, (which represents an empty inventory slot) has it’s Asset ID always set to -1. Turning this “Empty” into, say, an antique shotgun, will result in a “ghost item”. Turning the sacrifice into an antique shotgun, however, will result in a regular item.
The only part of the ghost item that exists, for all intents and purposes, is the part of it that says “this inventory slot is occupied”. The ghost item otherwise cannot be seen, cannot be moved, cannot be equipped, cannot be interacted with, and cannot be destroyed*. Spooky!
*Cannot be destroyed from in-game.
Similarly to how “ghost items” can only be created through save editing, they can likewise only be destroyed through save editing.
First of all, find the “ghost item” by searching for its ID. Typically this ID will correspond to an item that you don’t see when you open your inventory in-game. Let’s assume our “ghost item” is an antique shotgun (“shotgun_doublebarrel”) with two shells in it.
First, change “shotgun_doublebarrel” to “Empty”.
Then, you should change both “CurrentItemDurability” and “MaxItemDurability” to 0.0
When that’s changed, change “CurrentStack” to 0
After that, change “CurrentAmmoInMagazine” to 0
This should revert your “ghost item” antique shotgun into an empty slot that can now store things like staplers.
However, for “ghost items” that have batteries or are liquid containers, you will need to do this as well:
Change “LiquidLevel” to -1, then scroll down a little bit until you see “CurrentLiquid”.
It should have a part that says this:
“Label”: “E_LiquidType::NewEnumerator0”
If it does not say that, change the number at the end of “NewEnumerator” to 0.
This should revert it back to an “Empty”.
Giving yourself a new trait
You probably didn’t pick the Fanny Pack trait on your first playthrough. Let’s fix that.
Type “trait” into the search box. This should take you to a small section of text. It should something like this:
              "Traits_15_0039F2B34D2A43327122E9960B328E55_0": {
                "Array": {
                  "array_type": "NameProperty",
                  "value": {
                    "Base": {
                      "Name": [
                        "Trait_Dry",
                        "Trait_WrinklyBrainmeat",
                        "Trait_ThickSkinned",
                        "Trait_Gardener",
                        "Trait_SelfDefense",
                        "Trait_WeakBladder"
Add a comma to the last trait and then press enter to make a new line.
Afterwards, type your desired trait ID. (Usually “Trait_” followed by the name of the trait, though sometimes the name might not be what’s used in the trait ID)
Let’s assume you want to give yourself the Fanny Pack trait. On the new line, type “Trait_FannyPack”. The end result should look something like this:
              "Traits_15_0039F2B34D2A43327122E9960B328E55_0": {
                "Array": {
                  "array_type": "NameProperty",
                  "value": {
                    "Base": {
                      "Name": [
                        "Trait_Dry",
                        "Trait_WrinklyBrainmeat",
                        "Trait_ThickSkinned",
                        "Trait_Gardener",
                        "Trait_SelfDefense",
                        "Trait_WeakBladder",
                        "Trait_FannyPack"
Now save the file and close out of VSCode.
Good job! Now, when you load into the game, you should see that you have 2 extra hotbar slots and a new trait.
Creating the Magnum of Gods, Destroyer of Game Balance
Could be any ~sth of Gods, Destroyer of Game Balance, but we’ll just do the magnum. The antique shotgun would be a close second, though.
Let’s start by finding our sacrifice. Again, let’s assume the sacrifice will be a metal scrap. Type “scrap_metal” into the search box and find your victim.
Once you’ve found a “scrap_metal”, replace the “scrap_metal” with “magnum_military”.
Once you’ve done that, find the section that stores the info about the item.
Since being capable of breaking is bad for our magnum, we can set both “CurrentItemDurability” and “MaxItemDurability” to 9999.0. While it’s not unbreakable per se, it’s close enough.
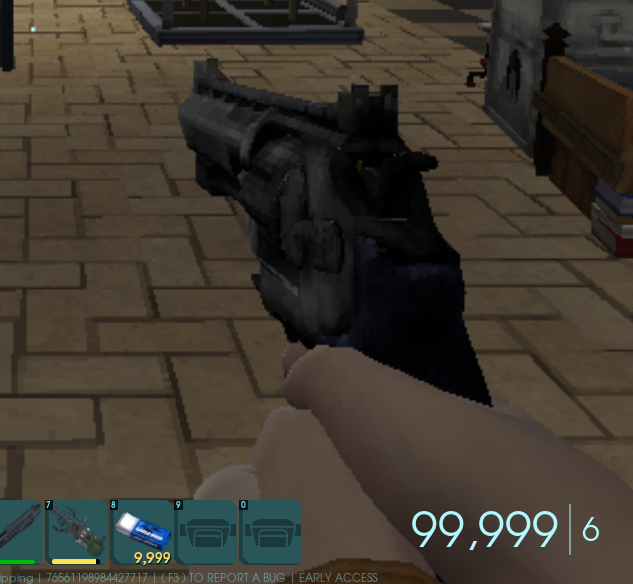
Now, the regular magnum is balanced out by needing to reload and a limited ammo supply. We can fix both by simply setting “CurrentAmmoInMagazine” to 99999 (no decimals!). While, yes, technically the magnum does need to reload, you’ll probably have opened the Vacuum Chamber door and talked to the Sister of the Unlost by the time time you get through half the clip.
Afterward, simply save your edits and close the editor. Once you load in, you will be in possession of an affront to game balance.

List of Item IDs
This is a list of ID’s of items I have picked up during my playthrough of Abiotic Factor that you can use for save editing. While this isn’t a comprehensive list, it does contain the ID’s of most items. Unlabeled because of per-section character limits.
“brick_power”,
“scrap_metal”,
“harddrive”,
“casefan”,
“circuitboard”,
“powersupply”,
“scrap_tech”,
“weapon_pipe”,
“ducttape”,
“scrap_cloth”,
“gib_carbuncle_carcass”,
“scrap_bio”,
“Deployable_Toolbox”,
“Screwdriver”,
“Empty”,
“pipe_metal”,
“PressureGauge”,
“flashlight_basic”,
“knife”,
“fryingpan”,
“food_porkchop”,
“scrap_plastic”,
“scrap_paper”,
“weapon_deskleg”,
“woodplank”,
“Deployable_Bench_Crafting”,
“bandage”,
“gib_peccary_chop”,
“gib_peccary_leg”,
“gib_peccary_skull”,
“Deployable_Medkit”,
“splint”,
“syringe”,
“iodinetablets”,
“food_carbuncle_carcass_cooked”,
“scrap_glass”,
“Deployable_FilingCabinet_Large”,
“gigaglue”,
“coil”,
“Oil”,
“rubberbands”,
“waterbottle”,
“Deployable_FilingCabinet_Huge”,
“Container_LootSpillBag”,
“money”,
“Chair_Office_03”,
“armor_helmet_hardhat”,
“screws”,
“Deployable_GaseousNest”,
“armor_chest_leadvest”,
“magazines”,
“Deployable_Desk_Executive_01”,
“Deployable_Desk_02”,
“stapler”,
“Pens”,
“cafeteriatray”,
“Deployable_FilingCabinet_Small”,
“food_chips”,
“soda_d”,
“cpu”,
“armor_legs_makeshift”,
“armor_helmet_makeshift”,
“battery_makeshift”,
“acid”,
“plugstrips”,
“anvil”,
“hammer”,
“backpack_security”,
“Book”,
“armor_arms_makeshift”,
“soilbag”,
“hose”,
“beaker”,
“Deployable_DeskLamp_01”,
“plasticshield”,
“Deployable_FilingCabinet_Medium”,
“Keyboard”,
“phone”,
“soda_a”,
“soda_b”,
“soda_c”,
“alienwheat”,
“seed_wheat”,
“seed_antelight”,
“brick_cpu”,
“enethiol”,
“Deployable_TrashCan_Small”,
“Deployable_TrashCan_01”,
“food_cannedpeas”,
“salt”,
“anomaly”,
“gib_pest_tail”,
“gib_pest_body”,
“Deployable_Bench_Repair”,
“Controller”,
“infrared_emitter”,
“glowstick”,
“lcd_screen”,
“keypad_hacker”,
“Deployable_GardenPlot”,
“Deployable_MakeshiftStove”,
“food_pest_tail_cooked”,
“food_peccary_chop_cooked”,
“food_peccary_leg_cooked”,
“Deployable_WaterCooler”,
“Crossbow”,
“ammo_bolt”,
“Deployable_Couch_Office_Long_01”,
“food_mre”,
“suit_hazmat”,
“Deployable_Magazine_Stand”,
“powercell”,
“TrashCan_Park”,
“Deployable_WarningSign”,
“pistol_pipe”,
“ammo_scrapshot”,
“pistol_security”,
“ammo_9mm”,
“pistol_security_flashlight”,
“ratscanner”,
“Ramp_Small”,
“food_pest_body_cooked”,
“gib_exorheart”,
“bucket_plastic”,
“cementbag”,
“geigercounter”,
“rebar”,
“gib_human_arm_mil”,
“scrap_military”,
“Deployable_Fridge”,
“toilet_makeshift”,
“feces”,
“Bed_Tier1”,
“fireextinguisher”,
“aircanister”,
“club_fire”,
“smg_military”,
“gib_human_skull”,
“food_brain”,
“ammo_Magnum”,
“magnum_military”,
“crackedlight”,
“armor_helmet_beret”,
“backpack_radio”,
“scrap_leather”,
“steelcable”,
“Deployable_CementBagWall_Block”,
“barricade_office”,
“Deployable_CementBagWall_Straight”,
“pickaxe”,
“woodplank_reinforced”,
“storagecrate_makeshift_t2”,
“vacuum”,
“armor_chest_highvisvest”,
“backpack_medium”,
“armor_chest_forge”,
“hose_reinforced”,
“armor_helmet_weldingmask”,
“crowbar”,
“keypad_hacker_t2”,
“powderedcrystal”,
“chains”,
“ammo_disc”,
“aircompressor”,
“disc_launcher”,
“armor_helmet_military”,
“armor_arms_blacksmithinggloves”,
“armor_helmet_forge”,
“armor_arms_forge”,
“armor_legs_forge”,
“Deployable_Couch_Office_Medium_01”,
“HandDrill”,
“tramkey”,
“pipewrench”,
“armor_arms_biometric”,
“pocketwatch”,
“tinygears”,
“silverchain”,
“SledgeHammer”,
“grease”,
“batterycharger”,
“scrap_silver”,
“briefcase”,
“cookingpot_makeshift”,
“battery_industrial”
List of Item IDs (Continued)
“soup_solder_raw”,
“soup_solder”,
“solder”,
“cookingpot”,
“cable_fibre”,
“healingkit”,
“Lens”,
“headlamp_default”,
“diode”,
“fryingpan_makeshift”,
“food_exorheart_cooked”,
“Deployable_Barrel”,
“SoupBowl”,
“soup_uncooked_random”,
“soup_meatystew”,
“JumpPad”,
“gunrepairkit_t1”,
“Deployable_CementBagWall_Curve”,
“Deployable_CementBagWall_HalfCurve”,
“essence_leyak”,
“Deployable_Chair_Office_01”,
“net_launcher”,
“net”,
“Cabinet_Vintage”,
“Chest_Vintage”,
“capacitor”,
“ExorQuill”,
“gib_exor_arm”,
“refinedcarbon”,
“gem”,
“ammo_12g”,
“seed_greyeb”,
“burner”,
“ProjectionMatrix”,
“megalight_turret”,
“backpack_rat”,
“screwdriver_makeshift”,
“electrothrower”,
“Cabinet_Lab_01”,
“armor_helmet_gasmask”,
“gib_pecmushroom_skull”,
“ChargingStation”,
“food_milksac”,
“gib_sow_skull”,
“plugboard”,
“armor_legs_labs”,
“food_mushroom”,
“shotgun_military”,
“cpu_purple”,
“soda_anom”,
“food_nachos”,
“Desk_Lab_01”,
“soup_glue_raw”,
“quantumglass”,
“soup_glue”,
“brick_memory”,
“keypad_hacker_t3”,
“battery_carbon”,
“soup_armandleg”,
“icecream”,
“food_rootbearfloat”,
“gib_symph_skull”,
“scrap_composer”,
“money_stack”,
“Deployable_Chair_Executive_01”,
“storage_hazardcrate”,
“armor_helmet_breacher”,
“suit_ratsuit”,
“barrel_crafted”,
“Deployable_WaterFilter”,
“personalteleporter”,
“distribution_pad”,
“suit_fire”,
“armor_stand”,
“Deployable_GardenPlot_Medium”,
“armor_helmet_medic”,
“scarecrow_symph”,
“lever”,
“trinket_geigercounter”,
“organ”,
“Deployable_Table_Cafeteria”,
“PestTrap”,
“GravityCube”,
“shotgun_doublebarrel”,
“trinket_gravitycube”,
“standing_lamp”,
“TeslaCoil”,
“CableReroute”,
“armor_legs_bionic”,
“heater”,
“Bench_Locker”,
“techshield”,
“spear_tech”,
“TV”,
“oar”,
“Armchair_Tall_Fancy”,
“sword”,
“food_tomato”,
“seed_tomato”,
“kiteshield”,
“Chair_Beanbag_01”,
“food_potato”,
“megalight”,
“syringe_acid”,
“ichor”,
“gib_tarasque_skull”,
“gel”,
“Carapace”,
“seed_ropeplant”,
“armor_hat_baseball”,
“carbonplating”,
“armor_helmet_labs”,
“armor_chest_labs”,
“powerdrill”,
“AlienThermite”,
“Deployable_DiscTurret”,
“soup_toxic”,
“Deployable_Antelight_GRN”,
“seed_antelight_GRN”,
“fig_exor”,
“Deployable_ConstructionLights_01”,
“glowshard”,
“backpack_large”,
“laser_reflector”,
“storagecrate_makeshift”,
“armor_helmet_chefhat”,
“frag”,
“Deployable_Couch_Office_Armchair_01”,
“food_cookie”,
“seed_supertomato”,
“PlantFood_T2”,
“key_ornate”,
“Cabinet_Fancy”,
“umbrella”,
“canesword”,
“Desk_Fancy_01”,
“Chair_Fancy_03”,
“cushion”,
“Armchair_Vintage”,
“Crate_HOrnate”,
“trinket_order”,
“Ammo_308”
Thanks to SirRZN for their excellent guide; all credit belongs to their effort. If this guide helps you, please support and rate it here. Enjoy the game.
Related Posts:
- Abiotic Factor: FAQ for New Crush Depth Update
- Abiotic Factor: How to Disable Lumen and Boost FPS
- Abiotic Factor: Secret Loot Boxes Location
- Abiotic Factor: How to Get to Distant Shore
