For The Callisto Protoco players, while the game may lock optimization overall, it is still entirely playable on Steam Deck! And I’d know: I just recently completed the game!
The Preface
There’s no denying that at this current time, the game needs some optimizations. However, some of you, like me, love the Steam Deck! That means there would be nothing more joyous than some handheld horror, and let me tell you: it works just fine!
Some things are worth noting: don’t target more than 30fps. The Steam Deck is powerful, but not THAT powerful, and graphically intense games like this just aren’t going to run a full 60fps.
Secondarily, I spent HOURS trying to find the best balance between visual quality and framerate stability. It’s not perfect, mind you: you WILL still have areas of heavy framerate dips, but the game looks good enough to use as the perfect excuse to show off the Steam Deck to your friends and one of THE best looking games you can run on it, period!
Without further ado, let’s get into the settings complete with notes should you decide to change your priorities!
The Settings
As mentioned, don’t bother trying to go for 60fps. It won’t be stable even if you set everything to its lowest and make the game look like garbage. You’ll get 60fps looking at a wall or the floor, but once anything is happening, it’ll drop. Instead, turn on v-sync in the game and set the framerate to 30. From there, here are the settings to get the most out of your experience!
DISPLAY
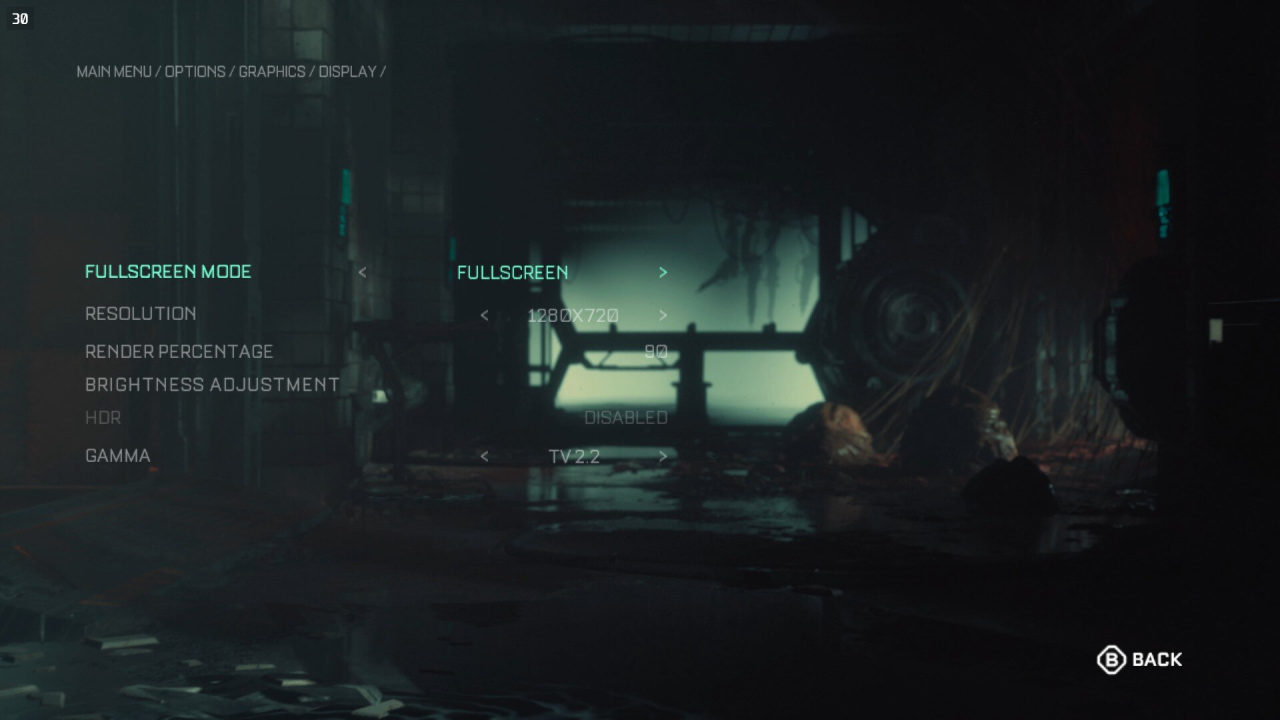
First and foremost, the game will set itself to either 1280×720 if you’re docked, or 1280×800 if you’re handheld. You’ll want to change it to 1280×720 even if you’re handheld as the game does NOT support 1280×800 and you’ll have wasted black bars.
The resolution render percentage is THE biggest framerate factor. In fact, even though I’ve set it to 90, I’ve found that in handheld mode, you can go down to 80 with virtually no discernible difference AND get a more stable framerate (I had to flip between two screenshots to tell the res difference). I DO want to note that due to the resolution, some text will be hard to read. The usual Steam Deck warning some of us know very well lol
And finally, I found that the default gamma was just ridiculously over-contrasted, and that TV 2.2 provided the best overall image quality between light and dark. It’s almost like a post-process color grading and HDR effect combined.
LIGHTING
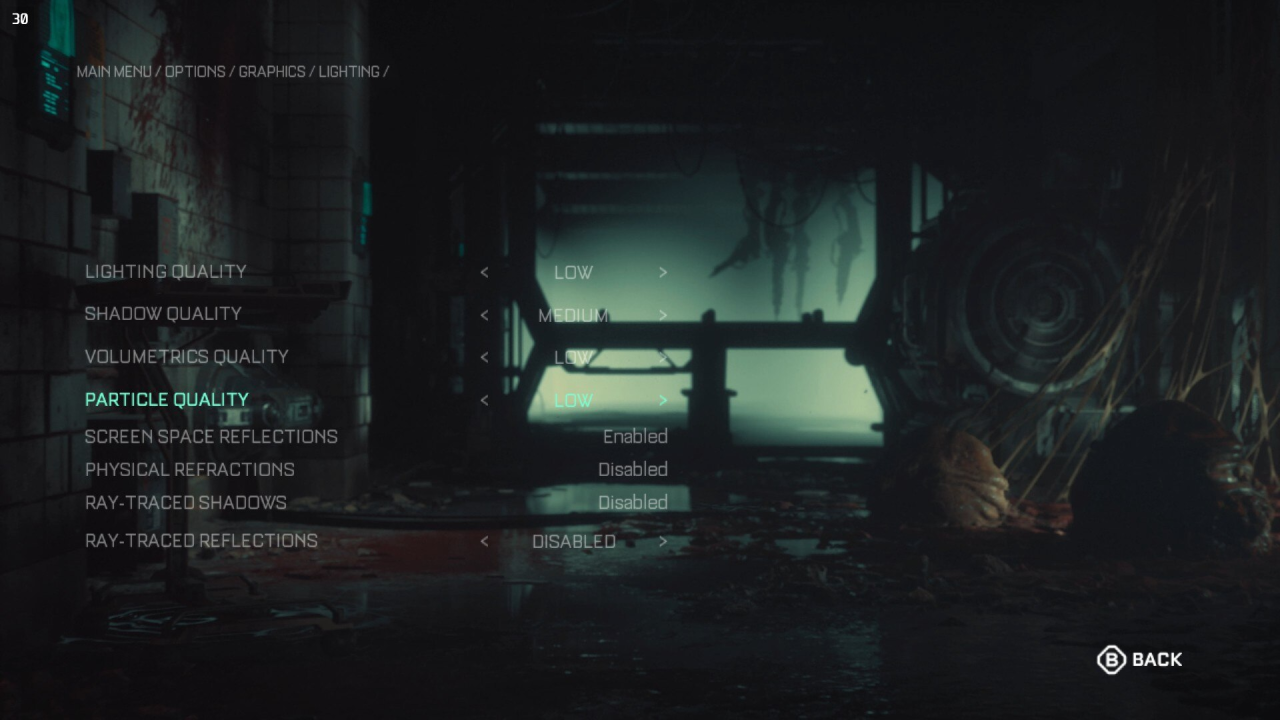
This area contains the most GPU heavy things, and I found I could really only turn up shadow quality without noticing MAJOR dips in framerates all too often.
Physical refractions and ray-tracing are pretty much out of the question. Though, if you’ve dropped to 80% resolution scale in the last section, you could possibly afford physical refractions with a pretty small hit of about 2-3fps. Then again, when you’re capped at 30fps, just a few fps can make all the difference, so my recommendation remains firm.
EFFECTS
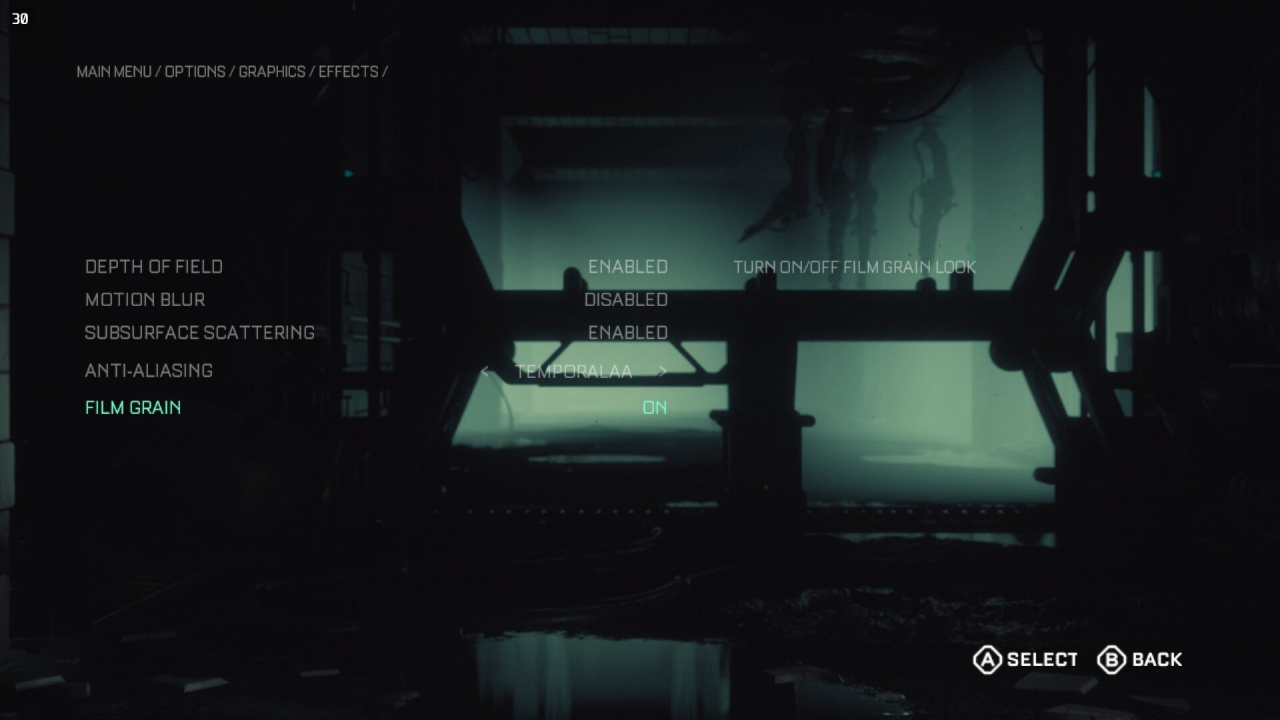
There’s not a lot to fiddle with, here. You’ll want to disable motion blur, though: we’ll be using both temporal AA and temporal rendering which both cause lots of motion blur on their own. If you add motion blur, it just looks terrible. In addition, you WILL want to use temporal AA: it’s what provides the best image quality overall despite running slightly below 720p. It’s what also allows you to drop the render percentage even to 80% with virtually no discernible difference. Subsurface scattering is also something you’ll want: it’s what makes their skin look soft and touchable. Dude, trust me!
Lastly, I normally HATE film grain, but here, it helps fill in the image with a sort of “texture”. This helps masks some things from the last settings section.
ADVANCED
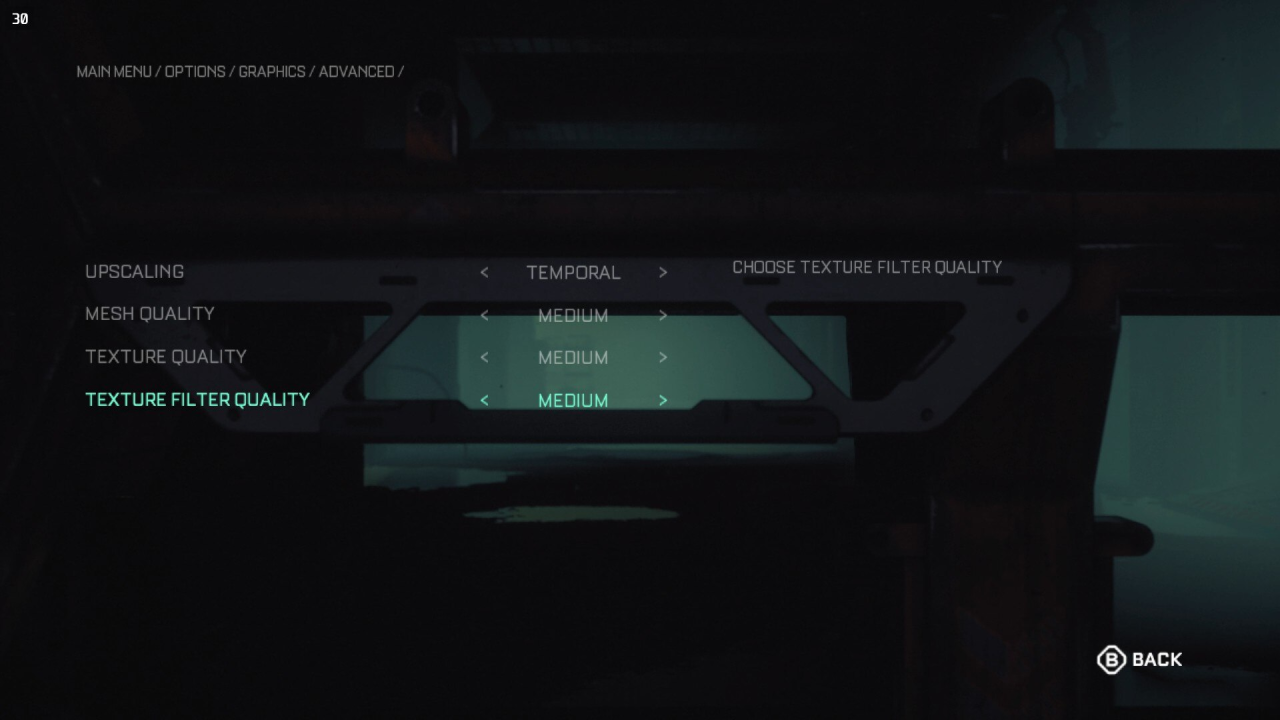
Here are THE core settings to the game’s graphics. Set the upscaling to Temporal: don’t bother with the FSR settings as they ALL look TERRIBLE or perform WORSE than the in-engine upscale method. You can fiddle with this, but you’ll find out very quickly that none of the FSR settings come close to the performance and visual quality of the temporal upscale (it’s the same method used in Killzone Shadowfall!).
Mesh quality is your overall graphical quality of the game, and Medium is actually the lowest setting (yes, I know lol). Textures and filtering are both fine at Medium as well, and allow for textures like carbon fiber on the armor to be rather distinct. Combined with the film grain from above, you’ll even be able to take some very worthy screenshots!
And that’s that, you’re ready to get cooking!
