A guide for (almost) every location of the new Gas City Sentient Labs as well as their accompanying access controllers and control panels.
Secret Labs?
If you haven’t completed the Second Dream you probably don’t want to go through this guide. Slight spoilers ahead.
The remaster of the Gas City brought new map secrets for us to explore, with one of those secrets being the new Sentient Labs that can be found on various tiles on Jupiter. These labs are available on specific tiles with a 100% spawn chance on the tiles they have been found on. I don’t know what the spawn chance is per map.
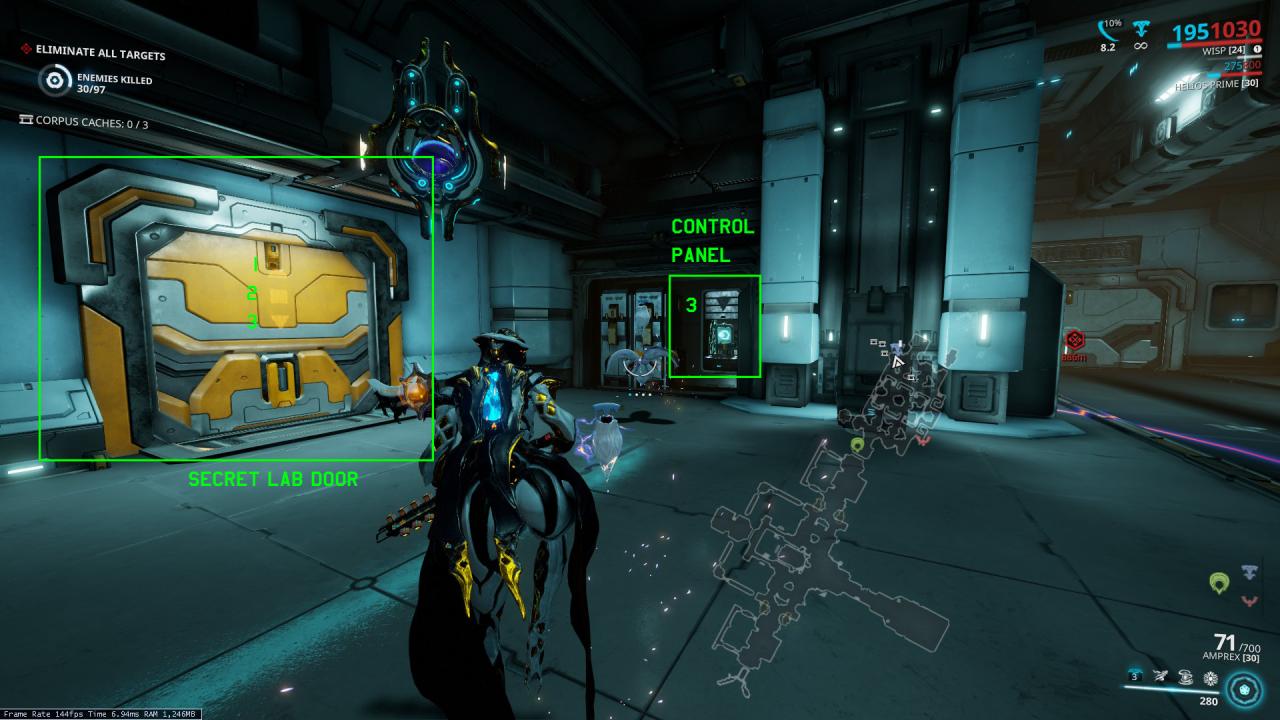
These labs can be found either by locating an access controller, a hidden control panel, or the yellow door of the lab itself. There are many yellow doors, but the one you’re looking for has orange symbols on the front. There are screenshots attached later on to show you what these look like.
Once opened, each Sentient Lab contains a purple locker which contains one of the 13 new Gas City Captura Scenes, and the drops seem to be random. Once inside, you can see another door through which the lab itself is visible. To get inside, one must use the Operator void beam on the door. Once inside, there might be one or two Corpus scientists, along with Amalgams currently not found anywhere else on Jupiter. Shooting the hanging or immobile Amalgams wakes them up and allows you to scan them for some rare codex entries. There is also a single Conculyst, which you may also fight by breaking its containment. Finally, there is another purple locker inside, which holds another Captura Scene, bringing you to a total of two random Capturas per Secret Lab found. Supposedly the rare Amalgams also drop some of the new gold mods, but I haven’t been able to confirm that at all.
Things to keep in mind:
- You do not need to find every secret lab in the Gas City for any sort of ingame achievement. There are only 3 different secret labs and 13 Capturas, all of which are randomized in the labs. Theoretically, you only need to know a single one and repeat it and you can obtain every Captura, mod, and codex entry.
- If you find any of the three signs of a secret lab on a tile (the door, control panels, or the access controller), that means the lab is guaranteed to spawn on that tile and future visits to that tile.
- The number of symbols on the door tells you the amount of panels to look for, as well as the order inn which they need to be pressed. The order is always the same depending on the tile you are on. Do it once, and you’ve figured it out for the next hundred times you try.
- The very last control panel will always be somewhere near the door itself, so if you’ve found the door, at least one of the control panels isn’t far away!
- Every piece of the puzzle that you need to open a lab is on the same tile. You don’t have to look across the map for these things- the lab, as well as every panel, is found in that same tile. Just hope it’s not a huge one…
For the sake of this guide, I’ll give the rooms my own names in order to keep track of them if they don’t have names given to them in Capturas already. These labs aren’t in any particular order. “Briggs, why are your images kinda wonky?” I took the types of screenshots that would help me personally orient myself on an unfamiliar tile. I’m sure there are also video guides out there that can also help, should this type of guide not be your cup of tea.
Office Lab
Creative name, isn’t it?
Number of panels required: 3
The location of the Access Controller is near the center of the room, in the ceiling. There is a gap between the machinery and the circuitry, and it’s sitting on the side with the circuitry:
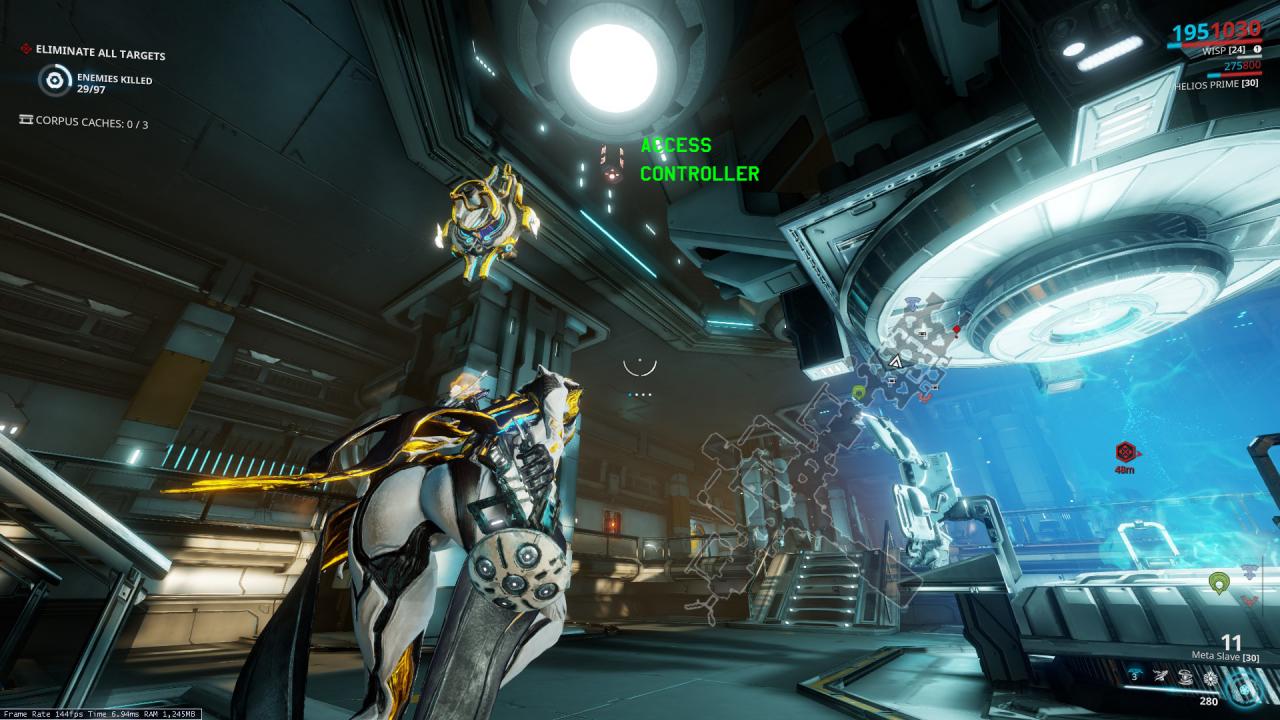 The first control panel is found in the corner of the room, hidden behind a staircase:
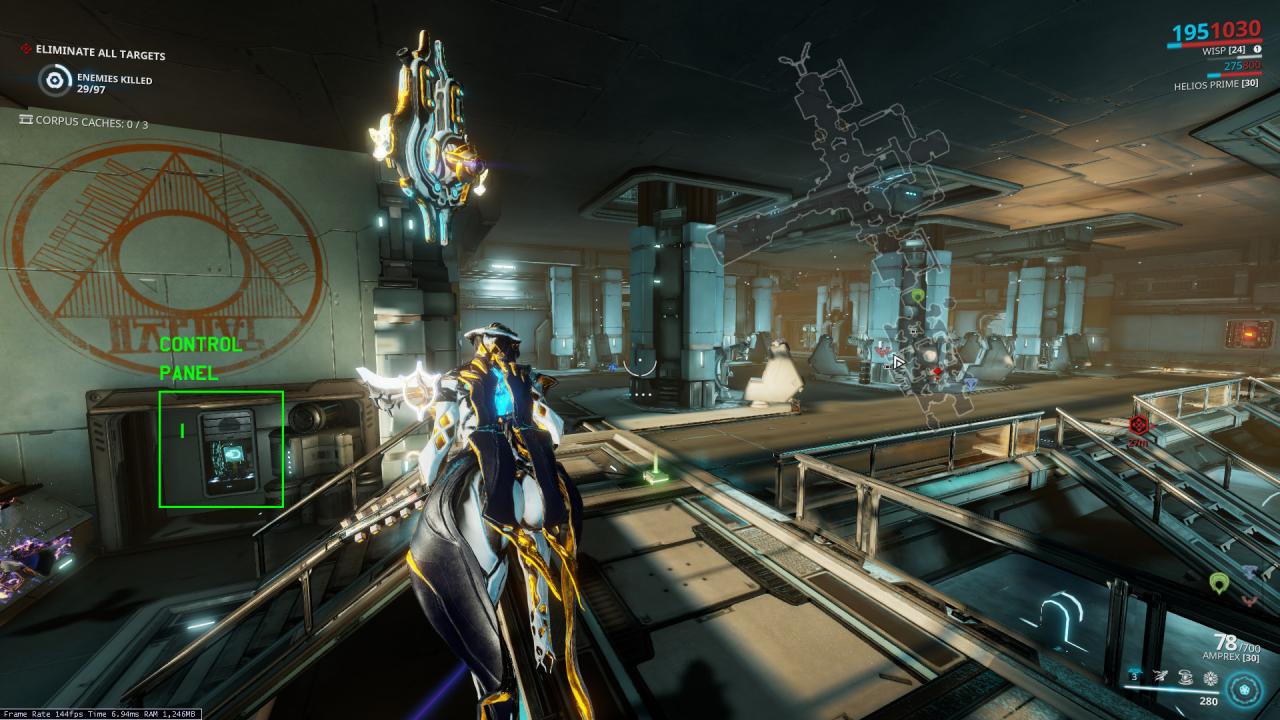 The second control panel is located on the opposite side of the room from the lab’s door, in a hallway:
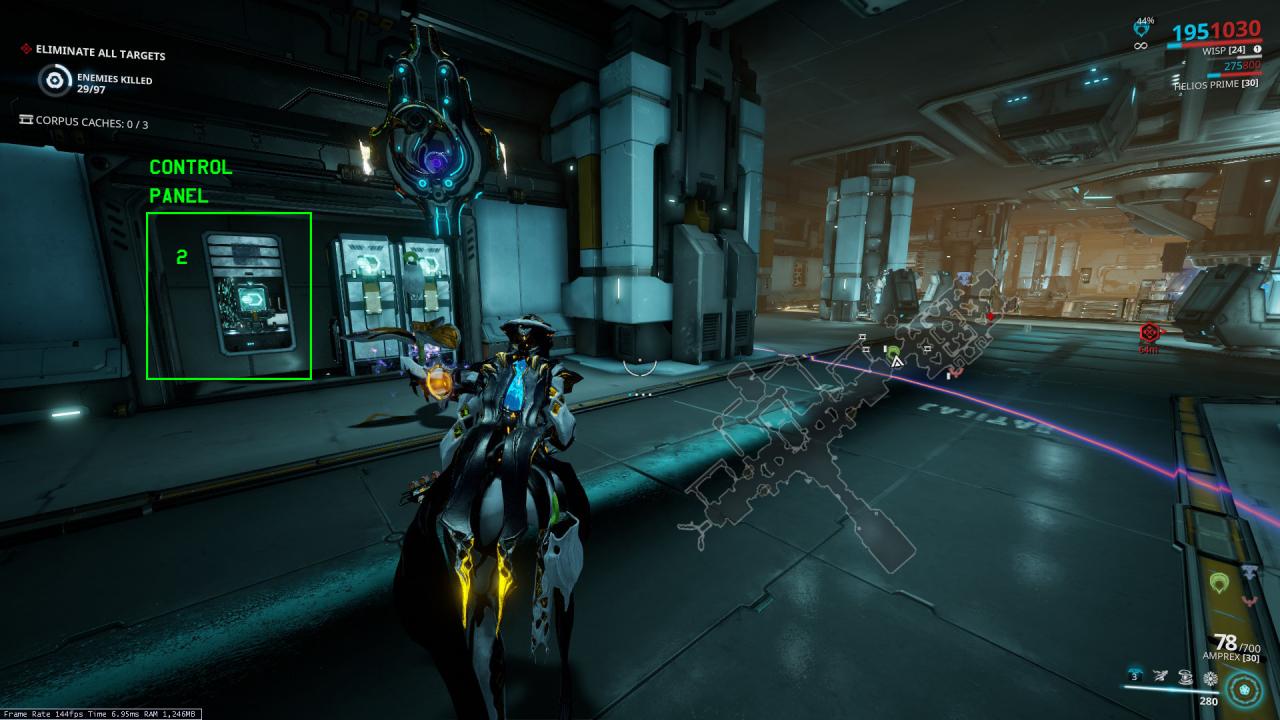 The third control panel is found directly in front of the door, across the room from the second control panel:
Capacitor Lab
Number of panels required: 3
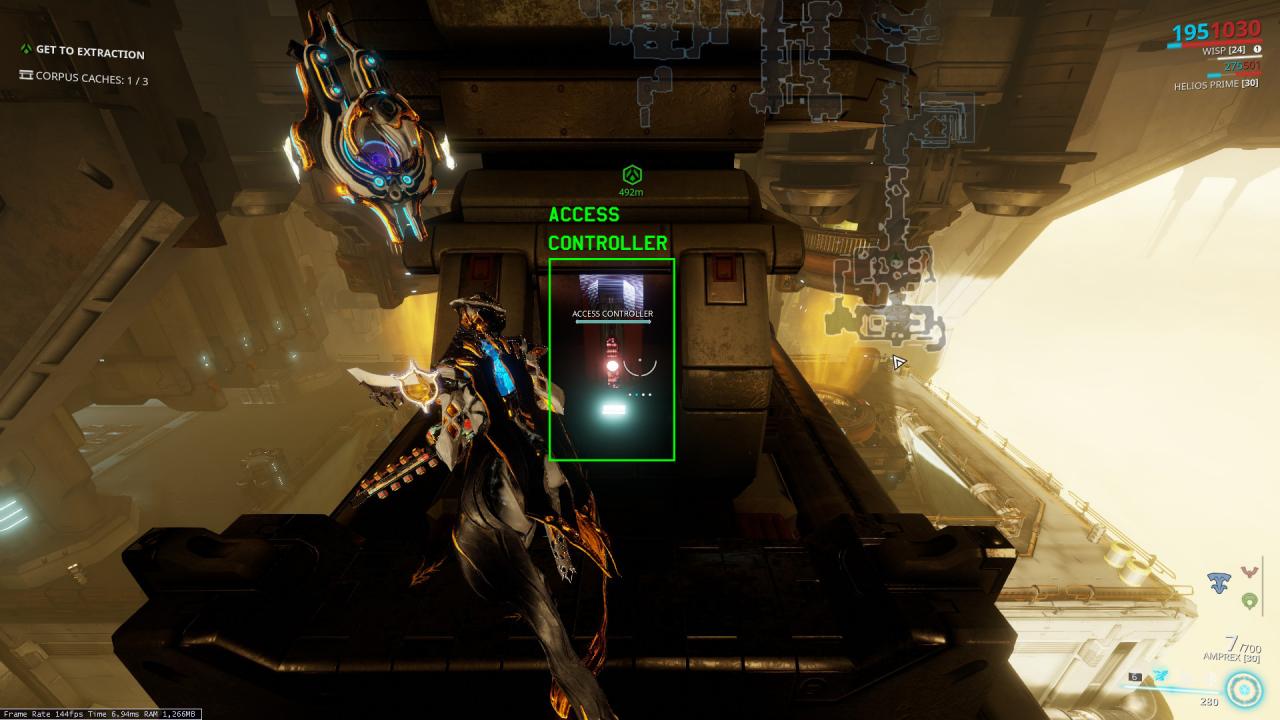
The Access Controller is located near the top of the tile, at the end of the big pipes near the ceiling, hanging over the edge of the tile:
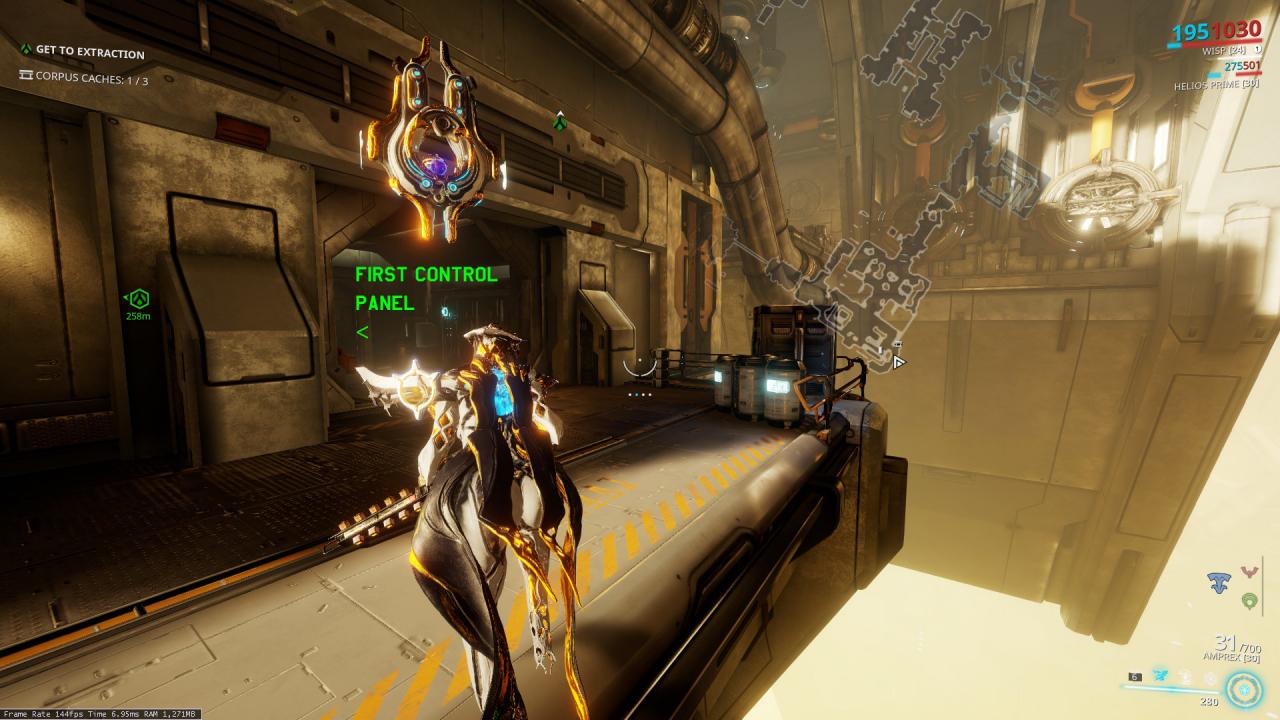
 The first control panel is off on the edge of the tile, in a small room:
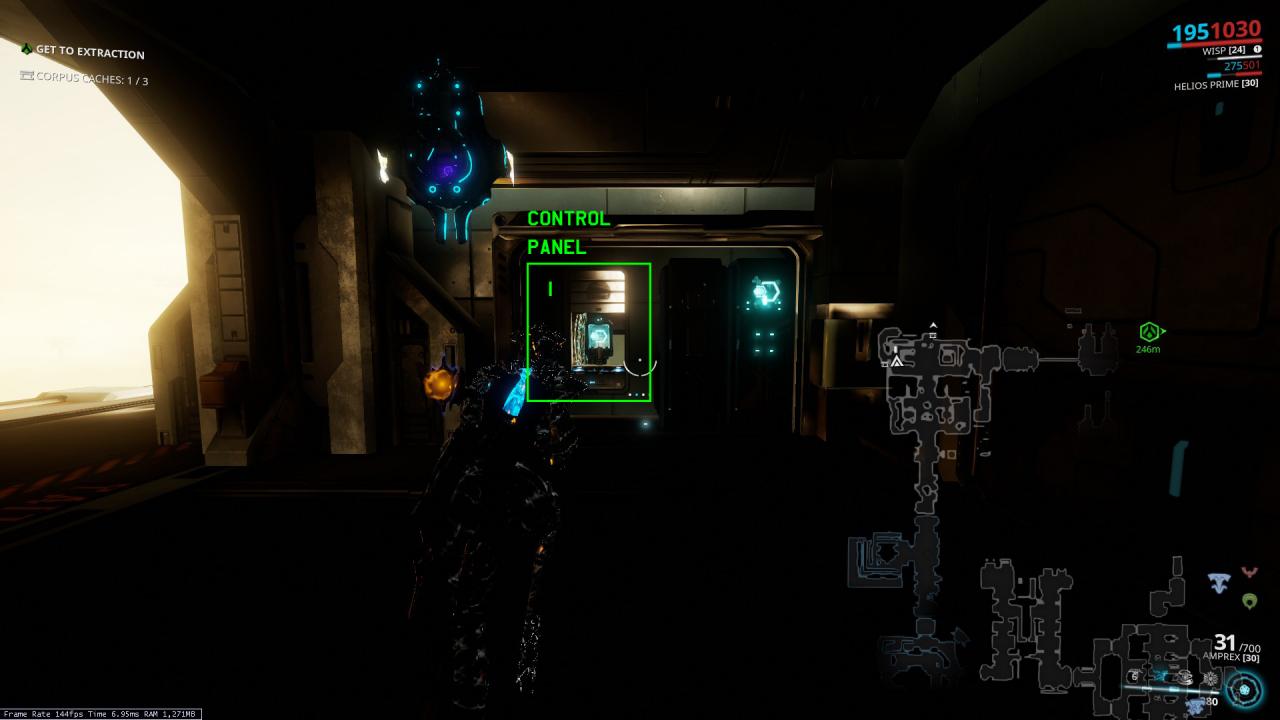 The second control panel is located on the other side of the tile. You have to shoot a grate open in order to access this location:
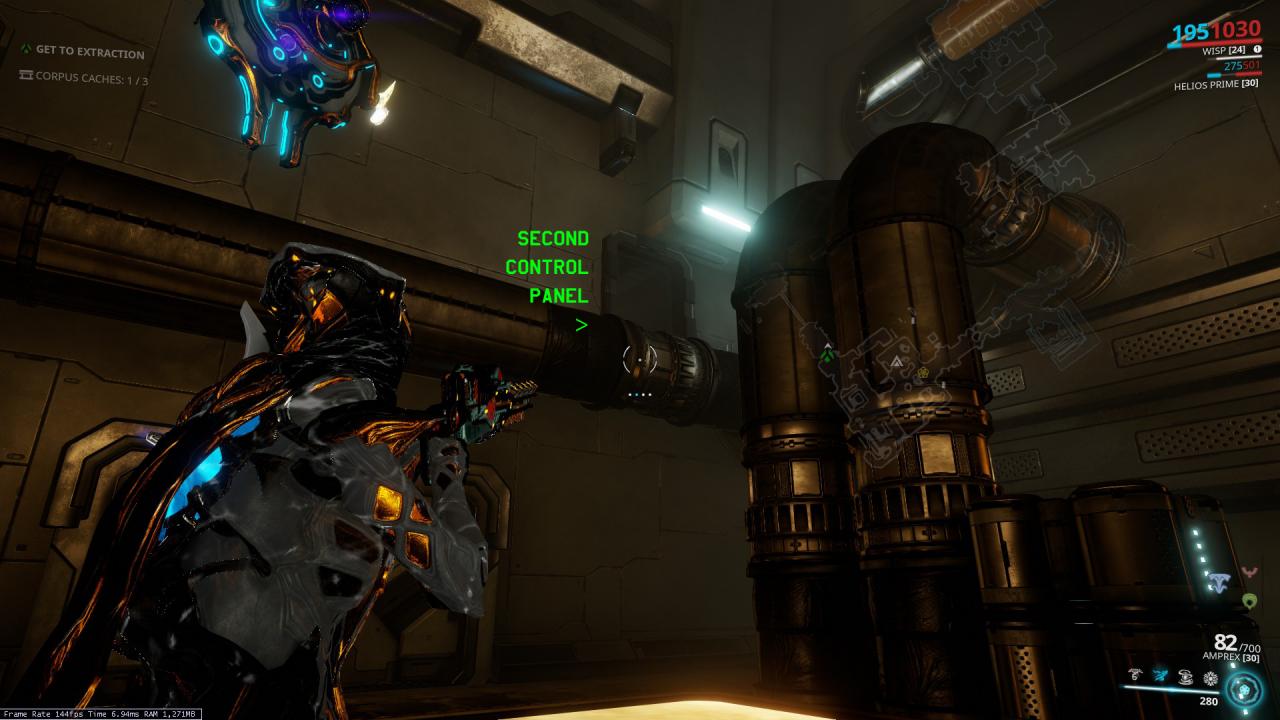
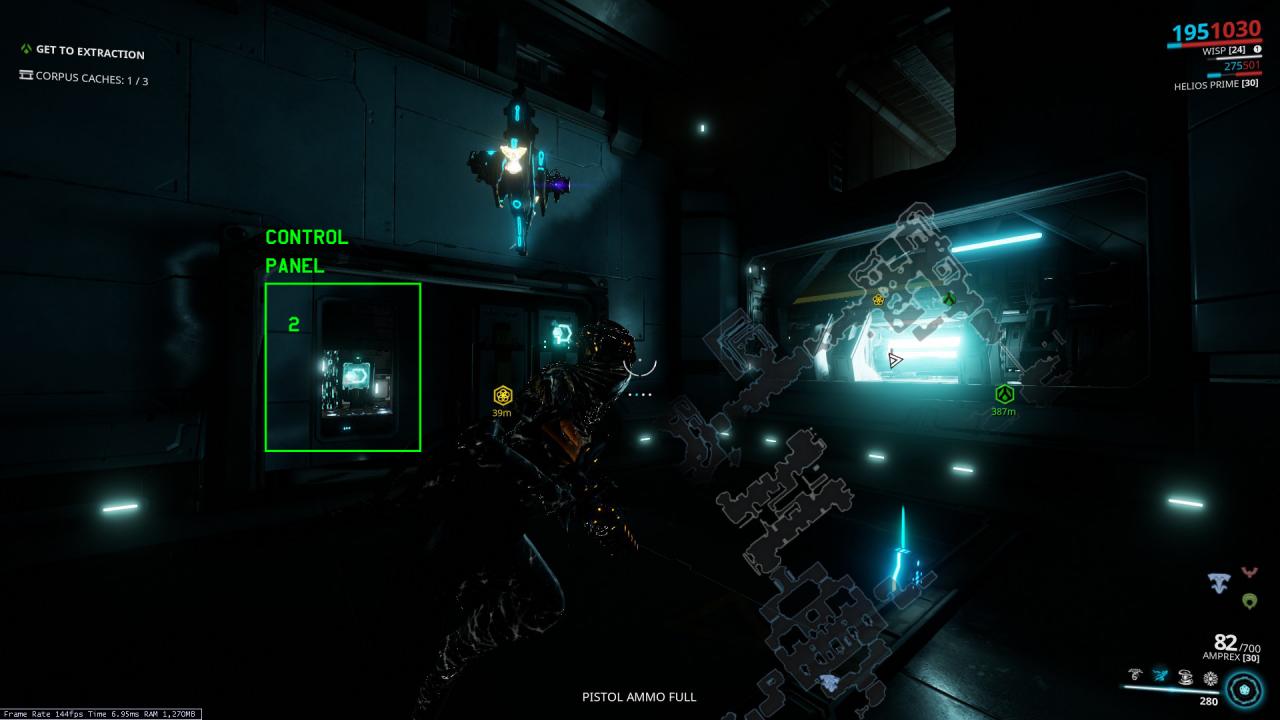 The third control panel is a straight shot outside of the vent hiding the second panel, right next to the door:
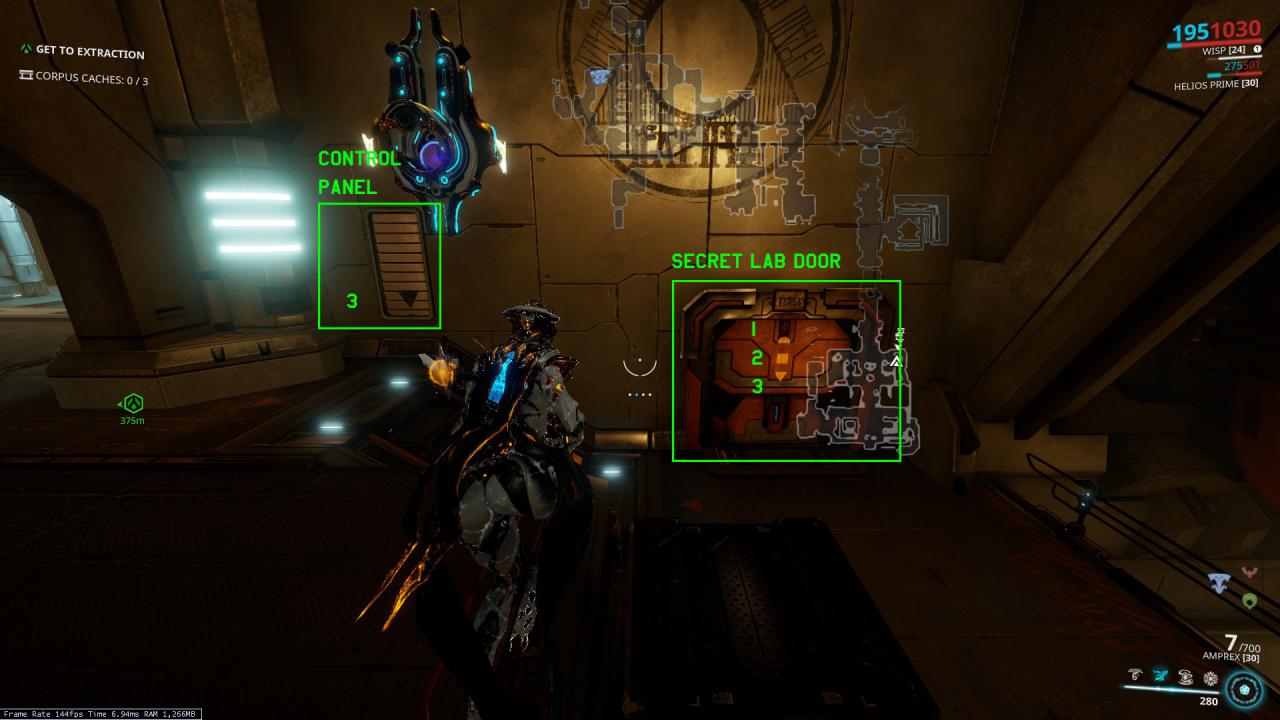
Transport Foyer Lab
This is one of the huge foyers you can enter into when first spawning into a Gas City mission.
Number of panels required: 3
The Access Controller is hidden away in a dark section of the ceiling. Its buzzing isn’t really audible from the floor, meaning you would have to jump up to the ceiling to hear it. Thankfully, its red lights make it easy to see:
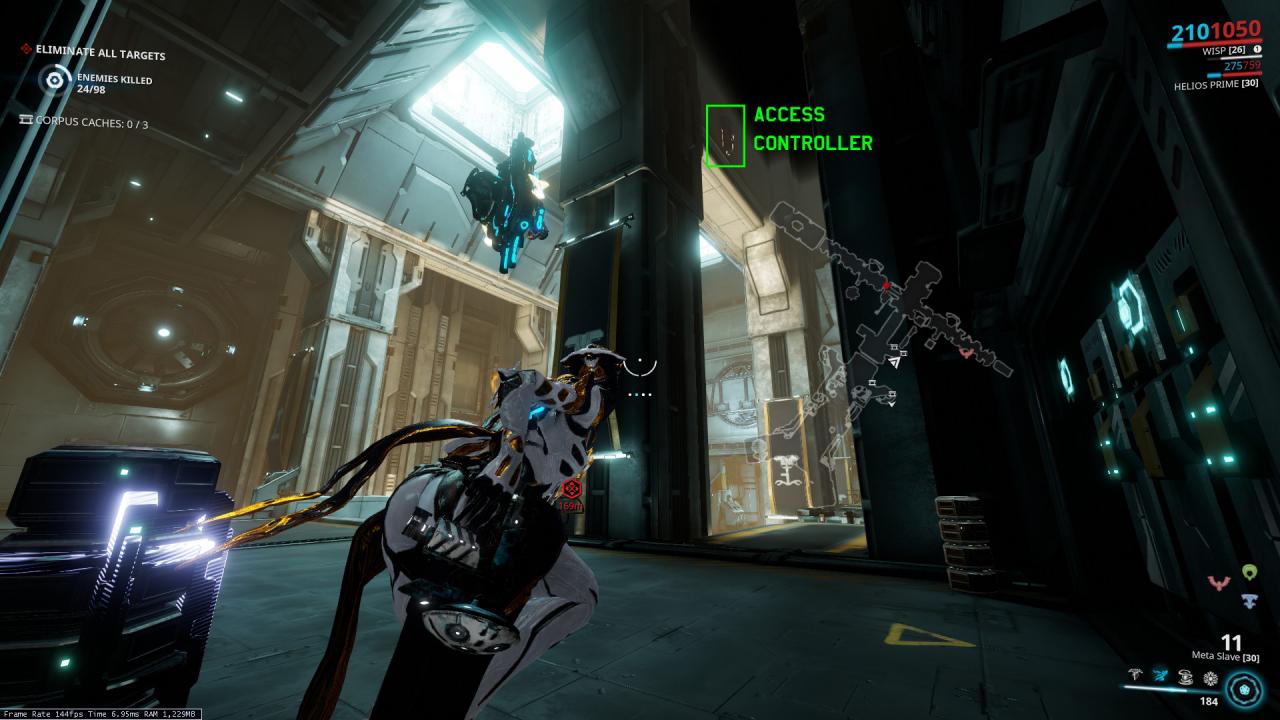 The first control panel is located in the left long hallway of this tile (from when you first enter), along the left wall:
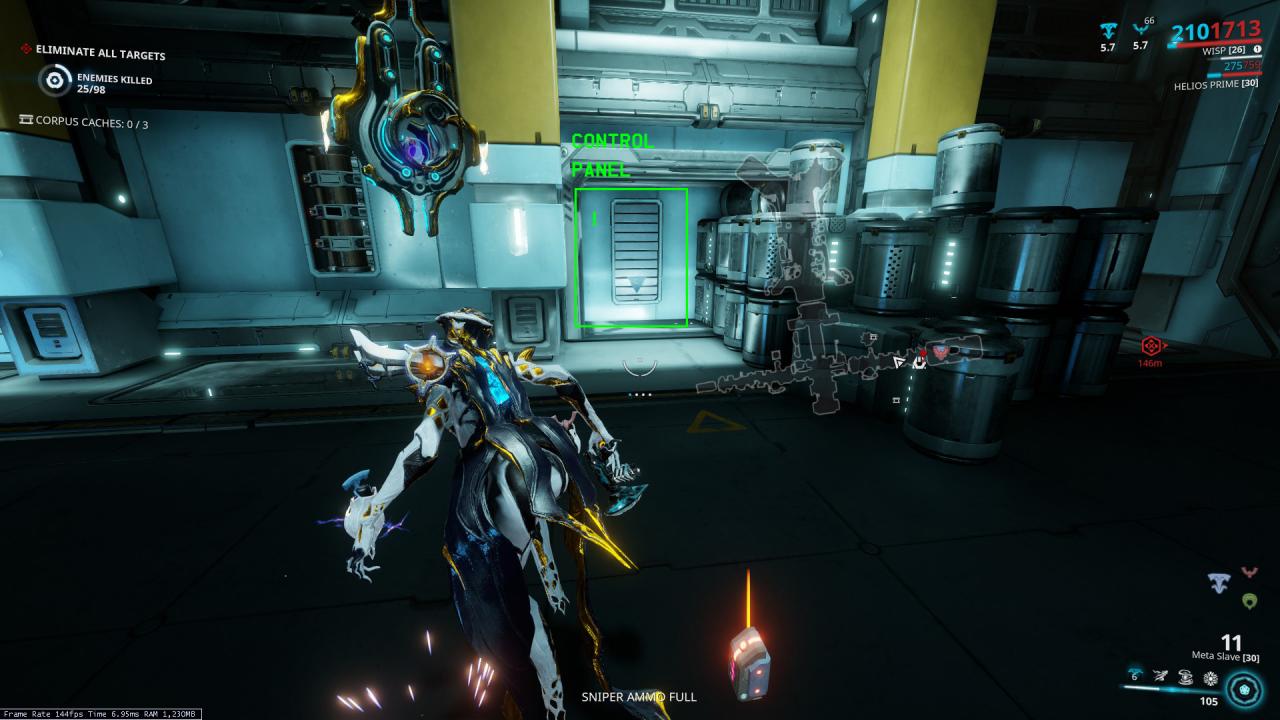 The second control panel is in the opposite hallway, on the right wall:
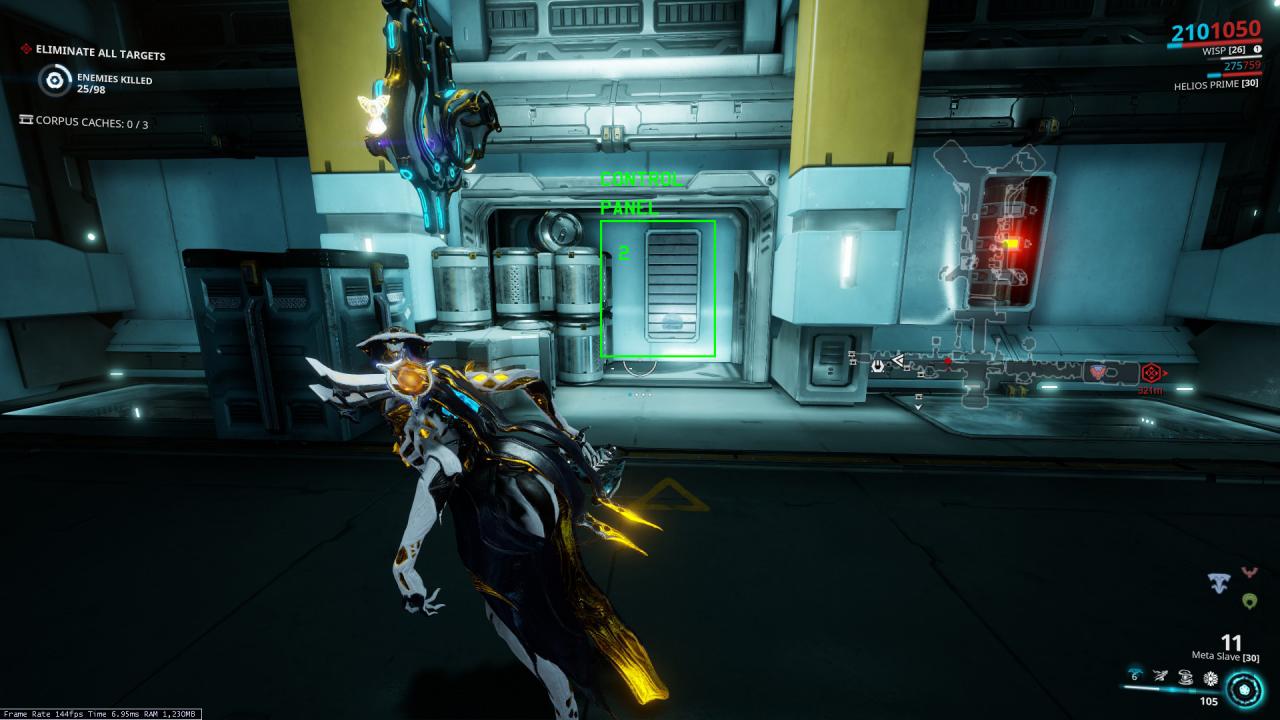 The third control panel is directly in front of the door, both of which are located underneath what you see when you first enter. This area is easily accessible by jumping off the bridge in the center of the room, and the opening to the room is visible from there.
Alternatively, you can also break a vent to access this location, which is near the right staircase past the bridge (from first entering the room):
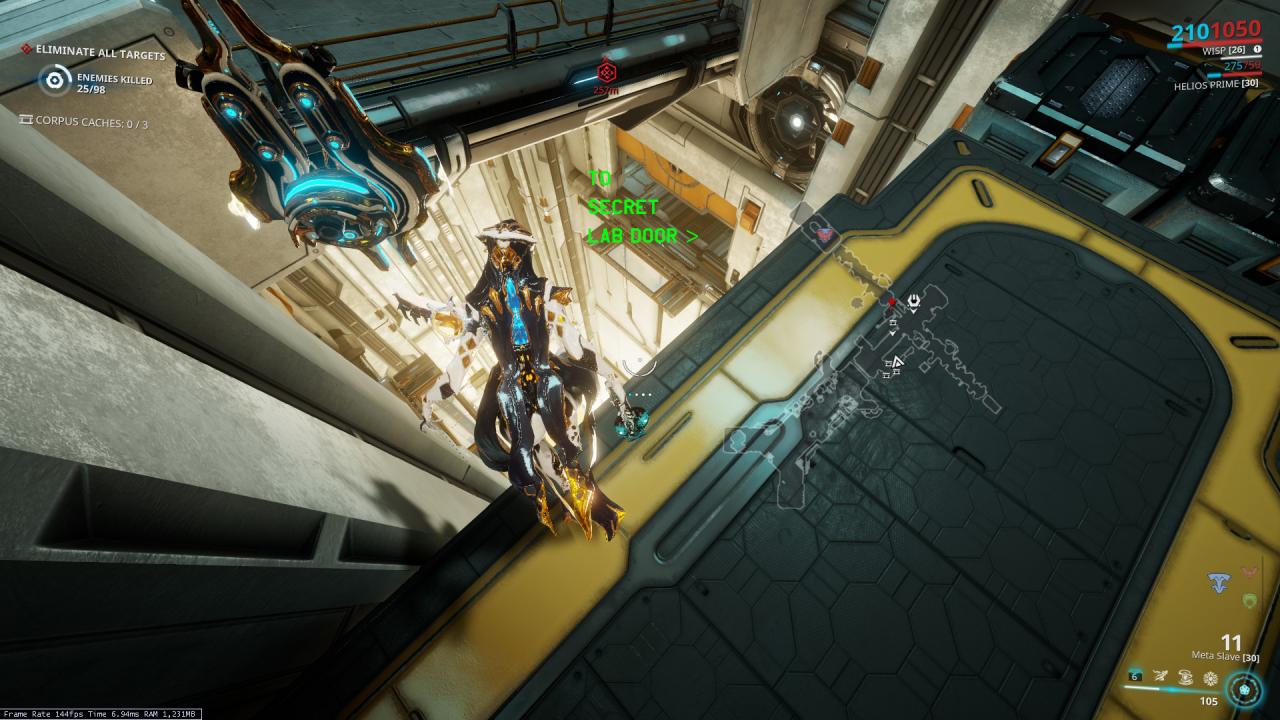
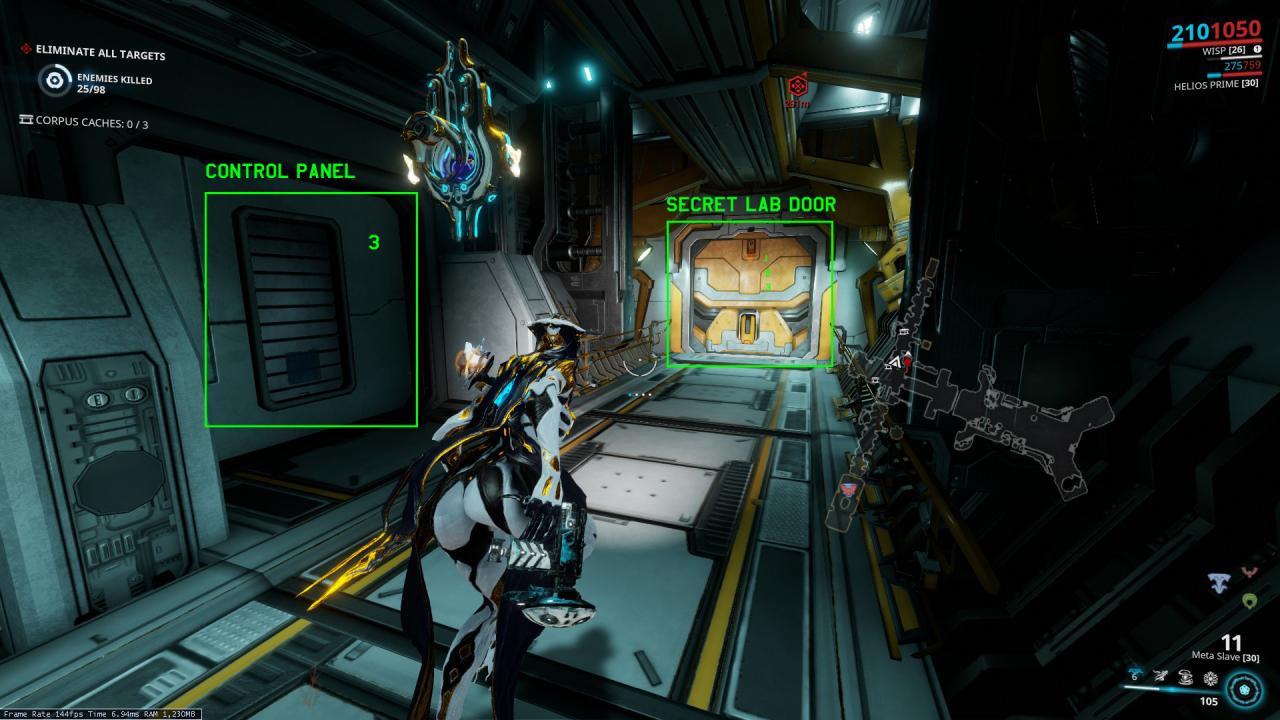
Satellite Lab
Number of panels required: 3
The Access Controller is located underneath one of the hanging machines, underneath its platform:
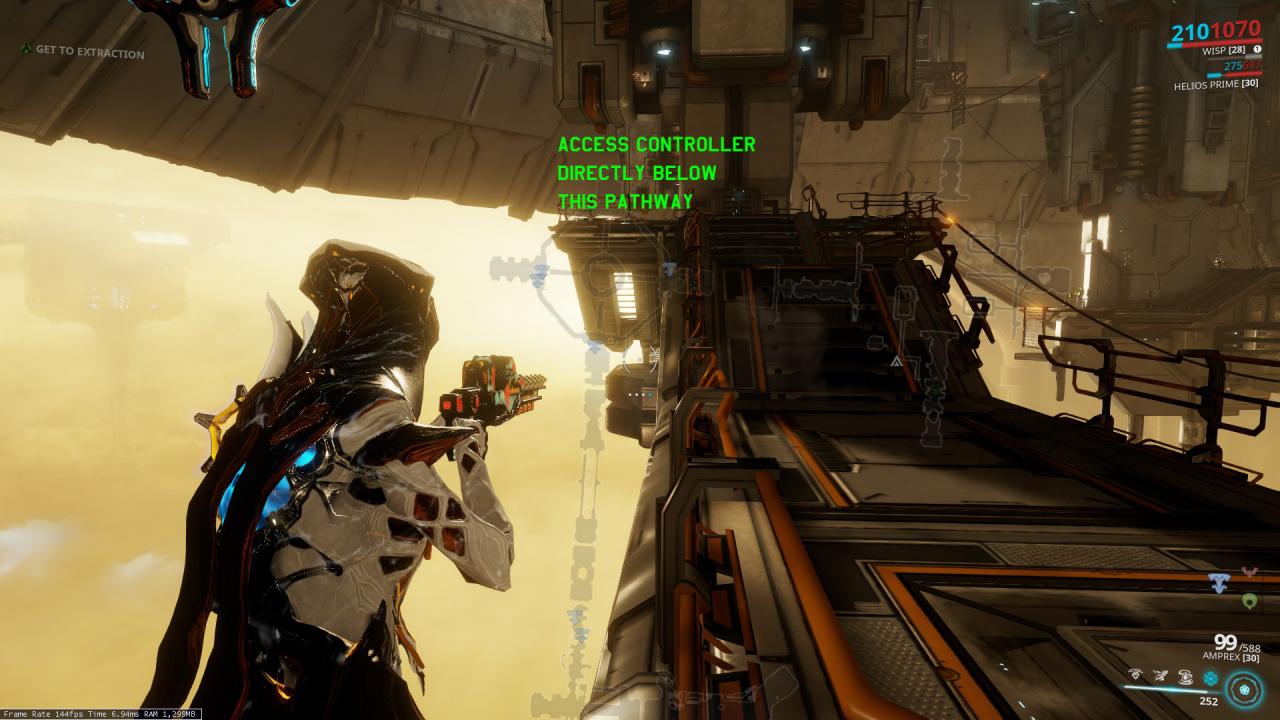
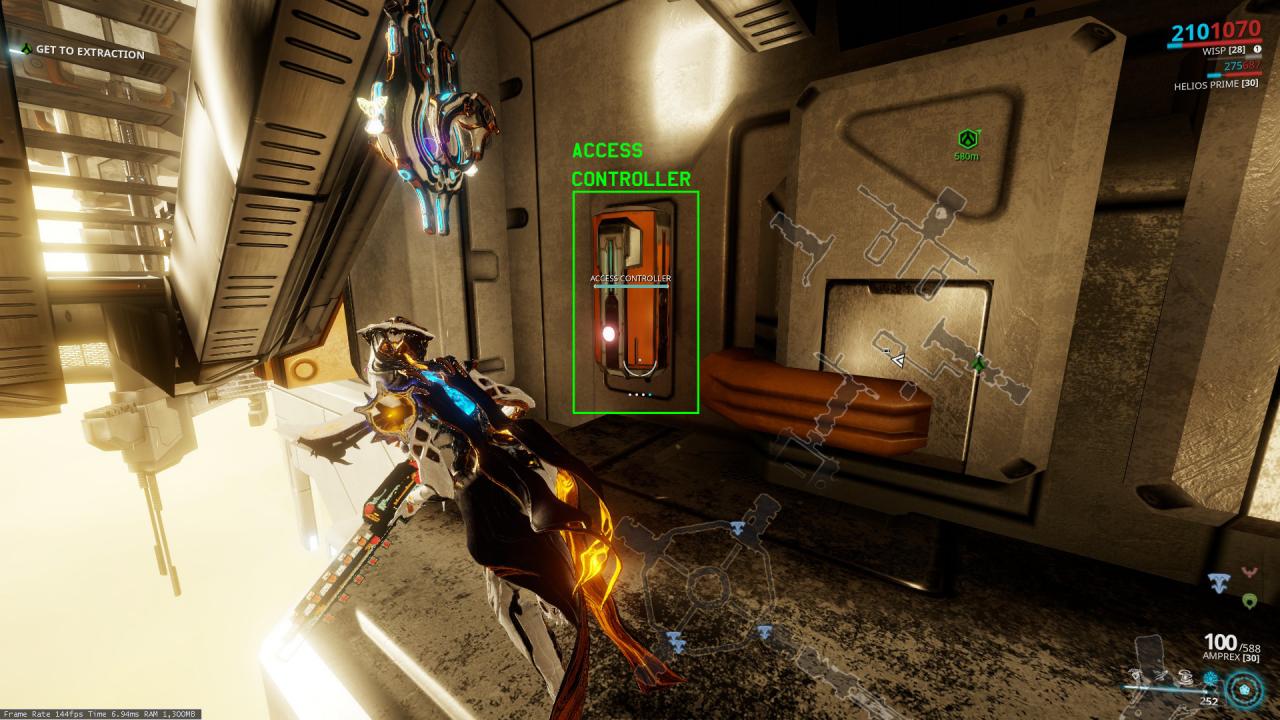 The first control panel is located in the one room on its own and (I think) the spinning machine is attached nearby:
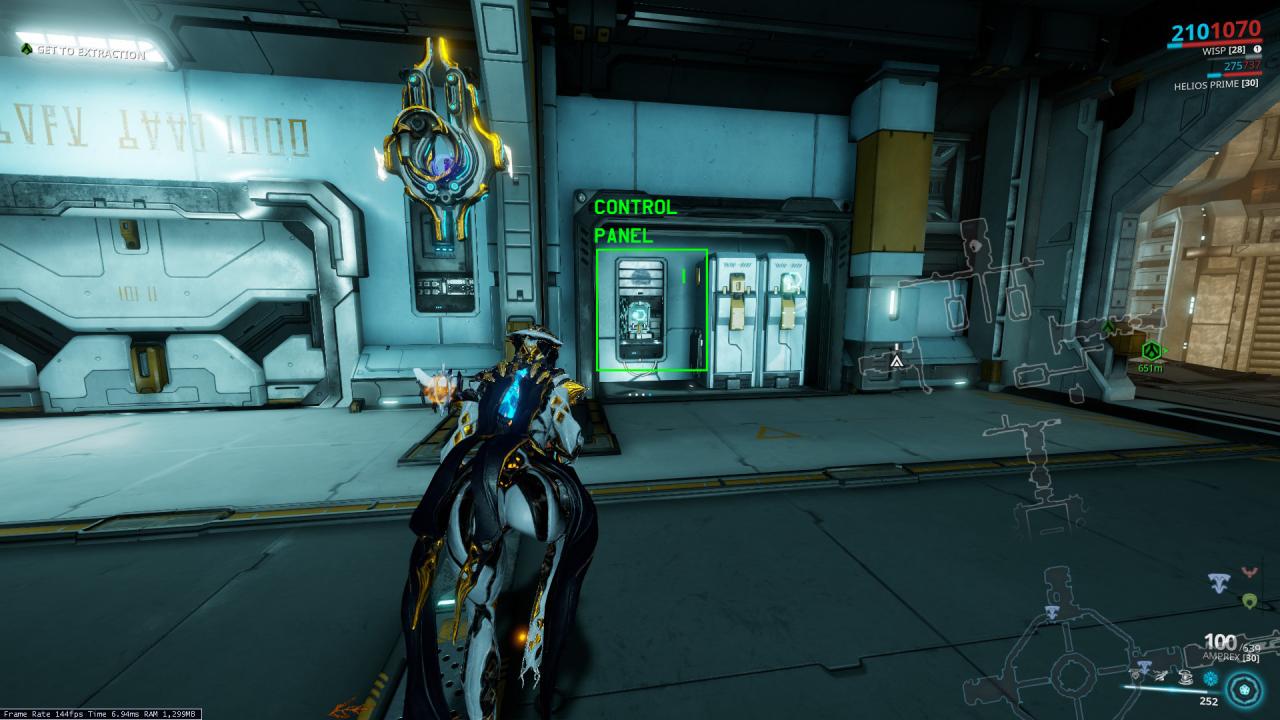 The second control panel is a straight shot across the tile from the first room and immediately to the right. The panel is on the left wall of its own room with a broken platform hanging in front:
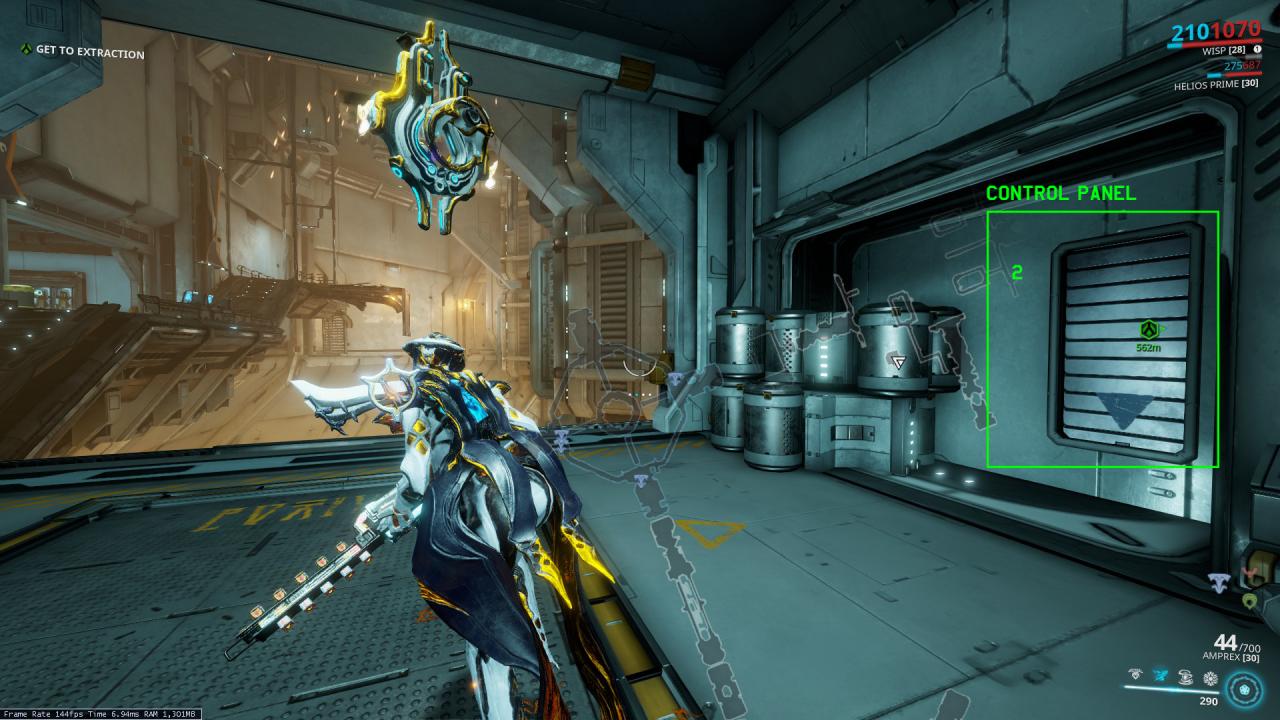 The third control panel is located in the room following the left wall from the second one. This panel sits behind the door it opens, on the right wall:
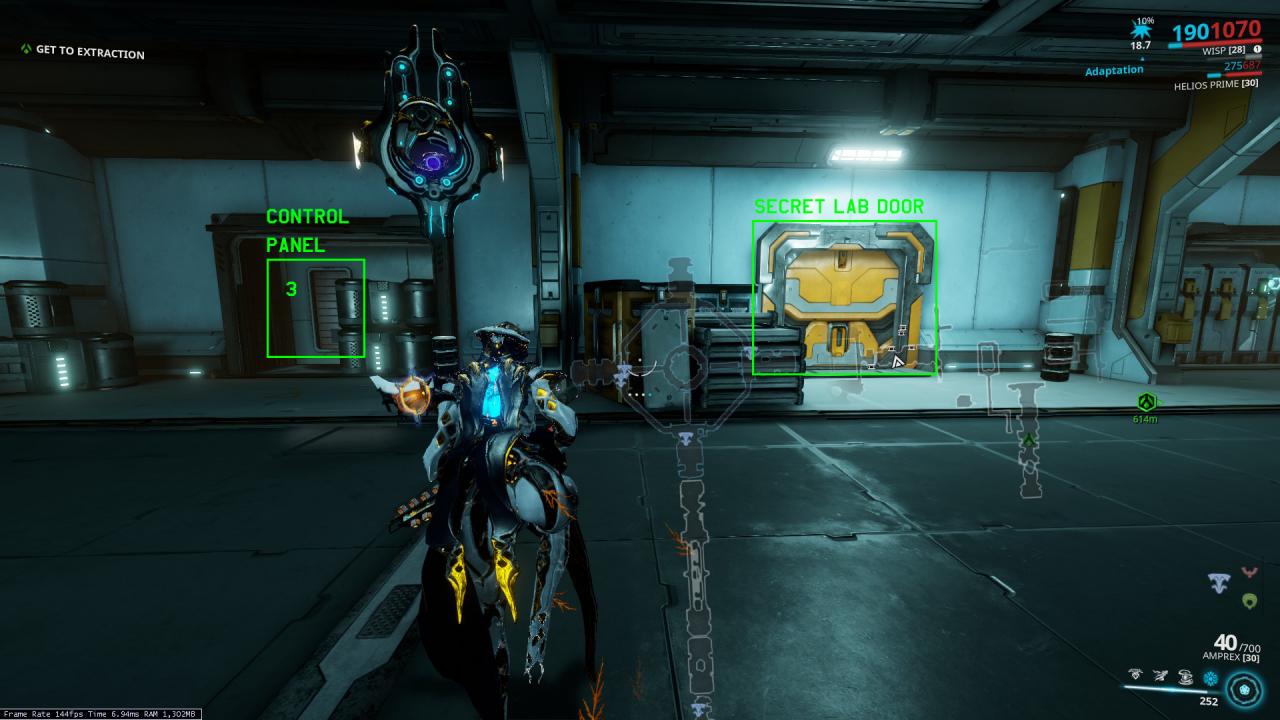
Elemental Refinement Lab
Number of panels required: 3
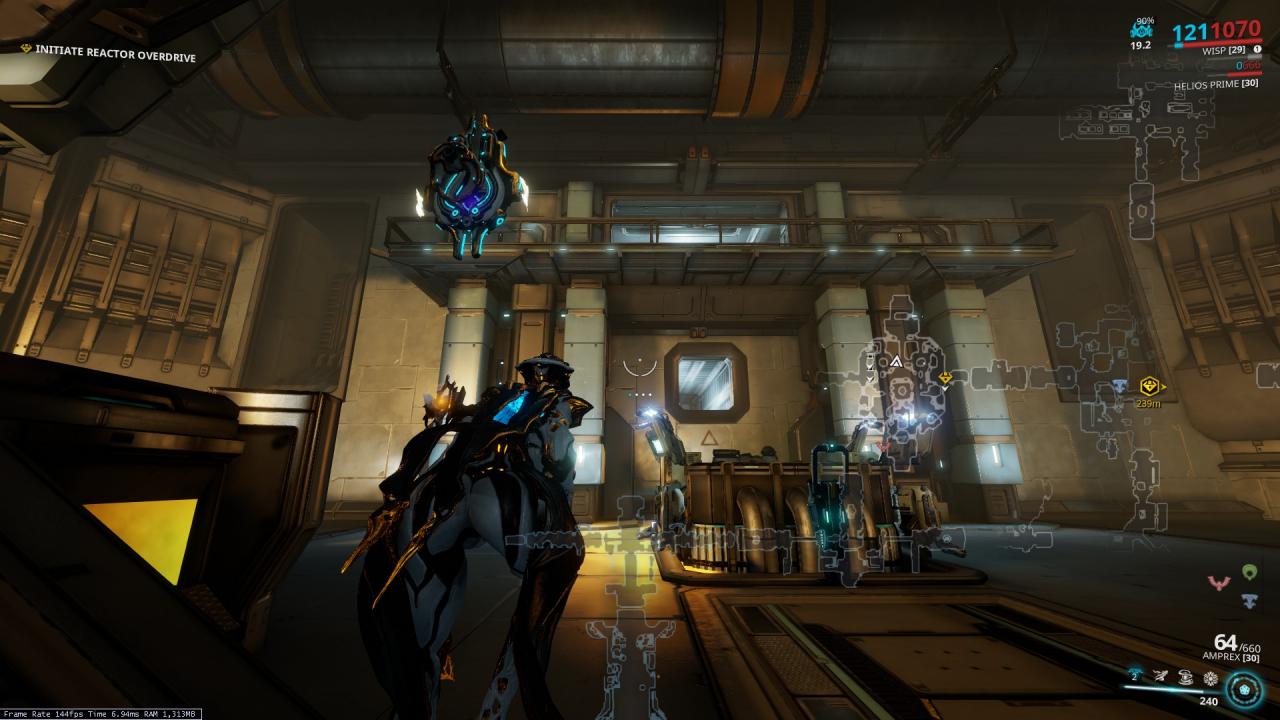
The Access Controller is located in the room overlooking the rest of this tile, on the ceiling:
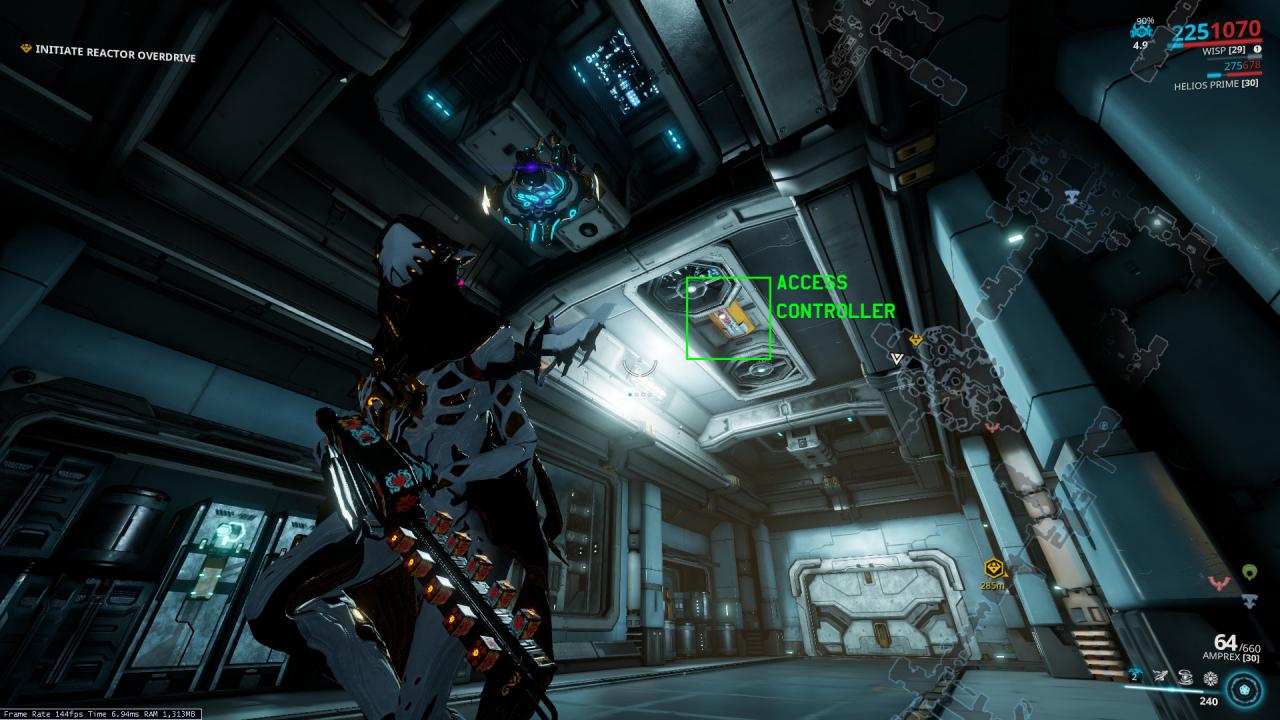 The first control panel is located across the room from the Access Controller:
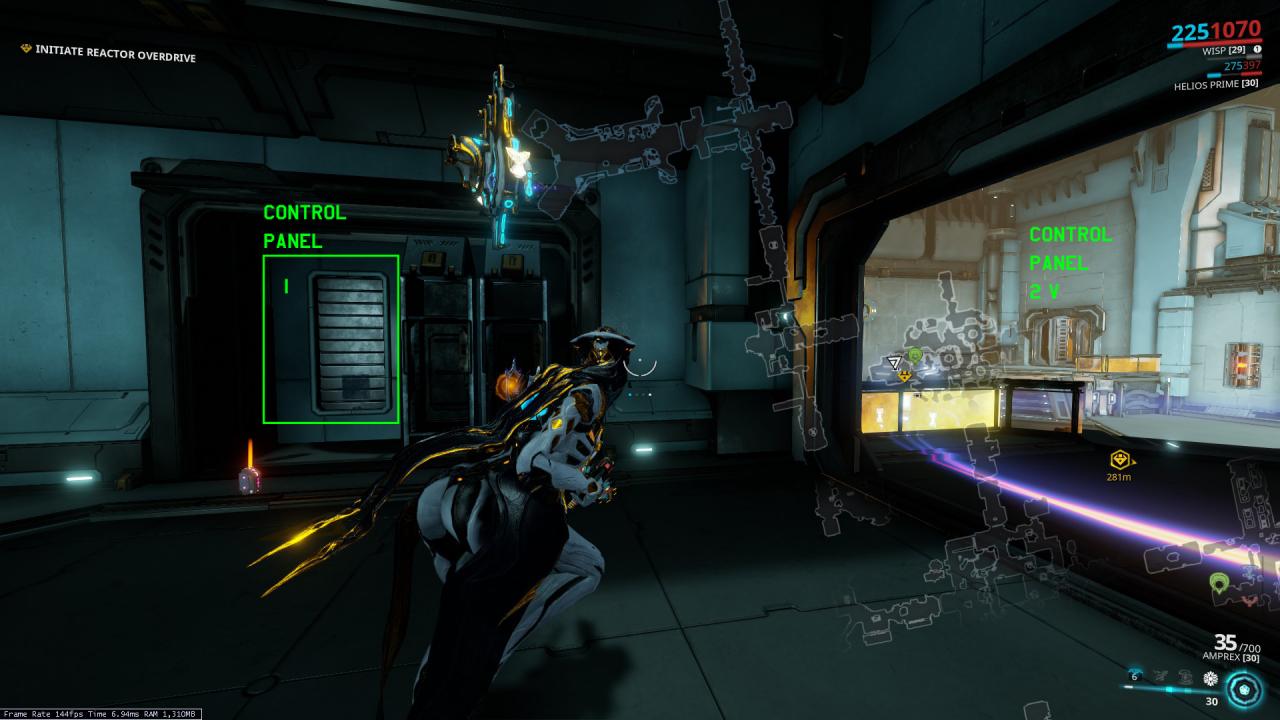 The second control panel is located following the left wall outside the room with the first panel. It is found on the left wall inside:
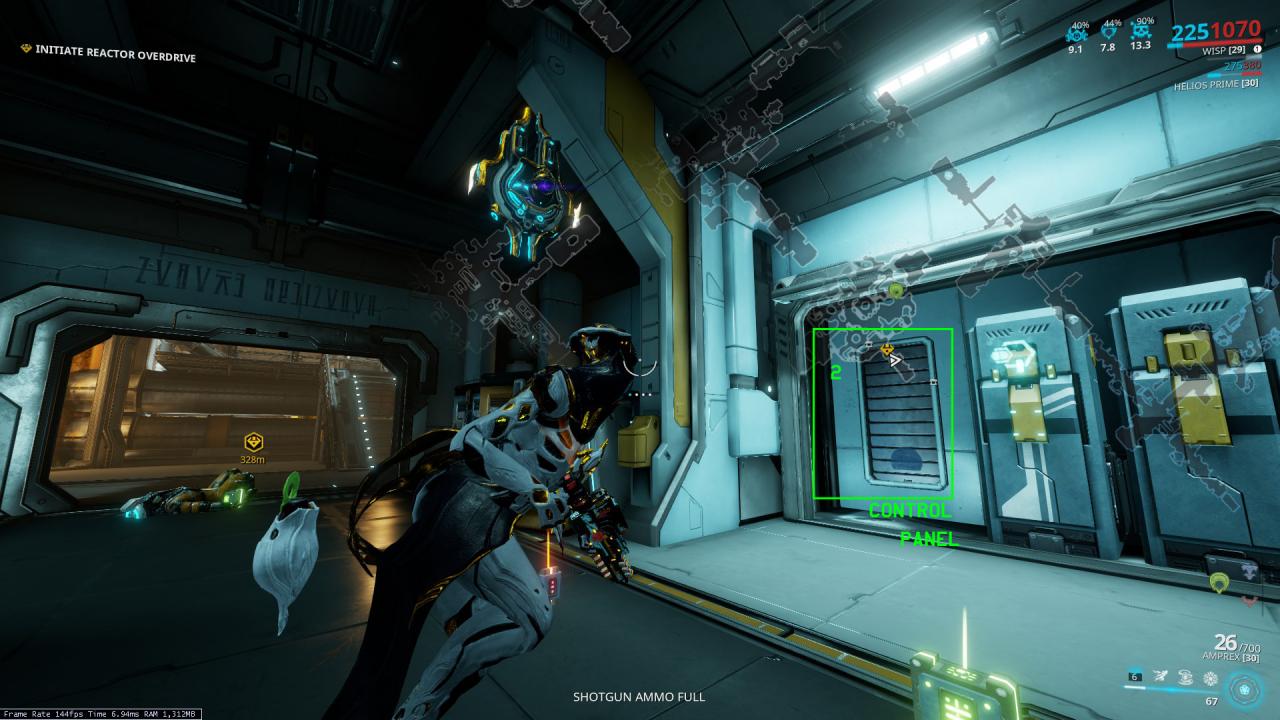 The third panel is found on the lowest part of this tile. There is a large hallway headed straight down here from the center of the tile. It sits behind a pillar across from the lab door:
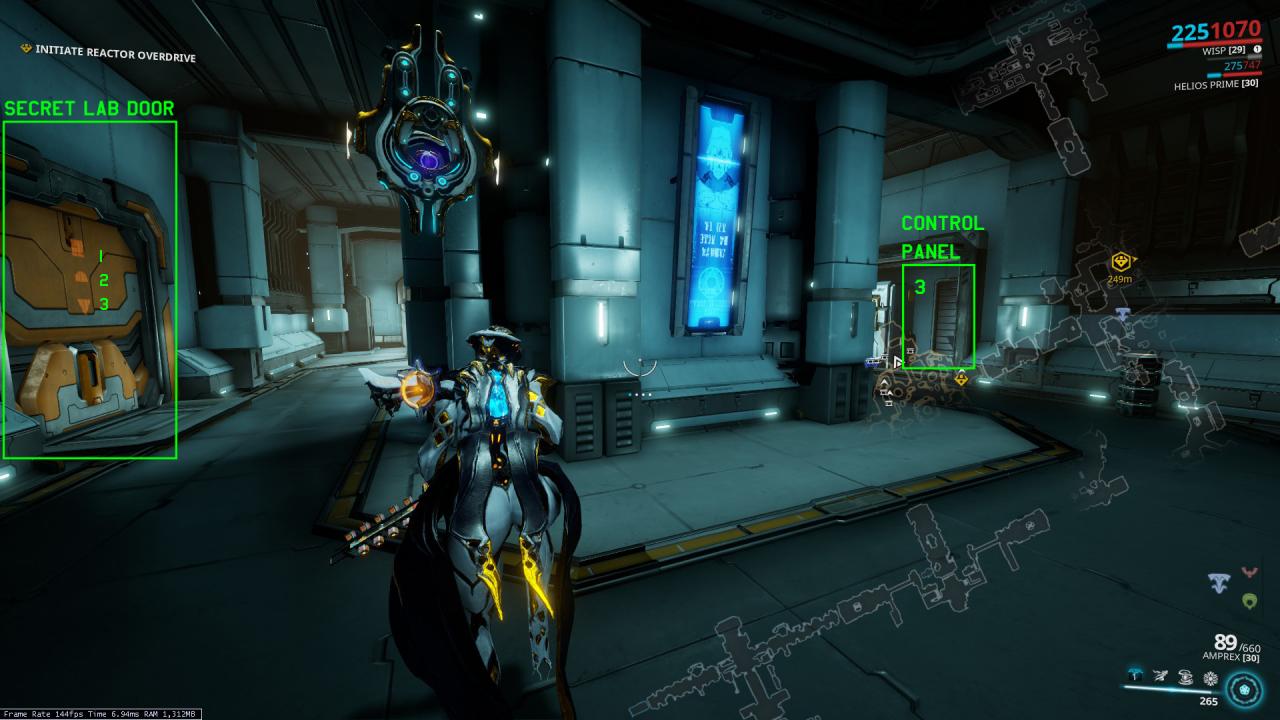
Lifts Lab
Good luck with this one if you’re not familiar with the layout. Thankfully, the puzzle goes in order from the top of the tile to the bottom, with the Access Controller being at the very top and the lab door being at the lowest point.
Number of panels required: 4
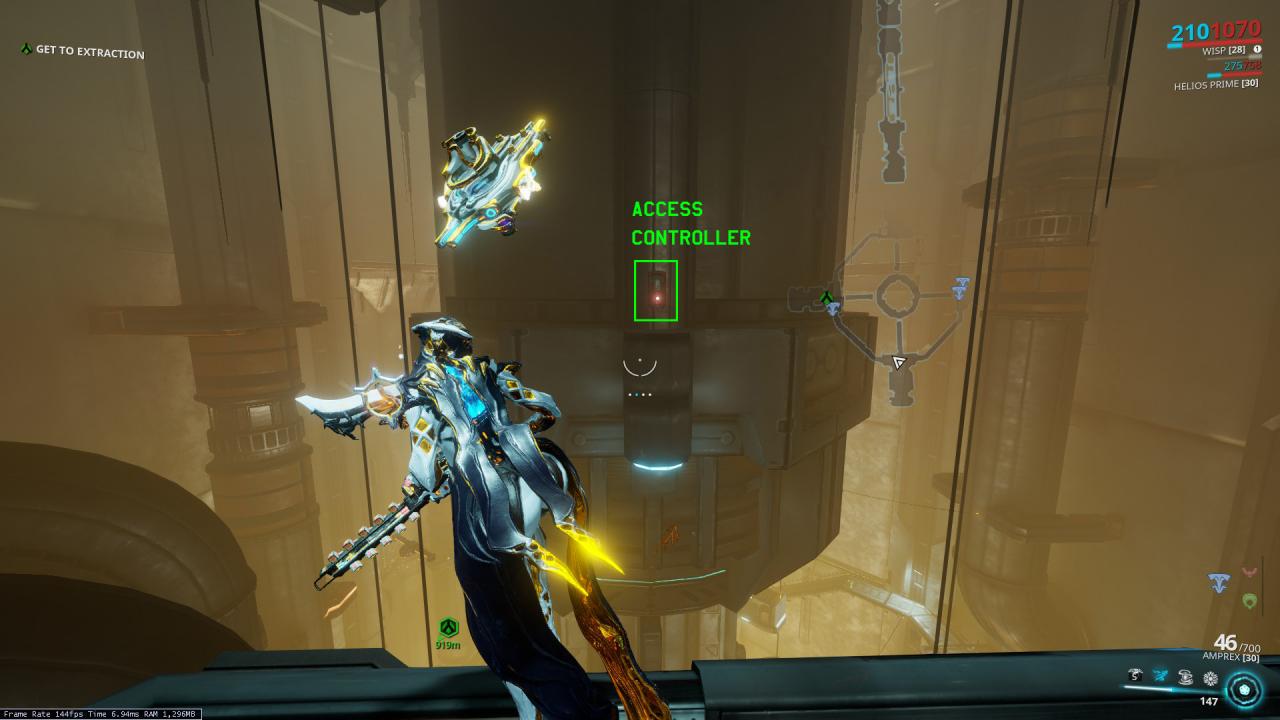
The Access Controller can be found, as stated above, at the highest point of the map. Located above all the rooms on the center pillar:
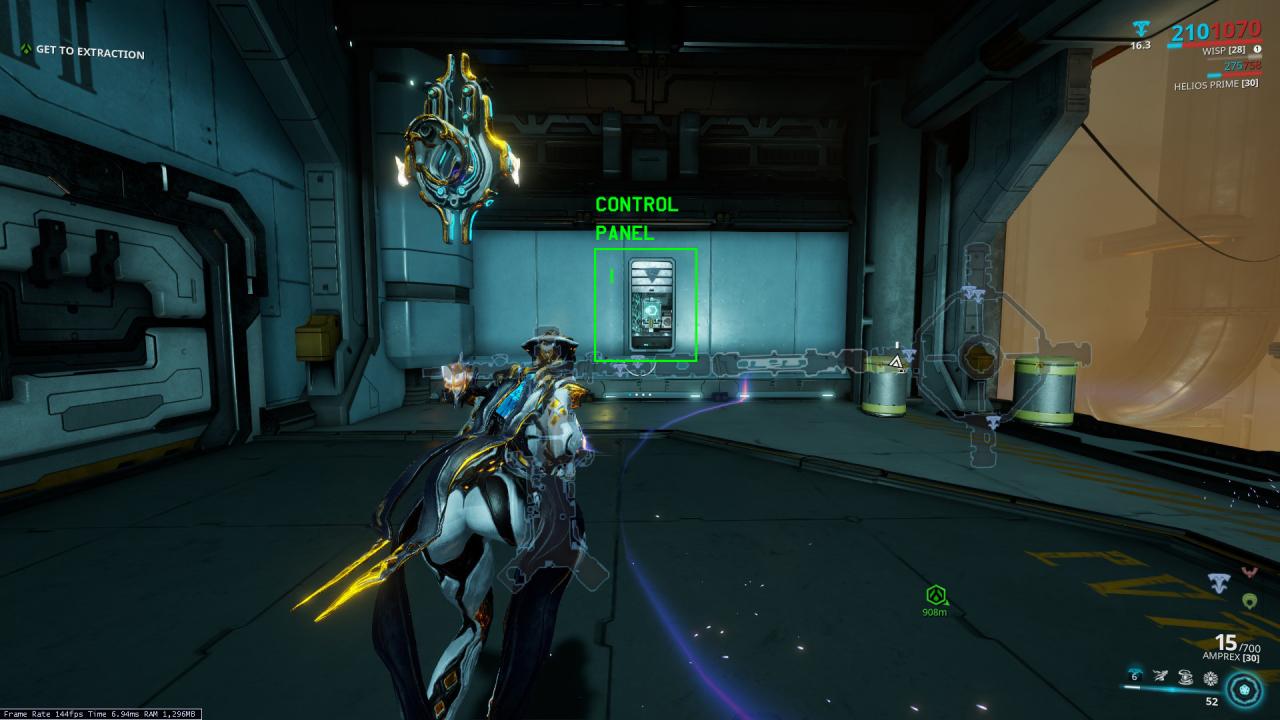
 The first control panel is located inside a small room near the top of the tile. There are no doors, no walkways leading up to it, and no platform in front:
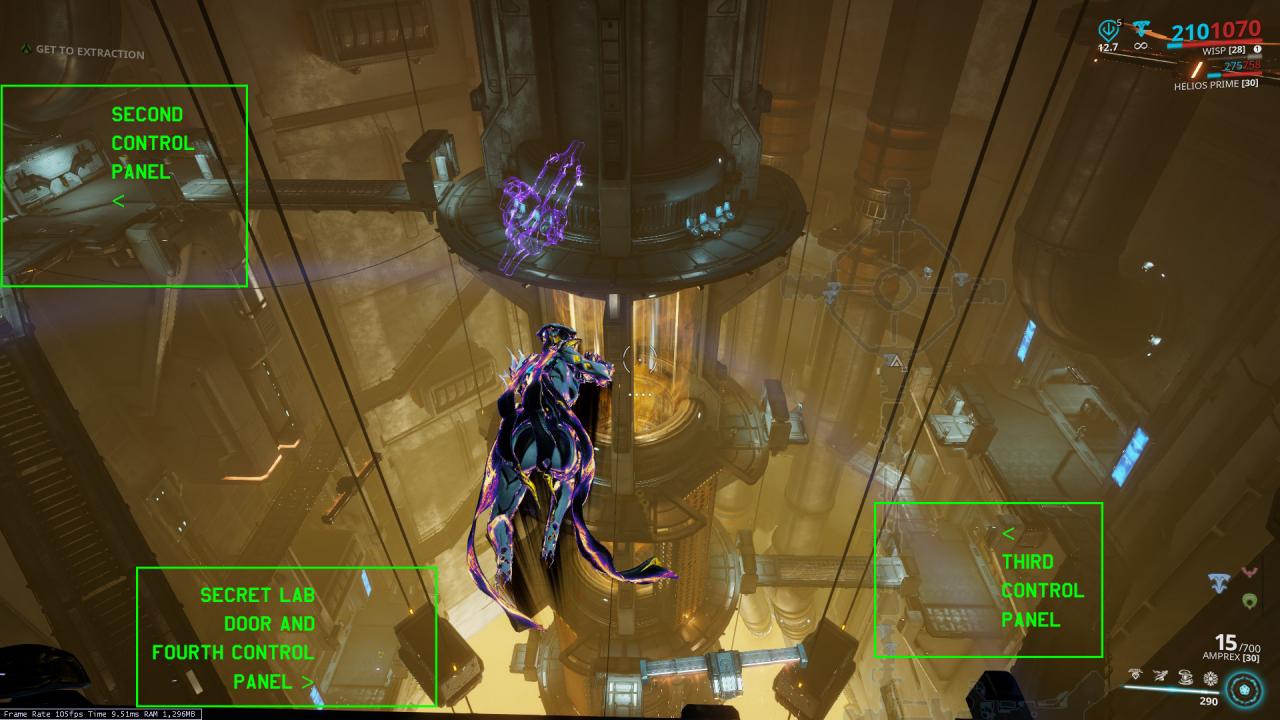
 The second panel, when looking out of the room where the first panel is located, is to the very left. The pathway leading from somewhere below the first room leads up to the second panel that’s sitting outside and to the left of the door:
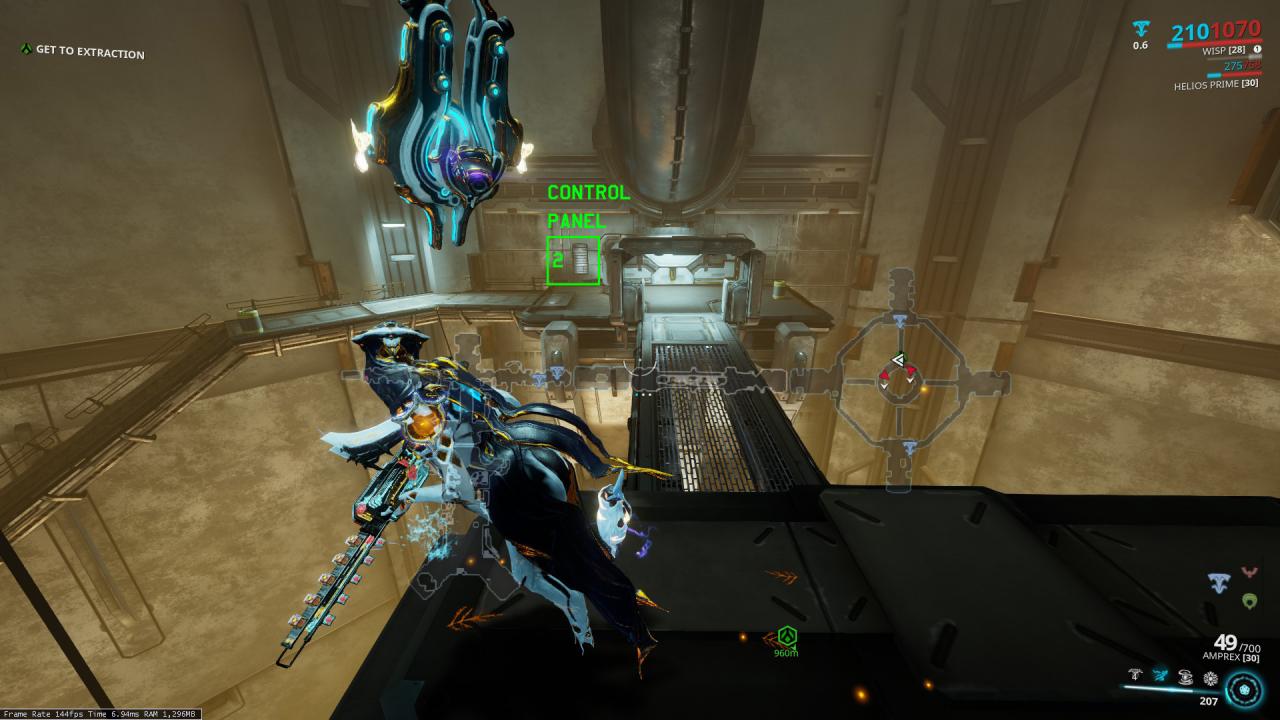 The third panel is across the tile, meaning you have to maneuver around the center pillar in order to get to it. There are two platforms on the other side of the pillar from the second room, and this panel is located on the bottom one, just outside and to the left of the door:
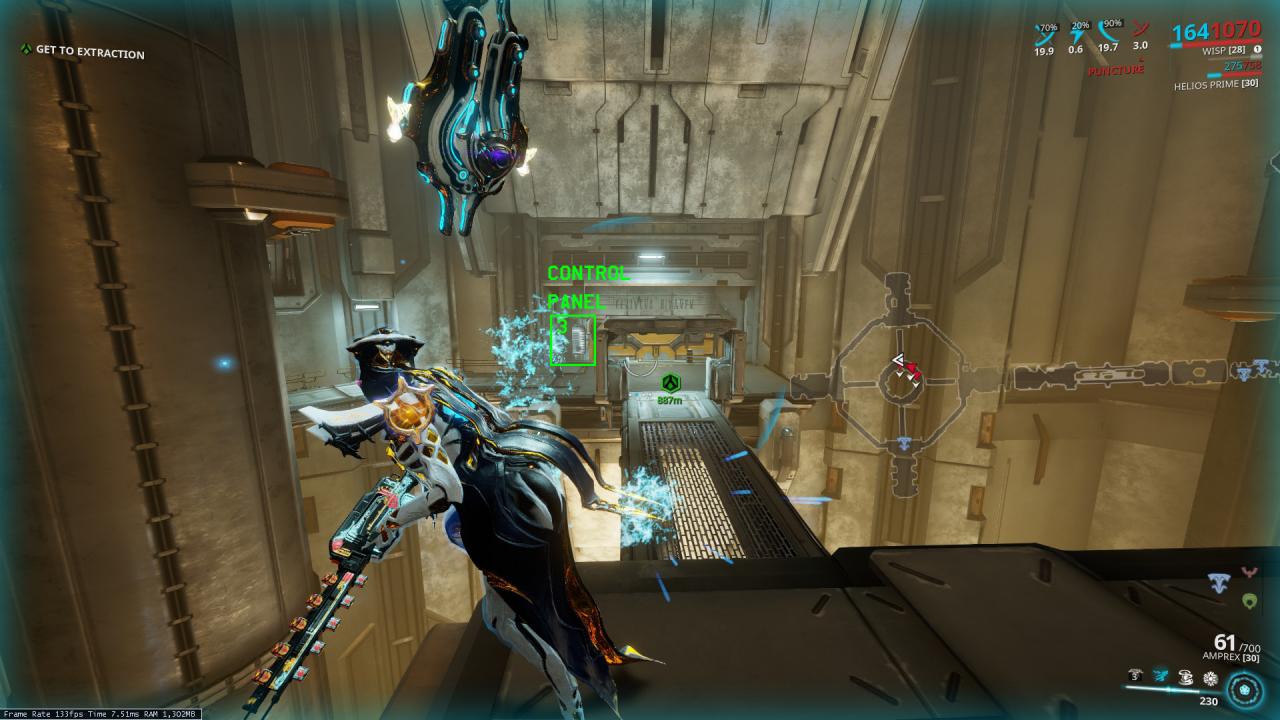 The fourth panel is located in front of the secret lab door. This room is across the tile from the third one, meaning you have to maneuver around the pillar yet again, this time to the lowest possible room on the tile. The panel is on the right wall, while the lab is on the left:
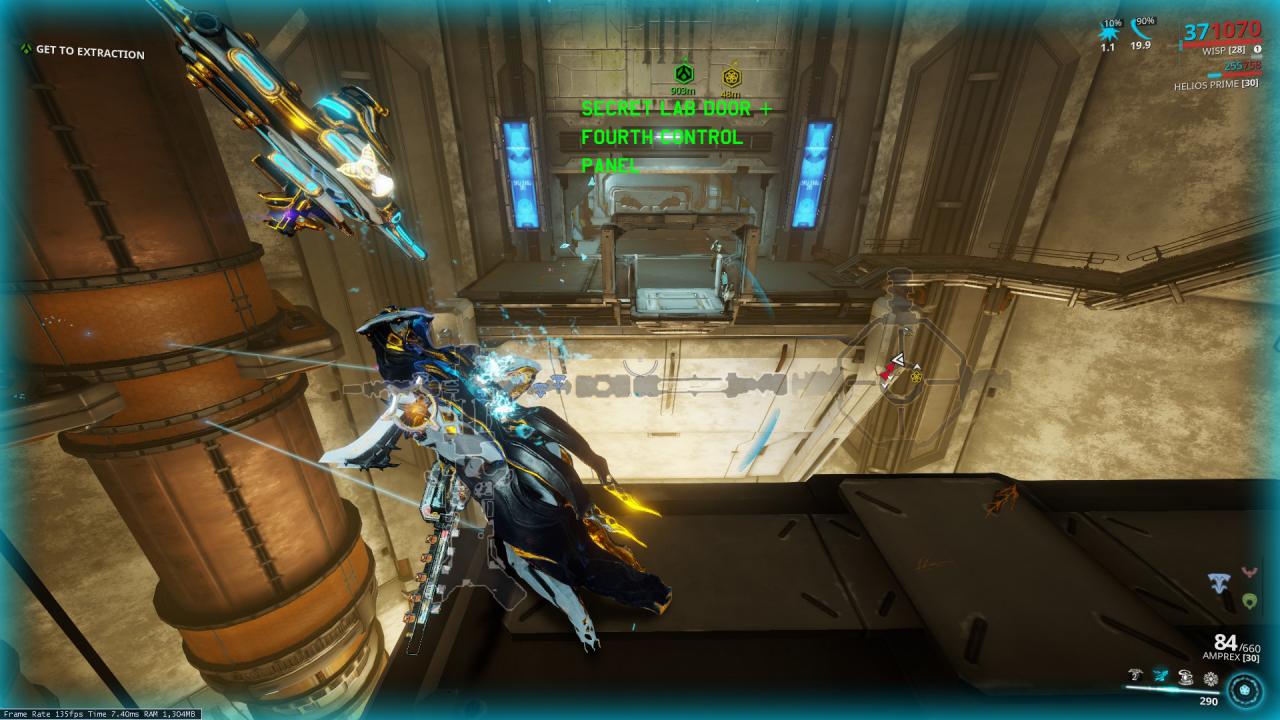
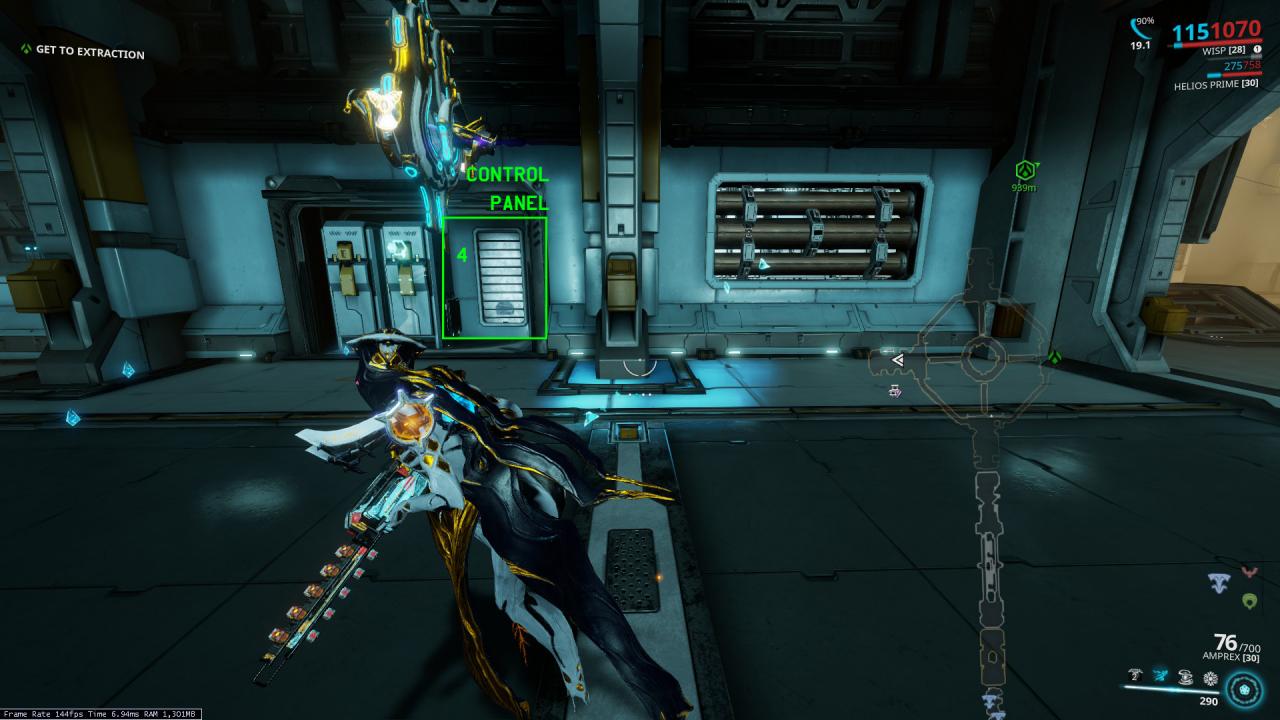
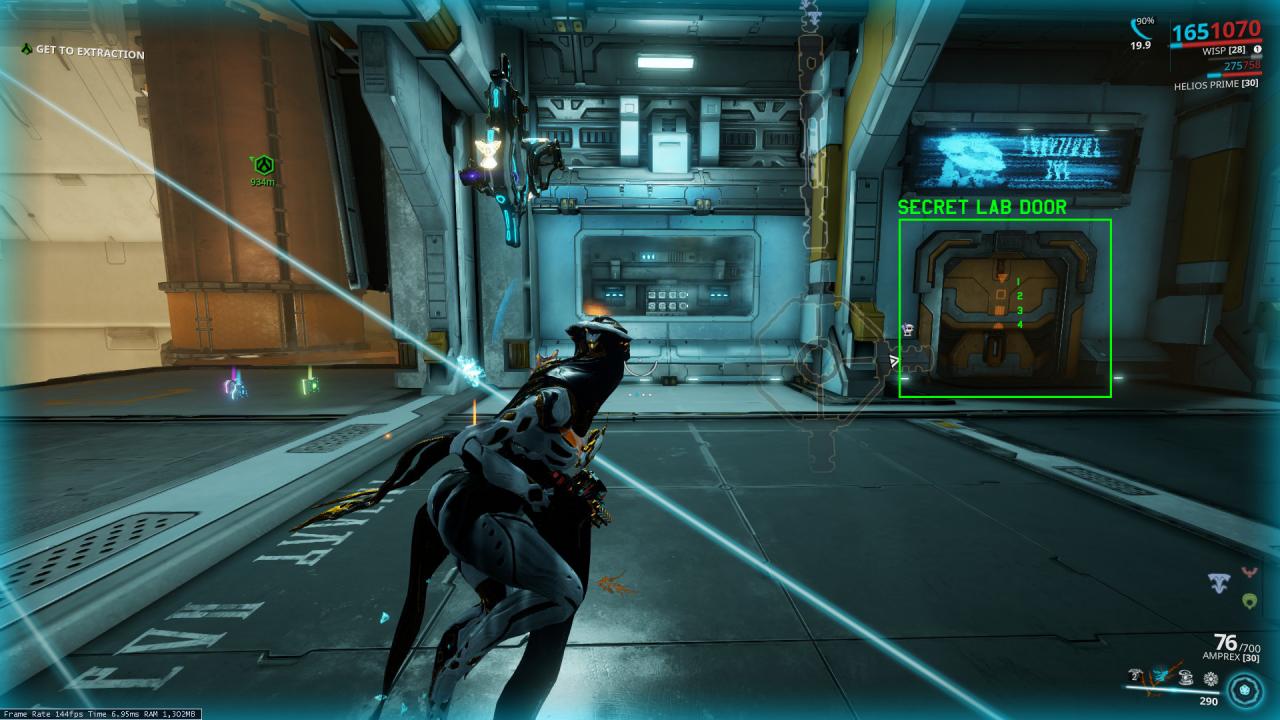 I’ve found that this tile is fairly confusing for newcomers, so here’s the overall locations of every single control panel from the POV of being inside the first control panel room:
Overhead Lab
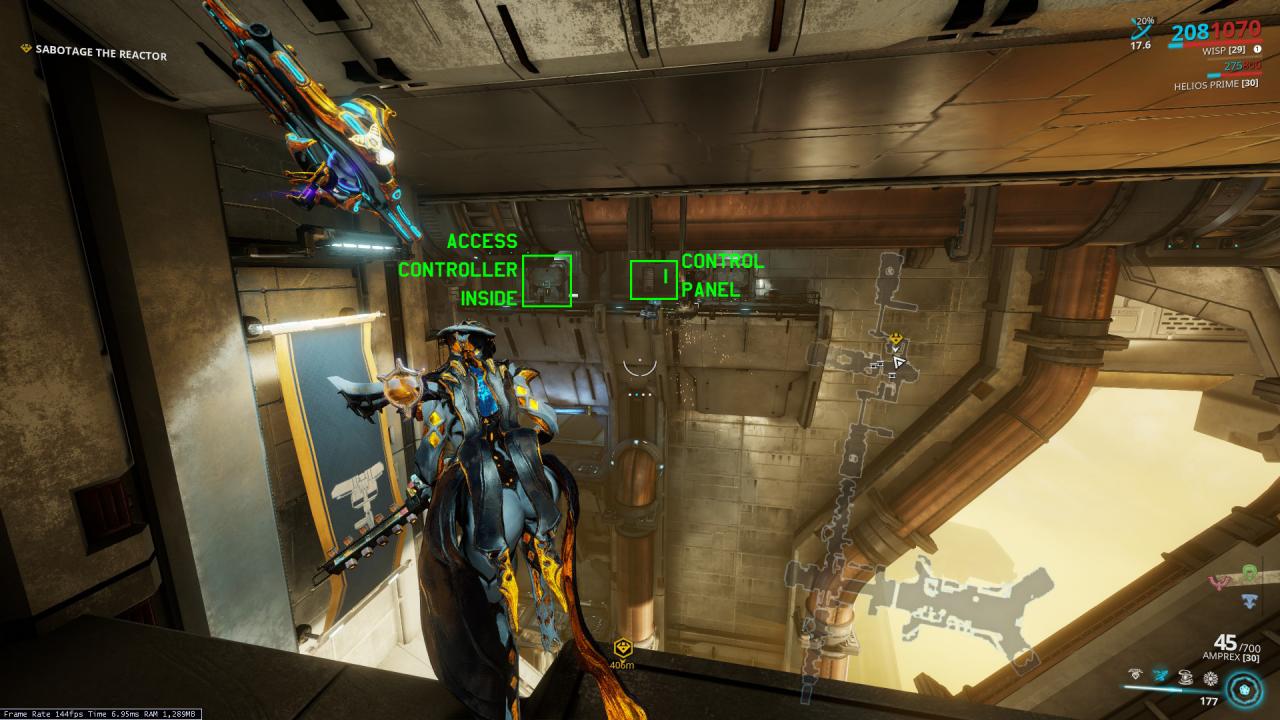
The secret door is located on top of the pathway that usually gets used by us and the Corpus. Many of these screenshots are taken from that vantage point, as it oversees three of the four total control panels, as well as the door to the Access Controller. I found it’s useful to orient yourself from up here first before attempting this. if you’re not familiar with the tile. This tile just proves the saying “size doesn’t matter” when you’re looking for secret rooms. You’d think this small tile would only have 3 control panels.
Number of panels required: 4
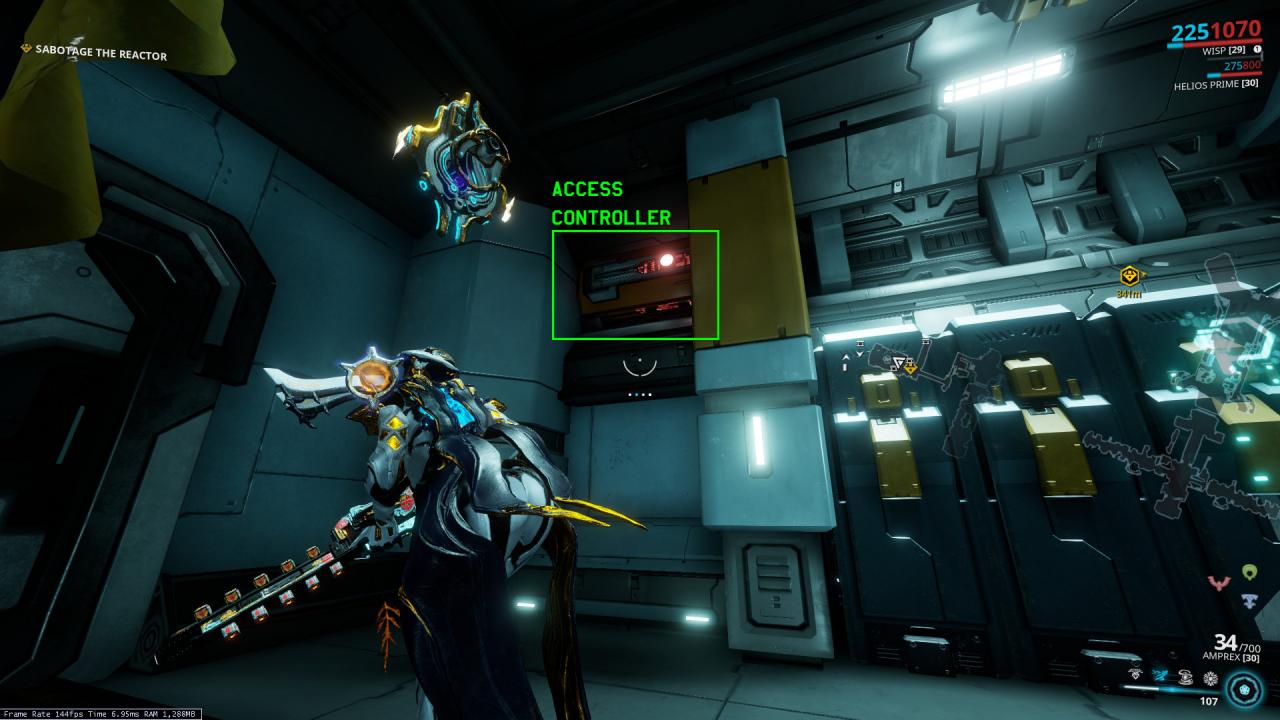
The Access Controller is found in one of the uppermost rooms (to the right when looking directly at the lab door). It is the only accessible door on that level, sitting right next to the very first control panel you’ll be accessing (shown in the first pic). Inside the room, it is located close to the ceiling on the right wall:
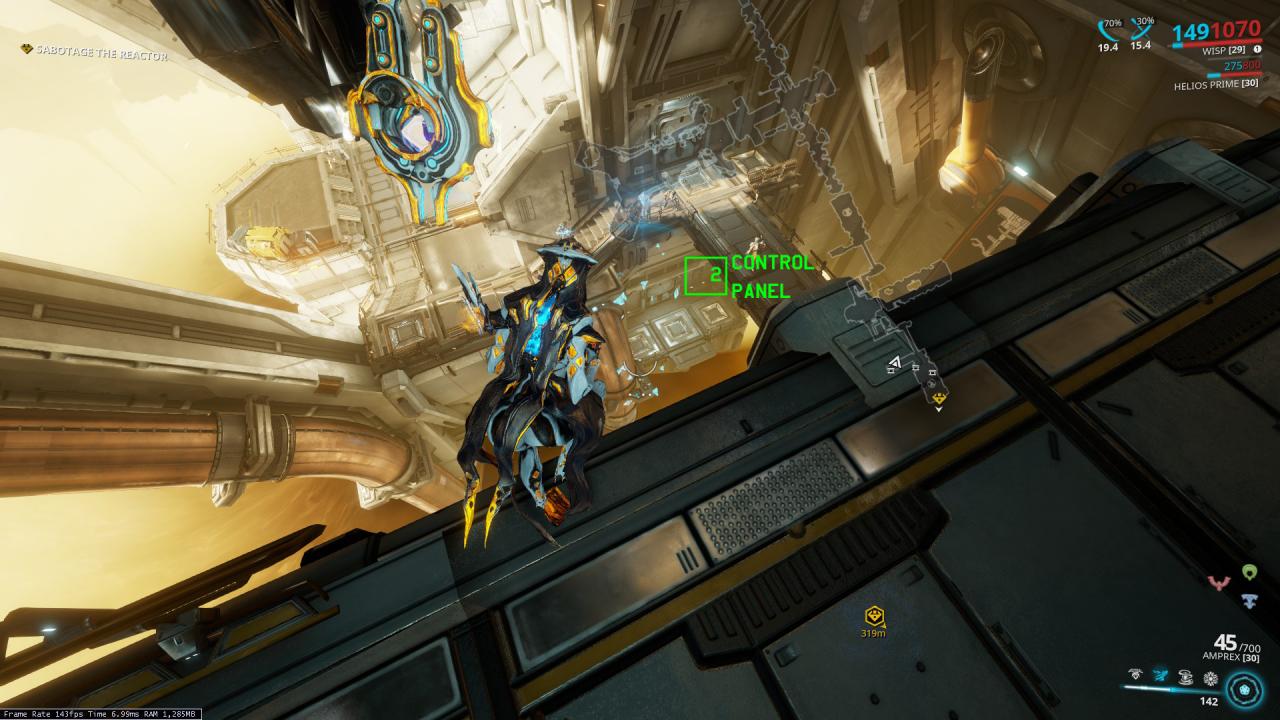
 The second control panel involves plummeting straight down from the first control panel, as it is located on the lowest level, underneath a pathway. It is to the right of an inaccessible door:
 The third control panel is found on the other side of the tile, next to a door:
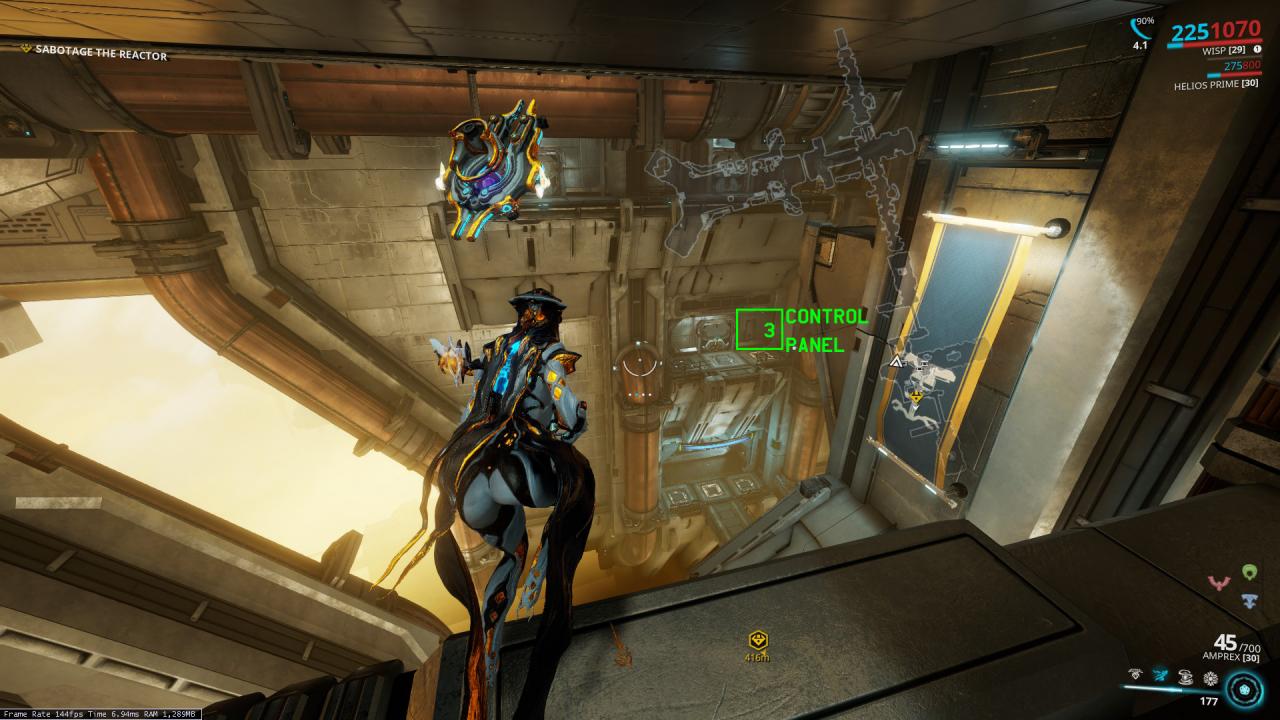 The fourth control panel is right at the top and center of the tile, sharing a wall with the secret door:
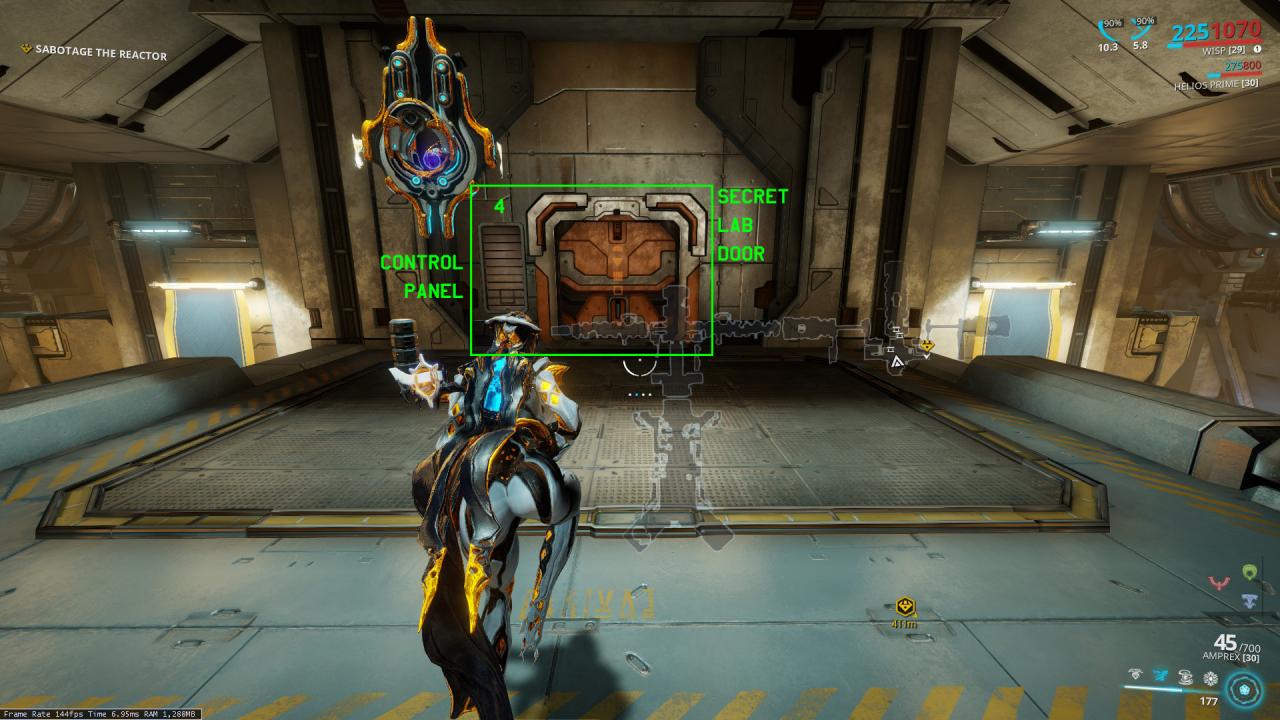 Another view that includes almost all the control panels:
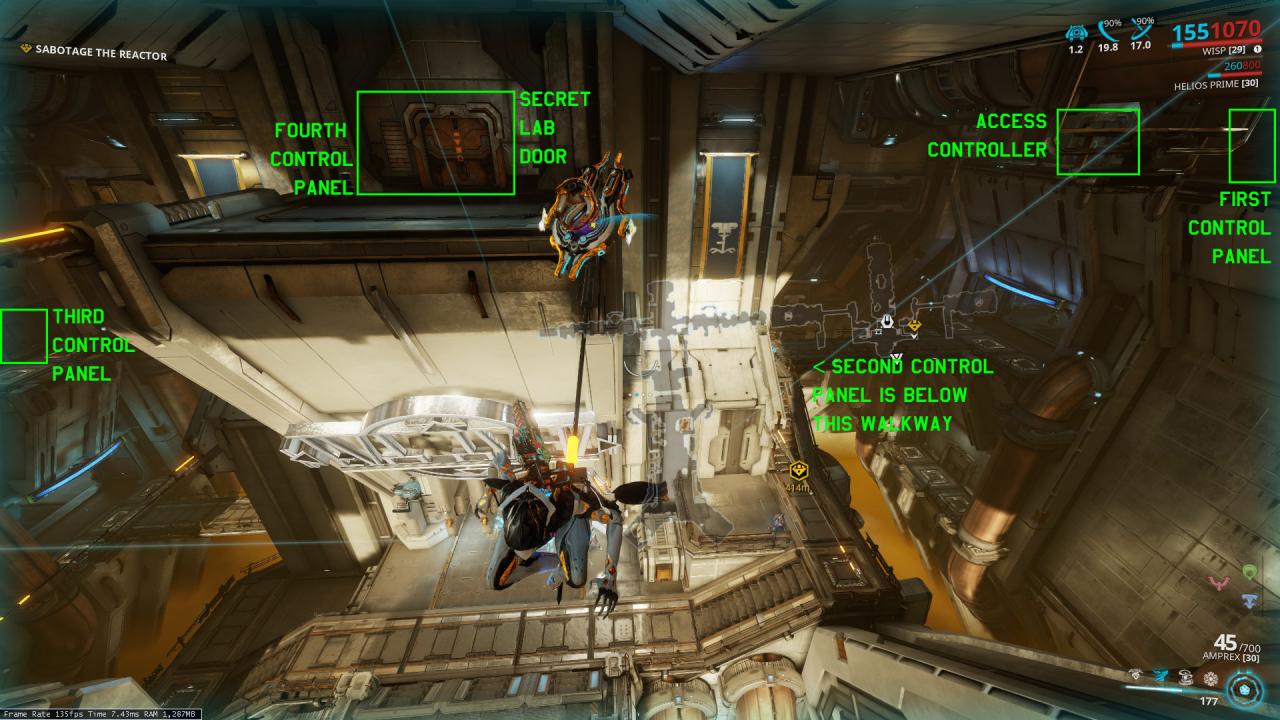
Conduit Lab
Don’t give up, you conduit!
Number of panels required: 4
The Access Controller is located in the topmost center room. In this room, it’s sitting on the ceiling:
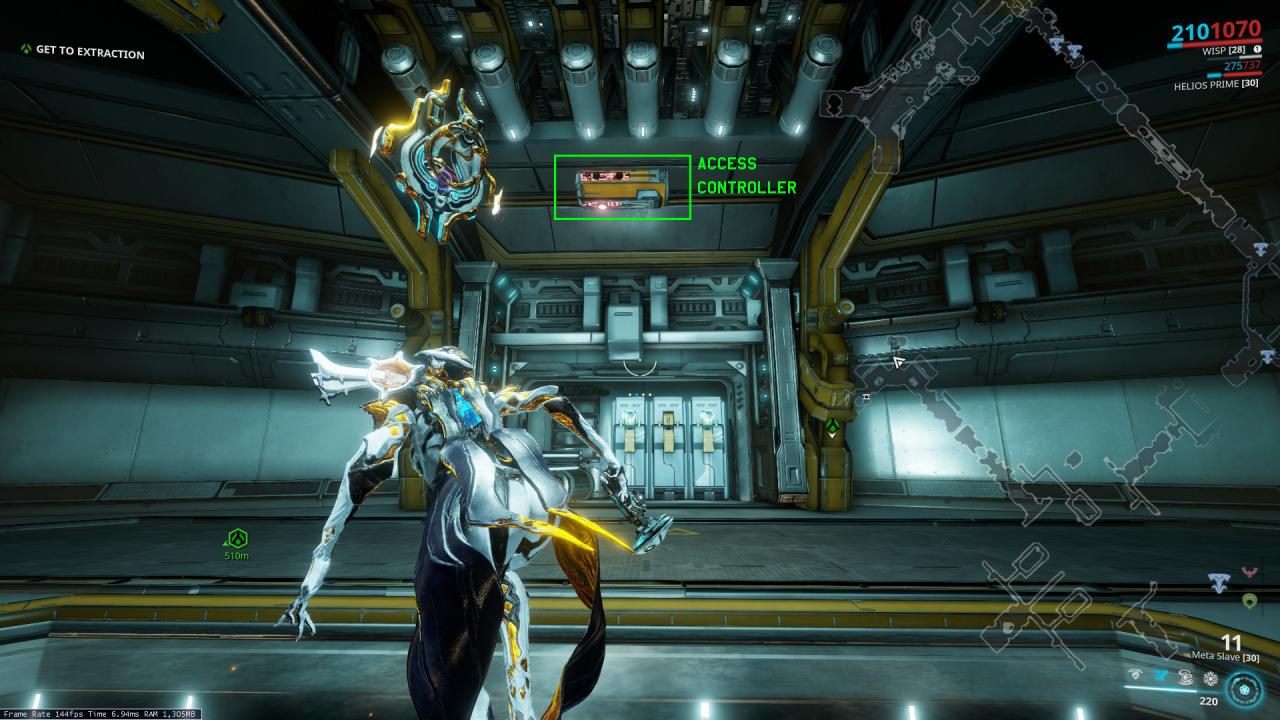 The first control panel is located in one of the topmost rooms on the edge of the tile:
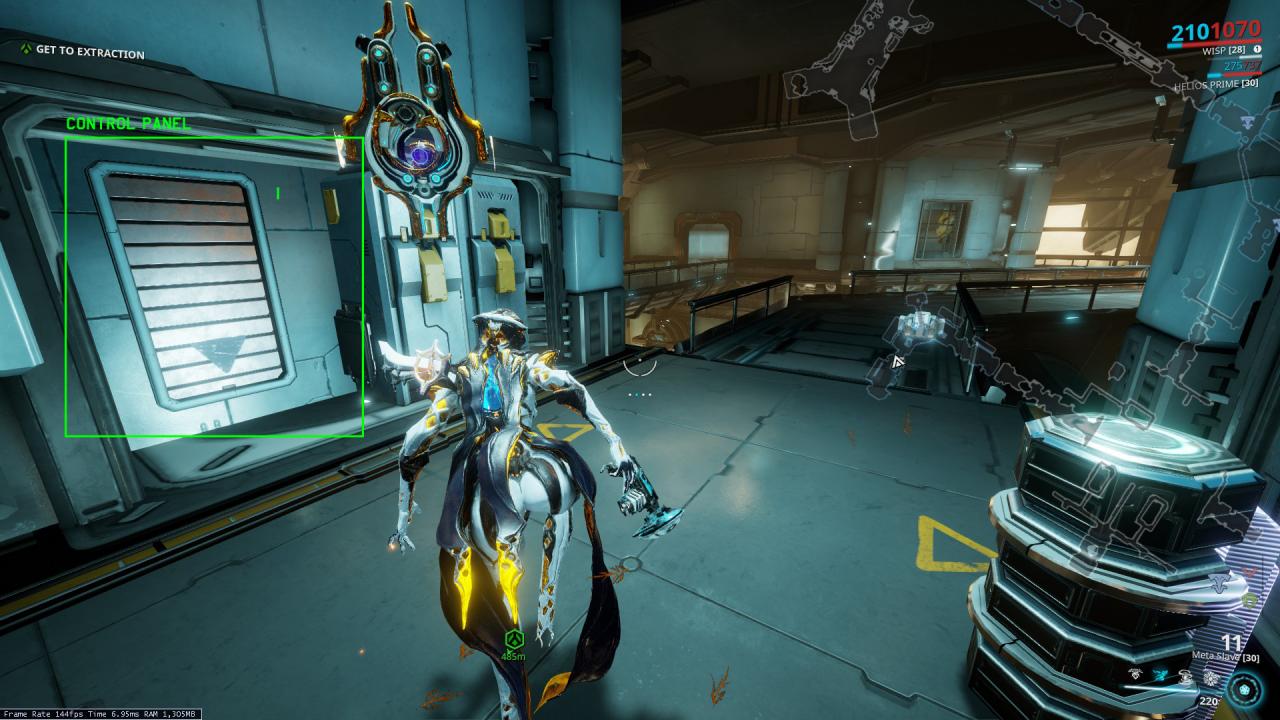 The second control panel is across the tile, also in a room at the top. It’s across the pathways, past the room where the Access Controller was:
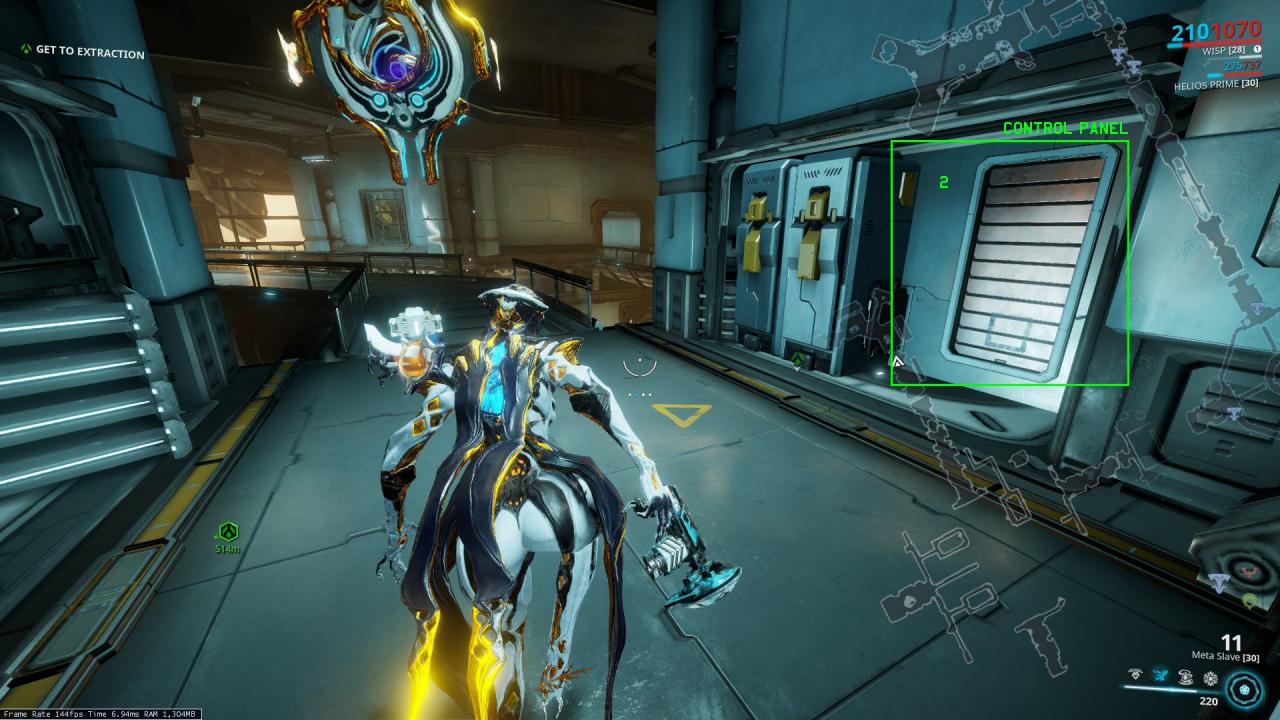 The third control panel can be found in one of the rooms at the very bottom. There is a small hallway located in the center of the tile, and once you enter this room it will be on the left wall:
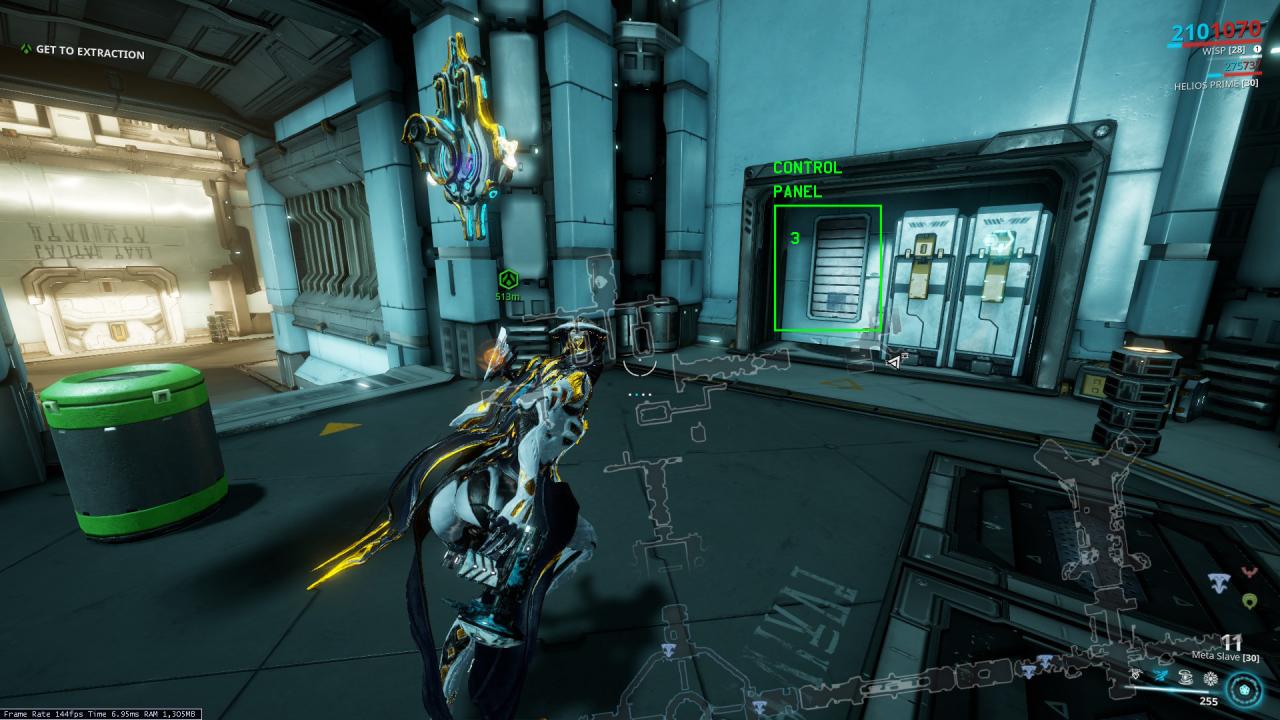 The fourth panel is located in the rightmost hallway once you exit the room with the third control panel. It is behind the lab door:
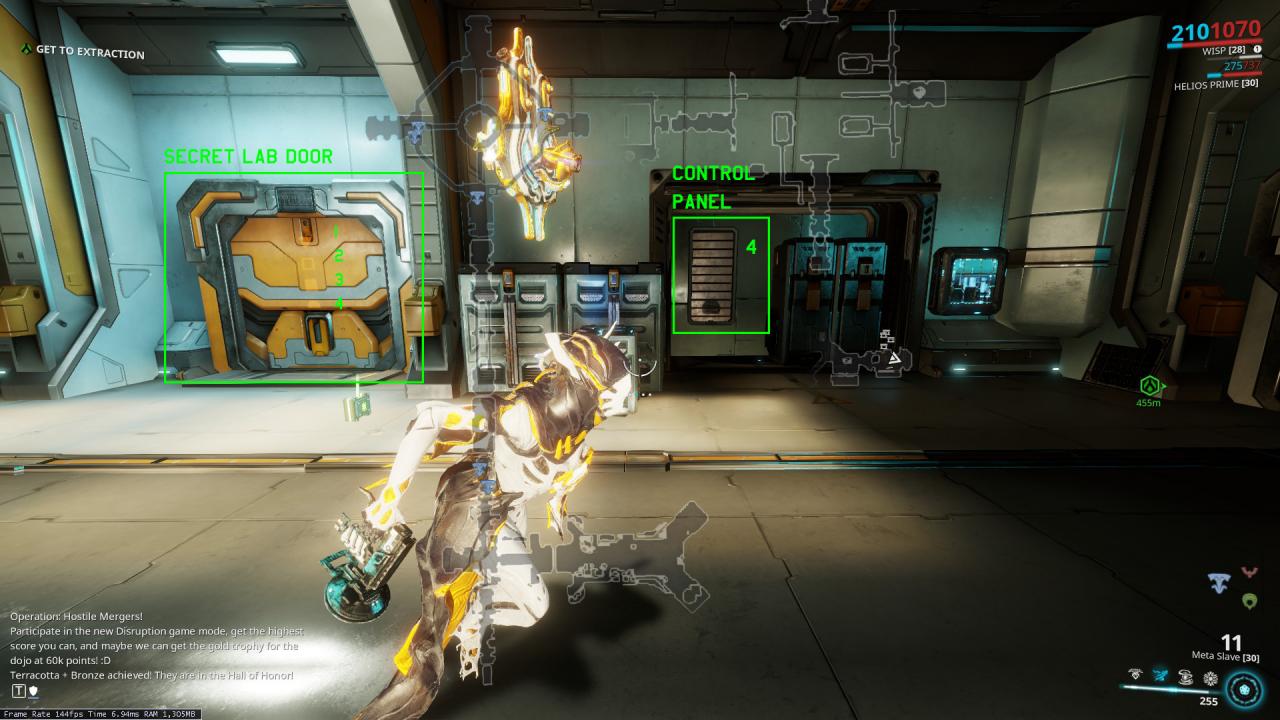
But wait, there’s more!
Related Posts:
- Warframe: Partnership Fragment Locations
- Warframe: All the Hash Locations
- Warframe Railjack Battle Secrets & Tricks Guide
- Warframe: Abilities Versus Demolysts
- Warframe: How to Gain Decent Mods

When you approach the second cache in the sentient labs, do you see a red logo glowing from the door?
There are 2 different logos that I have found but have no meaning, it isnt part of the corpus alphabet.