This guide covers the basics of modding Horizon’s Gate, allowing creation of zones, ports, item types, races, classes, and more.
PLEASE READ THE DISCLAIMER BEFORE MODDING! Mod at your own risk!
DISCLAIMER
Intro, Filepaths, Console Commands
First: there are two important folder locations for modding.
The Mods directory is at
X:\Users\Username\AppData\Roaming\BoatTactics\Mods
and can be easily accessed by pressing the small folder button in the top left of the Save/Load menu.
The Game Data is stored at
X:\Program Files (x86)\Steam\SteamApps\common\Horizon’s Gate\Content
and is important for viewing examples of existing data formats.
By pressing “Shift” + “~” in-game, you can bring up the Console.
Some important console commands:
- h lists commands or gives more info on them.
- dm toggles Debug Mode, which:
- allows you to bring up the console with just “~”
- allows you to hold right-click on character stats, then mousewheel to alter them
- causes the B key to toggle Build mode at any time
- allows certain other commands in build mode
- b enters Build mode, allowing terrain editing, item placement, etc.
- go and gob sends you to the specified zone (ex: go port1). gob puts you into Build mode immediately. Going to a zone that doesn’t exist yet generates a brand new zone.
- z, bz, and sp shows a list of zone data. They do not list zones in the Mods folder.
Build mode
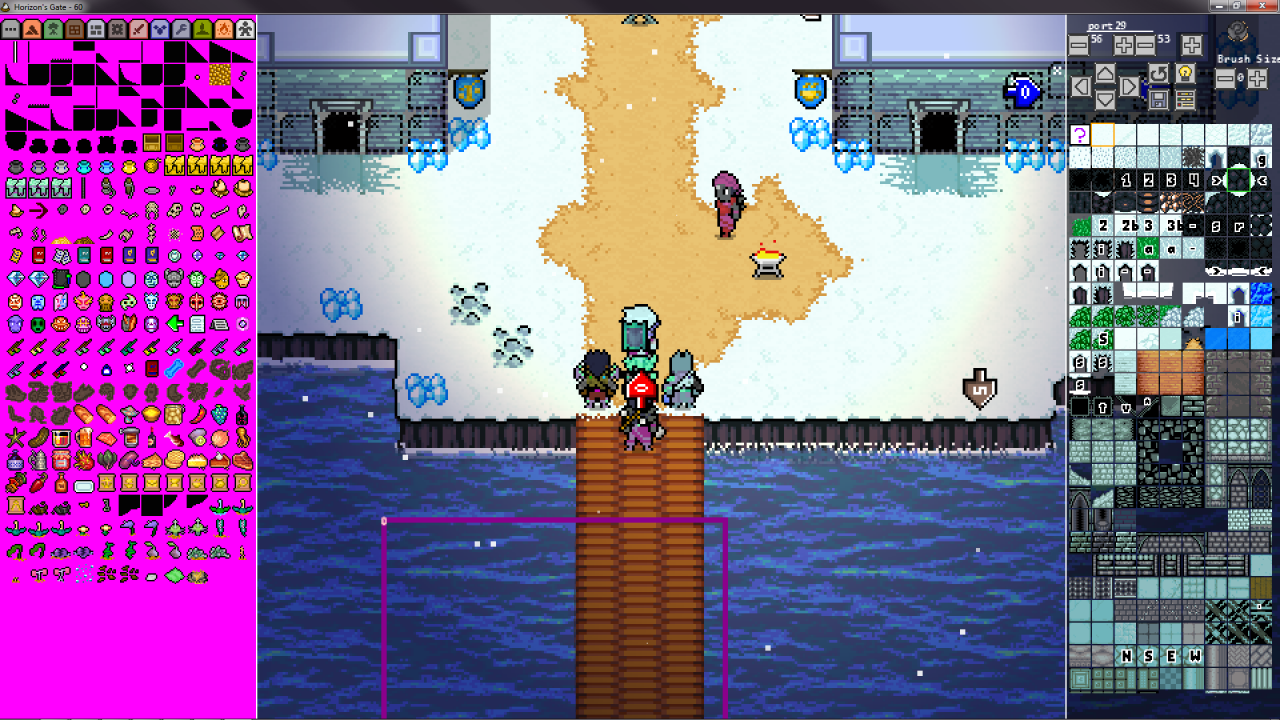
In build mode, you can view and edit the zone, actors, and even terrain types. Use WASD to pan the camera.

The left panel creates Items or Actors.
- Click the tabs at the top to view different categories.
- Mousewheel to scroll the list of items or actors.
- Left click an item to create 1, or right-click to create a stack of 9.
The right panel edits the zone and shows TerrainTypes.
brings up a list of shortcuts and hotkeys when hovered.
- The Zone’s ID can be edited in the text field at the top.
- Most buttons are self-explanatory if you hover them and read the tooltip.
- Below these buttons are the TerrainTypes.
- Left-click or right-click to assign a TerrainType to that type of click. Click the zone to place that terrain type.
- Mousewheel to scroll the list of TerrainTypes.
- Middle-click a TerrainType to view or edit the TerrainType’s properties.
opens the Zone Settings Window.
- From here you can edit many values of the zone, such as palettes, darknessColor, etc.
- Hold Right-click on palette text fields to view a mousewheel-able list of options.
- Hold Right-click on color text fields to bring up a mousewheel-able color picker.
saves the current zone to Game Data. Be careful not to overwrite your work!
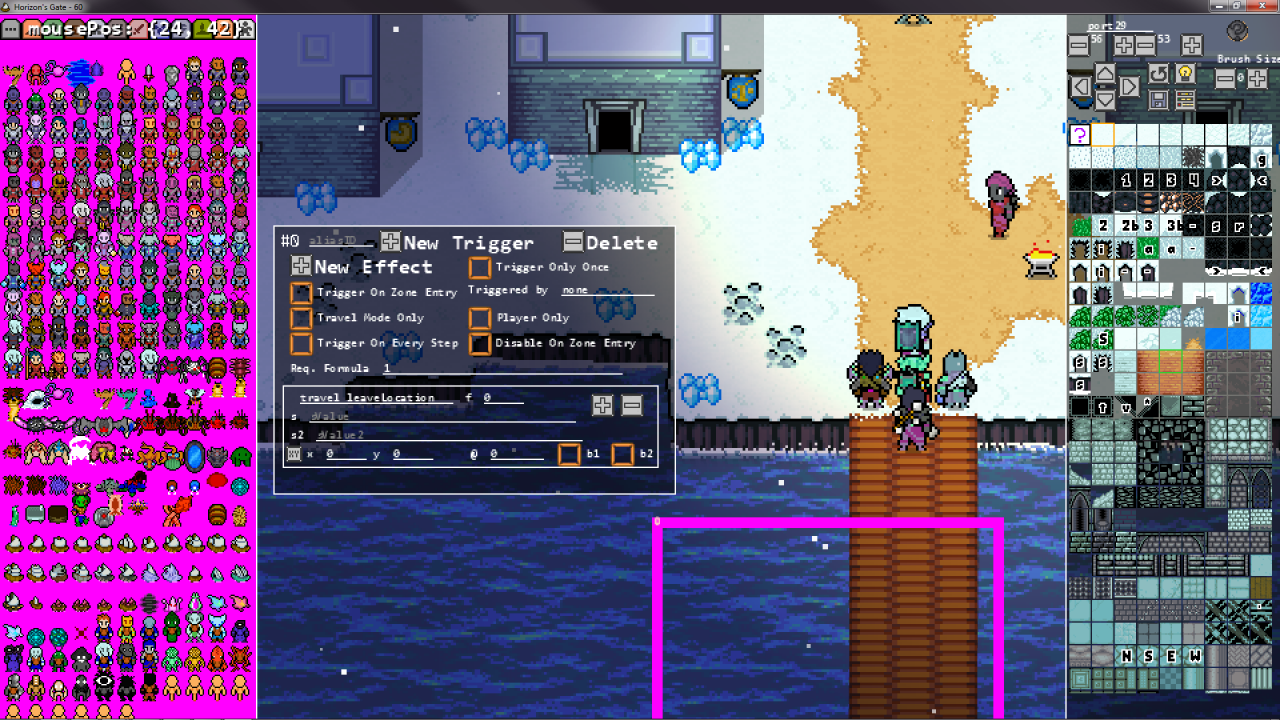
Press T to toggle Trigger mode. This allows you to place event triggers in the zone.

- Press New Trigger to create a new Trigger, or New Effect to add a TriggerEffect to the currently edited trigger.
- Hold left-click on the zone to set the trigger box. Right-click to add additional boxes for the same trigger. Middle-click to remove additional boxes.
- Left click a trigger box to edit its trigger.
- Hold right-click on an effect text field for a mousewheel-able list of possible TriggerEffects.
- Not all TriggerEffects are safe to use or work correctly! Generally, only use TriggerEffects that have a tooltip explanation.
- Hold right-click on Element text fields for a mousewheel-able list of Elements.
- Some common TriggerEffects are:
- travel_point handles most normal travel from zone to zone.
- travel_leaveLocation is used to go from the current zone to the overworld.
- fx plays an fx or sound at the specified spot.
- setGlobalVar sets a variable that is stored in the player’s save.
- spawn is a complicated effect, but is used to create actors or groups of actors.
- enterCombat forces combat start in the specified area.
- Note: any TriggerEffect can also be called via the console or via dialog specialEffects.
———-
To edit an Actor, middle-click them and it will bring up their properties window.
Additional notes on editing Actors:
- If debugMode is on, you can right-click a stat and mousewheel to alter its value.
- If debugMode is on, you can alter hostile/neutral by clicking the red or green gem in the character stats window. Right-click adds them to your party.
- To rotate an actor, hold them and press ‘R’.
- To change an actor’s class, hover them and press ‘C’.
- To edit an actor’s appearance, hover them and press ‘E’.
- Left-click the arrows to select from options available to the player.
- Right-click the arrows to select from all options.
- The bottom text field is a sprite selector for bodyParts. Hold right-click and mousewheel to select a part to edit.
- Some actor properties do nothing, while others are very useful. Some important ones:
- canDespawn, if true, lets the Actor’s corpse disappear if the player leaves the zone.
- dialogNodeID specifies what DialogNode to use when the Actor is spoken to.
- ai_lua is which .lua script to use for AI. “idle” is the proper script for almost all NPCs.
- aggressiveness affects positioning in combat. High aggression (1+) makes the Actor move as close as possible instead of maintaining attack distance.
- bravery affects likelihood of the AI fleeing in combat.
- intelligence affects max time the AI can spend thinking, and how easy it is for them to reach a ‘good enough’ action and stop thinking.
Zones and Locations
First, save your zone with 
Now a player can visit your zones using travel triggers or via the console. But let’s make it so they can access the zone from the overworld. To do this, we need to make a Location.
Take a look at the game’s normal Location data at Horizon’s Gate\Content\SystemSaves\defaultLocations.txt. This is the format we want to use to define our new Location.
In the Mods directory, create a new text file, and put a new [Location] in it by mimicking the format shown in defaultLocations.txt.
Here’s an example:
This example creates a Super Cool Beach right near Searth. If this file is in the Mods directory, any save that doesn’t already have Super Cool Beach will automatically add one to the overworld!
NOTE: you can override the game’s default Locations or Zones by putting your own versions in the Mods directory and using the same ID. The game will always check the Mods directory FIRST when loading Zones.
NOTE: after the first time a Location is created in a save, changing the base data will not affect it! The player now has their own version that will never be overwritten!
NOTE: please store Location or Zone data separate from other data types, such as [ItemType] or [ActorType]. If the game detects a [Location] or [Zone] in a text file, it will not load that file on startup, and instead wait until the appropriate time.
Creating an ItemType
The game’s items are all stored at Horizon’s Gate\Content\Data\SystemData\Definitions\items. Take a look at these files to get an idea of the formatting.
Now, take a look at the example item at Horizon’s Gate\Content\ModSamples\items_mod1.txt. This example creates a new item that uses its own texture. Copy “items_mod1.txt” and “items_mod1.png” to the Mods directory so you can access this item in-game using Build mode.
To override an existing item, set your item’s ID to the existing item’s ID. Additionally, if you’d like to retain all original properties of the item except for those you alter, you can use “cloneFrom”.
As an example:

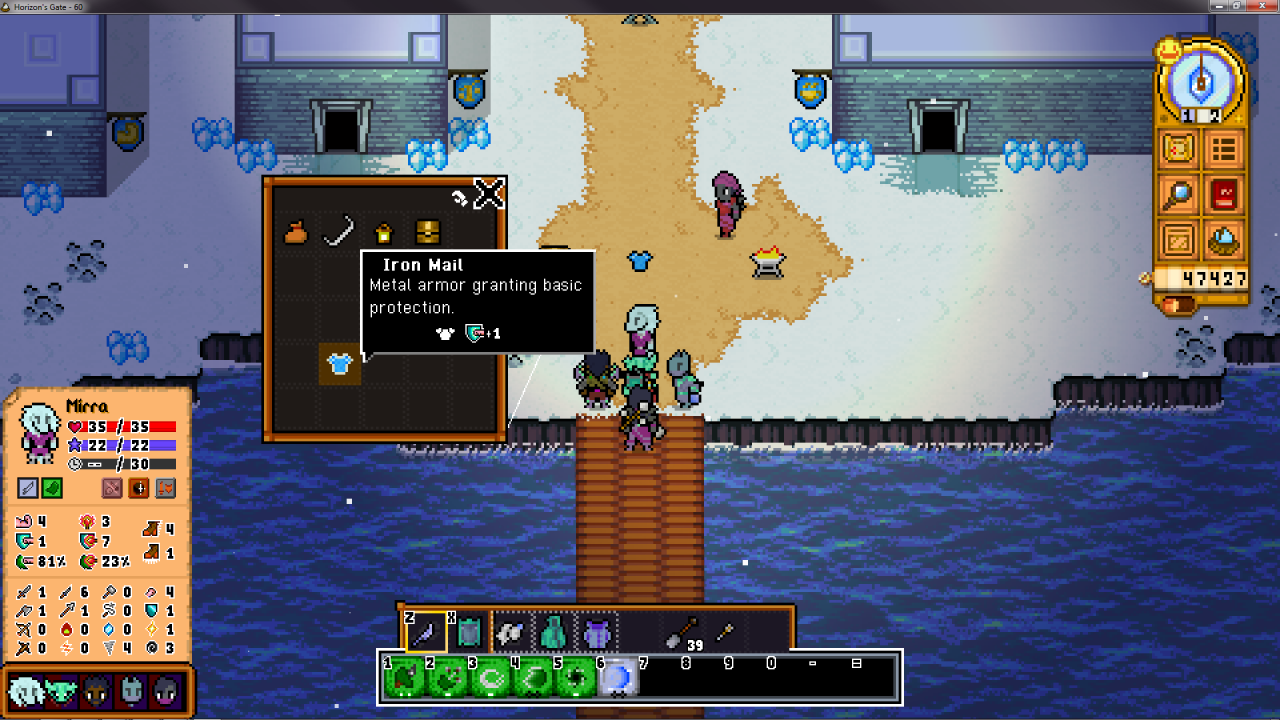
This example changes the color of all Iron Mail to blue, without changing anything else about it. (cloneFrom also allows multiple mods to ‘stack’ if they both modify the same item.)
Creating other types
Create your own by following the format in the original data – or override existing types by using the same ID.
ActorType and ActorClass do not yet support cloneFrom, but will soon.
Actions and dialog do not support cloneFrom.
You can also create TerrainTypes of your own. I recommend using the in-game TerrainType editor, saving in that editor, then copying your new TerrainType out of Horizon’s Gate\Content\Data\SystemData\Definitions\terrain\terrain.txt and into your own mod file.
Final notes
NOTE: Sound effects only support .wav format. Music is not yet supported.
NOTE: Currently, the game will crash if it tries to display an image that no longer exists. Be careful when adding or removing mods that add new images. (As an example – trying to load or view your save will crash if you customize your character with a sprite mod, then delete that mod.)
NOTE: As a 32-bit .NET application, Horizon’s Gate has a hard limit of approximately 1.2 GB ram maximum. Try not to use very large sound effects, songs, or images to avoid hitting this limit.
Related Posts:
- Horizon’s Gate Full Map with Trainer and Dojo Locations
- Horizon’s Gate All Trainner Locations (With A Map)
- Horizon’s Gate: All Trainer Locations
- Horizon’s Gate: All Classes Guide
- Horizon’s Gate: How to Push People off of Their Ship to Permanently Borrow it
