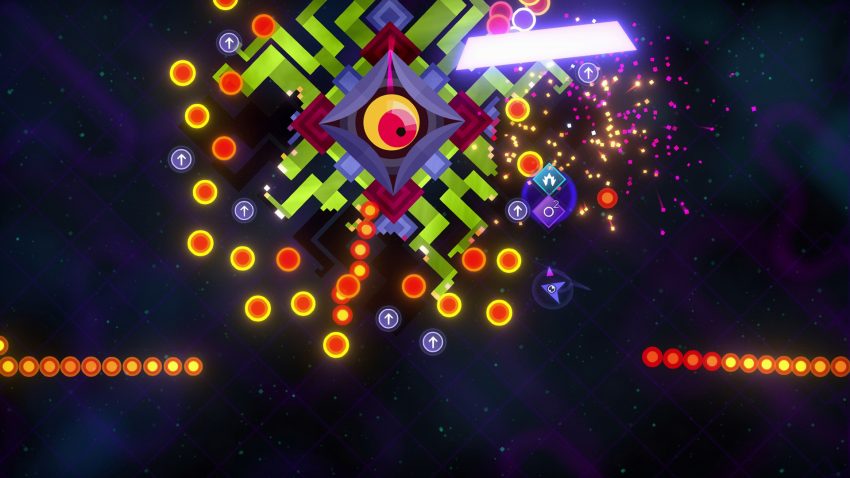
This guide aims to give you helpful advice for clearing the first stages of the Crusade campaign, and potentially improving your best times.
Introduction
Additionally, this guide will not cover items or powerups unless they are relevant to strategies covered here.
I will most likely continue this guide to cover the entirety of the Crusade campaign eventually.
General Tips
- Detaching enemy guns is almost always better than shooting them until they’re destroyed.Not only do you avoid the bullets that guns counterattack with, but it’s much faster in the majority of stages.
- Don’t sleep on +damage powerups, especially if you’re going for a gold medal. They add up fast, and they’re the only permanent powerup in the game. The less time you have to spend destroying the boss, the less time you have to avoid the boss’s attacks.
- Shooting behind you as you move will increase your movement speed. This may be tricky to get used to at first, but if you need to get around a boss quickly or dodge an incoming attack, it could be the edge that helps you avoid a hit or get a better time.
- Watch other peoples’ replays! You can discover strategies and techniques you might never have thought of this way, and it’s a great way to learn more about each boss.
- Join the Discord server![discord.gg] You can get advice for any part of any level there, and the community is friendly to boot.
Neophyte
![]()
5:00
2:30
1:30
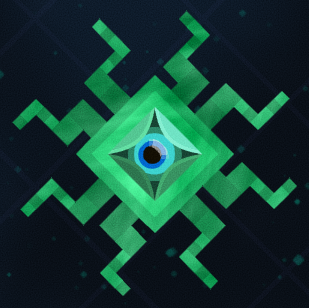
Neophyte’s first form is the game’s tutorial. Incredibly simple and straightforward, you can either follow the boss’s instructions, or attack it while it’s teaching you (despite its pleas). If you’re trying to get a gold medal, you should destroy it immediately.
Its entire body is squishy and destructible, so you shouldn’t have any problems here.
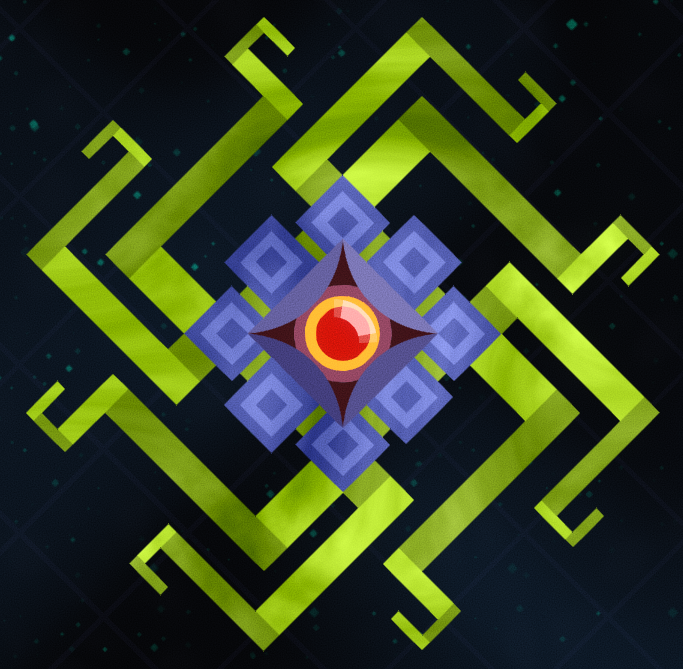
Another very simple form with easy to dodge attack patterns. Its entire body is destructible, but the blue armoured sections are tougher than the green fleshy parts. With careful aiming, it’s possible to shoot between the blue armour to hit the core, but breaking through the blue parts shouldn’t be a problem with how simple its attack patterns are.
Take note that from now on, whenever you shoot an enemy’s core or gun, it will periodically shoot medium-sized, round bullets at you. These aren’t a problem to dodge on their own, but they can be troublesome if they end up mixed in with another attack pattern.
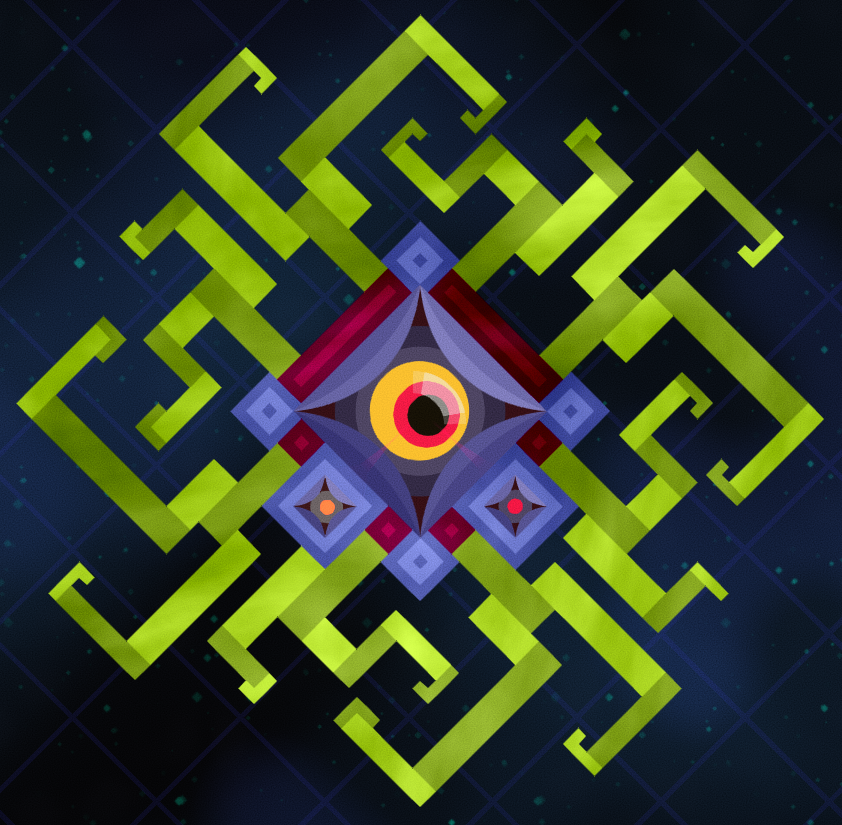
This phase introduces invulnerable red sections that cannot be damaged, and guns that must be destroyed before the core can be damaged.

The boss remains simple, however. You can either shoot away the tentacles surrounding the guns, or aim between them to hit the guns directly (which you should do if you’re aiming for a gold medal). Either way, taking them out should not be a problem. Just make sure you avoid shooting the red sections. After that, fire away at the core and you’ll be on to Neophyte’s final phase.
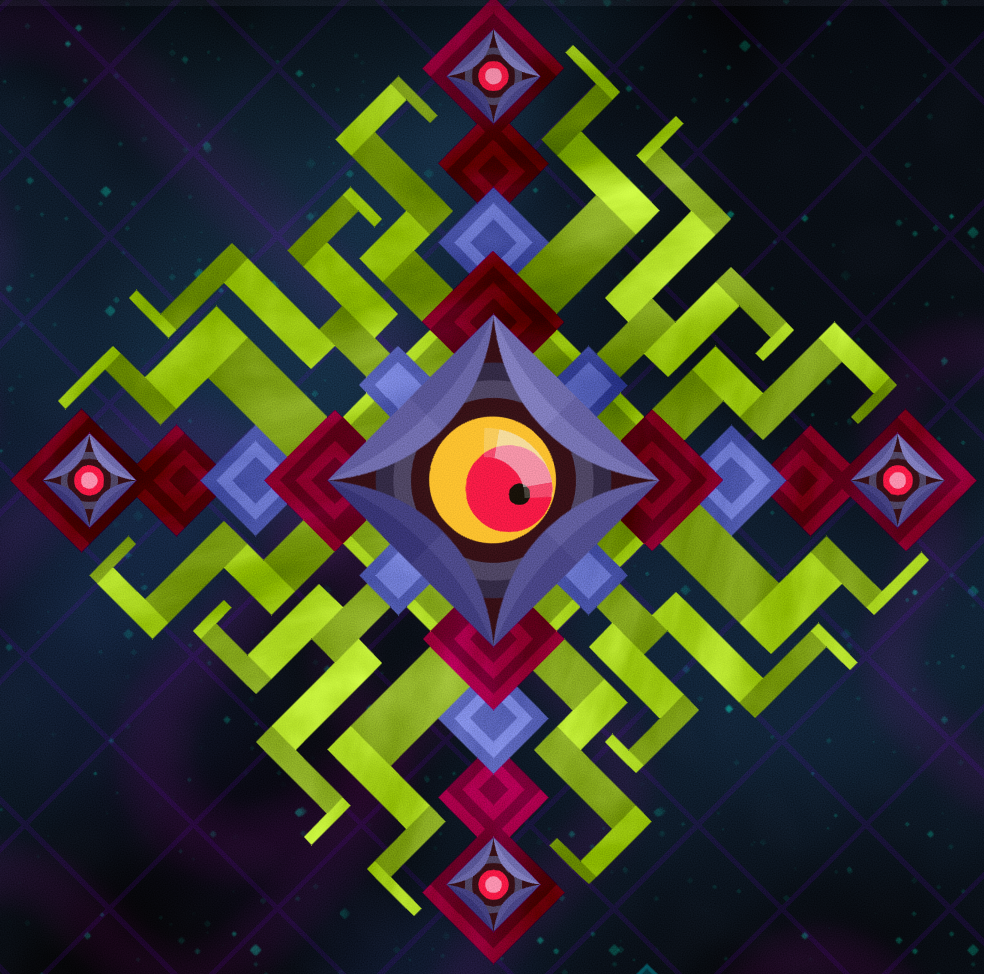
The final form is a bit trickier, as it teaches you the main gimmick behind Chippy’s gameplay: detaching parts by cutting them off entirely.
The four guns on each corner of the boss are surrounded by invulnerable pixels, thus, your only option is to cut through the blue pixels that connect them to the boss’s main core.

Doing so will instantly destroy anything not connected to the main body, including guns. Cannons are very effective at destroying the blue pixels, so it may be worth saving some for this phase.
Chip away at those blue connections, and once you’ve destroyed all four, shoot the core to finish the stage.
Kraken
![]()
7:00
5:00
3:00
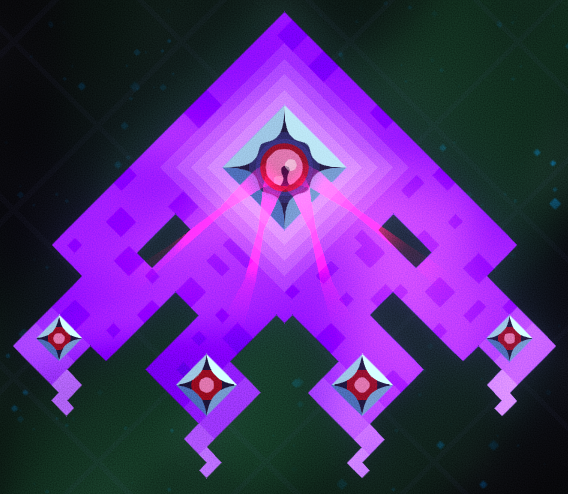
Shaped like a friend, Kraken has the unique ability to blow bubbles at you throughout all of its phases. These don’t hurt you, but they bop you around, and could send you flying into bullets or the Kraken itself. Even if the boss eagerly tells you to “touch bubble,” try not to touch them.
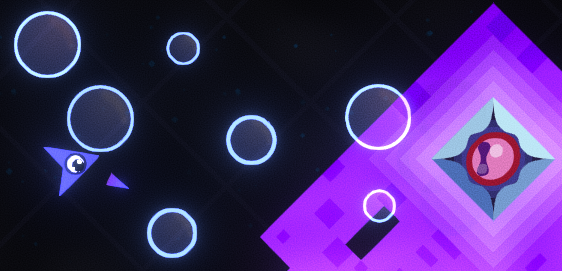
Aside from that, its first form is very easy as it is entirely destructible. You can shoot the guns directly, but if you’re aiming for a gold medal, you’re far better off detaching the guns entirely (this will be a recurring theme for strategies throughout the game).
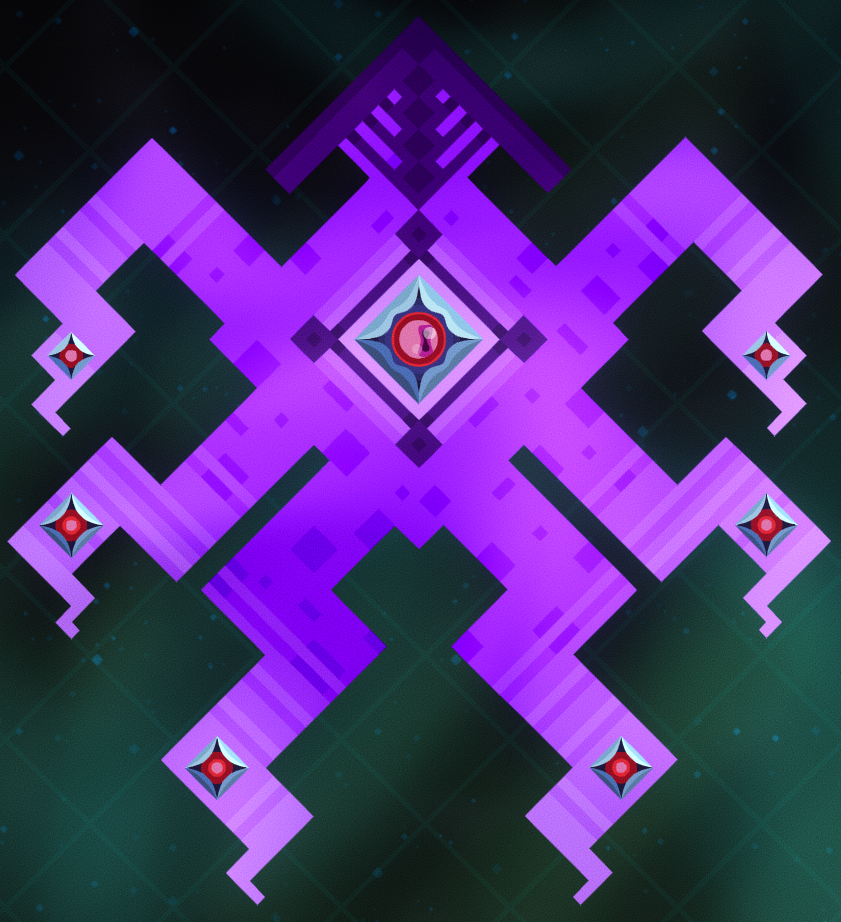
Don’t be intimidated by the second phase’s size, since the main strategy remains the same: try to cut each of the tentacles off. The entire body remains destructible as before, but the dark purple areas are much tougher than the light purple pixels. Although you can safely ignore the tough section sitting on top of the boss’s core, it may be worthwhile to save a Cannon or Turret powerup to shoot through the bulk of the Kraken’s body when going for the core.
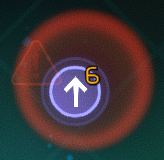 The Kraken will also offer you a dangerous powerup right at the beginning of this phase: 6 +damage powerups. The downside is an enemy turret will hover far above you and shoot a bullet down once every second for a very long duration. That said, this attack is not too hard to avoid, and the 6 +damage items are well worth it if you’re going for a gold medal.
Two attacks to note from this phase onwards is a bullet rain pattern: the Kraken will shoot several volleys of round bullets off the top of the screen. Shortly afterwards, those bullets will rain down across the whole arena in big rows. Keep an eye out for this move so you can be ready in advance.
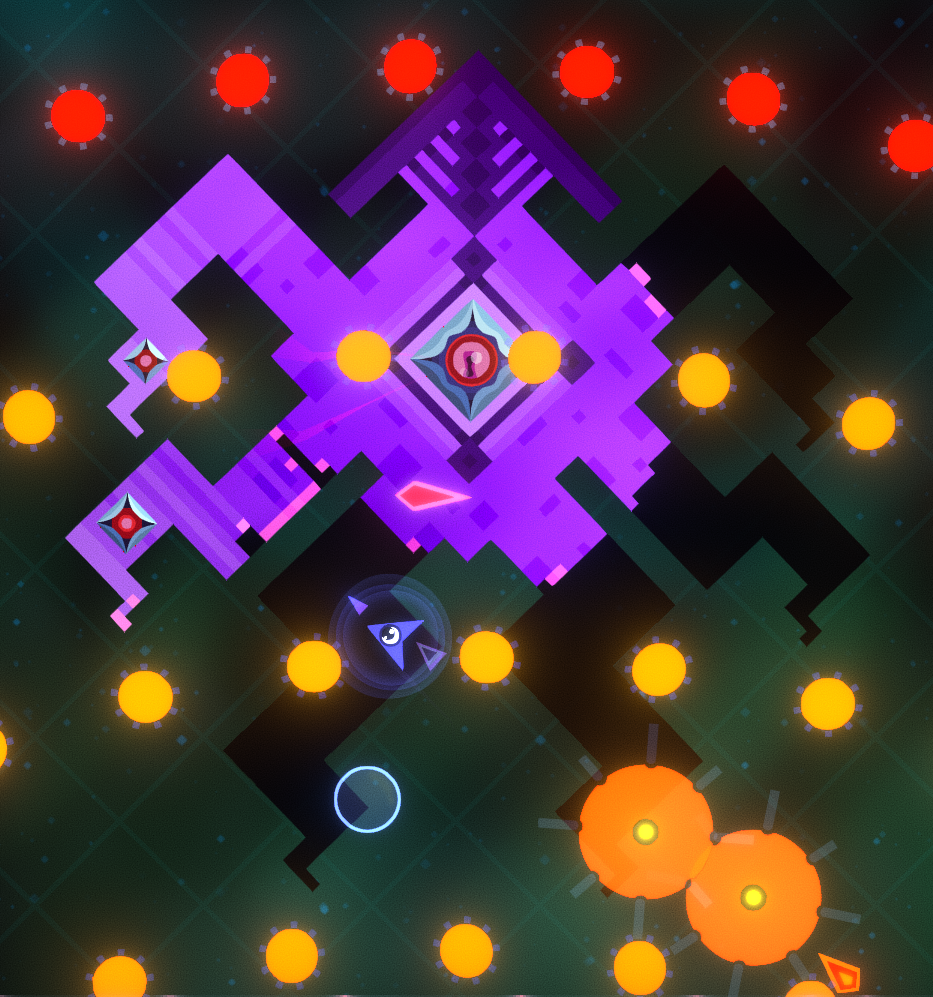
There’s also a “flowing water” attack where the arena will have rushing water sweep through it. It can’t hurt you, but it will push you and your Turrets in the direction of the moving water in the background. When you hear the sound of ocean waves, you know this attack has begun. Just be ready to adjust your position and/or movement to compensate for it.
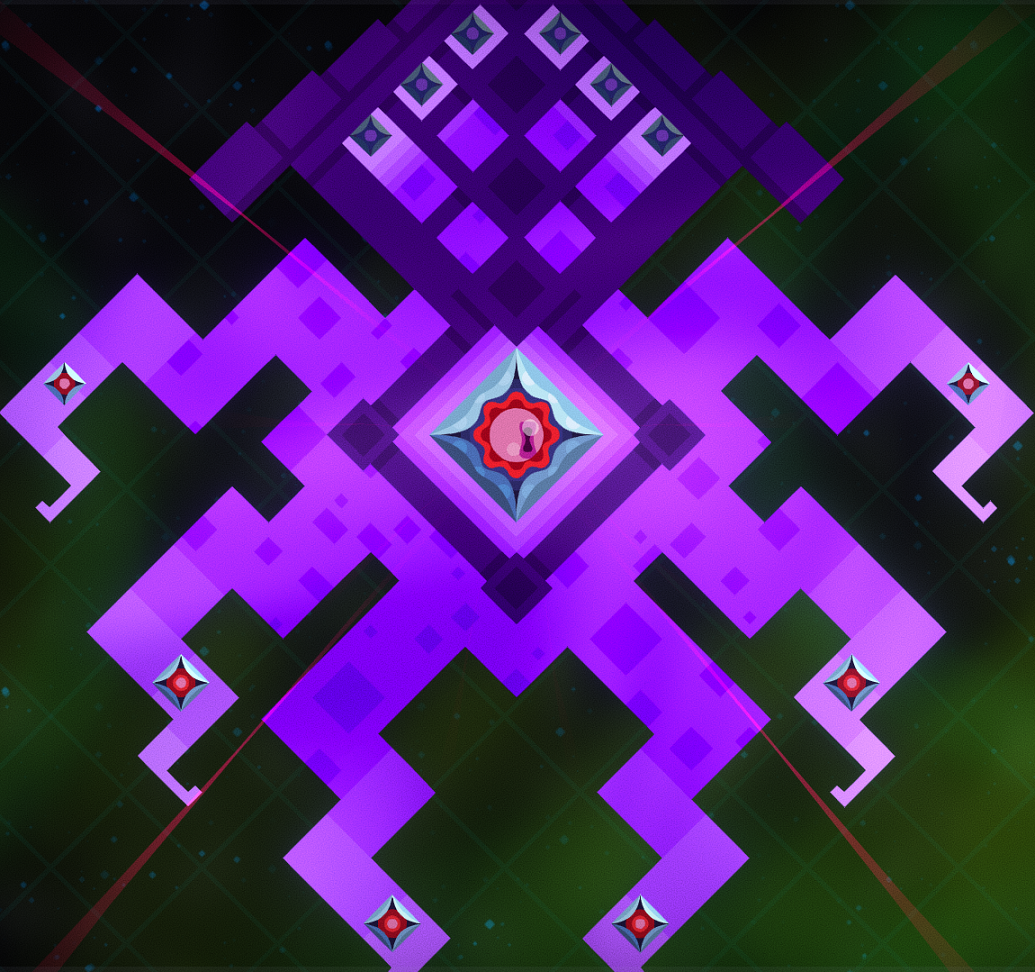
First off, the six guns in the Kraken’s heavily armoured section do NOT need to be destroyed to damage the core. Otherwise, it’s the same strategy as before: cut off the tentacles, except there’s a small catch.
In each corner of the arena is a mini-Kraken protecting the Kraken’s core. They are very weak, and each of them offers a Shield powerup if you’re having trouble, or a Cannon if you need a little extra firepower.
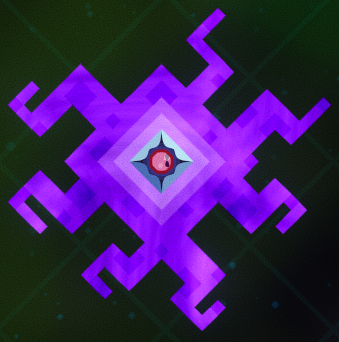
A helpful strategy is to save your Turret and Cannon powerups for this phase. Aim your turrets at various locations around the Kraken so they’re busy cutting off the tentacles while you go to each of the mini-Krakens and destroy them. One Cannon shot will destroy enough of the minis’ flesh to render the cores vulnerable, and they’ll go down after just a couple seconds of sustained damage.
After all the guns and mini-Krakens are destroyed, blast into the core with everything you have, and you’ll have defeated the Kraken stage.
Guardian
![]()
7:00
5:30
3:45
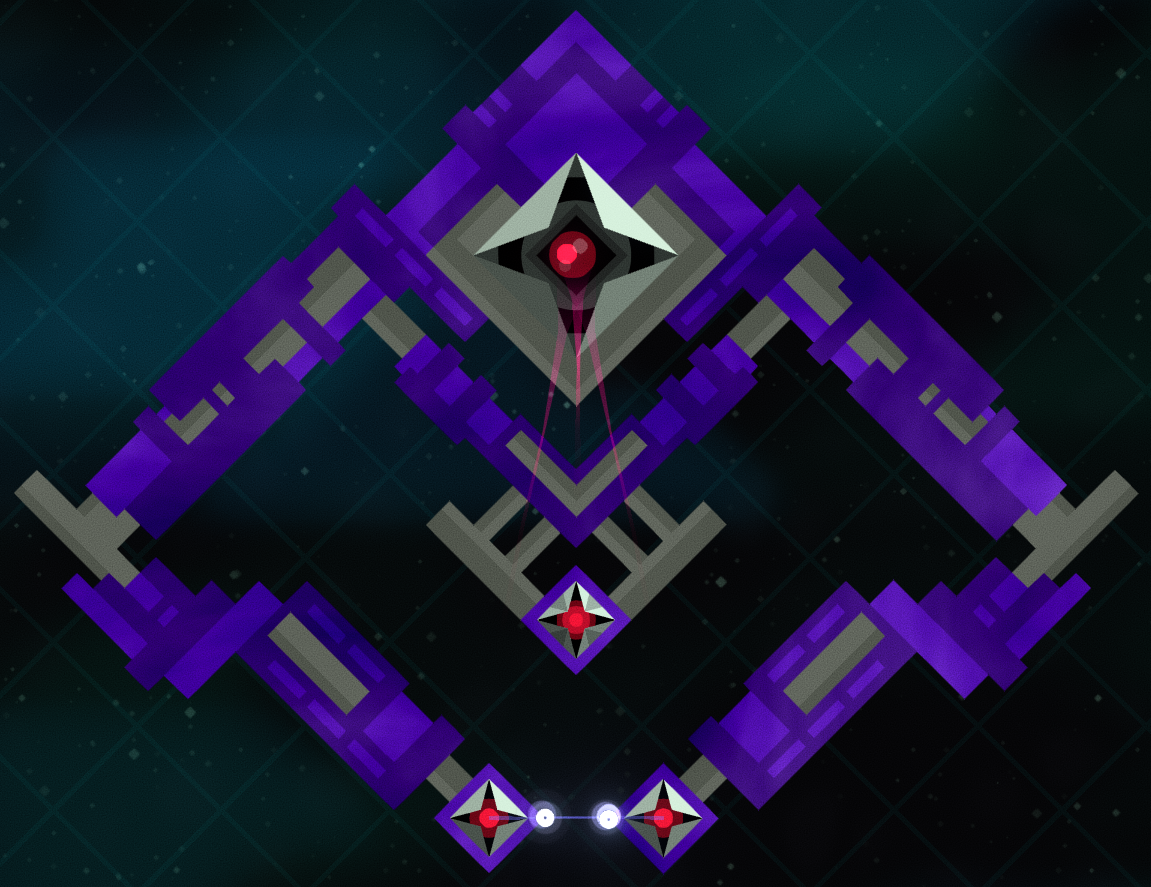
This first form is pretty simple. Guardian’s body is almost entirely made of blue invulnerable pixels; the only parts you can damage are the grey sections in order to detach its limbs. Assuming its two long appendages are arms, aim for the elbows to detach the first two guns (and give yourself some room as well). Although, as you do this, be careful of the lasers the bottom guns are constantly firing. Once you break one arm off, the range of the other arm’s laser will increase dramatically as it no longer has anything to block its trajectory.
Cool tip: If you fire downwards and move straight up at the very beginning of the stage, you can get past the arms’ lasers before they activate. This can be useful for shaving off a couple seconds of time, but it’s a bit claustrophobic in there, careful!
After its arms are gone, aim for these two connections here so you can detach the centre gun and reveal the core in one move.
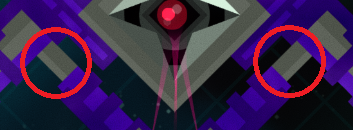
Punch through the grey pixels surrounding the core and you’ll be on your way to the second and final phase.
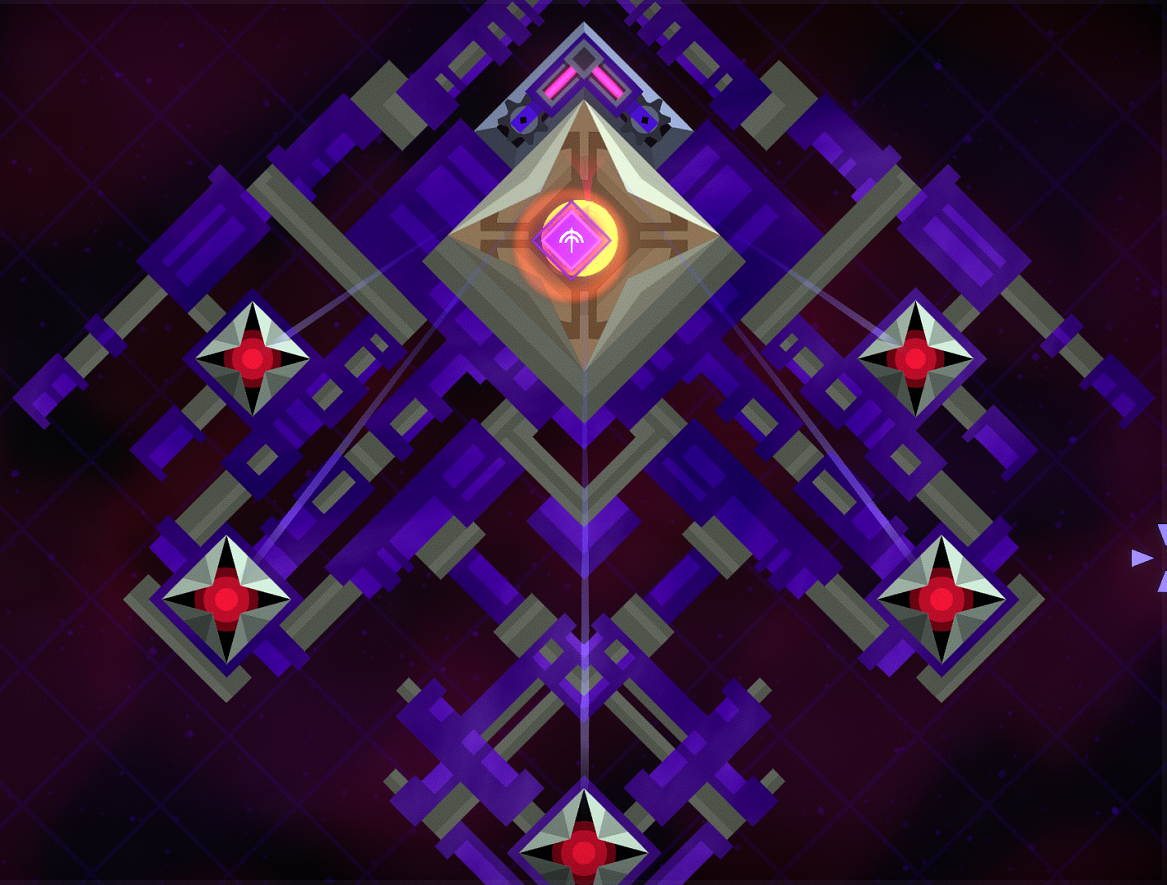
Here’s where the real fight begins. Once again, it’s all about aiming for those grey weak points. This is the first fight where it’s important to figure out which weak points are worth aiming for. For example, take the centre gun.
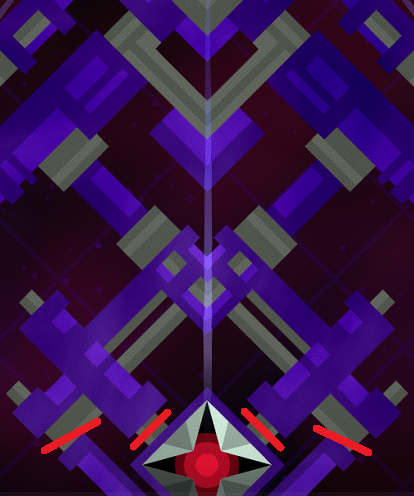
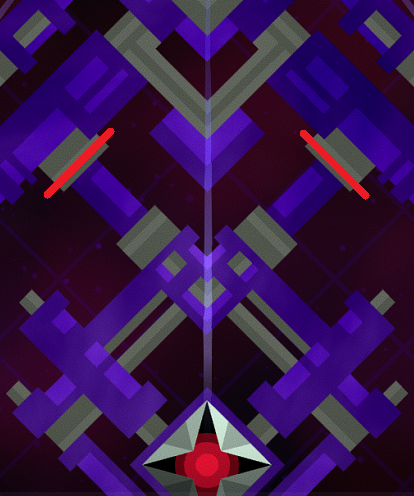
In the left example, you could destroy these four weak points marked with red lines in order to detach the gun, OR, you could follow the right example and destroy just two weak points in order to destroy a lot more of Guardian’s body, as well as revealing more weak spots that will be important to knock out as well. The example on the right is clearly the superior strategy in this case.
With this in mind, here are a couple overviews of possible strategies to use against Guardian’s second phase, the first being simpler, and the second being trickier, but faster.
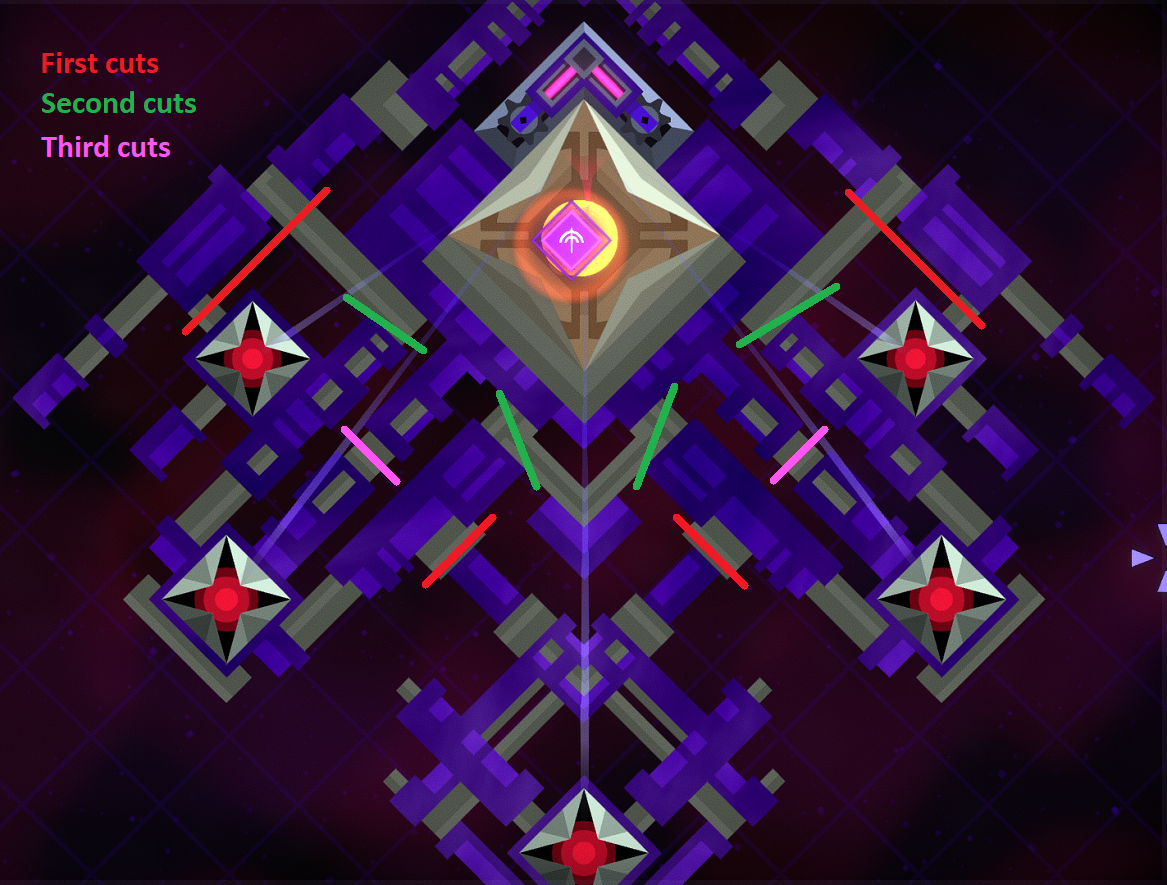
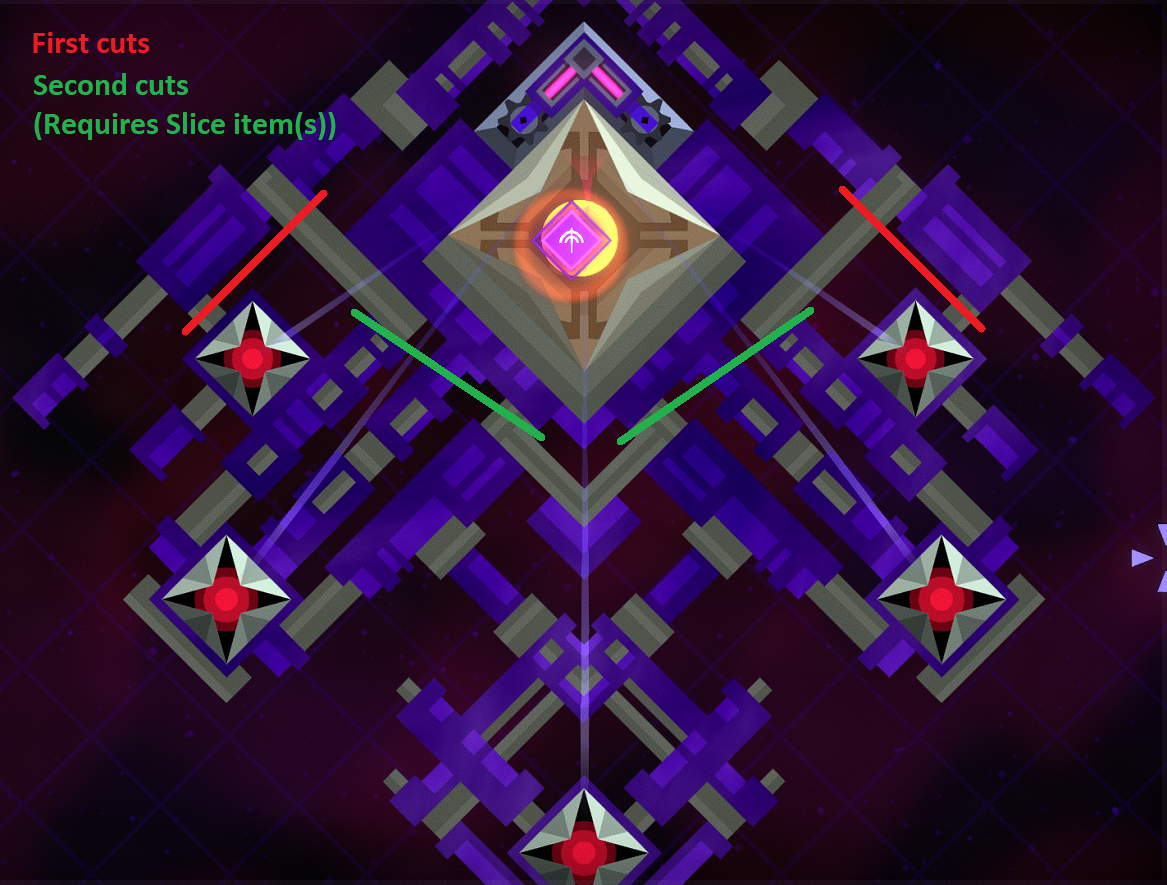
Slice is one of the only powerups that allow you to destroy any pixels, regardless of invulnerability. There are just two available in this stage (one is available only as a dangerous powerup at the beginning of the second phase, which causes lasers to periodically fire downwards across the arena with a couple seconds of warning). Using them to cut through the invulnerable sections marked with the green lines will allow you to easily detach a huge chunk of Guardian’s body.
If you only have one slice item, it’s possible to combine these outlined strategies due to the boss’s symmetry.
Once you’ve destroyed all five guns, the entire boss will rotate so it’s upside down.
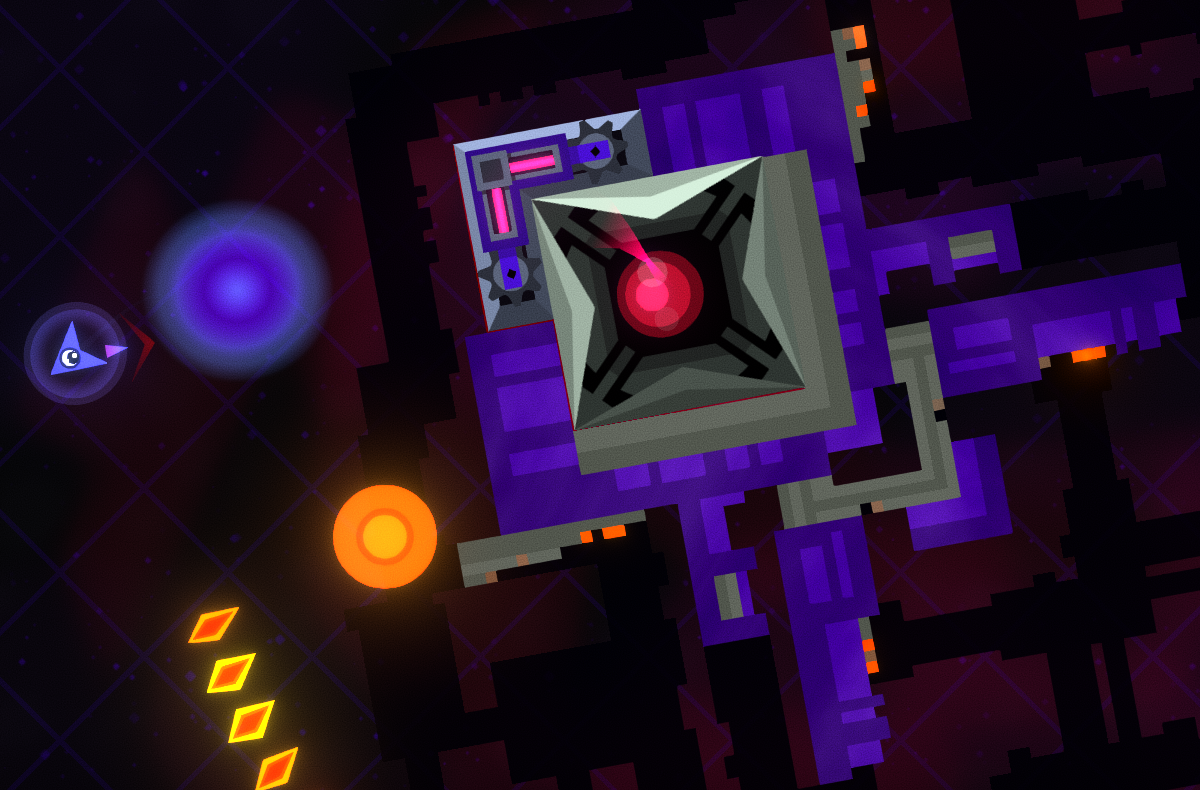
The fight becomes a damage race at this point; Guardian will unleash its most powerful attacks, and eventually spawn additional enemies that rapidly fire at you as well. Attack the core’s barrier with everything you have, then keep firing at the core until it’s destroyed. Remember: unless you’re going for a gold medal, taking a few seconds to focus on dodging a difficult attack is more worthwhile than taking a hit.
Execution
![]()
6:30
5:45
4:15

By far the game’s most unique boss. Simply put, the only goal of Execution is to keep shooting at the barrier just beneath the boss until the lasers at the top corners pierce its defences and eventually destroy the boss.
As you shoot the barrier, the boss will periodically spawn followers to attack you. They can be destroyed to give you various powerups.
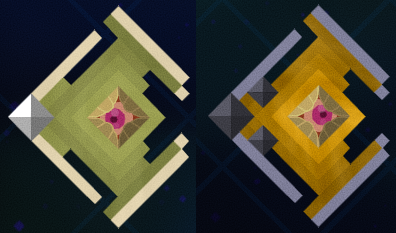
Here are some general tips to help clear this level:

- Use the Convert powerup the boss offers you at the beginning of the stage. If you collect the powerup in this spot in the arena (seen on the left, use the gridlines for reference), it will guarantee the first enemy that spawns in the top right will shoot the maximum amount of bullets once it flies in front of the boss’s barrier. Use the Convert powerup on those bullets, and it’s possible to more than double your firepower for the entire stage. If you need help understanding this technique, look at the top replays for reference.
You only need about 15-16 damage per shot in order to sustain maximum laser damage against the boss, but anything higher certainly won’t hurt, especially for destroying the boss’s followers.
- The lasers attacking the boss’s defenses have a maximum damage of 30 per tick. The lasers do 8 damage by themselves, but by shooting the barrier beneath the boss with several +Damage powerups and/or Turrets, the lasers can do up to 30 damage. On that note…
- Take advantage of items. This level has plenty of both Turrets and Shields. If you do not have any Shields equipped, the boss’s followers will almost always give you a a Turret/Shield item choice. If you have Turrets shooting the boss from the bottom of the arena (where they are least likely to be rammed by the boss’s followers), it gives you a chance to focus on dodging, destroying the followers, and/or inflicting even more damage on the boss.
- Keep the boss’s followers under control. Until the end of the stage, they are the only thing that can actively attack you, and they can quickly become overwhelming if their numbers get too high. If you perform the strategy with the Convert powerup, you can make quick work of them with a few seconds of sustained fire.
- The grey bars on either side of the boss will fire bullets at you when destroyed. The amount of bullets they fire increases with each destroyed bar. When there’s a pair of explosions near the top of the screen, be ready for a wave of bullets to come down.
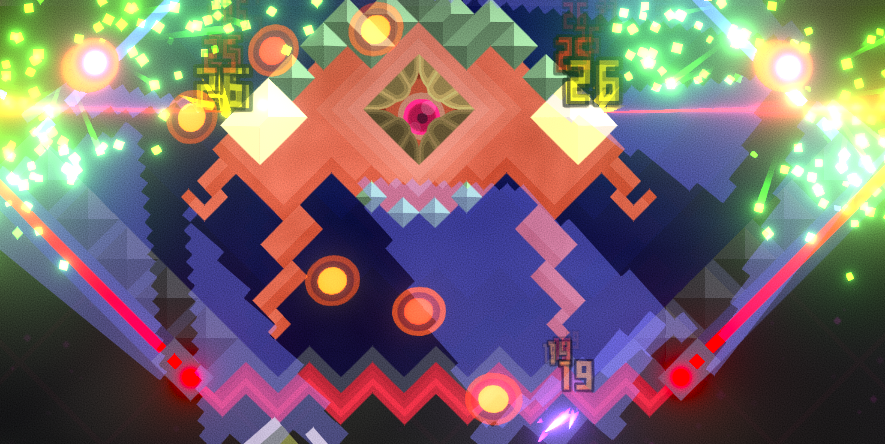
Once the boss’s defenses go down (when there are several explosions at the top of the arena and the boss cries out), all of its followers will become enraged and they will chase you down for about 5 seconds until it wears off. Depending on how many followers there are alive, this can be easy to avoid, or a total nightmare (hence, keeping their numbers down is good).
The objective remains the same — keep shooting at the barrier — but be aware that the boss itself will now begin attacking you, and it will continue enraging its followers once in a while if you take long enough. If there aren’t too many followers left, the boss’s attacks can be easily avoided, but the level may become quite challenging if there are too many followers left.
Conclusion
If you are having problems with any specific parts of a level, or there are certain sections of levels you would like to see covered here, feel free to leave a comment and I’ll try to get back to you.
