For Ultimate Ragdoll Game players who want to play with a custom ragdoll, this guide will show you how to create and upload one.
How to create Ragdoll
To create your own ragdoll, you will need a few things:
- UNREAL ENGINE 4.27.2 EDITOR
- ULTIMATE RAGDOLL GAME SDK
- 3D MODEL OF YOUR CHARACTER
- PREVIEW IMAGE
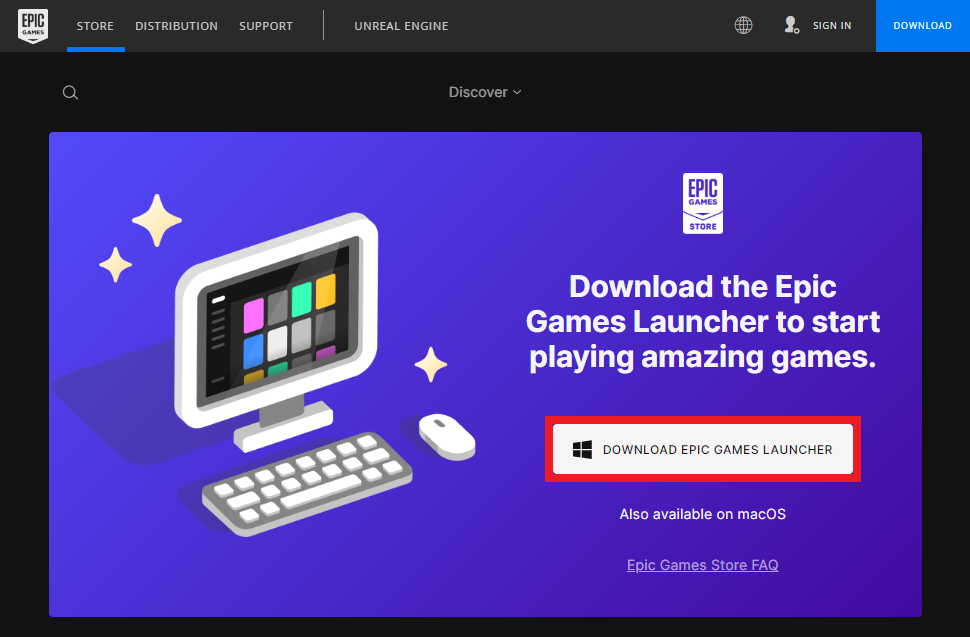
First, download and install the Epic Games Launcher[store.epicgames.com].
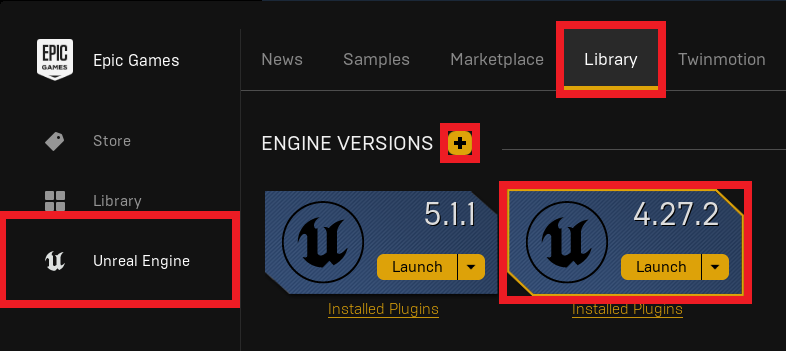
After installation, go to the UNREAL ENGINE tab, then LIBRARY, click the PLUS ICON, and select 4.27.2.
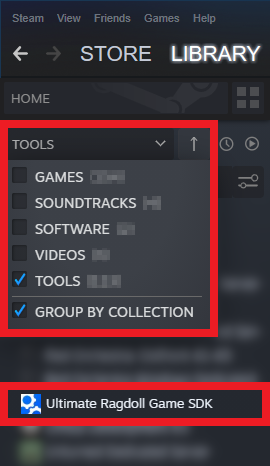
When you install the Unreal Engine Editor, open Steam and go to the LIBRARY tab. On the left side at the top, select TOOLS from the drop-down list, and then find Ultimate Ragdoll Game SDK in your library. Install this tool and then run it.
When all the necessary programs are downloaded and installed, you will still need a 3D model of your character. To create such a model, you will need a special character creator or a ready-made 3D model downloaded from the Internet.
Examples of character creators:
- MAKEHUMAN[www.makehumancommunity.org]
- METAHUMAN[www.unrealengine.com]
- CHARACTER CREATOR[www.reallusion.com]
Examples of websites with free 3D models:
- TURBOSQUID[www.turbosquid.com]
- CGTRADER[www.cgtrader.com]
- RENDERHUB[www.renderhub.com]
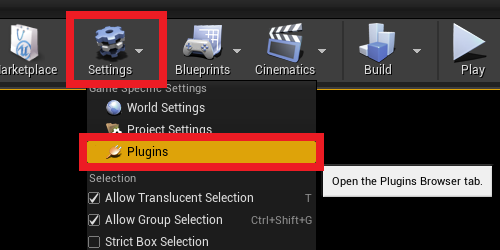
Open Ultimate Ragdoll Game SDK, click on SETTINGS on the top bar of the editor, and then select PLUGINS.
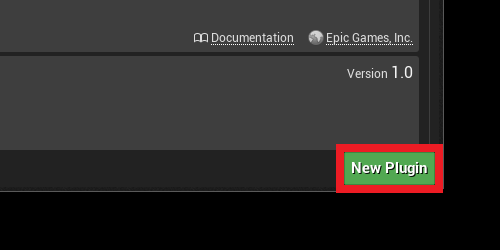
Click the green NEW PLUGIN button located in the bottom right corner of the window.
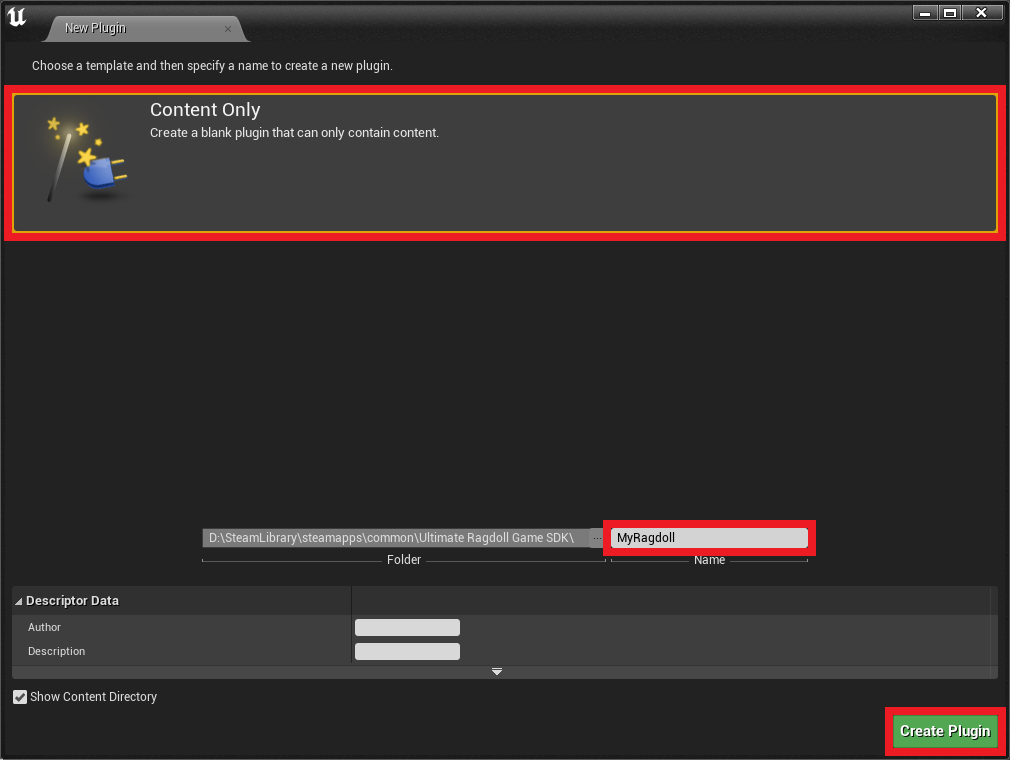
Choose CONTENT ONLY, enter a name, and then press the green CREATE PLUGIN button.
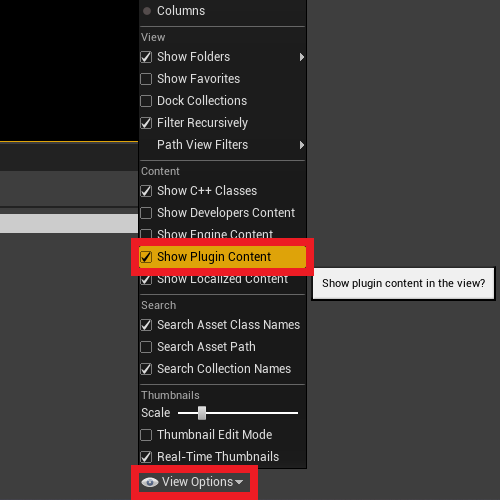
In the bottom right corner of the editor, click VIEW OPTIONS and then select SHOW PLUGIN CONTENT.
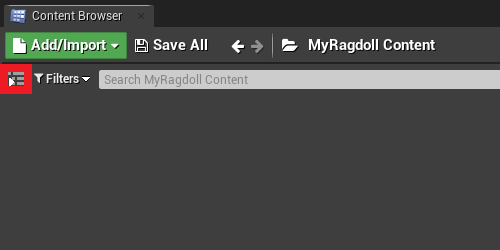
Click the icon on the left side of CONTENT BROWSER to expand the folder list and select the CONTENT folder.
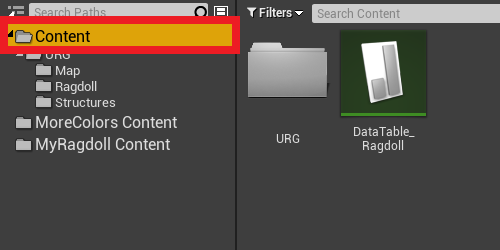
Click and drag the DataTable_Ragdoll file into the Content folder of your Ragdoll.
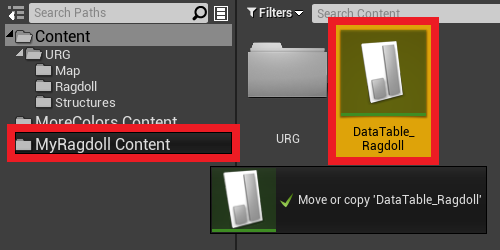
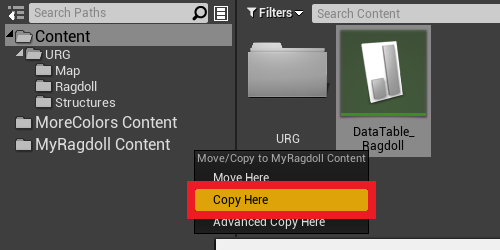
Click COPY HERE and navigate to your Ragdoll’s Content Folder.
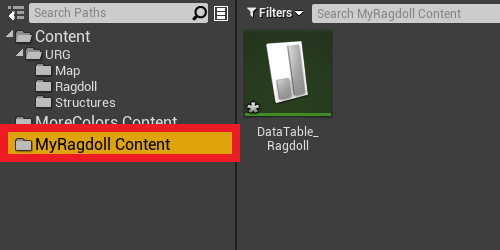
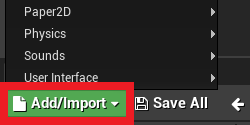
Click on the green ADD/IMPORT button and select IMPORT TO.
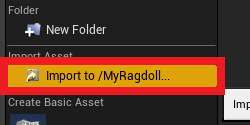
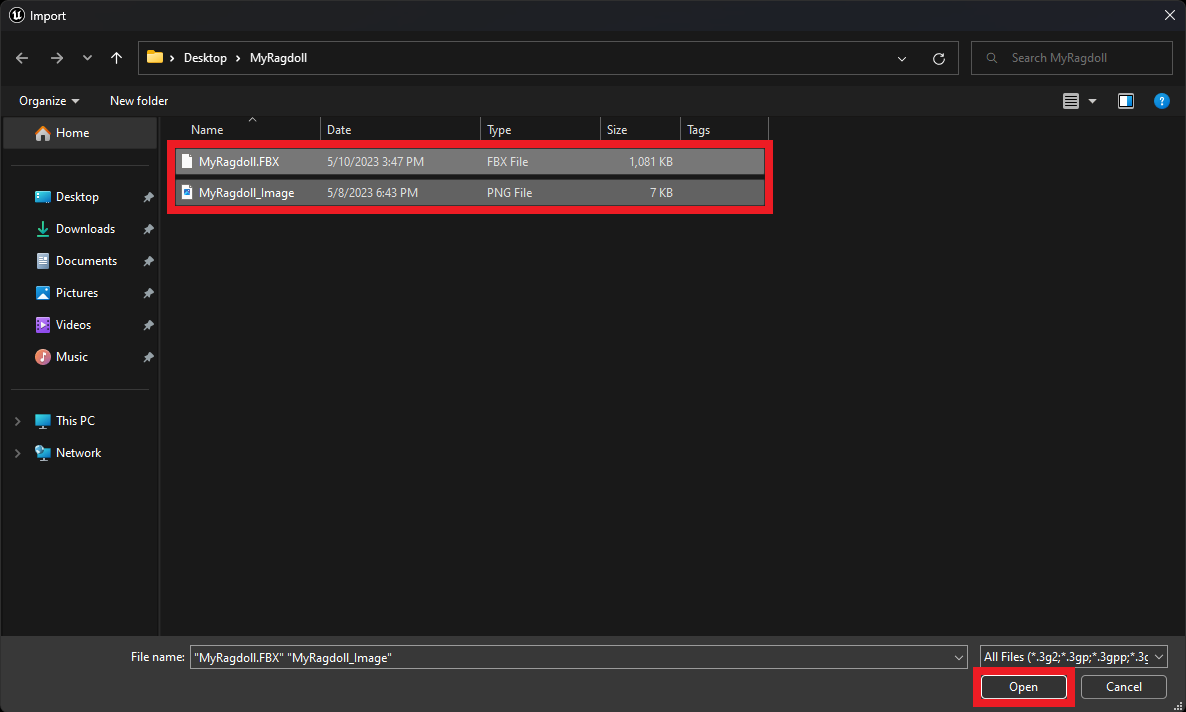
Select the file with your 3D model and preview image and import it into the project.
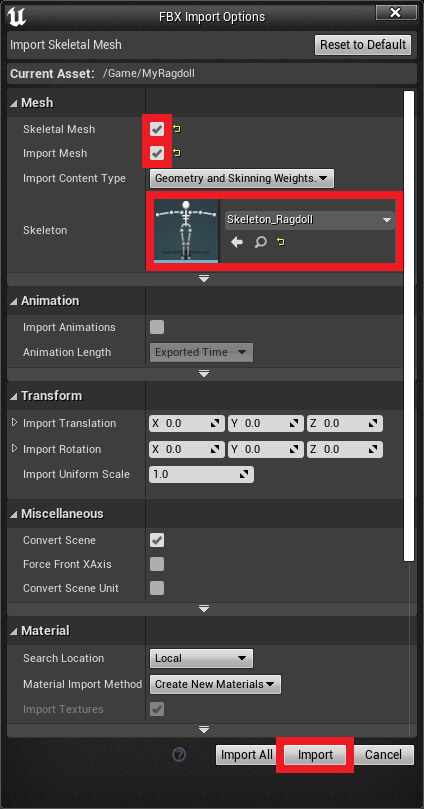
In the FBX IMPORT OPTIONS window, select the options SKELETAL MESH and IMPORT MESH. Select Skeleton_Ragdoll in the SKELETON field and click IMPORT.
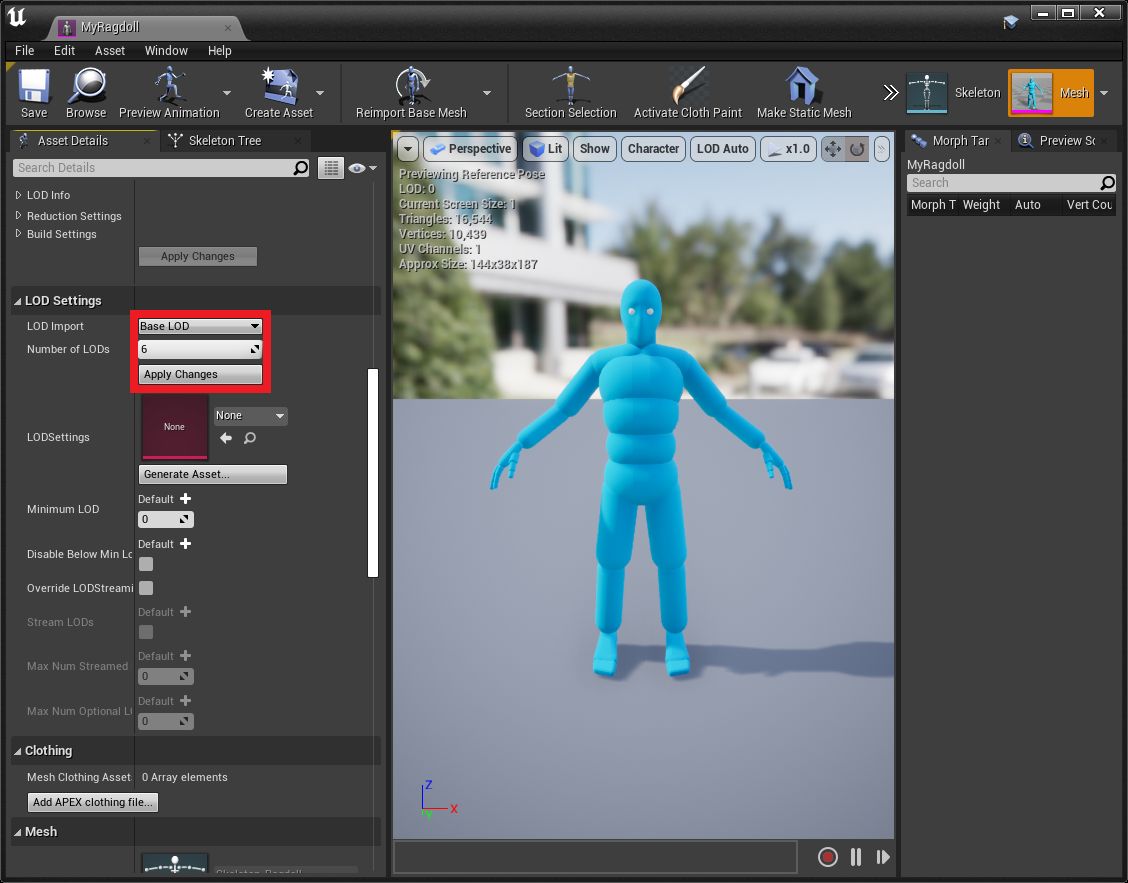
Open your 3D model and find the LOD SETTINGS tab. Set the highlighted values as shown in the screenshot below and click APPLY CHANGES.
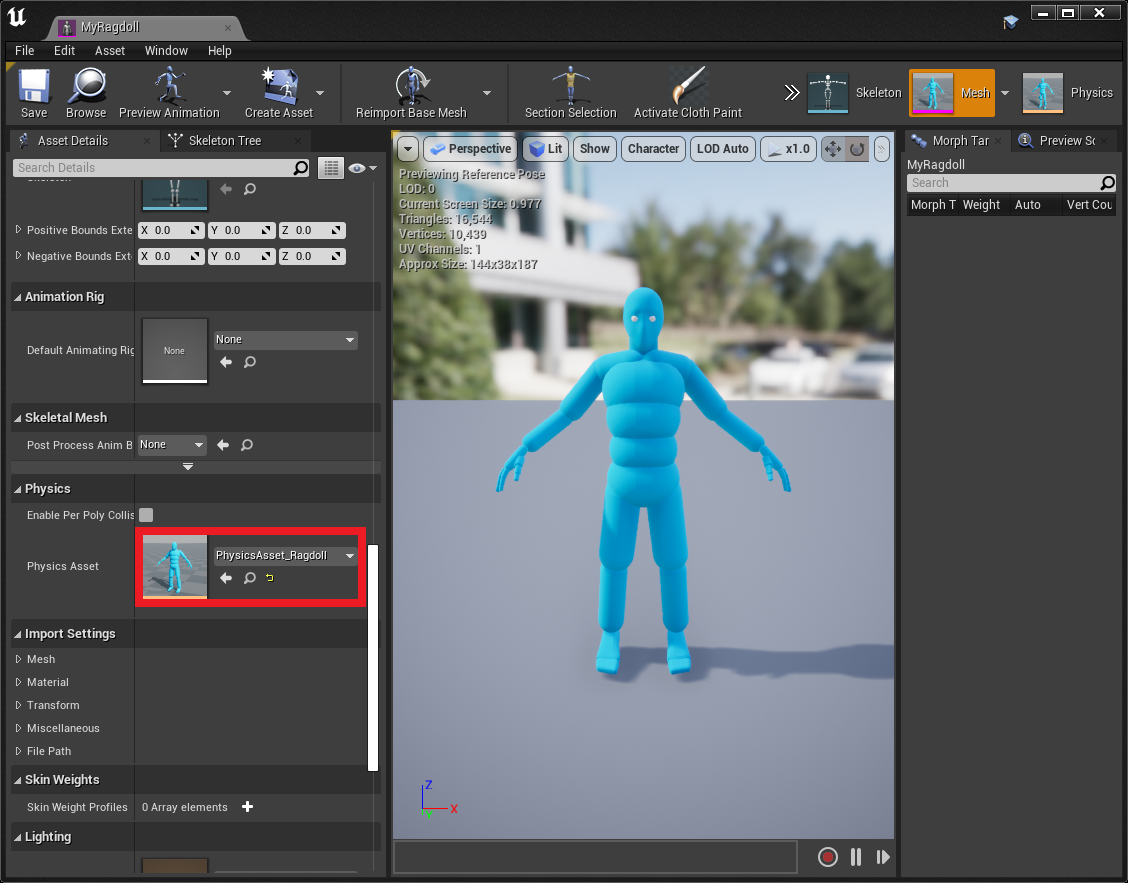
Then find the PHYSICS ASSET field. Replace it with PhysicsAsset_Ragdoll and save your character.
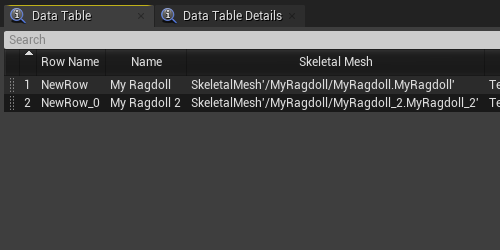
Next, open DataTable_Ragdoll and click the ADD button. Fill in all the newly created fields and save the data table.
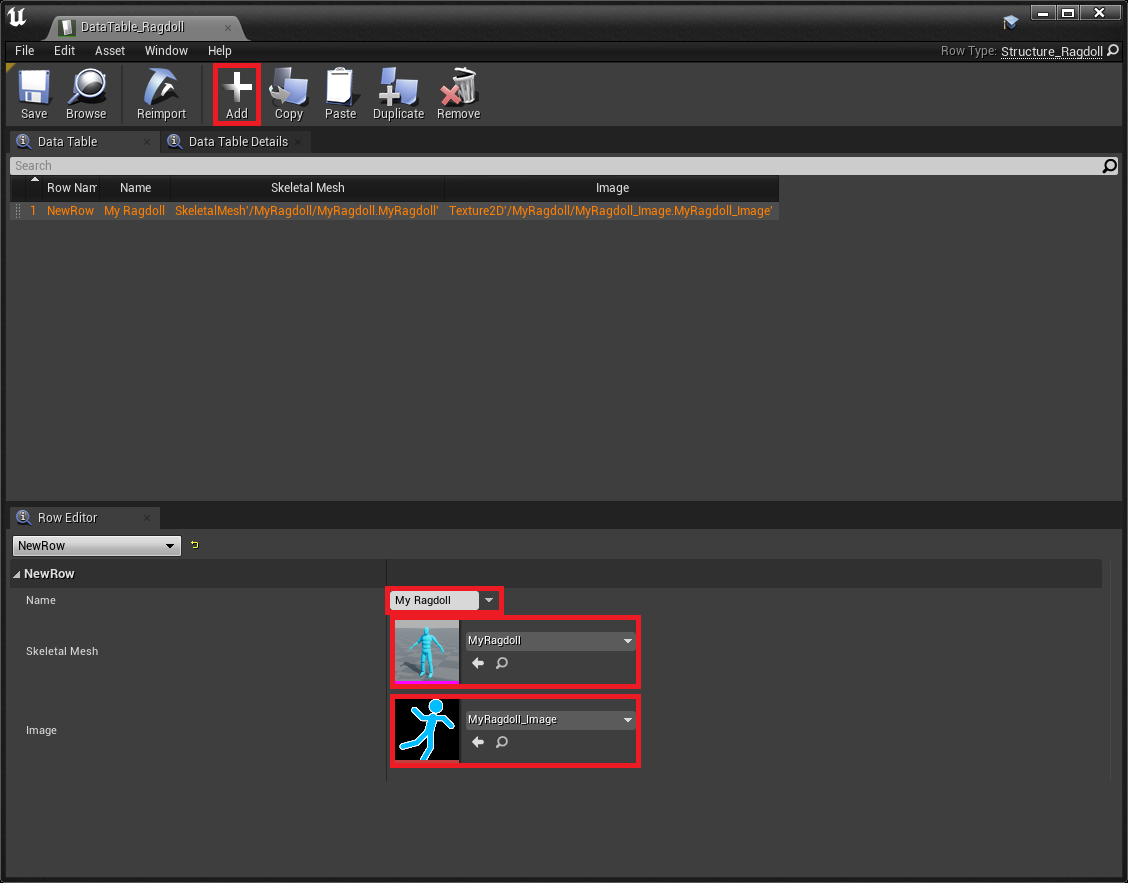
If you want, you can add more than one Ragdoll. Simply create another row in the DataTable_Ragdoll and repeat all the steps with the next Ragdoll added to the folder.
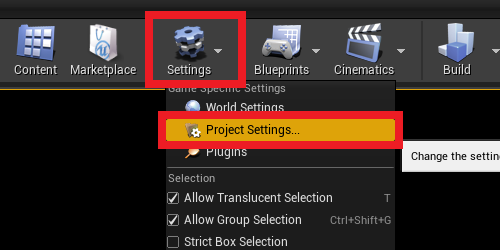
Now click on the SETTINGS button and then select PROJECT SETTINGS.
Type in the phrase “Share Material Shader Code” and make sure that this option is disabled.

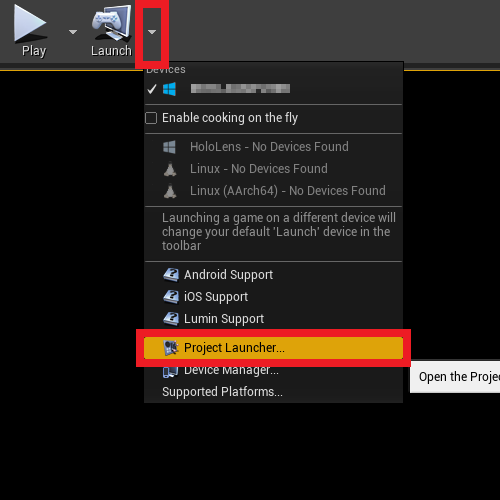
Now we can export your Ragdolls to a .pak file. To do this, click on the small arrow next to the LAUNCH button and select the PROJECT LAUNCHER option.
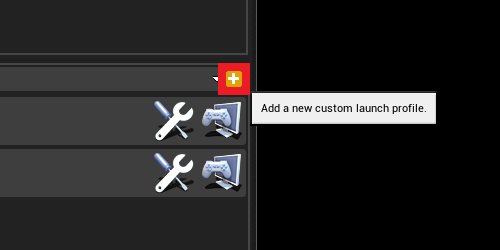
Click on the small PLUS ICON.
After creating new launch profile set all highlighted values the same way as in the screenshots below.
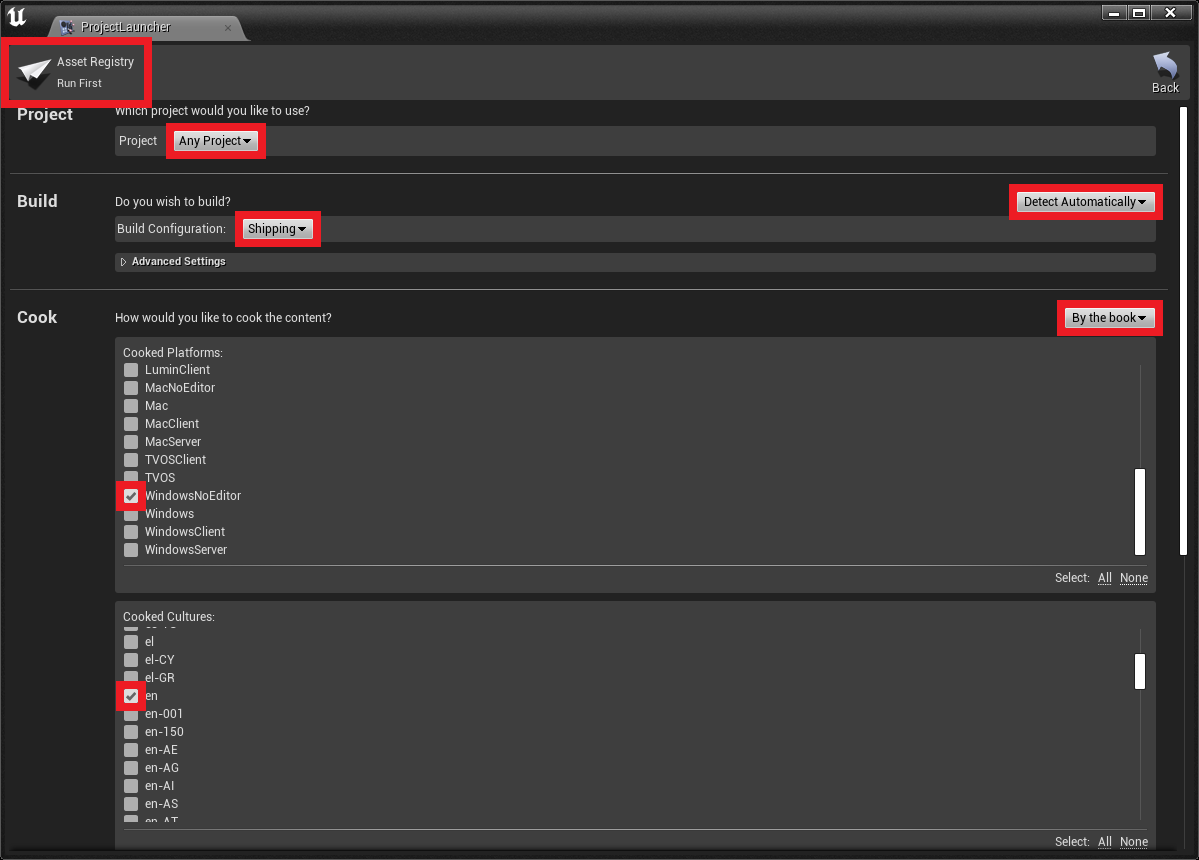
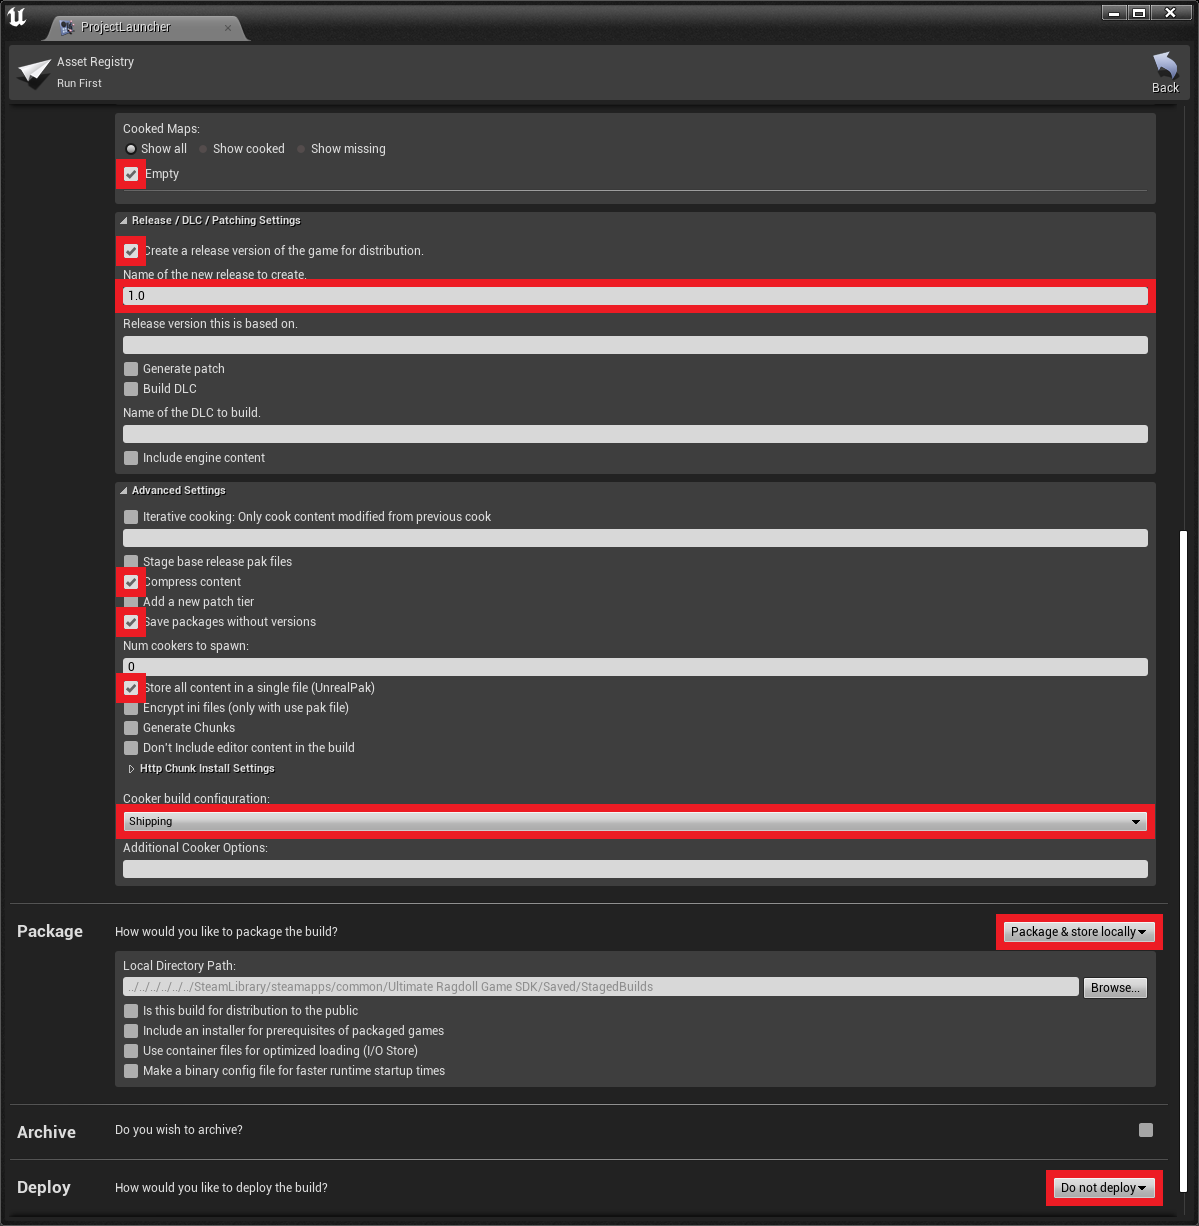
When all values are set correctly, click BACK, and then click on the small PLUS ICON again and set everything as shown in the screenshots below.
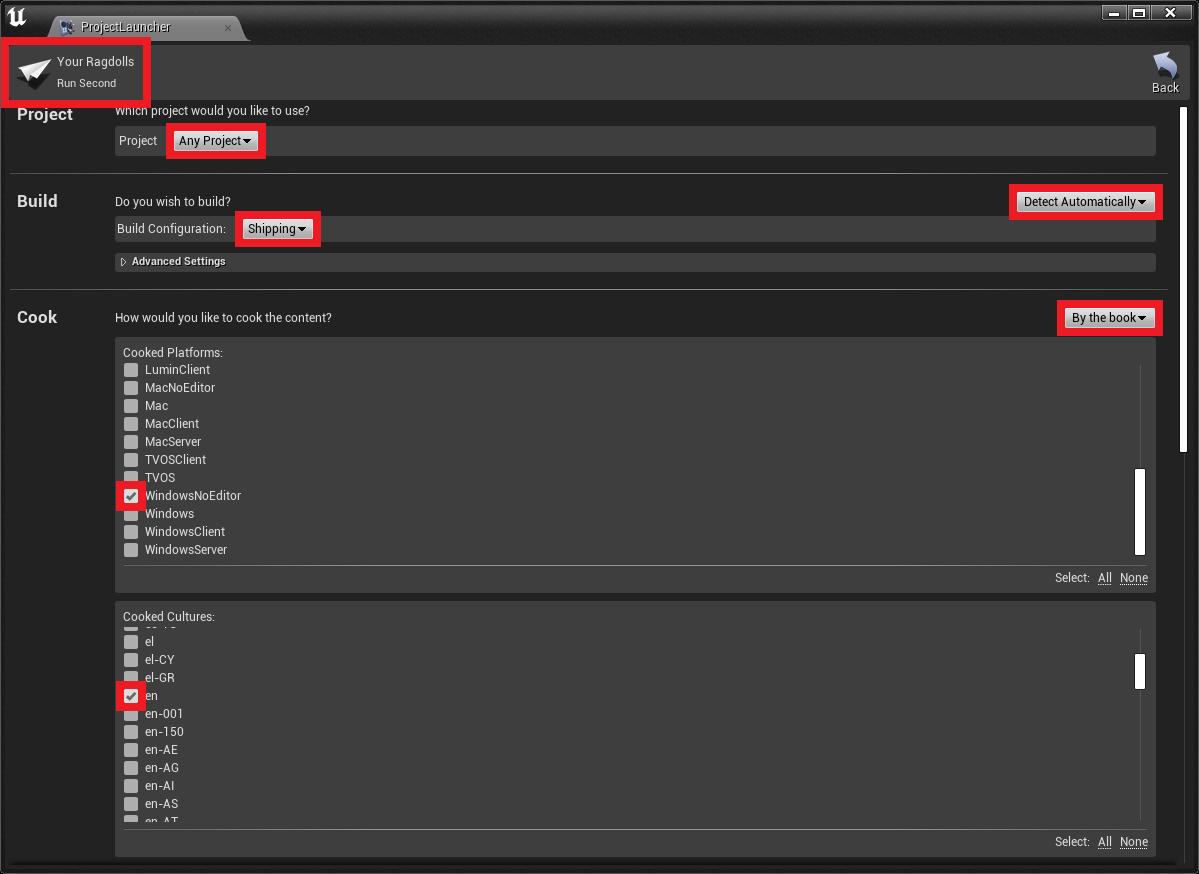
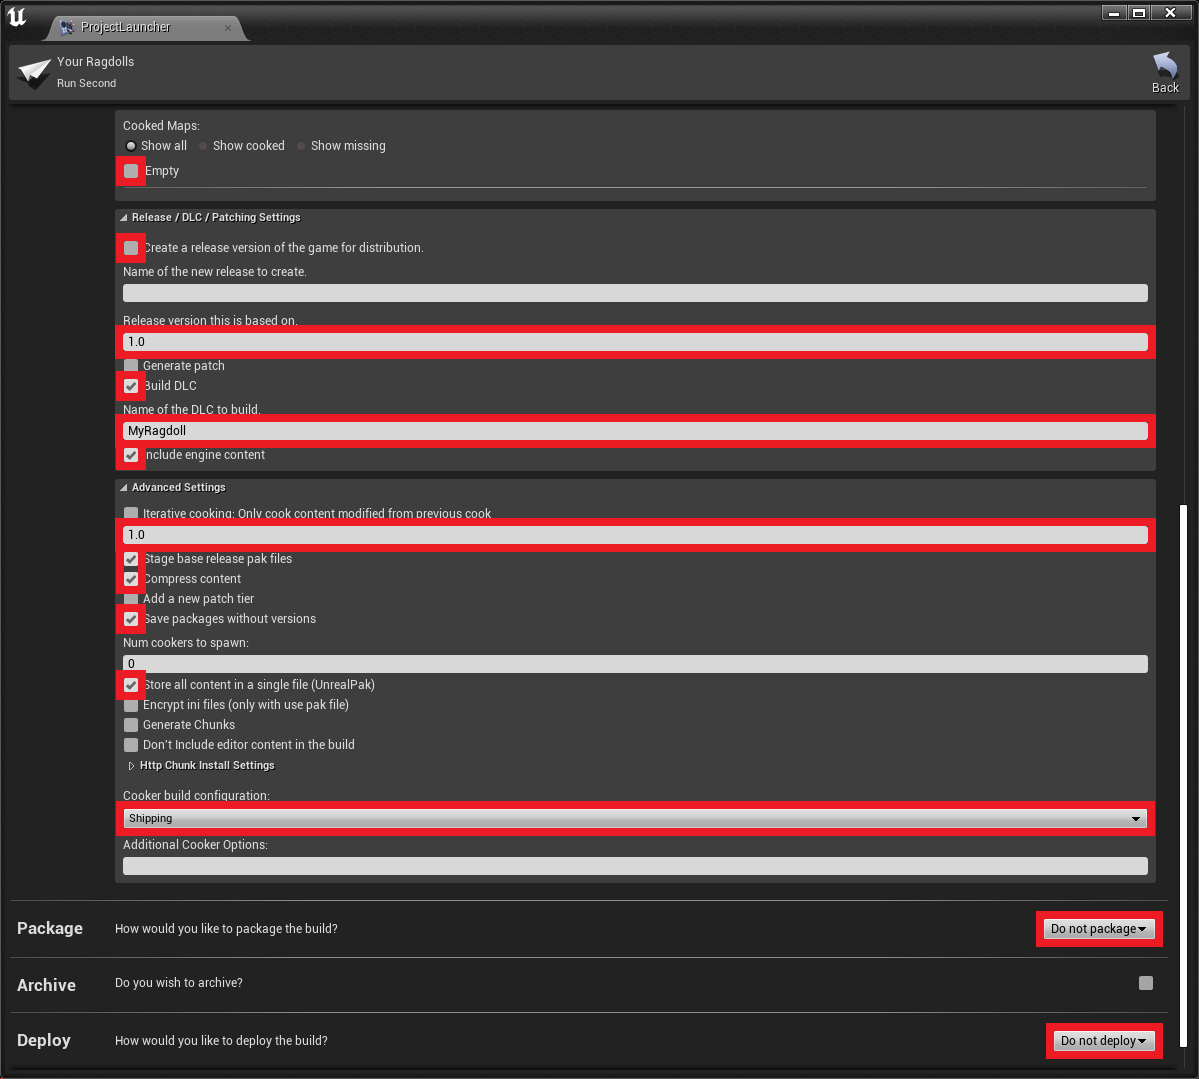
NOTE: In the NAME OF THE DLC TO BUILD field, enter the exact same name as the name of the plugin you created earlier.
When all values are set correctly, click BACK, and then click LAUNCH THIS PROFILE in the first profile.
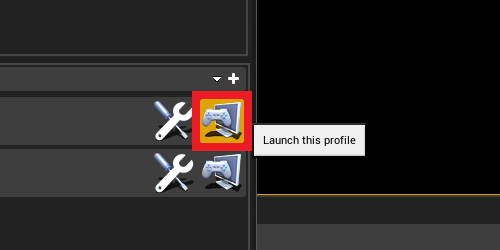
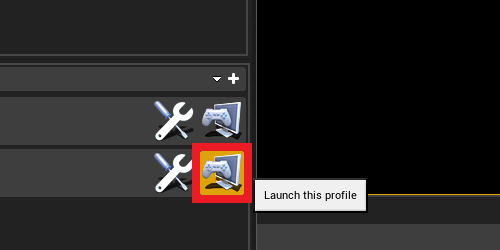
When the compilation is complete, click LAUNCH THIS PROFILE in the second profile. When the compilation is complete, you can close Ultimate Ragdoll Game SDK.
To find your file go to steamapps > common > Ultimate Ragdoll Game SDK > Plugins and find your plugin’s folder. Then search “*.pak”.
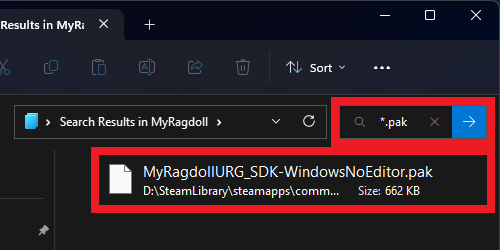
NOTE: You need to change the file name to be the same as the name you chose for your plugin. In this case it would be MyRagdoll.pak.
How to upload Ragdoll to Steam Workshop
To upload your Map or Ragdoll to Steam Workshop, first go to the WORKSHOP tab in the Main Menu.
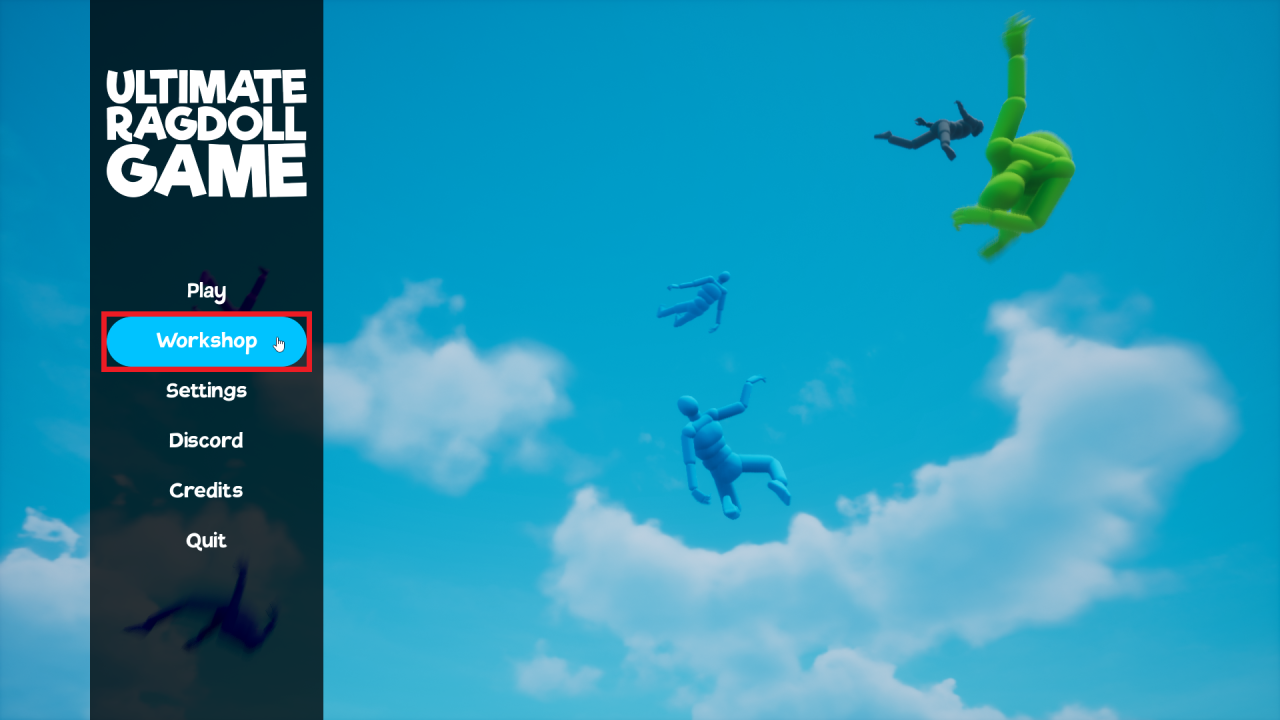
Next, enter the NAME, DESCRIPTION, select IMAGE, and the folder with your Map/Ragdoll FILE, then click UPLOAD.
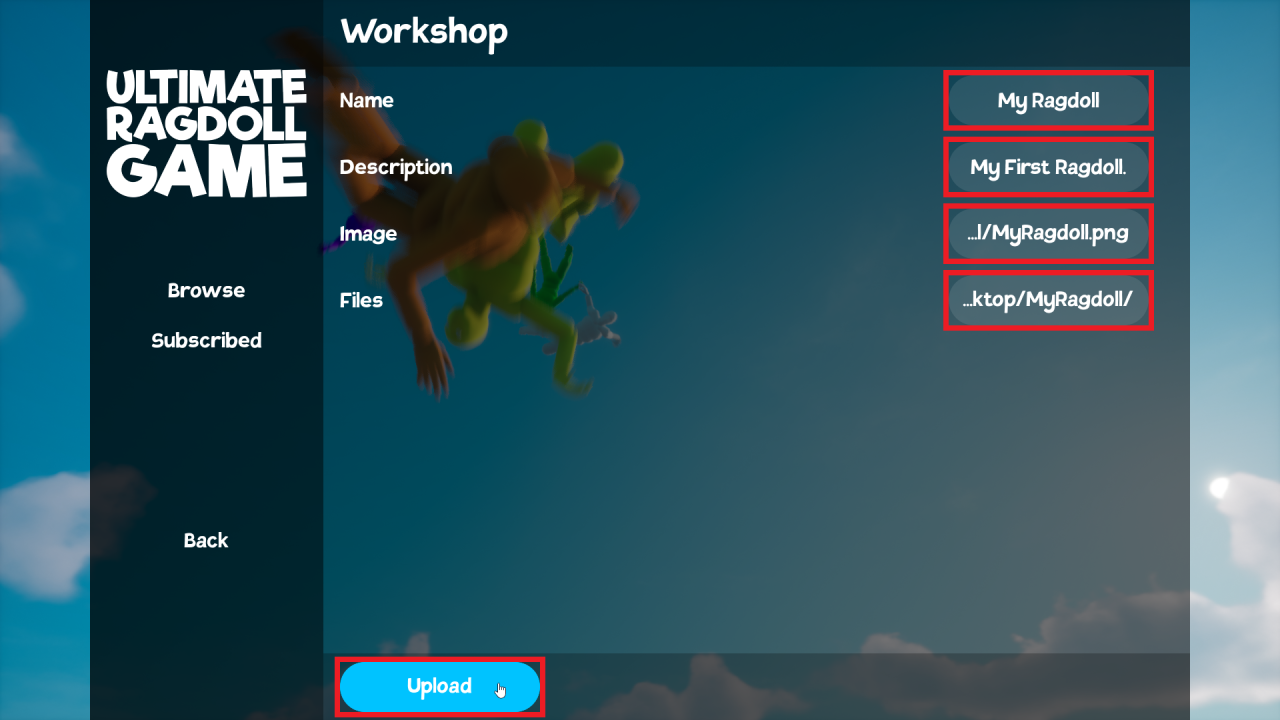
- NAME – Enter any name you want
- DESCRIPTION – Enter any description. You can edit it later directly in the Steam Workshop
- IMAGE – Select an image that will be a thumbnail for your item in the Steam Workshop. The image can’t weigh more than 1MB.
- FILE – Choose the folder where your Map or Ragdoll file is located. It’s important that the folder only contains files with the downloadable content.
After clicking UPLOAD, the process of uploading your files to Steam Workshop will begin. If everything goes correctly, the message “Success” will appear.
If something goes wrong, remember the result that appears and then check what caused the failure HERE.
