
Dimensions of all the Stadiums in the game, that’s it, that’s the guide
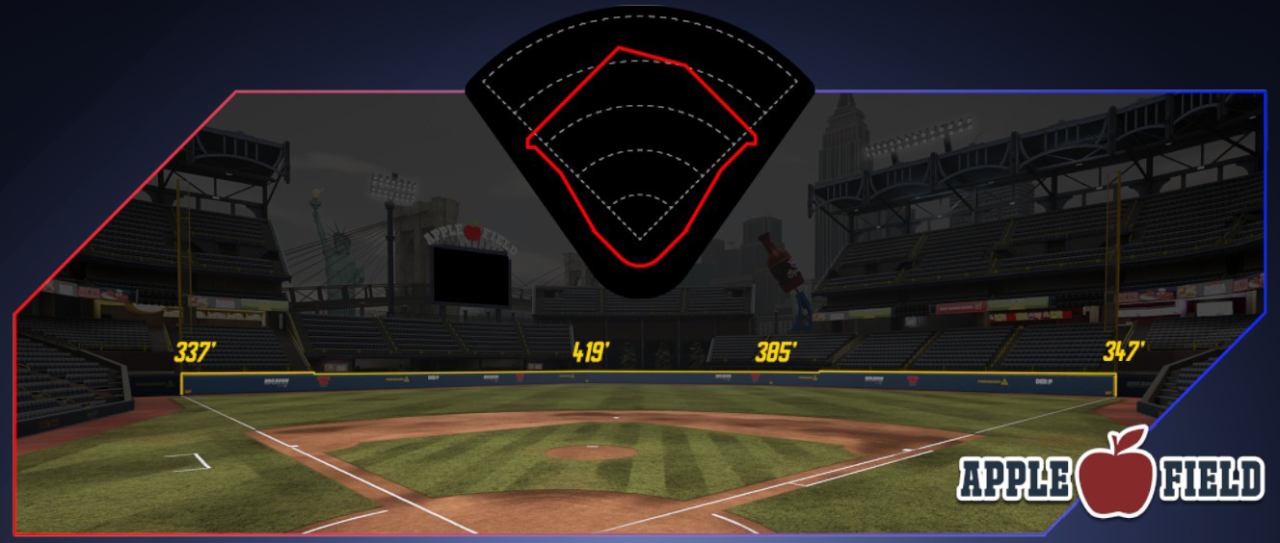
Apple Field
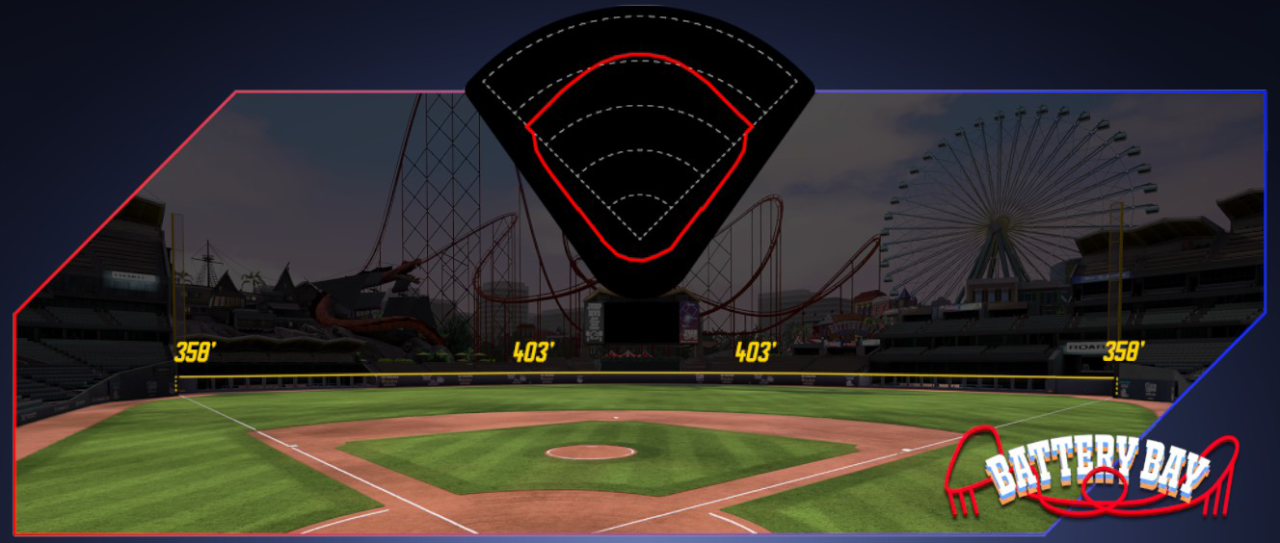
Battery Bay
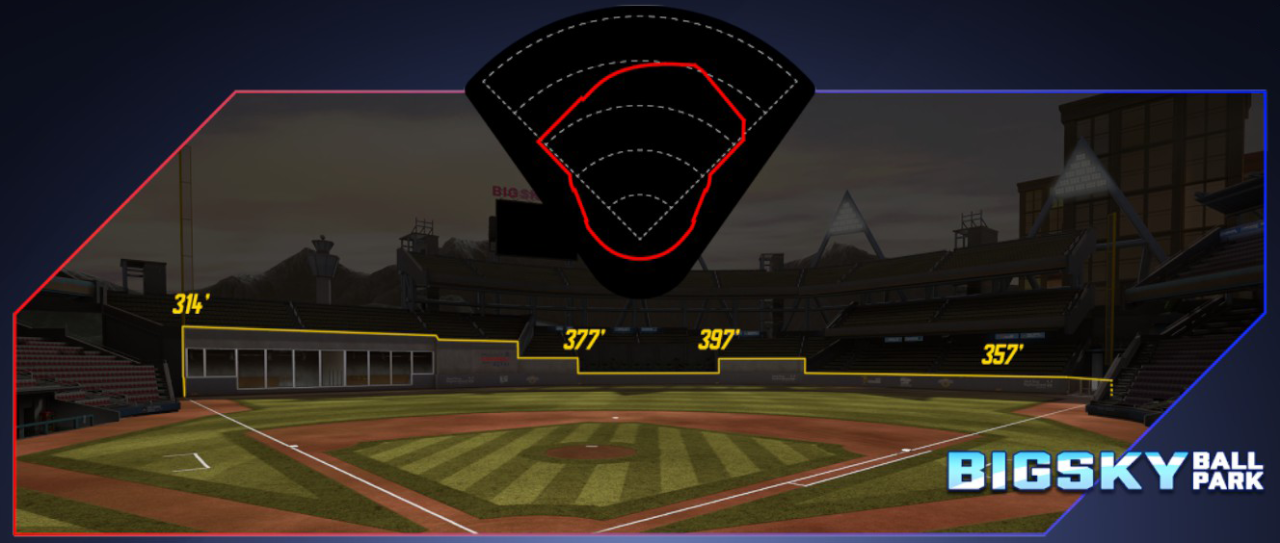
BigSky BallPark
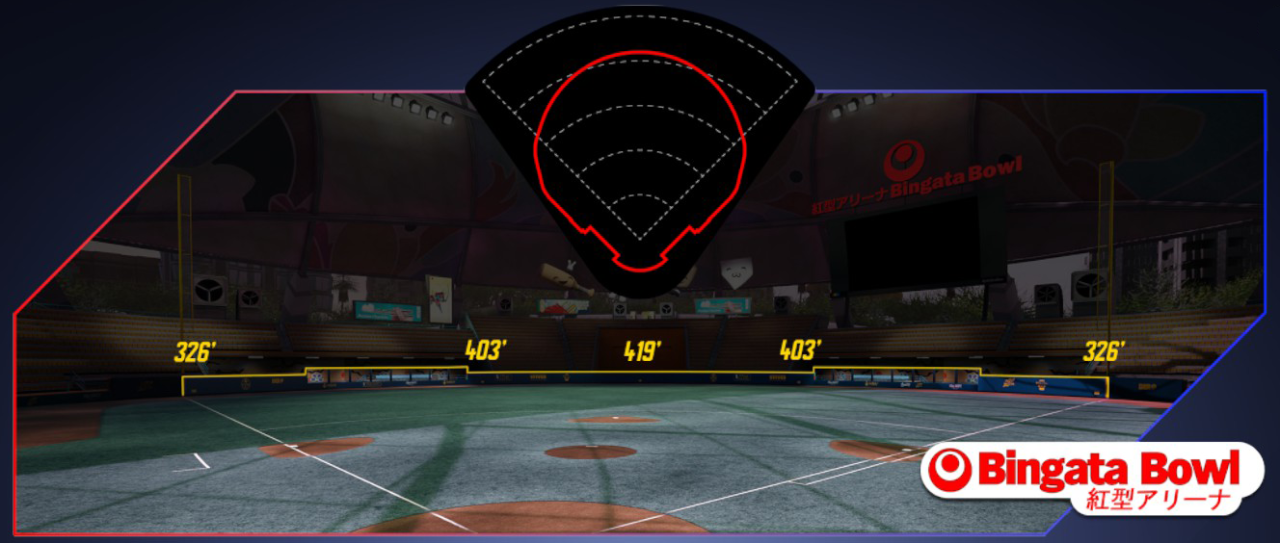
Bingata Bowl
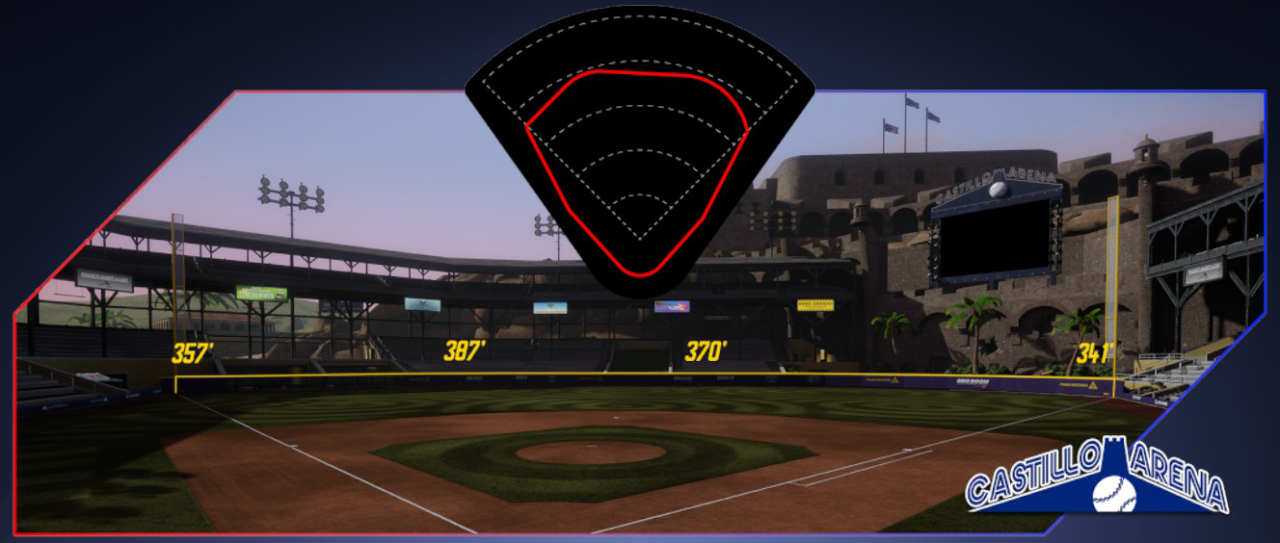
Castillo Arena
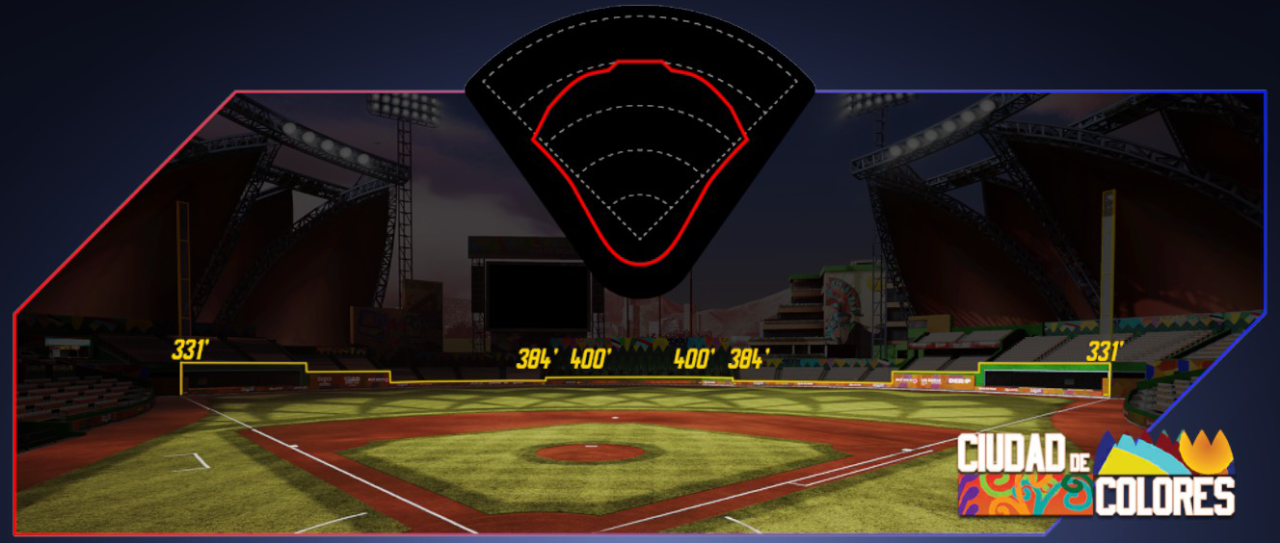
Ciudad De Colores
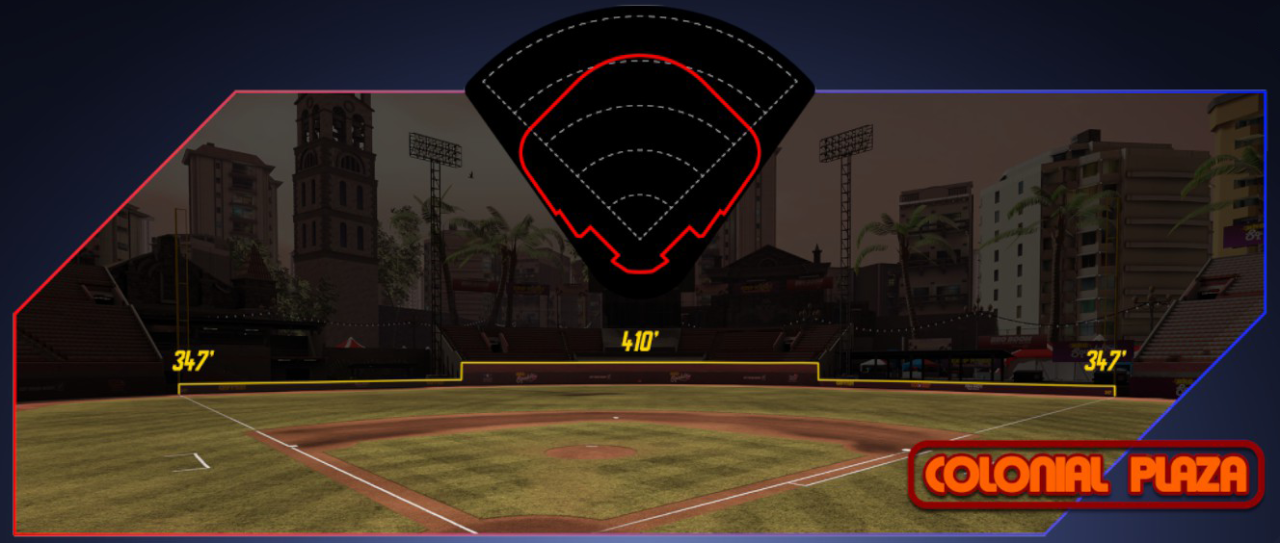
Colonial Plaza
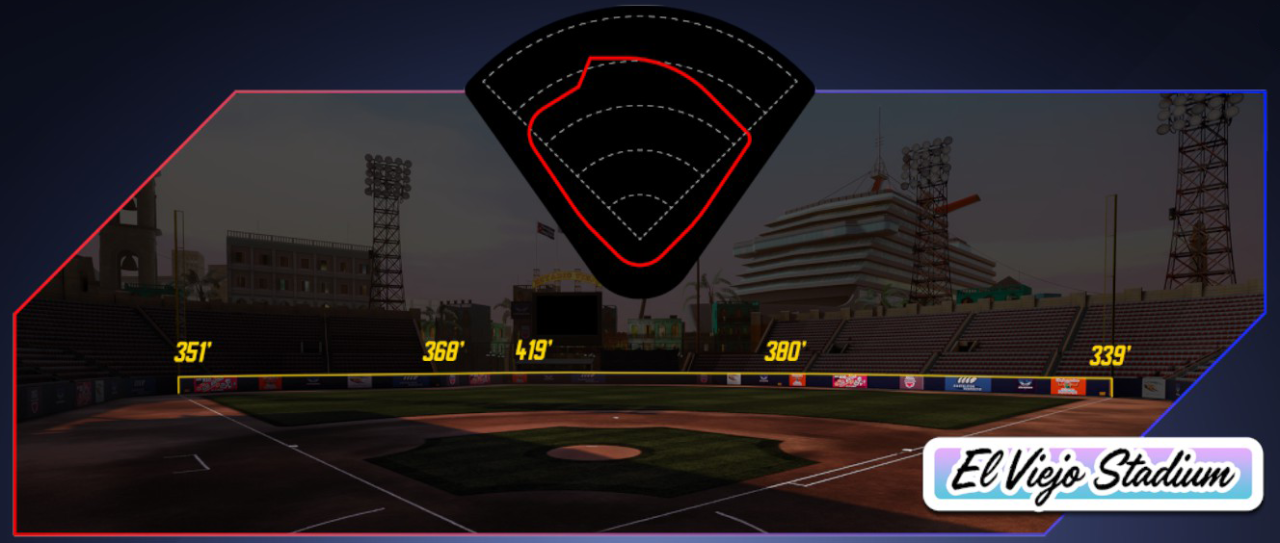
El Viejo Stadium
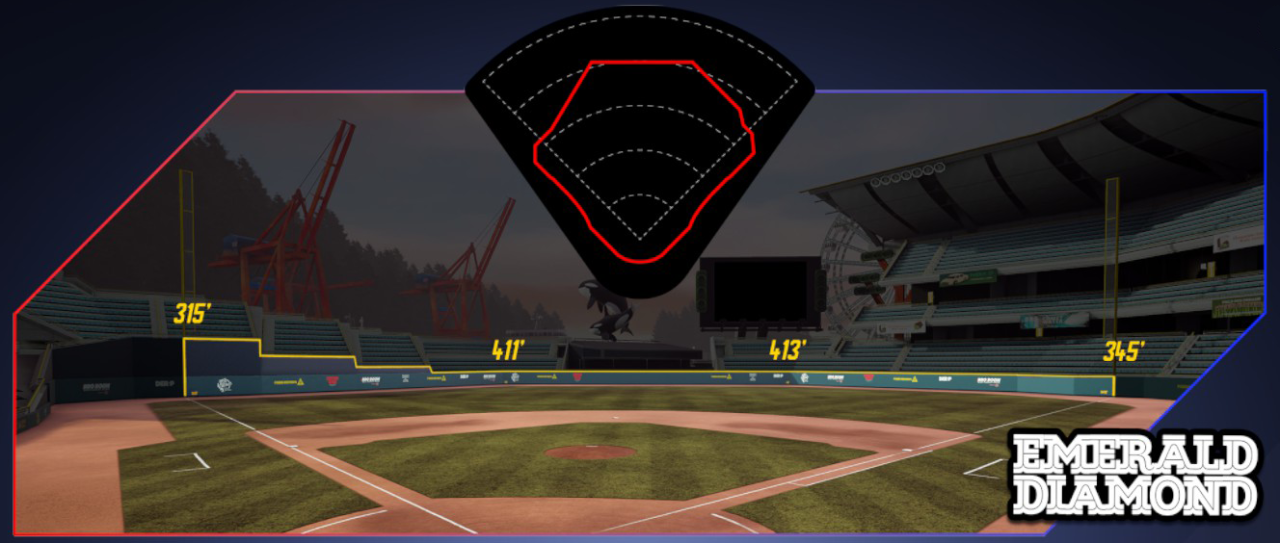
Emerald Diamond
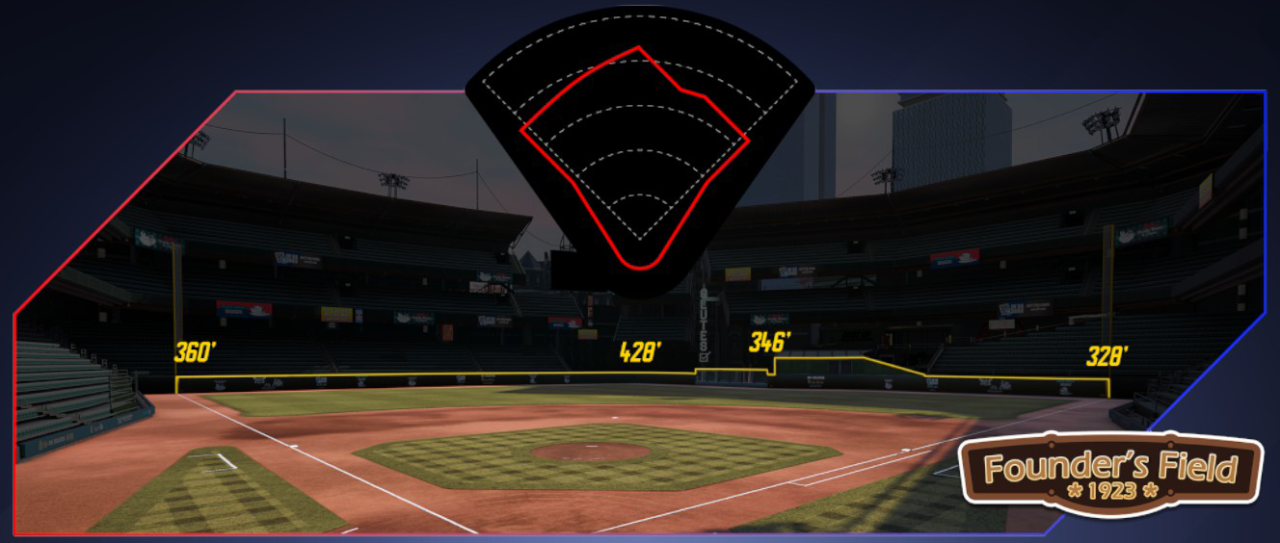
Founder’s Field
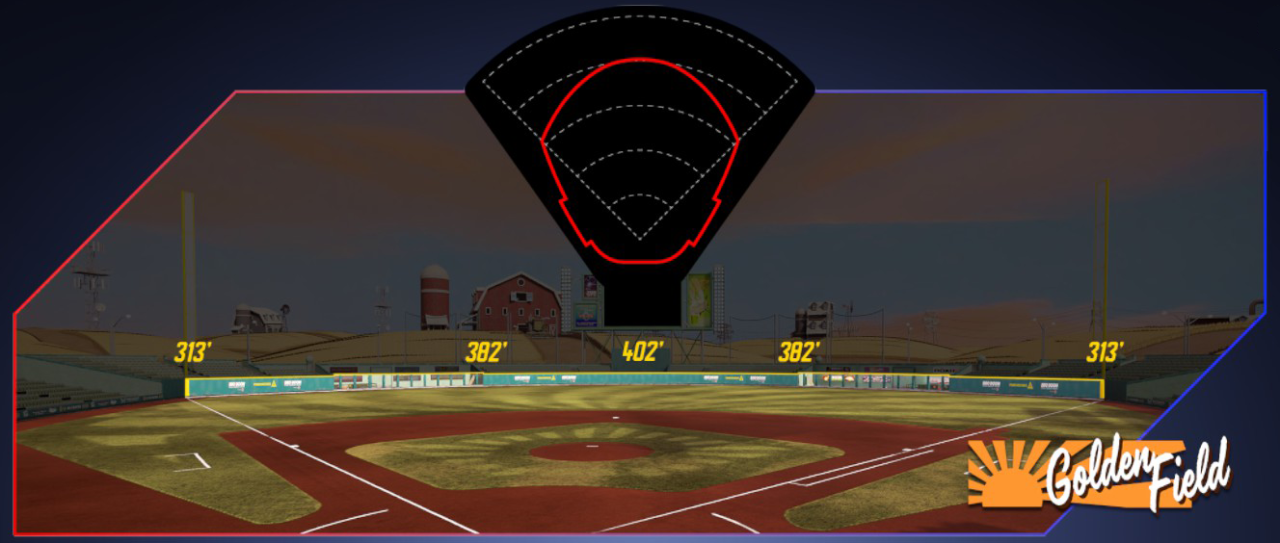
Golden Field
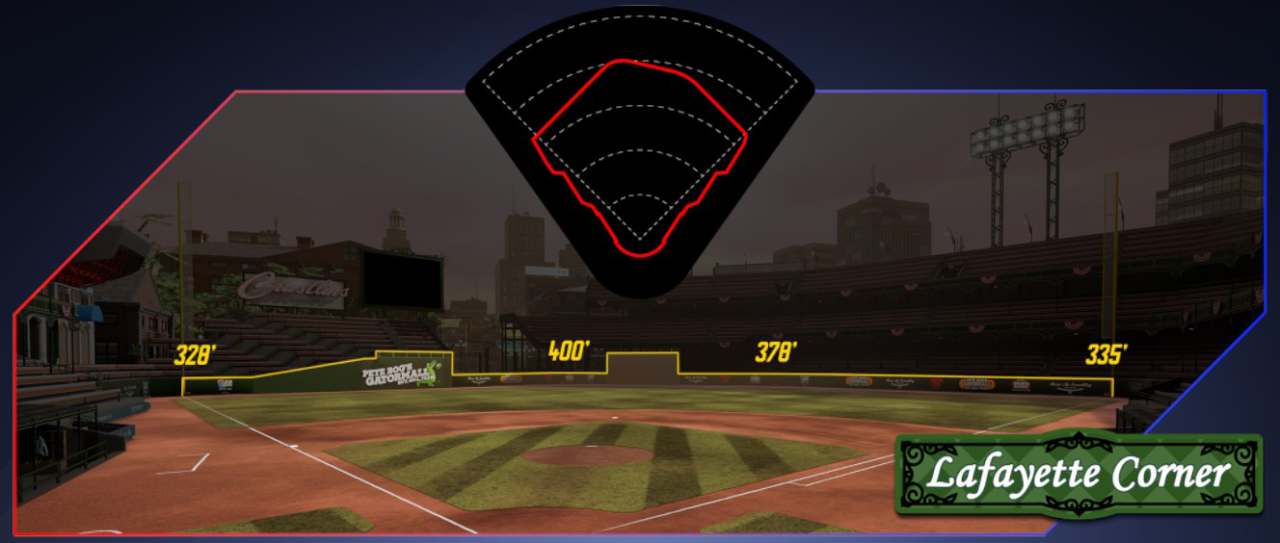
Layfayette Corner
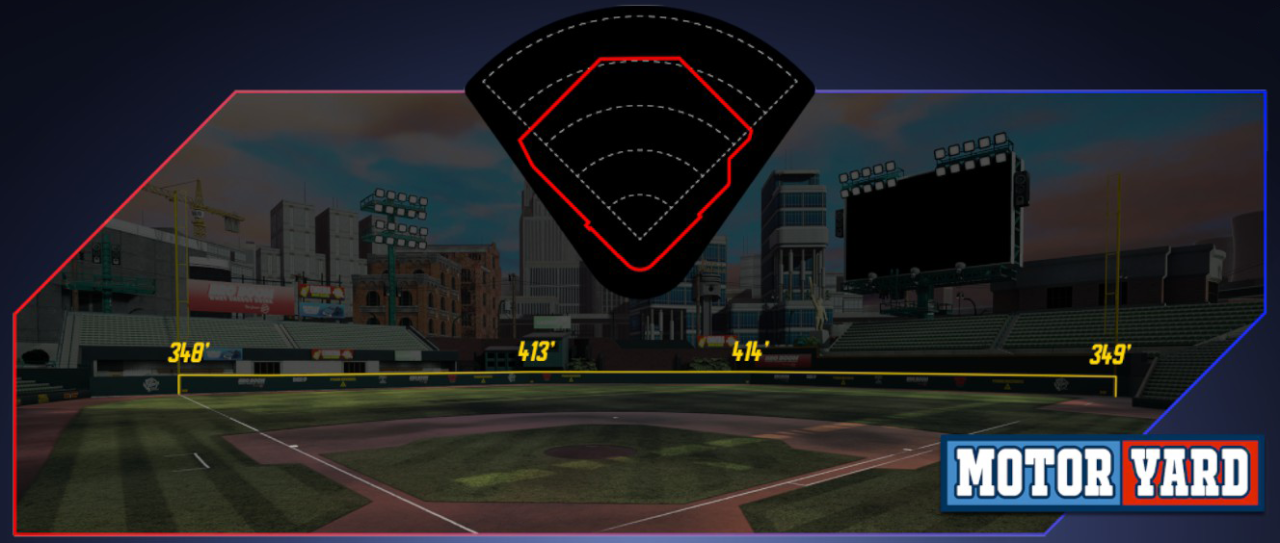
Motor Yard
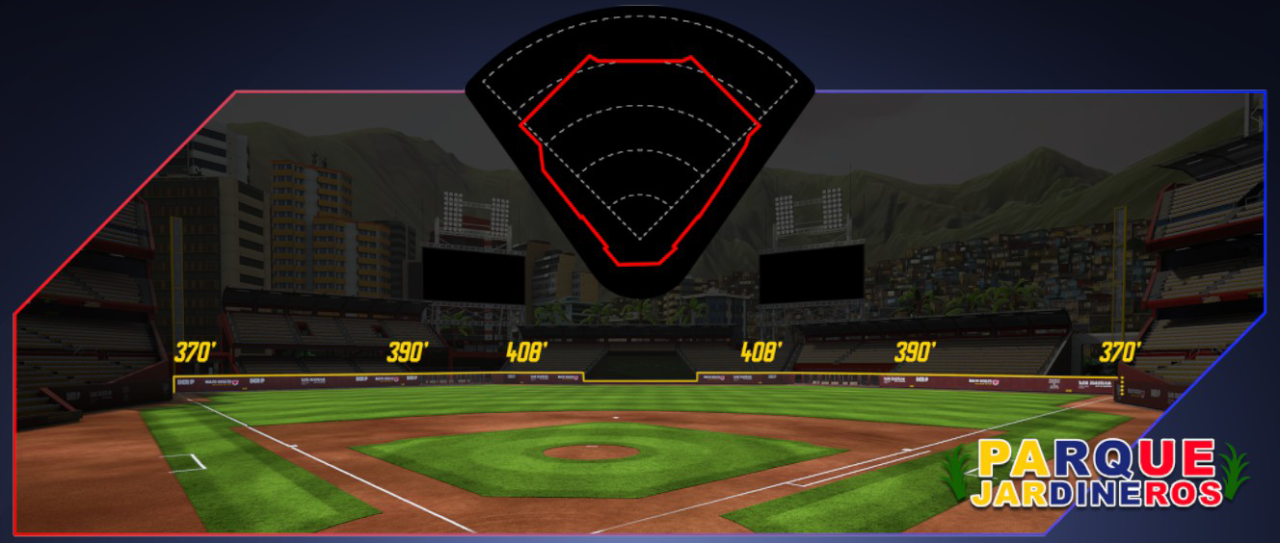
Parque Jardineros
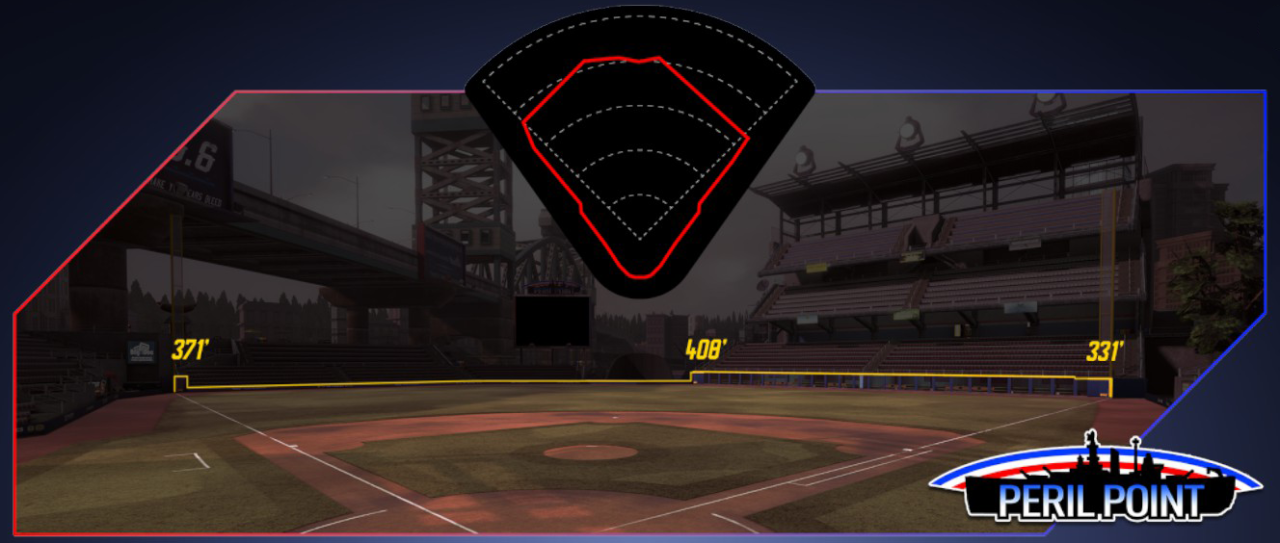
Peril Point
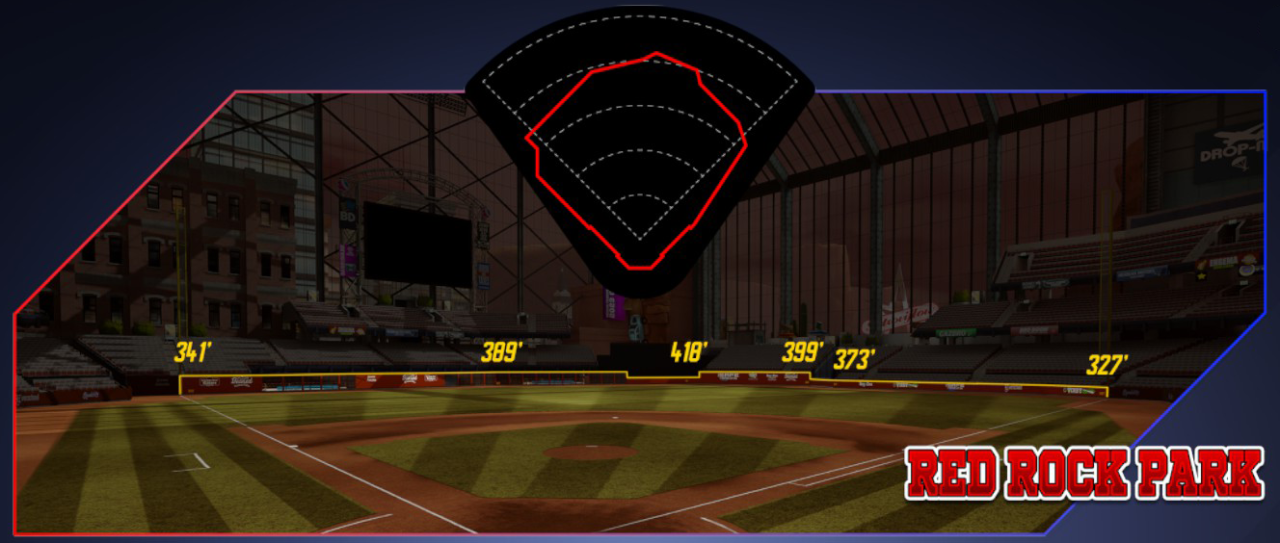
Red Rock Park
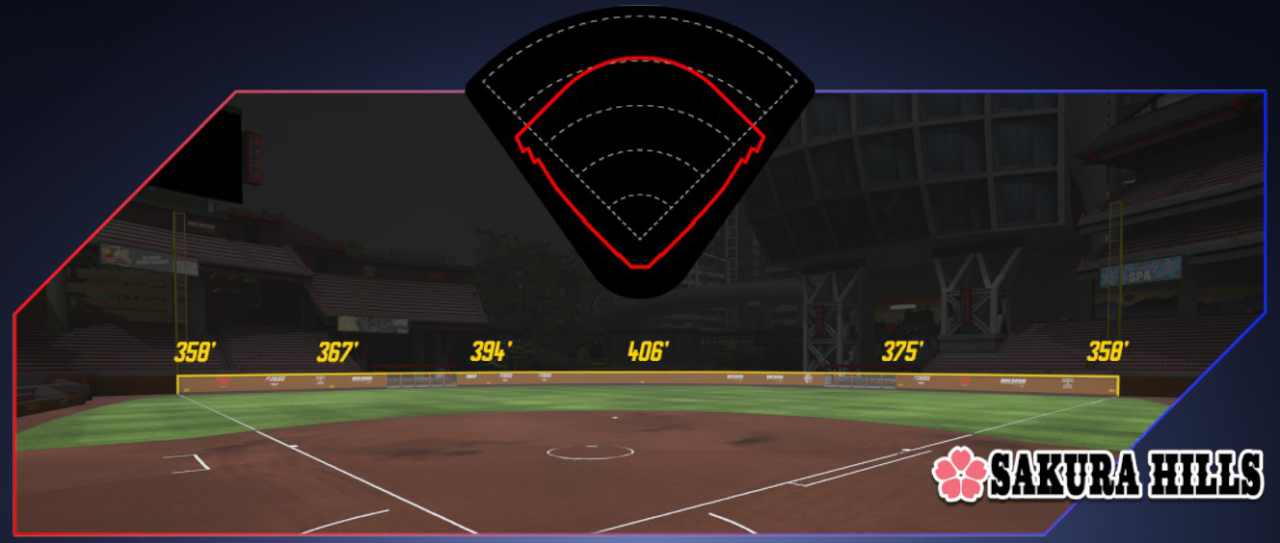
Sakura Hills
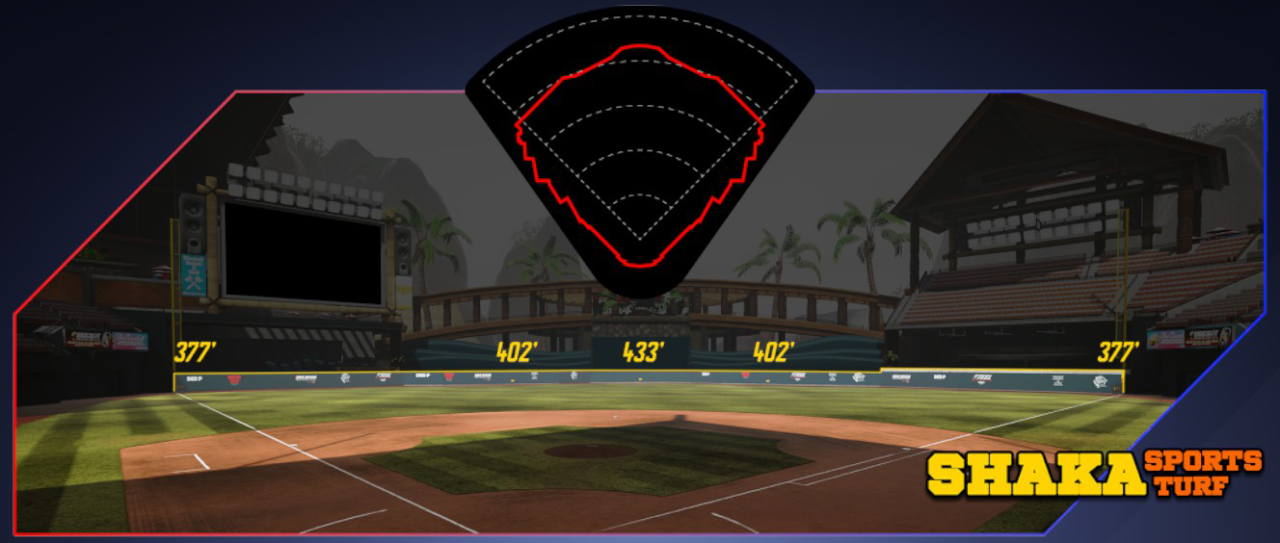
Shaka Sports Turf
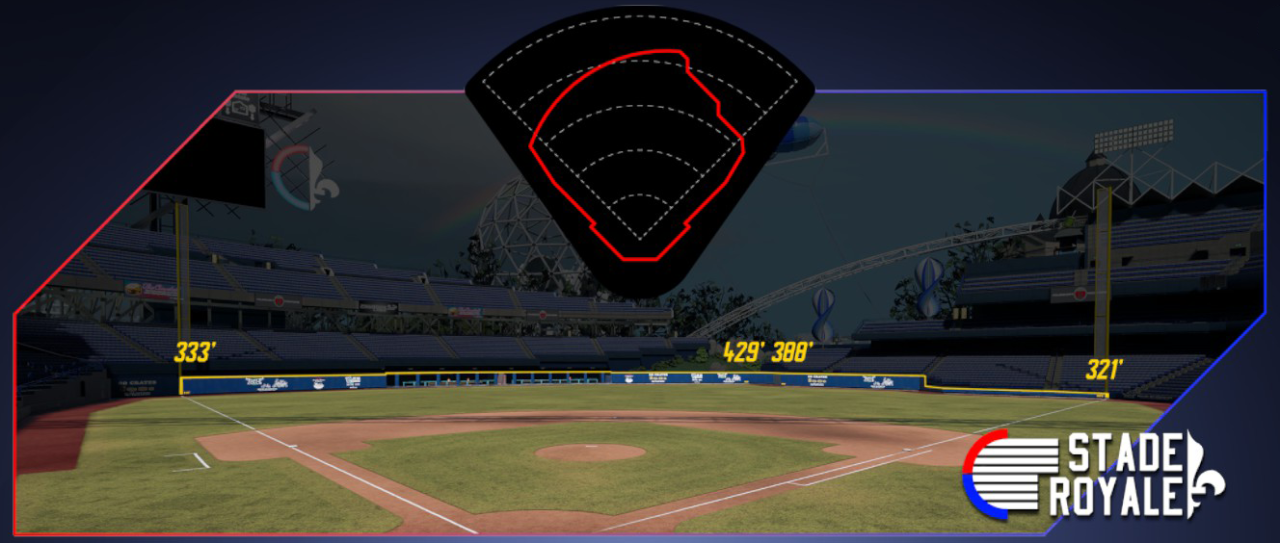
Stade Royale
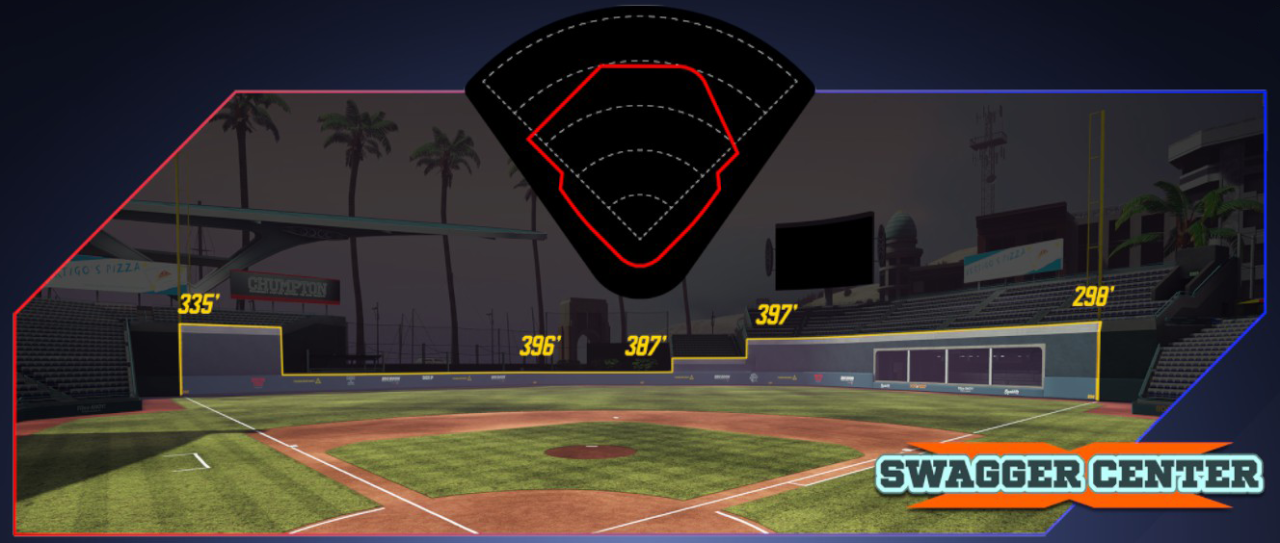
Swagger Center
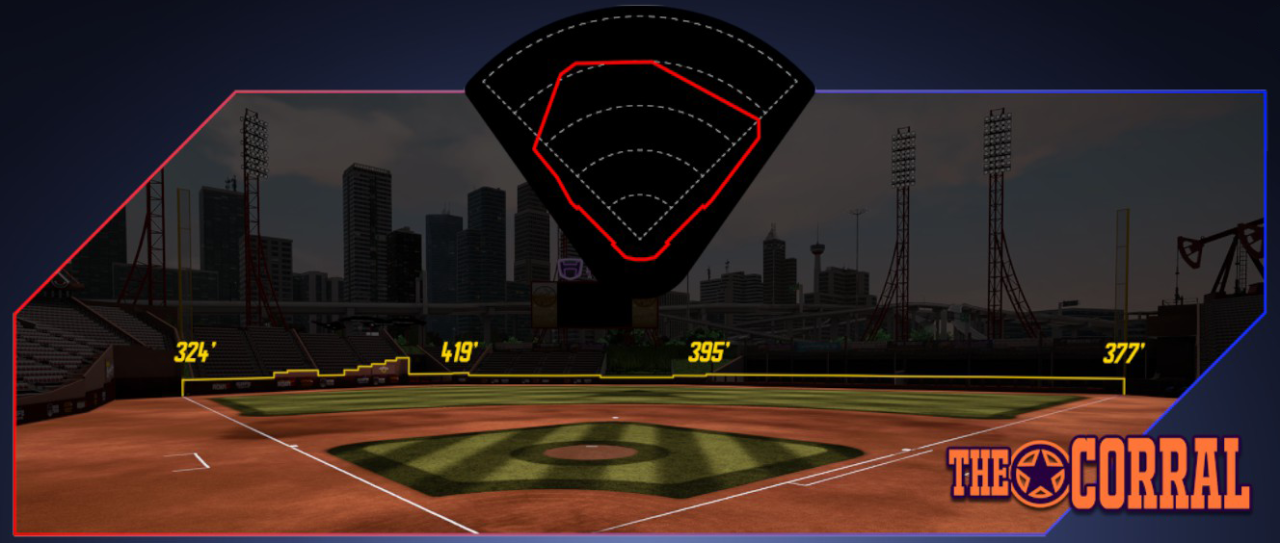
The Corral
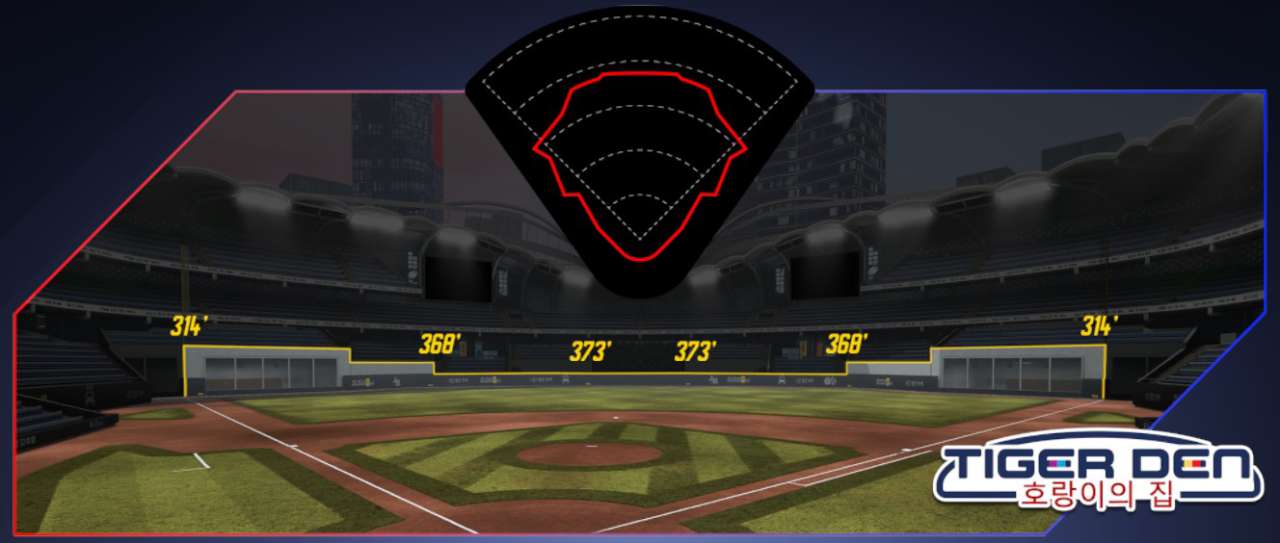
Tiger Den
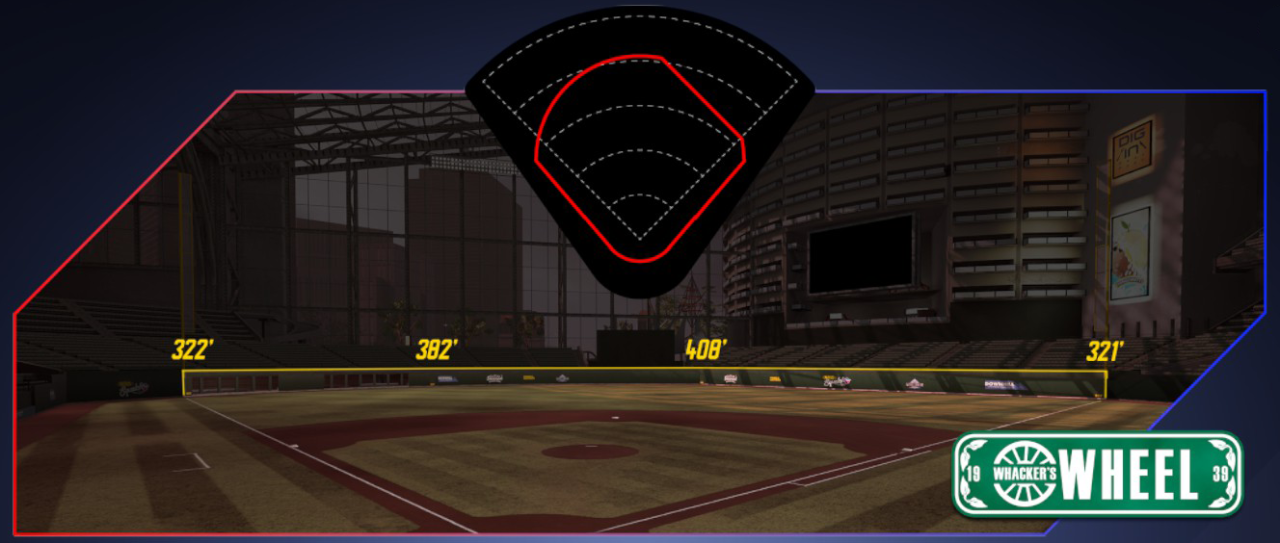
Whacker’s Wheel
Thanks to [Oral-B]Dan the Chef for their excellent guide; all credit belongs to their effort. If this guide helps you, please support and rate it here. Enjoy the game.