A beginner’s guide on the basics of Sons of Valhalla, from user interface to mechanics, and early gameplay/helpful tips!
Gameplay Overview
On your journey, you will establish a base, gather resources, and recruit/upgrade fellow warriors as you battle through different regions of England in pursuit of this Jarl. You will encounter new enemies, new bosses, and apply different strategies to combat them.
How you choose to lead your men is up to you, and remember – Valhalla will remain shut until you fulfill your destiny. Thankfully, you have Odin on your side, and he will provide you with immortality in return for ancient runes to give you the best advantage against those who fight against you!
Prove Odin’s faith in you before the gods, and seek out your destiny.
Main User Interface Elements
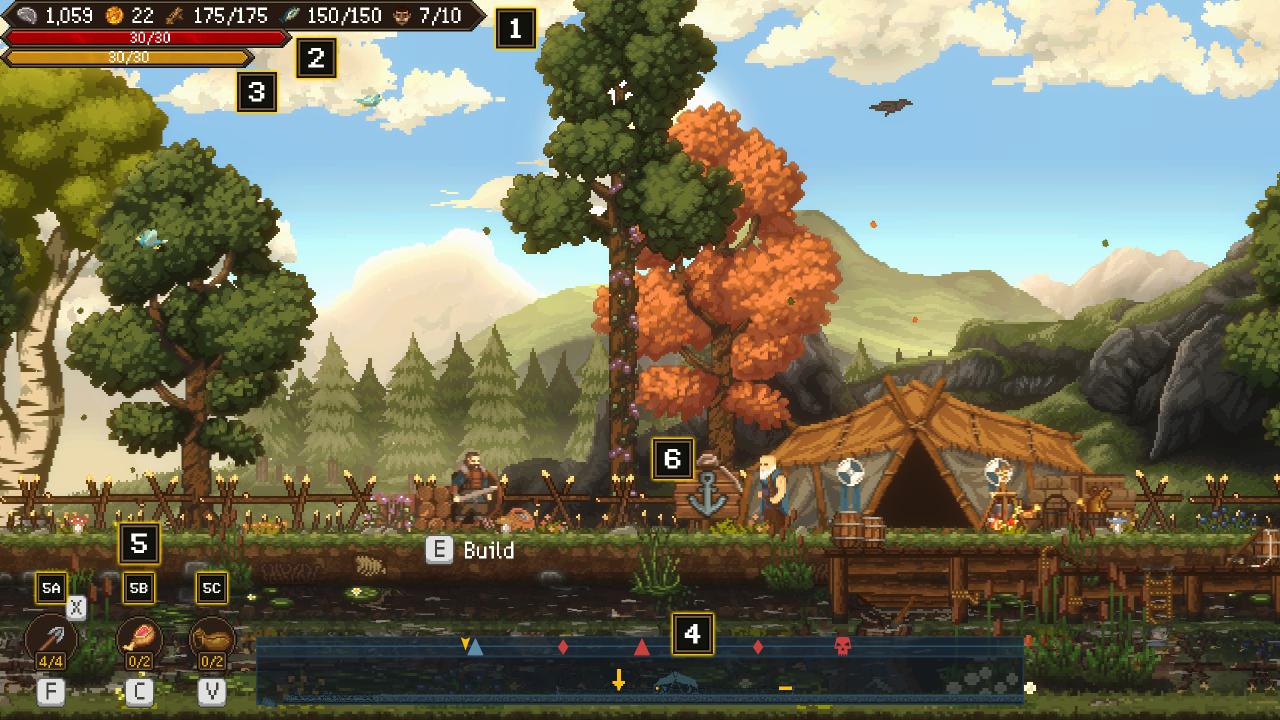
No matter where you are in Sons of Valhalla, these User Interface elements will remain the same.
1. Top Bar Resources – An overview of the resources you will utilize to upgrade your settlements and recruit soldiers.
- Hack Silver – Hack Silver is used to purchase soldiers, construct buildings, and research upgrades.
- Gold Coins – Gold Coins are used to upgrade your character. You can only do this at the Mead Hall.
- Wood – Wood is used in the same manner as silver.
- Fish – Fish is used in the same manner as silver and wood.
- Manpower – Soldiers cost manpower, with the cap increasing as you upgrade your Mead Halls.
2. Health Bar – This is your health status. You can level it up by using gold at the Mead Hall.
3. Stamina Bar – Stamina is used for power attacks and dodging. Once depleted, you will not be able to do either, and can either consume a drink to replenish quickly, or simply rest in place. It is leveled up by using gold at the Mead Hall.
4. Minimap – The minimap provides vital information on the level, including your settlements, farms, enemy locations, and bosses.
5. Equipment – Your character has a range of equipment to help keep you alive. These can be restocked at any time at fortresses/outposts.
- 5a – Ranged Options – Projectiles and throwables of different types to counter any situation. As the game progresses, holding X on these three equipment types will bring up options for you to cycle through.
- 5b – Food – Food restores your health.
- 5c – Mead – Mead restores your stamina.
6. Fast Travel – This sign allows you to fast-travel between any of your captured regions on the map.
Base-Building
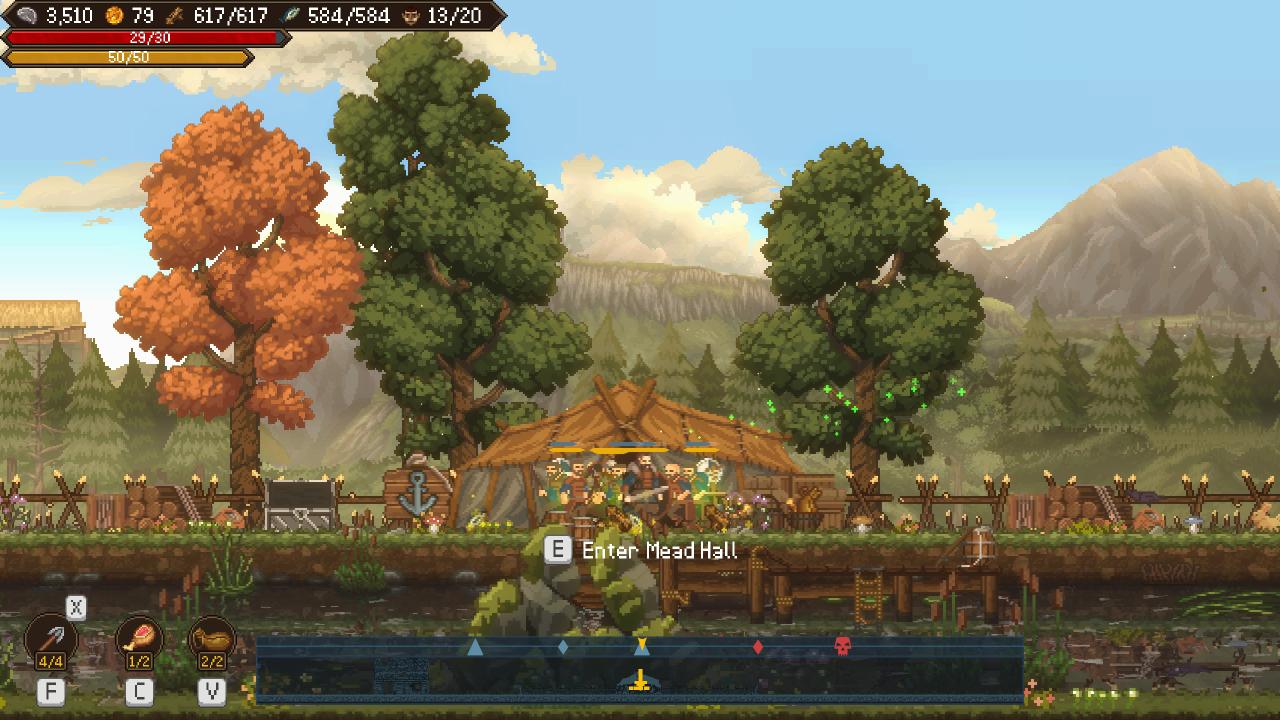
1. Mead Hall – Mead Hall is the center of every fortress, and upgrading this building will allow for more plots to be built on, unlock new buildings, and provide personal character upgrades at the cost of gold.
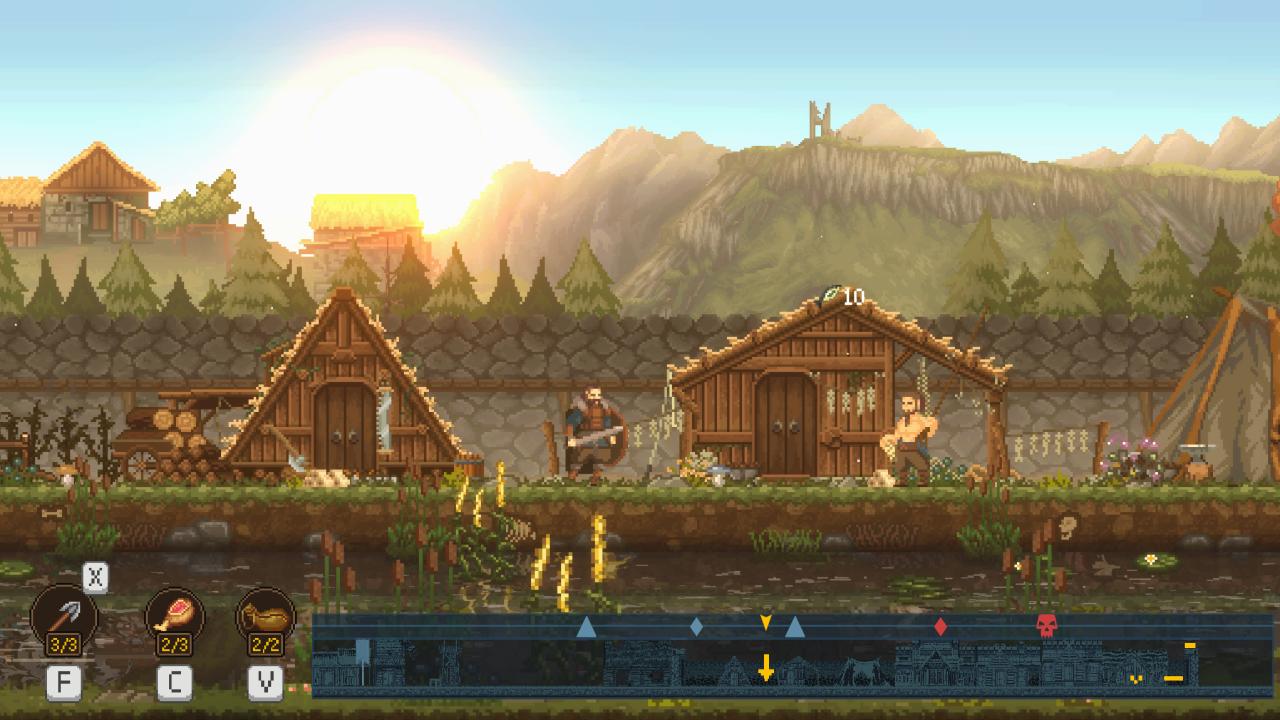
2. Lodges – Wood and Fish are the only resources your settlements will actively generate through lodges. These lodges can be upgraded as you level up your settlements with a Mead Hall. Pictured are Tier 2 lodges.
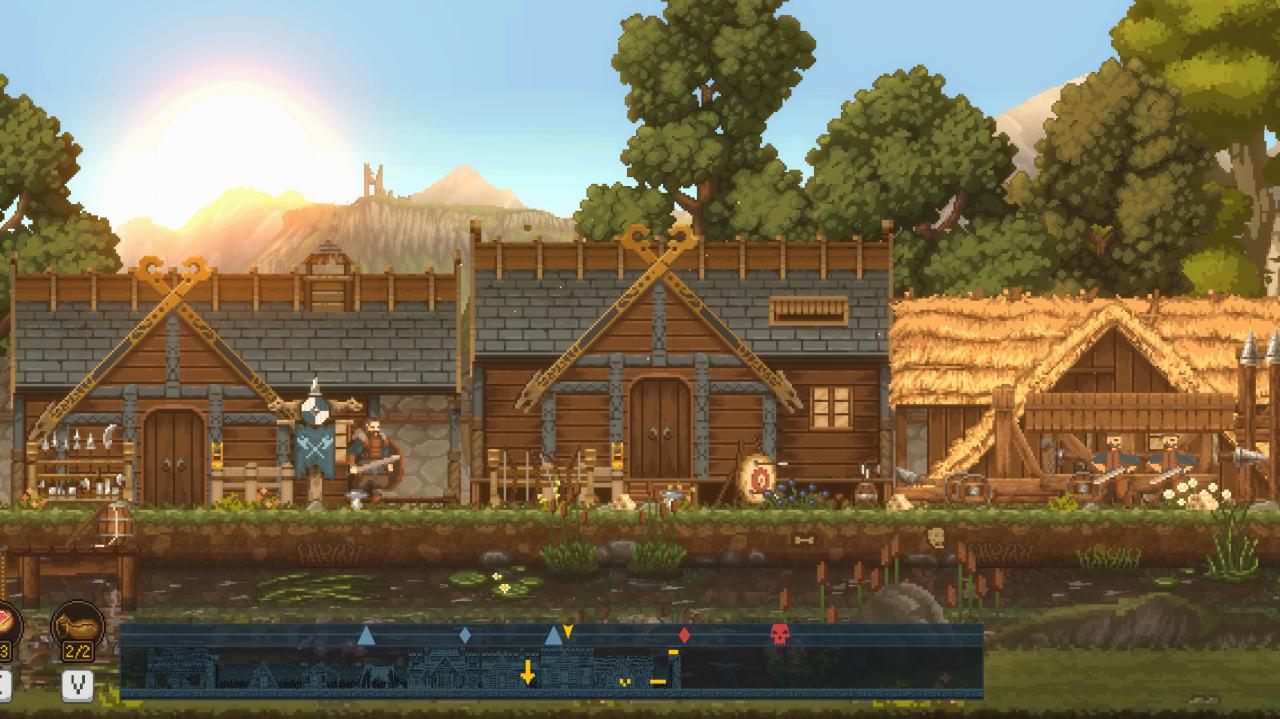
3. Military Buildings – There are five military buildings: the Barracks, Archery Range, Siege Workshop, Blacksmith, and Shaman’s Hut. While the first three buildings produce and upgrade your army’s units, the blacksmith allows a special army unit but will only upgrade your character. Pictured from left to right are Tier 3 Barracks, Tier 3 Archery Range, and Tier 1 Siege Workshop.
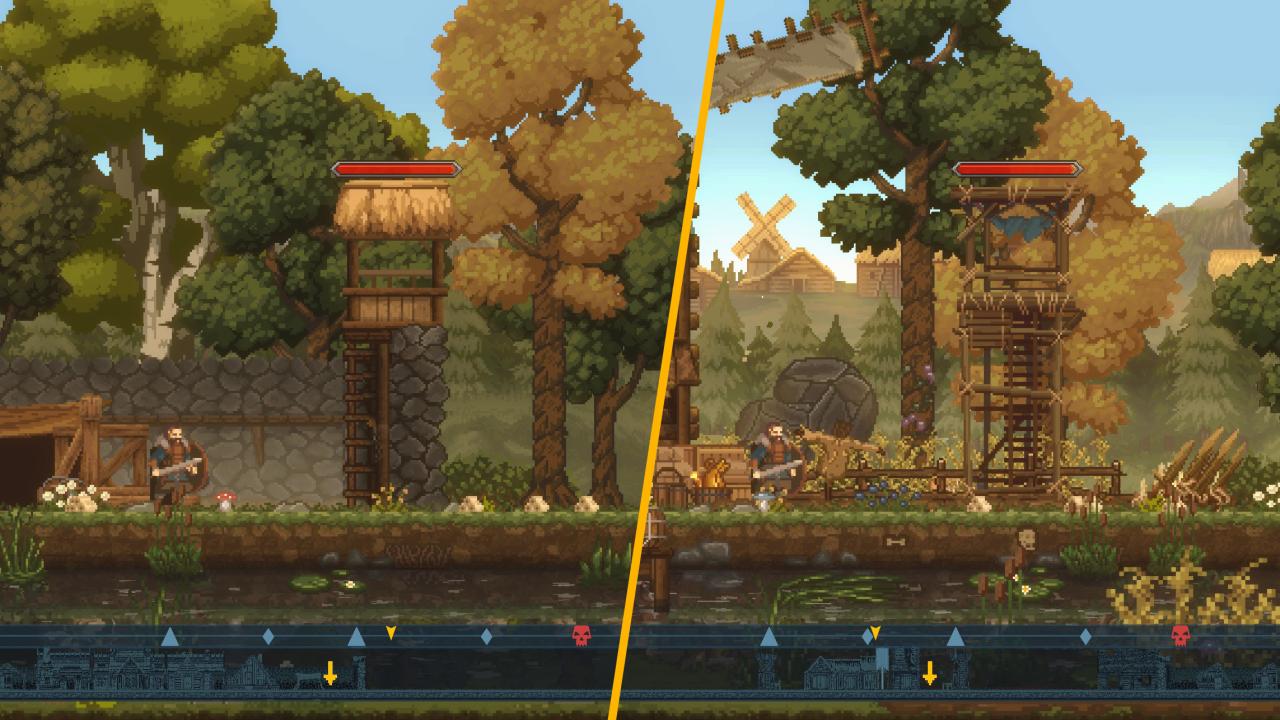
4. Fortress Defenses – Fortresses and outposts each have defenses, with upgraded fortresses having more robust walls and towers. You will need to knock down enemy defenses to capture their fortress/outpost.
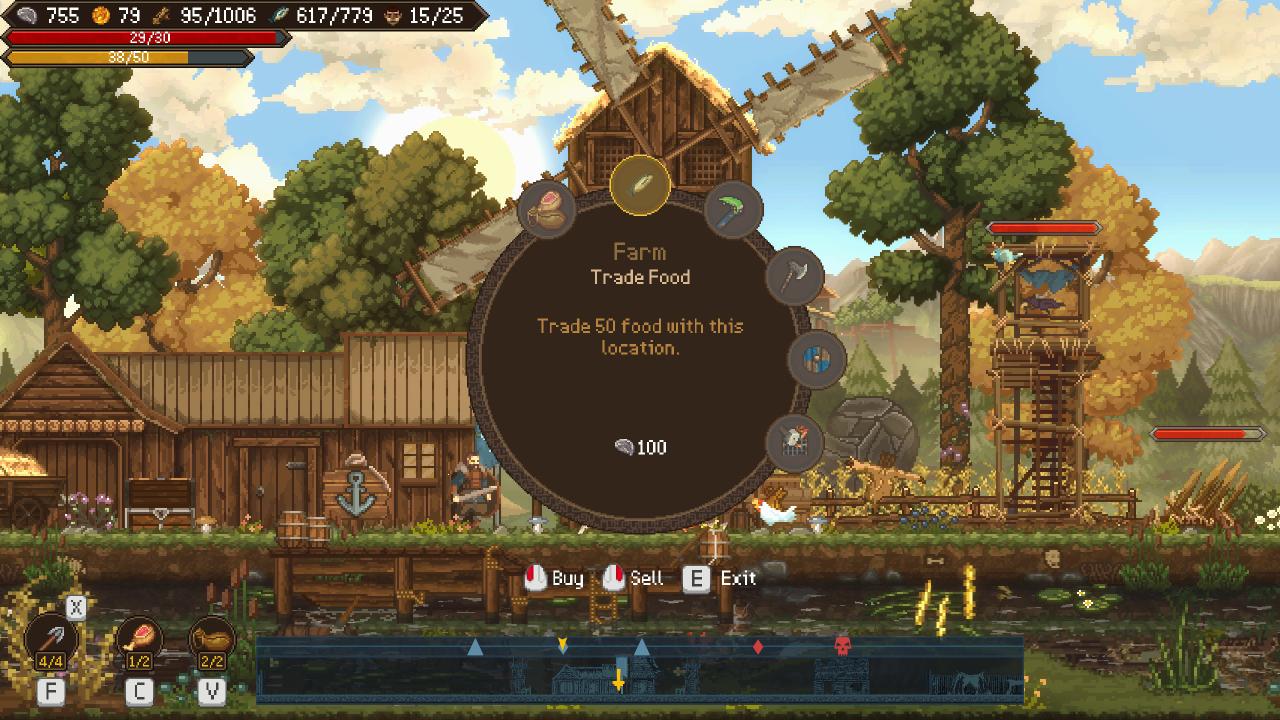
5. Outposts– Between fortresses lie outposts. These do not provide passive resource generation like fortresses; however, they allow trading silver for resources, and provide access to different types of mercenaries.
Runes
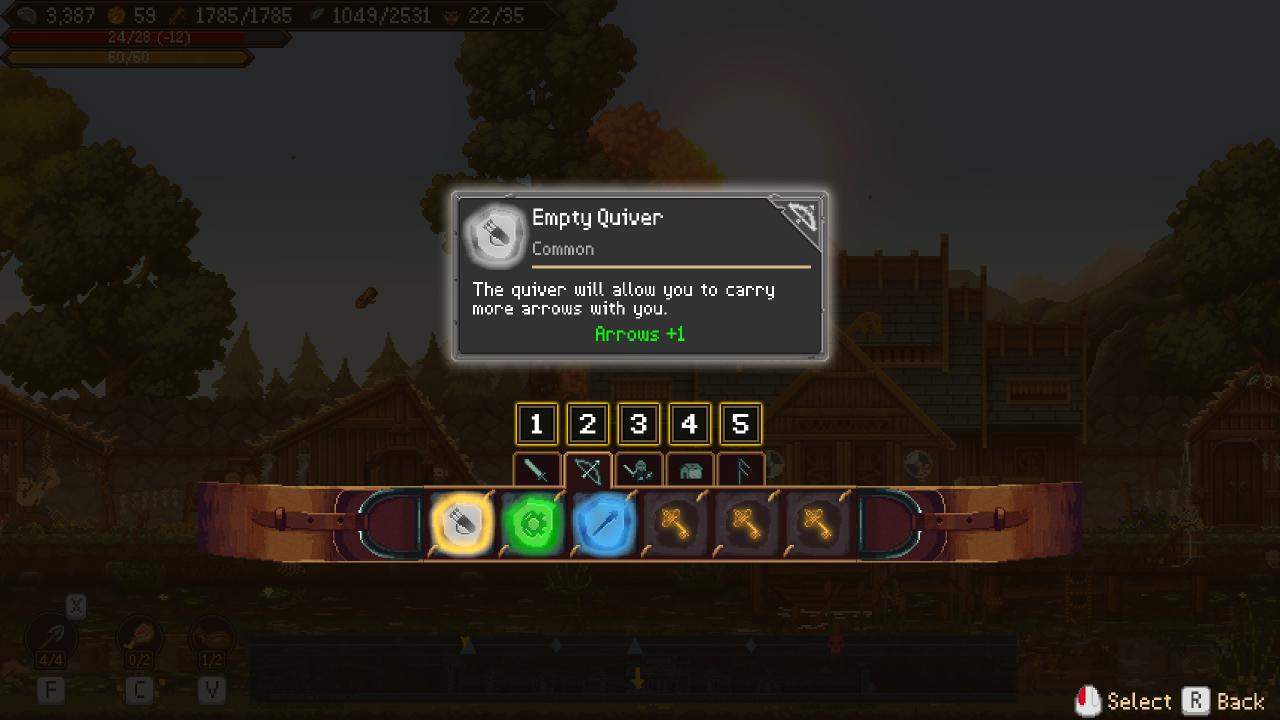
Runes are found by slaying enemies and opening up chests on the map. These ancient stones vary in rarity and will give you advantages in the following areas:
- Hero Melee
- Hero Ranged
- Army
- Economy
- Divine
Your belt can hold a limited number of runes, however, you can unlock more slots by equipping rune sockets. Note that on your death, you must release a rune to Odin before being restored to life.
Battle
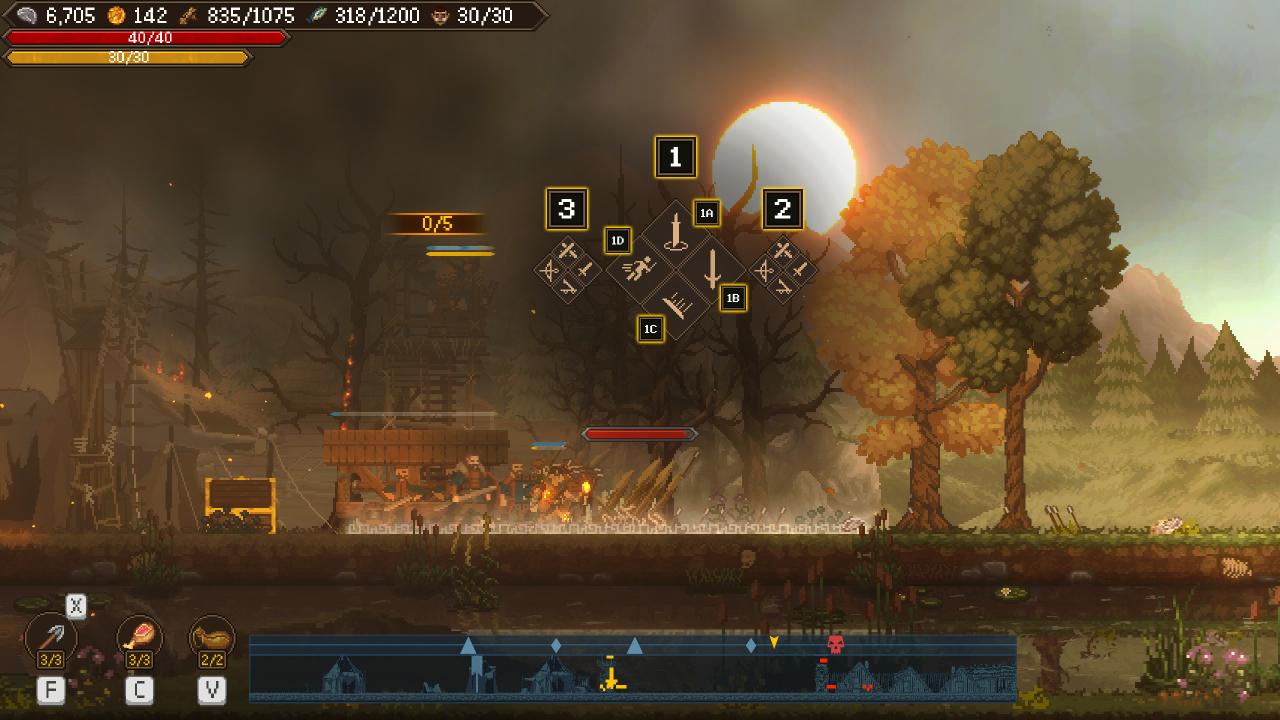
1. Army Management – As leader of this expedition into England, you are in command of yourself and the units you create. Holding down shift will bring up commands for your men, with a breakdown as follows:
1. Center Command
- – Commands all units within the white border, rotating from the top clockwise:
- 1a. Hold Positio – Hold at the heroe’s position. When used near a friendly gate, units will defend that gate.
- 1b. Attack – Continually push forward whatever the cost.
- 1c. Shield Wall – Best used with shielded melee units, forms a shieldwall for as long as their stamina lasts, with archers behind.
- 1d. Follow Me – Units will follow behind you regardless of enemy units.
2. Right Command
- – Select your troops to attack, rotating from the top, clockwise: mercenaries, melee, siege weapons, ranged.
3. Left Command
- – Select unit type to follow me, rotating from the top, clockwise: mercenaries, melee, siege weapons, ranged.
2. Personal Commands – Your personal commands are as follows:
- Space – Dodge at the cost of stamina.
- Left-Mouse Click – Light Attack
- Hold Left-Mouse Click – Charges for a power attack at the cost of stamina.
- Hold Right-Mouse Click – Brings up the shield. You can change the shield’s direction by moving the mouse up and down.
- F Key – Draw ranged projectile, with X to switch out projectile type.
- C Key – Consume food to replenish health.
- V Key – Consume Stamina Items to replenish stamina.
Region Map
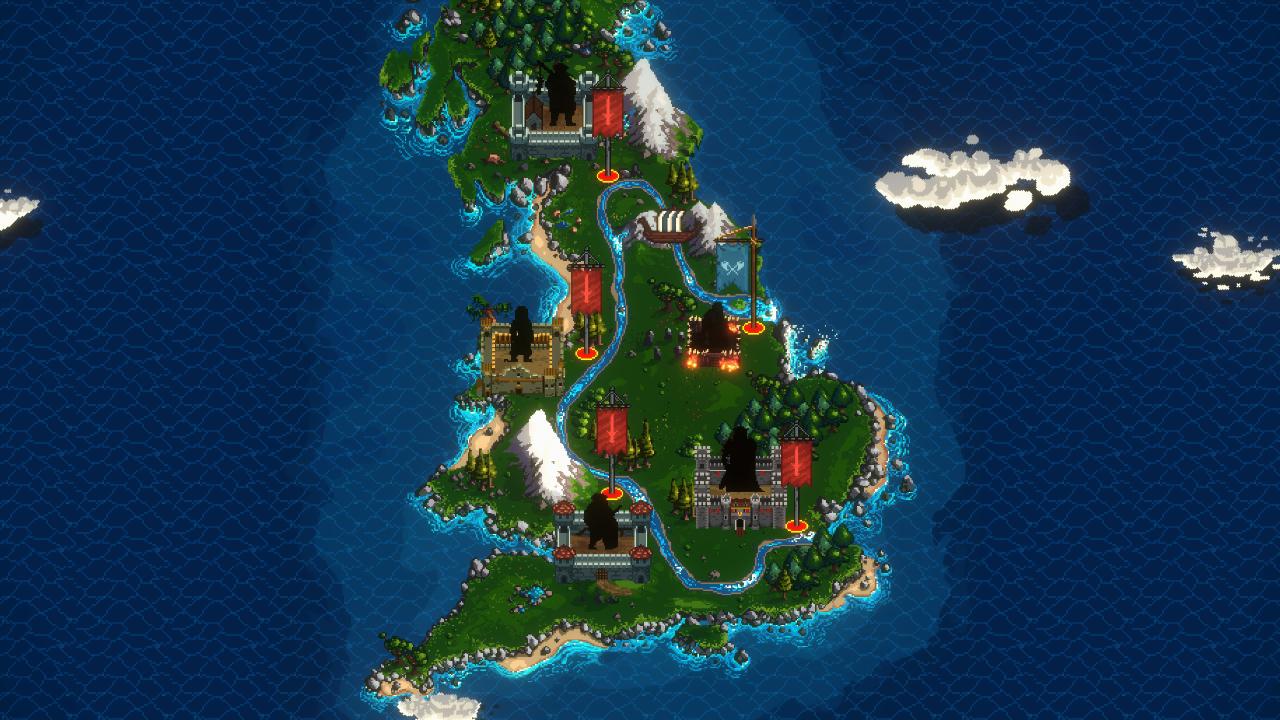
On completing a level, you will move along the region map, bringing you to the next level, where you will encounter new enemies, bosses, and fortress buildings, not to mention progress along the story to fulfill your destiny!
Early Gameplay/Helpful Tips
- As you fight further into a level, it is wise to return to your more well-protected fortresses and rebuild to focus on resource generation, with military buildings at the forefront of battle.
- Headshots are possible, and arrows automatically replenish. Master the bow and snipe the enemy from afar.
- A shieldwall is incredibly effective against a wave of enemies and gives you time to use your bow and power up an attack, dealing maximum damage as the enemy tries to fight through your defense.
- Adapt your army to the situation. Melee soldiers can destroy lower-level defenses, but a wooden palisade or stone wall will require siege equipment, which consumes more manpower.
- Your watchtowers can hold up to 5 archers, and you can reduce that number by selecting it when you are close. Limiting the number allows you to have a solid garrison while replenishing your army, or in reserves should a battle turn sour.
- Death is not the end! Odin will require you to give up a rune, but once you enter the Bifrost, you will be returned to the nearest settlement.
- Your companion dog will alert you before an attack occurs.
- You can pet Odin’s wolves, as well as your dog. They are good boys.
Thanks to Antony (Hooded Horse) for their excellent guide; all credit belongs to their effort. If this guide helps you, please support and rate it here. Enjoy the game.
