For RUNE II players, if you want to play multiplayer games with friends, this guide of Multiplayer Hosting Instructions will help you out.
How do I join a RUNE II multiplayer session?
There are three ways to join a RUNE II multiplayer session:
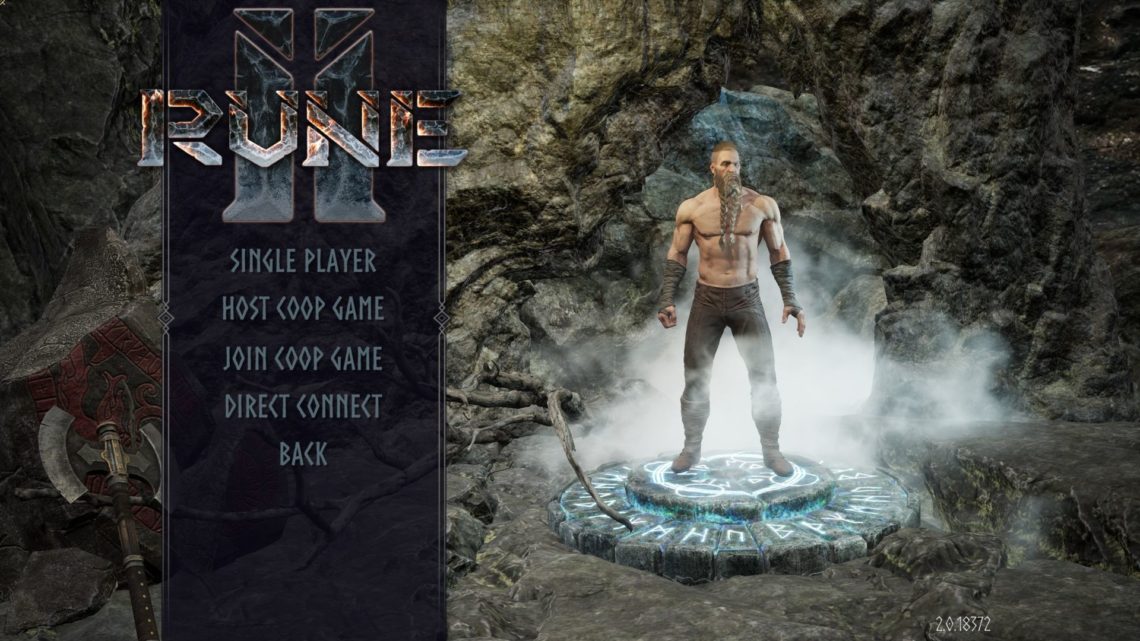
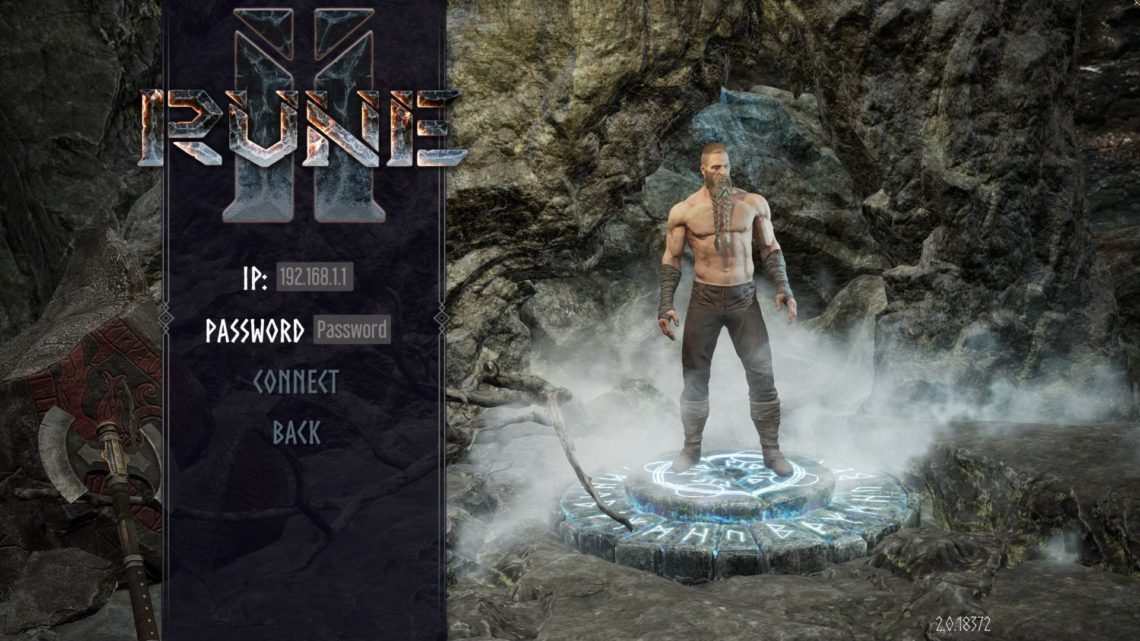
- You can click CAMPAIGN >> DIRECT CONNECT and manually type in the IP and optional password, then hit connect.
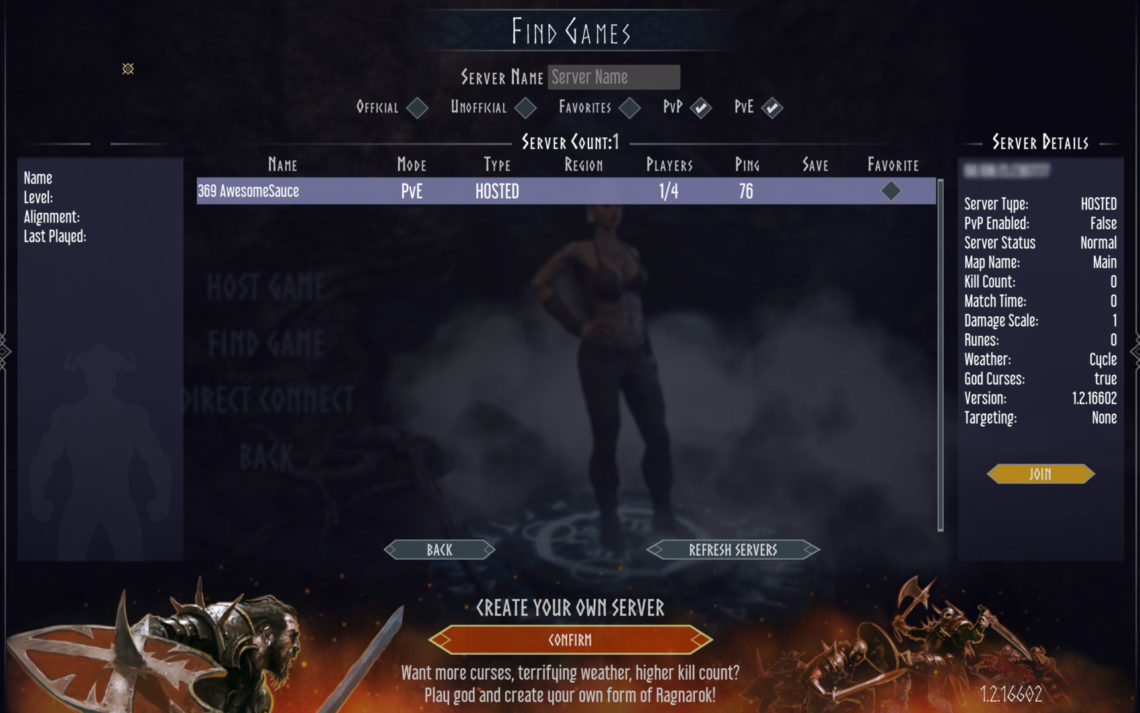
- You can click CAMPAIGN >> JOIN CO-OP GAME and use the server browser to join any open co-op games.
- You can click PvP and use the server browser to join any open Deathmatch or Team Deathmatch games.
RUNE II Direct Connect
RUNE II Session Browser
How do I host a co-op game session for others to join?
To host your own joinable co-op multiplayer session, just type in the “Hosted Game Name” field, add an optional password below, wait for UPNP to work it’s automatic port forwarding magic, and hit confirm to enter RUNE II! It’s finally that simple.
Other co-op hosting methods are not supported.
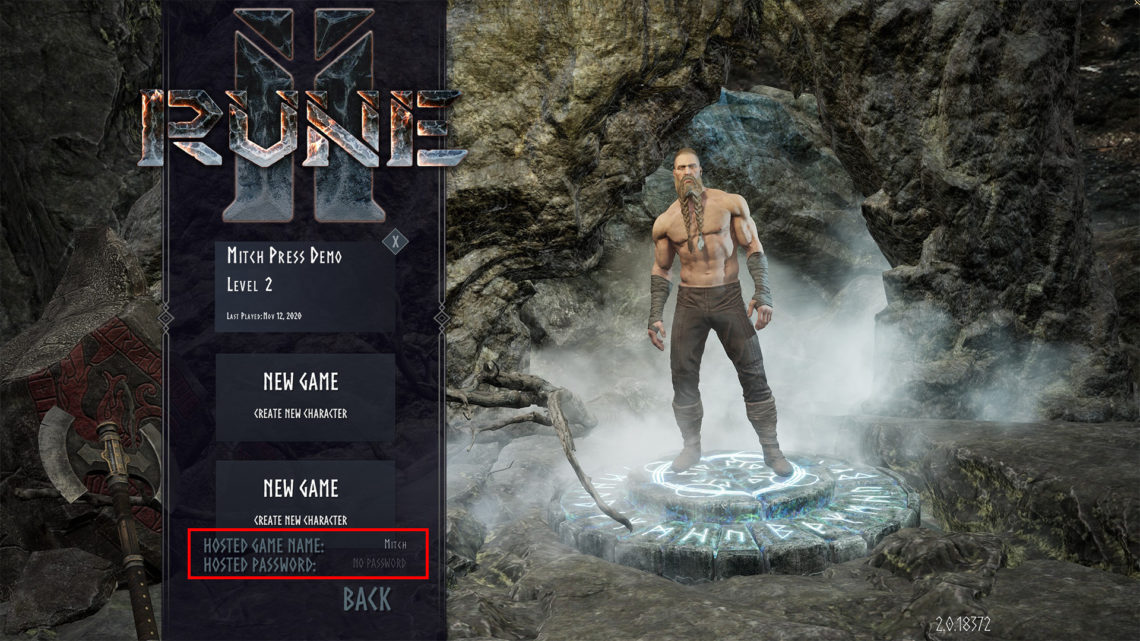
If you don’t want to host a game and just want to play single player, LEAVE THESE FIELDS BLANK.
Frequently Asked Questions
Q: I’m hosting a session with no password. When my friend tries to join via the server browser, they see a password. but the server browser says I have one on it.
A: Your ports may not be open. Try to direct connect. If you get the message “connection failed, server not found”, go through the guide below to ensure your ports are open.
Q: I put in a password but I got kicked to the main menu?
A: Passwords are case-sensitive. Please ensure that you are typing the password exactly.
Q: Why can’t I see my friend’s hosted game?
A: Make sure you and your host are on the same version of RUNE II. Version number can be found in the lower right corner of the main menu.
Q: I’m getting Error Code 14 when trying to host a game. What does that mean?
A: UPNP is unable to make a connection with your gateway device. Please login to your router and check to make sure that UPNP is enabled. You may need to follow the instructions below to manually open ports.
Q: My AT&T (or other brand) router doesn’t support UPNP, can I still host a multiplayer game?
A: Yes. Please follow the instructions below.
I want to customize my RUNE II experience for me and my friends further, how do I do that?
Change any of the variables that are listed in this blog post and copy them into your engine.ini (don’t forget to hit save!), then start RUNE II normally and enable your game to be hosted from the Campaign menu like normal.
How do I host a co-op game session for others to join?
To host your own joinable co-op multiplayer session without UPNP, you will need a little bit of technical knowledge. Let’s walk through some of the basics. NOTE: This guide is written for hosting a RUNE II co-op game session on a Windows home computer. Other hosting formats are not officially supported.
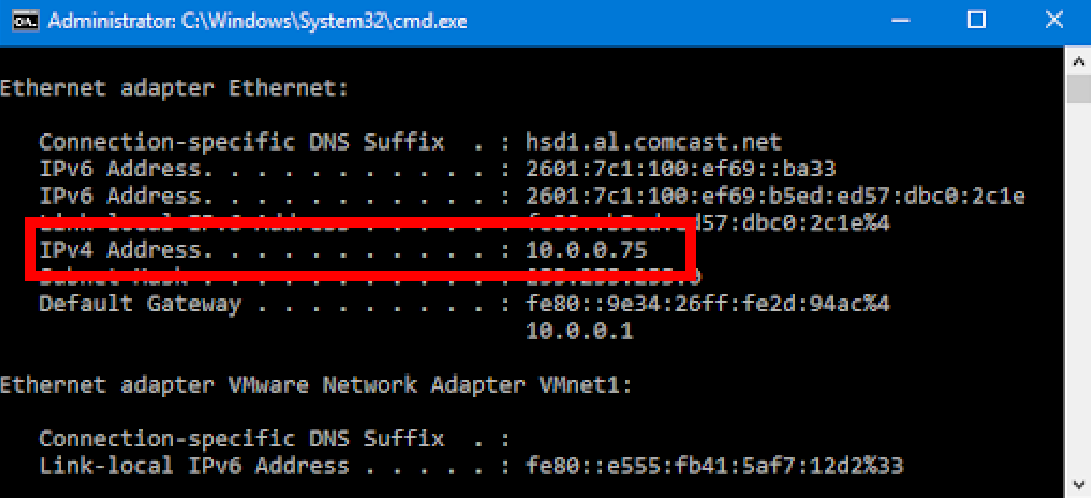
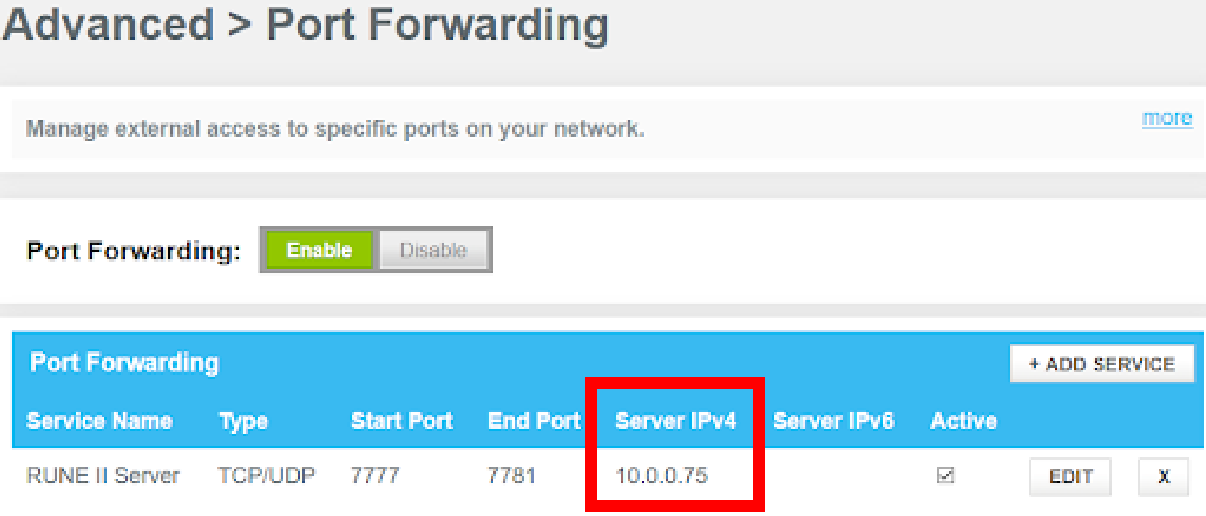
First things first, you will need to go into your modem or router settings and port forward ports 7777-7781. If you aren’t familiar with where your port forwarding menu in your router is. Search for “ROUTERMODELNUMBER + port forward” into Google. Make sure that you port forward using your IPV4. You can find your IPV4 in your computer by opening the Windows command prompt and typing in “ipconfig”
Port forwarding will happen via your modem, router, of modem/router combo. Here are a few samples to get you started.
https://en.wikipedia.org/wiki/Port_forwarding
https://www.whatismyip.com/port-forwarding/
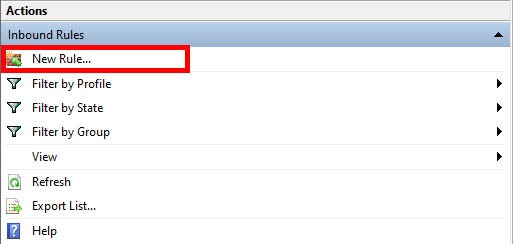
Next, we’ll need to unblock ports 7777-7781 on your local PC. The local PC is the one you are hosting the RUNE II server on. While unblocking ports primarily happen in your firewall, depending on setup this could be in software, hardware, or both. For this setup, we will be unblocking ports in Windows Defender Firewall with Advanced Security.
Go to “New Rule” in the actions pane.
We’re unblocking ports, so select “port”
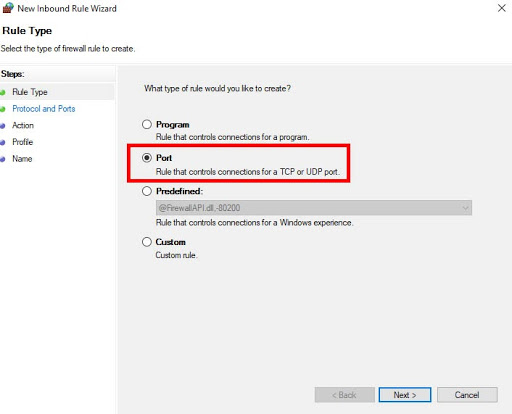
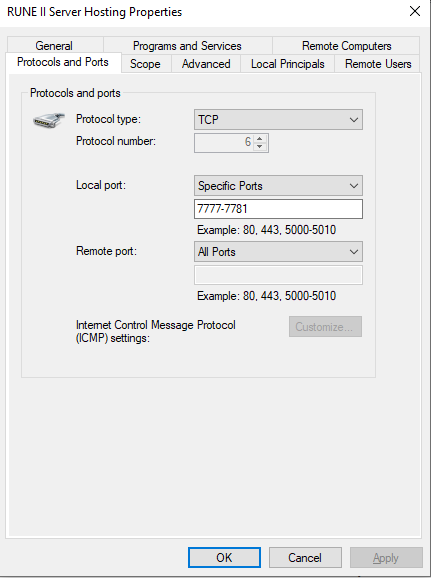
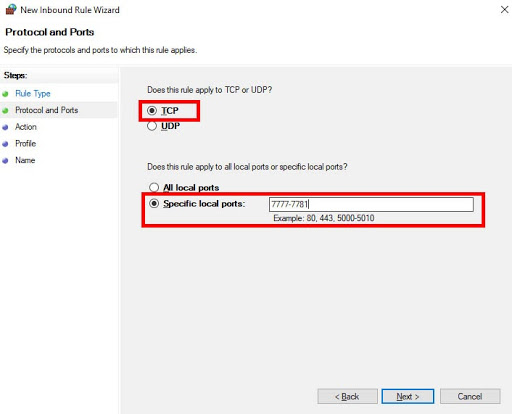
RUNE II uses TCP/IP, so select TCP up top. Fill in “7777-7781” under specific local ports.
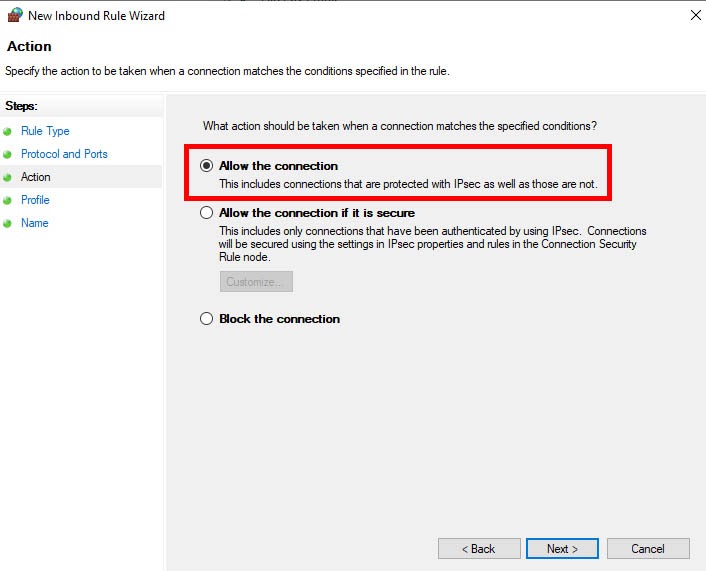
We want to allow connections so people can join your hosted server.
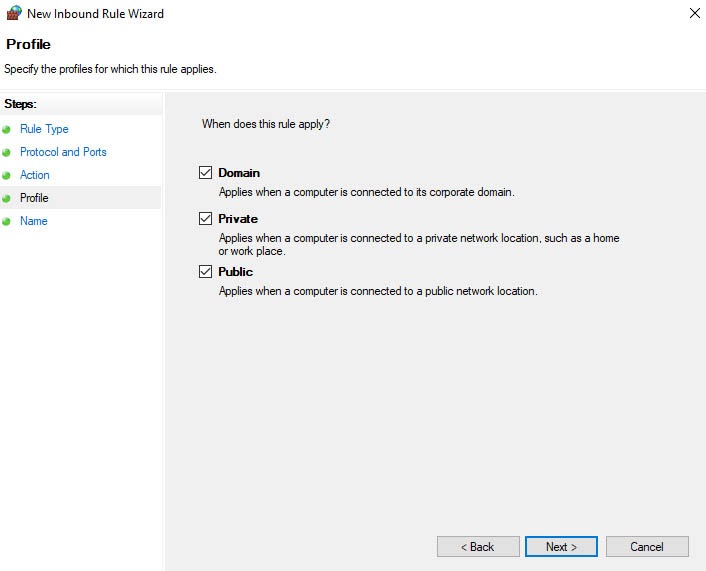
This one depends on your network settings. Select all boxes that apply to your network.
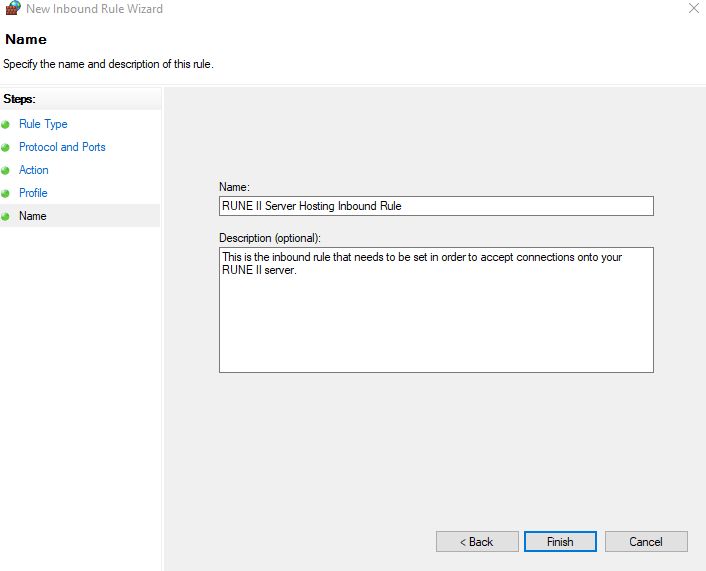
Give this inbound rule a name and optional description, and click finish.
You can verify that your settings are correct by checking the properties for the inbound rule.
