Skip to content
Menu
SteamAH
  • Cheat
  • Guide
  • Tips
  • Privacy Policy
  • Abuse
SteamAH

One Finger Death Punch 2: 100% Achievement

Posted on April 21, 2019

There are NO missable achievements in this game. You can aquire all of the achievements within a single playthrough and at any time you feel like going for them.


Keep Fighting! – Do not Button Smash!

Nothing to say about the following achievements. Just keep fighting. These achievements are tracked in every mode the game has to offer.

What to kill…

Picture
Achievement
Description
One Finger Death Punch 2: 100% Achievement
Your kung fu is not strong
Achieve 5000 kill count
One Finger Death Punch 2: 100% Achievement
You are legend
Achieve 10000 kill count
One Finger Death Punch 2: 100% Achievement
Kill 5000 grey enemies
One Finger Death Punch 2: 100% Achievement
Kill 1000 green enemies
One Finger Death Punch 2: 100% Achievement
Kill 1000 blue enemies
One Finger Death Punch 2: 100% Achievement
Kill 320 brawlers
Kill 320 brawlers
One Finger Death Punch 2: 100% Achievement
Fight me
Kill 1000 brawlers
One Finger Death Punch 2: 100% Achievement
Defeat 10 nemesis
Defeat 10 nemesis
—
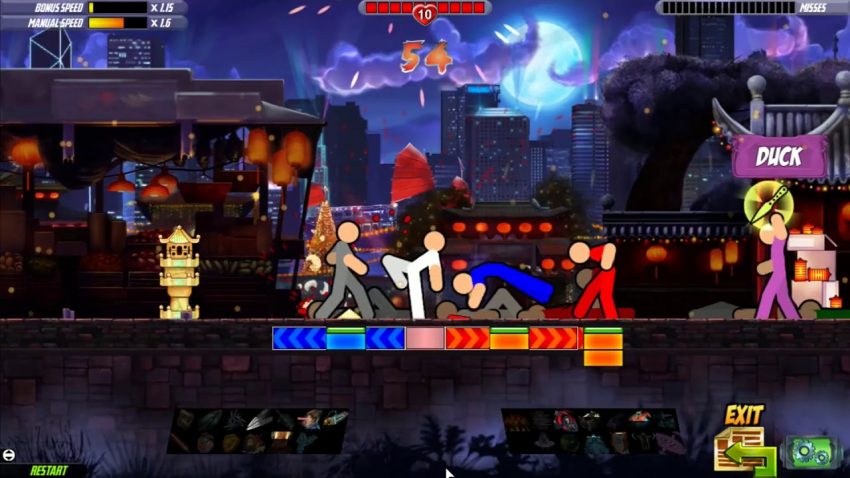
Normal looking brawlers which just need way more inputs to defeat
One Finger Death Punch 2: 100% Achievement
I’m the real boss
Kill 250 bosses
—
NOT available in blind mode!

… and how to do it:

Picture
Achievement
Description
One Finger Death Punch 2: 100% Achievement
Kill with ball of death 250 times
One Finger Death Punch 2: 100% Achievement
Kill using a weapon 2000 times
One Finger Death Punch 2: 100% Achievement
Kill using a power weapon 1000 times
—
Only laser sword kills count
One Finger Death Punch 2: 100% Achievement
Kill using a chainsaw 1000 times
One Finger Death Punch 2: 100% Achievement
Achieve a 150 hit combo
One Finger Death Punch 2: 100% Achievement
A storm is coming
Tornado kick 15 times
—
The short Auto-Attack animation – random event
One Finger Death Punch 2: 100% Achievement
It’s party time
Get a dance party
—
The long Auto-Attack animation – random event
One Finger Death Punch 2: 100% Achievement
Use skills 500 times
One Finger Death Punch 2: 100% Achievement
Spirit attack 500 times
One Finger Death Punch 2: 100% Achievement
Catch a weapon 100 times

Levels

You only need to beat the last level on each map for the following achievements to unlock:

Picture
Achievement
Description
One Finger Death Punch 2: 100% Achievement
Complete tutorial level 16
One Finger Death Punch 2: 100% Achievement
Complete the forest
Complete the forest
One Finger Death Punch 2: 100% Achievement
Complete the swamps
Complete the swamps
One Finger Death Punch 2: 100% Achievement
Complete the lava lands
—
Leads both to area 4 and 5
One Finger Death Punch 2: 100% Achievement
Complete the ice lands
—
Leads to area 6
One Finger Death Punch 2: 100% Achievement
Complete the alien crash site
—
Leads to area 7
One Finger Death Punch 2: 100% Achievement
Complete the sky lands
One Finger Death Punch 2: 100% Achievement
Complete the wastelands
One Finger Death Punch 2: 100% Achievement
Complete the land of temples
—
Can be reached through both area 6 and 7
One Finger Death Punch 2: 100% Achievement
Victory
Beat the last level on the Map

Just to make sure:
There is no achievement-related reason to play the 35 bonus level, which unlock after the “Victory” achievement.

While completing all these areas, you’ll also unlock:

Picture
Achievement
Description
One Finger Death Punch 2: 100% Achievement
Unlock 10 trophies
Unlock 10 trophies
One Finger Death Punch 2: 100% Achievement
Unlock 20 trophies
Unlock 20 trophies
One Finger Death Punch 2: 100% Achievement
Marching on
Complete 100 levels
One Finger Death Punch 2: 100% Achievement
The wise master wanders the lands
Complete 150 levels
One Finger Death Punch 2: 100% Achievement
Get perfect 5 times
Get perfect 5 times
One Finger Death Punch 2: 100% Achievement
Get 3 stars 99 times
One Finger Death Punch 2: 100% Achievement
Get 4 stars 50 times
One Finger Death Punch 2: 100% Achievement
Get 5 stars 25 times

You’ll soon notice, that the areas aren’t exactly linear.
There are many dead ends, which reward you with revenge tokens and skill points:

Picture
Achievement
Description
One Finger Death Punch 2: 100% Achievement
Get 10 revenge tokens
One Finger Death Punch 2: 100% Achievement
Use a revenge token
Use a revenge token

There are some ~40-50 revenge tokens available on the map.
The levels, which reward you with one of those are marked with orange coins on the map.
You can only use them, after you’ve failed a level. You then have the choice between returning to the map, replaying the level or using a revenge token.

You can pretty much waste them, without thinking about it.
There are only 3 really difficult levels in the last areas, in which you can’t even use them, so…

Picture
Achievement
Description
One Finger Death Punch 2: 100% Achievement
Get 35 skill points
Get 35 skill points
One Finger Death Punch 2: 100% Achievement
Highly skilled
Max out 10 skills

There’s a total of 78 available skill points to max out all of the 26 skills of this game, so these two should be really easy.
The levels, which reward you with skill points are marked with pink gems on the map.

I highly recommend getting all of them!

Survival & Gauntlet

Alright, let’s talk about Blind Mode first, and why it is NOT as hard as it may seem/sound.

Blind mode is negative in 2 ways:

1) It removes the markers beneath your character, which indicated, if your enemies were within reach or not. Not really that big of a deal, since you’ll only unlock blind mode after you’ve played normally for quite a while. Which means you should have a solid feeling for range anyway.

2) It removes the markers beneath your enemies, which illustrated the needed inputs to beat them.
They are instead replaced by a unique symbol per color. That’s not toooo bad though, since you can learn the symbols and the associated inputs, though it may take a while.

BUT! –

Blind mode comes with some really handy advantages!

1) No two-colored enemies
2) No black enemies
3) No bosses — (not to mix up with brawlers – those are still there)

With those gone, it’s actually not to bad.

Alright, that being said, here we go:

Picture
Achievement
Description
One Finger Death Punch 2: 100% Achievement
Digging in and climbing high
Play survival mode 10 times
One Finger Death Punch 2: 100% Achievement
Heading to the top
Unlock survival tower tier 5
One Finger Death Punch 2: 100% Achievement
King of the hill
Unlock tier 10 in Normal Survival
One Finger Death Punch 2: 100% Achievement
Climbing the ladder blind
Unlock tier 5 in Blind Survival
—
Blind Survival unlocks, after you’ve reached tier 10 in normal survival
One Finger Death Punch 2: 100% Achievement
Mastering blind survival
Unlock tier 10 in Blind Survival
One Finger Death Punch 2: 100% Achievement
No Luca No!
Unlock tier 5 in No Luca No Survival
—
Main Menu -> More -> No Luca No
One Finger Death Punch 2: 100% Achievement
I hate this stupid cat
Unlock tier 10 in No Luca No Survival
One Finger Death Punch 2: 100% Achievement
Who is this kid anyways?
Unlock tier 5 in Baby Survival
—
Baby Survival unlocks, after you’ve reached tier 10 in No Luca No
One Finger Death Punch 2: 100% Achievement
Why did I even do this?
Unlock tier 10 in Baby Survival

Do this AFTER you’ve unlocked all skills!

You do NOT need to reach tier 10 within a single try!
Once you reached a new tier, you can start a new survival attemp starting at said new tier.
Unlocking the 2nd takes 200 kills, the 3rd takes 400 kills and it increases by 200 per tier. Which means you can start at tier 9 and “only” need 1800 kills to get the respective tier 10 achievement per survival mode!

For those, who have played the first One Finger Death Punch:

No Luca No is by far not as bad as in the first game!

Back to this game. Luca does not change the side of your screen, once (s)he spawned. I highly recommend restarting the No Luca No survival as often as needed to get Luca to spawn on your left side of the screen.
Doing so will make the run / tackle and horse riding rounds way easier – and you’ll be needing those free health points.

Picture
Achievement
Description
One Finger Death Punch 2: 100% Achievement
Master of the Gauntlet
Beat the last level in the Gauntlet Normal
One Finger Death Punch 2: 100% Achievement
Master of the Blind Gauntlet
Beat the last level in the Gauntlet Blind

As with survival – Do this AFTER you’ve unlocked all skills!

You do NOT need to beat every available level!
Your only goal here is to get all the way to the right.

There are some levels with heart icons – those will heal you upon completing them.

Regarding the blind gauntlet:
Do it after the blind survival. You’ll most likely need to have the symbols for the different enemies memorized, or you’ll have an even harder time.

Hidden Achievements & Bonus Stages

Alright then, let’s get to the achievements for which I felt the need to create this guide.

Picture
Achievement
Description
One Finger Death Punch 2: 100% Achievement
Yes I know this is nothing
Enter the background music test

Main Menu -> Survival -> Press arrow buttons:

Left Right Right Left

Picture
Achievement
Description
One Finger Death Punch 2: 100% Achievement
Get ready for the real challenge
Enter the computer room

Main Menu -> More -> Press arrow buttons:

Up Right Down Left

Do NOT leave this screen with the red buttons pressed.
This will enable “hard mode”.

Picture
Achievement
Description
One Finger Death Punch 2: 100% Achievement
What in the world?
Summon the Who’s The Daddy guy

Main Menu -> More -> Click spam the floating icon on the left side of the screen.

Picture
Achievement
Description
One Finger Death Punch 2: 100% Achievement
Watch your step
Complete 10 stages in Johnny’s Minefield

Main Menu -> Press arrow buttons:

Up Down Left Right

Press play and finish the first 10 stages

Picture
Achievement
Description
One Finger Death Punch 2: 100% Achievement
Why am I doing this?
Collect 10 boogers in Flick or Eat

Main Menu -> Up Down Left Right (as in the achievement above) -> Press a second set of arrow buttons:

Right Left Down Up

Press play.

Attention: I was NOT able to get this mini-game to work with mouse + keyboard and HAD to use a controller.

Move the finger in his nose and pull it out.
Then move the finger together with the pulled booger above his mouth and feed him.

If you pull out a new kind of booger, an icon will appear on screen.
Either that of a finger – flick
Or of a mouth filled with teeth – eat

If you pull out a booger of the same kind again, do what the icon indicated.
After you made the right move for a few times, a new kind of booger will appear. Repeat as with the first one.

As soon as you eat the 10th kind of booger in a single playthrough, this achievement will unlock.
Took me 620 points (or 62 boogers) to get to the 10th.

Bonus Stages
Picture
Achievement
Description
One Finger Death Punch 2: 100% Achievement
Enter the SDG Bonus Stage

Main Menu -> More -> Credits -> Press arrow buttons:

Up Down Up Down

Click the appearing portal.
You do NOT need to win this fight.

Picture
Achievement
Description
One Finger Death Punch 2: 100% Achievement
Enter the Epic Bonus Stage

Main Menu -> More -> Contact -> Press arrow buttons:

Down Up Down Up

Click the appearing portal.
You do NOT need to win this fight, either.

Picture
Achievement
Description
Hidden
One Finger Death Punch 2: 100% Achievement
Enter the Pixel Bonus Stage
yes
One Finger Death Punch 2: 100% Achievement
Strange super hard level
Beat the Bonus Pixel level on the map
–

The pixel stage can be found on the second-to-last map, to the left of the dragon.

One Finger Death Punch 2: 100% Achievement

Picture
Achievement
Description
Hidden
One Finger Death Punch 2: 100% Achievement
Enter the Cloud Bonus Stage
yes
One Finger Death Punch 2: 100% Achievement
Super death cloud stage type thing
Beat the Bonus Cloud level on the map
–

The cloud stage can be found on the last map, on the level beneath the sun.

One Finger Death Punch 2: 100% Achievement

There’s no trick to the last 2 stages.
It really comes down to your skill.
Do not expect to beat these stages on your first few tries.
If there’s one hint I can give you: Unlock all the skills beforehand. It really is helpful.

Well, I wish you the best of luck!

Have Fun playing One Finger Death Punch 2 =)

And don’t forget – Do not Button Smash!

Written by Brachragon

MORE GAME GUIDES FOR YOU

Related Posts:

  • One Finger Death Punch 2: Secrets and Easter Eggs
  • One Finger Death Punch 2: How to Enable In-game Music Player
  • One Finger Death Punch 2: SoundTrack Lists
  • One Finger Death Punch 2: Keyboard Controls

Leave a Reply Cancel reply

Your email address will not be published. Required fields are marked *

Disclaimer

All content cited is derived from their respective sources. If you think we have used your content without permission, Please go to the Abuse Page to contact us and we will be taking it seriously.

Recent Posts

  • Rogue Prince of Persia: Save Files for the Final Boss
  • Deltarune: Save for 100% Secret Bosses (NO EGGS)
  • Hollow Knight: Silksong Save Files – Before the Final + Before Any Bosses
  • Parisian Brasserie Simulator Save Files: New Start with A Lot of Money
  • Revenge of the Savage Planet Save File: New Game with A Lot of Money
©2025 SteamAH | Powered by SuperbThemes & WordPress