Sometimes, an update to Hunt: Showdown can cause a lot of performance issues. While there will always be some performance loss the more game gets updated and expanded, in Hunt this is often caused by an issue with your Shader cache. To fix this and increase your performance, you can delete your Shader Cache.
Default directory.
If you installed Steam and Hunt: Showdown in the default location and are running an English installation of Windows, you should be able to just copy-paste the following path into the bar at the top of your File Explorer
C:\Program Files (x86)\Steam\steamapps\common\Hunt Showdown\user
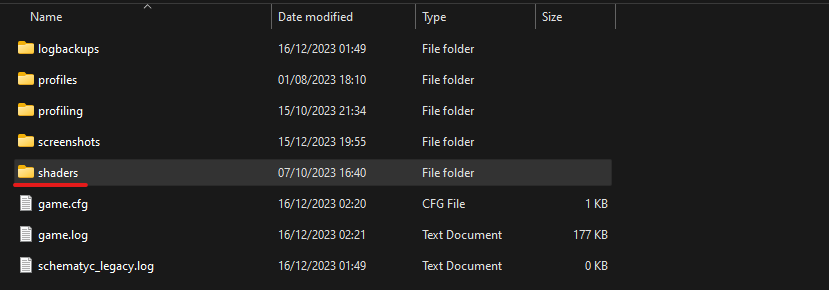
In there, you’ll want to delete the shaders folder.
If you can’t use this path for any reason, follow the steps below!
C:\Program Files (x86)\Steam\steamapps\common\Hunt Showdown\user
In there, you’ll want to delete the shaders folder.
If you can’t use this path for any reason, follow the steps below!
Step 1: Finding your Hunt: Showdown game directory
Go into your library.
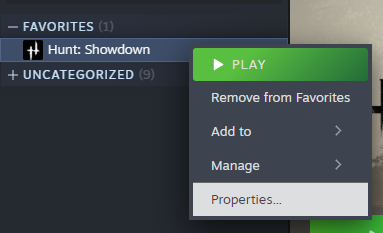
Right-click Hunt: Showdown and select Properties.
 Under Installed Files, click Browse…This will take you to your game’s directory.
Right-click Hunt: Showdown and select Properties.
 Under Installed Files, click Browse…This will take you to your game’s directory.
Step 2: Navigating to the correct folder
Once you’re in the Hunt: Showdown folder, you’re looking for the user folder. Enter it and you’re already pretty much done.


Step 3: Deleting the shader cache
Now, all you need to do is delete the shaders folder.
 This will delete the old shader cache, causing a new one to be created in its place the next time you launch the game.
 This will delete the old shader cache, causing a new one to be created in its place the next time you launch the game.
Related Posts:
- Hunt: Showdown – How to Fix Game Crash on Startup in New Update1.15
- Hunt: Showdown – 100% Achievement Guide
- Hunt: Showdown – How to Use the Wini
- Hunt: Showdown Best Poison Build Guide
- Hunt: Showdown – Complete Weapon Guide (V1.3)
