For Charlie Murder players, this guide will be to help players make custom items however they want by using a hex editor to modify the game
Navigating Your Savefile And Getting What You Need
(If you have any queries you can join this discord to get some further help from some willing members)
To summarise you will need to locate your savefile, have a hex editor and a hex converter to make things easier. I’ll walk you through exactly where to find and download them all safely.
First off you will need to locate your Charlie Murder save file. It is hidden so you need to go into your files and at the top bar it should say View. Click it and the section that has appeared should have a box that says “Hidden items”. Make sure that is ticked otherwise you will not be able to locate your CM Save file.

From there you need to find your user file. It should have your name or the alias you set yourself on the pc. For me I went into my C Drive, then Users, then Ziroikabi (Yours will be different). If you have ticked the hidden box then you should see a folder a bit faded called AppData. Inside that go in Roaming then CharlieMurder. Yours should look like this:
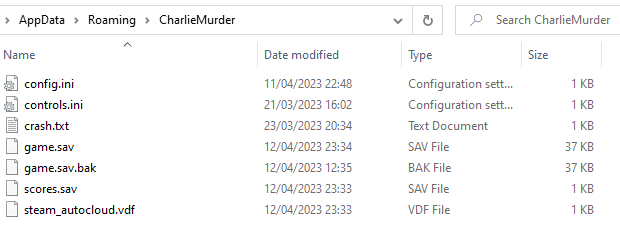
You’re looking for game.sav. Before doing anything I highly suggest making a copy of it. It’s extremely easy to make a mistake and mess up your savefile if you are careless even when you know what you are doing.
If you havent managed to find it my folder pathway went like this:
This PC -> C Drive -> Users -> Ziroikabi -> Appdata (Will only show if you can see hidden folders) -> Roaming -> Charlie Murder
Next you will need a hex editor. If you already have one you like to use any is fine however this guide will be using HxD so keep in mind things may slightly differ if you use something different.
The link to the site: https://mh-nexus.de/en/hxd/
If the link to the site isn’t working for some reason if you search HxD download it should be the top search in google.
The front page of the site should look like this:
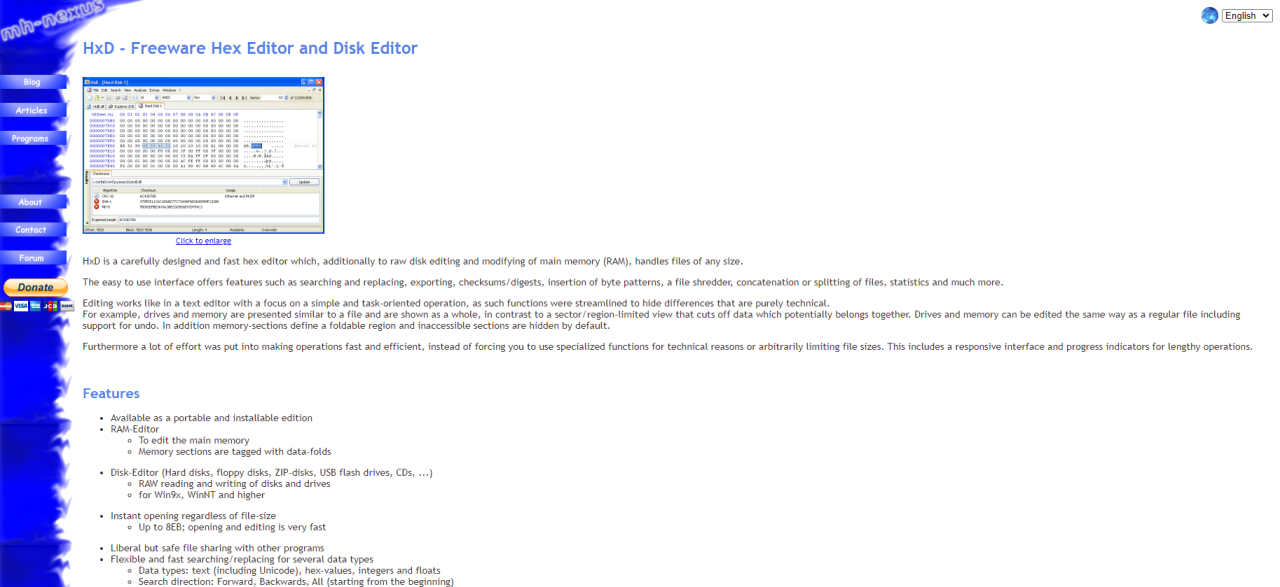
If you scroll down there should be a link to the download page that looks like this:

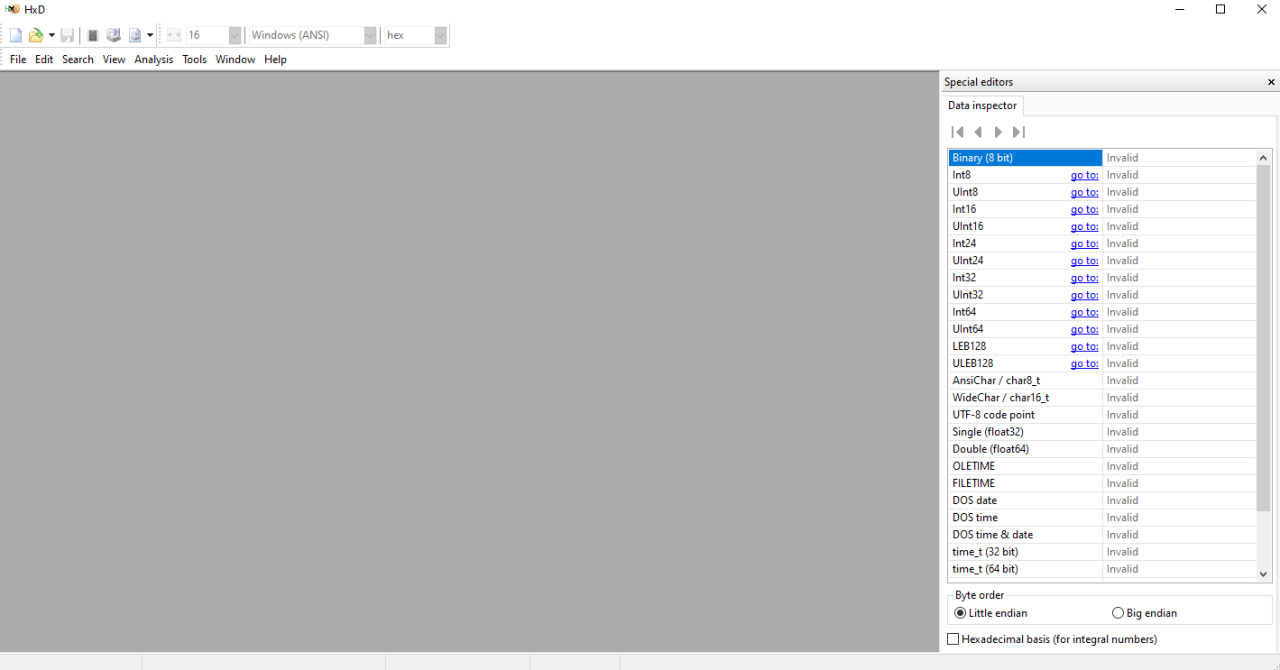
Click the download button and it should take you to a page where you can choose whatever language you like. It should download a zip file with the Hex editor setup in, go into it and set up the hex editor and you should have a blank hex editor that looks like this:
Special thanks to Love for providing some notes and the hex converter
This is a link to a zipfile containing some helpful notes for editing values and the converter you will need as if you are wanting to modify stats you will need to know the values in hexadecimal
{LINK REMOVED}
Steam sometimes doesn’t like links so if it isn’t there you can go to his youtube video and in the description there is a link to the tools:
Inside the zipfile it should look like this, the only 2 things of note you will really need is the tutorial 1 notes and the BConv64:
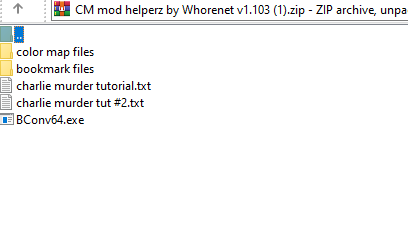
The three main things you’ll need open at once is the converter, notes and the hex editor so try arrange them on your screen so you can access all at once
Warning: Make sure your converter is set like mine to Intel for Byte Order and long for Data Type as sometimes the numbers will be flipped in reverse, this just flips them to be how you want them for this game.
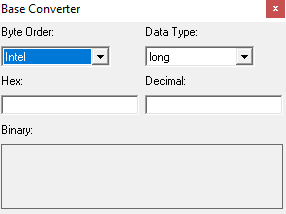
Now you have everything I’ll show you the basics of hex editing and modifying values!
Using the Hex Editor to Mod Items Part 1
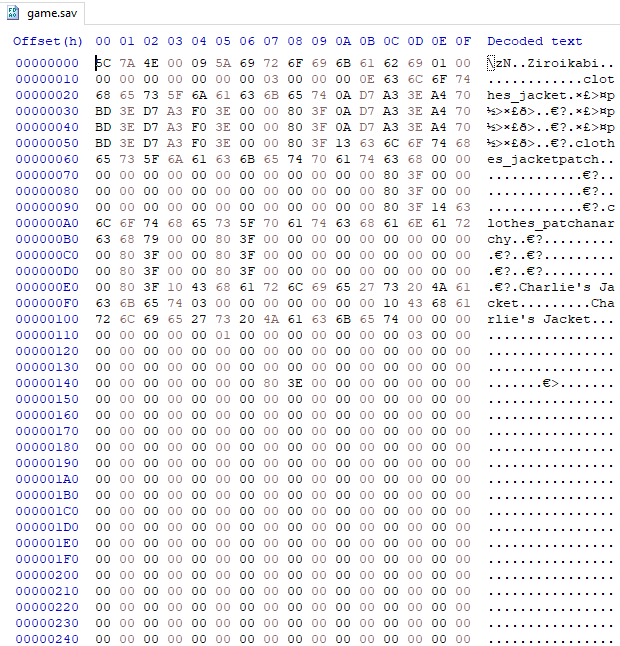
Once you have everything make sure your converter, hex editor and notes are onscreen. Then go into the hex editor and click open and open up your save file game.sav in it. It should look something like this:
Another warning: If you havent yet done so be sure to have backed up your game save incase you mess up something and break your file.
If you have progress on a lot of characters it might be hard to locate the exact thing you want to modify, one of the best ways to know which character you are on is by keeping their original outfit with the name on so you can scroll down looking at the decoded text and when it says the characters outfit you know where you are. Incase you have sold or lost the starter clothes the characters are ordered as follows:
CHARLIE – Berzerker
LESTER – Mage
TOMMY – Shaman
REX – Tank
KELLY – Mesmer
CHARLIE – Frostwraith
LESTER – Lich
TOMMY – Icemonk
REX – Halfyeti
KELLY – Enchantress
CHARLIE – Bloodmage
LESTER – Warlock
TOMMY – Paladin
REX – Necromancer
KELLY – Siren
CHARLIE – Bat
LESTER – Scarecrow
TOMMY – Skeleton
REX – Corpse
KELLY – White wolf
Each progressing set of characters being the ones you unlock from the secret boss using the golden ticket.
Another way to find the item is to use the Search function and click Find then type in the name and it should bring you close to where it is for example:
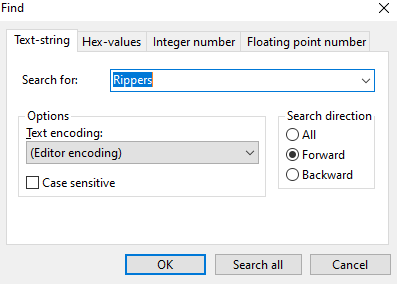

If you have multiple characters with the same items it may be hard to differentiate who is who but personally I haven’t had any problems with it.
To make things easier to see I changed the bytes per row from the default 16 to 24. This is just to make things set out easier for later.
For my example I will be using the Rippers. The stats of the item start directly after the name of the clothing ends. I am going to highlight in the decoded text just after the s in Rippers and drag along until my highlighted length is 3C or 60 bytes which will show at the very bottom of hex editor.
[A way you can check to see if you’ve highlighted the correct area will be that the end 4 bytes should always have something in them because that is the value of the clothing and [b]IF[/b] your item has any yellow effects such as stasis there should be an arrangement of 4 bytes like this “01 00 00 00” as the effect has no level, that string of 4 bytes is just telling the game its active]
To make things easier first copy the selected bytes and click New at the top left to make a new page so you can paste them into its own section so you don’t have to worry about messing up something else.
Make sure, for quality of life purposes to also change your bytes per row to 24 again for this new page

[The last 4 bytes in this show the value of the item as mentioned prior [b]CD 5B 02 46[/b], My Rippers already have some of those yellow effects mentioned which is why before that string of bytes you can see a few strings of 4 like this “01 00 00 00”. This is how I know I very likely have what I want instead of just some random bytes in the middle of nowhere]
Everything value you are going to edit in here comes in a string of 4, sometimes if something is a single byte such as “1A” make sure it is followed up by 00 00 00 or else you will start mixing values up and could breaks something.
As an example I’m going to edit the first value, the first string is the strength of the item, this is where you will need your hex converter. Currently my strength is 666666 which translates to 666.66mb in game which is way higher than the best legitimate items should give you. I’m going to change it to 999.99mb. Whatever value you want put it into the Decimal side of the hex converter.
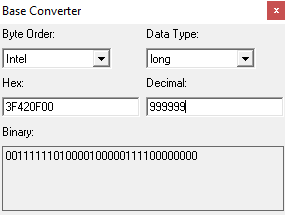
You can see it has converted to Hex on the left side you can now highlight and copy and paste the hex version into your editor to replace the old value like this:


To check if its the correct value you want, if you are unsure you can look at the data inspector at the right and if you’ve highlighted the 4 bytes it should tell you what it is. For me I wanted 999999.
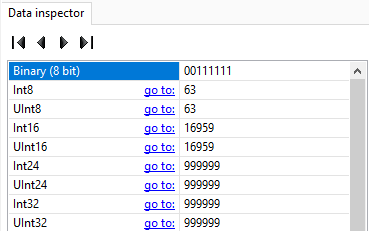
You might notice how certain types of clothes cant have certain stats in game like anarchi on some or you can’t have speed at all. However with this you can put all of them onto any clothing you want.
As one string of 4 bytes ends the next value of the item starts, here is the list in order of what each string of bytes is:
First string: – Strength
Second string: – Speed [Don’t edit this too high or you can break the game, recommend 500 max]
Third string: – Defence
Fourth string: – Anar-chi
Fifth string: – Secondary rarity/Drop rate*
Sixth string: – Rarity/Colour of Star
Seventh string: – Element 1
Eight string: – Element 1 Strength
Ninth string: – Element 2
Tenth string: – Element 2 Strength
Eleventh string: – Element 3
Twelfth string: – Element 3 Strength
Thirteenth string: – Element 4
Fourteenth string: – Element 4 Strength
Fifteenth string: – Item Price
*Changing this effects nothing
For % values such as Resistances whatever value you type in will be exactly what it says but for things like Strength which measure in KB and MB 1000 = 1MB
00 – None
01 – Fire [Attack]
02 – Thunder [Attack]
03 – Poison [Attack]
04 – Acid [Attack]
05 – Fire Resist [Defence]
06 – Thunder Resist [Defence]
07 – Poison Resist [Defence]
08 – Acid Resist [Defence]
09 – Leech [Health Drain]
0A – Knockback
0B – Cooldown [Skill Recharge]
0C – Wounding
0D – Stun
0E – Crit
0F – Frost [Attack]
10 – Dark Fire [Attack]
11 – Food Power [Heal Buff]
12 – Required Strength*
13 – Required Speed*
14 – Required Defence*
15 – Required Anar-chi*
16 – Rapid Jabs**
17 – Block to Cooldown**
18 – Shockwave Slams**
19 – Shockwave Falldown**
1A – Shockwave Counter**
1B – Stasis**
1C – Wave Uppercut [Heavy attack + Light attack]**
1D – Wave Kick [Heavy attack + Heavy attack]**
All the values for elements are provided in the tutorial notes by Love
*Certain items have a requirement to equip them, this is classed as one of the 4 elements, you’ll see in game that no high level items can legitimately have 4 elements as they all have a skill requirement so you can bypass this.
**These are the Yellow effects, the string of bytes following this that would usually by the strength of the element for example Fire strength, but instead just as mentioned earlier set the first byte to 01 and the 3 after to 0s so the string should be “01 00 00 00”.
You can change any of the effects at your leisure but I recommend only doing the basic stat ones and elements and don’t change item rarity or price. I will leave my Rippers almost as they were except with the extra strength I added.

If done correctly according to the hex values I should have around:
999.99MB Strength
666kb Speed
536.55MB Defence
66.6MB Anar-Chi
666% Dark Fire
90% Stun
Wave Uppercut
Wave Kick
Using the Hex Editor to Mod Items Part 2
Once you have completely edited the stats you want on your clothing. Copy and paste the whole code back into your original file and save and close the hex editor. When you enter the game you should hear a punching sound like normal, if you hear a sword slice sound it means you have broken your savefile. It might be something small but its easier to just exit, delete your messed up file and grab your backup from earlier and copy it back in.
I loaded up my game and went to my character and now her Rippers are edited just like in the hex editor:
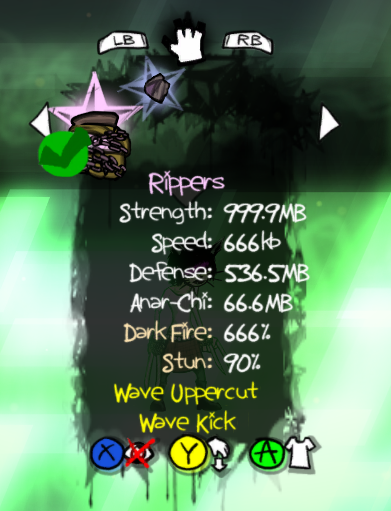
It worked!! 🙂
Currently there is no way we know of to add other relic stat boosts such as Rare Loot% to our Clothing but I will edit the guide should anything important be discovered.
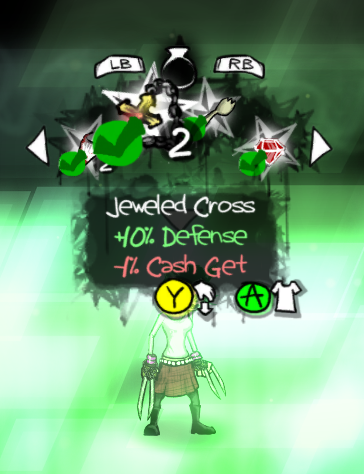
There is also a way to get any relic you want including the Jewelled Cross which is bugged and not available by normal means however you can’t add them to your inventory, you can only change existing relics to different ones. The best way I find is to buy something like a Diamond Scale, save and exit. Change it to whichever relic you want and save. Go back in the game and you should have new relic instead then just go back and buy another Diamond Scale. Rinse and repeat till you have all relics. I’ll give a quick explanation how to find and change relics.
Using the Hex Editor to Change Relics
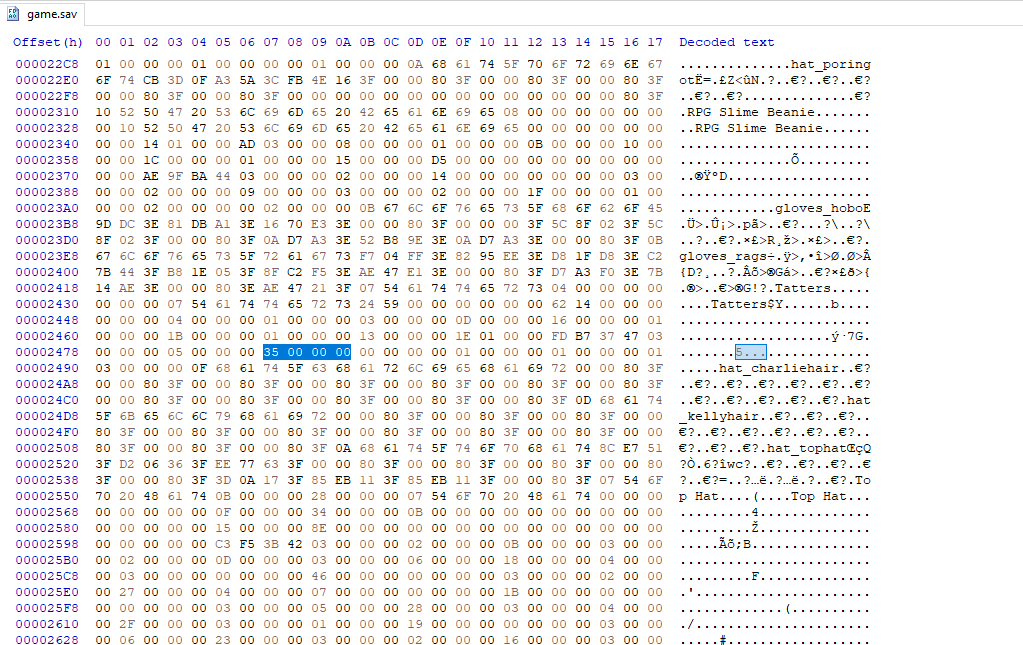
If you go into your hex editor and locate your savefile as normal, you may be able to find occasional strings dotted about with a first byte no larger than 36 and 3 empty bytes after left as 00 00 00. These are your relics and may be slightly harder to find. However if you use the Search function again and switch to Hex-Values you can find some pretty easily.
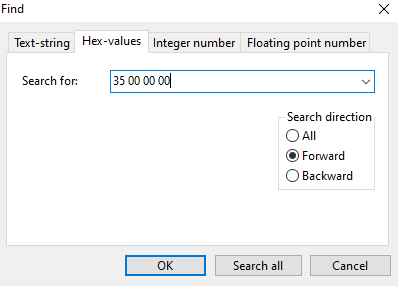
The relic ID for Diamond Scale is 35 so if you input 35 00 00 00 into the Search function it should take you straight to your diamond scales if you have any like this:
Here is the complete list of Relic IDs
00 – Kitty Chain
01 – Ivory Skull
02 – Jewelled Cross*
03 – Mithril Bottle Opener
04 – Cobalt Drum Key
05 – Stress Cube
06 – Silver Bottlecap
07 – Sapphire Car
08 – Rusty Key
09 – Rabbit’s Foot
0A – Smockula’s Tooth
0B – Moonstone Claw
0C – Spark Plug
0D – Safety Pin
0E – Jasper Cross
0F – Smockula’s Eye
10 – Toy Microscope
11 – Smockula’s Heart
12 – Heart of Soul
13 – Emerald Mug
14 – Crystal Syringe
15 – Dish Plush
16 – Car Battery
17 – Xbox360 Controller
18 – Mookite Pick
19 – Epic Mix Tape
1A – Super Goo
1B – Iron Lighter
1C – Opal Monocle
1D – Spoonfork
1E – Spider Ring
1F – Tattoo Coupon
20 – Blessed Toothbrush
21 – Dirty Bandage
22 – Mithril Cog
23 – Solid Rainbow
24 – Smockula’s Brain
25 – Smockula’s Liver
26 – Ancient Ice Pack
27 – Silver Hammer
28 – Build Failed
29 – Anarchy Pin
2A – “The Cause”
2B – Robot Button
2C – Trash Pin
2D – Star Button
2E – 3.5″ Floppy
2F – Creepy Doll
30 – Haunted Tape
31 – Golden Ticket
32 – Corruption Orb
33 – Magnifying Glass
34 – Pestilence Vial
35 – Diamond Scale
36 – Bag of Oregano
*Unobtainable Item, Stats: [+10% defence -1% cash get]
Because Jewelled Cross is bugged we’ll edit the Diamond Scale and change it to that, all you need to do is change the first byte in the string so it should go from “35 00 00 00” to “02 00 00 00”.
