For Sweet Transit players, this uide will explain signal in game, and step by step instructions on how to signal your intersections without needing to fully understand how everything works.
Introduction
This is a quick, simple guide on the absolute basics of signals, designed specifically for people having trouble even with the tutorial and official resources. This should give you enough information to get started with trains.
This guide is meant to teach signals in the most simple and basic form needed to play the game, not how to use them most effectively.
What is a rail signal?

A rail signal is used to tell an oncoming train when there is another train on the track ahead, and to stop it so they don’t collide. This is useful, and pretty much necessary, if you would like multiple trains on one track or if you have tracks crossing each other.
The side of the track you place the signal on determines which way you want your train going on the track. An arrow will point in the direction your train should be going. If the arrow is pointing the wrong way, you need to place your signal on the other side of the track
You *can* have trains going both directions on a track, but I don’t recommend it. Instead consider building a 1 way loop or two tracks side by side for each direction.
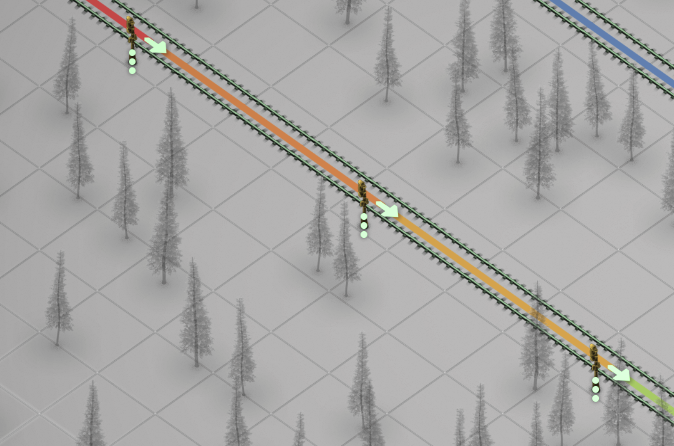
The train on this track runs left to right, a train going the other way will not see the signals and will crash into an oncoming train.
What is a block?
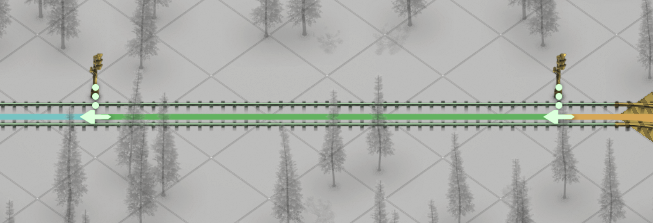
A block is the space between two rail signals. Sweet Transit automatically color codes blocks when you have the signal tool selected so you can see where they are.
How do signals and blocks work together?
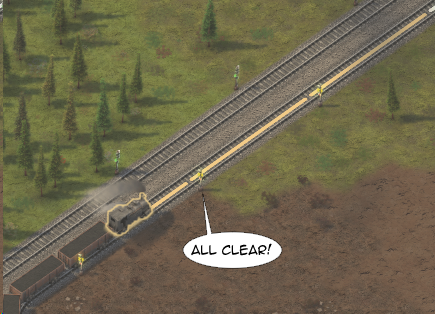
The first signal going into a block checks to see if there is a train in the block past it and will stop an oncoming train from entering that block if there is. There can only be one train in a block at a time so they won’t collide.
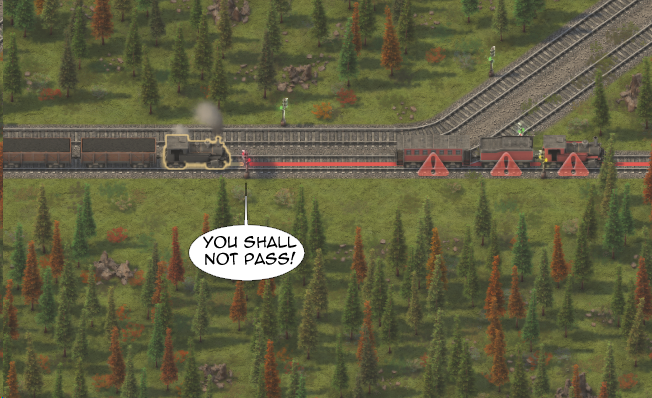
When and why should I be using signals/blocks?
Signals prevent trains from colliding with each other if one is going faster than another or they are going towards each other. If you are going to have multiple trains using the same track you should be using signals, even if they are going the same direction.
What are chain signals?

Chain signals are a little more complex. They are used primarily to manage splits in the track and intersections where rails cross or join. These are not necessary; you can play without them if you wish, but I recommend that you learn them as soon as you are comfortable as these are extremely helpful and will make your rail system much more efficient.
How do chain signals work?
A regular signal will check the status of the block ahead of it and will stop a train if that block is occupied by another train.
A chain signal instead checks the status of the signal ahead of it.
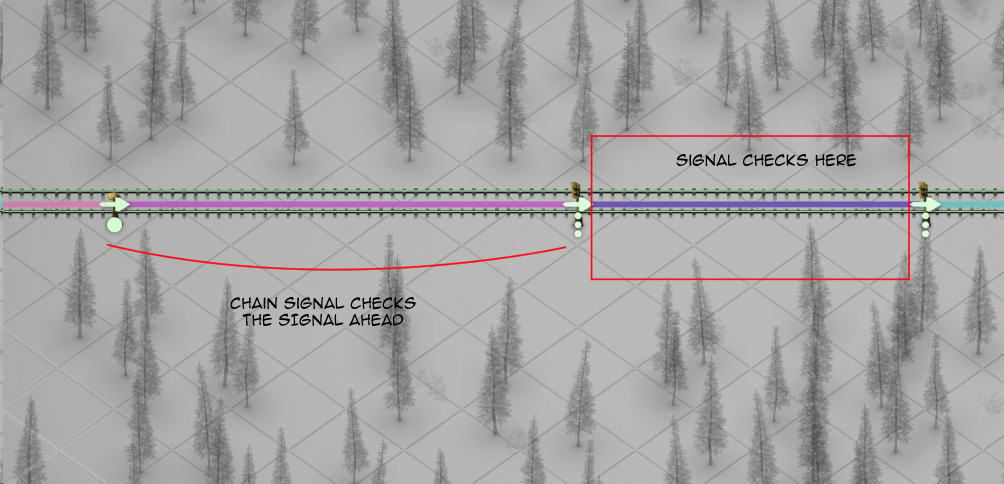
If that signal will allow a train through, the chain signal will also.
If that signal ahead would not allow a train through, neither will the chain signal.
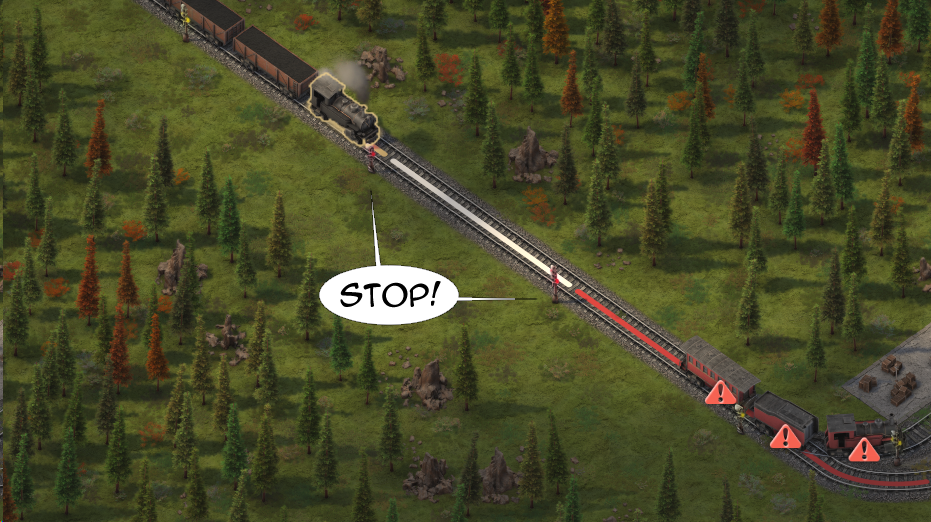
The train here stopped one block sooner than it would have if there was a regular signal there because the chain signal saw that the signal ahead indicated the block was occupied.
This isn’t really useful on straight track, however:
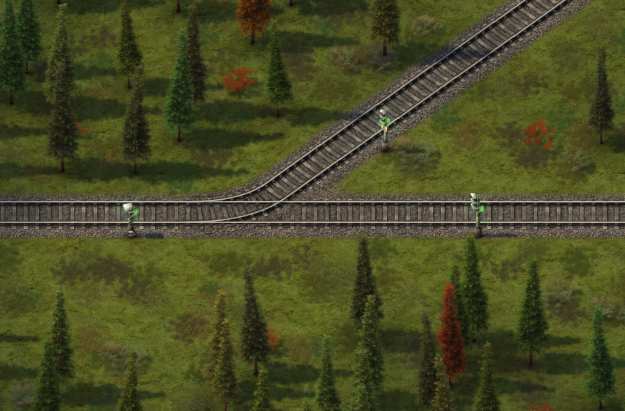
There are two signals ahead of this chain signal on branching paths, and this is where chain signals start to shine.
It reads both of the signals ahead. If both signals would stop a train, the train will stop at the chain signal before the intersection and wait for a spot to clear up.
If one signal is clear, the chain signal will allow the train through the clear path.
If both signals are clear it will allow the train on either path.
This is useful because it’ll stop the train before the intersection, so the train won’t block it.
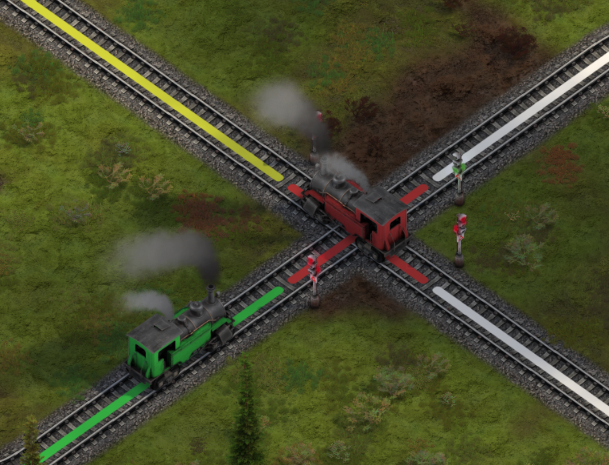
The red train is stopped in the intersection, so the green train can’t pass.
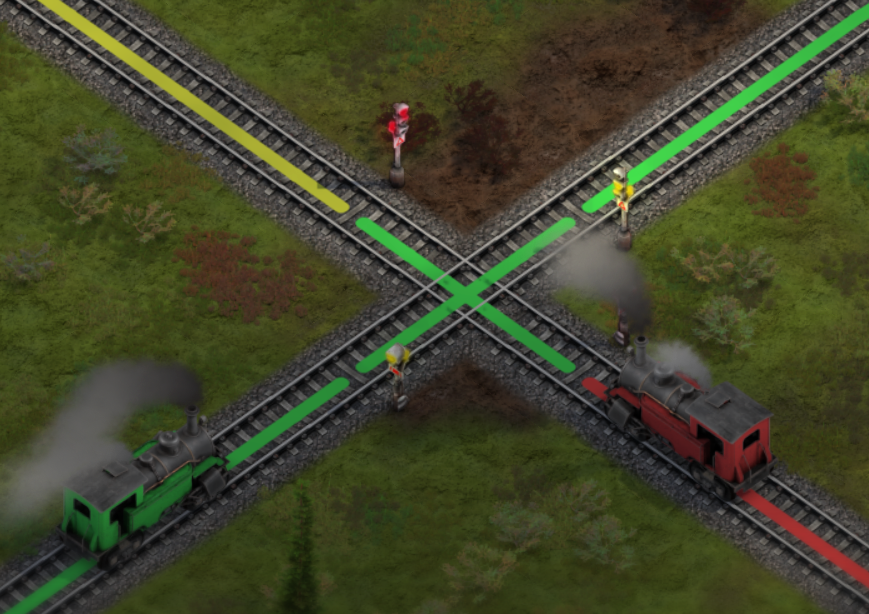
Placing a chain signal ahead of the intersection will make the train stop sooner, so it doesn’t prevent the green train from going through.
How to simply add signals to an intersection/junction without thinking too hard, step by step: Example 1
Note: This is a simplified guideline and is not the most efficient way to do things. I am aware that this method uses more signals than needed, but it also provides a consistent guide to follow for people who have difficulty understanding how it works.
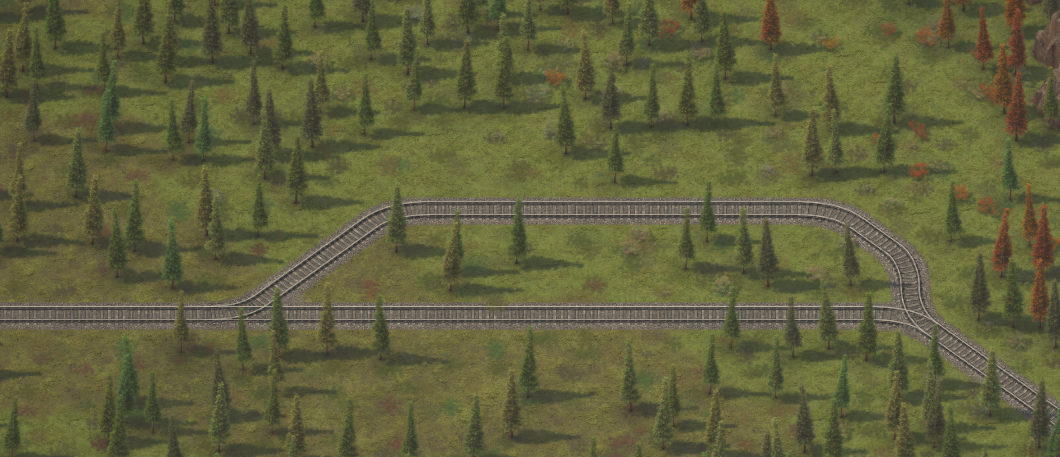
Step 1: Build your track
⠀
⠀
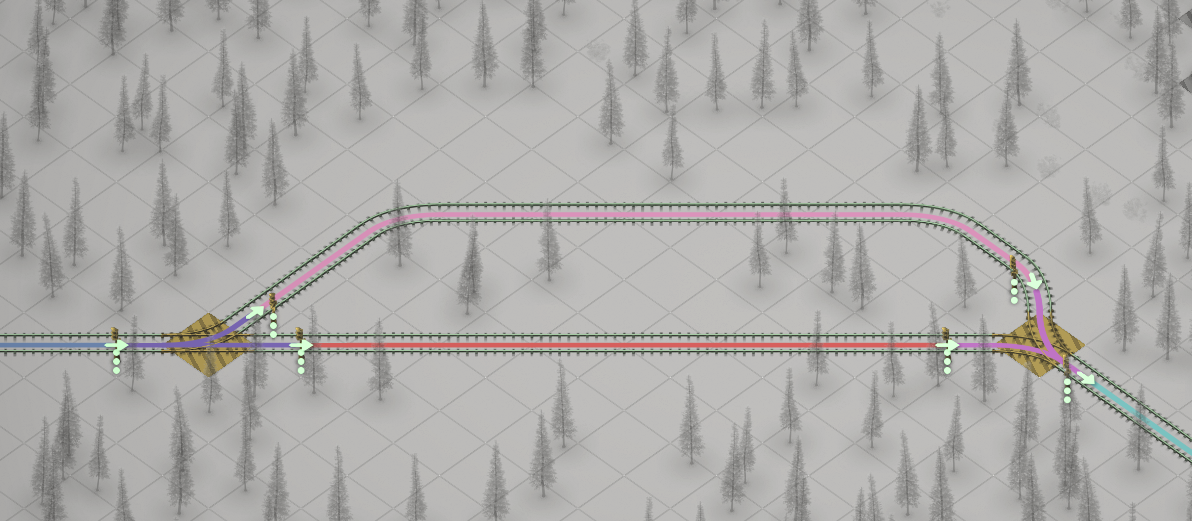
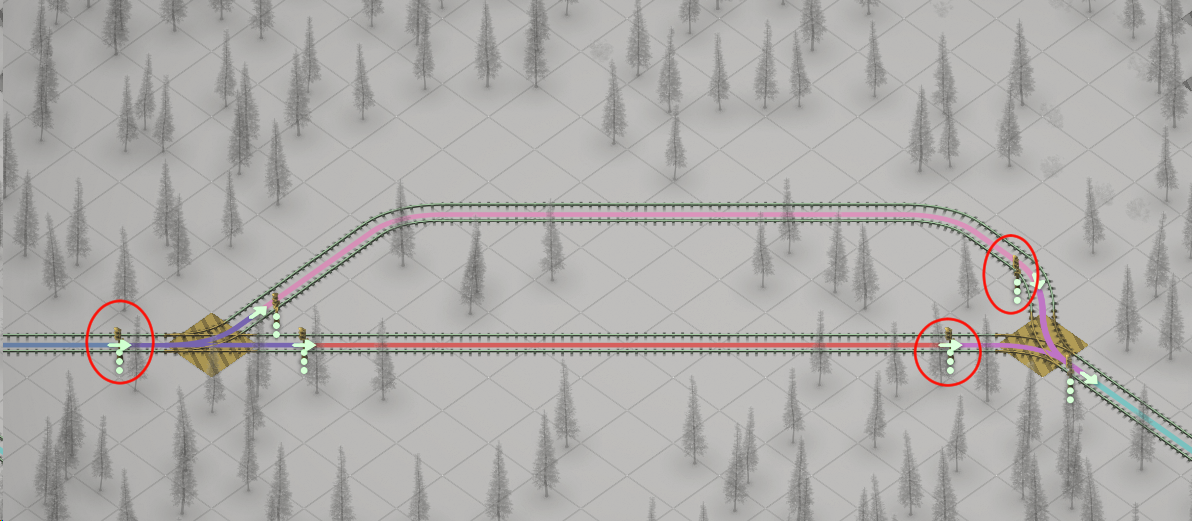
Step 2: Use regular signals to divide your track into blocks. You want each straight section of track to be its own block, and each intersection to be its own block.
⠀
⠀
Step 3: The train on this track will be going from left to right. Take note of the signals where the train may enter an intersection
⠀
⠀
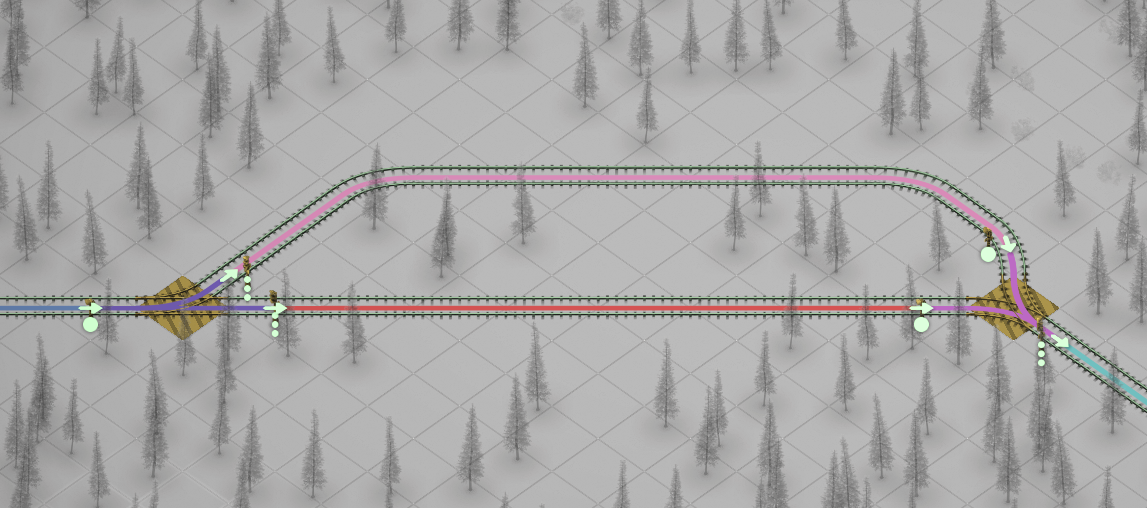
Step 4: Replace those with chain signals
⠀
And that should do it. If a train stops on the red track, another train coming by will use the pink track to bypass it without stopping. (unless there is a hazard ahead)
How to simply add signals to an intersection/junction: Example 2
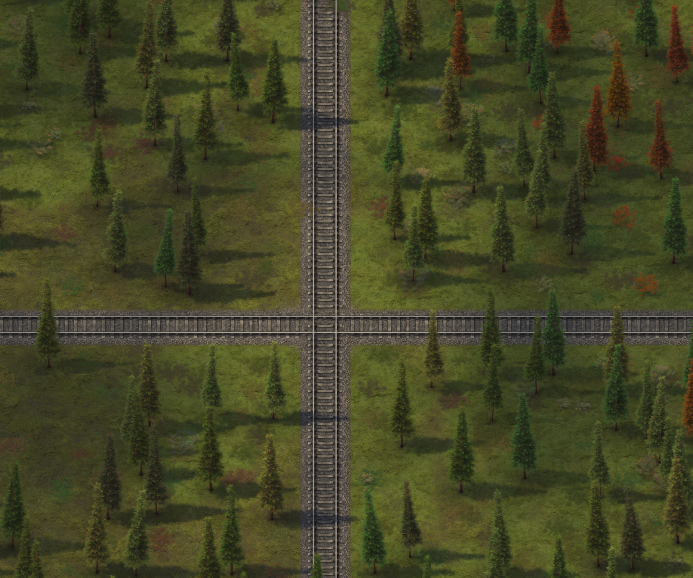
Step 1: Build your track
⠀
⠀
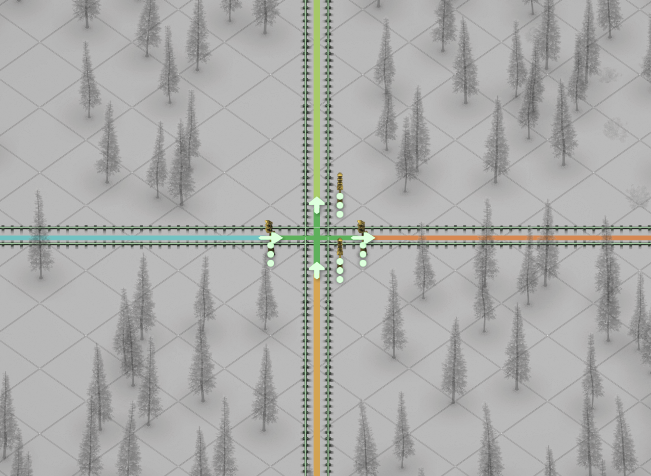
Step 2: Use signals to divide your track, making sure the intersection is its own block.
⠀
⠀
Step 3: There will be a train running right to left, and another train running down to up. Take note of where these trains will enter the intersection.
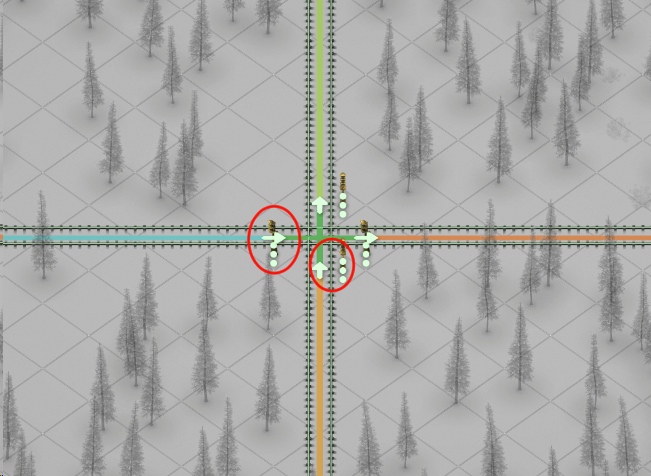
⠀
⠀
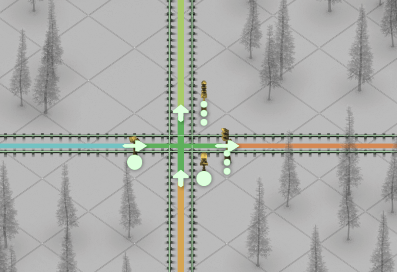
Step 4: Replace with chain signals.
⠀
With this layout, a train will not stop in the middle of the intersection, so the other train won’t be blocked.
How to simply add signals to an intersection/junction: More complex example
Step 1: Build your track.
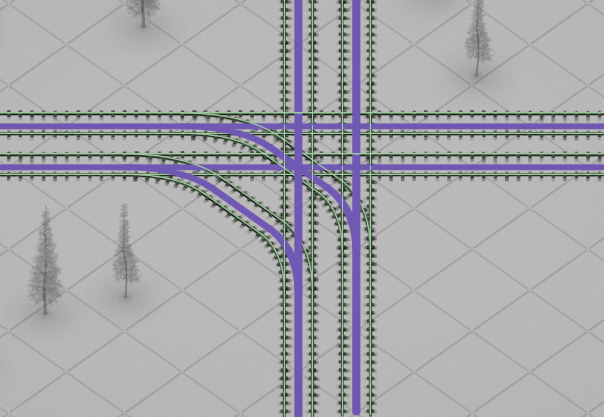
⠀
Step 2: Use signals to divide your track, making sure the intersection area is its own block
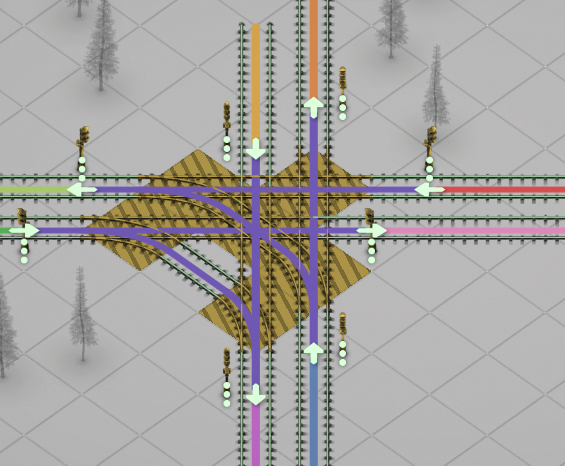
⠀
⠀
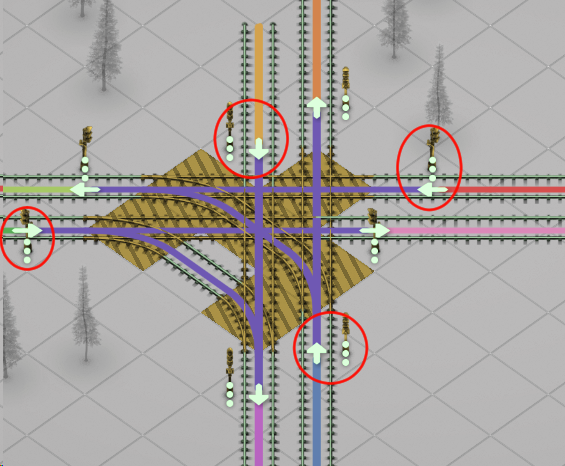
Step 3: Take note of the signals where a train may enter the intersection. Since there are so many going in several different directions, you will want to note any signals with arrows pointing into the intersection block (the purple area in this example)
⠀
⠀
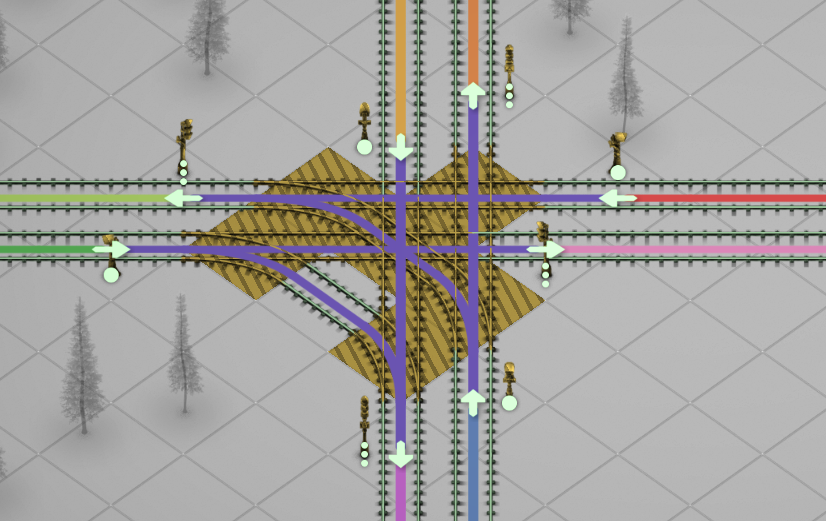
Step 4: Replace with chain signals.
⠀
Now a train will not enter the intersection if there is another train in it and will instead wait for it to clear before it goes through.
That’s all we are sharing today in Sweet Transit Signal Guide For Beginner, if you have anything to add, please feel free to leave a comment below, you can also read the original article here, all the credits goes to the original author SamethStarr
