It took me some time to get used to the mods and how to properly use them to make my own trains using individual trailer assets.
As far as i know theres no “official” guide out there that explains everything.
Things you need
- Extended Asset Editor
Without this mod you can only make trains with 1 trailer asset, it is mandatory in order to make mixed trains. - Trailer Variation Loader
This mod is used to load submesh-masks on trailer assets properly. (Not needed if your trailer assets dont use submeshes.) - Cargo/Passenger Train Engine Asset(s)
Can be any cargo or passenger train engine from the workshop (or vanilla).
Example: ES64U1 - Cargo/Passenger Trailer Asset(s)
Can be any cargo or passenger trailer from the workshop (or vanilla).
Example: EANOS Trailer Pack
Hint: If you subscribe to any train from the workshop, you get the trailers aswell and you can use them in the asset editor.
Getting started
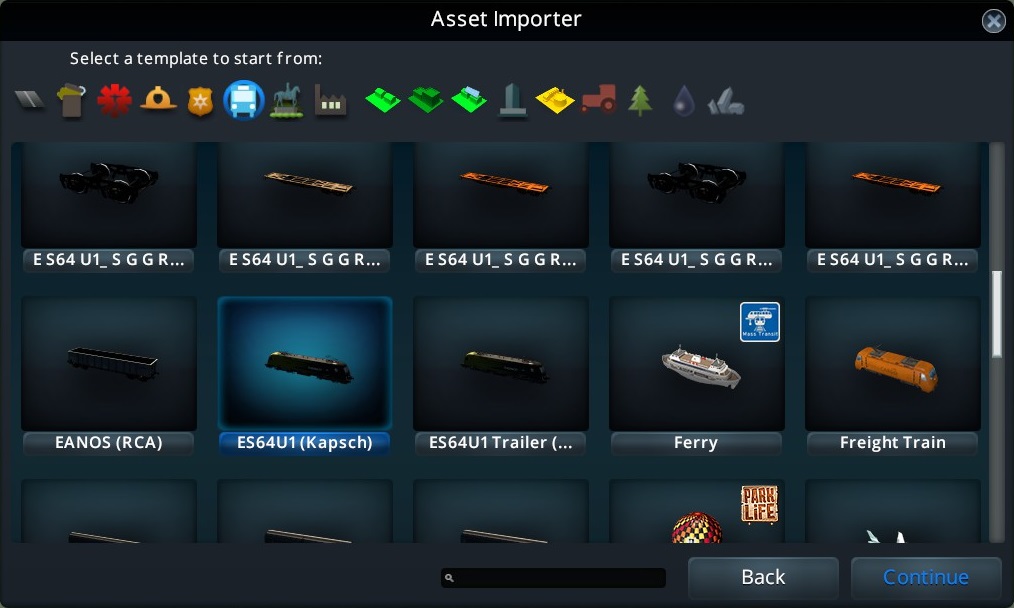
(can be vanilla or any other engine asset).
It has to be a train engine though, (doesn’t matter whether its a cargo or passenger engine) otherwise you cant put trailers behind the asset.
Once you found the engine asset you want you click on continue.
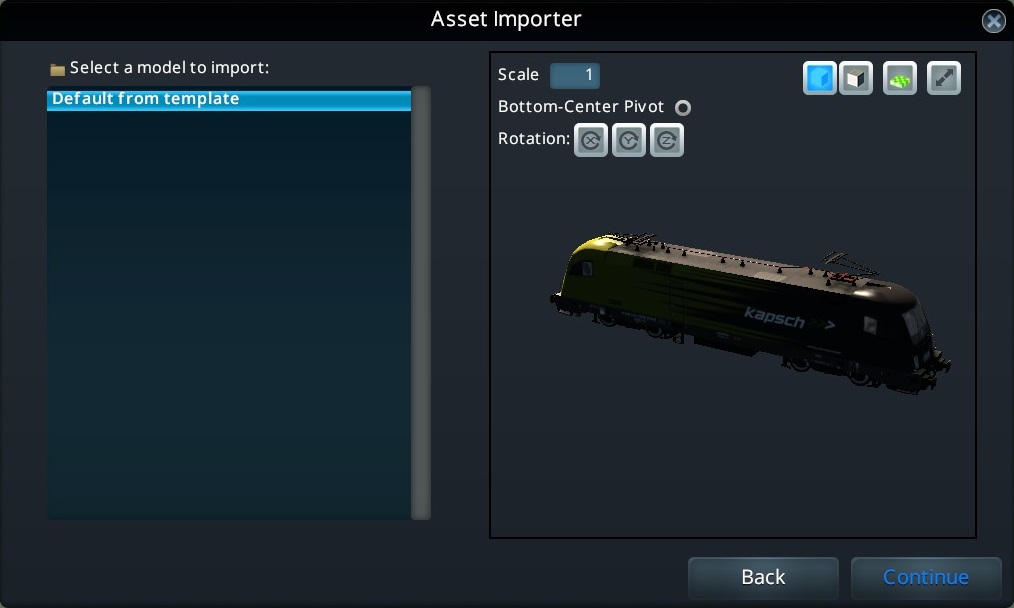
The next window is irrelevant to you since its purpose is to import custom meshes to use for the engine asset you chose. Only asset creators will use this window.
So you always click on default from template and continue.
Making a layout
(Hint: You can’t replace the engine with a different asset once it is selceted!)
You will notice alot of panels that popped up.
You can ignore the Display-Options- and the Doors-panel.
In the Properties-panel open the Trailers-tab, then click next to the box that says Trailer asset to load one of the trailers you want in your train. Now click on the box that says Trailer count to set the total amount of trailers you want.
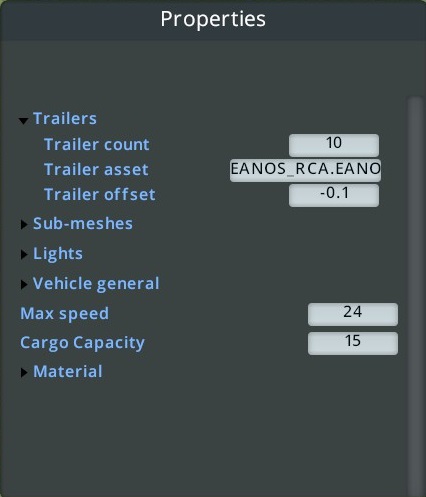
IMPORTANT: DO NOT CHANGE ANY PARAMETERS IN THE PROPERTIES PANEL AFTER THIS STEP AGAIN OTHERWISE YOUR LAYOUT WILL BE OVERWRITTEN AND THE FIRST TRAILER WILL BE REPLACED FOR EVERY TRAILER.
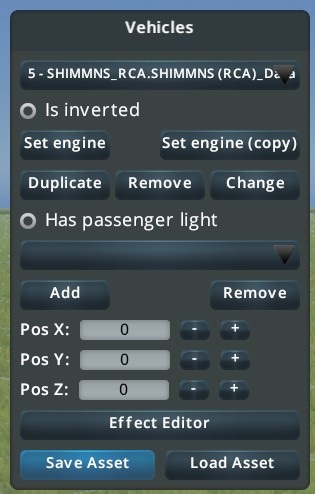
Next you will have to replace the trailers you want a different asset for, using the Vehicle-panel.
On the very top in the panel, you have a dropdown list of every trailer including the engine.
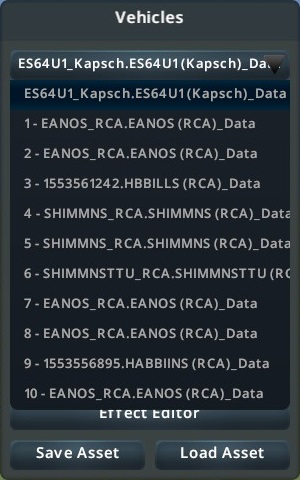
Select one of the trailers you want to change and click on Change.
Now in the Vehicle Settings-panel you can adjust the spacing of the trailers using the Offset front-and Offset back-parameters.
(Once you changed a value, all the trailer assets that are the same will have that value too).
Saving your train
DONT SAVE IT BY PRESSING ESCAPE AND CLICKING SAVE ASSET
In the Vehicle-panel theres a different Save-button.
ALWAYS USE THIS BUTTON TO SAVE
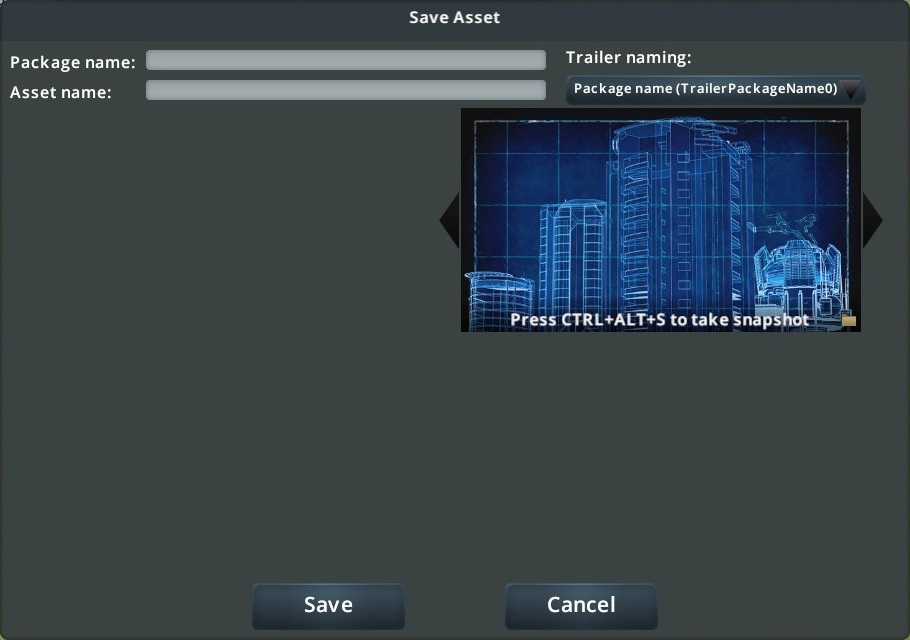
(Hint: Package name refers to name that the local .crp file of your train gets, while Asset name is the name that is displayed ingame.)
Additional advice
- Just like saving, loading your train can only be achieved using the Vehicle-panel’s Load Asset-Button. (Otherwise the game won’t load your layout properly.)
- The engine can never be changed once you chose it in the very beginning. You have to remake your layout from scratch. (Which makes updating engine assets a pain in the bum.)
- In the asset editor you see a grid. This is useful if you want to make your train fit the vanilla cargo stations, since the trailer assets can vary in length.
19 units (or squares) is vanilla length.
Written by CV
Related Posts:
- Cities: Skylines – Broken Assets Guide in 2019
- Cities: Skylines – DLC Feature List
- Cities: Skylines How to Prevent Forestry Industry Imports
I looled and looked all over for such a tutorial and I found yours! Thank you so much for the information. Seems that most people assume that others know how to do things. I’m 64, not that computer savvy but can follow simple directions. Your instructions where just what I was looking for. Thanks again for the guide. Beats all those so-called tutorial videos where they shake the screen around as they quickly do things without telling you what and how they are doing things.