
Hellraiser difficulty in Clive Barker’s Hellraiser: Revival does not hand out autosaves, so every save token you find becomes a small lifeline. This guide covers where all eleven of them are hiding, where I actually burned mine across a full playthrough, and a handful of combat and looting habits that made the run survivable. Spoilers ahead for locations and sequences.
What Changed Between Hard and Hellraiser
Having cleared the game on Hard first and then on Hellraiser, the physical loot placement barely moved. I counted only one or two missing items between the two difficulties. What does shift is enemy drops — they were already stingy on Hard, and Hellraiser trims them a little further. So the map still feeds you, but the bodies feed you less.
One thing that caught me off guard early: you must have your flashlight switched on to loot anything in the dark. If a spot is dark enough, the game simply will not register the prompt, even when you are staring straight at a box you know is there. Water was my worst offender — enemy drops and loot boxes that landed in water became unpickable more than once. On dry ground I never ran into the problem.
Enemies That Will End Your Run
The sprinting gimps — the ones dressed head to toe in black who only throw hands — hit far harder than their size suggests. When a room starts filling with them, I stopped hoarding resources and just spent them. Gas cans, bear traps, ammo dumped into the crowd, whatever it took. Bleeding a few consumables is cheaper than a reload.
Cultists carrying SMGs are the other standout threat on Hellraiser, and fighting them in open ground is how you die. Break line of sight, pull them into doorways, and never trade shots across a courtyard.
Armored cultists go down in a single bear trap, which is worth exploiting whenever a spawn is telegraphed — the iron maidens are the obvious example. It saves ammo and clears a room faster than any gunfight. And once a cultist’s head armor is gone, every cultist in the game dies to one bullet to the skull. My routine was to pop the helmet with the revolver, then finish with a single tap from the pistol or SMG.
That headshot rule does not carry over to the unworthy creatures. They soak noticeably more punishment than standard cultists, so lean on throwable sawblades and flames and try to line up multiple targets with each one whenever the geometry allows.
The chain ultimate you pick up late in the game is genuinely absurd. Use it on hordes, use it on bosses, use it on the mini-boss Embracers — there is no reason to sit on it.
All Save Token Locations in Order
Save Token 1: Right after you fight your first enemy with the knife.
Save Token 2: Inside a locked container in the room containing the climbable ladder, the one with a save point at the top.
Save Token 3: Purchasable from the merchant the moment you first meet her.
Save Token 4: Inside the code-locked safe in the cabin at the top of the cemetery.
Save Token 5: Hidden in a flower pot near the merchant while she is stationed in the central area with the gates that need different statue parts. Look for the gap in the wall beside her.
Save Token 6: Available to buy from the merchant once you survive the cabin sequence.
Save Token 7: Another merchant purchase, this time when you return to the clubhouse.
Save Token 8: On a body you find after retrieving the peephole insert and climbing a ladder.
Save Token 9: Buy it from the merchant immediately before entering the sex rooms — the area behind the door with the sex positions lock.
Save Token 10: Sitting in a plant after the second Bruno fight, upstairs in the small office space.
Save Token 11: Found after using the elevator key. It is in the bedroom attached to the room with the window overlooking Bruno’s surgery, on the body to the left.
Where I Spent My Saves
This is the sequence I settled into, though you should shift it around based on which sections give you the most grief. The rule I stuck to was simple: loot everything you can before committing a save, so a reload costs you as little progress as possible.
My first save went down when I climbed the yellow ladder in the room that also held a save token. The second came at the house at the top of the graveyard, before the stealth section. After using the boltcutters I ran back to bank a save before the Bruno fight. The fourth went down before starting the cabin sequence — I doubled back to spend one. Then a save before fighting Charlotte, another before the voyeur room stealth section with Sister of Mercy, and one more before the Sister of Mercy fight itself.
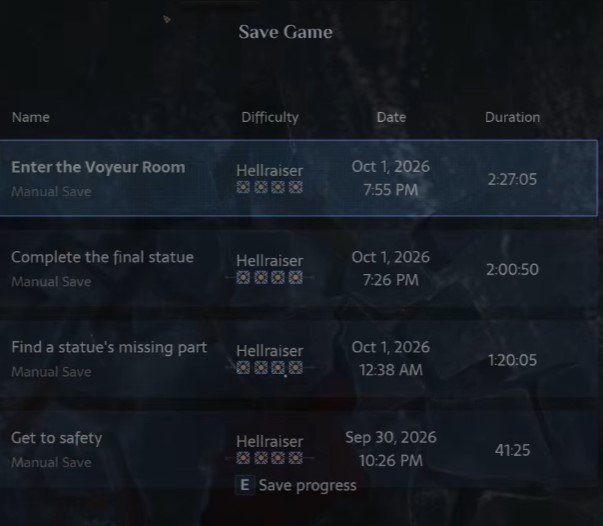
From there: the start of the Industrial Estate next to Zora, then after beating Bruno a second time but before using the elevator key. My tenth save came right before the giant room with water, lots of enemies, and movable sawblades. The eleventh and last I spent before fighting Marlowe.
Seeing the Other Ending on Hellraiser
There is a clean workaround for the ending choice. After the credits roll, hit Continue from the main menu and the game will let you pick endings again — even on Hellraiser difficulty, despite normally refusing to autosave. If that fails for whatever reason, reload a save and redo Marlowe, or shuffle a save around until you have one sitting after the boss. If you go the shuffling route, I would sacrifice the spot where I used my tenth save.
For players chasing the full completion list alongside this run, my achievements guide pairs well with these token locations.