
The tutorial hands you the keys and points at the road, then walks off. What it never mentions is that every level-up can shove your Carbrainess back down because a mechanic you haven’t built yet suddenly exists, and your economy just quietly takes the hit. I wrote this because I got tired of guessing which building was draining my numbers.
Fair warning up front: this is a work in progress. I’m publishing it as I go rather than sitting on a polished version, so sections will get filled in, corrected, and occasionally rewritten when someone points out I’ve got a detail backwards. Check back — and if you’re brand new, my begginers’ guide covers the ground before this one starts.
Overview
The tutorial covers the basics and stops there. It teaches you how to lay a lot, how to slap down a business, how a car finds its space — and then it lets go of your hand and leaves you to discover on your own that half the systems in this game were never mentioned. That gap is what this document is for.
What follows is a mechanics overview of the secondary stuff: the things that quietly change your numbers without ever showing up in a tutorial prompt. Civil unrest, pollution, cars and the oil chain, drive-thru services, land and eviction. Consider this the manual the game didn’t hand you.
Yeah so
Calling this a finished guide would be a lie, and I’d rather not start things off that way. It’s a work in progress, plain and simple, and I’m pushing it out now instead of waiting until it’s tidy because the information is more useful in your hands than sitting in my drafts.
So bookmark it and swing back. I’ll keep filling in sections as I nail things down, and honestly, the corrections I get from you lot are half the reason this thing gets better at all. If I’ve got something backwards — and I probably do somewhere — tell me. I’m not precious about being wrong, and I’d rather fix a bad claim than defend it. Worst case, you get to watch me eat crow in public, which is at least entertaining.
Now, onto the parts the tutorial never bothered to explain.
General Tips
Before I get into the individual systems, here are the things I wish someone had told me twenty hours earlier. None of these are hidden secrets — they’re just scattered across menus and tooltips in a way that makes them easy to miss.
The first one is purely a quality-of-life fix. Open Statistics, then head to Money > Configure Pricing. What this gives you is a single menu listing every business you own and what it’s currently charging — a full picture in one screen instead of clicking through each lot individually. When you’re running a sprawl of lots it’s the only sane way to keep prices consistent, and it becomes close to essential the moment you level up and your Carbrainess takes a hit from some fresh mechanic you haven’t built yet. You end up re-tuning everything at once, and this is the screen where that happens.
Which brings me to the level-up problem itself. Each time you gain a level, a new mechanic may open up and your Carbrainess can sink because you aren’t satisfying it yet. Watch that number like it owes you money, and — this is the part people forget — bank some cash before you cross the threshold. Approaching a level-up with a healthy reserve means you can throw down whatever new thing your car-obsessed citizens suddenly want without stalling your economy for the next ten minutes. I’ve been caught short on this more than once, and it stings.
Drive-thrus are not permanent. You can reopen and edit them later to slot in newly unlocked components, so build with the future in mind. Practically, that means leaving yourself some breathing room — I’d aim for at least four spare drive-thru units in your layout. Lay everything out tight and you’ll be bulldozing half a district just to add one more stall.
Do not be shy about manufacturing your own parking demand. Plenty of objects in the build menu generate demand, and they usually cost a big chunk of money to place. The trick is that nothing forces them to sit in a populated area — you can drop a cluster out in the middle of nowhere and then ring it with the expensive demand generators, and everyone will make the trip out to it anyway. It works exactly like an anchor store dragging foot traffic to a mall. Find a cheap patch of empty map, seed it, and let the crowds come to you.
Where you put your factories and refineries is a genuine trade-off, not a solved question. Push them out to the boonies and you’ll see less Civil Unrest and your local parking demand stays cleaner — but every car and every unit of gas has to travel further to reach its destination, which slows your whole supply chain down. There’s no universally right answer here; you’re just picking which cost you’d rather eat.
Finally, traffic. Don’t cram a pile of drive-thrus into one spot. Your drivers won’t file a complaint about it, but the queueing and the congestion will quietly drag your throughput down. Spreading them out costs you nothing and saves you a headache.
Civil Unrest, Protestors, Riots, and Combat
Traffic congestion was the polite warning shot. This is where the game stops being subtle about what it thinks of a city paved over for cars, and starts actively pushing back. Every dead tree, every demolished train station, every refinery you bolt to the map chips away at whatever tolerance your citizens have left — and when it runs out, they don’t file a complaint. They show up at your businesses with signs, or they torch the thing you were counting on for income.
I’d rather know that going in than get blindsided by it. Treat unrest as a resource you’re spending, not a punishment you’re suffering — it’s got predictable sources, predictable removal paths, and a whole toolkit built around containing it. This section walks through where the pressure comes from and what you do once the gaskets start blowing.
Civil Unrest
Unrest doesn’t appear out of nowhere — it’s the tab the game opens whenever you do something that makes car life worse for the people living in it. Tear out the infrastructure that lets people move without a car, and the number climbs. Knock down a bus stop or a train station and you’ve earned it. Evict a family from their home, same deal. Kill plants and trees — whether you bulldoze them yourself or choke them to death with pollution — and that’s unrest too. Build the industrial backbone the whole economy runs on, refineries and pumpjacks and factories, and each one adds its own resentment on top.

Then there’s map-specific pain. Some maps lock off certain zones, and dropping a building inside one is a straight unrest hit. Egypt is the clearest offender — build anywhere near the pyramids and the game treats it as desecration, because it is.
Removing unrest is the awkward part, because you only get two doors. One is handling protestors and riots when they show up — the active, reactive route that most of your playtime goes into. The other is Plastic Trees, which only unlock near the very end of the tech path, so for the vast majority of a run you’re stuck with the first door. There’s no quiet trick to make the bar drop; you deal with the people in the street.
Riot Control
Your answer to protestors is the Riot Control building. Each one fields a single truck, and that truck holds up to 10 slots you split between police and dogs however you like. I honestly can’t tell you what each unit type actually contributes — the game doesn’t spell out a role difference, and I haven’t pinned down whether dogs do anything mathematically distinct from police. What I do is load 8 police and 2 dogs per car and move on. If someone’s cracked the real numbers, I’d love to hear it.
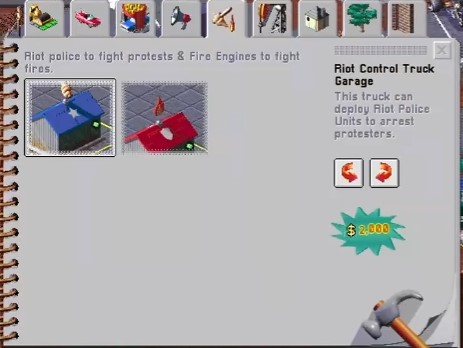
You can set a riot car to patrol, and it’ll clean up minor protests it stumbles across on its own. It doesn’t seem to engage the big riots, though — those either spawn outside the patrol’s reach or the car just won’t commit. Could be bad luck on my end, could be a hard rule; I’ve seen it fail enough times that I plan around it rather than trust it.
Minor Protests
Once your Civil Unrest climbs above 50%, you open the door to minor protests. These take a very specific form: one protestor glues themselves to the entrance of one of your businesses, and that business is dead in the water until you deal with them. No customers, no income from that slot — just a person sitting on your doorstep being a problem.
The fix is simple once you know where to look. Click the protestor directly, or click the notification sitting on the left side of your screen, and their menu opens. From there you dispatch a riot control car to the location for what I can only describe as “help” with the ungluing process. Send the truck, watch the fight play out, and the business comes back online.
Major Protests (Riots)
Hit 100% Civil Unrest and you’re gambling on a riot. A big crowd gathers somewhere on the map and starts shouting about fictional grievances — “trains” is the one that comes up constantly, which is a funny thing to demand in a city built entirely around parking. Then they march, and where they march matters.
If the crowd reaches one of your car parks, or happens to spawn right on top of one, there’s a chance they torch the cars sitting there. That’s the moment unrest stops being an abstract number and starts being burned inventory. You want police moving toward the gathering point the second you see it form, not after the fire starts.
On scale: my read is that the further you push unrest past 100%, the more protestors turn up to the party. You have to put down nearly every single one of them before the riot is considered resolved, so a large crowd is not a fast fix. Clear the stragglers or it just keeps going.
Combat
Once a car arrives and your police pile out, the brawl starts. Both sides have health, and you can watch it by clicking on the riot car itself — that’s where the health of your units and the protestors shows up. On a big fight that readout is the difference between knowing when to send backup and finding out the hard way.
Speaking of backup: on larger scraps you’ll probably need to top your units up mid-fight. Click your riot cars to check their strength, and be ready to build more. The saving grace is that any new units spawn right at the car, ready to fight immediately, so a reinforcement truck isn’t a wasted trip.
Don’t hoard your units. I’ve gotten into the habit of dispatching literally everything I’ve got, because as far as I can tell the game will never run more than one riot at a time — there’s no second front to save troops for. If you do lose every unit in a car, you get a notification saying you were defeated and the car heads back to the garage. Rebuild the crew and send whoever else is available.
And when the dust clears, send your units home. Get them back to the garage so they can heal and be sitting ready for the next mess — because there will be a next mess, and you don’t want to be scrambling with half-dead police.
Pollution
Something else you’ll catch drifting across your map once the industry side gets going: the game quietly “modifies” the environment around certain buildings and vehicles. That modification is pollution, and like unrest it cuts both ways depending on what you’re trying to do with the land.
The list of offenders is smaller than you’d think. Oil Refineries, Car Factories, Plastic Tree Factories, and the transport vehicles hauling oil and gas all push it out. The vehicles are the sneaky ones — they lay oil slicks along whatever route they drive, so the pollution doesn’t sit politely next to a single building. It streaks. Expect a visible smear of it between your refineries and your gas stations, tracking the delivery path itself.
On the miserable side of the ledger: trees and plants in range die, which feeds straight back into the unrest system I covered above — every green thing you lose nudges protest percentages up. Farms catch the worst of it, with cows dropping dead on you if the slicks creep too close. And honestly, the brown stains splattered across your carefully laid-out city just look bad. If you care at all about how your map reads at a glance, that’s a real cost.
Here’s the part I didn’t appreciate until I watched it happen. That same pollution tanks nearby land value, and low land value means discounted land — steeply discounted. Push it far enough and you can be looking at a full hundred percent off, land for free. That dead zone around your factory row? It’s a cheap expansion corridor if you’re willing to build ugly. The trade is blunt: you ruin the view and kill the greenery to feed unrest, and in exchange the ground beneath it becomes affordable enough to pave over entirely.
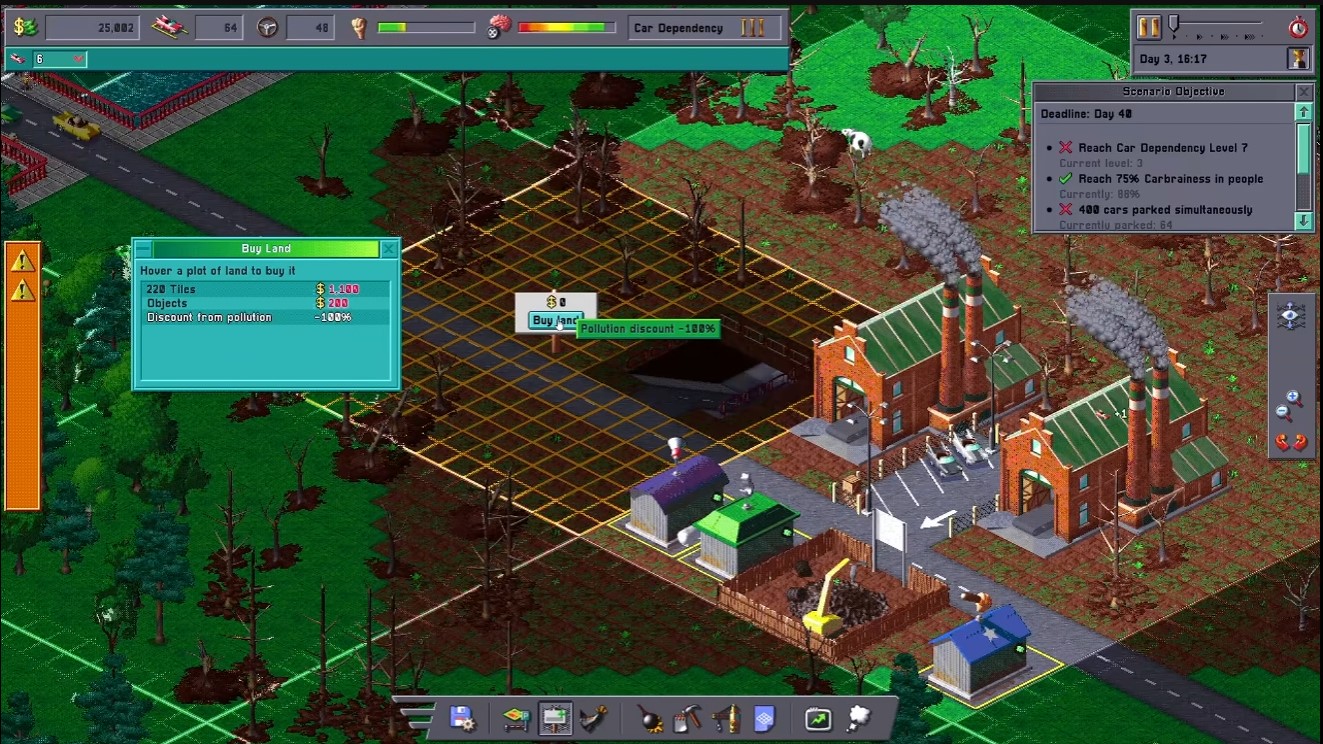
So it’s the same knife as unrest, just held by the other end. Chew up a corner of the map with refineries and you’ll farm discounted parcels for parking — but the dead trees keep nudging protestors, and the cows you lose on nearby farms are production you don’t get back. Decide which side of that you want before you place the first refinery, not after the slicks are already on the asphalt.
Making and selling Cars
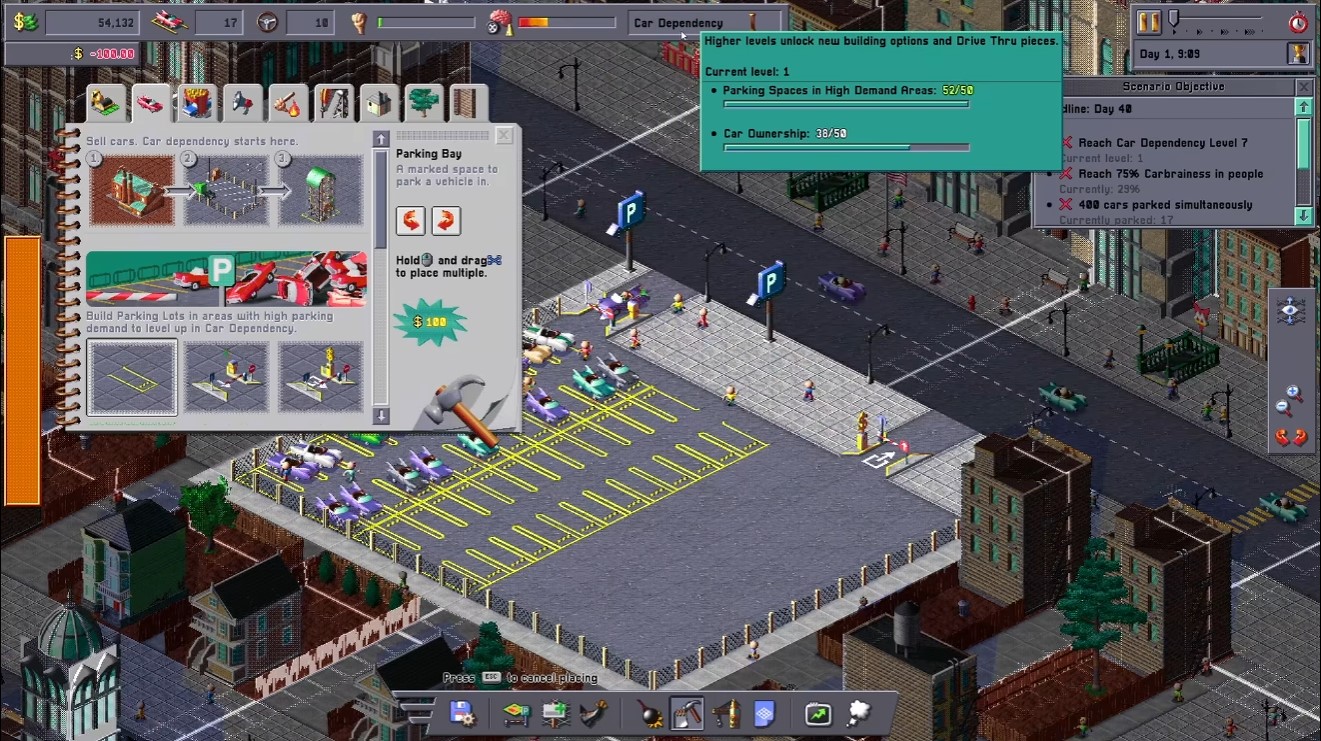
Everything car-related lives under the Cars and Parking menu, and the chain runs from factory floor to painted bumper. There’s one shortcut worth learning before you touch any of it, though, so I’m starting with the shop rather than the factory.
Car Shop Carousel
The big note first, because it saves you a pile of infrastructure: you can simply buy the cars you sell. Every car costs you $200, which means your sale price has to clear that to be worth anything. The Carousel itself is where your citizens achieve enlightenment and purchase freedom in the form of a vehicle they’ll spend an hour sitting in. Each one holds 10 cars.
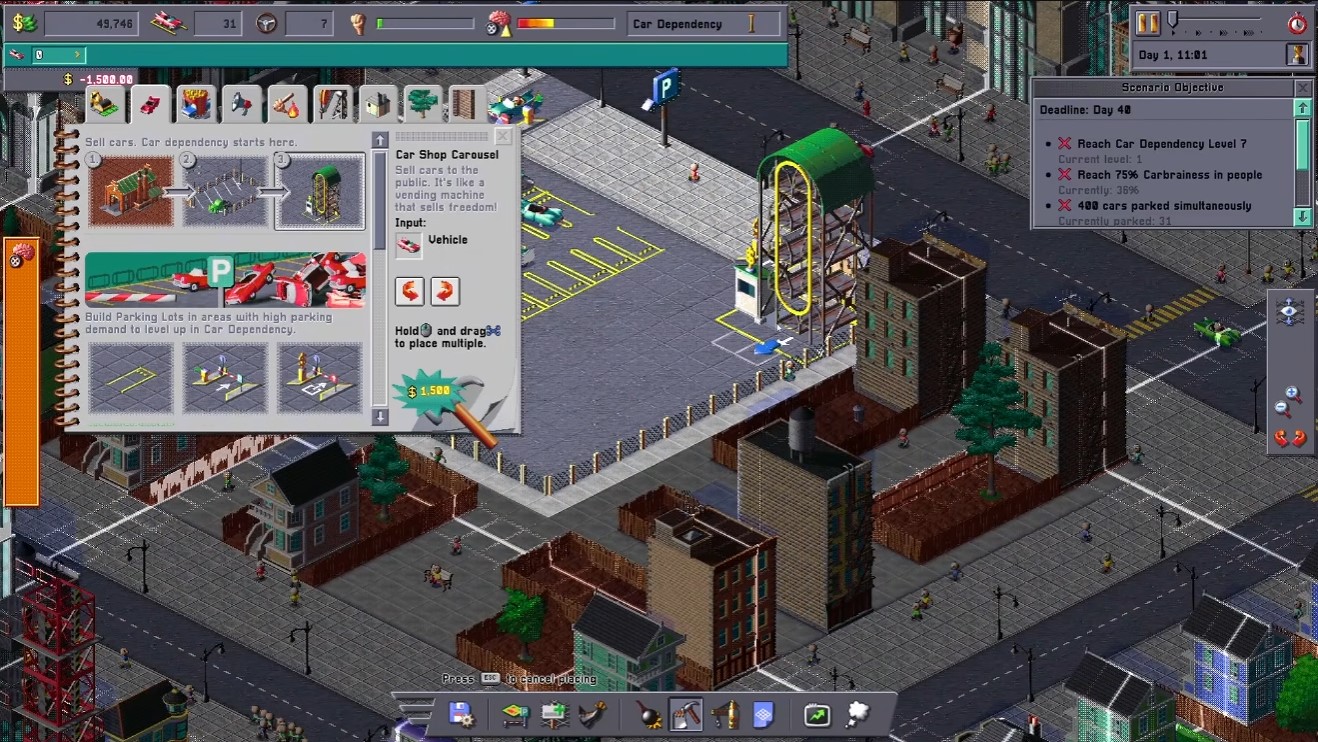
You’ve got two ways to fill that stock: pay $200 per car outright, or build the factories and wait for deliveries. Buying direct is the one I’d lean on early — you dodge the pollution and the parking-demand penalty entirely. My own sale price sits at $250. That number tends to land inside the green zone, and it stays there even after a level-up shifts your economy around, which is more than I can say for greedier pricing.
Car Factory
So you’ve decided you actually want to manufacture the things. A factory spits out a car roughly every 30 seconds, and the build menu lets you choose which model it produces — on the Florida map I believe that’s the only route to the boat cars. Two downsides come attached: factories throw off Pollution and they drag parking demand down in the surrounding area. Against that, they don’t need a street connection at all, because handling that is the job of the next building.
Car Carrier
Carriers move your finished vehicles from factory to Carousel. One truck carries 4 cars, and I think each lot stores another 4 on top of that. Unlike the factory, these do need to sit on your road network, or the trucks simply can’t make their deliveries.
Car Paint Shop
This belongs here in the order because it’s the next stop for anyone who just bought a car — the factory hands everything over in default grey, so a fresh owner goes looking for a spray booth. It’s a drive-thru setup, and every shop needs two pieces: a payment station and a spray booth. Build the payment station first. Skip that order and you’ll be staring at a half-working building wondering what you forgot.
Oil and Fuel
Somewhere up the Car Dependency ladder, the game stops letting you pretend gas comes from nowhere and asks you to actually supply it. The chain runs in one direction: Pumpjack, then Oil Transport, then Refinery, then Gas Transport, then Gas Station. Everything in that line cuts parking demand in the immediate area — worth remembering, because you can use that deliberately.
Pumpjack
One unit of oil every 40 seconds. That’s the entire output, and it comes with a 5% Civil Unrest bump for every single one you put down. They also refuse to be crowded — each pumpjack needs at least 3 spaces of breathing room from the next. If you’re laying a field of them, plan the plot out before you start clicking, because the spacing rule will punish sloppy placement.
Crude Oil Transportation
This building exists to collect oil from the pumpjacks sitting near it and ferry the stuff to your refinery. Each truck holds 6 oil drums. The catch is the trail — oil slicks get dropped along the route, which means pollution blooms between the transport building and wherever your refinery sits. That’s not a bug you can dodge; it’s baked into how the truck behaves.
Oil Refinery
The refinery converts 1 oil into 2 gas on a 15-second cycle. In exchange, each one you build adds 15% to Civil Unrest — triple the hit a pumpjack costs you. It also throws off a serious pollution cloud, spreading roughly 25 units out in every direction. That radius is the number I keep in my head when I’m eyeballing a refinery site, because everything inside it is going to die.
Gasoline Transportation
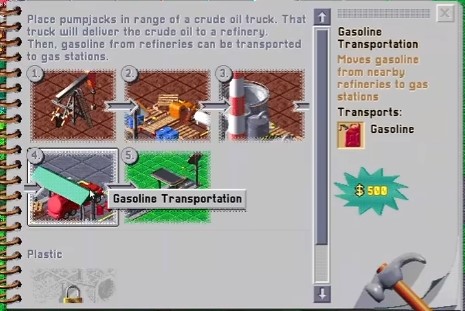
Once you’ve got gas, this is what moves it: it pulls from refineries in range and delivers to your gas stations. The capacity per car is large — I’ve seen 100 thrown around, but I genuinely don’t know if that’s the real figure, so treat it as unconfirmed. Like the crude trucks, these leave oil slicks behind, so the pollution trail now extends from the transport building all the way out to each station you’re supplying.
Gas Stations
A drive-thru where car owners top up. Every car pulls 1 unit of gas, so your supply has to keep pace with traffic, not just with construction. The good news is that a fresh gas station spawns holding 4 gas, which buys you a grace period before you have to get a delivery route running to it.
Here’s the thing I can’t fully answer: the game menu labels Gas as “optional.” I have no idea what a gas station actually does if it’s left dry — whether cars skip it, whether it sits idle, or whether something worse happens. If you’ve tested it, that’s exactly the kind of correction this document wants.
Keeping the chain fed
Watch the top-left corner for your Oil and Fuel counts. When one of them starts falling steadily, that’s your signal to add more of whatever produces it — more pumpjacks if oil is draining, more refineries if gas is. I’d rather build on that reading than wait for a visible problem.
Refinery placement deserves more thought than it usually gets. They’re pollution factories, and every tree that dies from that cloud hands you a fresh slice of unrest. Push the refinery toward the map’s edge where the dead zone costs you nothing you cared about. But don’t shove it so far that deliveries crawl, because distance translates directly into slower trips. It’s the same tension you feel everywhere else in this game — and one last reassurance worth having: pollution only kills trees. The people don’t care. They’ll live next to a blackened refinery and never complain about the air.
Food & Farming
Hunger is one of those needs that doesn’t announce itself until your cars start drifting toward it, and by then you want the infrastructure already standing. Drive-thrus handle the food side, farms handle the supply, and the two have to work together or your Hamburger Stalls sit there uselessly waiting on patties that never arrive.
Fast Food Drive-Thru
Building a drive-thru isn’t a single placement — it’s a small project with a strict order. Lay down that first tile, and the build menu opens up the arrows you need. Here’s the catch that caught me off guard: you can’t slap the food stalls down right away. The queue comes first, and you have to extend it across a few tiles before the game will let you place anything else. Once you cross that minimum length, the actual service tiles unlock for placement.
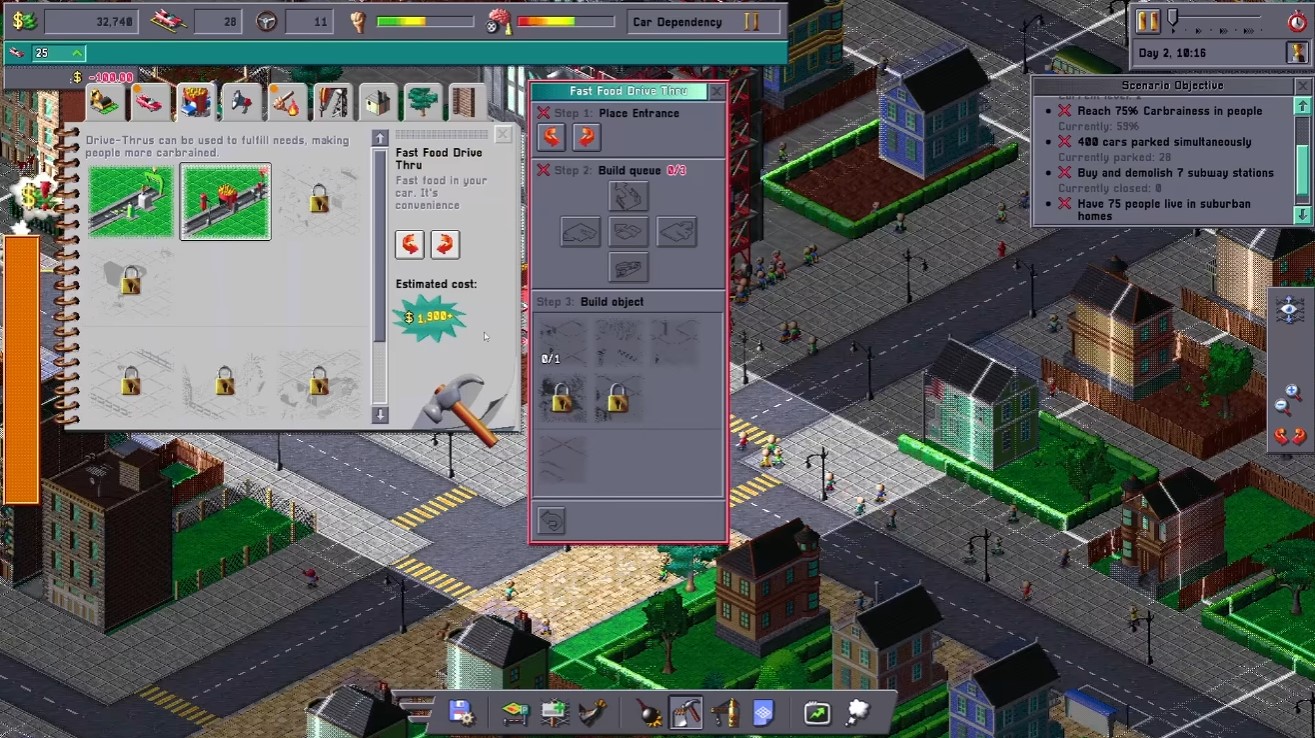
The ordering matters here, and the game enforces it. The Ordering Window has to go down before anything else — it’s mandatory and it comes first, no exceptions. After that you can add:
Fries Stall, which gives a car some food to chew on. Sauce Post, which is an upsell that hands out extra sauce. Then the two that arrive later: the Hamburger Stall, which unlocks after some progression and serves more filling food so cars stay satisfied for longer — but it needs a steady intake of patties to function. And the Soda Stall, also a later unlock, which covers the drinks need. Finally there’s the Drive-Thru Loop, which as far as I can tell is purely cosmetic — it dresses up the layout without doing anything mechanical.
Because the Hamburger and Soda options come later, you’ll want to plan ahead rather than rebuild. Drive-thrus can be edited after the fact to slot in those stalls as you unlock them, so give yourself breathing room during the initial build. If you build tight and cramped, you’ll be tearing things apart to squeeze in a burger stall you didn’t know was coming. The same blueprint-tweaking logic applies here as anywhere else in your city — if you want the finer details on rearranging layouts, the guide to customize your blueprints is worth a read.
Farms
Once burgers unlock, the supply chain kicks in. Any Hamburger Stall you build is going to want patties, and patties come from cows, so you need a farm. The setup has three moving parts.
Cow Field is where the cows grow up on their own, maturing until they’re ready for slaughter. Barn gathers up nearby cows and routes them toward the grinder — its range reaches about three Cow Fields out, so you can pack a fair number of fields around a single barn. Watch the throughput though: a barn only hands off four cows at a time, so stacking endlessly doesn’t help. Meat Grinder takes those cows from the barn and converts them into four patties each. Every grinder gets its own truck, and that truck automatically runs deliveries to drive-thrus across town.
A few things I’ve learned the hard way. Cows absolutely hate pollution — keep your farms well clear of factories and oil refineries, because a farm sitting in the smog is a farm that isn’t producing. One cow yields four patties, so resist the urge to build a sprawling cattle empire; match your farm output to what your stalls actually consume. And if the map happens to spawn wild cows, you can grab them and relocate them into one of your own Cow Fields, which credits you +1 cow for the trouble.
Amusement
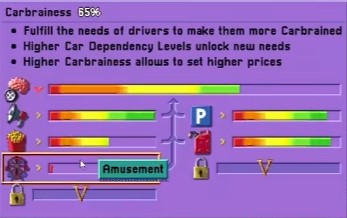
Once your Car Dependency climbs high enough, Amusement shows up as a need you have to serve. Naturally, the answer is fun from the comfort of your own car — because of course it is. Nobody in this city is getting out and walking anywhere.
You satisfy it by building Car Ferris Wheel drive-thrus. The build process works like any other drive-thru, so if you already have the food flow down, you won’t fumble this. That said, the wheel is bulky and eats up a chunk of your layout, so don’t wedge it into a cramped corner where its queue has nowhere to go.
The ride itself takes a while — long enough that a short queue backs traffic up fast. I learned this the annoying way. Either give it a genuinely long stretch for cars to wait in, or drop it on a quieter road where a line forming won’t choke an artery. And be careful about how many you scatter around: the ride is free, so each one you place costs you upkeep without bringing in a single coin. Build what the demand actually calls for, not a skyline of wheels.
Drinks
Somewhere along the climb in Car Dependency, the game decides your drivers are thirsty. Drinks show up as a need the same way the amusement rides did — another notch on the ladder that only reveals itself once you’ve pushed that stat high enough, and another reason your Carbrainess can suddenly dip on a level-up if you didn’t see it coming.
Here’s the genuinely good news, given how much of this guide is me complaining about sprawl and logistics: you don’t need dedicated real estate for this. Drinks bolt onto any food drive-thru you’ve already built. I mean that literally — tack the drink handling onto the queue you already have rather than paving out a fresh loop somewhere else. If you scrolled past the food section wondering why I kept telling you to leave yourself room, this is part of the payoff. Capacity you kept in reserve is capacity you can use right now without bulldozing anything.
If you haven’t set up a food drive-thru yet, go read that earlier stretch first — the build order and the component flow matter, and I’m not going to make you read it twice by repeating it here. Drinks ride on top of that structure, so get the structure right.
There’s one other piece: Soda Vending Machines unlock at some later point. I’ll be honest and say I can’t tell you how much they actually move the drinks need — I’ve never pinned down whether they meaningfully chip away at it or barely register. On top of that, they’re a walk-up deal, meaning the driver has to get out of the car. For a game whose entire premise is never leaving your seat, that reads less like a convenience and more like a punishment, so I wouldn’t count on them to carry the demand for you.
Toilet
Raise your Car Dependency far enough and a new demand line appears on your drivers’ wish lists: the bathroom. It arrives the same way drinks and amusement do — as a symptom of pushing your city deeper into car-only design, not something you can preempt at the start of a map.
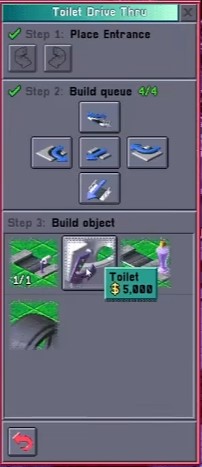
Construction follows the exact same drive-thru routine you already know from food. Lay the entrance tile, line up your queue tiles, then start dropping components inside the loop. The pieces themselves are the toilet stall, a paper dispenser, and a perfume unit. I’ve never been able to confirm that the order they’re placed in changes anything, and honestly I don’t think it does — nothing in the behavior I’ve watched suggests the sequence matters. If someone has hard evidence otherwise, I’d rather be corrected than keep hand-waving it.
The one thing that genuinely will bite you is the animation length. Spending a moment on the toilet takes a noticeable chunk of time per car, which means throughput is slow. A short queue that handled a hamburger stand fine will gridlock the instant a bathroom sits at the end of it. Give yourself more queue tiles than instinct tells you, especially on roads that already carry a lot of traffic.
There are also public toilets you can build for pedestrians — walk-up facilities for people crossing on foot. Whether they actually absorb any of the bathroom demand from drivers is something I genuinely can’t tell you. My guess is they serve on-foot citizens rather than relieving your drive-thru load, but I haven’t tested it in a way I’d trust enough to write down as fact. For now I treat them as decorative unless proven useful.
Fires and Towing
Set a match to the bathroom problem and you’ll end up in the same mess here: the two systems that keep car parks from rotting are the ones the game never explains until something’s already burning.
Fire is a protest problem first, not an accident problem. When a large protest breaks out next to one of your car parks, or when you let one roll through instead of breaking it up, there’s a real chance a protester will start setting the parked cars ablaze. That’s the moment the Fire Engine Garage stops being a building you skipped over in the menu. You can send a fire truck out to douse any burning cars, or set one to patrol an area so it automatically kills any fire it crosses paths with. The catch is the build time: a Fire Engine Garage takes a few minutes to finish constructing, so placing one after the flames start is already too late. I keep one up before I need it — pre-building is the whole game with this thing.
Cars you don’t reach in time turn into wrecks, and wrecks have to be towed. Which drags us to the second half of this problem.
Abandoned Cars
Now and then a car just gets abandoned, and honestly I can’t tell you the exact trigger. I see it most often in the aftermath of a big protest, so my working theory is that the protestors either talked the driver out of owning a car or did something worse to them. I don’t have confirmation on that. What I can confirm is the damage: every abandoned car sitting in a lot drags its parking demand down, and if enough of them pile up in the same lot, drivers will flat-out refuse to park there. One or two you can shrug off. A handful is a dead lot.
Towing the Wrecks
Clearing them means building a Tow Truck Garage, which lives under the Cars & Parking menu. Once it’s up you can dispatch trucks to haul individual cars away, or set them on a patrol route so they sweep up whatever abandoned vehicles they run across without you micromanaging each one. Patrol is the better deal once the problem gets routine — you’ll waste real time clicking wrecks one at a time otherwise.
Hauling has a destination problem, though. A tow truck needs somewhere to drop the scrap, so you’ll also need a Junkyard. Build it, and the towed cars finally have a place to go. Just know the Junkyard isn’t free real estate — it pushes parking demand down in the area around it, so don’t drop one in the middle of your best parking district or you’ll trade one problem for another.
Pre-build the fire garage, keep a junkyard somewhere out of the way, and both of these stop being emergencies and start being maintenance.
Evictions and Suburbia
That land you just bought isn’t empty. Somebody’s already living on it, and the game won’t let you simply toss them into the street — you need somewhere for them to actually go first. Buying the plot is step one; the tenants are a separate problem.
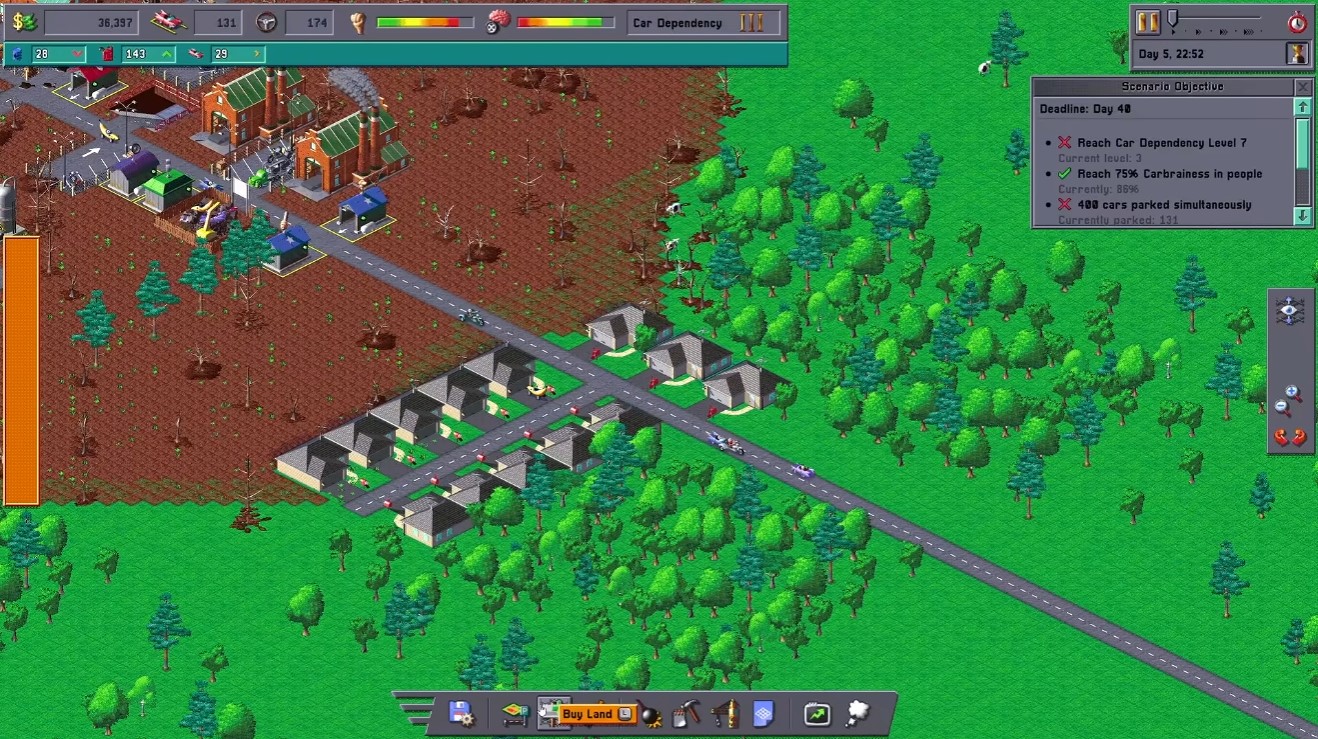
So the move is to build suburban housing before you buy anything you plan to clear. A suburban home takes almost any spot on the map, which makes placing them easy, but each one only holds 2-3 residents. It also takes a minute or two to finish construction, which is the part that catches people out — if you buy land and start evicting the same minute, you’ve got nowhere to send anyone. Keep a few spare houses sitting ready.
With suburbia lined up as a destination, you can go ahead and evict. Budget the unrest before you click: every person removed adds 2% Civil Unrest. If you’ve got a radio tower, run the “Suburban Dream” broadcast and that drops to 1% per person — half the pain for the same result. With a whole plot’s worth of tenants, that savings adds up fast, so the tower is worth having before you start clearing.
Once the eviction’s done, the home is yours to demolish. That’s the whole point of the exercise — pull the house down and put parking on the freed land, trading a few residents for density. That’s the last piece of the puzzle, and honestly it ties back to everything above: land, unrest, and demand are all one system, and clearing space for cars is just the other end of it.