

I’m compiling every objective I’ve confirmed across HOPE 01’s character quest chains, from the doctor’s multi-stage storyline down through the biologist, the chad, the dog, the mercenary, and the girl. If you’re chasing quest completion, or you just want to stop wandering a sectior with no idea where the NPC actually went, this is the guide I wish existed when I started.
I’m making one thing clear up front: this guide is written live. Some sections come straight from my current playthrough, and some I’m reconstructing from memory after already finishing them. Where I’m unsure of the exact trigger or location, I say so plainly instead of pretending. That’s the point — I’d rather you know a step is shaky than assume the guide has it figured out.
Overview
This is a straightforward walkthrough of every character mission I’ve tracked in HOPE 01, laid out step by step so you can actually follow along instead of guessing. Each quest chain is broken into its individual objectives — where to go, what the game asks you to do, and the specific things that tripped me up along the way. If you’re picking this up mid-playthrough and just need to find one NPC, jump straight to that character’s section. If you’re running the whole list, you can read it top to bottom.
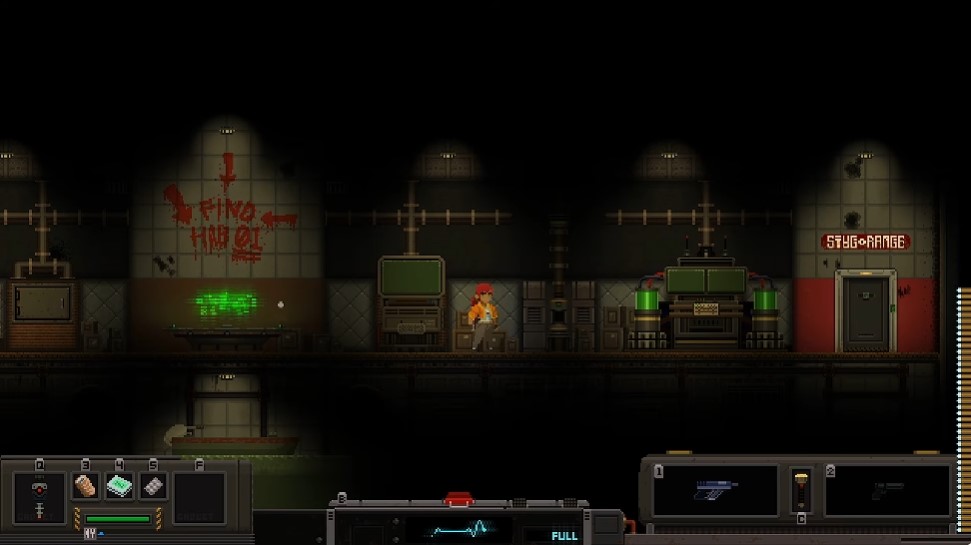
Since HOPE 01’s areas connect in ways that aren’t always obvious, it also helps to keep the HAB clusters map guide open in another tab while you work through these. A few of the quests send you back and forth between sectors, and having the layout in front of you saves a lot of dead-end walking.
About This Guide
Before you start following any of this, you should know a couple of things about who wrote it. This is my first guide, so I’m still figuring out how to explain things clearly — some sections will read cleaner than others, and I’m fine with that being visible.
English isn’t my native language either, which means a few lines might come out slightly awkward or less precise than I’d like. I’m not going to hide behind that, but I’d rather you know it going in so you can read around the rough edges instead of assuming a step is wrong when it’s just phrased badly.
I’m also writing this in real time as I work through the quests myself. That matters, because not everything here comes from the same session. A chunk of it is written retroactively — based on quests I’ve already finished — so some objectives and descriptions are vaguer or more incomplete than I’d want them to be. Especially the ones from memory, where I’ll remember what I had to do but not the exact location, the trigger, or the order events happened in.
And there’s a specific kind of gap I want to flag honestly: some objectives are genuinely hard to explain precisely because I completed them without fully understanding what set them off in the first place. When that’s the case, I say so directly rather than dressing it up as a confident solution. I’d rather hand you a shaky step you can double-check than a clean-sounding answer that sends you somewhere wrong.
Treat this as a work in progress. As I replay quests and confirm more, I’ll tighten the locations, sharpen the instructions, and fill in the details I’m missing right now. If you’ve got information on a location, an objective, a trigger, or simply a cleaner way to finish a step, drop it in the comments — I’ll fold anything confirmed back into the guide so the next person doesn’t have to guess. Thanks for reading, and I hope this actually helps.
General Quest Mechanics
Before I get into the individual chains, it helps to understand how HOPE 01 structures quests in the first place. Most of them are broken into a variable number of objectives, and once you clear one, a notification usually pops to confirm it registered. That confirmation matters — I’ve learned to watch for it, because if it doesn’t appear, the objective hasn’t actually counted and I’d just be wasting a trip.
The other habit worth building early: after finishing an objective, you can almost always walk straight back to the same NPC to trigger the next part. Very rarely do you need to go hunting for where the chain continues — the quest-giver is your next stop by default.
Common Quest Objectives
Objectives come in a handful of recurring shapes. Recognizing which type you’re dealing with tells you a lot about how long it’ll take and how much RNG could slow you down:
- Kill Monsters — take down a set number of enemies.
- Kill and Collect — kill specific monsters and grab the items they drop. These drops are quest-specific and only appear while the matching objective is active. Sometimes every kill drops the item; other times it’s pure RNG, so you may need to grind several kills before the one you need shows up.
- Discover Locations — find one specific location, or occasionally several.
- Boss Drops — beat a specific boss and collect an item that only drops for the active quest.
- Retrieve and Use an Item — travel somewhere, pick up an item, then use it in a different place. Sometimes that has to happen within the same run, and some quest items can expire — so check the objective text before leaving an area, or you’ll be making the trip twice.
- Movement Objectives — perform a specific movement action, like jumping, running, or covering a set number of steps.
- And more — a few quests throw in objectives that don’t fit neatly into any of the above.
Quest Rewards
Clearing an objective usually pays out Luxury Fabric. From what I’ve tracked, the amount typically lands somewhere around 15–30 Luxury Fabric, though I haven’t nailed down the exact figures across every quest yet — treat that range as what I’ve observed rather than a confirmed constant. The precise payout seems to vary by quest and objective.
Store Your Luxury Fabric When You Can
Luxury Fabric feeds into meta progression, which is exactly why I don’t like carrying it around. If there’s a Mail station near you after an objective completes, deposit it before moving on. It costs you a few seconds and saves you from losing progress if the next stretch goes badly. I made a point of doing this routinely once I realized how much the fabric was worth, and it’s the single easiest habit to keep in this game.
The doctor
What follows covers every step needed to finish Myst’s quest — where to find him, what each objective asks of you, and a few notes I picked up on the rougher sections. If you’re working toward full quest completion, this is one chain you’ll want to run carefully, because a couple of these steps are unforgiving in ways the game doesn’t warn you about.
1. Find Myst
Tracking down Myst is the entry point to the doctor’s whole chain, and it’s one of the easier steps to fumble if you’re not sure which side of the sector you should be on. You’ll find her in the Mil-Sec Sector, specifically on the right side of the rail. If you’ve been hugging the left side for whatever reason, that’s your problem — swing over to the rails on the right and you’re in the right spot.
Once you’re in the Mil-Sec Sector, the elevator there is how you move between the different floors of the area, so it’s worth getting comfortable with where it sits before you start bouncing around. I treat the elevator as my home base for this step — ride it, find Myst on the correct floor and side, and then you’re set up for the kill objective that follows.
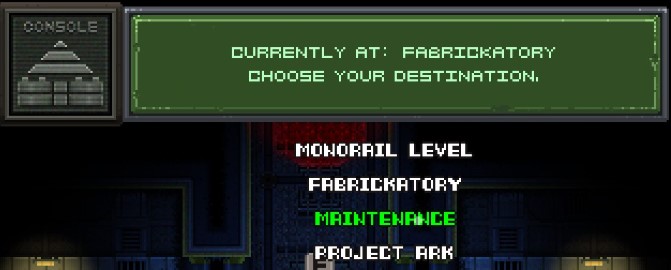
If you’re the kind of player who clears one NPC chain at a time before moving on, this is the moment to commit to the doctor’s line. Get the elevator locations in your head now, because you’ll be coming back through this sector more than once.
2. Kill 50 Monsters
This is the buffer step before things get interesting. Take the elevator back down, and start clearing. Fifty is the target, and nothing here is weighted — any enemy that counts toward the total counts, so use what’s already in front of you rather than hunting for a specific spawn type.
If you’re anything like me, you’ll want to keep a loose tally instead of trusting your gut on this one. Counting to fifty while you’re busy fighting goes sideways fast, and I’d rather not climb back up to Myst only to find out I’m sitting at forty-eight and have to turn around again. Keep pressing the descend route, thin out what you find, and check your objective tracker as you go if the game surfaces a counter for it.
Once the count hits fifty, head back up to Myst in the Mil-Sec Sector to hand it in and open up the next objective. Don’t wander off exploring before you turn this one in — the quest won’t advance until she registers the kill total.
3. Restore the Power in the Maintenance Level
Once the first fifty kills are banked and you’ve handed the count back to Myst, the next objective pushes you down into the Maintenance Level to fix the power system. She’ll hand over an item before you leave — that’s the tool you need to actually restore power, so don’t drop it or lose track of it on the way.
The trip there is where people get chewed up. The route is crawling with Stompers, and there are live wires strung across the path that punt you backward the instant you clip them. Rolling is how I get through the dangerous stretches — treat the roll as your primary dodge, not a panic button. You will take some hits regardless, so walk in expecting chip damage rather than a clean run.

If timing-based minigames aren’t your strong suit, stock up before you go. I’d carry at least 4 Medkits into this one — going in light is the fastest way to eat a death you didn’t need. Restore the power with the item and the objective closes, opening up the next step.
4. Find the Source of the Infection
Once the power is back on, the objective shifts and Myst points you toward finding the source of the infection. Head for the Fabricator Section and keep an eye out for a room lined with broken incubators.
That room is your target — the broken incubators mark the exact spot you’re looking for, so if you spot them, you’re in the right place. There’s nothing to interact with or kill here; it’s purely a discovery step, which is a welcome breather after the Stompers and wiring. I’d just recommend you scan the room clearly once you walk in so the objective registers rather than passing back through and second-guessing whether you hit the right area.
5. Get the Canister from the Military Sector
Now that the source is confirmed, you need something to actually deal with it, and the game sends you to the Military Sector for the Canister. The rail exit you want is on the left side — worth stressing, because after all the back-and-forth in the Fabricator Section it’s easy to jump on the first rail car you see and end up on the wrong branch. Check the side before you commit.
Once you’re in the sector, find and pick up the Canister. There’s no puzzle or fight gating it here — it’s a straightforward retrieval, just a matter of locating it and grabbing it. From there it’s a clean two-part loop: head back to wherever you found the source of the infection, then use the Canister on it.
I’ll be honest, this step reads as filler after the infection discovery, and the real risk is purely the travel. The trek back to the source is the part I’d mentally prep for, not the pickup itself. If you’re like me and you like to clear a sector before doubling back, resist the urge to detour here — the Canister wants to go straight onto the source, so there’s no reason to make the round trip twice.
6. Find the Church of the Congregate
Once the Canister is spent, Myst hands you the next task: locate the Church of the Congregate. This one is far less of an ordeal than the Canister run, and that is a relief after all that backtracking.
The church sits on the left side of the Temple Rail. If you are anything like me, you have probably already wandered past it while exploring earlier, and that is where this objective gets easy. The guide notes that if you have already discovered the church before reaching this point in the quest, the objective completes on the spot — no travel required. I check my map first thing here, because there is no sense riding the rail back across the sector if the game is already going to tick this one off for me.
If it has not registered yet, take the Temple Rail and head for the left-hand side. That is the whole step. Nothing to carry, nothing to kill, just a location check.
7. Kill Former Scientists and Obtain the Key
This step is the one where I genuinely can’t hand you a fixed location and say “go here.” The key I need comes off a Former Scientist, and which one drops it is pure RNG — so the objective isn’t a route, it’s a farm. What I do is pick a spot where Former Scientists spawn in numbers and just work through them until the drop finally lands. It can come quick, and it can drag; that variance is the whole reason I don’t bother counting kills here.
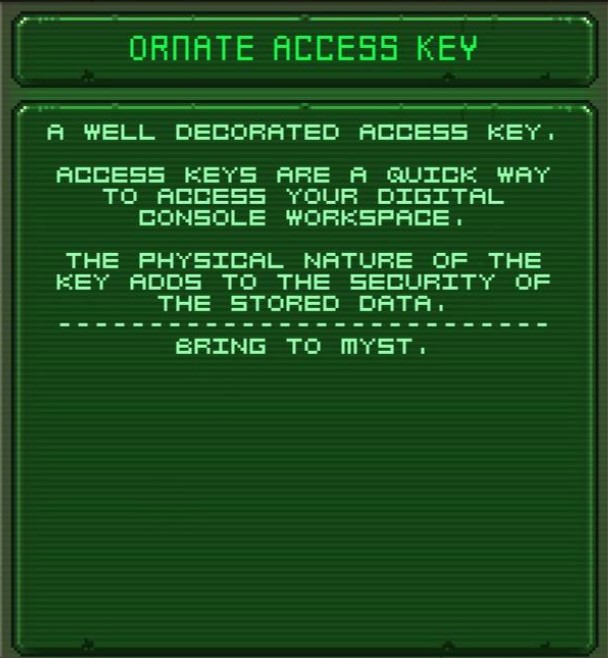
When the key does drop, don’t get clever with it. The only thing that matters next is getting it back to Myst, so I turn around and hand it over the moment I have it rather than banking it for later. Once Myst takes it, the step closes and I can move on.
- Kill Former Scientists until one drops the required key — the drop is RNG, not a guaranteed specific target.
- Carry the key back to Myst.
Worth saying plainly: if you’ve been through this and know a spawn cluster where the Former Scientists reliably stack up, that’s exactly the kind of detail this guide wants — drop it in the comments and I’ll fold it in.
8. Find the Secret Passage to the Labs
Now the chain wants a secret passage connecting the Church of the Congregate to the Labs. That’s the objective text, and it’s about all I can hand you with confidence.
Here’s my honest admission: this one cleared itself for me without me ever noticing the trigger fire. The objective completed on the spot, which means either I’d already walked the passage by accident or something I did earlier in the church quietly satisfied it. I can’t tell you where the entrance sits or what actually flips the flag — and I’d rather say that than guess at a wall texture and send you hunting in the wrong room.
If you’ve got a screenshot of the passage, a location callout, or the exact action that triggers completion, the comments are open. This is the kind of step where a second set of eyes beats a hundred lines of me hedging.
9. Find the Relic
With the secret passage still hanging over this chain, the next objective at least gives you something concrete to chase: a Relic. It’s a straight boss drop, so there’s no RNG to fight and no ambiguity about whether the kill counted. After the shifting-drop rate on the previous step, that was a genuine relief.

The Relic comes from the boss in the Temple Rail, and you want the left side of that area. Head in through the ATHENAEUM door specifically — that’s the entrance that puts you on the boss’s path. I’d confirm the door name twice before committing, because the Temple Rail has more than one way in and it’s easy to duck through the wrong threshold and waste a trip.
- Travel to the Temple Rail.
- Enter through the ATHENAEUM door.
- Defeat the boss.
- Pick up the Relic once it drops.
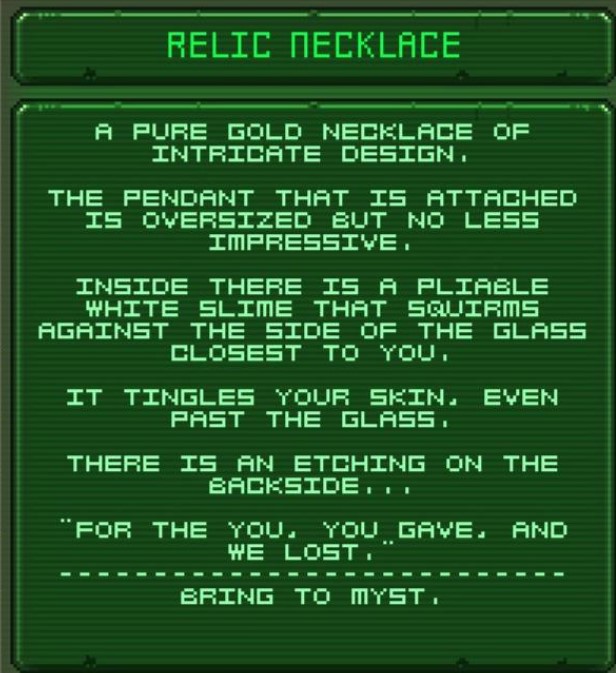
Once the Relic is in your inventory, that’s this objective closed — you can move straight on to tracking down the Biostatic Converter.
10. Find the Biostatic Converter
Right after the Relic, the trail picks up again in the Ark Project level, where your job is to locate and recover a Biostatic Converter.
Here’s the part that caught me off guard: the Biostatic Converter is extremely fragile. The moment you start running with it in hand, it begins cracking, and enough of that punishment finally shatters it. If you’ve been sprinting everywhere up to now — same as I had — this objective forces you to slow down in a way that feels almost wrong.
I still haven’t pinned down exactly how many times you can run before it breaks. What I can say for certain is that it survives at least two, and I haven’t confirmed the true ceiling beyond that. Until someone nails down the number, treat it as breakable on nearly any sprint.
My approach, and the one I’d hand to anyone else: scout the whole stretch first and lock the route into your head before you ever pick the thing up. Once you know the path cold, grab the Biostatic Converter and walk — no running — the entire way back. Deliver it and the objective closes.
You do get a cushion: there are three Biostatic Converters in the level, so breaking one isn’t a run-ender. Still, don’t lean on that. Learn the route, then carry it at a walk, and you won’t have to burn your spares at all.
11. Find the Auto Stabilizer
Once you hand in the Biostatic Converter, the chain pushes you toward one more retrieval: an Auto Stabilizer. Like the converter before it, this one isn’t lying around in a crate somewhere — it drops from a boss, and that boss sits in the Ark Project level. So if you’re keeping score, that’s the same level you were just sneaking a fragile component through, only now you’re going back in to take a piece off whatever’s waiting at the end of it.
That pairing is worth noticing. You already learned the Ark Project‘s quirks the hard way on the converter run — the fragility, the walk-don’t-run discipline, the whole rhythm of the place. You’re not learning a new level here; you’re cashing in the familiarity. I’d treat this as the payoff objective for that area rather than a fresh puzzle.
I’m deliberately not going to dress this one up, because I haven’t closed it out yet. The Auto Stabilizer is confirmed as a boss drop in the Ark Project, and that’s as far as I can honestly take you right now. I’d rather leave a step short than feed you a guessed route to a boss I haven’t personally put down — that’s exactly the kind of confident-sounding filler that wastes your run. Once I’ve cleared the fight and can pin down the exact spawn, the approach, and how the drop presents itself, this section gets rewritten with the real thing.
The biologist
The biologist sits down in the Flesh Caves, and getting to him is half the battle. You reach the area from the replicade, then push through a hole in the wall that’s been sealed over with flesh. I’ll be honest: the exact route through that opening is genuinely hard to spell out in text — it’s the kind of cramped, organic tunnel that you have to feel your way through rather than follow a clean set of turns.
Once you’re face to face with him, the quest unwinds in a fairly clear sequence, so let me walk you through each request in the order he hands them out.
His first ask is to “kill” a batch of hanging capullos. Each one you take down either drops loot or spawns slimes, so expect a little chaos if you’re standing close when they pop. The count he wants sits around 50, though I’d treat that number as provisional — it’s one I still need to confirm on a fresh run.
After that, he hands you a device and asks you to scan a heart somewhere in the Flesh Caves. Bring the device, find the heart, and scan it.
Then comes the step that actually demands planning. He wants you to travel to the medical zone, craft a medicine, and throw it into a digestion pool — and it all has to happen in a single raid. The medicine expires if you don’t pull the whole trip off in one go, so before you leave, load up on ammo and medkits and map out a route that gets you in and out cleanly. This is the one part of the chain where a sloppy path costs you the run and forces a restart.
Next up, he’ll send you to destroy a colossal cycler — that’s the boss of the chain. Bring it down, and he gives you nothing for your trouble. Annoying, but that’s how it goes.
The real payoff, if you can call it that, comes when you return to him later. He’s been converted into an infected scientist, the same type you run into over in the cult area. In the chest sitting in his room you’ll find an invitation letter that reads “present to mother nature.”
And this is where the trail goes cold for me. The following step isn’t clear. I’ve already tried both sides of the temple rail, and I’ve gone to the tree boss because the wording of the letter seemed to point that way — but neither gave me a real clue. If you’ve pushed past this point and know where “mother nature” actually wants you, drop it in the comments. I’d rather flag the dead end honestly than hand you a guess dressed up as a route.
The chad
The chad’s quest follows the same shape as the rest of the chains in this guide: find the NPC, then grind through a mixed bag of movement and collection objectives. A couple of these steps are pure reflexes and a couple are pure patience, and knowing which is which before you commit saves real time. I’ll lay out how to reach the NPC and what each objective actually asks of you, with the tips that mattered most to me on the harder stretches.
1. Find the NPC
This chain starts the same way most of HOPE 01’s side quests do — figuring out where the NPC is parked before you can do anything else. The good news is the chad isn’t buried behind a chain of prerequisites or a boss gate. He’s sitting behind one very specific landmark in the Entertainment District, and once you know the name of it, the walk is short.
Head to the Entertainment District and commit to the left side of the area. Don’t drift toward the middle or the right side looking for him — the left side is the only approach that matters here. Your landmark is Shasta’s Gauntlet. That’s the structure you’re aiming for, and finding the NPC means getting to it.
The reason I’m spelling this out instead of just saying “go left” is that the Entertainment District is dense enough that wandering it blind burns time you don’t get back. If you’ve already been through the district for other quests, you’ve probably seen Shasta’s Gauntlet without registering it as a quest landmark. Keep an eye out for it specifically on the left side the next time you pass through.
What comes after you find him is its own set of moving parts — platforms, a step count, a garden patch, and a print job. I’ll break each of those down next, starting with the gauntlet crossing, because that’s the stretch where I’d want to know exactly what I’m signing up for before I jump.
2. Cross Shasta’s Gauntlet
Past the door in the Entertainment District, the floor gives way to a stretch of moving platforms I’ve come to call Shasta’s Gauntlet. There’s no trick to reading it — just hop from platform to platform until you land on the far side. What makes it tense is what waits underneath.
If you slip, you don’t get a clean reset into the void. Down in the red water there’s an enemy waiting, and from everything I’ve seen it lashes out from the ground and water itself. As far as I can tell, you cannot kill it. You can climb back up and try the crossing again, but that thing is still down there the whole time you’re redoing the jumps. I’m flagging this as not yet re-verified — I want to be honest that “unkillable” is my current read, not a confirmed fact, and if someone’s found a way to put it down for good I’d genuinely like to hear it.
Using the Double Jump Gadget
If you’ve already picked up the Double Jump Gadget, you don’t have to eat the full platforming section. It only skips part of it, but that partial skip is worth knowing if you keep dropping into the water like I did on my first pass.
When you fall, you don’t have to start from the very beginning. Instead:
- Run back toward the last platform you were standing on.
- Use the Double Jump to reach the horizontal obstacle that would otherwise be out of reach.
- From there, continue up to the higher floor.
Once you clear the higher floor, the section is effectively behind you. At the end of the crossing you’ll find the NPC — that’s your payoff for getting across without donating another life to the red water.
3. Complete the Jumping Objective
Once you’re across and standing in front of the NPC, the quest doesn’t open with anything dramatic — the first thing they want from you is a few jumps. Just jump a handful of times and the objective clears. It’s almost jarring after the gauntlet you just survived, but that’s how this chain paces itself: the hard part is the crossing you already did, and this is the breather.
I still tapped the input a few extra times the first run, half-convinced I’d misread the prompt and it wanted something more specific. It doesn’t. Hit jump the number of times it asks, watch the objective tick over, and you’re free to move on to what comes next. Nothing here is hidden and nothing here is missable — the only way to fail it is to not jump at all.
4. Run 2,000 Steps
Once the jumping objective ticks over, the NPC hands you a Gadget — and this one is a step counter, not a tool you wave around. The catch is what happens if you die mid-objective: every step you’ve banked is gone. I can’t stress how much that stings if you’re deep into the count, so treat the Gadget with the same caution you’d treat a fragile fetch quest, because that’s effectively what it is.
On the bright side, you’re not locked out of the objective once you lose it. If the count resets because you ate it while carrying the Gadget, you can go back to the NPC and ask for a fresh one. I’d rather you know that now than panic when the progress bar empties out on you.
The Safe Way to Bank 2,000 Steps
Here’s the thing I wish someone had told me before I tried to grind this in a live combat zone: you don’t have to. Nothing about the objective forces you into danger, so my first move is always to take it somewhere the enemies can’t touch me.
- Your base is the cleanest option — just run laps in circles until the counter fills. No threats, no risk of losing the Gadget, no wasted time.
- If you’d rather not do it at base, pick a low-level area, clear out every enemy first, then run around the now-empty space until you hit 2,000.
Either route keeps your progress safe, and honestly the base-circling method is the one I fall back on every time. It’s boring, but boring doesn’t lose you steps.
Reward
Hand in the completed objective and the NPC pays you 30 Luxury Fabric. That’s a healthy chunk of the material, so if you’ve been banking Luxury Fabric for later crafting or upgrades, this objective is worth knocking out cleanly rather than risking a reset.
5. Cut 50 Grass
After the 2,000 steps objective, the chad sends you out to cut 50 grass. I’ll be honest, this one reads like filler when you first see it, and it kind of is — but it’s also fast if you know where the grass actually grows.
Head to the Park on the right side of the Entertainment District. That’s the opposite end of the district from where the chad is standing, so yes, you’re walking back across the zone. Plenty of grass grows in the Park, which means you won’t have to hunt for it once you’re there — just find a patch and start swinging.
To actually cut it, use your melee attack. I keep the melee bound to its default input and just tap through the patch rather than swapping weapons, since the objective only cares that the grass comes down. Work an area clean, then move to the next patch until the counter hits 50.
6. Obtain 3 Jikola
Once the grass is cleared, the chad’s chain moves on to collecting 3 Jikola. This one caught me off guard because there’s no map marker telling you where to look — the game just expects you to have it, or to figure it out on your own. If you’ve already scanned a Jikola earlier in your run, you’re in luck: you can simply print it instead of hunting one down in the world. If you haven’t scanned it yet, though, you’ll have to go find it yourself, and the guide’s own note on that is a flat “good luck finding it” — which tells you everything about how much of a scavenger hunt this step can turn into.
The printing route comes with its own cost, so plan around it. Printing Jikola takes 20 Luxury Fabric to print 4 units. I bank any Luxury Fabric I pick up specifically for moments like this, because you never know when a quest is going to demand a print instead of a pickup.
One thing that tripped me up when I first read the requirement: a printed Jikola has 4 uses. That number is the number of uses for that single Jikola, not the total count the quest is asking for. So don’t assume four uses means you’ve satisfied the quest — you still need the full 3 Jikola the objective calls for. Keep those two numbers separate in your head and this step is painless.
7. Next Objective
Step 6 ends cleanly at 3 Jikola, and I’ve got nothing verified past that point. Whatever the chad’s chain asks for next, I haven’t reached it yet in a way I’d trust enough to write down.
I’m not going to guess at a kill count, a location, or an item here just to keep the numbering tidy. When I finish the objective and can confirm the requirements in-game, this section gets filled in properly — same standard as everything else in this guide.
The dog
Next up is Hermes, the dog whose chain takes you through the Mil-Sec trials. This one matters to me because it’s easy to start without realizing how much of it hinges on combat endurance — you fight scripted waves, not wandering enemies, so you can’t just out-level the problem. What follows is everything I currently know: where to find him, the trials in the Mil-Sec area, and the habits that got me through them.
The location and the trial structure are solid. The deeper parts of the chain are the ones I’m still tightening up as I replay, so treat those with the usual caution until I mark them confirmed.
1. Find Hermes
Tracking Hermes down isn’t hard once you know he sits in HAB-A Rail 2, but the path to him is one of those things I’d have walked past a dozen times if I hadn’t been specifically looking for the dog. If you’ve just stepped off the station, the whole area reads as dead-end corridors until you notice the damage in the wall.
Here’s the route I use, and it’s short once you’ve seen it once:
- Head to the right side of the station.
- Find Room 45 — it’s the last room in that section, so keep going until the corridor runs out.
- Cross through the hole in the wall, then look for the glowing green door.
That wall gap is the part I’d flag for anyone doing this cold: the room numbering stops being obvious past a certain point, and the hole doesn’t announce itself. If you reach the final room and see no way forward, you’re in the right place — the opening is your way through. Beyond it, the green glow on the door is your confirmation you’ve found Hermes and not just another sealed exit.
2. Help Hermes Recover His “Body”
Once Hermes is in front of you, the whole thread of his quest makes sense — he wants his body back, and he’s going to hand you a chain of objectives to get there. Don’t expect it to be one clean fetch run. It’s a mix of combat and delivery, and I’ll tell you right now I’m not 100% certain about the connective tissue between every objective. I’d rather flag that than write a sequence I can’t back up.
Recover Robot Parts
The combat half of this quest asks you to kill a specific type of robot enemy — the ones with a siren mounted on their heads. When I’m scanning a room for these things, the siren head is the tell; if the machine doesn’t have that dish on top, it isn’t the target and killing it just wastes your ammo.
What you’re doing here is a standard three-beat: kill the required number of those robots, pick up the parts they leave behind, and bring the parts back to Hermes. The drops matter, so don’t kill one in a spot you can’t safely walk back to — I’ve had parts land awkwardly far from cover before, and going for them mid-fight is a bad trade.
I’ll be honest about the sequencing: there may be steps between this objective and the next one that I don’t currently remember. I’ll update this section once I can verify the full chain, rather than guess at what’s in the gap.
Deliver the Chip to the Hospital
Later in the chain, Hermes hands you a chip, and your job is to get it to the hospital. This one is inventory work rather than combat, but the interaction trips people up because the chip doesn’t do anything just sitting in your bag.
To use it, open your inventory, select the chip, and press Use. From there you deliver it to the required location. Once that’s done, you don’t walk away empty-handed — you receive an item that you then have to carry back to Hermes.
Same caveat as above: there may be intermediate objectives sandwiched between these beats that I don’t currently remember. I’d rather point you at the parts I’m sure of and admit the holes than pad the section with steps I can’t confirm.
3. Complete the Mil-Sec Trials
Once you’ve handed Hermes his body back, the quest sends you to the Mil-Sec area to run two trials. Neither one is hard in the traditional sense, but both have fail conditions that have nothing to do with killing things, which is exactly the kind of objective that trips people up. I’ll walk you through what I ran into on both.
Trial 1 — Survive for 20 Seconds
The first trial is exactly what it sounds like: survive for 20 seconds. The one rule that matters is that you cannot hit any non-combatants. There’s no overwhelming threat here — you get attacked by both melee and ranged enemies, but the trial’s main objective is to stay alive, not to clear the room. Your only real job is to avoid hitting civilians.
Civilians sometimes appear inside the area mid-fight, and that’s the part I’d watch closely. If one spawns next to an enemy you’re mid-swing on, a stray attack can fail you. My approach was to treat it as a survival timer first and a fight second:
- Avoid hitting civilians — that’s the failure condition.
- Focus on surviving rather than killing everything in sight.
- If you can safely kill an enemy, go ahead and do it.
- If you can’t, just dodge, avoid taking damage, and wait the trial out.
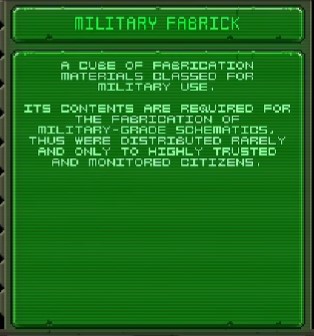
After you complete the trial, you receive 200 Military Fabric. That’s a solid chunk, so it’s worth actually finishing the trial rather than dying and re-running it.
Trial 2 — Destroy the Moving Targets
The second trial flips the objective. Here you need to use your knife to destroy targets that move toward you from both sides. The important detail: you have to destroy each one before it crosses the marked boundary, and that boundary is shown as a red square.

You get 3 chances to miss. That’s your entire buffer, so I stopped thinking about speed and started thinking about positioning — staying near the center lets you react to whichever side a target appears on. Let a target cross the boundary and you burn one of your three misses, so keep your eyes on the red square as much as the targets themselves.
4. Soldier Under One — Part 2
Once the first set of trials is behind you, the quest hands you Soldier Under One — Part 2. From what the objective asks, this means running both of the previous trials again — the survival test against the melee, ranged, and civilian waves, and the timed knife-target exercise inside the red square boundary. The catch this time is that Hermes follows you through both.
I’ll be straight with you: I haven’t finished this part yet. The exact spawn behavior when Hermes is trailing you, or whether his presence changes the failure conditions, is something I still need to confirm on a fresh run before I call any of this verified — so treat this section as a live note rather than a finished walkthrough. What I can pass along is the framing the game itself pushes, and it isn’t subtle. Hermes makes it very clear that failing this time carries consequences for him, which turns a repeat of the same two trials into something that suddenly feels far higher-stakes than the first pass did.
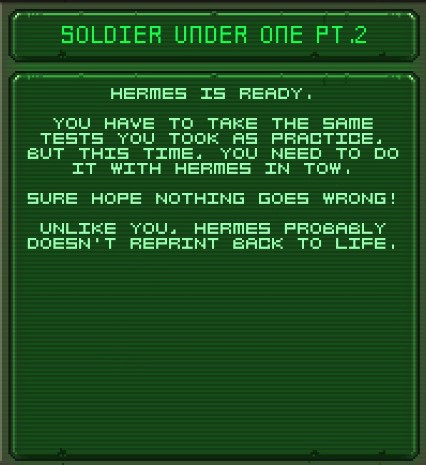
So if you’re working through this alongside me, my honest approach is to treat both trials as if the margins are gone. The knife-target trial already only gave you three misses, and I wouldn’t bank on extra slack now that Hermes is on the line. Try not to let the dog down.
Quest Progress — To Be Updated
I haven’t pushed Hermes’ chain past Step 4: Soldier Under One — Part 2 yet, so I’m holding this slot open rather than guess at what comes next. Once I can replay it and confirm the remaining objectives, rewards, and any intermediate steps I may have skipped along the way, I’ll fill this section in properly.
Worth noting that the earlier pieces of this quest have since grown — what used to be single entries for reaching Hermes and recovering his “body” are now split into fuller write-ups (Step 1 and Step 2) with more detail than the first pass carried. The final stretch after the second Mil-Sec trial still needs the same treatment, and I’d rather leave it marked unfinished than pad it out with assumptions.
If you’ve already run the later stages of Hermes’ quest, drop the details in the comments — the objectives, the rewards, and anything easy to walk past. That kind of confirmation is what turns this from a memory draft into something reliable.
The mercenary
Next up is Merc. I’m going to be straight with you: this chain is not finished. I’ve started poking at it, but I haven’t locked down the full sequence yet, so what’s here is a stub and nothing more.
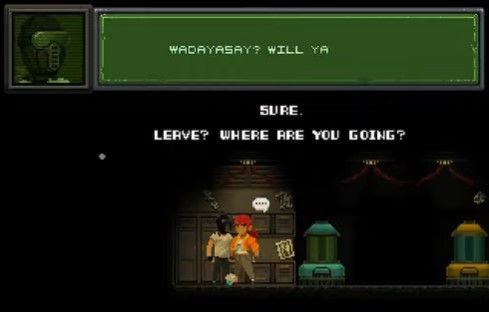
I’d rather flag it openly than dress it up as a complete walkthrough. Merc‘s locations, objectives, and any requirements along the way are all still getting confirmed on my end, and I’ll fill this out as I verify each piece. If you’ve pushed further into this quest line than I have, the comments are open — anything you can confirm saves the rest of us a pile of guesswork.
1. Find Merc
Tracking Merc down comes with a locked door standing between you and the conversation, so settle that detail before you make the trip. Head to HAB-A Rail 1 and stay on the right side of the car — Room 37 is where Merc is waiting, sealed behind a locked door.
To get through, you’ll need a Keycard. That much I can confirm from where Merc physically sits. What I can’t hand you yet is the Keycard’s source — I don’t currently remember where it drops or which objective hands it over, and I’m not going to guess a location and send you on a dead-end lap around the sector. Once I can confirm it on my end, I’ll drop the exact spot in here.
If you’ve already cleared this quest line further than I have, the comments are wide open. A single confirmed Keycard location saves everyone else the same backtracking I’m stuck on right now.
Quest Progress
Everything past that locked door in HAB-A Rail 1 is still a blank page for me. I haven’t pushed the Merc‘s chain far enough past the Keycard step to confirm what the next objective even asks for, and I’m not going to paper over that gap with guesses — a wrong objective costs you a trip across the sector just like the wrong Keycard location did.
Once I finish the remaining stages and can verify each objective and its rewards firsthand, I’ll write them into this section. Until then, treat the Merc line as unfinished business, same as I do. If you’ve already taken it further than me, drop what you found in the comments — a single confirmed objective here closes the loop for everyone still stuck at the door.
More information coming soon.
The girl
Kyo’s chain is the one I’m writing from the shakiest ground, so I’ll be honest about that before you commit any time to it. I finished these objectives a while back and didn’t capture screenshots for every step, which means parts of what follows are reconstructed from memory rather than read off a fresh playthrough. The broad shape is solid — meet her, give her a gun, handle the chores she sends you on — but I’d expect a detail or two to drift. When I run her quest again on a new save, I’ll tighten this section up and drop screenshots in to match.
What I can say with confidence is that her objectives are front-loaded into the early game, which makes them easy to trip over before you realize a character quest has even started. If something below doesn’t line up with what you’re seeing, tell me in the comments — a correction from someone mid-quest is worth more than my half-remembered version, and I’d rather the next reader get accurate information than my best guess.
The steps I’m working from, in the order I recall running them:
- Meet Kyo.
- Dispose of the trash bag.
- Defeat the Aqua-Tek boss.
- Unlock Kyo’s house.
Treat the ordering as provisional. I’ll expand each one once I’ve re-verified it — including the opening meeting, where I need to double-check the exact use of the record gadget and the point at which I handed Kyo the gun, since those are exactly the kind of small steps memory smooths over. This section is under construction, and I’d rather flag that clearly than write it as if it were locked down.
1. Meet Kyo
Kyo turns up early, so there’s a good chance you’ll bump into her before you’ve even settled into a rhythm. She’s one of the first NPCs I ran into, and true to form she hands you a short stack of odd jobs rather than one clean task — using gadgets, delivering something, marking spots on the map, and clearing out trash. I’m logging each of these below, but I’ll be honest: a couple of them I’m still pinning down the exact requirements for, so treat those as unverified until I can re-confirm them.
Record Yourself Using a Gadget
One of her objectives wants you to record yourself while using a gadget. The specific gadget and the exact conditions still need to be confirmed on my end — I don’t want to hand you a definitive answer I haven’t locked down yet. If you’ve already cleared this one and remember which gadget triggered it, drop it in the comments and I’ll update the section.
Give Kyo a Gun
Kyo will also ask you to give her a gun. Which weapon she actually wants is still something I need to verify, so hold off treating any single gun as the answer until I re-check it in a fresh run. Worth noting the way she phrases it, though — it’s a give item objective, not a fetch quest where you’re hunting something down.
Mark the Boss Doors
The last objective I’ve logged here is marking the doors of the three nearby bosses. What tripped me up is that it’s easy to mark one, feel satisfied, and move on — don’t. You need to visit and mark all three of those locations before this one counts. Run a lap and confirm all three are done rather than assuming the first mark closed it out.
Once these are handled, she wants you to dispose of a trash bag — I’ve split that off into its own step below so the sequence stays readable.
2. Dispose of the Trash Bag
Once the marking errand is squared away, Kyo hands you another task: dumping a trash bag into the compactor over in the Waste Rail. Nothing complicated about the drop itself — the delivery is the whole job.
The thing I’d flag before you grab it is the sheer bulk of the trash bag. It’s a big, unwieldy load, and that size matters for how you move. I plan my route to the Waste Rail around carrying something that large rather than treating it like a quick pocket item, because hauling it awkwardly through tight spaces is where you’ll waste time or fumble the trip.
3. Defeat the Aqua-Tek Boss
Once the trash situation is handled, the next objective Kyo hands over is a straight boss kill. As you’d probably guess from the name, the target sits in the Aqua-Tek area, so once that request lands in your log, that’s where you’re headed.
There’s nothing fancy buried in this step — no item to ferry, no delivery to time. Beat the boss and the quest moves on. The only real thing to keep in mind as you go is that the objective is tied to the Aqua-Tek location specifically rather than some vague arena, so if you’ve been putting off exploring that zone, now it’s mandatory. And if I’m being honest, I don’t have a confirmed clear order for this against the rest of Kyo’s chain yet — this is one of the steps I’m still re-verifying as I replay, so treat the trigger point loosely and let your log tell you when it’s actually active.
4. Unlock Kyo’s House
Once you’ve cleared everything Kyo asks of you, she finally opens up the door to her house and lets you step inside. That access is the quiet payoff of the whole chain — not flashy, but it matters.
Inside, you can hang out with Kyo while you wait for the train to arrive. The part I appreciate as a completionist is what that waiting spot really gives you: an instant extraction the moment the train shows up. If you’ve ever been mid-run with a full bag and no clean way out, you’ll understand why I treat this as worth locking in. Finish the objectives, get the house, and you’ve got a safe place to idle until it’s time to leave.
Quest Progress — Under Construction
The rest of Kyo’s quest chain is still under construction on my end. I’ve cleared the early steps — meeting her, dealing with the trash bag, putting down the Aqua-Tek boss, and unlocking the house — but the objectives past that point haven’t been nailed down cleanly enough for me to walk you through them line by line.
I’m going to update this section as I replay the quest and can confirm the remaining objectives, their exact requirements, where each one points you, and what you get for finishing them. Until then, treat everything below the house unlock as unverified — I’d rather leave it blank than hand you a step I can’t stand behind.
Because a chunk of what’s above came from memory rather than a fresh run, feel free to flag any mistakes or missing details in the comments. Corrections and extra info genuinely help — if you’ve pushed further into Kyo’s chain than I have, that’s exactly the kind of thing I want to patch in here.