
The map in Huglings is the one screen I keep coming back to more than any menu, because almost everything you need — quest givers, your pet, your own position — is packed into it once you know what you’re looking at. If you’re the kind of player who likes to move through a world without constantly guessing where you’re supposed to go, this guide covers the icons, the multiplayer coloring, and the zoom controls so you can read the map at a glance instead of squinting at it.
I put this together because the symbol set here is small but easy to misread on a first pass — a couple of the icons sit close together, and the zoom keys in particular tripped me up until I worked out why some inputs weren’t registering. Nothing here is complicated; it just rewards a minute of attention before you start wandering.
Opening the Map
The map is your navigation layer for the whole world — it lays out every location and gives you a single place to orient yourself before committing to a route. To bring it up, press M. That’s the one key you need to remember, and once it’s open you’ve got the full spread of the world in front of you.
Reading the Icons
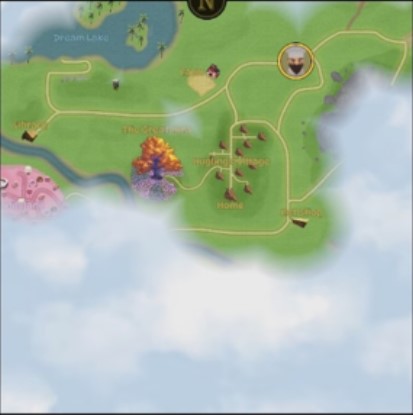
This is the part worth slowing down for, because each marker means something specific and mixing them up will send you in the wrong direction. Your own character is shown as an arrow, while your pet gets its own separate marker: a paw icon. So if you’re ever unsure which dot is you and which is your companion, look for the arrow versus the paw — that distinction holds even once there are more players on screen.
In multiplayer the same markers are used, but every player is drawn in a different color. That’s how you tell your fellow players apart from one another when the map gets busy — the shapes stay consistent, only the colors change per player.
Quests are handled with their own visual cue too. When you have an active quest, the quest-giving NPC’s portrait appears on the map inside a circle, which makes tracking down the person you need to talk to far easier than hunting for them blindly. I lean on this constantly, since it turns “where was that NPC again?” into a quick glance.
Searching Zones
Not every quest is as simple as walking to an NPC — some ask you to find something within a defined patch of ground. For those, the Searching Zone is drawn directly on the map, marking the area where you need to complete the objective. Treat that boundary as your work area: you don’t need to leave it to finish the quest, and if you’re ever unsure whether you’re in the right spot, checking the marked zone settles it immediately.
Zooming In and Out
Zooming works differently depending on your keyboard, and this is where I’d double-check before assuming the controls are broken. If you have a numpad, use the + and − keys to zoom in and out. If you don’t have a numpad, the 8 and 9 keys do the same job instead.
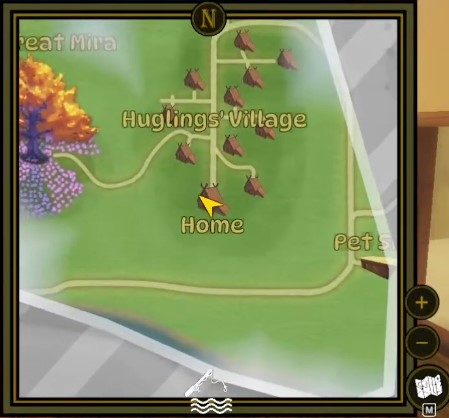
The trap here is reaching for the wrong set without realizing it — if a zoom key isn’t responding, the fix is almost always switching to the alternative pair for your keyboard layout rather than anything being wrong with the game. Knowing both sets means you’re covered no matter what keyboard you’re on.