

This guide breaks down the room layout and connection routes for each of the four main HAB sectors in Hope 01: the BCS Sector, the BCS Building, the Medical Sector, and Hospitek. Each section lists the corridor structure, the rooms branching off it, and every exit transition between areas so you can plan a route without wandering into a dead end.
I put this together while mapping the early-game clusters for my own runs and figured a cleaned-up version would save other players the backtracking. Treat this as a work-in-progress draft rather than a finished atlas — the Caves sector is still unmapped, and a few rooms lack signage for a proper name. Spoilers for area layout and room contents follow from here on.
How to Read the Layout Tables
Every route below is a parent-to-child tree: the top-level entry is the corridor or floor spine, and each indent beneath it is a connected room or an exit transition into another sector. I’ve also condensed the key thresholds into a single reference table so you can check prerequisites at a glance instead of scrolling through each tree.
| Area | Entry Point | Key Prerequisite | Editor Rating |
|---|---|---|---|
| BCS Sector | HAB A Rail 1 | None | Essential (early hub) |
| BCS Building | Breached Bathroom, Room 28 | None | Essential (early farm) |
| Medical Sector | HAB A Rail 1 (east) | Room 39 rubble cleared from Maintenance side | Essential |
| Hospitek | Hospitek Front Yard | None (Medical fabricks farm) | Optional until gear-ready |
| Extraction Tunnels | Various | M-H02 Access Keycard | Essential |
BCS Sector
Most players hit this area first. Enemy density is low and the enemy types here are the most basic in the game, so it rarely threatens anyone who’s prepared — but walking in under-geared will still cost you. Points of interest are thin on the ground: there’s the NPC, and this sector mainly serves as the approach into the BCS Building.
- Main Horizontal Corridor
- Stairs → [Exit Down] → Maintenance Sector
- Store Room
- Back Kitchen
- Kitchen
- Mess Hall
- Apartments Corridor
- BCS Front Yard
- HAB A Rail 1
- Upper Rooms (branching off the main corridor)
- Room 28 → Bathroom → Breached Bathroom → [Exit Up] → BCS Building
- Room 26 (Kio’s Room)
- Room 24
- Room 21 → Bathroom
- Room 20 → Bathroom
BCS Building
This is where the robot enemies first show up, and it’s where the combat loop clicks: cover usage and dodge rolling carry you through almost every fight from here on. The building doubles as the best early-game farming spot. You can either take down the boss for the armory keycard, or run fast loot cycles through the shooting range room and skip the fight entirely.
That boss drops the keycard that unlocks the armory door on Floor 3. The building is also one of the routes into the church/temple sector.
- Vertical Spine
- Floor 3 (Mail Service) → [Exit Right] → Caves
- Floor 2
- West Branch: Boss Room → Cells → Cells Corridor
- [Exit Left] → Caves
- Room
- Breached Showers → [Exit Up] → Caves
- East Branch: Mess Area → Shooting Range
- West Branch: Boss Room → Cells → Cells Corridor
- Floor 1
- Floor B
- Breached Basement → [Exit Left] → BCS District
Editor Warning: Do not sell or stash the armory keycard after your first clear. If you leave the floor without looting the armory, you’ll be stuck either re-fighting the boss or circling back through the Caves to reach that door again.
Medical Sector
Head right from the HAB A Rail 1 spawn point and you’ll land here. One routing catch matters more than anything else in this sector: the path to Room 39 starts blocked by rubble, so you have to enter the Maintenance Sector and clear it from the opposite side before the room opens up.
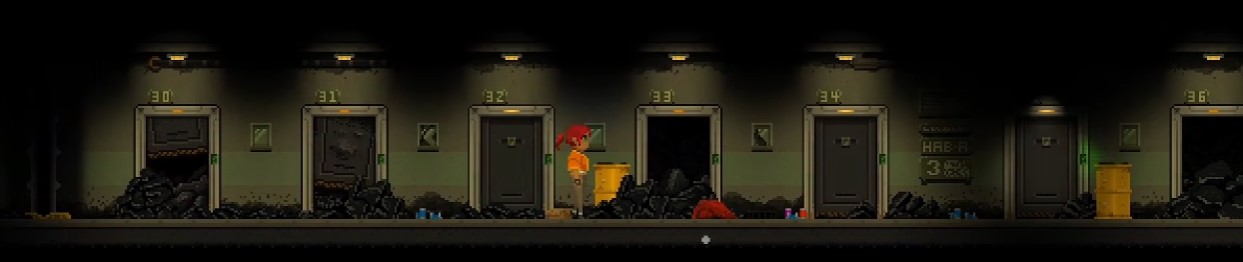
Room 37 (Caydian’s Room) is locked behind a keycard. You can grab it from the room past the BCS boss, or bypass the whole thing by approaching through the Caves.
- Main Horizontal Corridor
- HAB A Rail 1
- Apartments Corridor
- Hospitek Front Yard (Mail Service) → [Exit Right] → Hospitek
- Upper Rooms (branching off the corridor)
- Room 32 → Bathroom
- Room 34 → Bathroom
- Room 35 → Bathroom
- Room 37 (Caydian’s Room) → Breached Bathroom → [Exit Up] → Caves
- Lower Rooms (down from Apartments Corridor)
- Room 39 → Short Corridor → Bedroom / Breached Room → [Exit Right] → Maintenance Sector
Hospitek
Compact area populated by medical-themed robot enemies. Medical crates are dense here, so when your supply of medical items runs low, this is the loot run to make. The boss pays out heavily in medical fabricks if you can bring it down.
Be careful with that fight, though. This boss is the first genuinely demanding one in the game, and under-geared or newer players tend to hit a wall the first few attempts. Come in stocked on heals and don’t treat it like the earlier robot encounters.
- Main Layout
- Boss Room → Chirurgery → Routine A / Routine B / Corridor
- Main Lobby → [Exit Up] → Medical Sector
- Corridor → Room / Breached Room → [Exit Right] → Maintenance Sector
- Boss Room → Chirurgery → Routine A / Routine B / Corridor
Important Notes
- Every Extraction Tunnel requires the M-H02 Access Keycard to open. Keep one on your person at all times — leaving it in storage and realizing you need it mid-route is a wasted trip.
- Some rooms carry generic names because they lack signage and I couldn’t find any unique landmark or feature to name them after. That’s a limitation of the source layout, not a labeling preference.
- The Caves sector is deliberately the lowest priority for mapping. It’s a routing headache to diagram cleanly, so I’ve parked it at the bottom of the queue in case I attempt it at all. If I do tackle it, I’ll work out a solution that keeps the structure readable.
If you spot a connection I’ve missed or a room that deserves a better name, let me know so I can fold the fix into the next revision.